People are always throwing stuff away at our apartment complex and leaving it by the dumpsters for anyone to take. Last month I found a large pile of wood from a twin-sized bed. FREE wood!
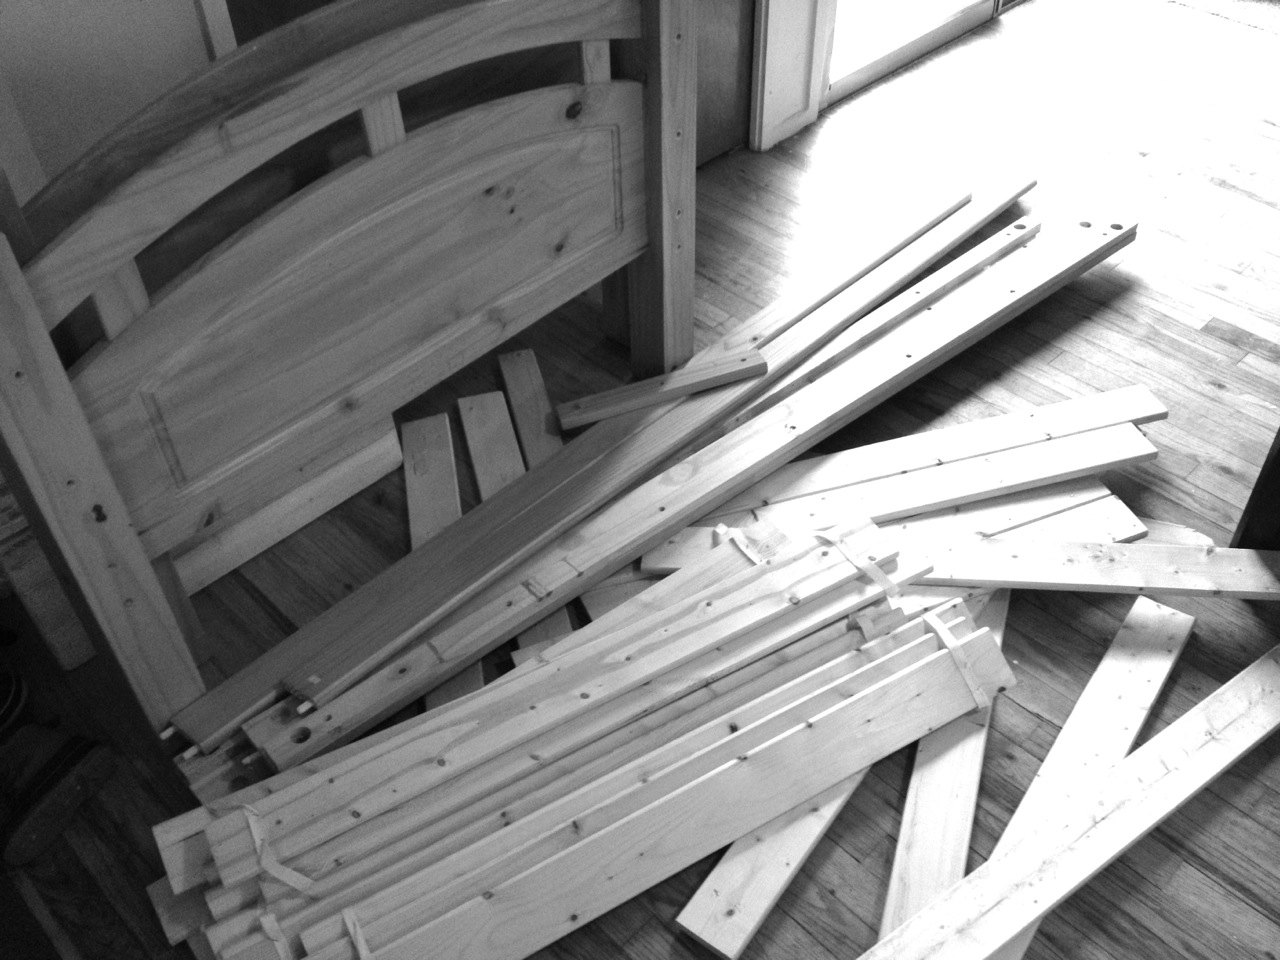
I had a project in mind and the wood planks would be perfect!
I originally planned to make building plans for this shelf, and that’s why I took pictures throughout the process of building but it ended up being ALOT of work so I scrapped the idea of making plans. Instead… you can just see how I put it together!
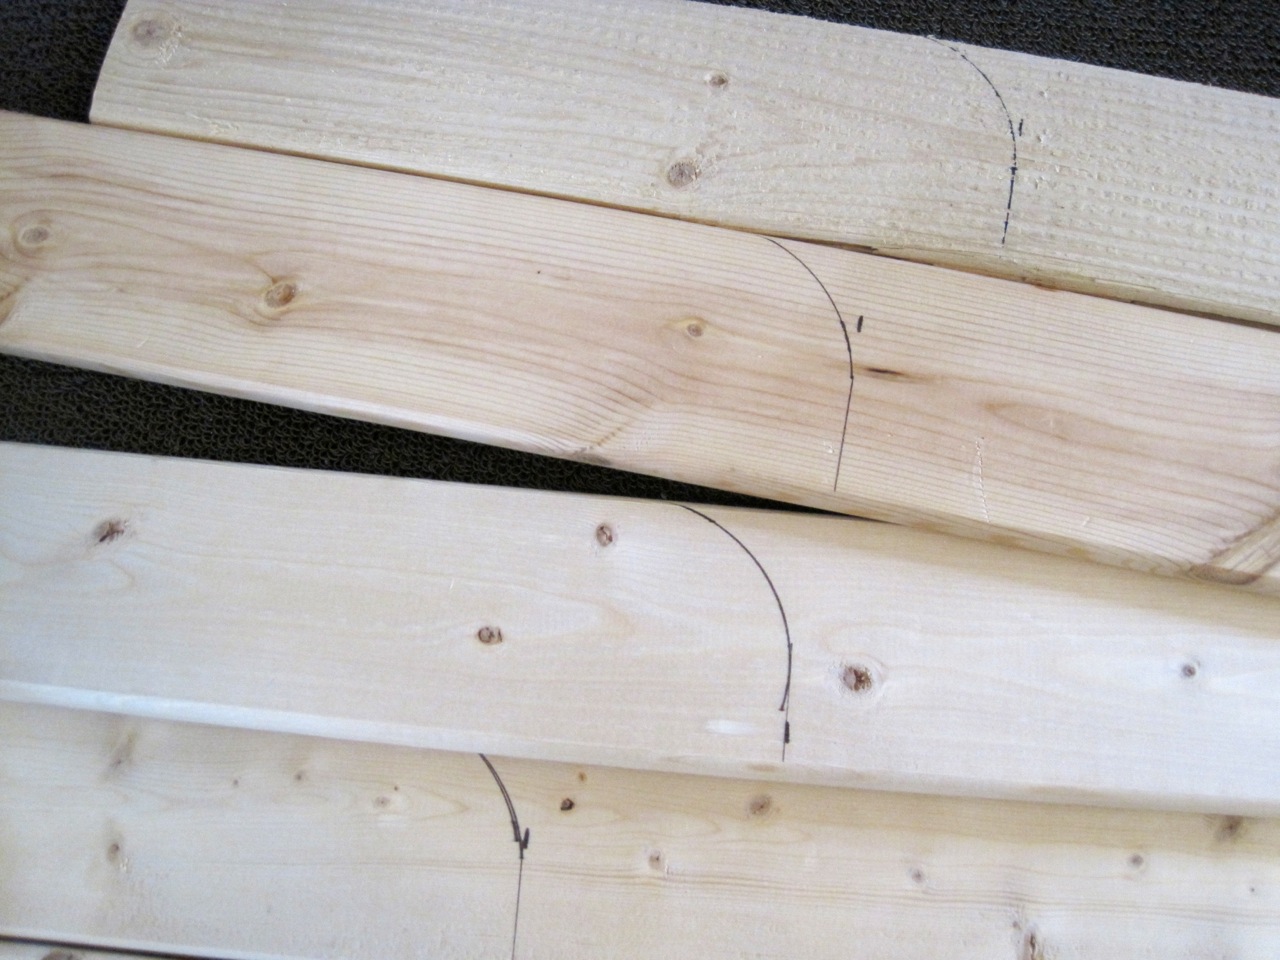
I figured out how deep I wanted each shelf and made cutting lines for the sides of each shelf.
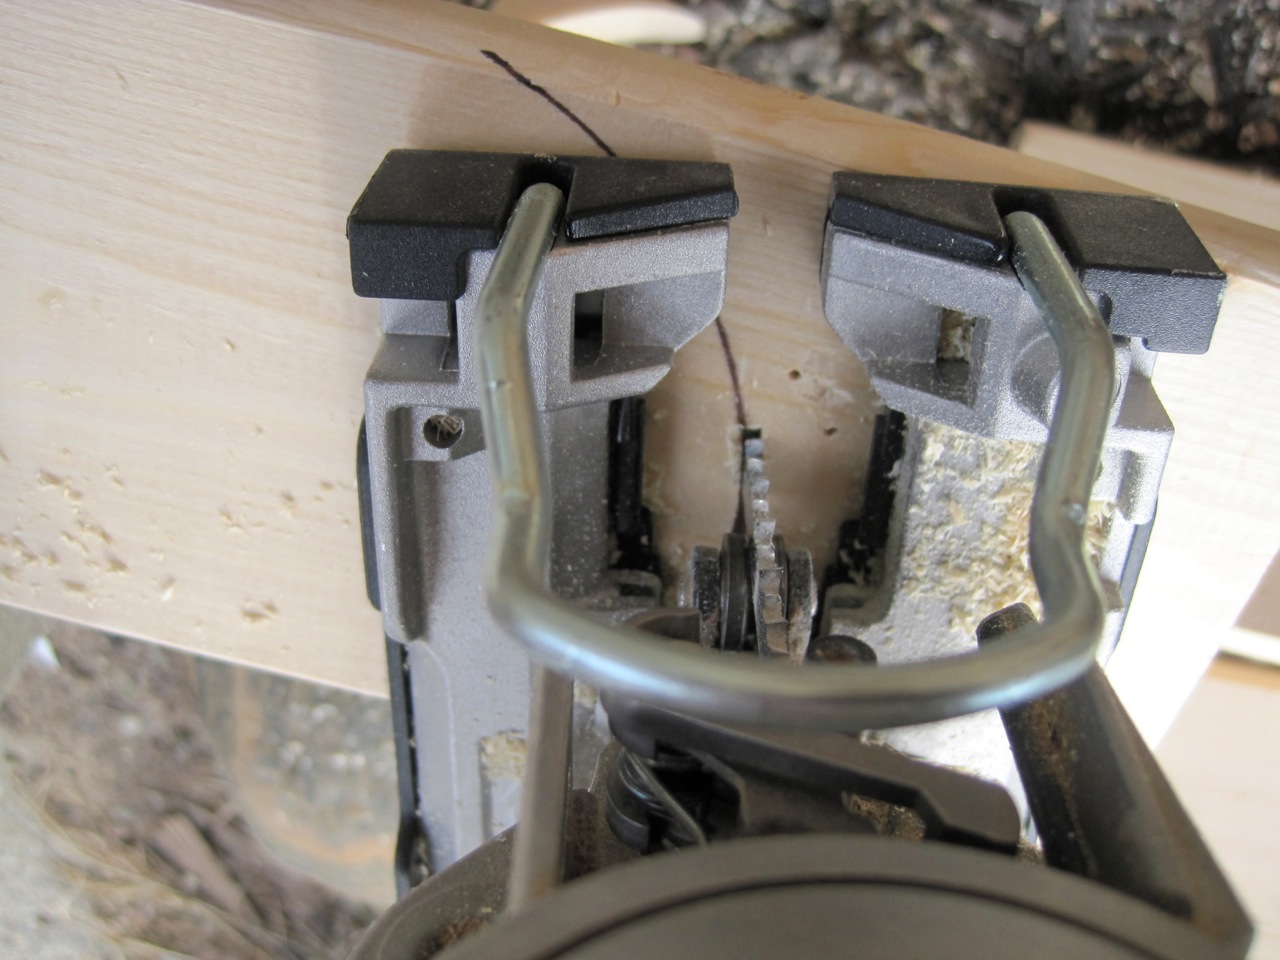
Using my sweet jigsaw – couldn’t do without it!
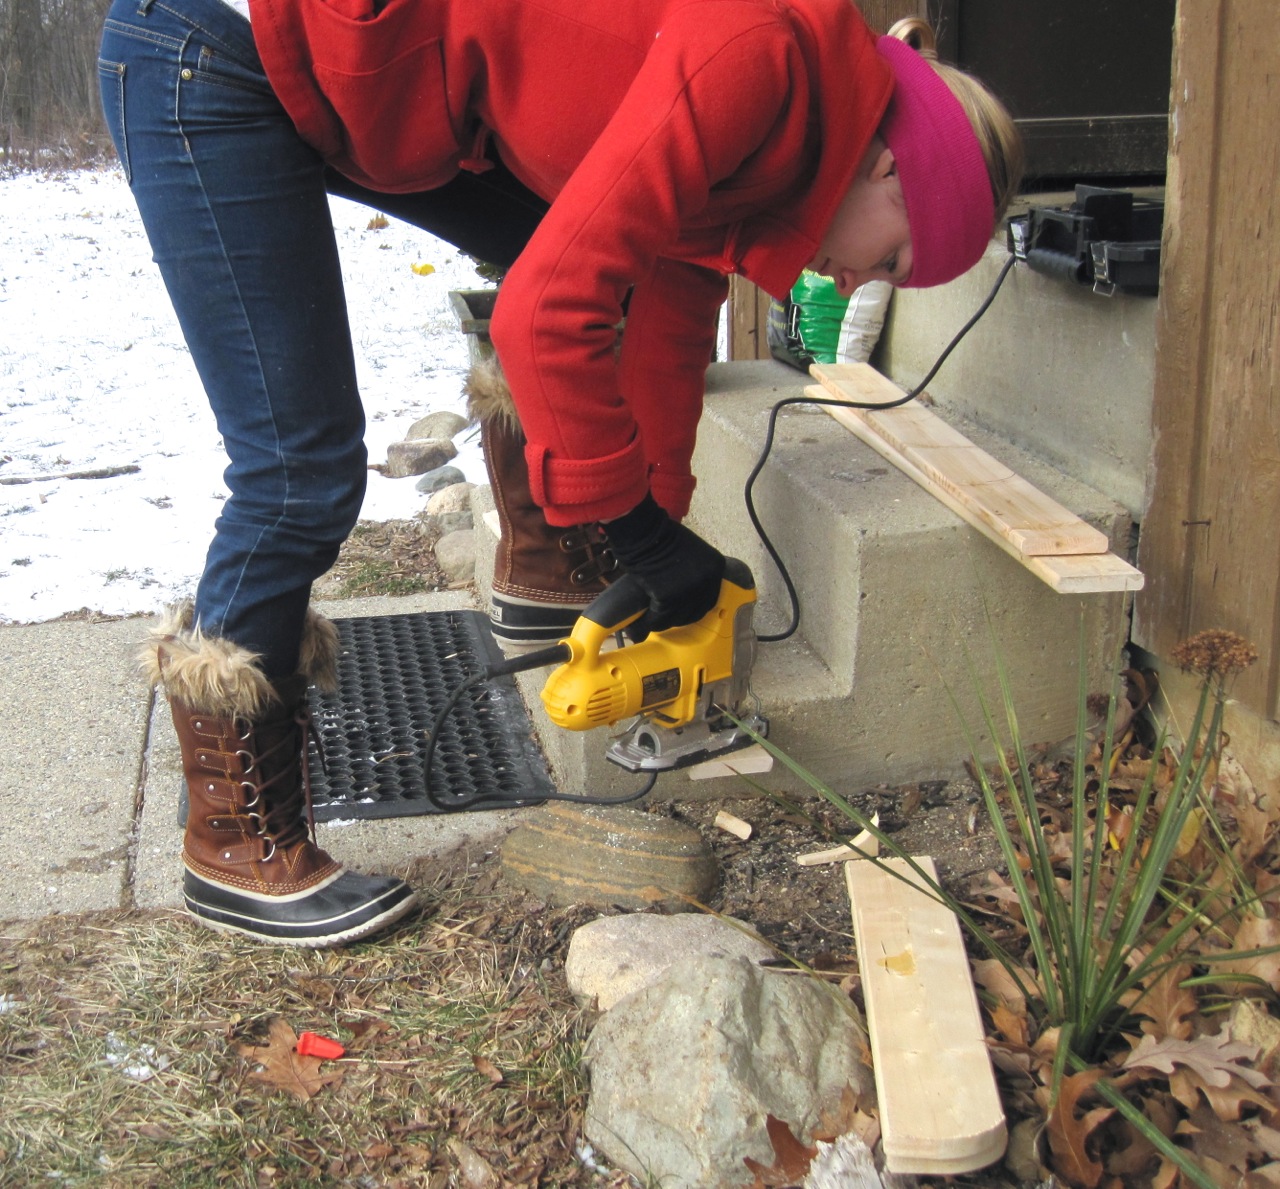
It was FREEZING outside but I wasn’t going to let that stop me! ….My fingers were actually freezing after about 5 minutes so I took everything inside even though that meant I’d be cleaning up sawdust everywhere.

I clamped all the boards together so the rounded edges were together and I could sand them so they were all the same. Belt sanders are awesome!

Next I used my Jigsaw to make pocket holes along the wood planks that were going to make up the bottom of each shelf. I wanted them to be strong so I chose to attach them together. After doing the pocket holes I screwed the shelf bottoms together.
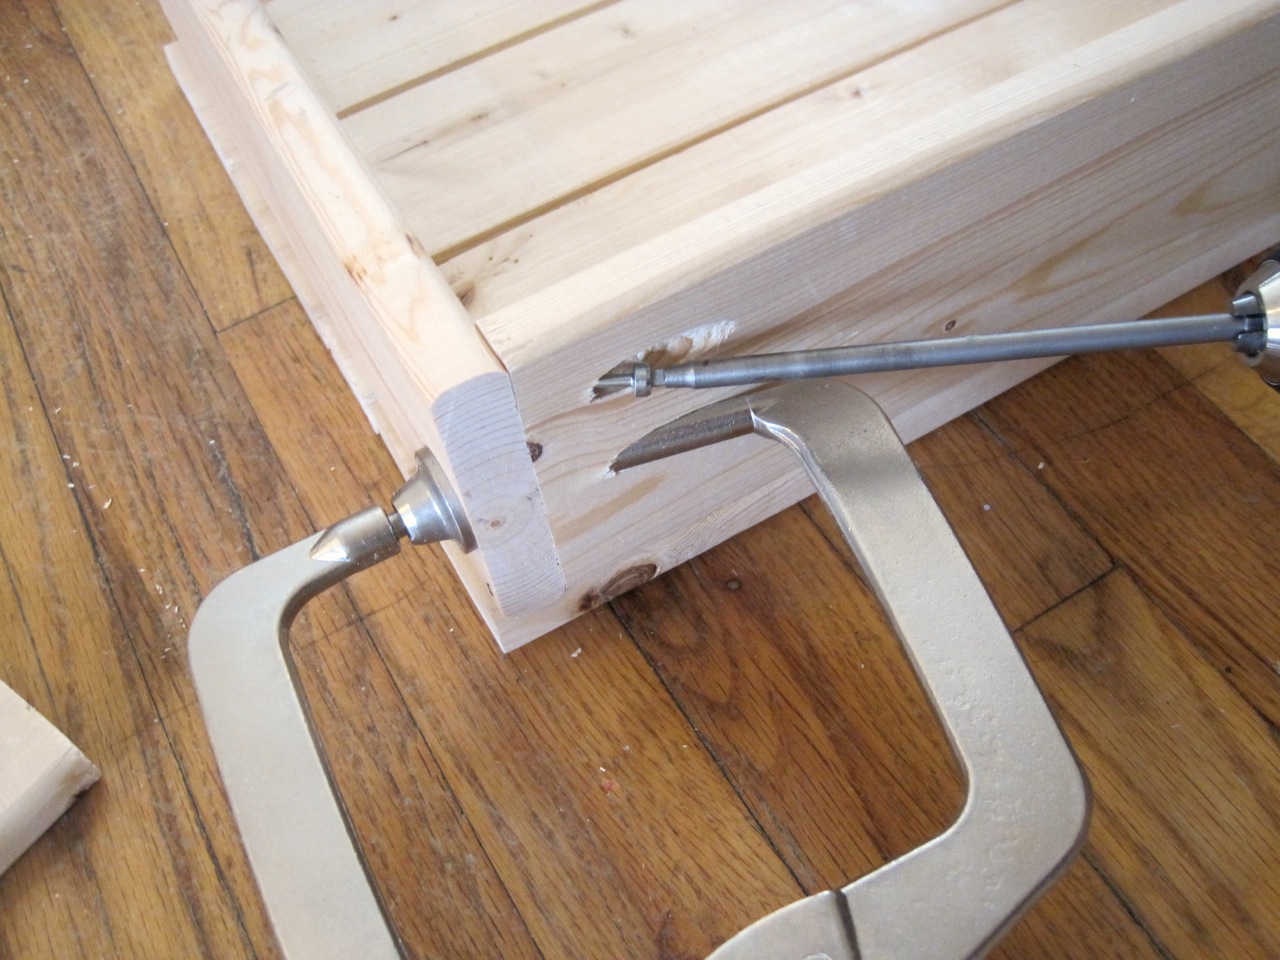
I also made pocket holes on the back sides of the shelves and clamped and screwed the backs to the sides.

I flipped everything over and screwed the bottoms to the sides and backs. TIP: Make pilot holes or your wood WILL split!

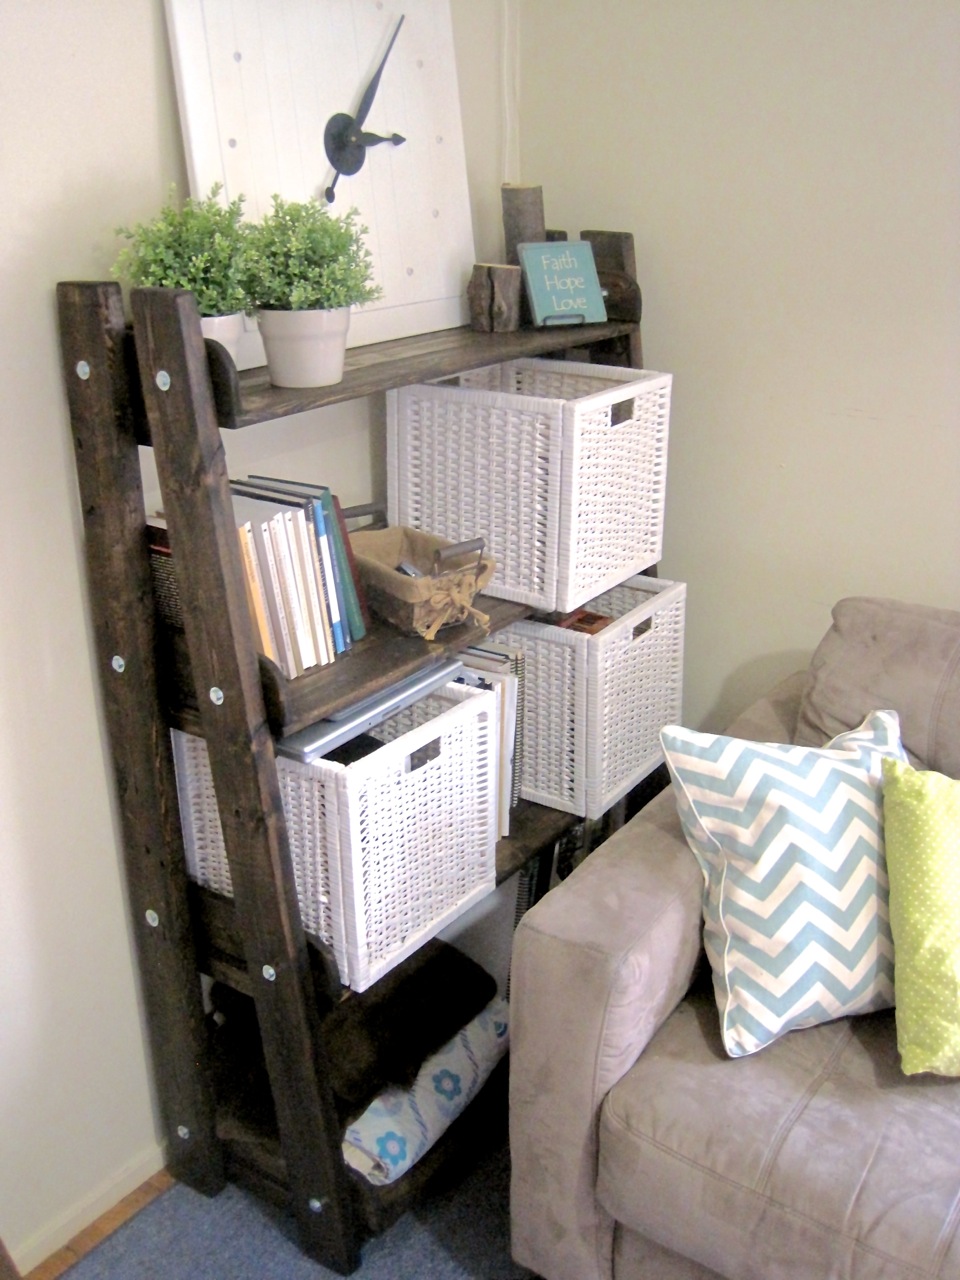
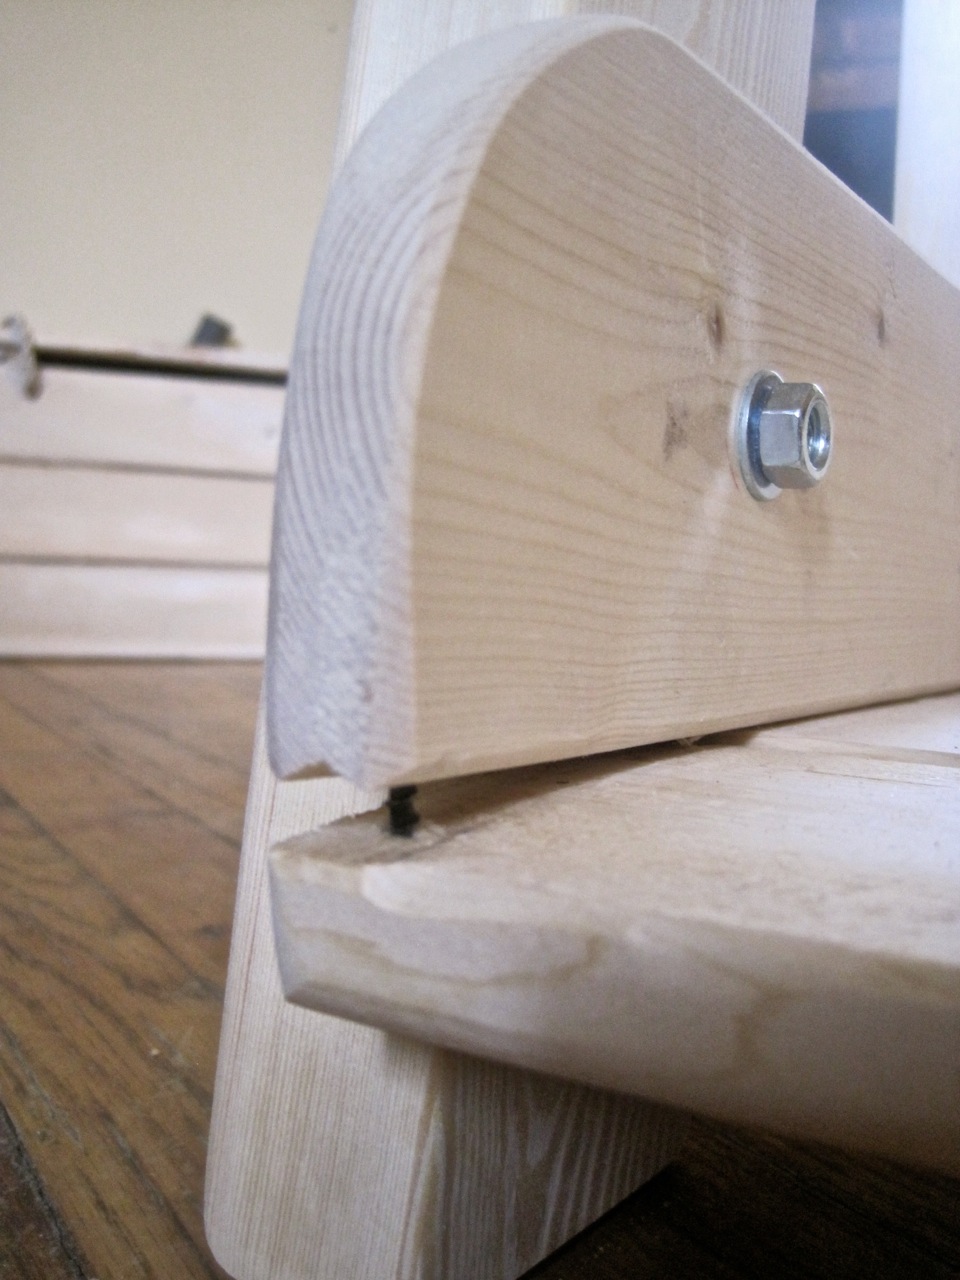
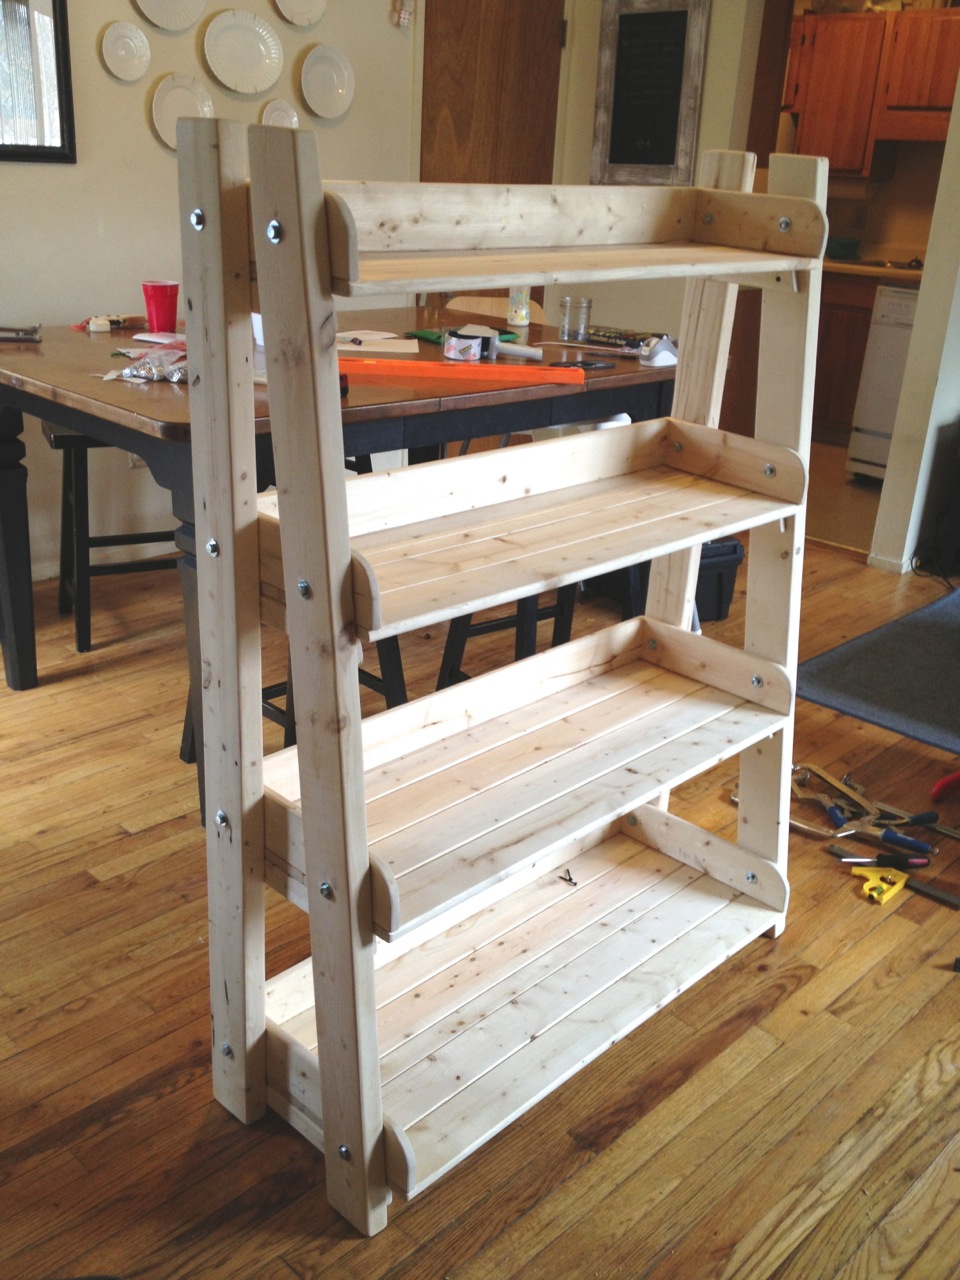
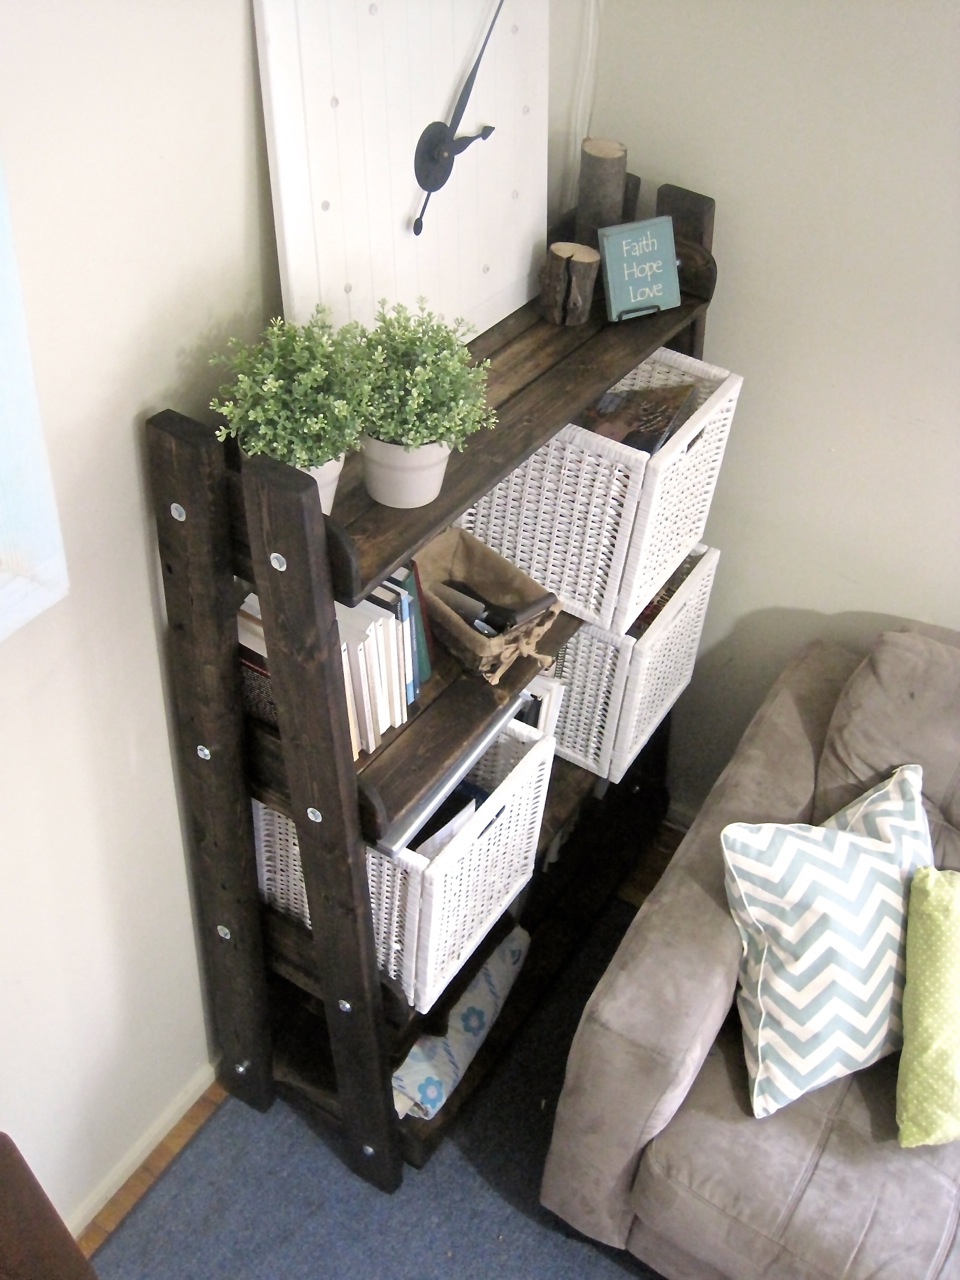
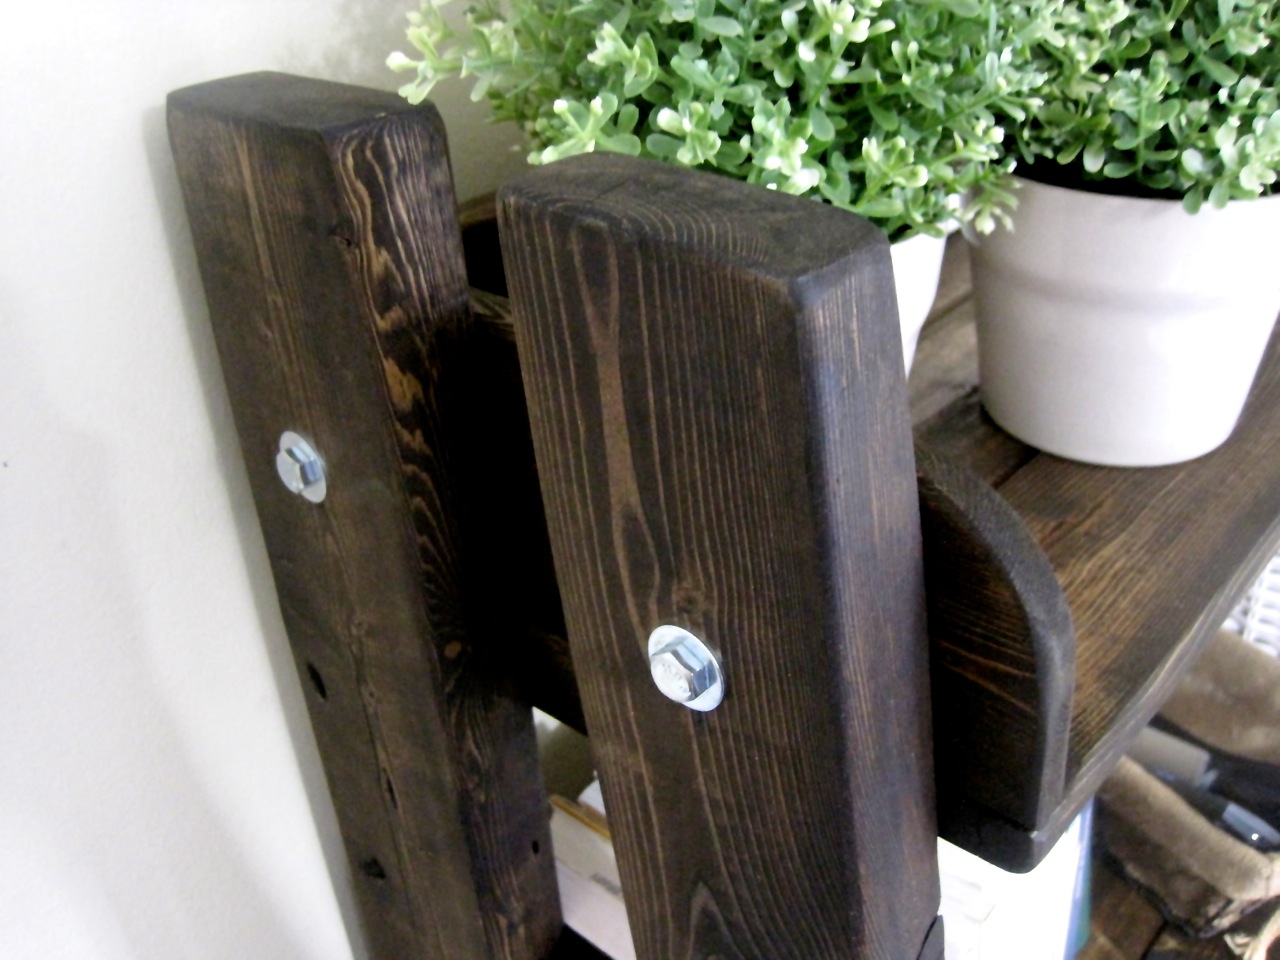
Here’s the staggered shelves finished! I sanded all the edges nice and smooth. I just needed to clamp them to some 2×4’s for the sides, drill holes through everything for the bolts and DONE! ….NOT! This was by far the hardest part and most frustrating. But once the shelves were all bolted it was worth it! And making sure it was level and square… yikes!
Of course the ‘finished’ shelf was in the basement for a week and the kids decided to climb/jump on the 2 bottom shelves and stripped some of the wood. I guess it was for the best so I could reinforce the shelves anyways.

I cut some small strips of wood to put underneath each shelf, then I clamped and screwed into place.
Nearly finished! It was 30-degrees and slightly snowing but I decided I wasn’t going to wait any longer to finish this project. I made a tarp teepee outside (wish I had a garage) and got to work.
After an hour of staining and all night of drying I was able to bring it inside and put it to use! One of the features I love about this shelf is that I can take it all apart if needed in a matter of minutes with just the bolts!
2 Comments
You are incredible!! That shelf is so AWESOME!! Way to show the cold who's boss!! 😉
February 28, 2013 at 7:21 amLove it! What a handy gal 🙂
February 28, 2013 at 7:21 am