
One of my boys has been asking for a goldfish so my husband and I decided to surprise all 3 of our boys with their own fish. After some research we realized we couldn’t get away with just a little fish bowl, gravel, fish and food. After a trip to the pet store and about $125 dollars later we had our aquarium and little fantail goldfish.

The piano bench was just a temporary spot until I could make something at eye level to put it on.

After a small sketch on paper and digging around in my wood scrap pile I came up with a stand and hood. Okay, it wasn’t as easy as it sounds… after a few DAYS of cutting, fitting, glueing, clamping, hole filling, sanding, dusting, painting, glazing, vinyl spackling and clear coating I was done! I also made sure to waterproof the top of the stand and bottom of the hood with clear caulking to protect it from any water.

I made cutouts in the hood for the filter and other various cords.
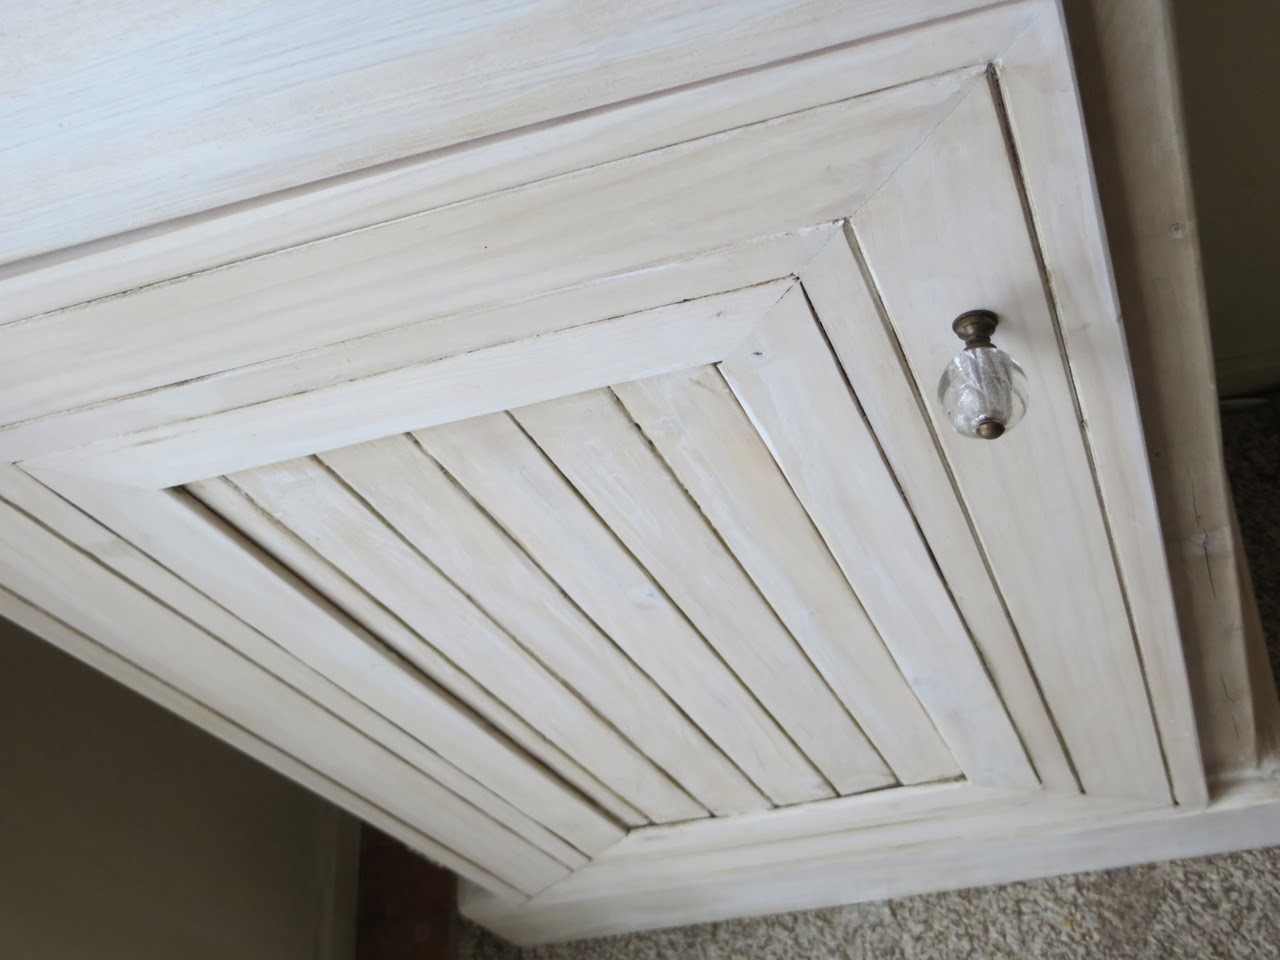
I figured I’d get the main parts done and work on the door later. For the door I made a frame the size I wanted and used trim pieces inside the window to tie it in with the sides of the stand. It was perfect!


What I’m most happy about is I only had to buy one board from the store… everything else I had on hand! I had an old 2×4 covered in ice outside I ripped down for the main structure of the stand, wood from a bed frame I found by the dumpster that I trimmed the top, bottom and hood with, leftover MDF for the shelves, hinges I scrapped from a desk by the dumpster, and various trims and boards from other projects.
HOW I FINISHED THE WOOD:

I used Minwax White Wash over the bare wood, wiped it off and let dry.

Then I brushed Rust-oleum Glaze on, wiped it off then used a wet rag to wipe off the excess. It tinted the white glaze and stuck in the cracks and crevices which I like.
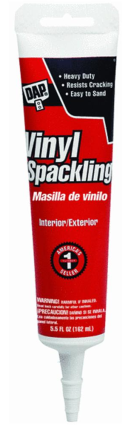
This was my first time using vinyl spackling and I will for sure have some on hand from now on! I wanted something similar to caulk to fill in large gaps and something I could sand if needed. This stuff reminds me of the mud used for drywall.
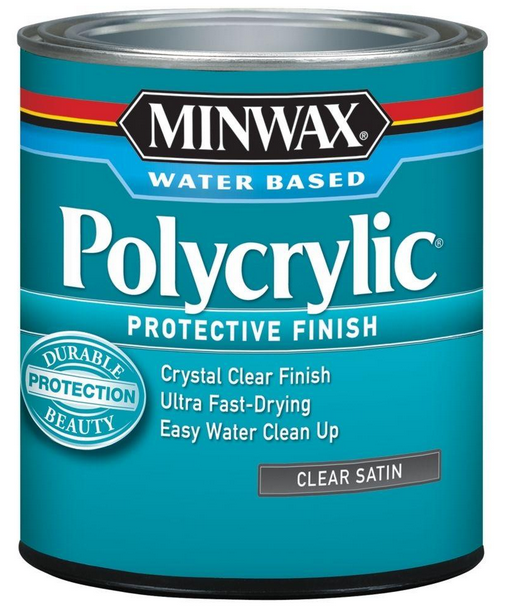
Last step was to put 2 coats of protective finish. I need to write a separate post just for this Polycrylic because I love it so much!

These little fishies seem pretty happy!

6 Comments
Love it!
January 27, 2014 at 2:14 pmthis is genius! Awesome work!
January 27, 2014 at 2:33 pmAwesome!
January 28, 2014 at 12:25 pmDo you have plans/ directions?
September 29, 2018 at 10:26 pmI’m sorry I don’t. This was one of my first woodworking projects I made on a whim and wasn’t thinking about making plans 🙁
October 2, 2018 at 11:13 am[…] Now I’m kind of obsessed, ha! Back when we had goldfish I made a stand and hood – see here for that project […]
October 15, 2018 at 11:41 am