
For this project I didn’t even think to make a post about it because I was making it up as I went and only had an hour to do it before the kids came home!

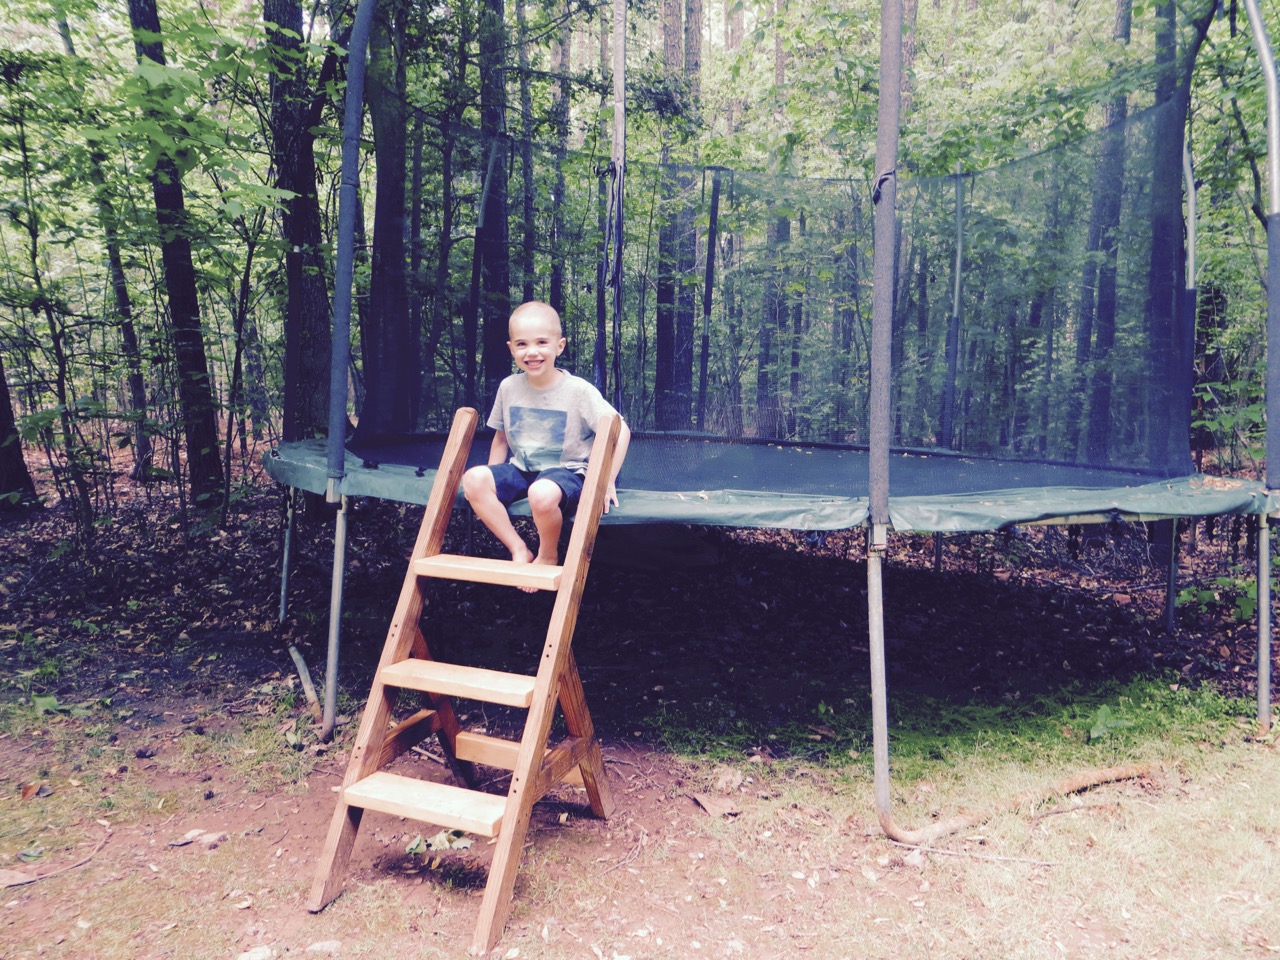
We were using a large tupperware placed upside down for the kids to step on to get onto the tramp – that was a problem for me. It was bright, eye-catching and was starting to cave in!
Mom to the rescue!

WARNING: This ladder is NOT recommend if you don’t have a safety net surrounding your trampoline because the ‘handles’ stick up and it would be easy for a face to hit into the wood. Please be cautious!
OTHER SUPPLIES:
12 4″-long screws
16 3-1/2″-long screws
Sandpaper
Wood Finish (if you desire)
TOOLS:
Miter Saw
Table Saw for Ripping (I used my Kreg Rip Cut Jig)
Drill/Bits
Angle Tool (recommended)
2-4 Wood Clamps (at least 20″ long)
DIRECTIONS:
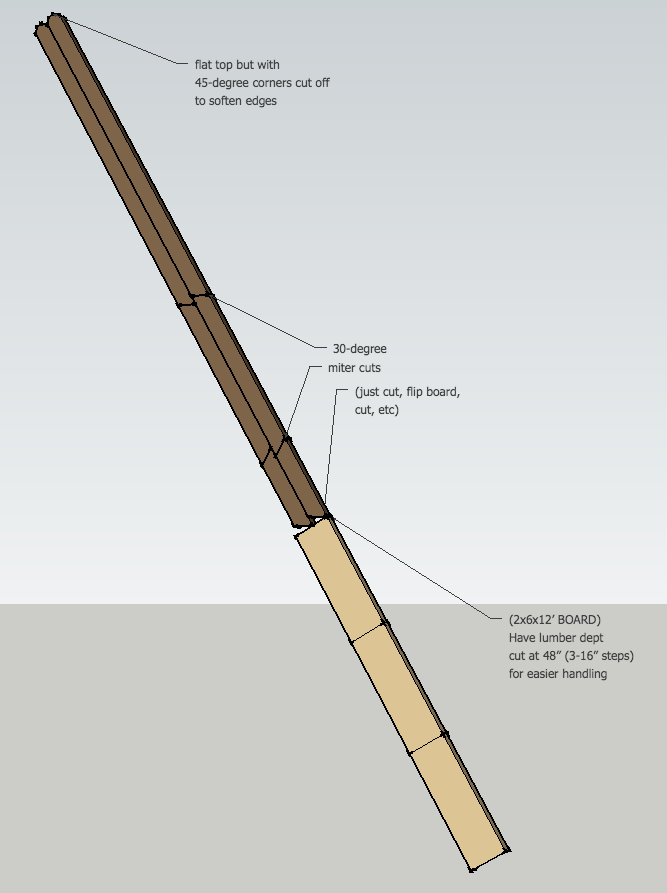


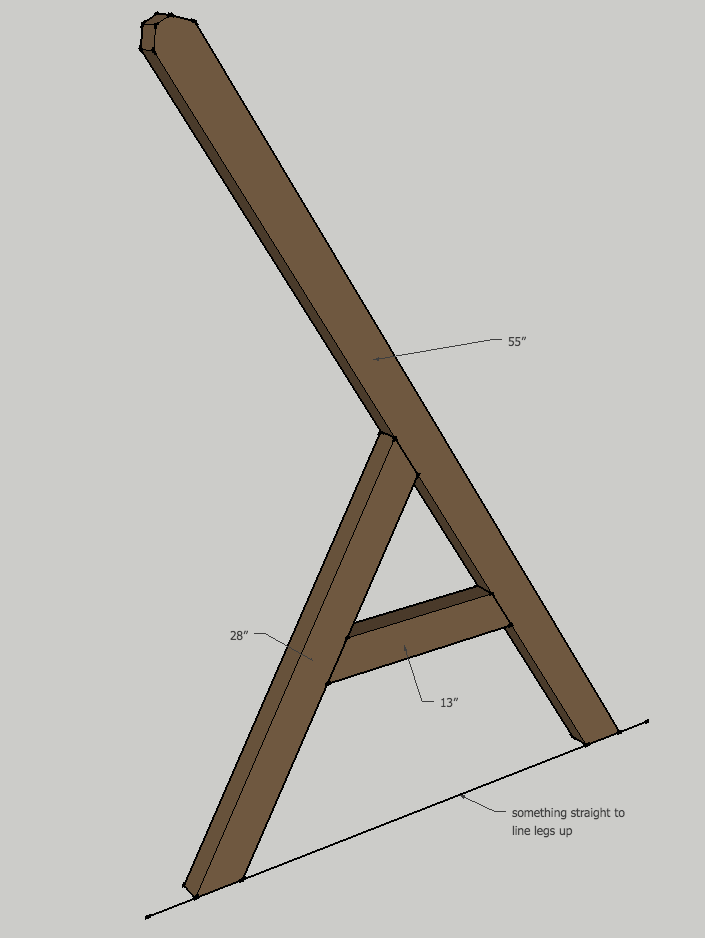
Arrange your pieces like this for each of your side sections. Lay them flat on the ground with the legs butted up against something straight. I pre-drilled holes for 4″ screws to attach my pieces (I used 2 screws for each joint which equals 6 for each side).
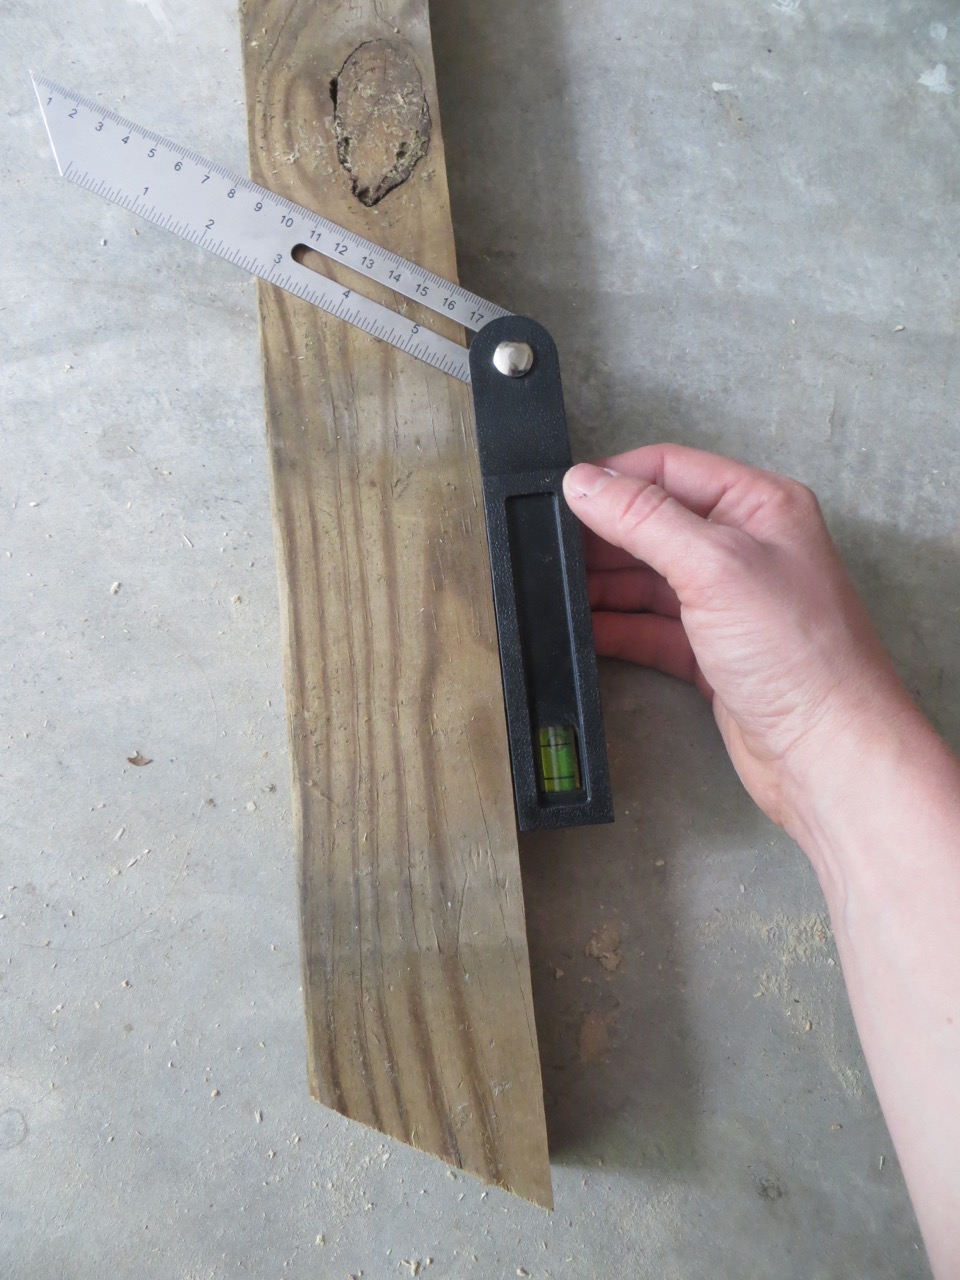
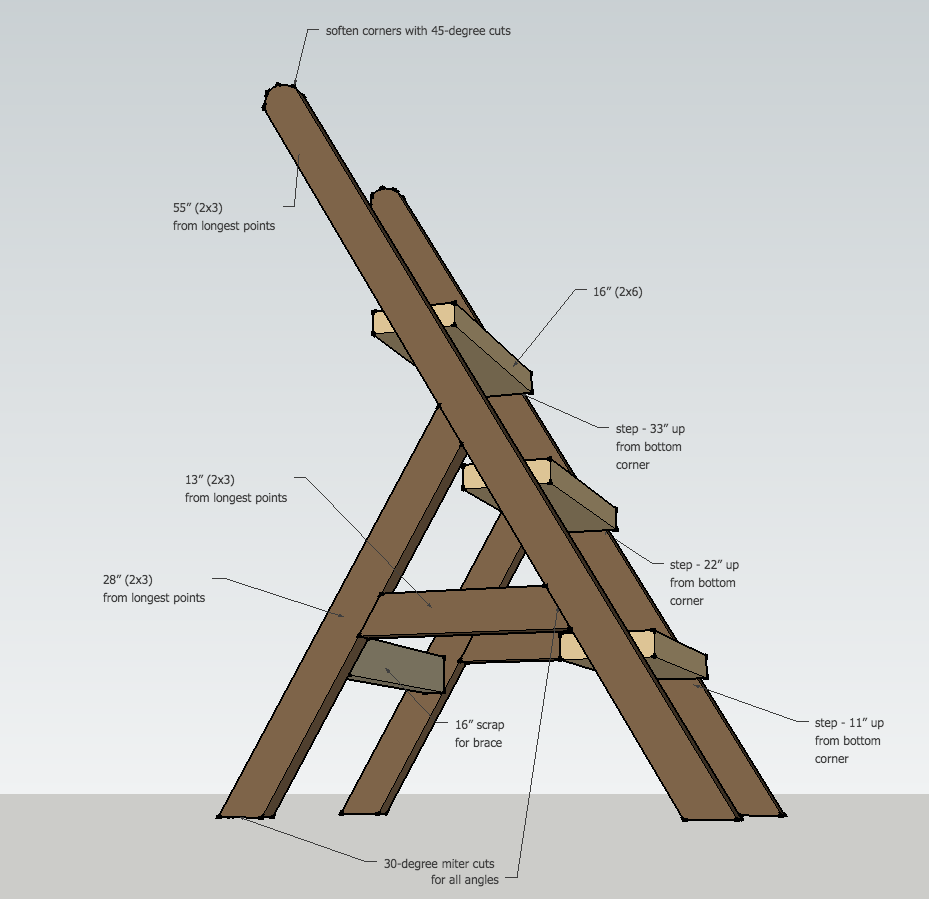
This little angle tool came in handy with this project for marking where to place my steps. I held it up to the bottom edge of the board pictured and secured the angle tight. For the steps, measure 11″, 22″ & 33″ from the bottom (longest) corner up; set your angle tool on the marks and score across the full width of the board.

Your steps will hang over the side pieces like this and you’ll align the bottom of the steps with the markings you made in the previous step.
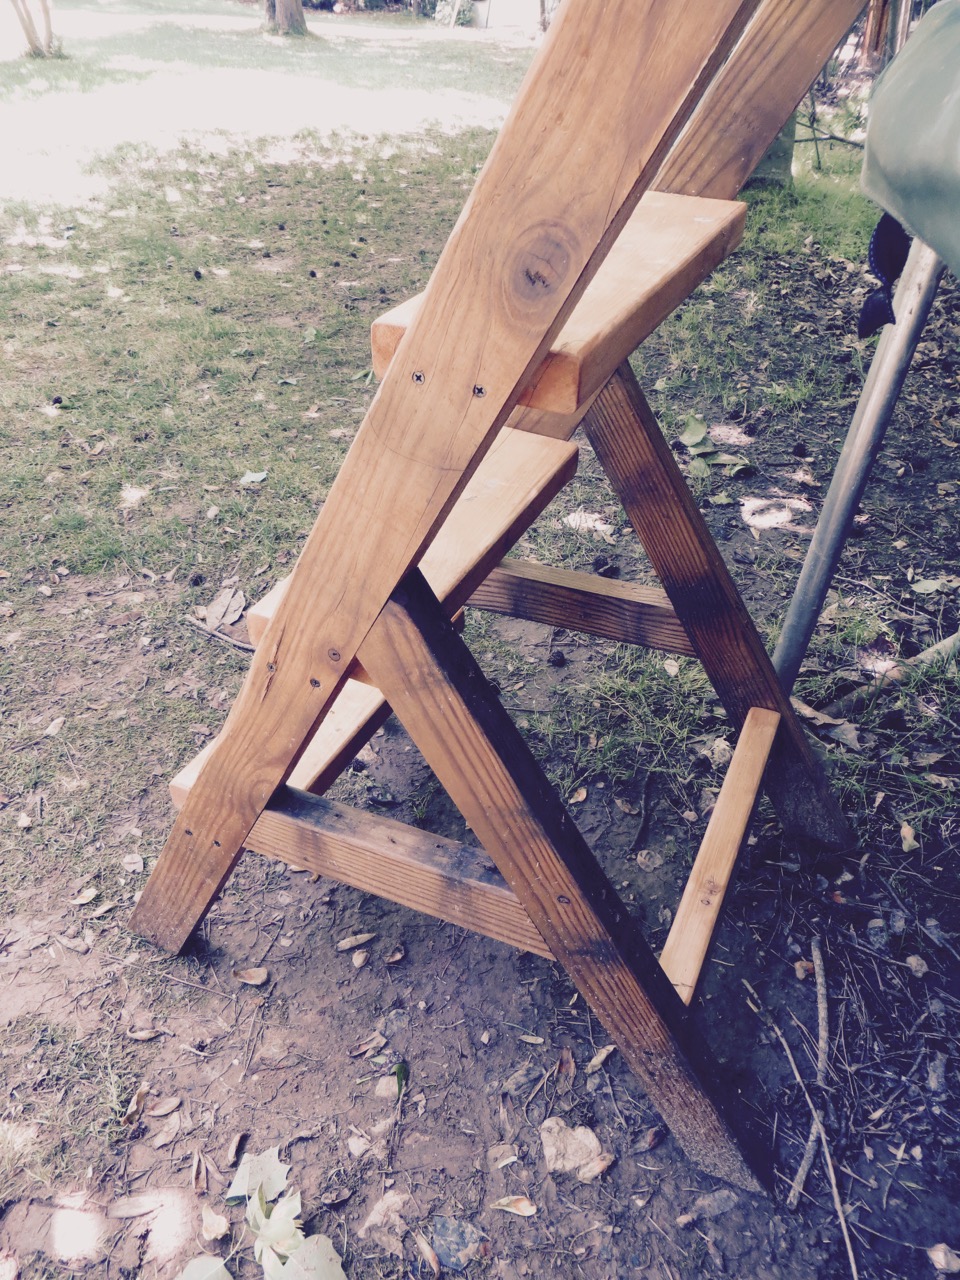
The best way to screw the structure together, I think, is to stand up both end pieces on a flat surface, with the backs butted up against a wall. Carefully (and awkwardly) clamp your steps between the side pieces along the placement markings. Once you get the bottom step clamped it’s pretty easy going from there. A mallet came in handy for nudging the steps around to exactly where I wanted them once they were clamped. I used a clamp for each step (place above/below so they’re not in the way for drilling/screwing). Then I used a 4th clamp for the back stretcher (placement isn’t critical, just where ever you want). If you don’t have clamps or only have a few.. improvise! I’ve used ratcheting straps before (lol) or do one step at a time.

Pre-drill holes for placing 2 3-1/2″ screws in each side of your steps/back stretcher, for a total of 8 on each side.
Sand to avoid splinters, especially at the top where the kids will hold.
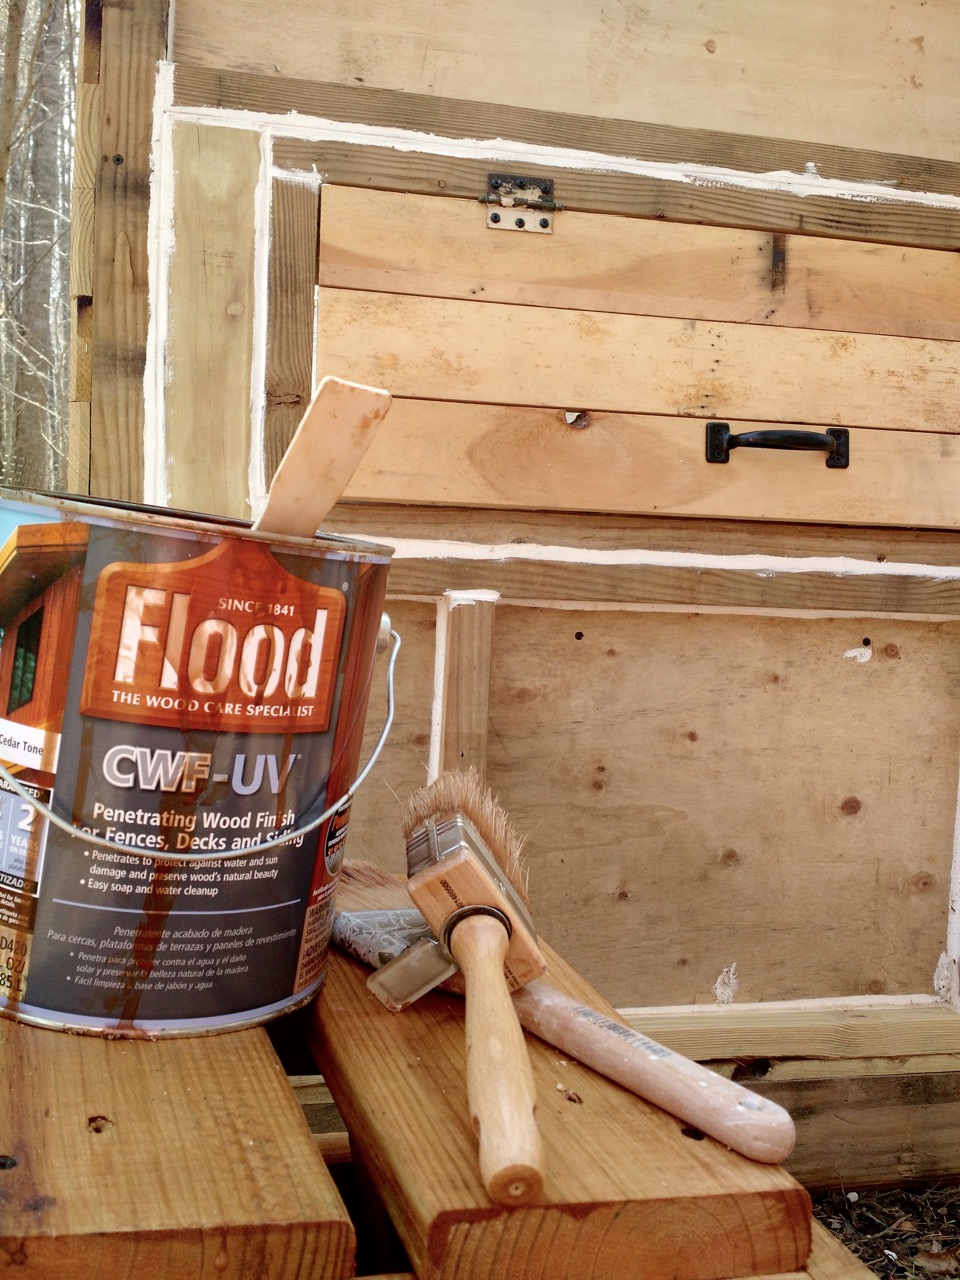
I used Flood stain, the same as our chicken coop, and it is SO easy & fast to use!

DONE! Not too bad for under $8 in wood & 1-2 hours of time, eh!?


9 Comments
What a great idea. Thanks so much for sharing the diagrams. I always get bogged down when figuring out angles.
May 5, 2016 at 10:05 amThis ladder could also be made slightly smaller for a step stool or porch plant holder. Dolly and I are looking forward to hearing about your next project.
Hi Gypsy! Thank you for your comment! It makes these time-consuming posts worth it for me knowing someone is reading and cares 🙂 Have a great day!!
May 5, 2016 at 10:09 amAwesome ! I think I will try this instead of using my Adirondack chairs for a step, lol. Thanks for the clear and informative instructions!
June 10, 2019 at 10:04 amHa! We used a tupperware tub before I made the ladder 🙂 It’s a fun-easy project – enjoy!
June 11, 2019 at 5:23 amHow long are the longest side pieces? I’m having a hard time figuring it out. I have left over 2×4’s. Are they the 49” piece (cut at. 55 degree angle?)
June 14, 2019 at 1:30 pmThis is perfect! I need something easy & sturdy – the ladder that came with our trampoline HURTS when you climb it barefoot! I’m gonna go check my garage & see what I have, then head to the store later for what I don’t! 🙂
June 19, 2019 at 5:21 pm… [Trackback]
[…] Read More here: theprojectlady.com/diy-wood-trampoline-ladder-easy-sturdy/ […]
December 13, 2019 at 8:47 amThanks so much for the instructions and post. This is my second build of this same design. The first one lasted about 6 years under heavy abuse from my kids.
One thing that you might want to correct on this post are the angled cuts. Your miter saw guide is very similar to mine. Your pic shows it set on 30 and you mention 30 degrees. That 30 setting is actually 60 degrees. The 60 degree cut (setting 30) is correct for the angle needed. On guides like these 0 represents 90 degrees. As you get further away from 0 the degrees decrease. For example 5 represents 85 degrees, 10 represents 80 degrees, 15 represents 75 degree and so on. 45 degrees is the only true number on guides like these. I say all this because some saws do come with true degree guides and some do not.
Thanks again for taking the time to put this together. The design is perfect and easy to move around if needed.
March 4, 2023 at 6:14 pmOh right, thank you for pointing that out!
May 19, 2023 at 6:57 am