
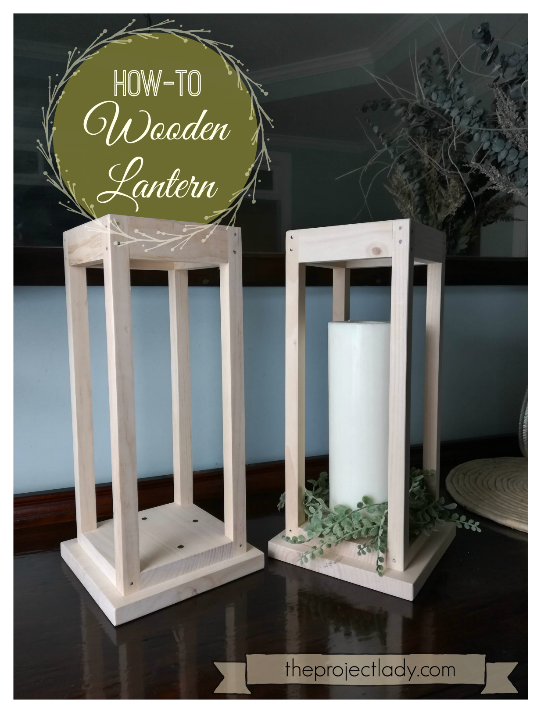
I made these simple wood lanterns for a church activity and thought I’d share how to make them. These are tall lanterns, about 15-3/4″, but can easily be customized to the size you want by adjusting the length of the pillars. Have fun!


SUPPLIES:
1×8″ board (at least 30″ long)
1-3/8″ nails (x4) – I used these*
1-5/8″ nails (x20) – I used these*
Wood Glue
*I used these certain nails because they have ridges giving them a stronger hold since I didn’t want to use wood glue on all the joints (messy and takes too much time!)
TOOLS:
Table Saw
Hammer
Drill + Bits (pre-drilling nail holes)
Sander + 180/220 sanding grits

Cut out your wood from your 1×8 board according to the cutting diagram above.

Cut out the corners of your 6 x 6″ piece to be 3/4 x 3/4″ (the same size as your 15″-long pieces that will be nailed in place there).
Pre-drill 4 holes in your 6 x 6″ piece like the picture above.
Sand all pieces to desired smoothness.

Pre-drill holes on the tops of all 4 15″-long pieces where your nails will go like picture above. With top and sides flush, nail your a 15″-piece to a 4-1/2″ piece like picture above.

Nail another 15″ piece on the other side like picture above. Repeat for remaining side.

Pre-drill holes on the other side of your 15″ pieces (slightly staggered from the ones already nailed).

Nail your remaining 4-1/2″ pieces in-between your sides already created.

Set your 6 x 6″ piece on the bottom of your 15″ pieces, pre-drill and nail in place (I only put one nail into these pieces rather than one on each side).

This is the best time to do a final sanding on all the outside edges before completing your lantern. Pay special attention to the bottom of your 15″ pieces that they don’t extend passed the 6 x 6″ base – if they do, sand everything flush.

Put some wood glue on the bottom of your lantern, keeping it 1/2″ from the edges so it doesn’t seep out. Spread around with your finger.

Center lantern over your 7-1/4″ base and use your thicker nails to nail in place through your pre-drilled holes.
Ta-da! Wasn’t that easy!?
No Comments