
I found a great deal on a pedestal table for $20 at a Thrift Shop!! Um… YES, I will take that!!
See how easy it is to fix up a wooden piece of furniture and learn from my mistake below as what not to do!

It was scratched, faded, gummy…
… really gummy! Kids, I’m sure…

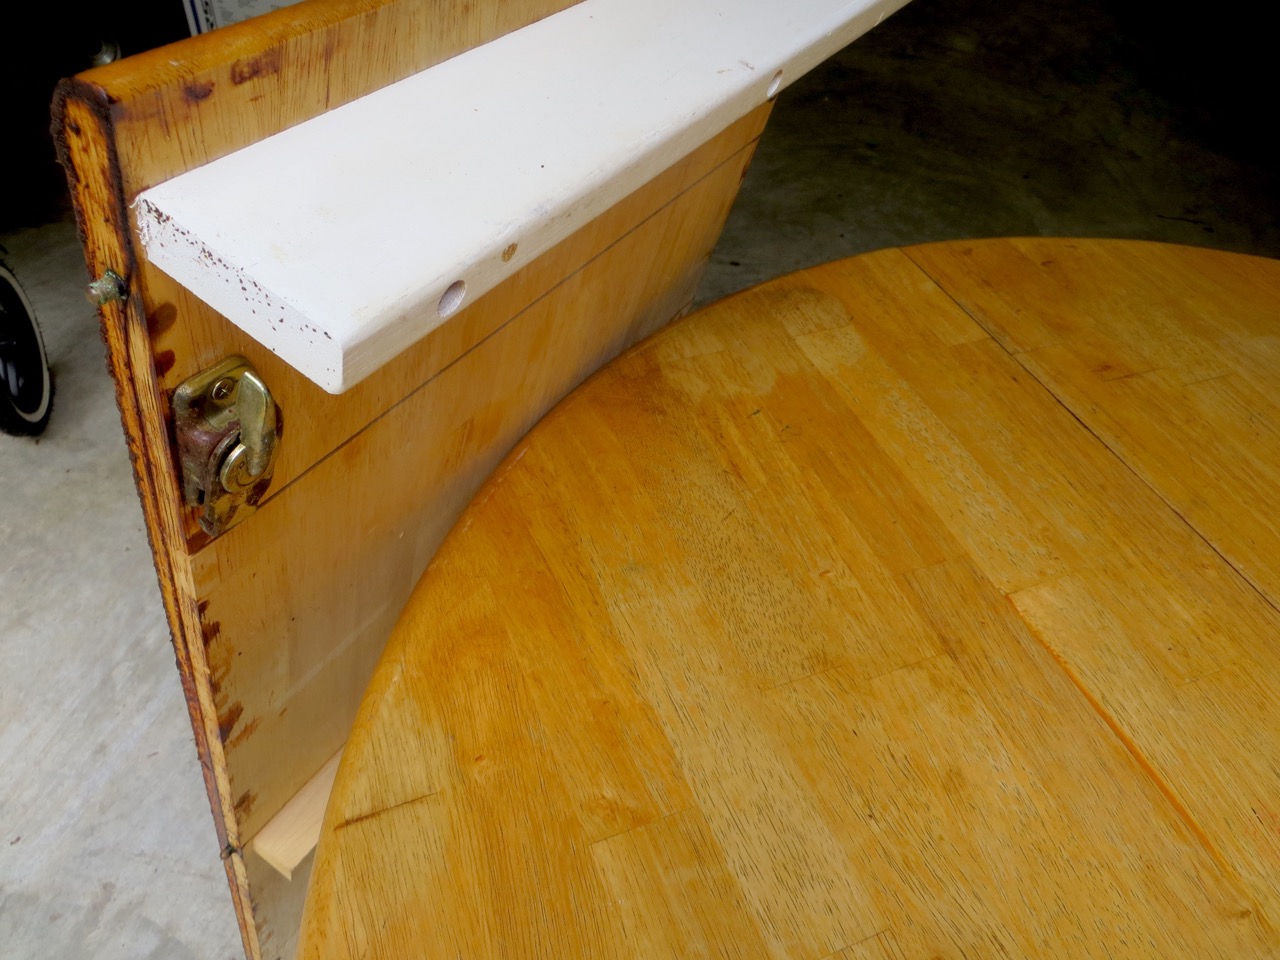
The legs were worn and marked up.
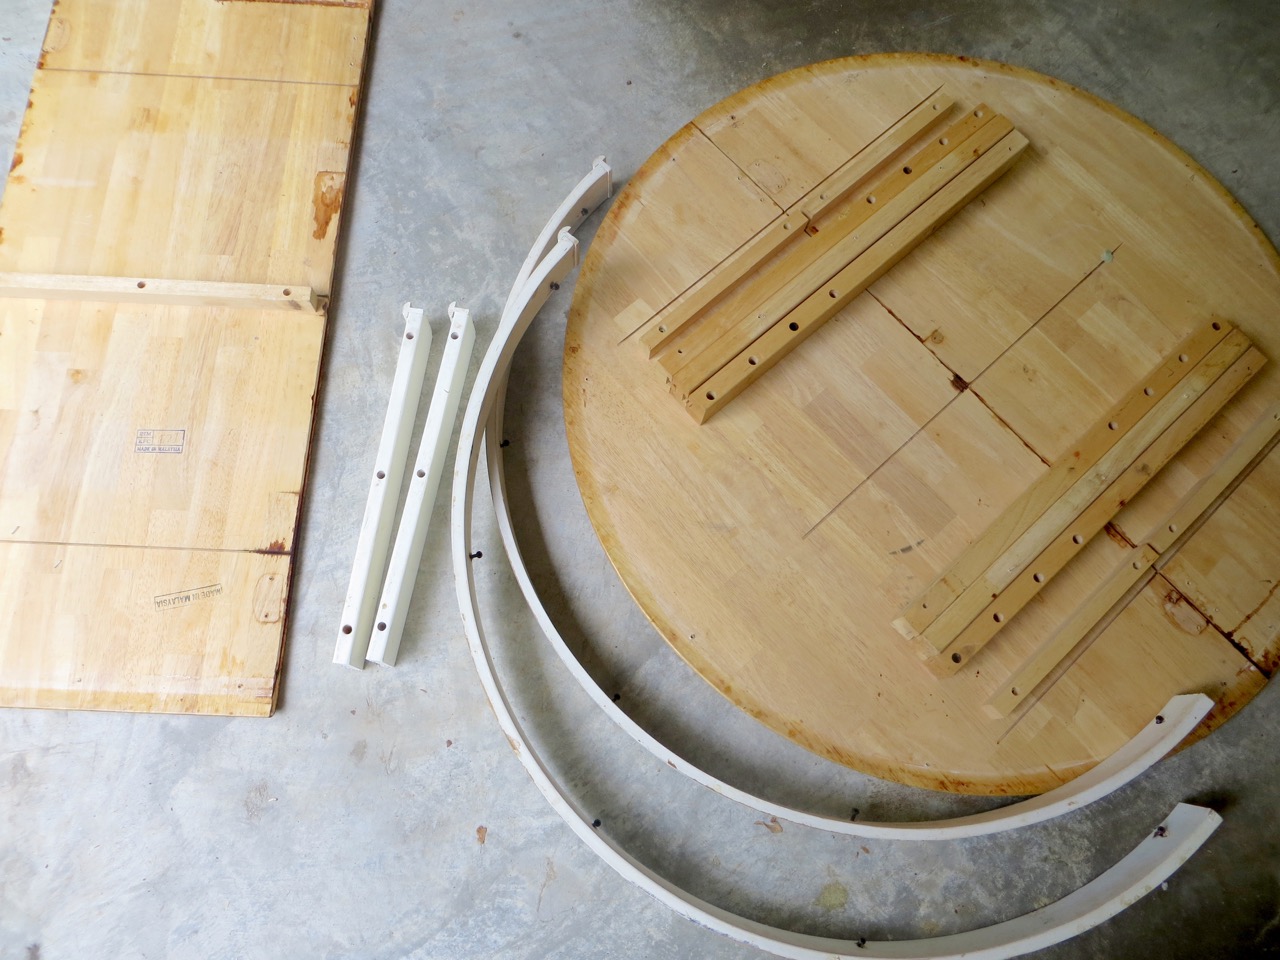
I couldn’t wait to sand this thing up and get it looking pretty again. I took off all the trim pieces to make my life easier.
To mark where to put pieces back in the right spot I lightly tapped a nail marking pieces that go together (where you wouldn’t see them)… other pieces would have 2 holes, 3 holes, etc. Since I was sanding all the surfaces I couldn’t use a pen or a marker because it would get sanded off.

I used 80 to 150 grit for the top. For the white base I used 220 grit to simply buff out any scuffs and stains. I still wanted a worn look which it had – I just wanted it more polished.
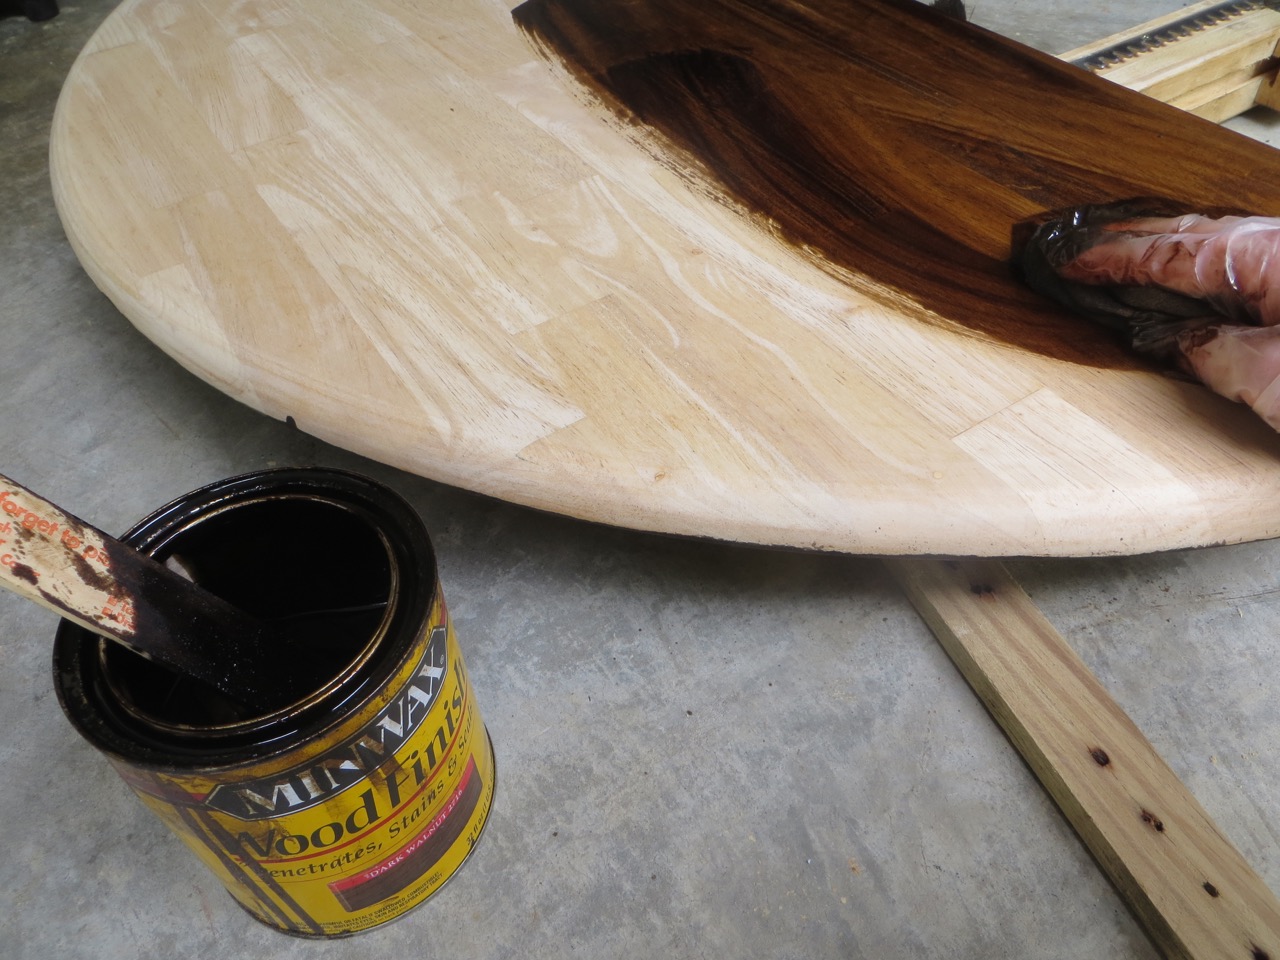
I wasn’t sure which finish to use but I ended up going with a Dark Walnut stain from Minwax even though I knew my General Finishes would have a higher quality look and better coverage.

Once the stain was dry I assembled the table back together. The easiest way was to have the trim pieces lifted so I could guide the screws back into the right hole on the table top.
Once it was all set up I wasn’t happy with the color. It was too dark and there were a few areas on the top that were filled in by the manufacturer that wasn’t taking the stain – it was bright red! I made the mistake by trying to go over those areas with other different stains to mask the spots that weren’t darkening. I got frustrated with the Minwax stuff and went over the whole table top with General Finishes Antique Walnut. It covered it alright but then it was an even darker color with a tint of purple AND it was gummy!
It was a big decision and very annoying but I had to start over! Sanding the stain off wasn’t much help because it gummed up my sanding discs within seconds and I was wasting so many. I ended up using a chisel to scrap off the finish. I couldn’t believe the messes I was making. A full 2-3 hours of scraping, sanding, scraping, sanding… sanding…. sanding then I had a wood top to work with again. Did I mention it was hot and humid outside!?
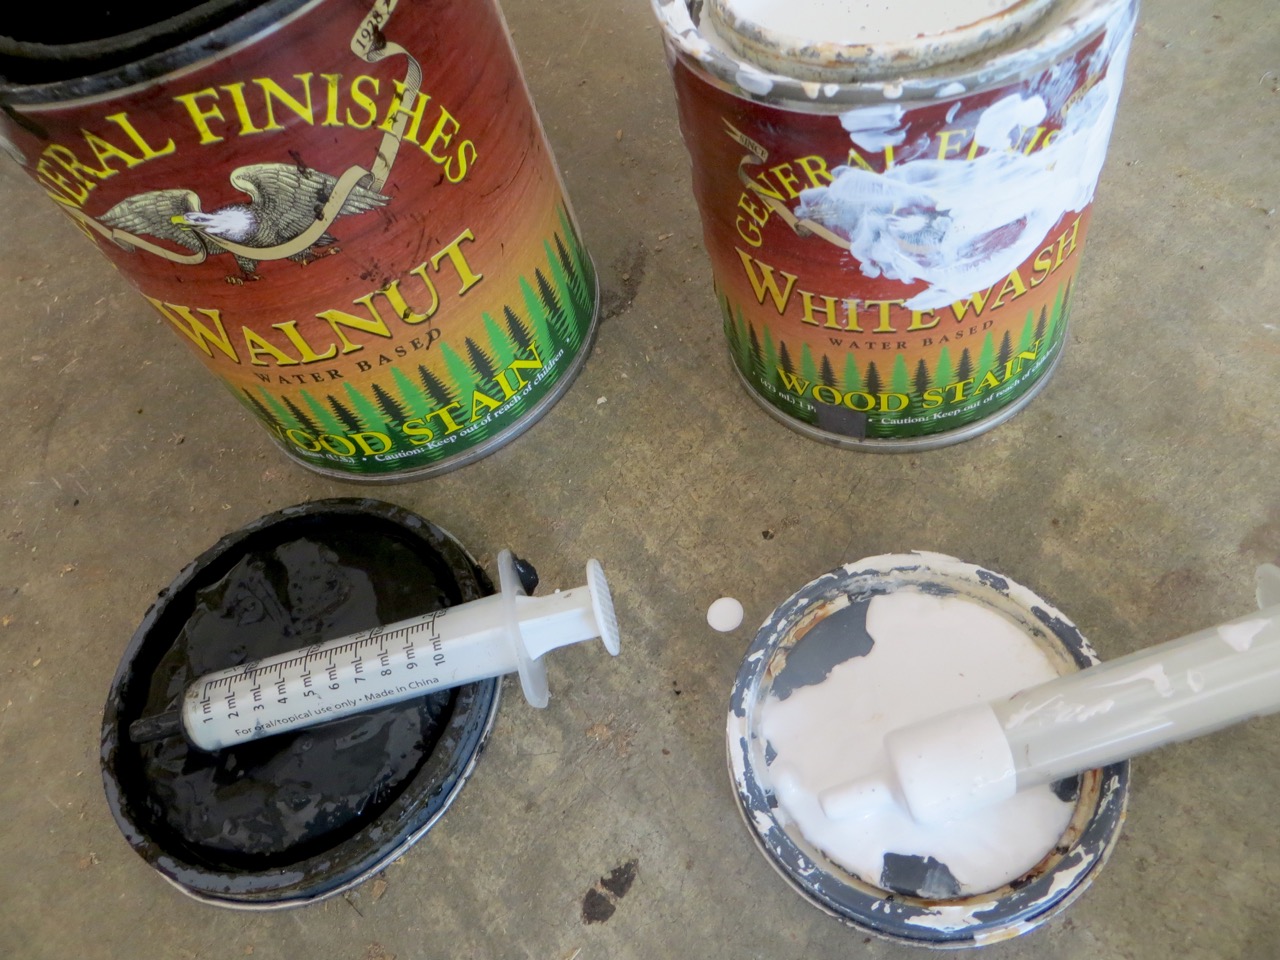
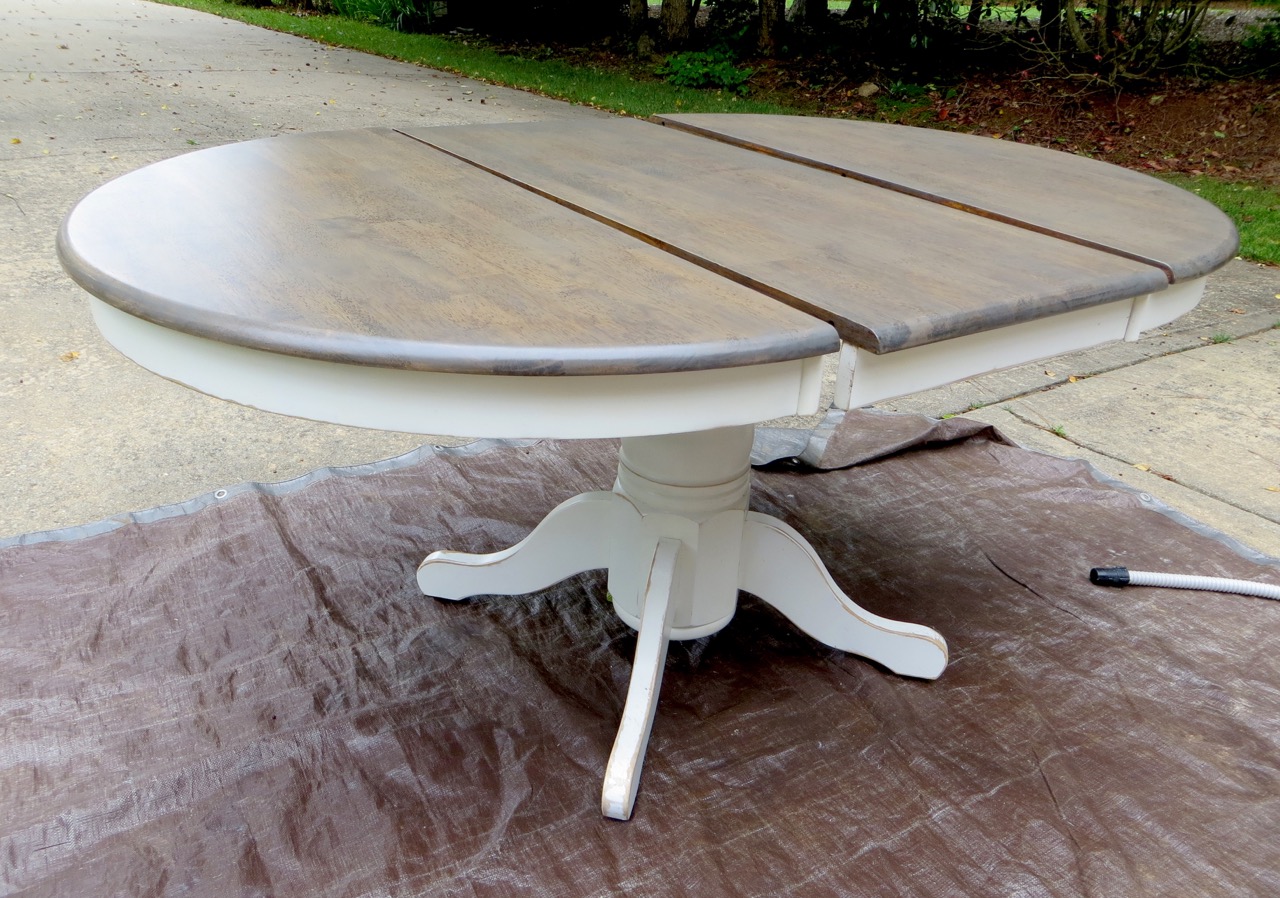
Starting over I wanted to make sure I was getting the color I wanted. I used my nifty syringes to measure out different ratios of stain to test what I liked best. I ended up going with a 1:5 ratio of whitewash (1) and walnut (5).
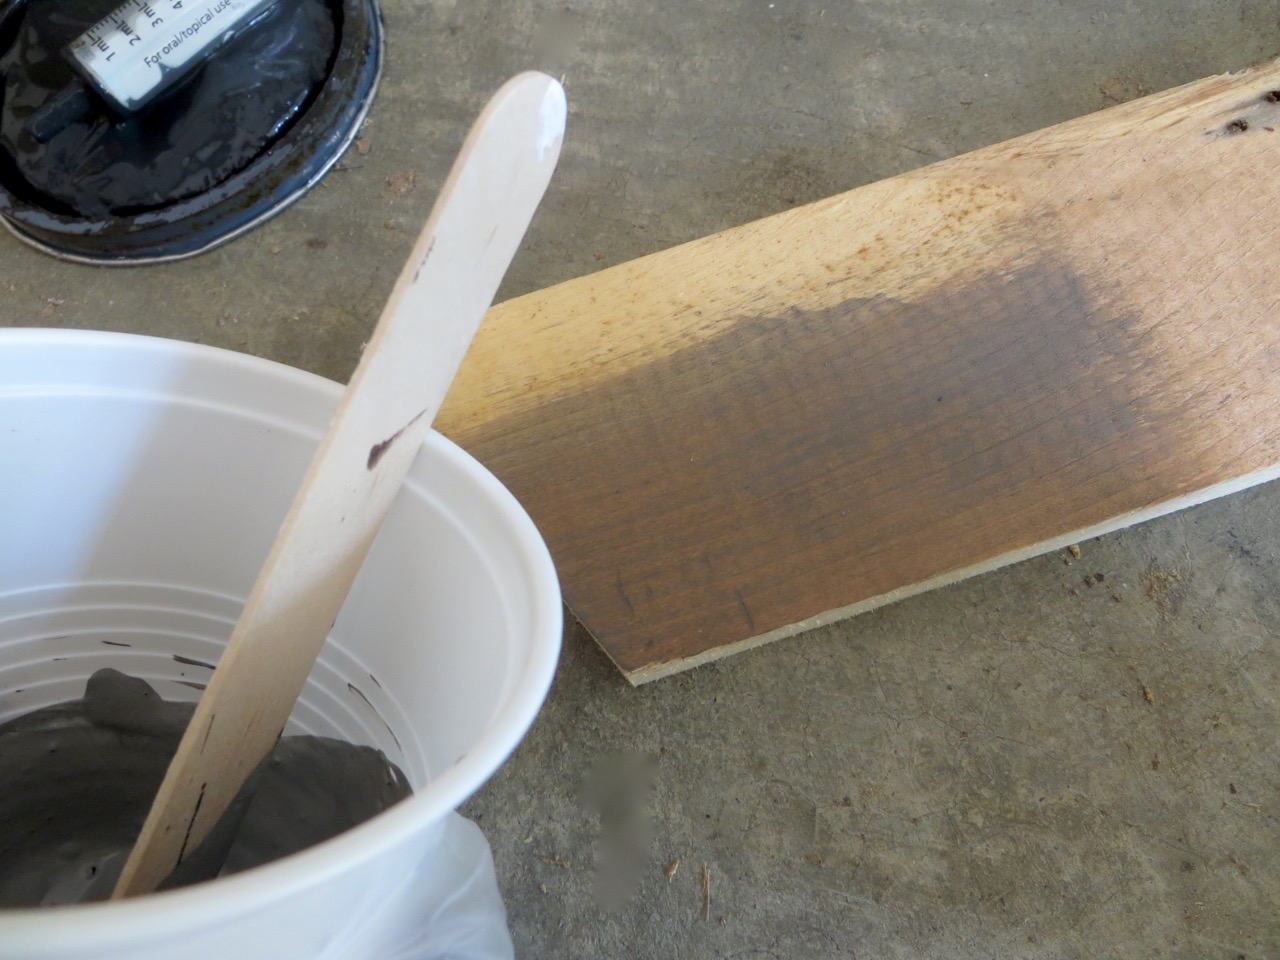
Here’s my sample.
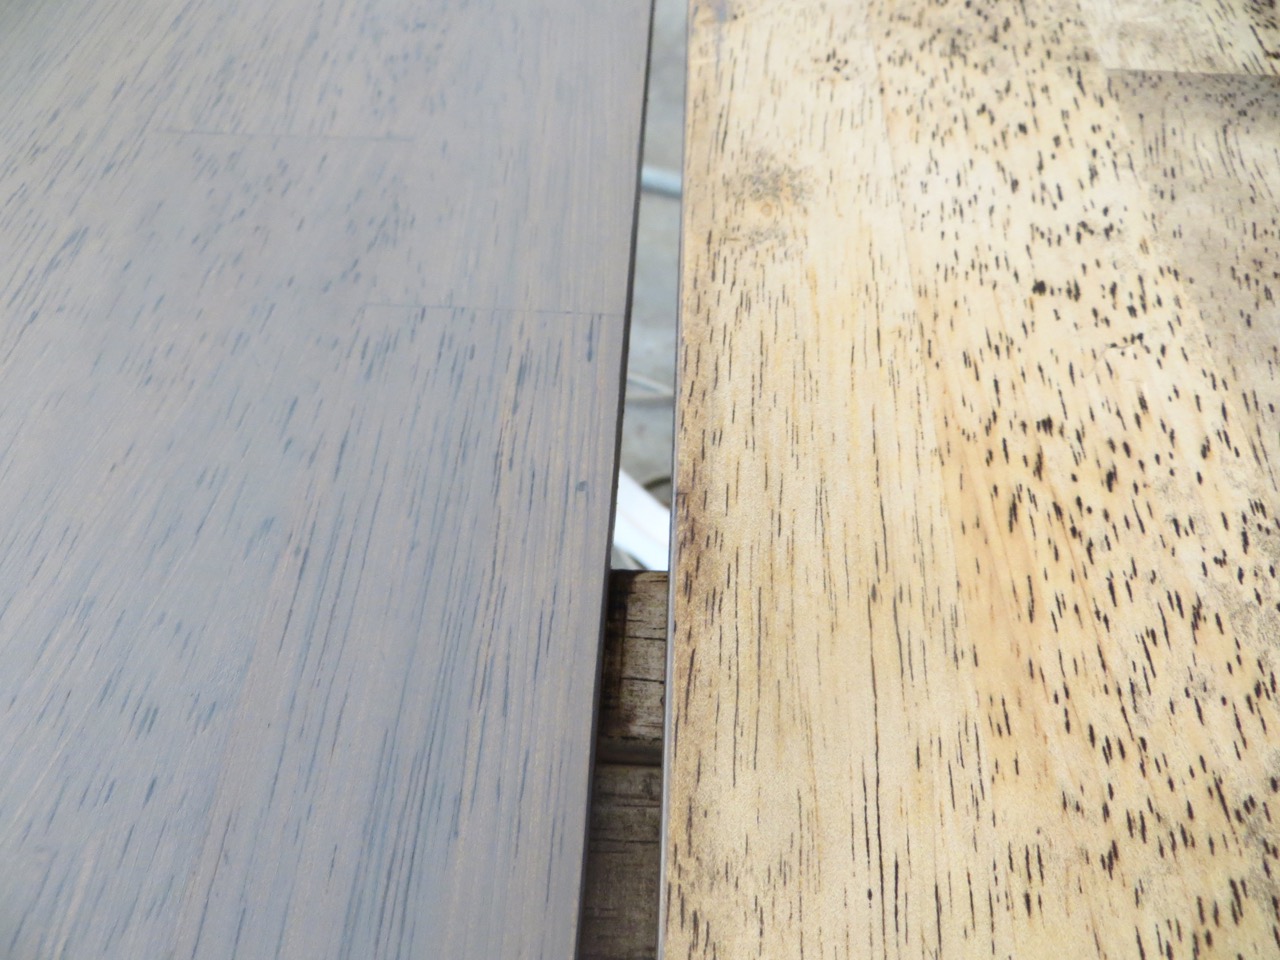
Here’s the stain on the table top. Notice the right side is back to bare wood but with dark pores from my little mishap – oops!
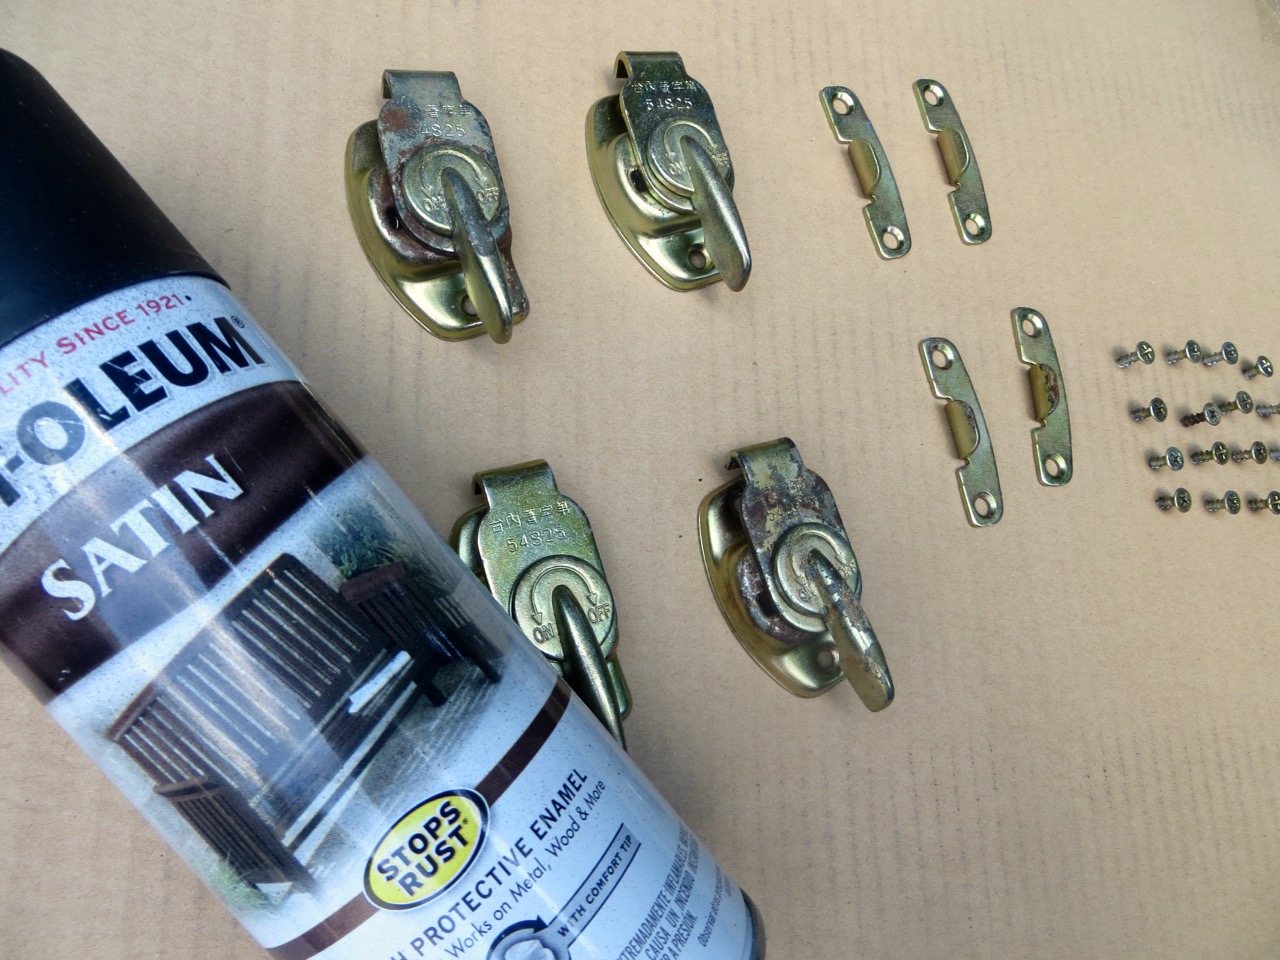
I cleaned the hardware with rubbing alcohol and a stiff brush. I don’t know what the gummy mess was on them but it rusted the pieces.

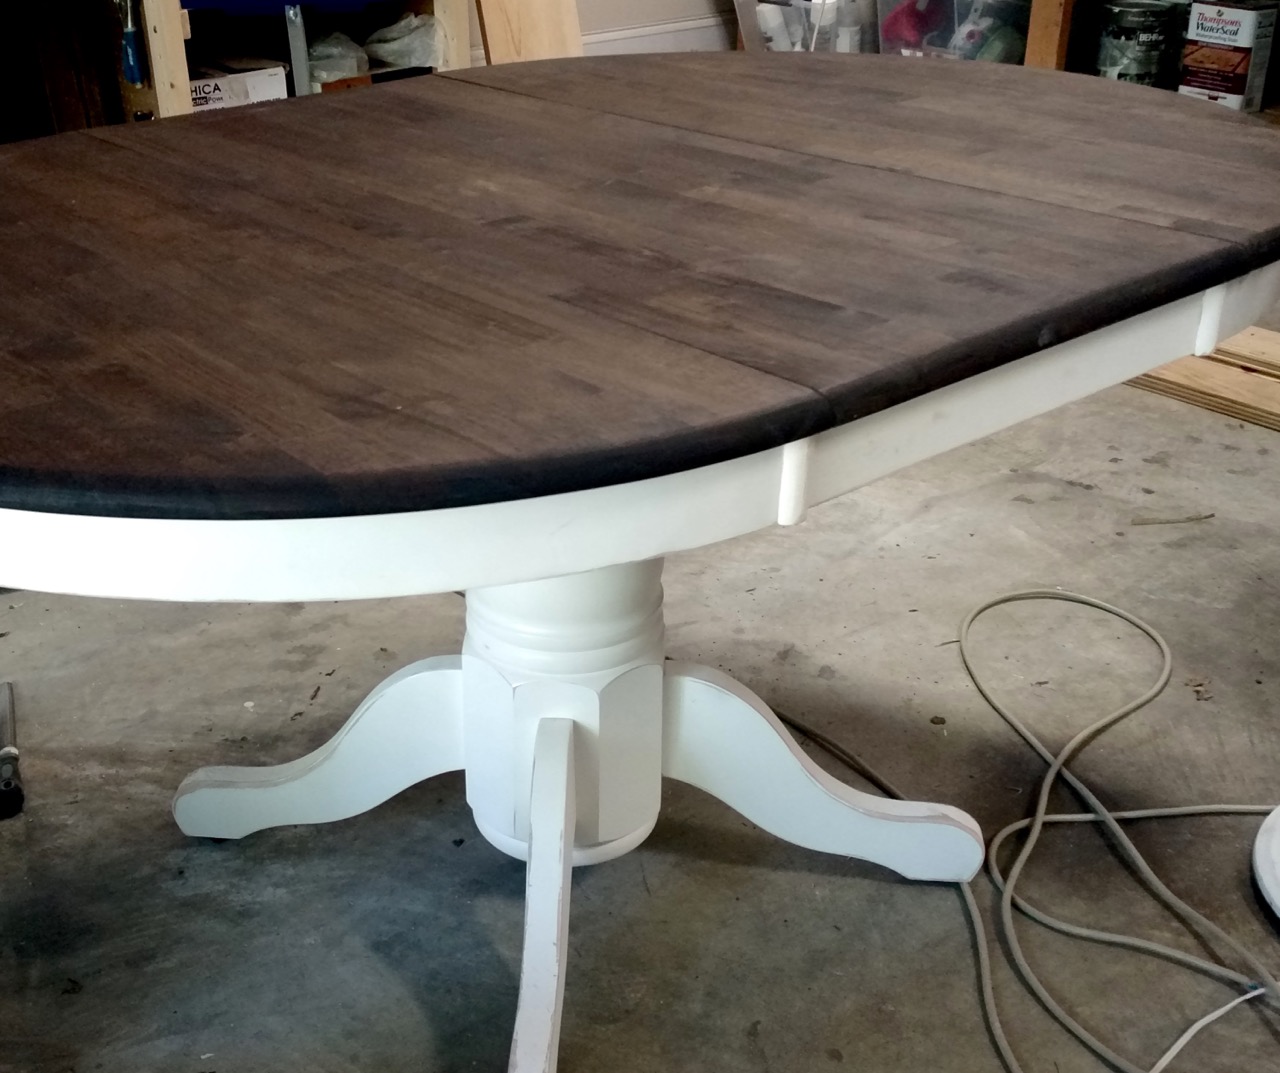
So much better!
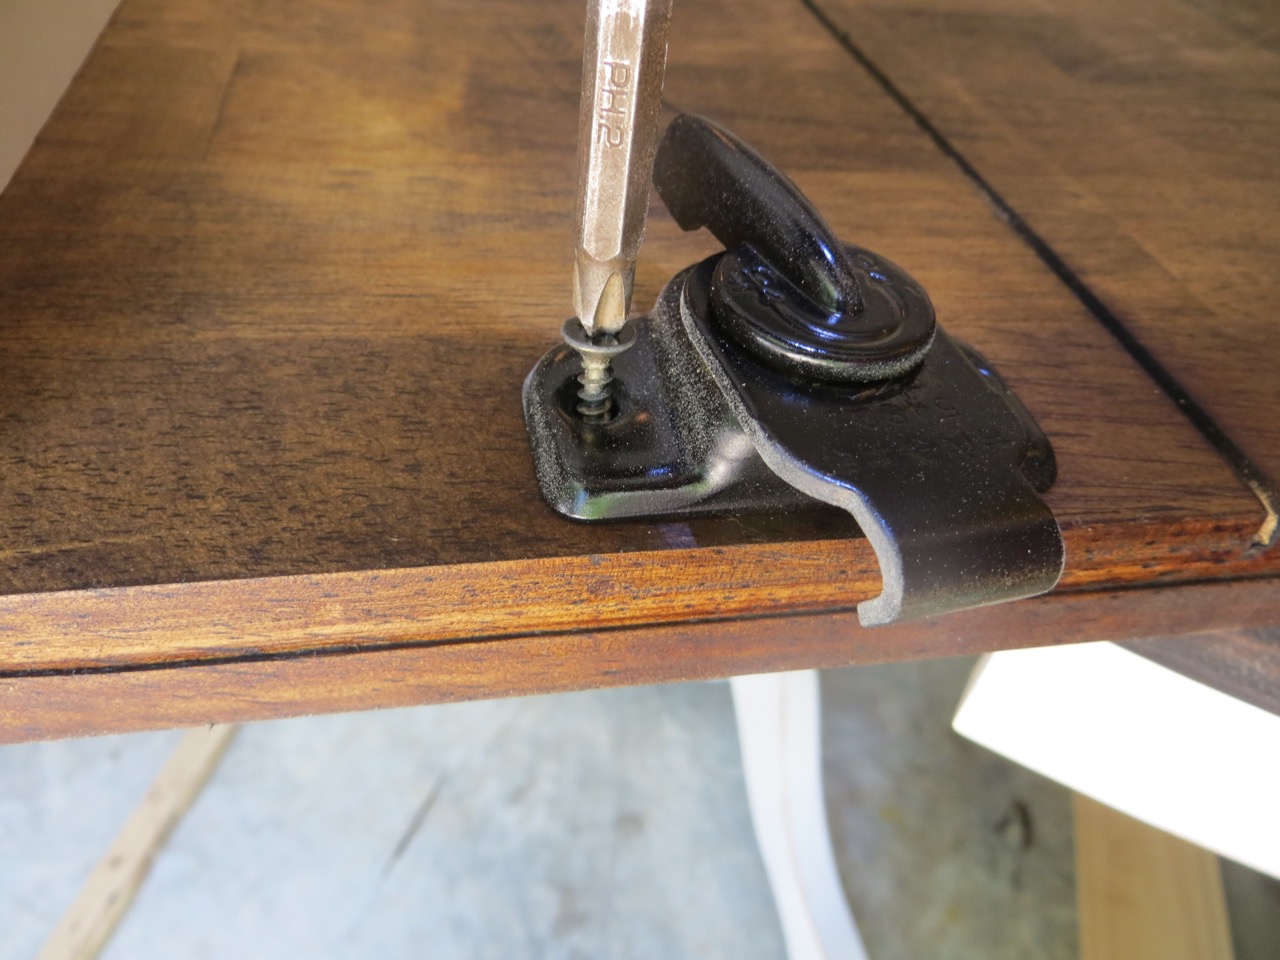
Attaching hardware is one of the best steps (it means you’re almost done)! Don’t worry -they’re just dusty from all my sanding work.
I used my Harbor Freight sprayer to spray on 3 coats of water based Polycrylic, sanding in between layers where needed.
Pretty finish!
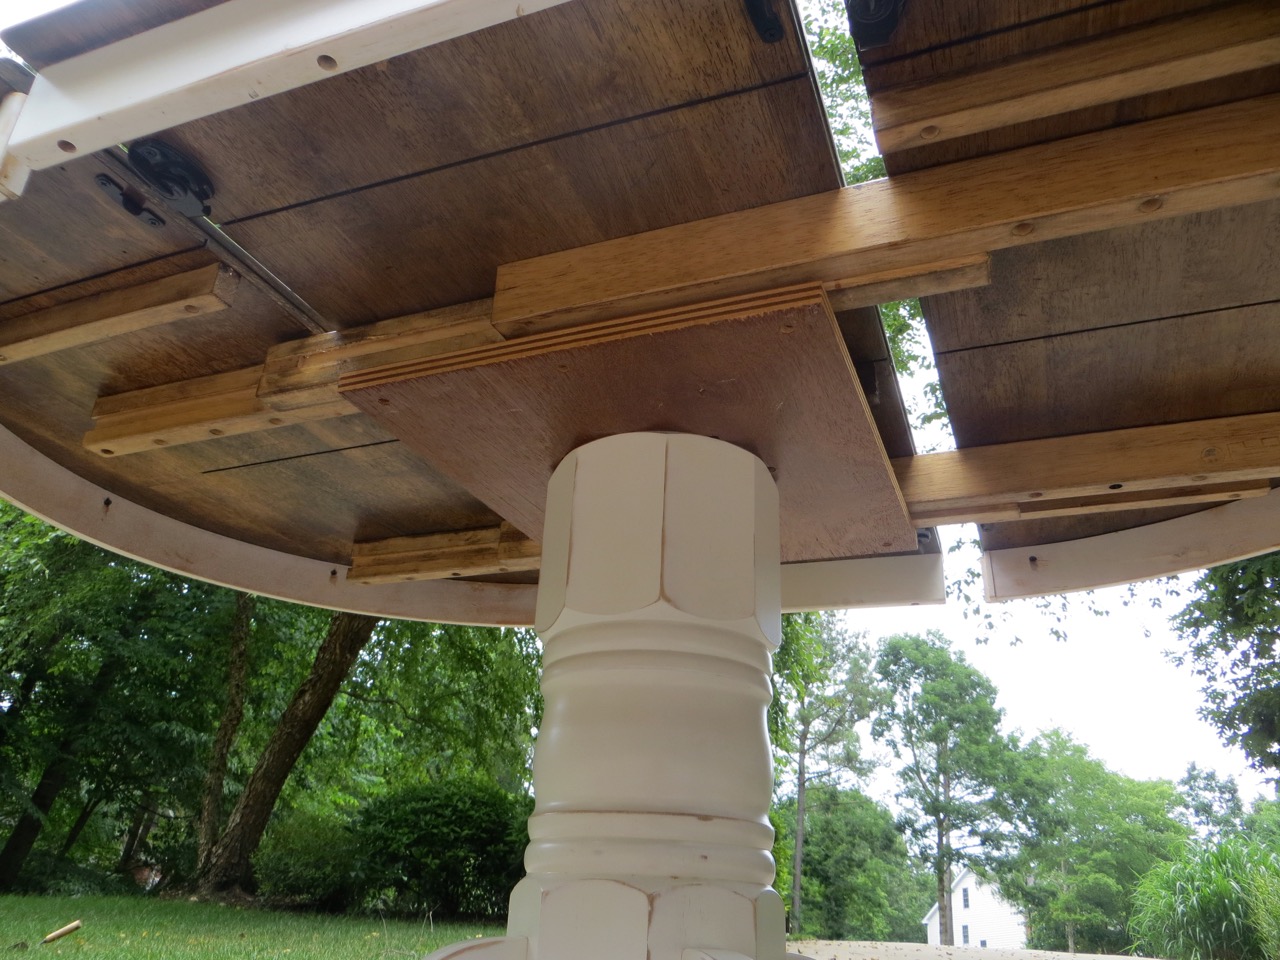
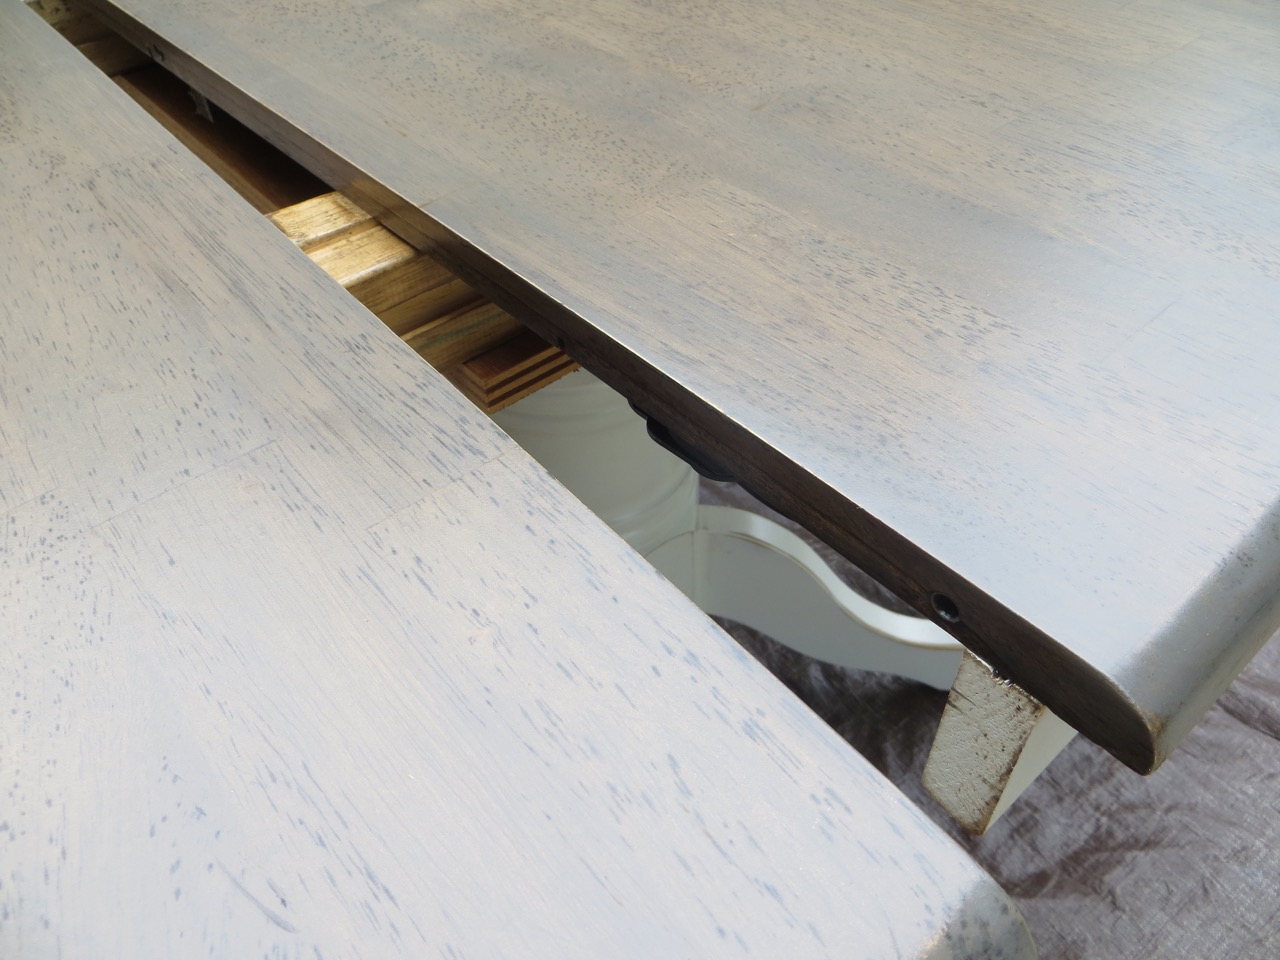
Being me, the underside had to be stained and poly’d too!

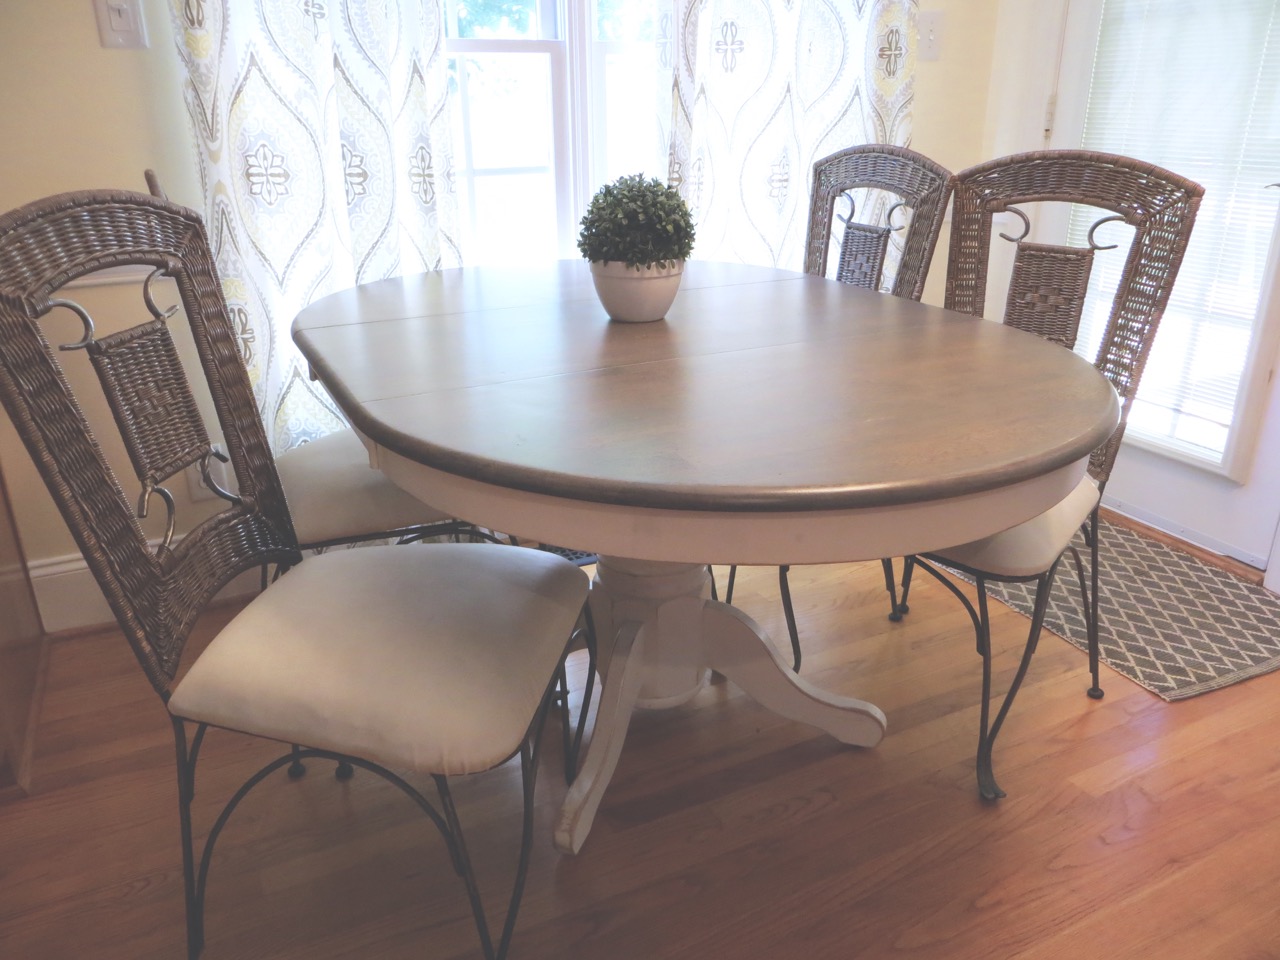
Do you know what I love most about this project? I’ve had these 4 chairs in my attic for the last 6 months with no companion table! I got them free from a lady and reupholstered them hoping to pair them with a farmhouse table for our dining room… but who knows when THAT will happen!
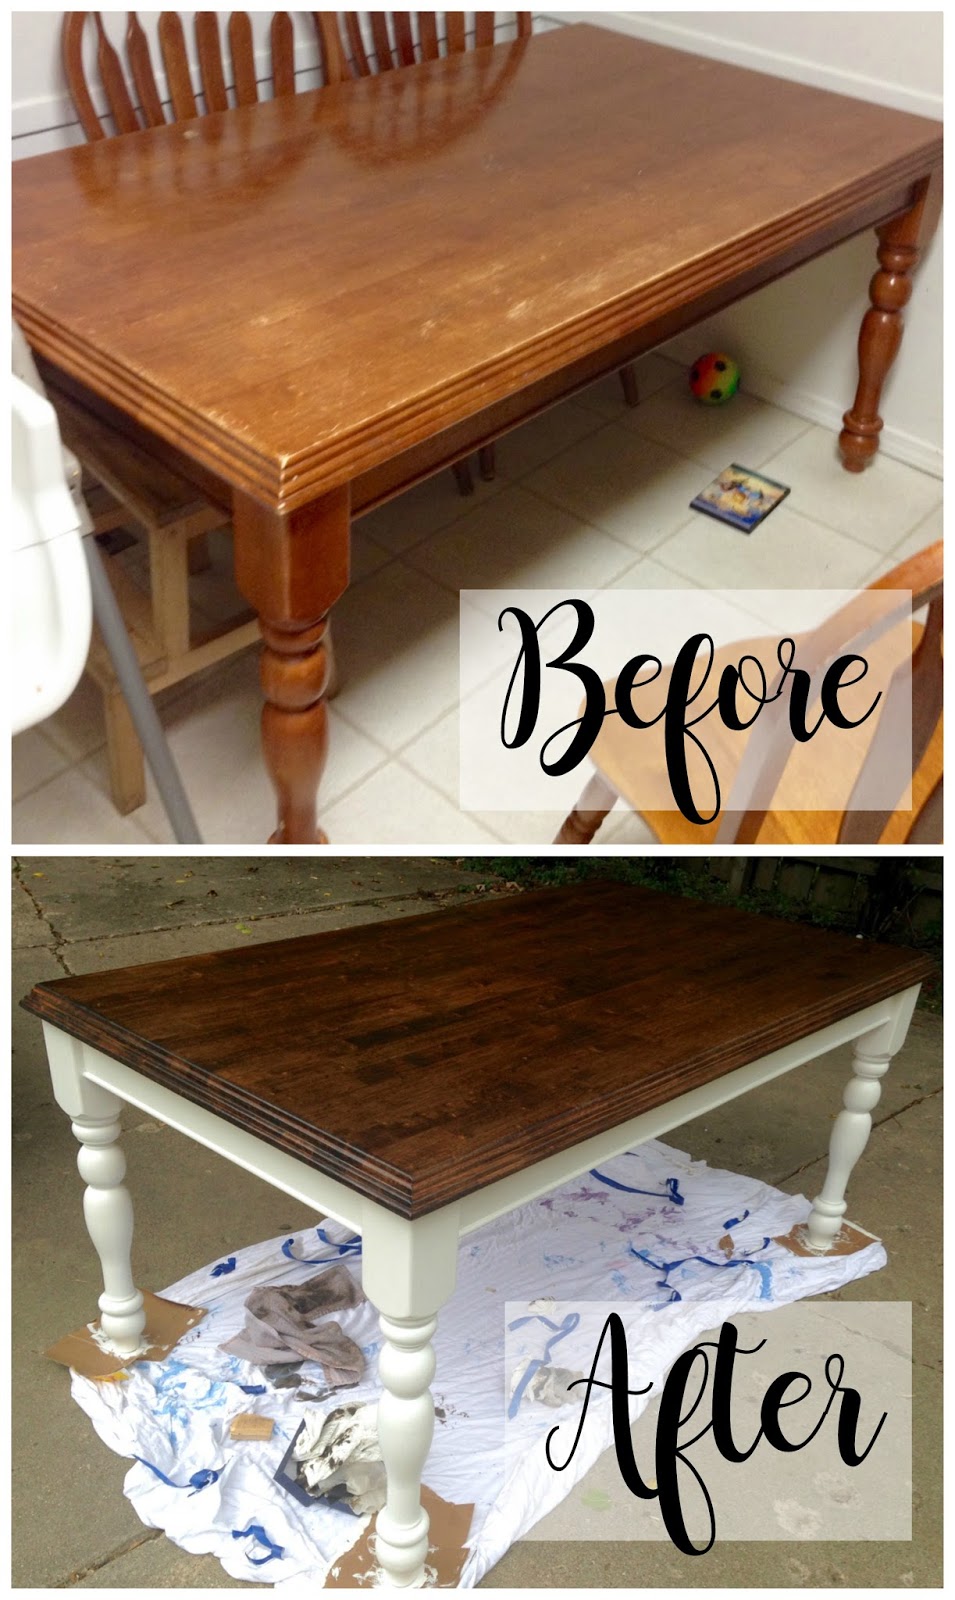
Here’s another example of a table refinish! Isn’t it amazing!? I helped a friend a few years ago and it took us about 2 hours of sanding and cleaning to prepare for paint and stain. We used two coats of white latex paint for the legs and Minwax Dark Walnut Stain for the top, and finished it off with a topcoat.


6 Comments
Oh I love this, great timing! We need to refinish our kitchen table – I love it but I would definitely describe it as gummy 🙂 (Kids, I'm sure, right?!)
June 20, 2016 at 3:23 pmWhen you decide to figure out the dining table, let me know! I'm dying to build one but know nothing about how to do it. Love your posts, thank you for all your good tips!
June 21, 2016 at 11:15 amI think refinishing a table is about an every-other year thing when you have so many little ones at home! It really is worth the time! You may want to invest in an electric sander if you don't have one! 😉
June 21, 2016 at 11:25 amI've been wanting to make one for a while and have a few ideas. I just have to convince my husband (he likes our tall one)! There's quite a few ideas online – you can get by with just a miter saw and a drill, really!
June 21, 2016 at 11:27 amFor some reason, my father stained much of the furniture he made in dark walnut. There are STILL some pieces I need to refinish. Sorry you had to go through so much trial and error to find the color you wanted, but it looks fantastic. Your newly upholstered chairs look wonderful. With youngsters in the house, you may want to consider spraying with fabric guard.
June 21, 2016 at 11:19 pmI've never used fabric guard – I should get some for my couch (my five year old just rubbed smears of permanent marker all over it)! I actually used a soft vinyl for the seats so they'll wipe off easy, but I am worried the kids will poke holes in them, lol! KIDS!!
June 21, 2016 at 11:23 pm