This project took only about 3 hours because I used a few ‘tricks’ to make it quick and easy: ripping my fabric, using my ruffler attachment and serging the bottom edge to make hemming more manageable on this whimsy fabric.
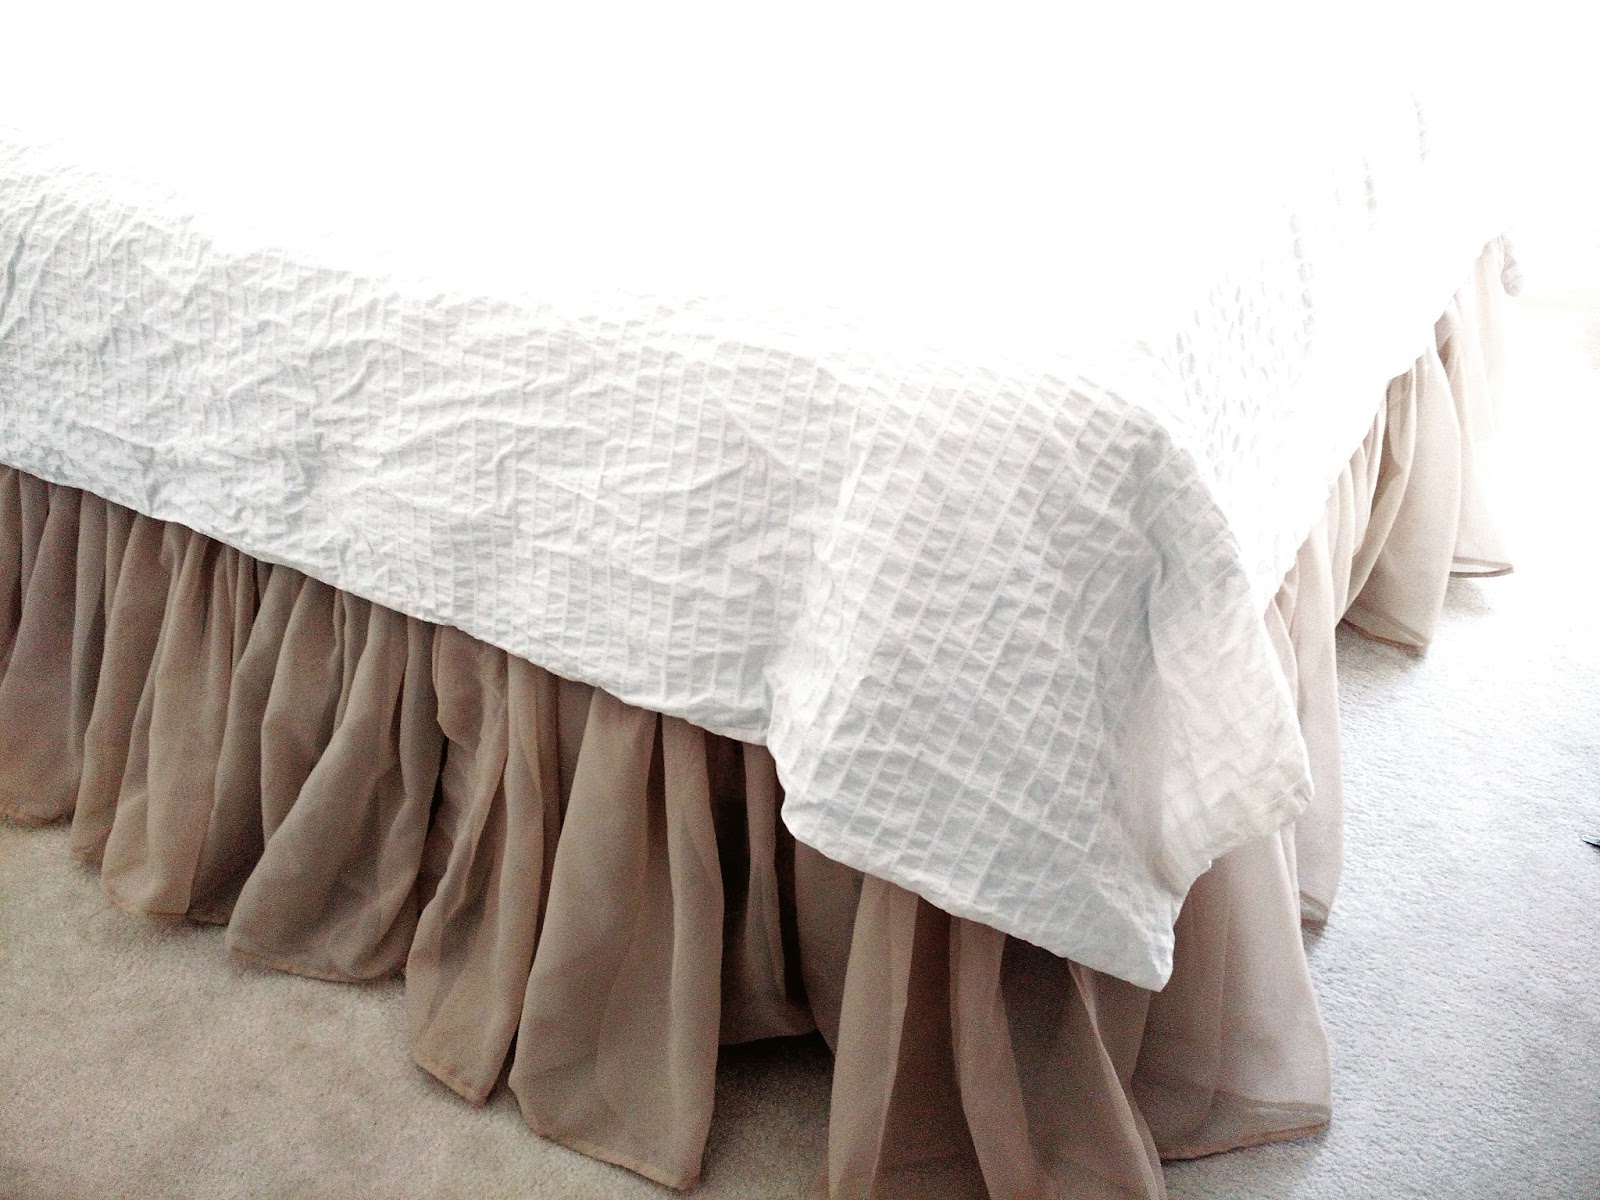
Our guest bedroom needed some attention – most of all, a pretty skirt for the mattress! I was at the thrift store and found 4 sheer curtain panels and brought them home to see what I could do.
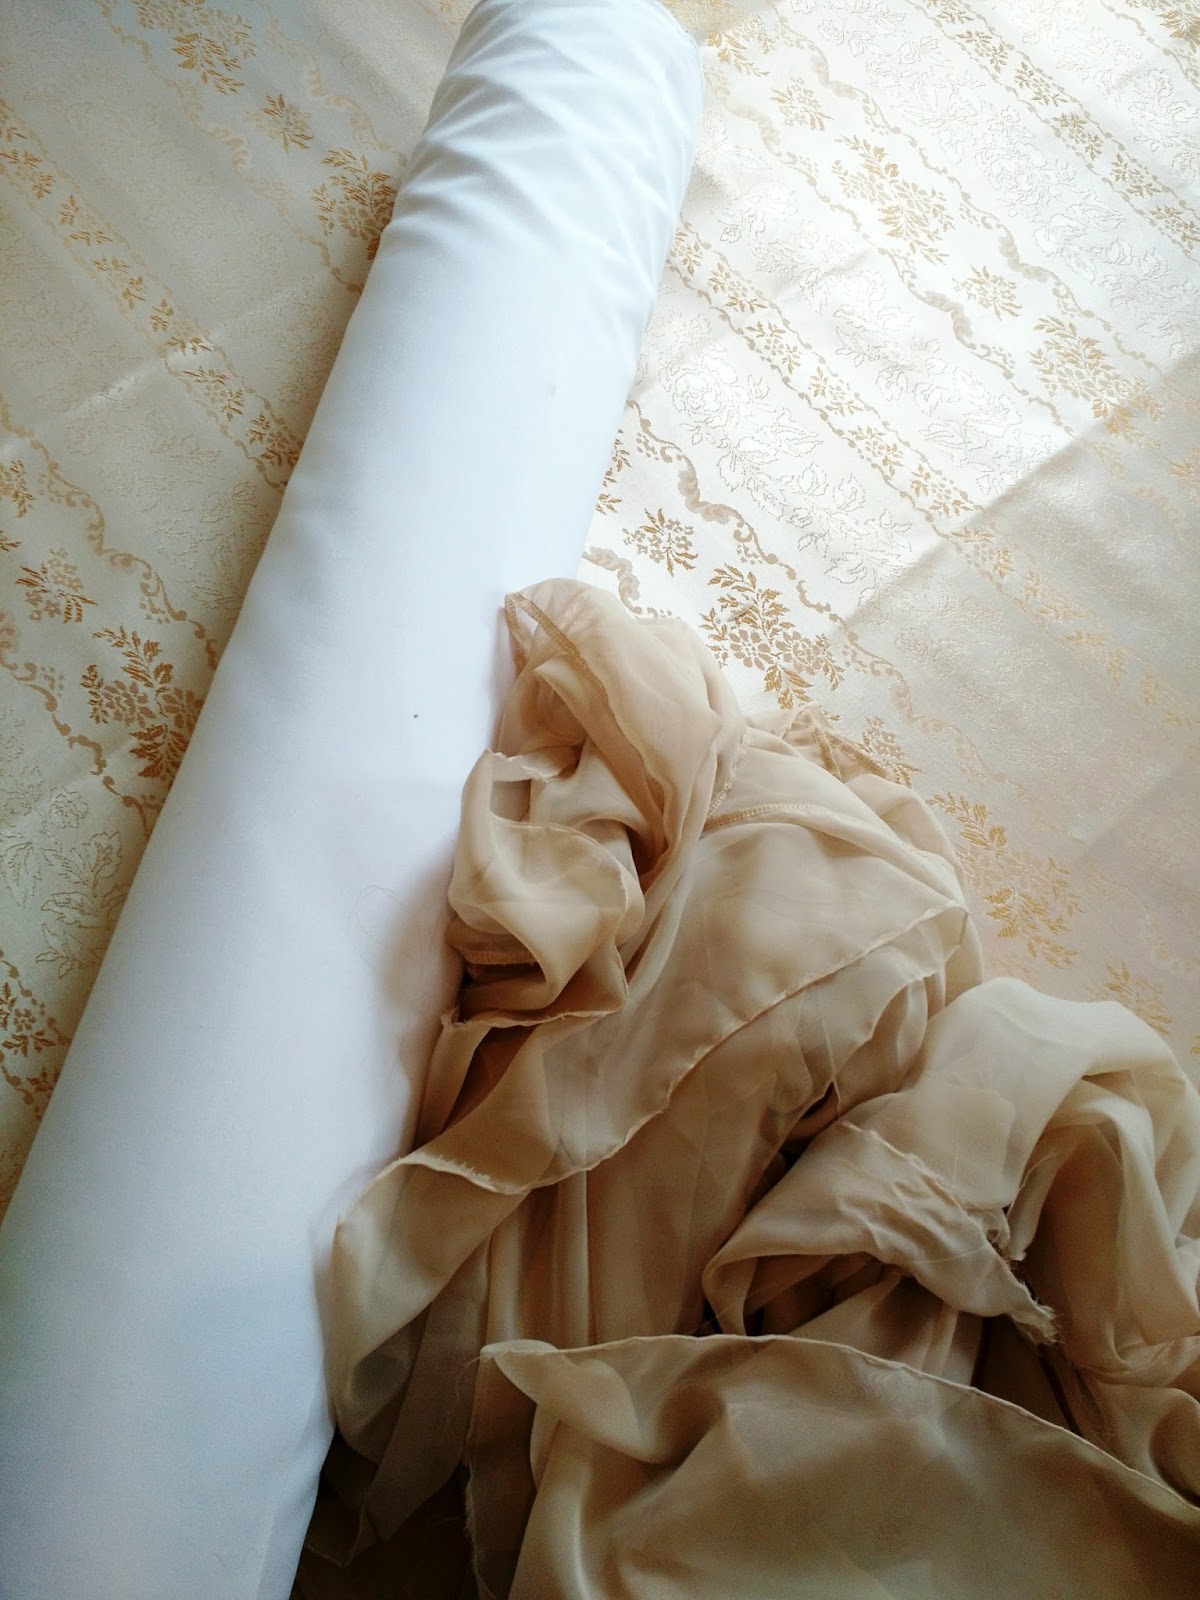
I paired the sheer fabric with some medium-weight twill I had on hand to keep the bedskirt in place (I’m usually moving the mattress myself and this way the mattress slides right over the twill easily without it adjusting)!
One thing to mention is that I wanted my ruffles to start about 1 to 2-inches in from where the edge of the mattress is, that way when the bed comforter is lifted you won’t see the white twill. I also wanted my ruffles to be long enough that they extended passed the length of the floor 1 to 2-inches as well to give it a really pretty look.
That being said, I needed my fabric strips to be a total of about 5″ longer than the length from the floor to the edge of the mattress. I simply snipped the edge of my curtains and ripped the strips of fabric. Can I just say I LOVE ripping fabric whenever I can? It’s so convenient since it rips right along the grain, making your lines straight and parallel to eachother. Of course not all fabric rips, and some rips easier than others. I got 3 long strips out of each curtain, so I had a total of 12. Serge your strips together, short-end to short-end.
Be patient with this step, it will feel like it takes FOREVER! You’ll want to make a 1/4″ hem on the bottom edge of your VERY long strip. To make this process much faster, easier and more neat in the end I whipped it through my serger first because it stiffens the edge so it’s easy to turn over for hemming.
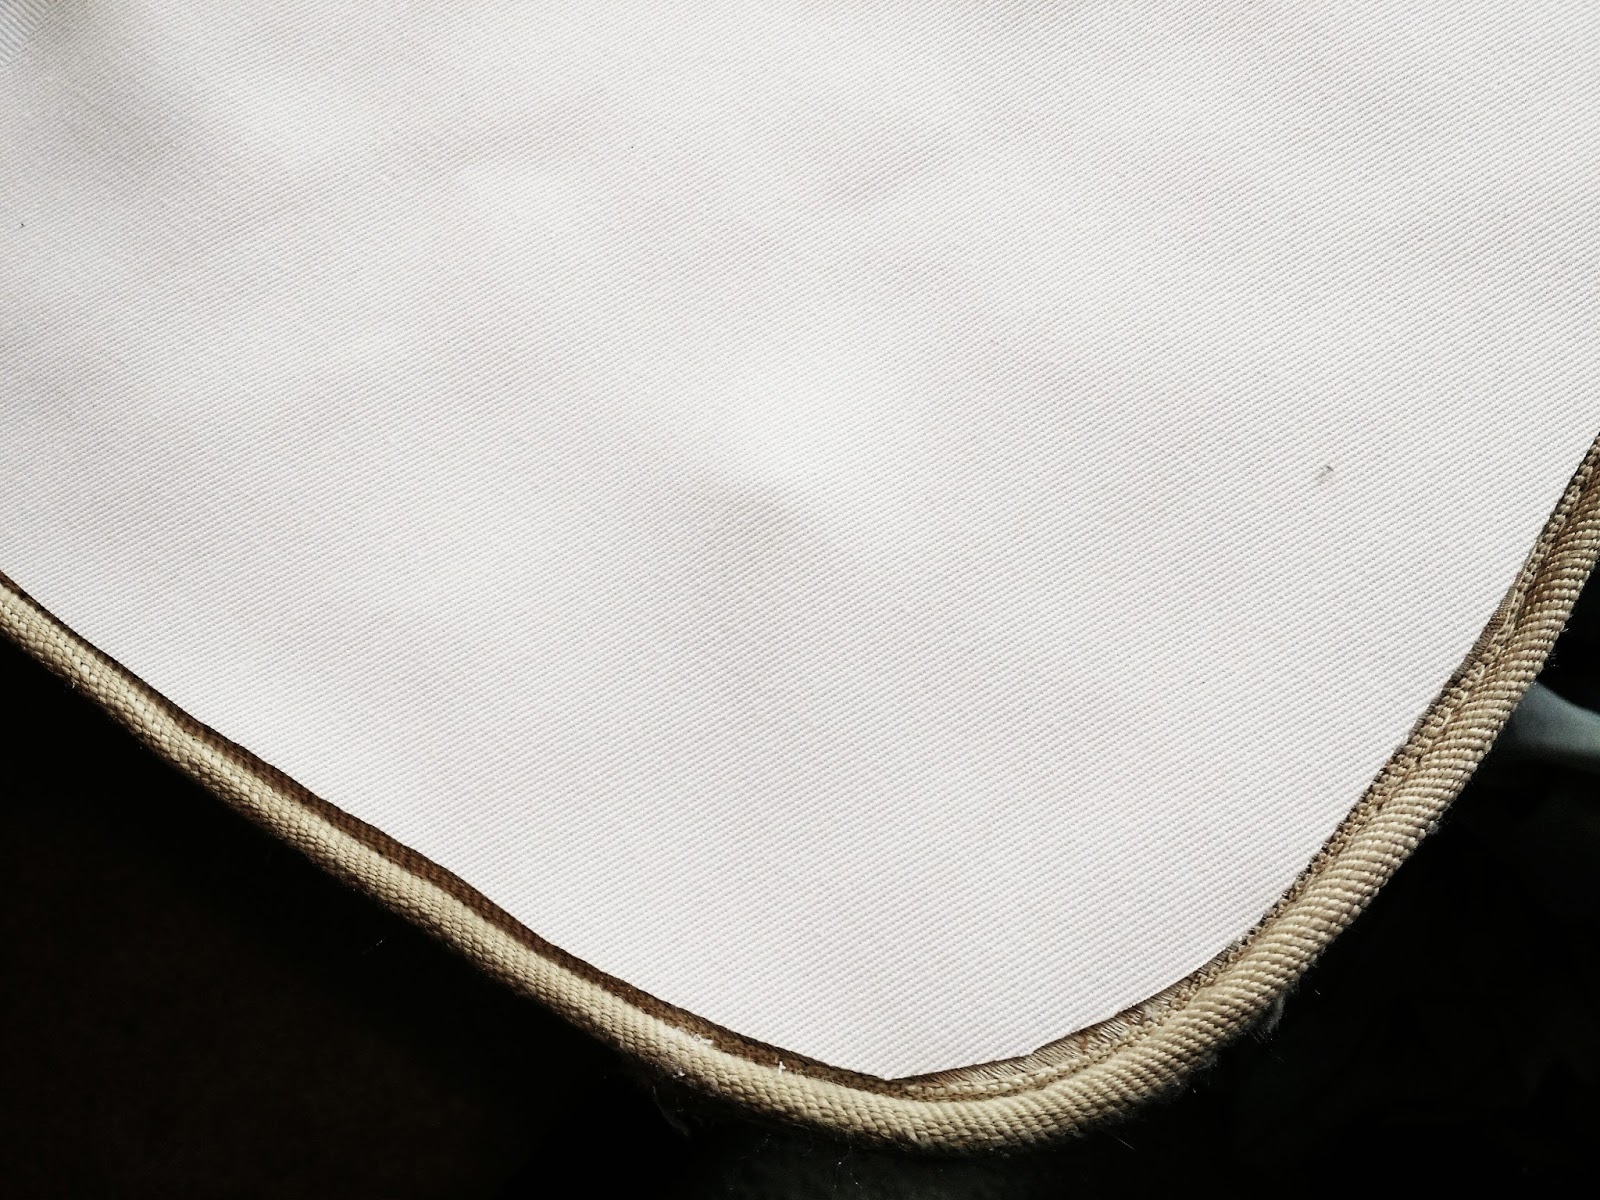
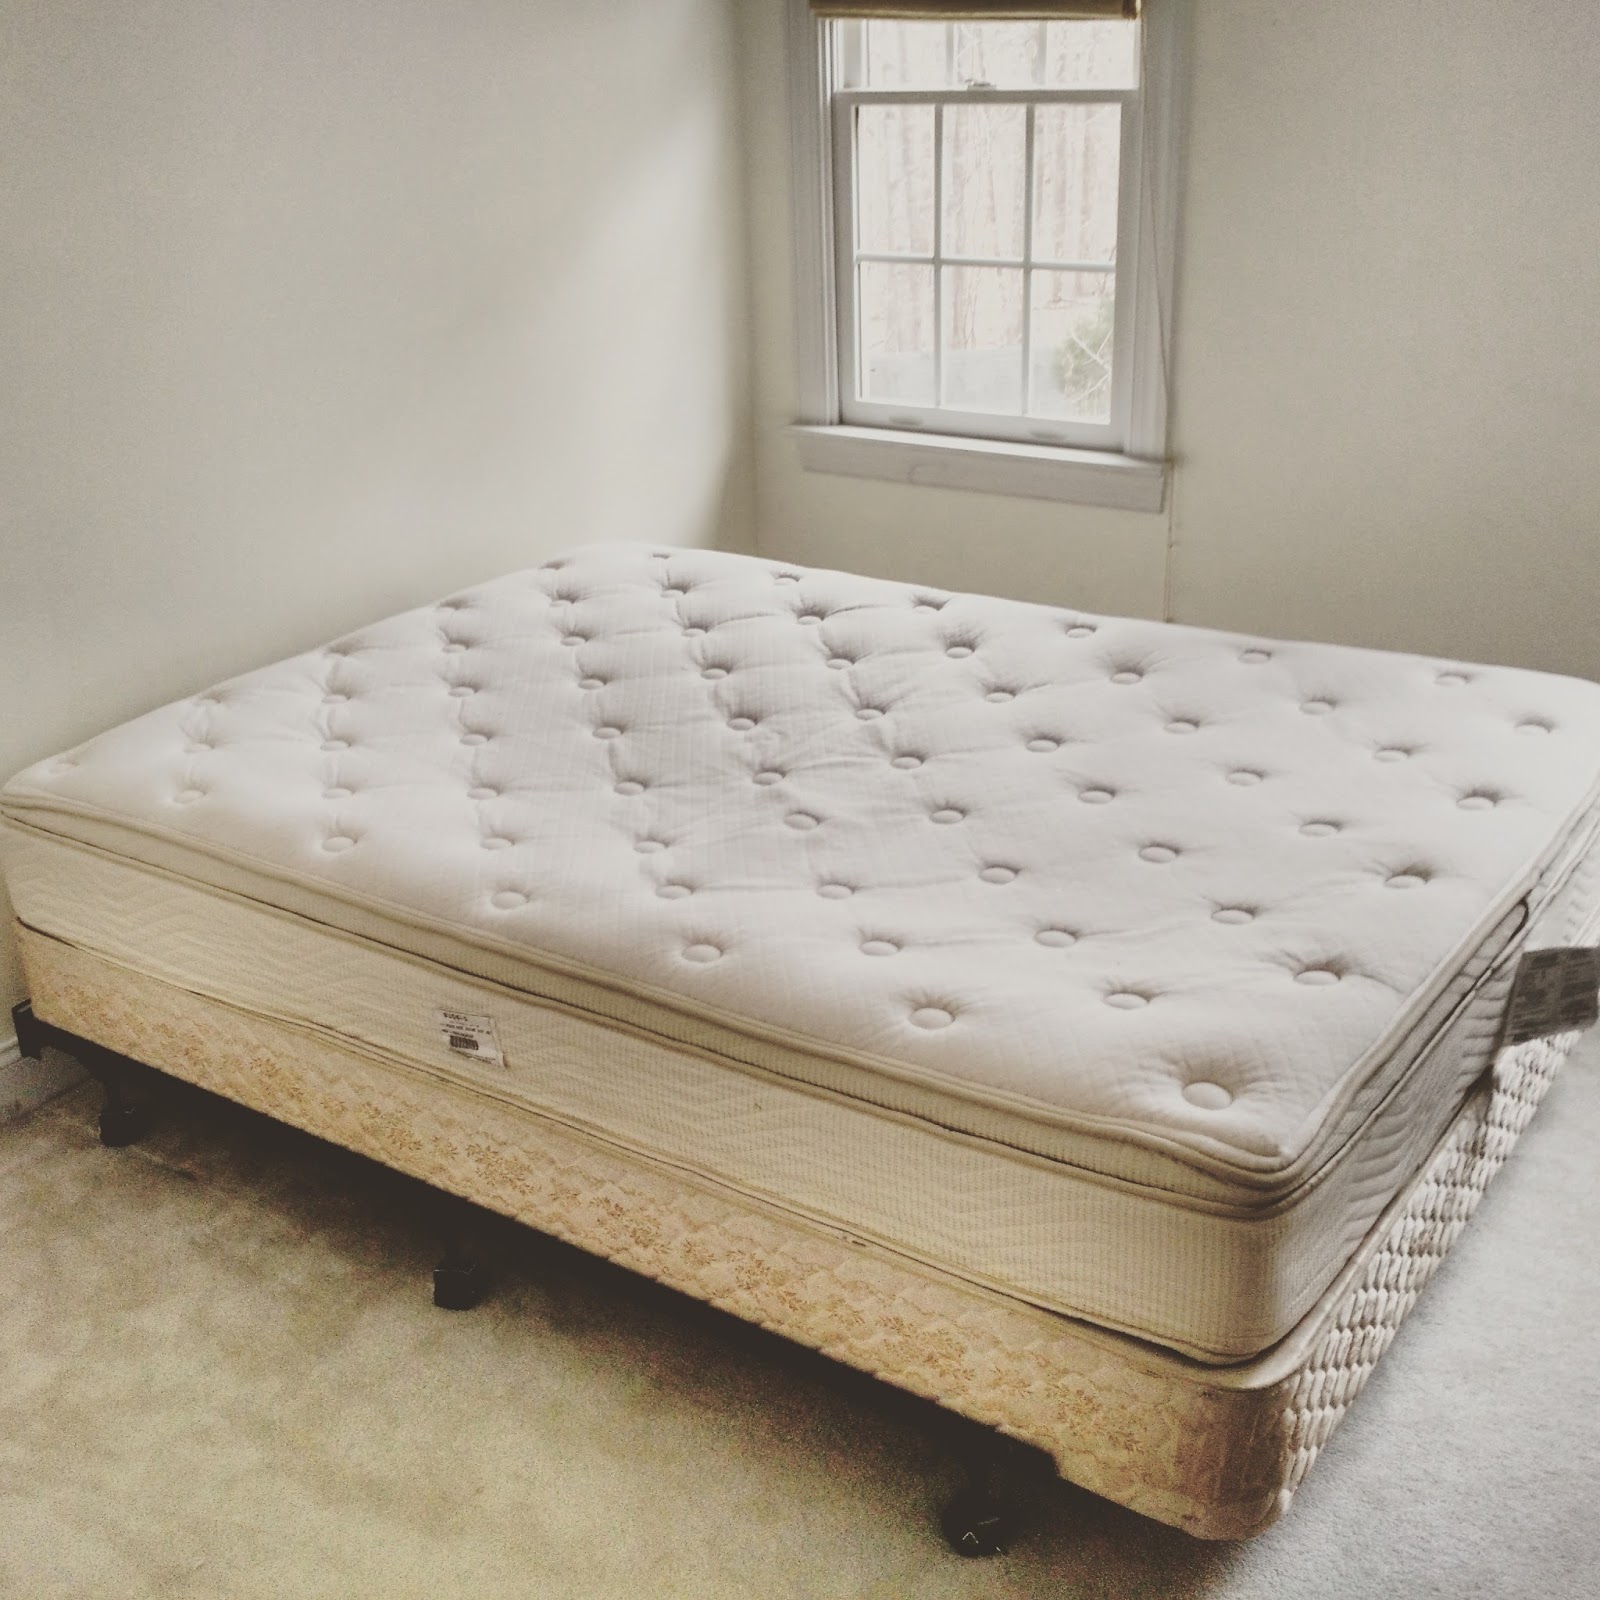
I cut my twill so it was 1/2-inch smaller than the entire top of my mattress (except the top edge by the wall I kept straight and extending passed the mattress by 1-inch). I simply laid my fabric over my boxspring mattress to do this.

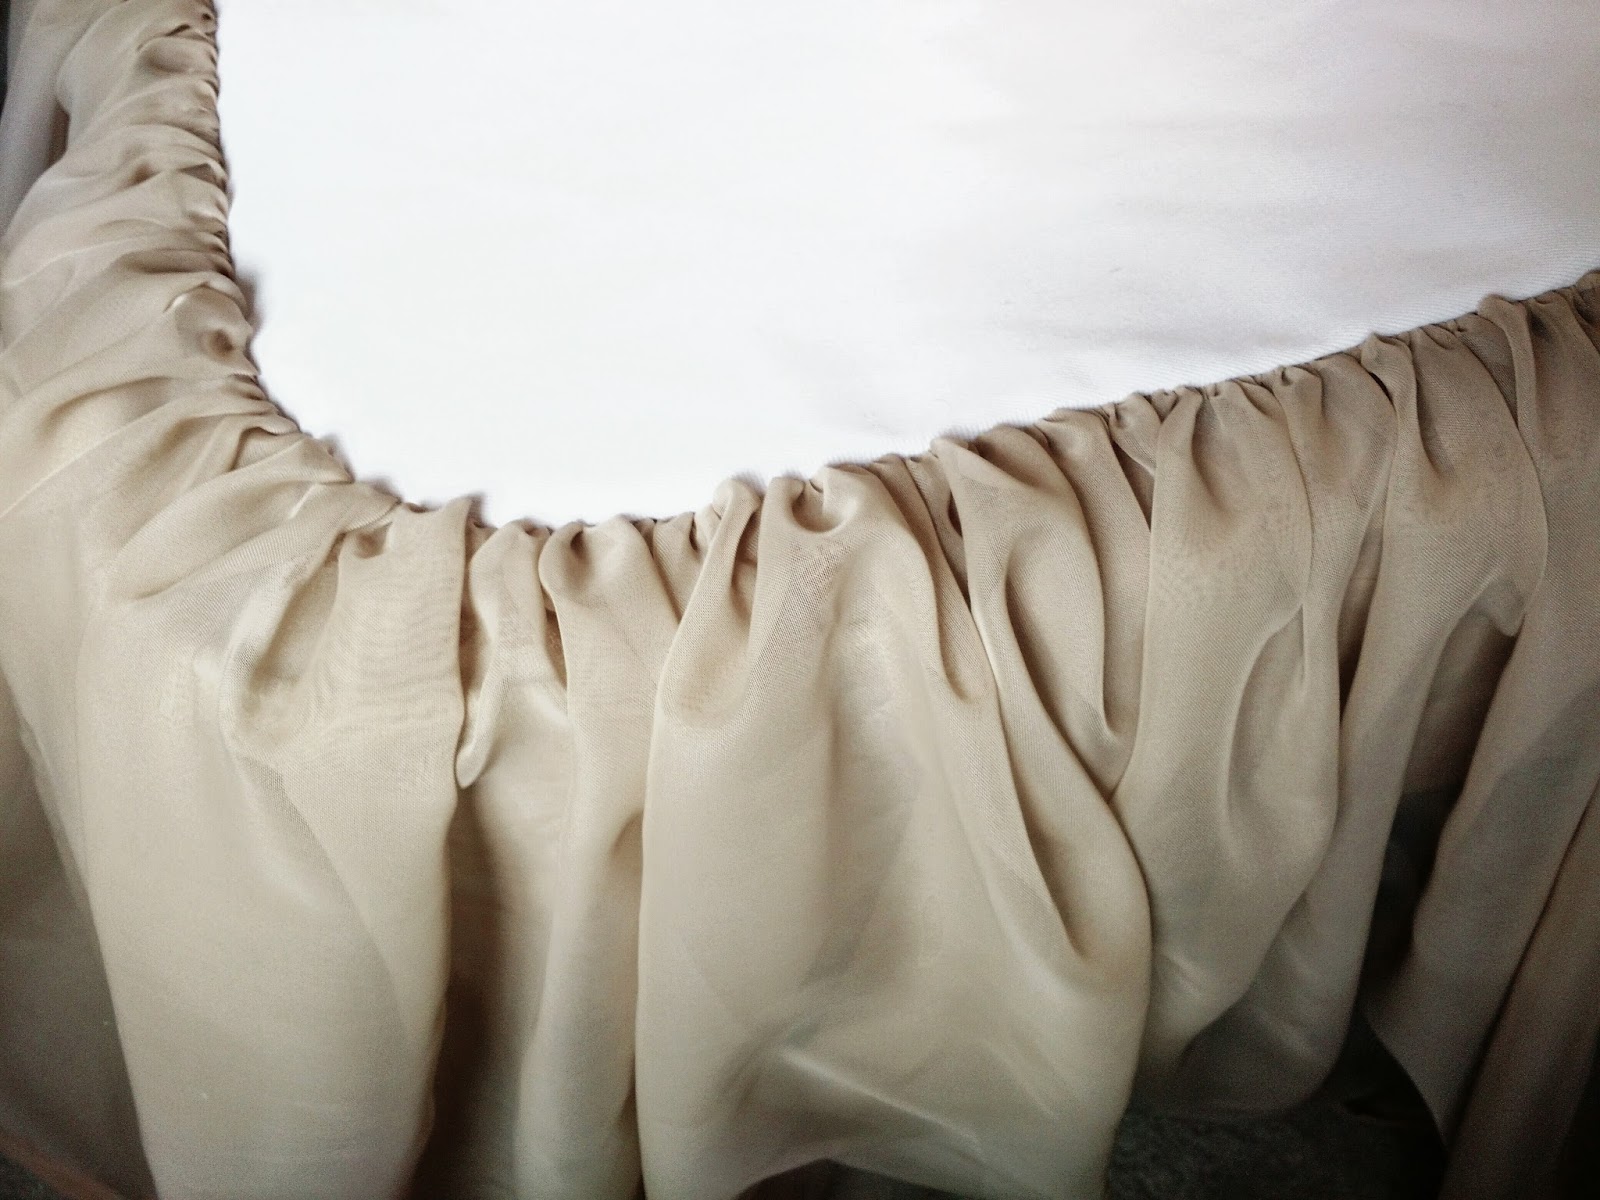
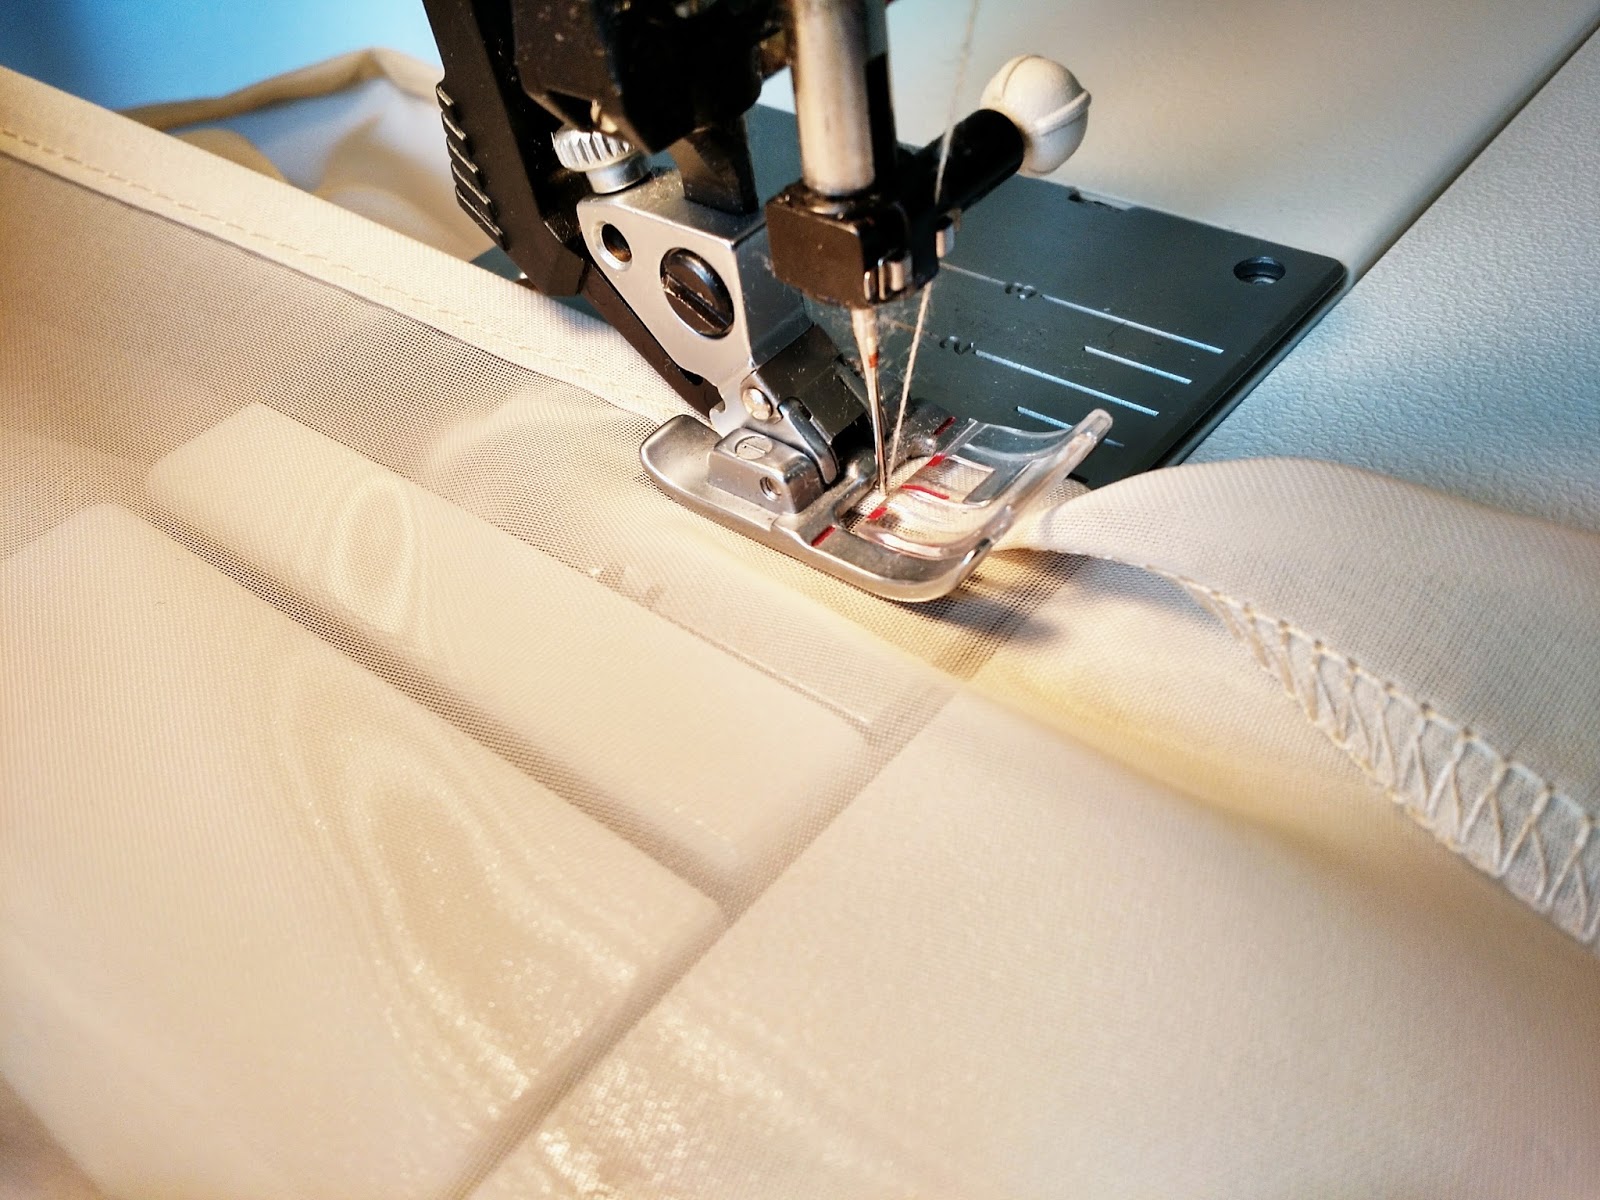
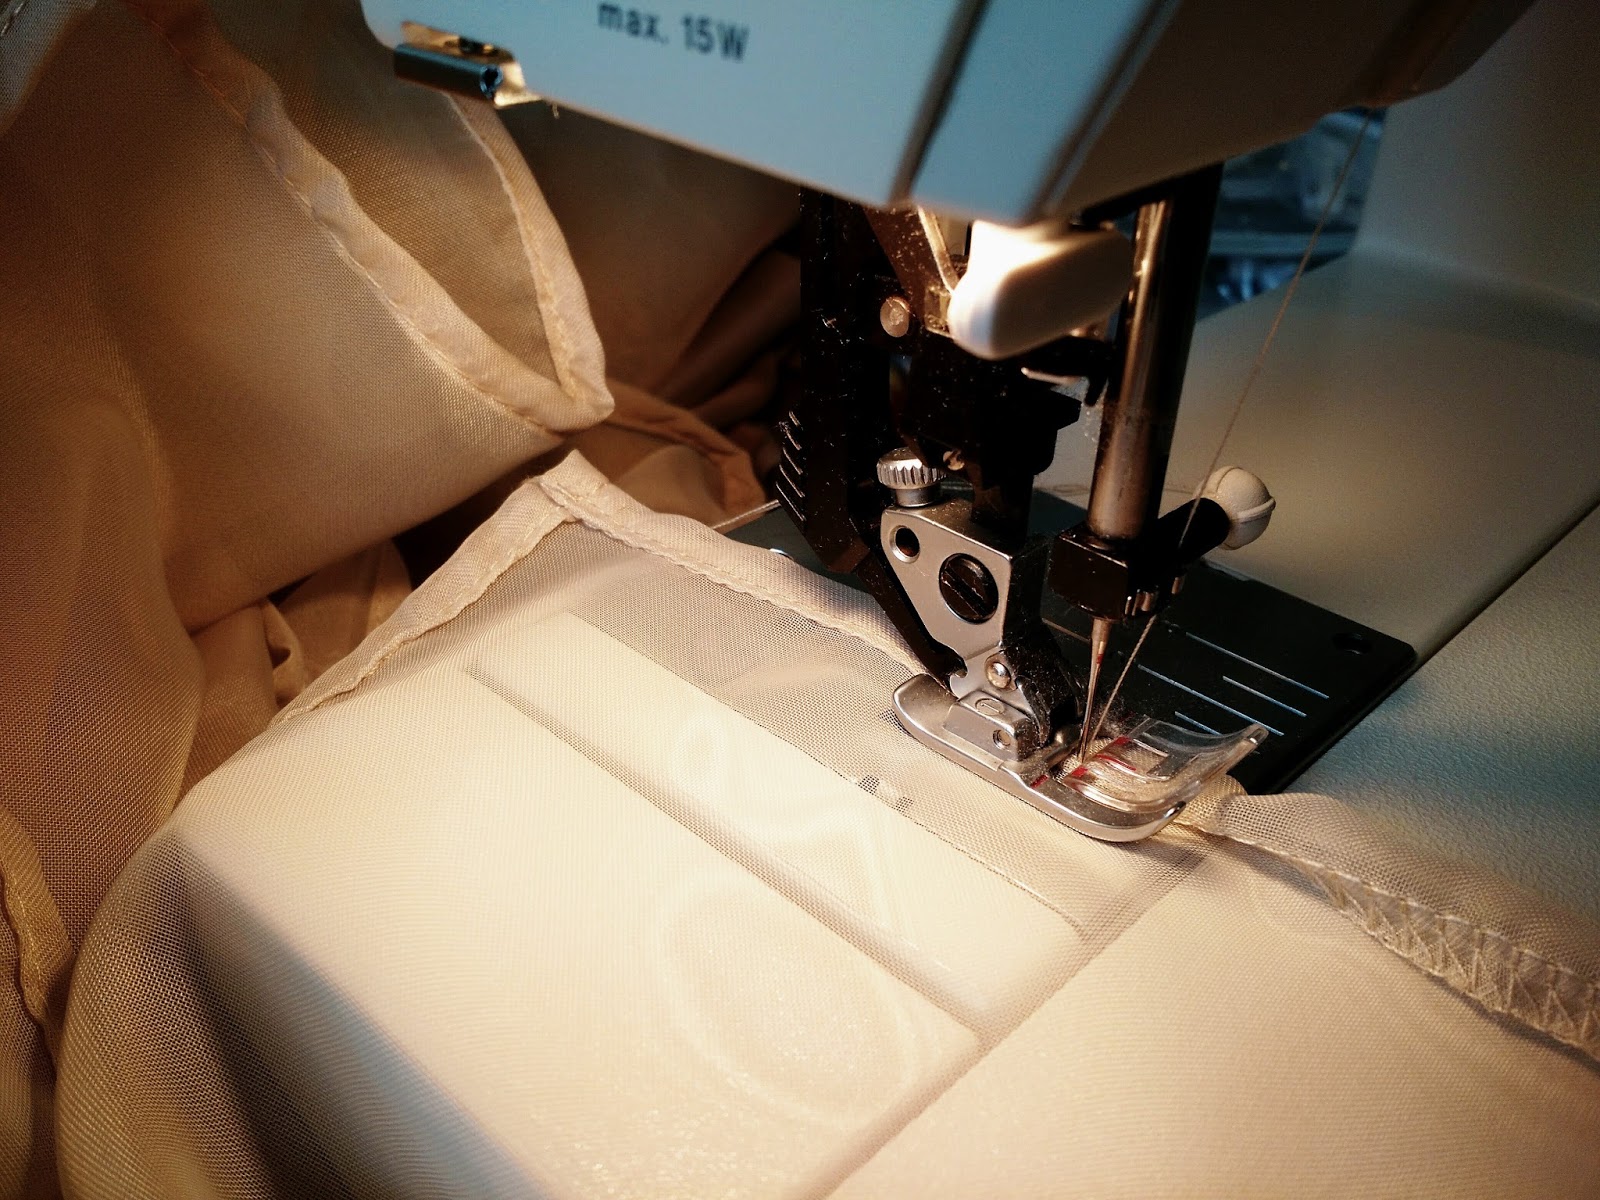
I can’t tell you how much I LOVE my ruffling attachment! It makes the perfect ruffles in seconds. Of course the regular basting and ruffling by hand works too, but I was able to do ruffles AND sew onto my twill without any pinning! YES! This method can be a little nerve wracking because there’s always a chance if you make your ruffles too ruffle-y that you’ll run out of fabric to ruffle! If you have one of these rufflers, I had my settings on 1-ruffle every stitch with the depth at 3.75, and my stitch length was 2.5. I’ll admit that my first shot had to be pulled apart and started again because I had the depth at the maximum (8) and was about 3 panel-lengths too short to complete my bedskirt – AH! The next time around I played it safe (set depth to 3.75) and I ended up with 2 extra panel lengths (I was a little bummed I wasn’t able to incorporate those panels for a fuller look, HOWEVER, I wasn’t about to pull it apart again). I made sure my right-sides were together when I did this and had my twill extending passed my sheer fabric about 1/4-1/2″. I also left the first 1-inch and last 1-inch of sheer fabric un-ruffled so I could hem across that edge later more easily. Of course if you’re doing this by hand, you’ll do everything the same, except you’ll need a lot of pins! 🙂

I put it through my serger and simply cut off the extra twill while serging the edge of my ruffles for a stronger hold (I didn’t cut any of the sheer fabric).
Now simply hem straight across the top edge of the bedskirt going from your sheer fabric, to twill, to sheer. Before doing this you should fit the skirt over your mattress to see if you need to do a wider hem, or even if you want to cut some length off to do a 1/4″ hem.
At only $4 for the curtain panels and about $4 for the twill I used, I’d say this project was worth it!
Good luck with yours!

No Comments