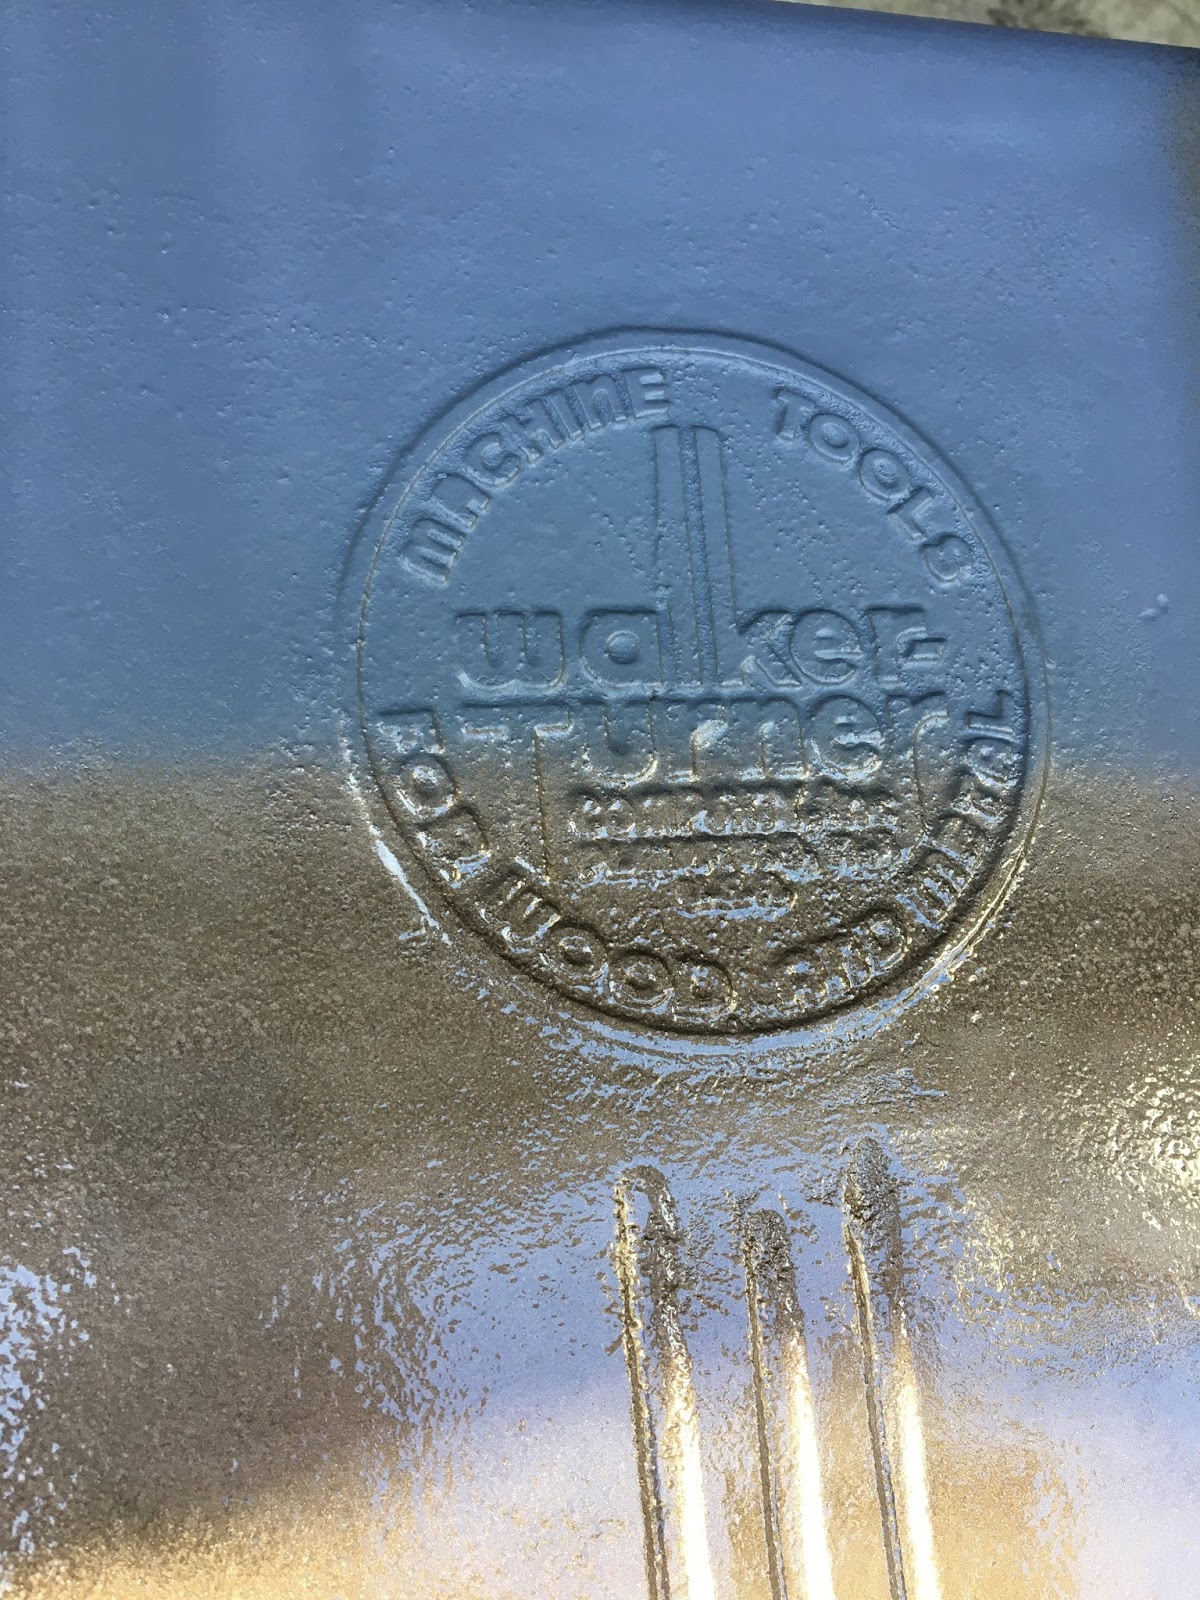
Walker Turner L1152 Lathe Restoration – Switching from 110v to 220v
December 8, 2017
I got frustrated with my first lathe and decided it was time to upgrade to something better.
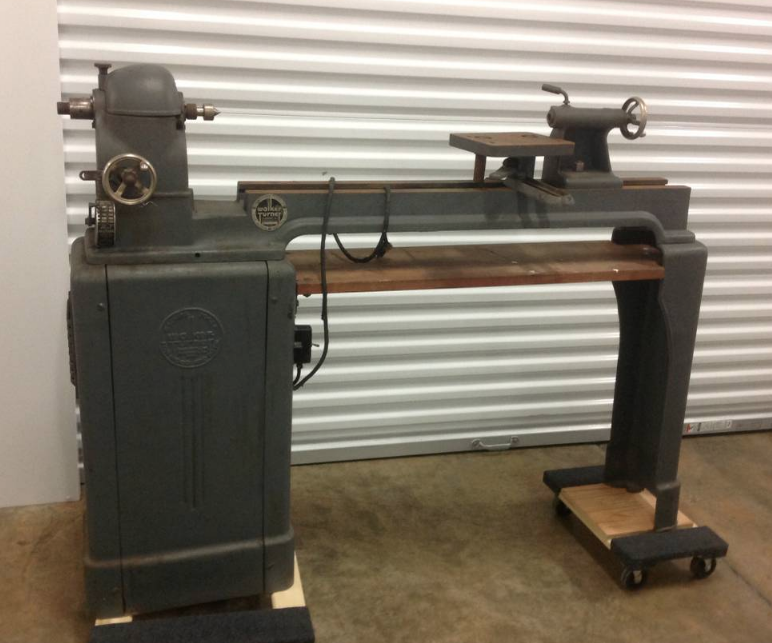
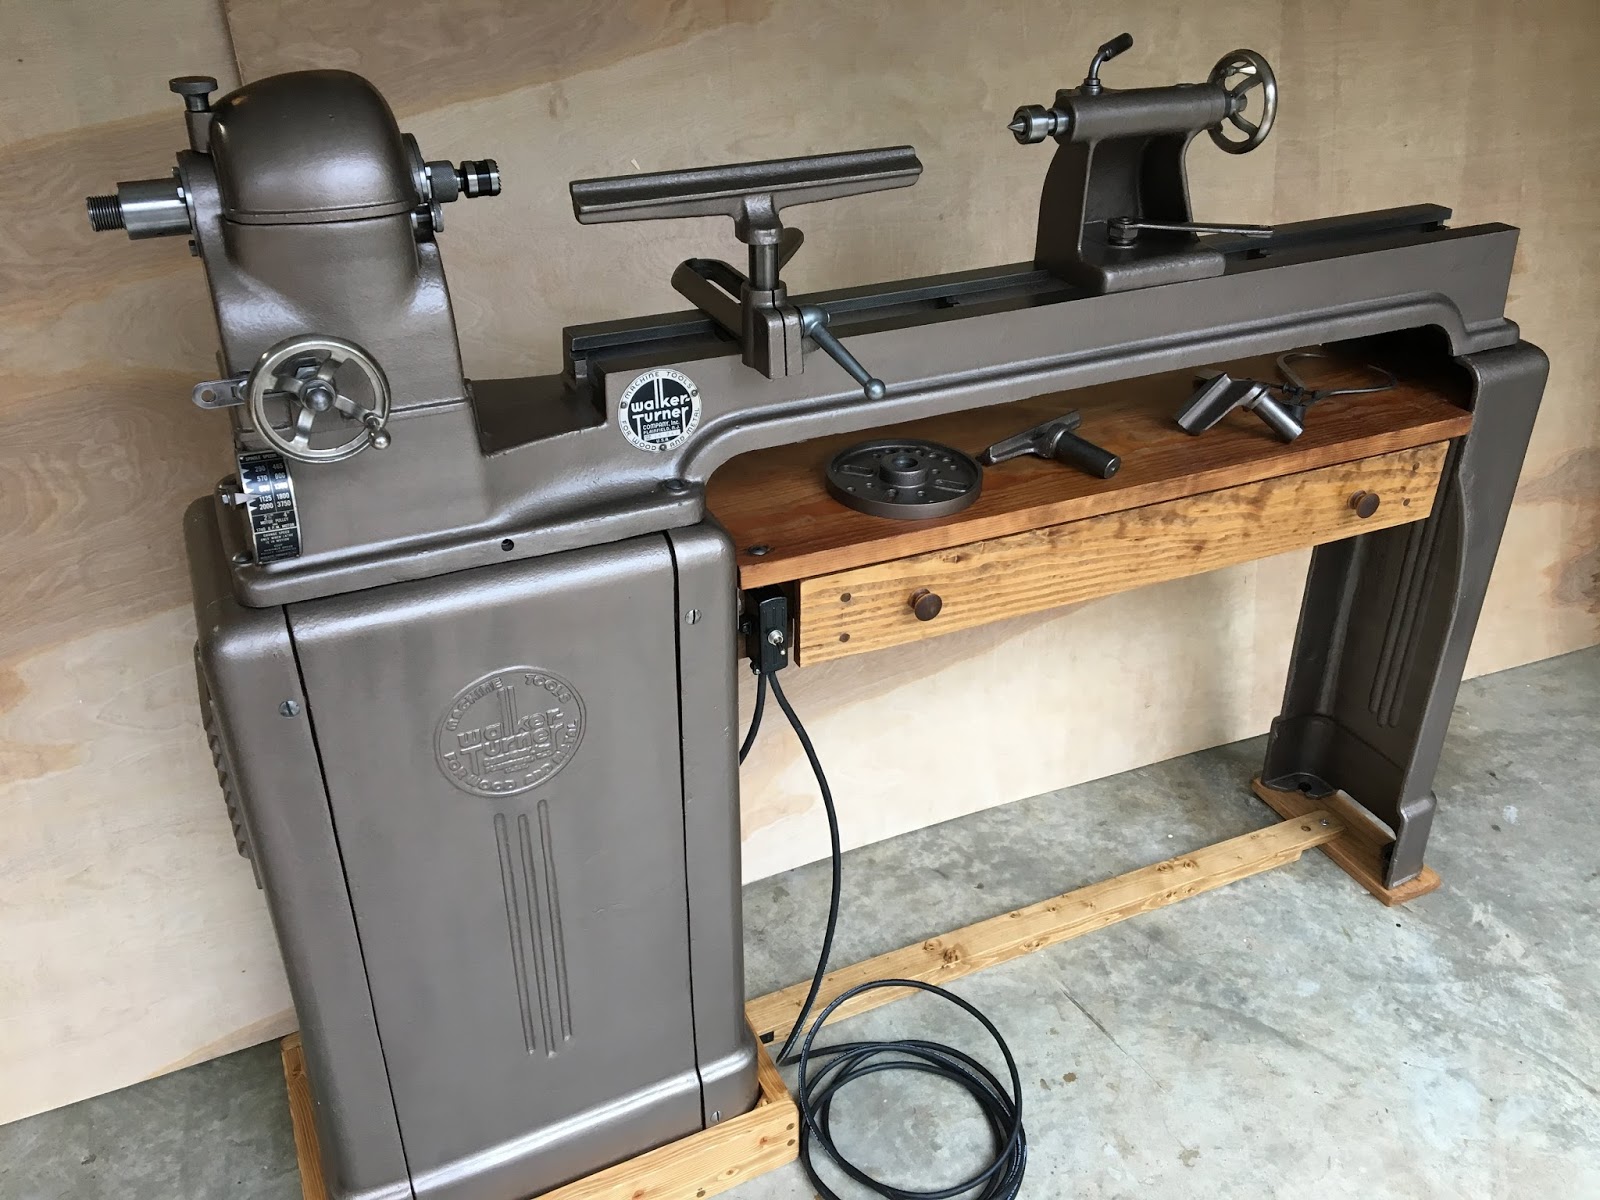
After searching my eyes fell upon this magnificent beast. It was old, it was big and it was just what I wanted. $500 and a few days later she was mine.
There were problems of course. The wiring on the motor was shot so I couldn’t even test it out. Red flag? Not when you’re in love! The tailstock quill wasn’t budging a bit – totally frozen. I decided I was willing to take my chances with it – who wouldn’t!?
Thankfully taking chances has always paid off – and with this restoration it totally did! This has been my biggest (and heaviest) restoration to date. The whole process took a stressful 5 weeks.
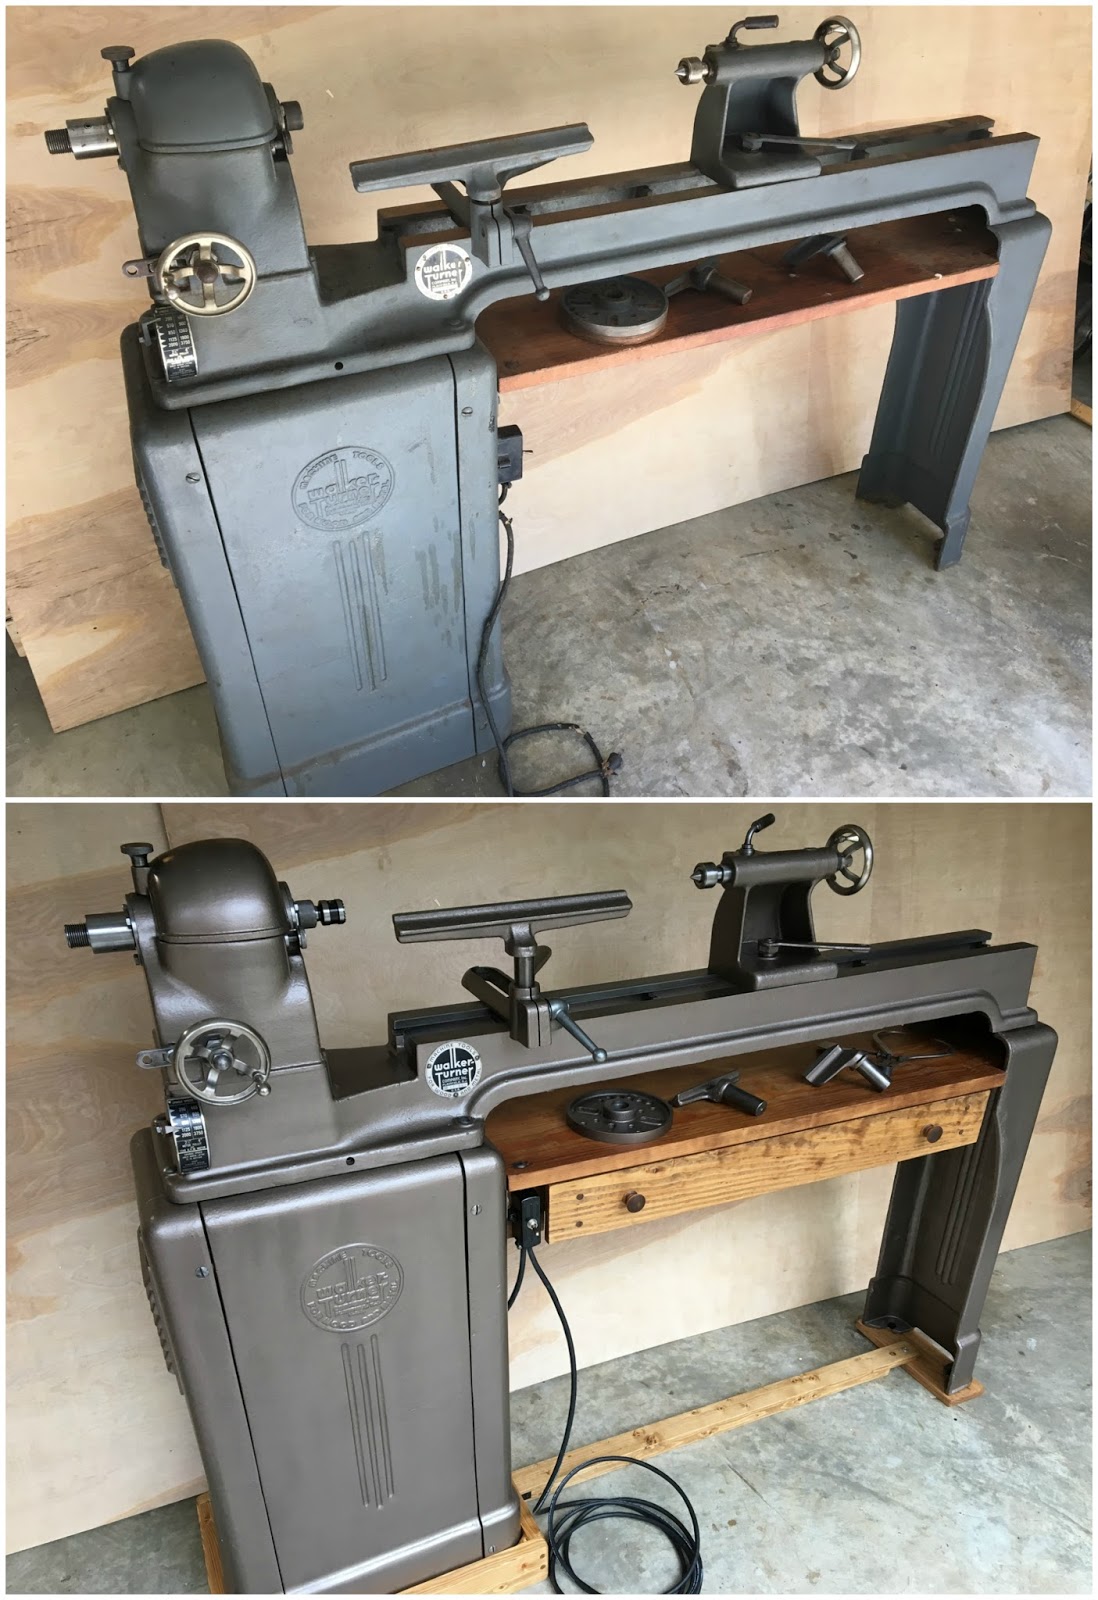
Stick around after the BEFORE and AFTER photos to see a bit of the process!
Ok, back to business.
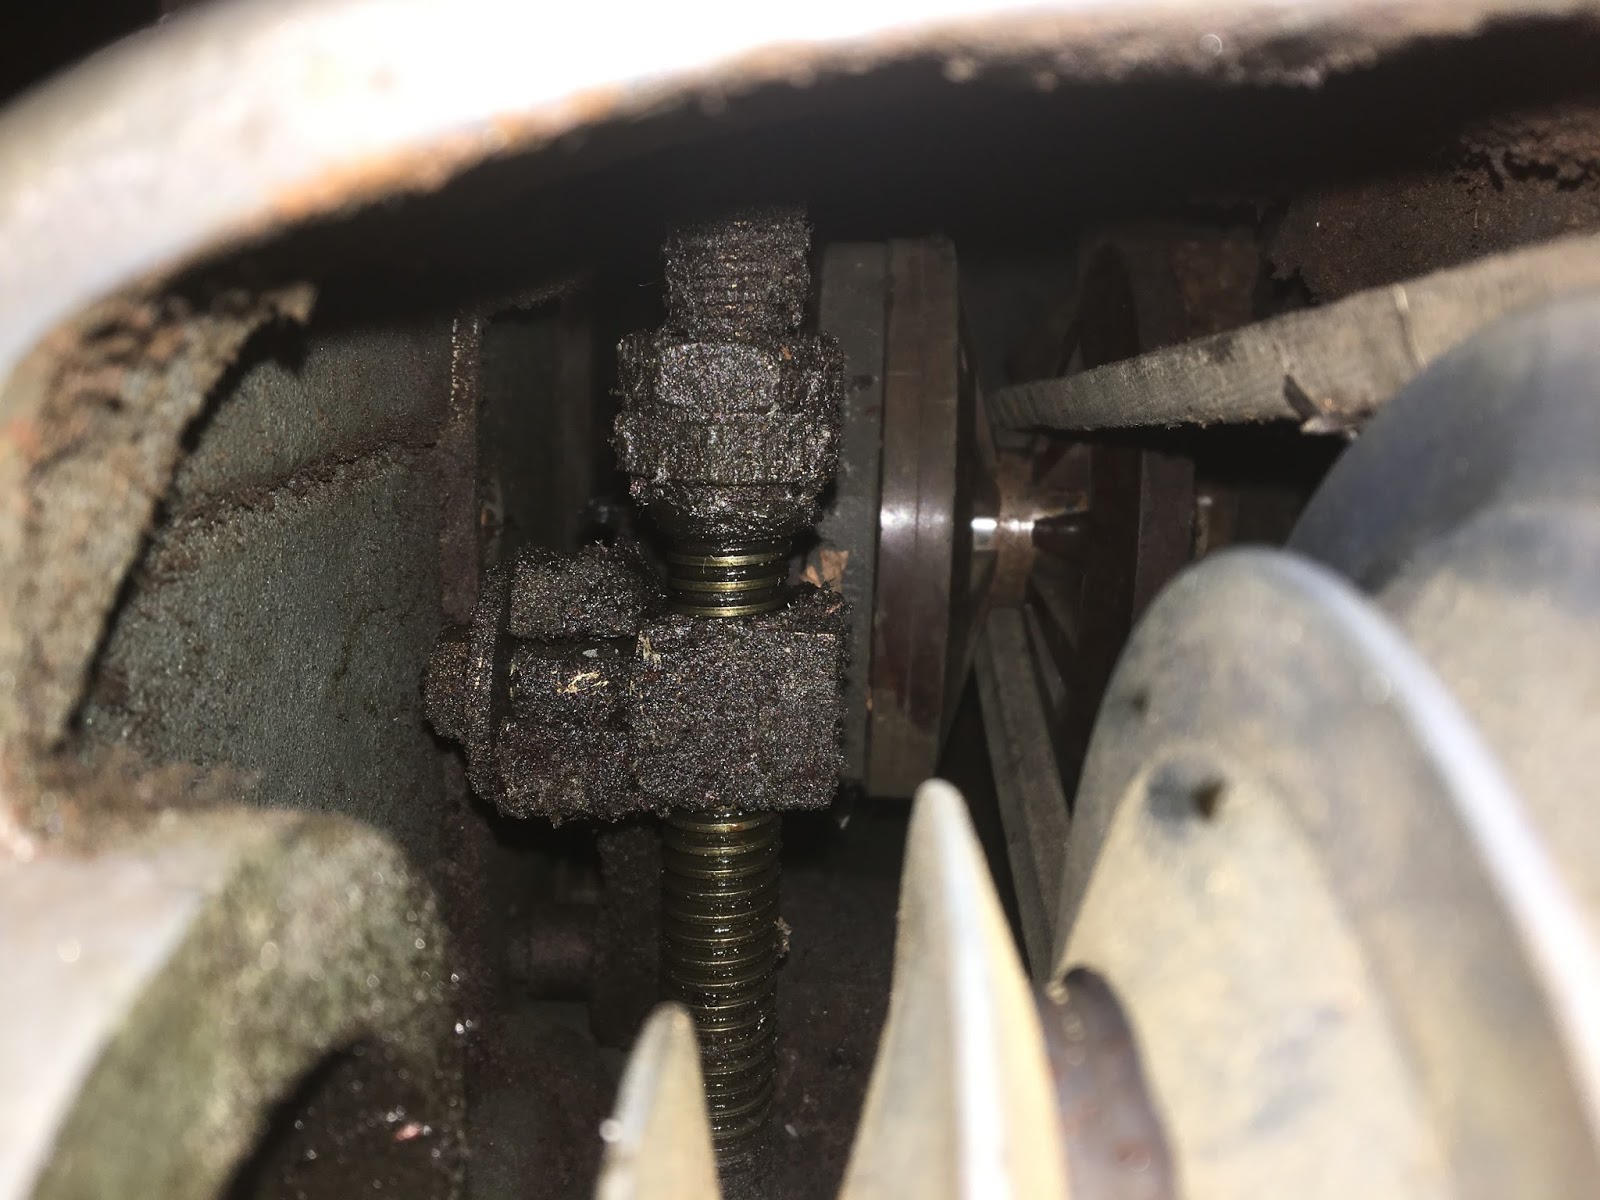
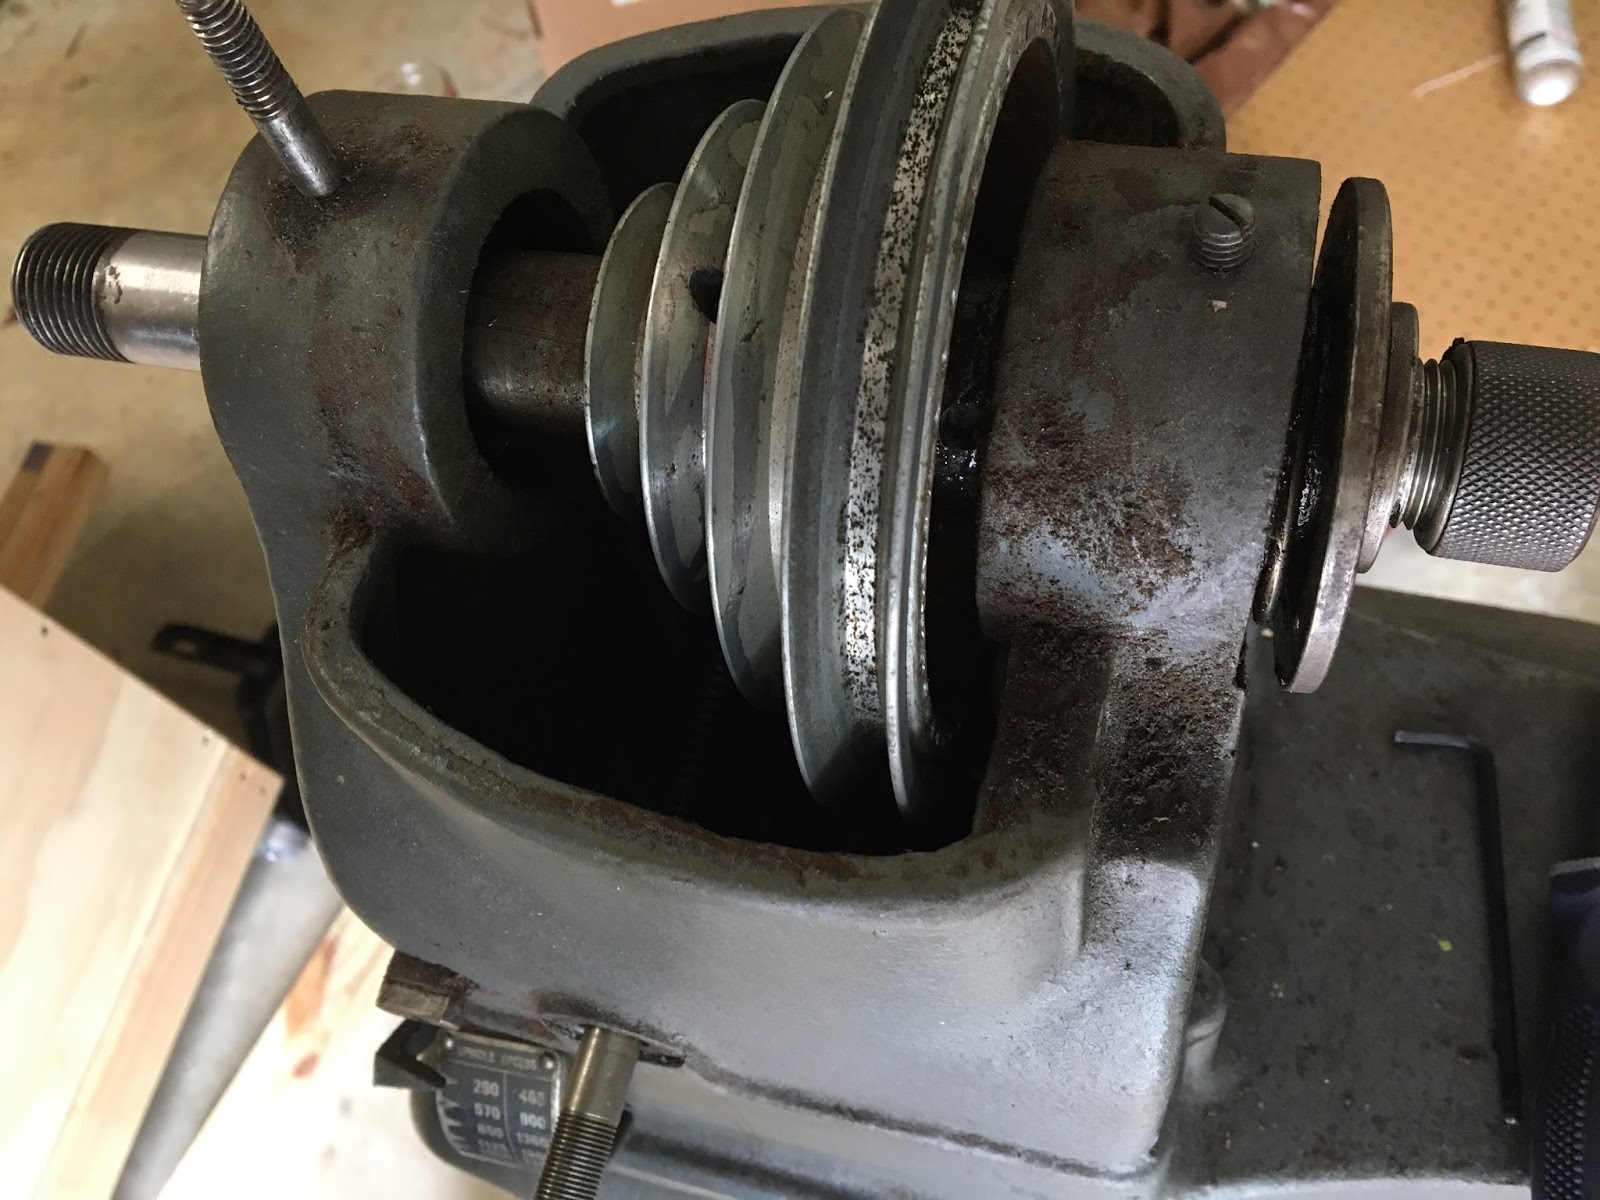
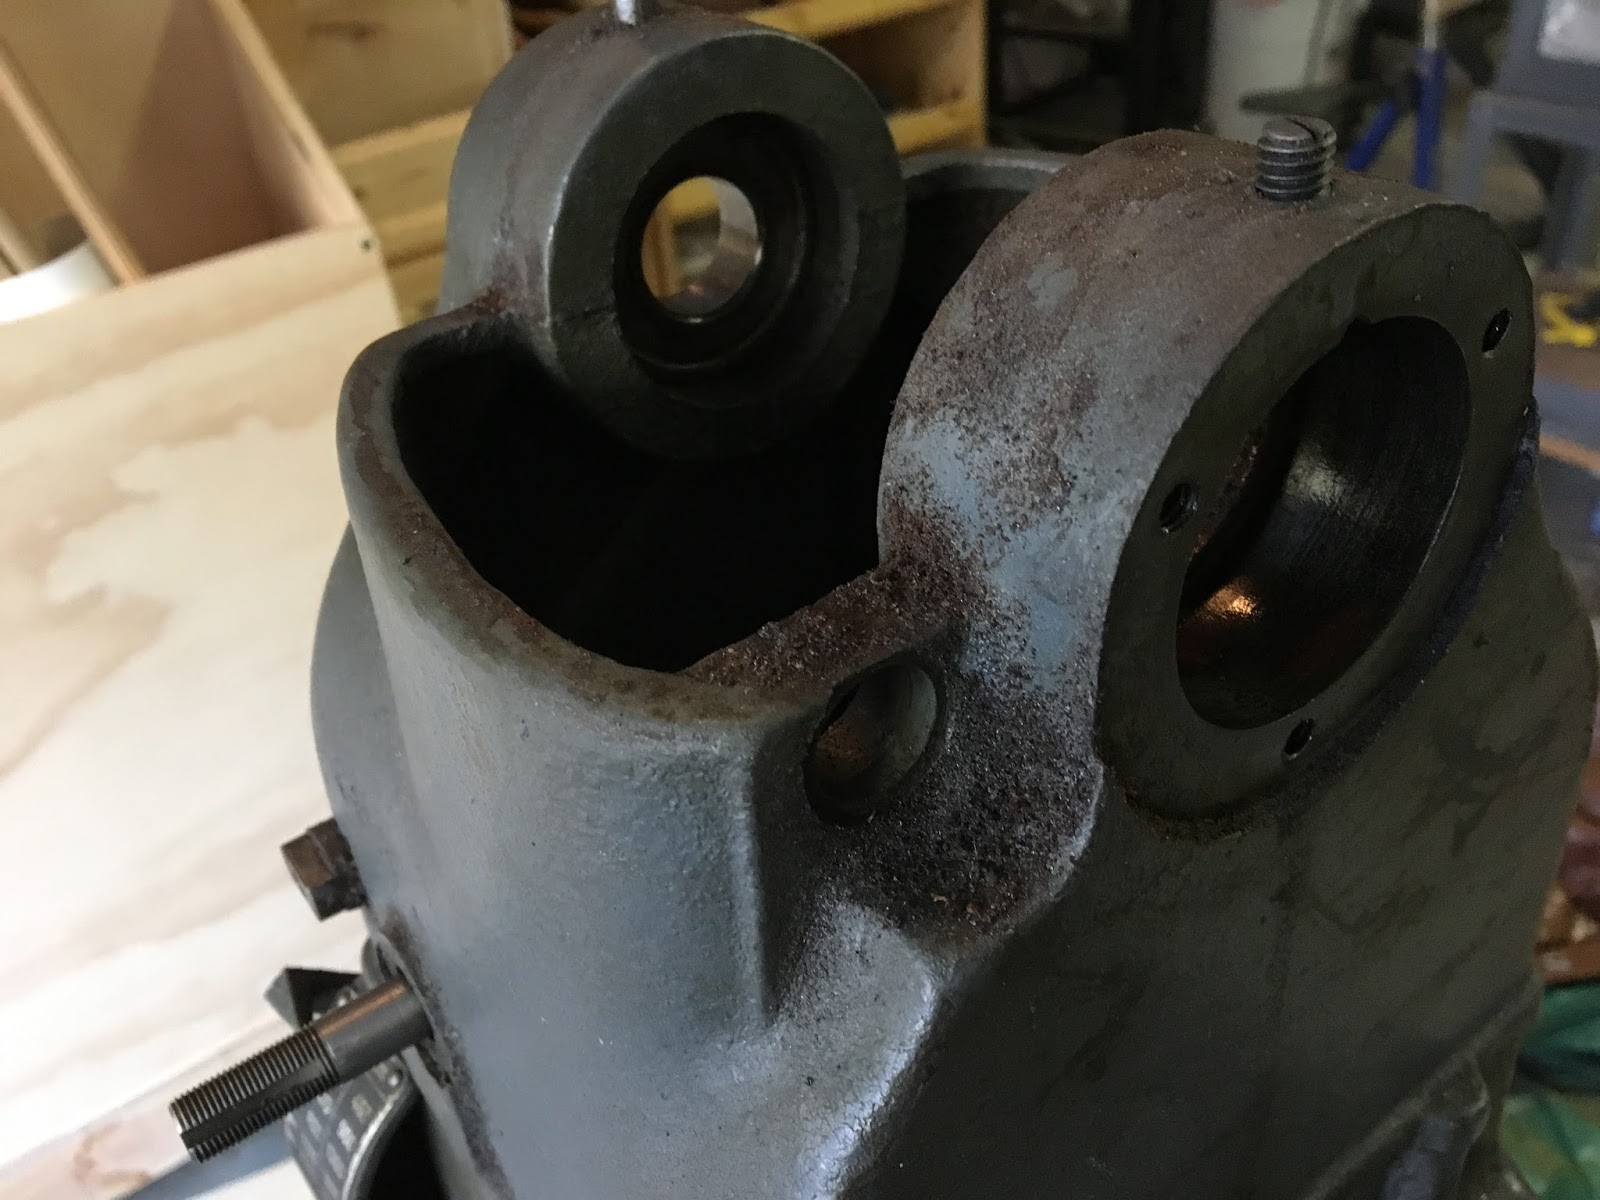
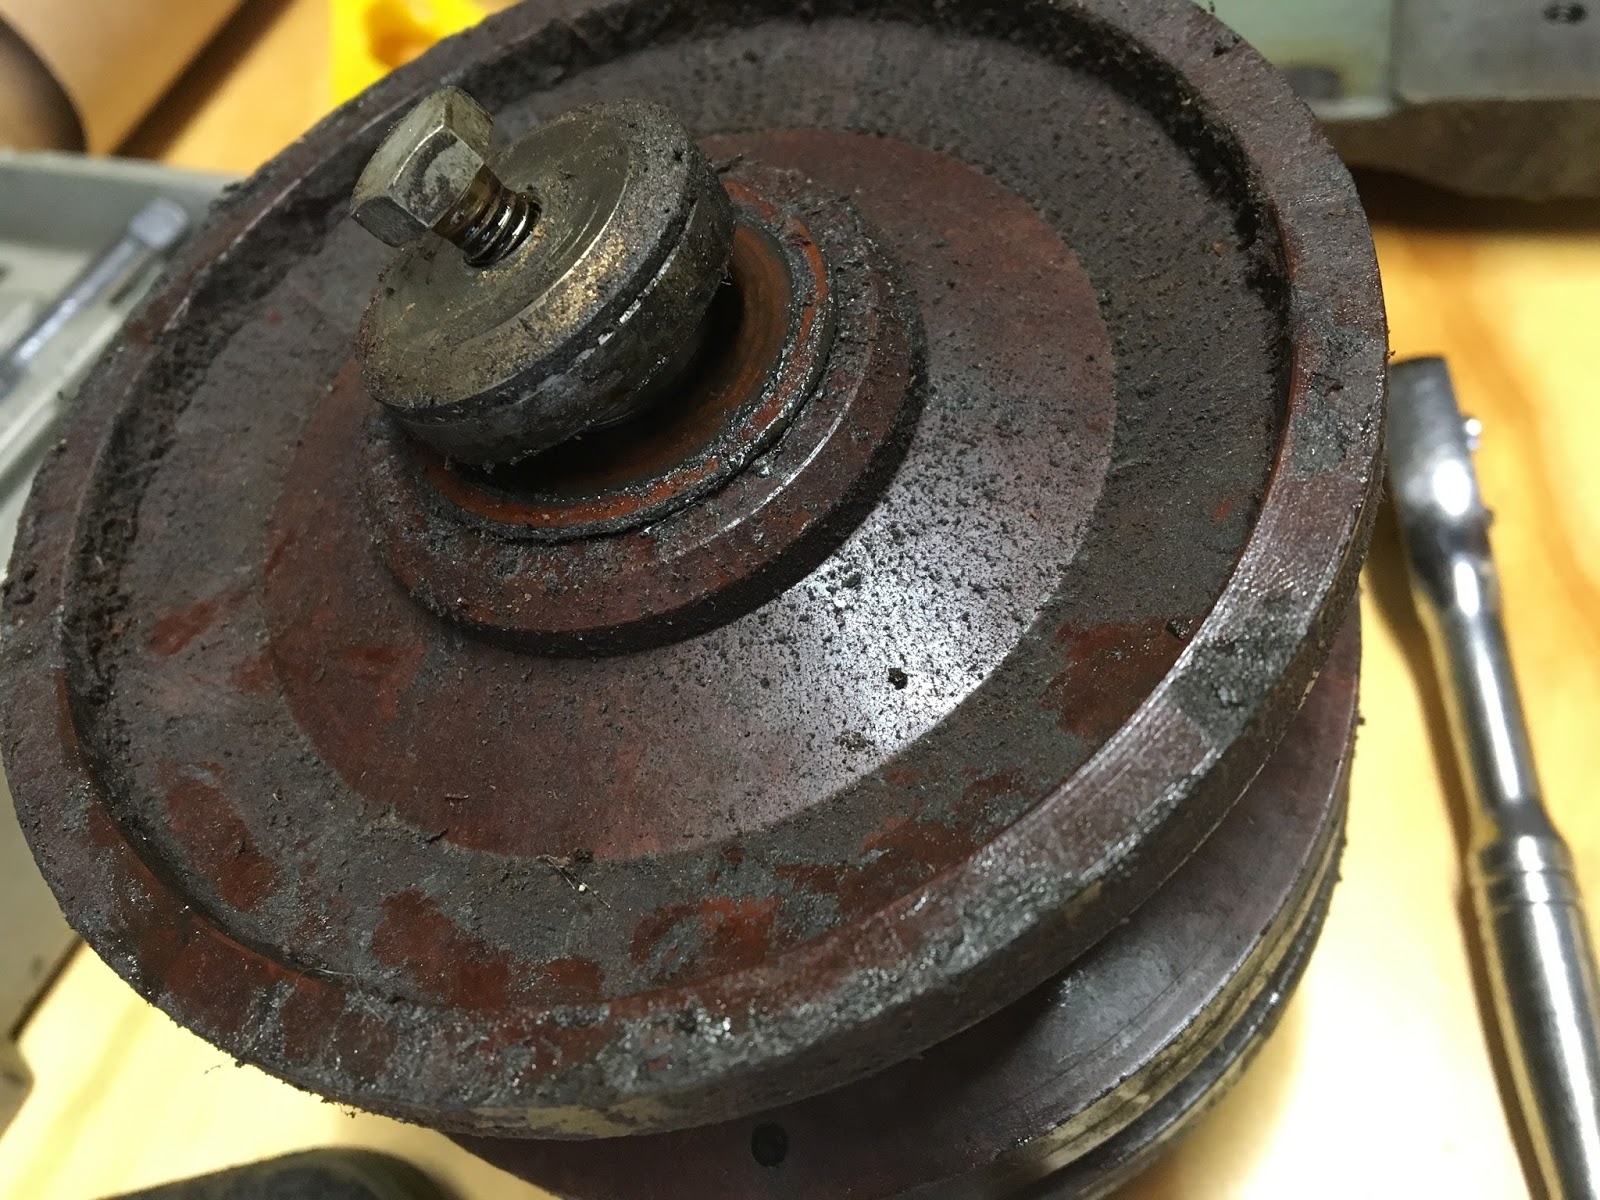
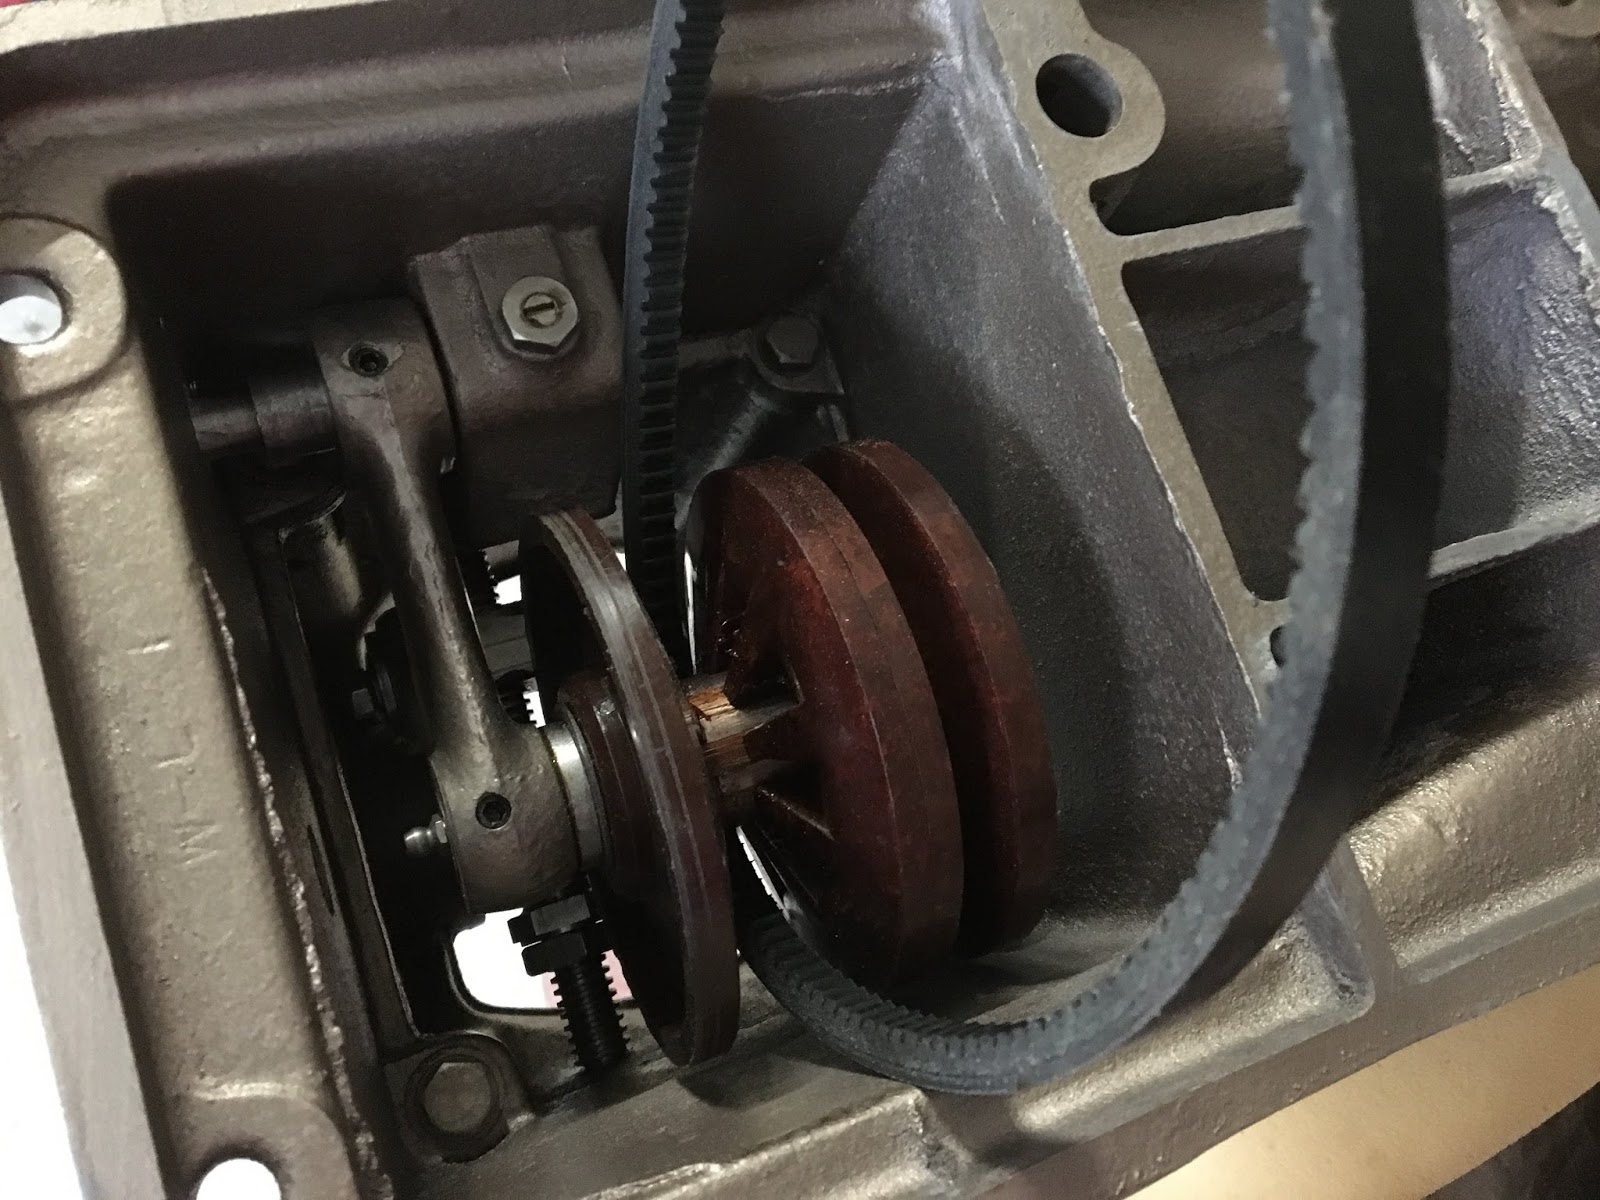
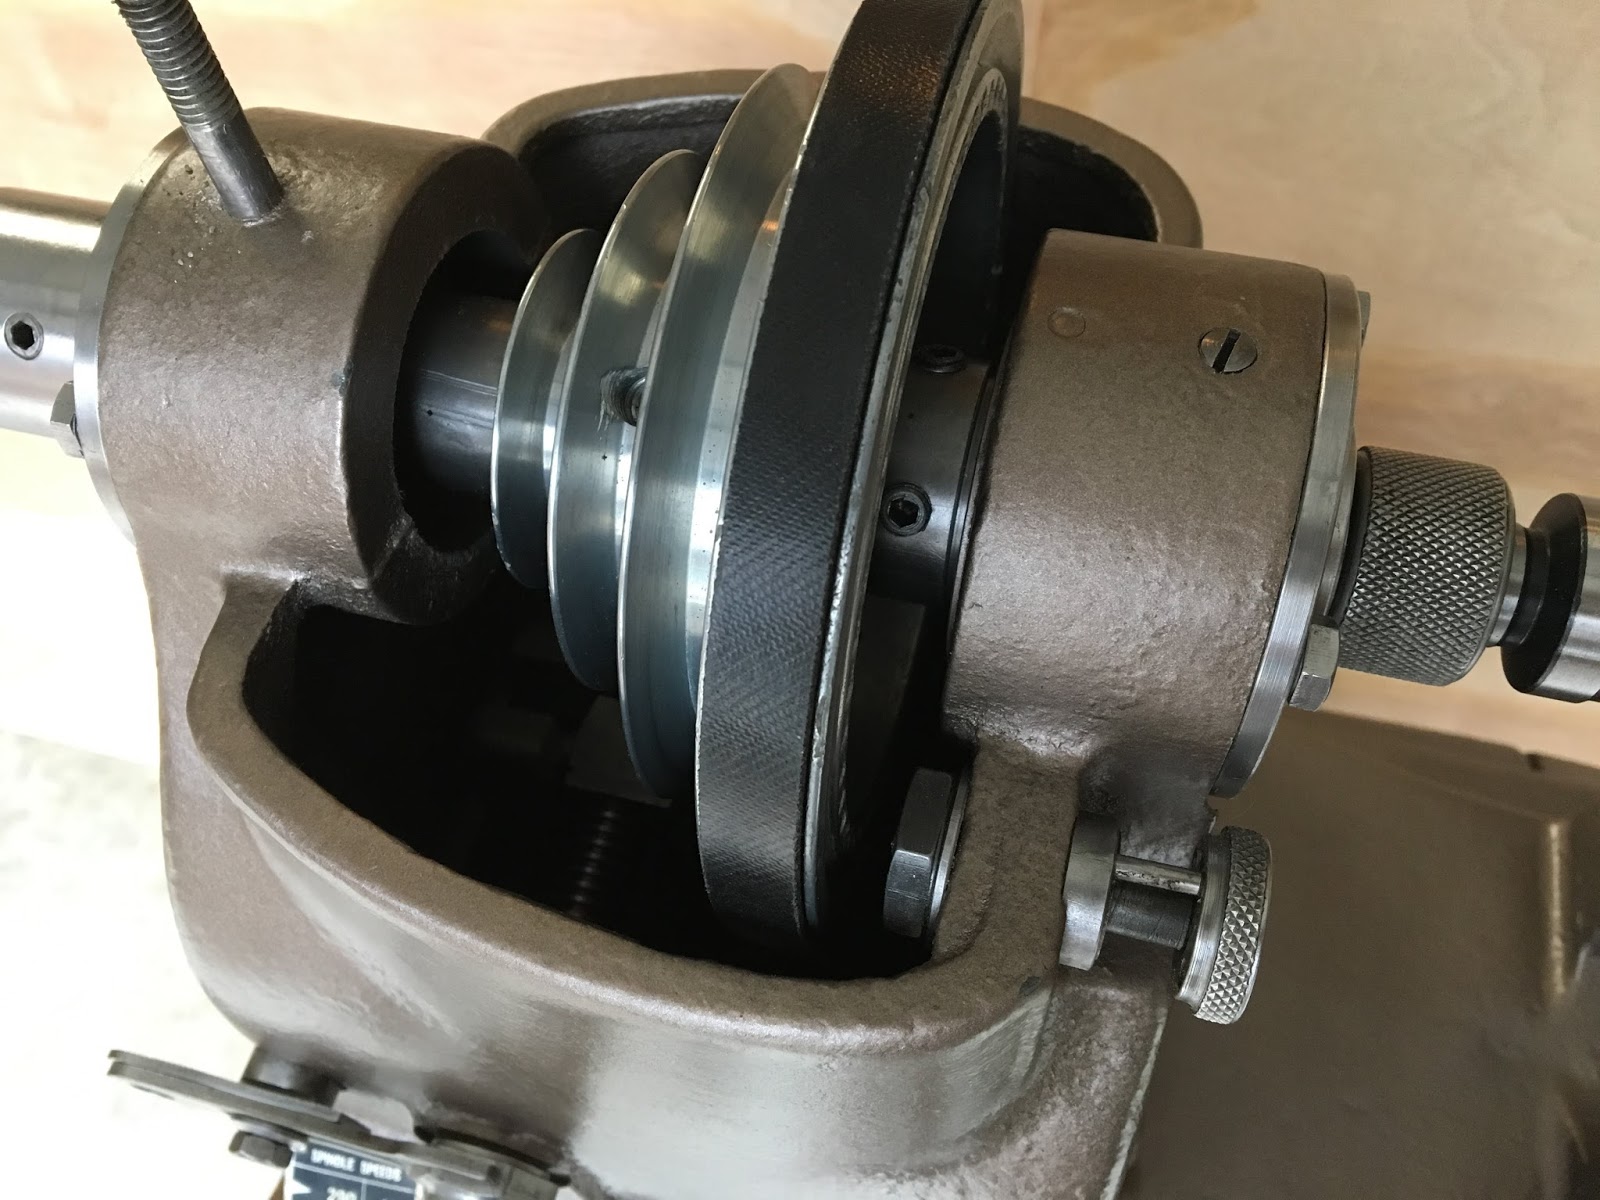
Here’s a peak down into the headstock before I attempted to pull everything apart. It was nasty in there. The belts were tearing in a few places and it was full of grease and wood particles.
I worked for days and days to try and release the spindle from the headstock. The pulley was stuck!
Turns out with a big enough sledge hammer anything is possible. It finally started coming loose!
I didn’t even break anything with all that hammering!
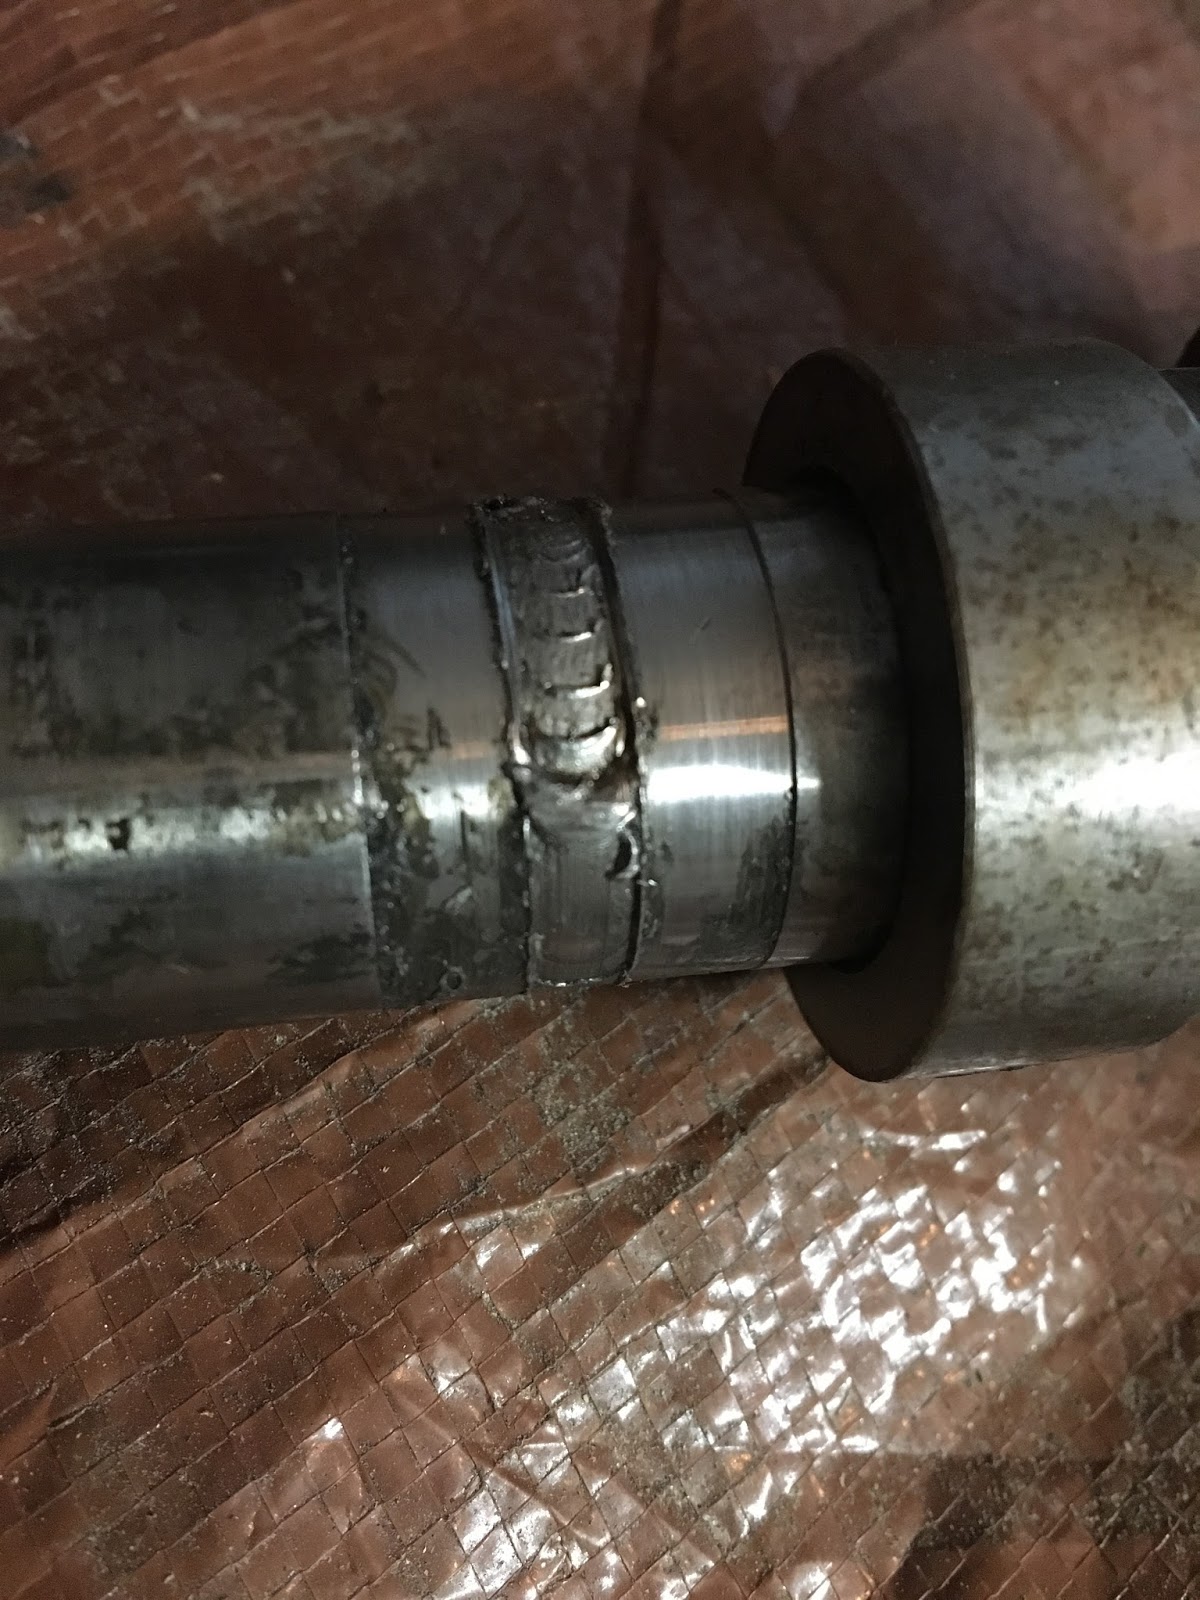
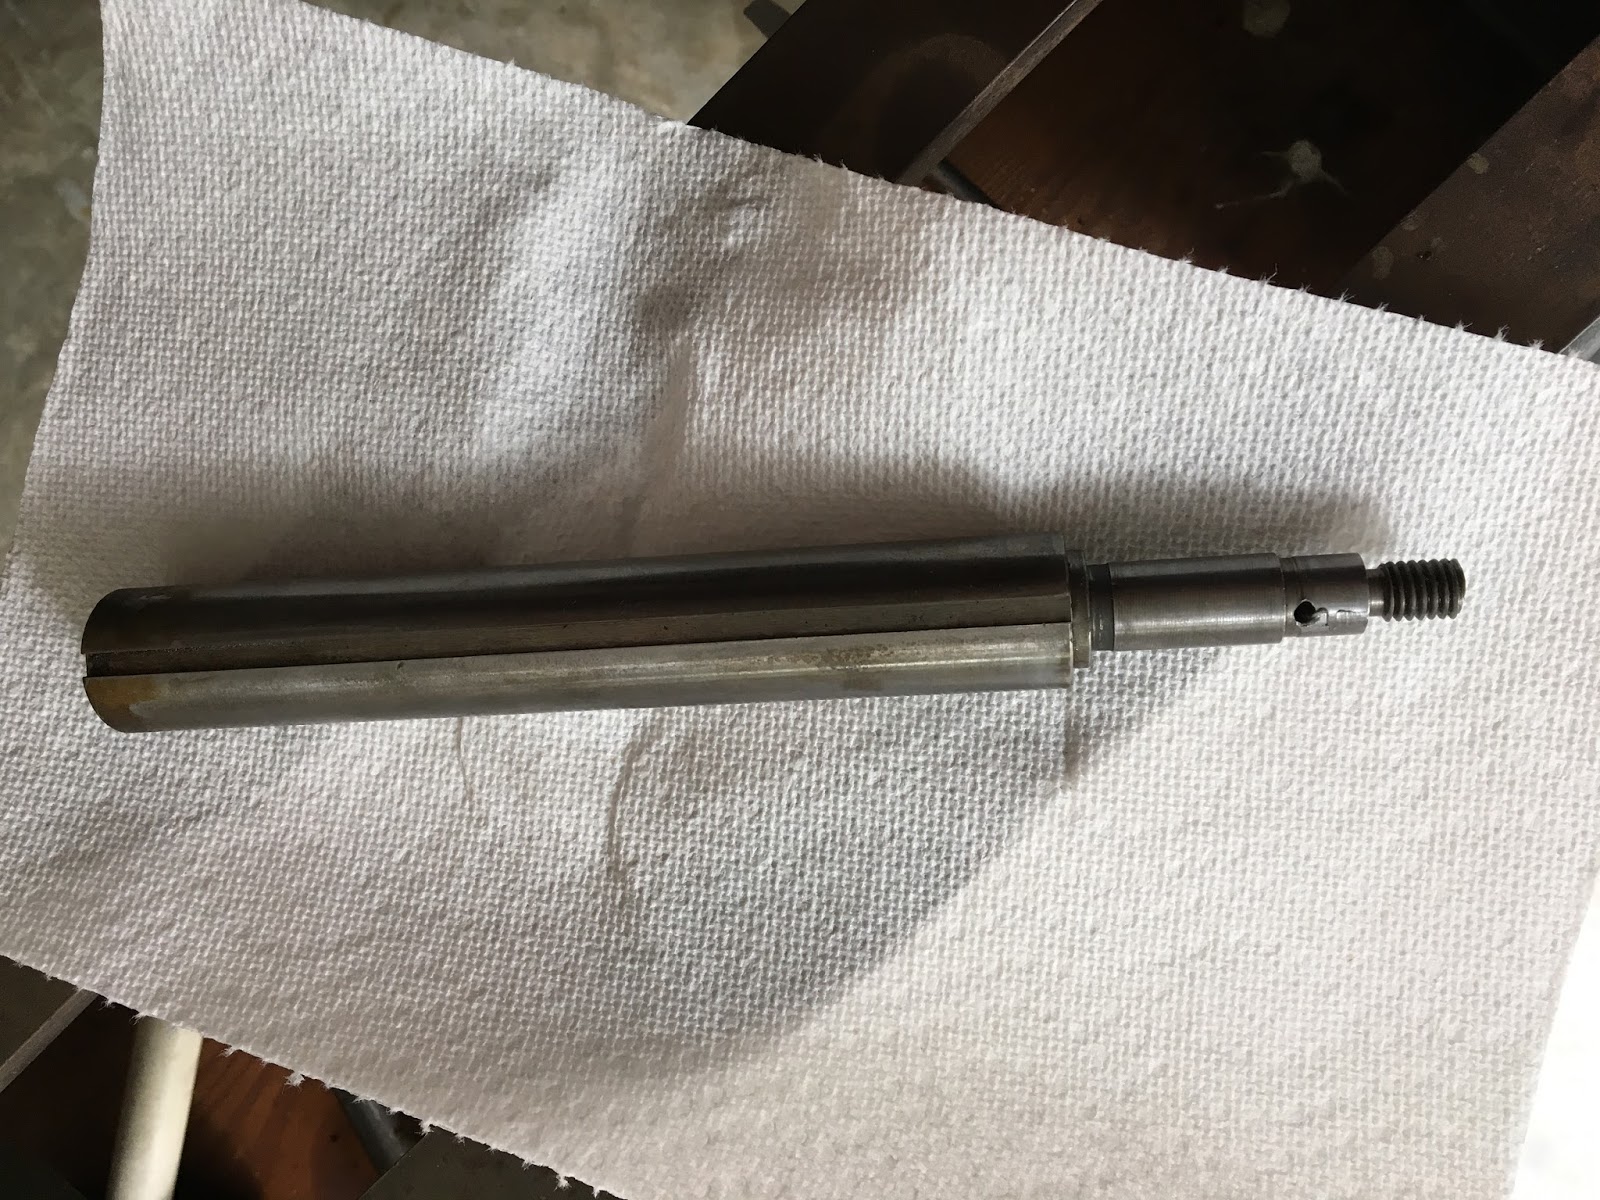
After removing all the parts it was obvious why the pulley was stuck! – look at the big mess the set screws made on the spindle! I ground down all the burrs carefully with my bench grinder.
Making progress.
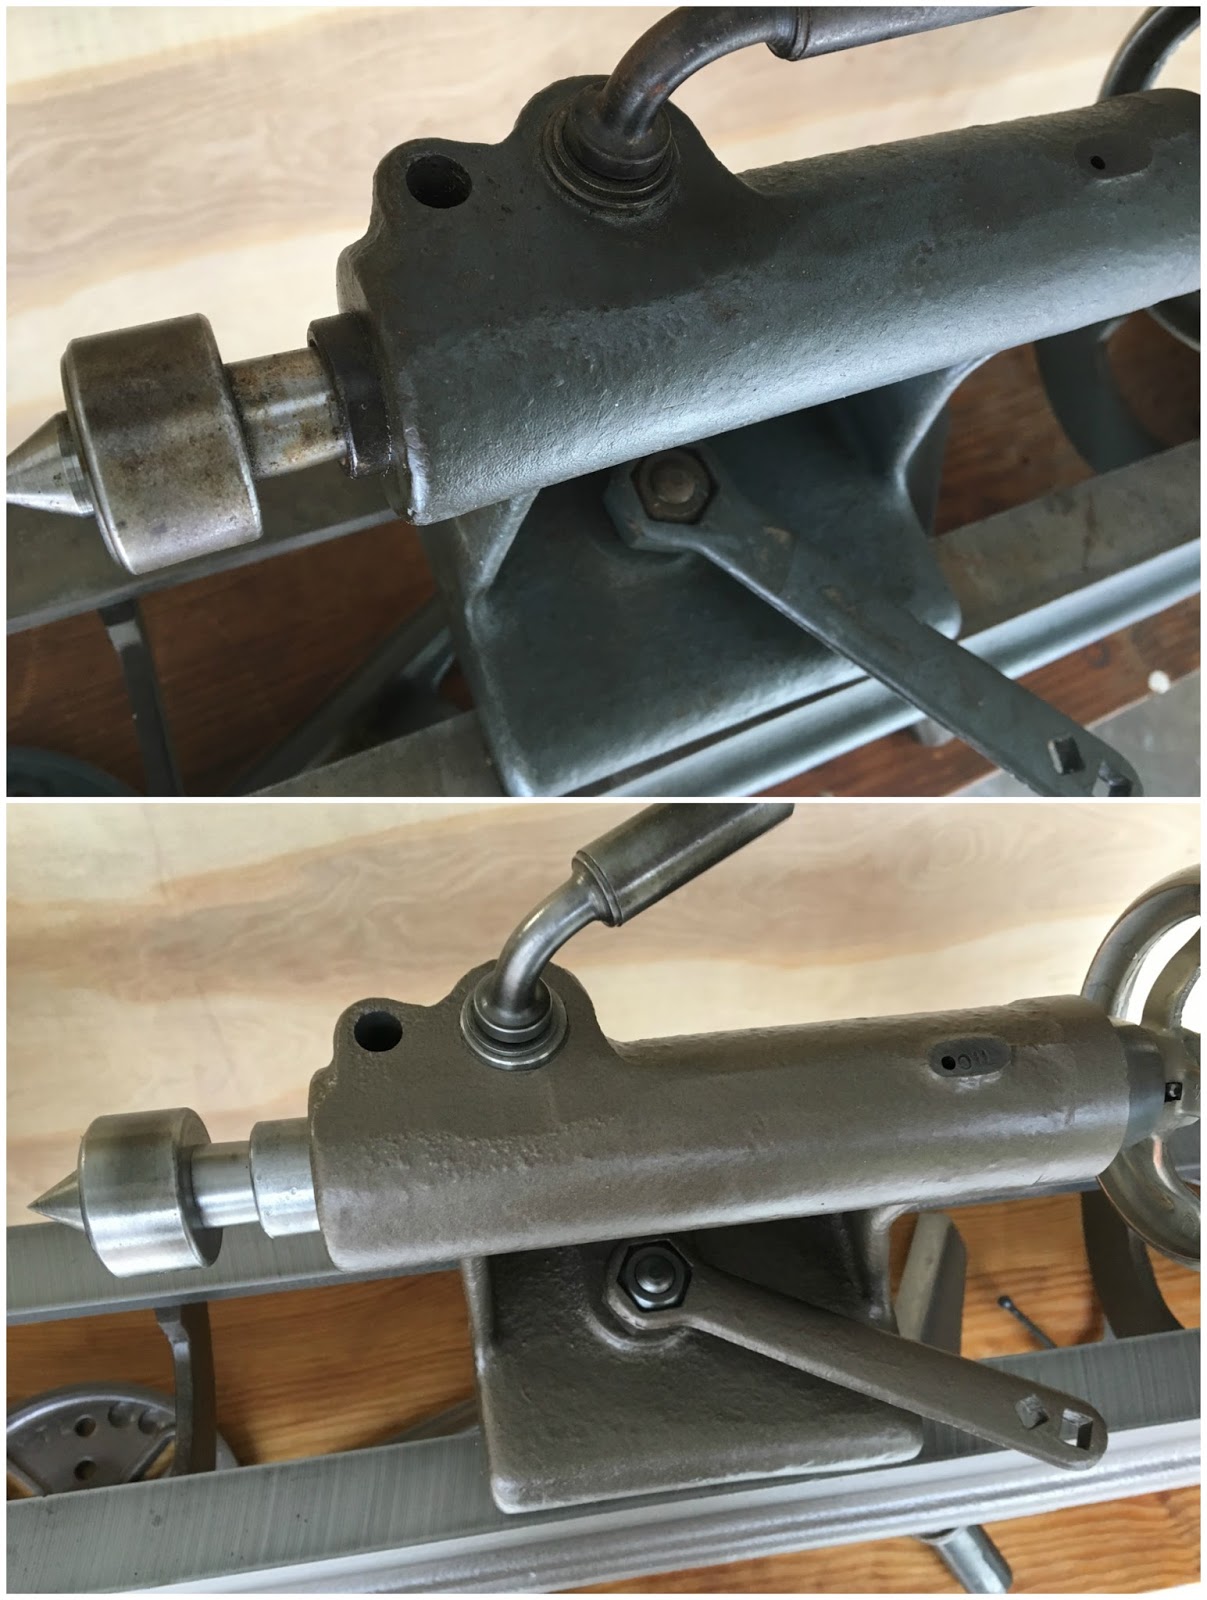
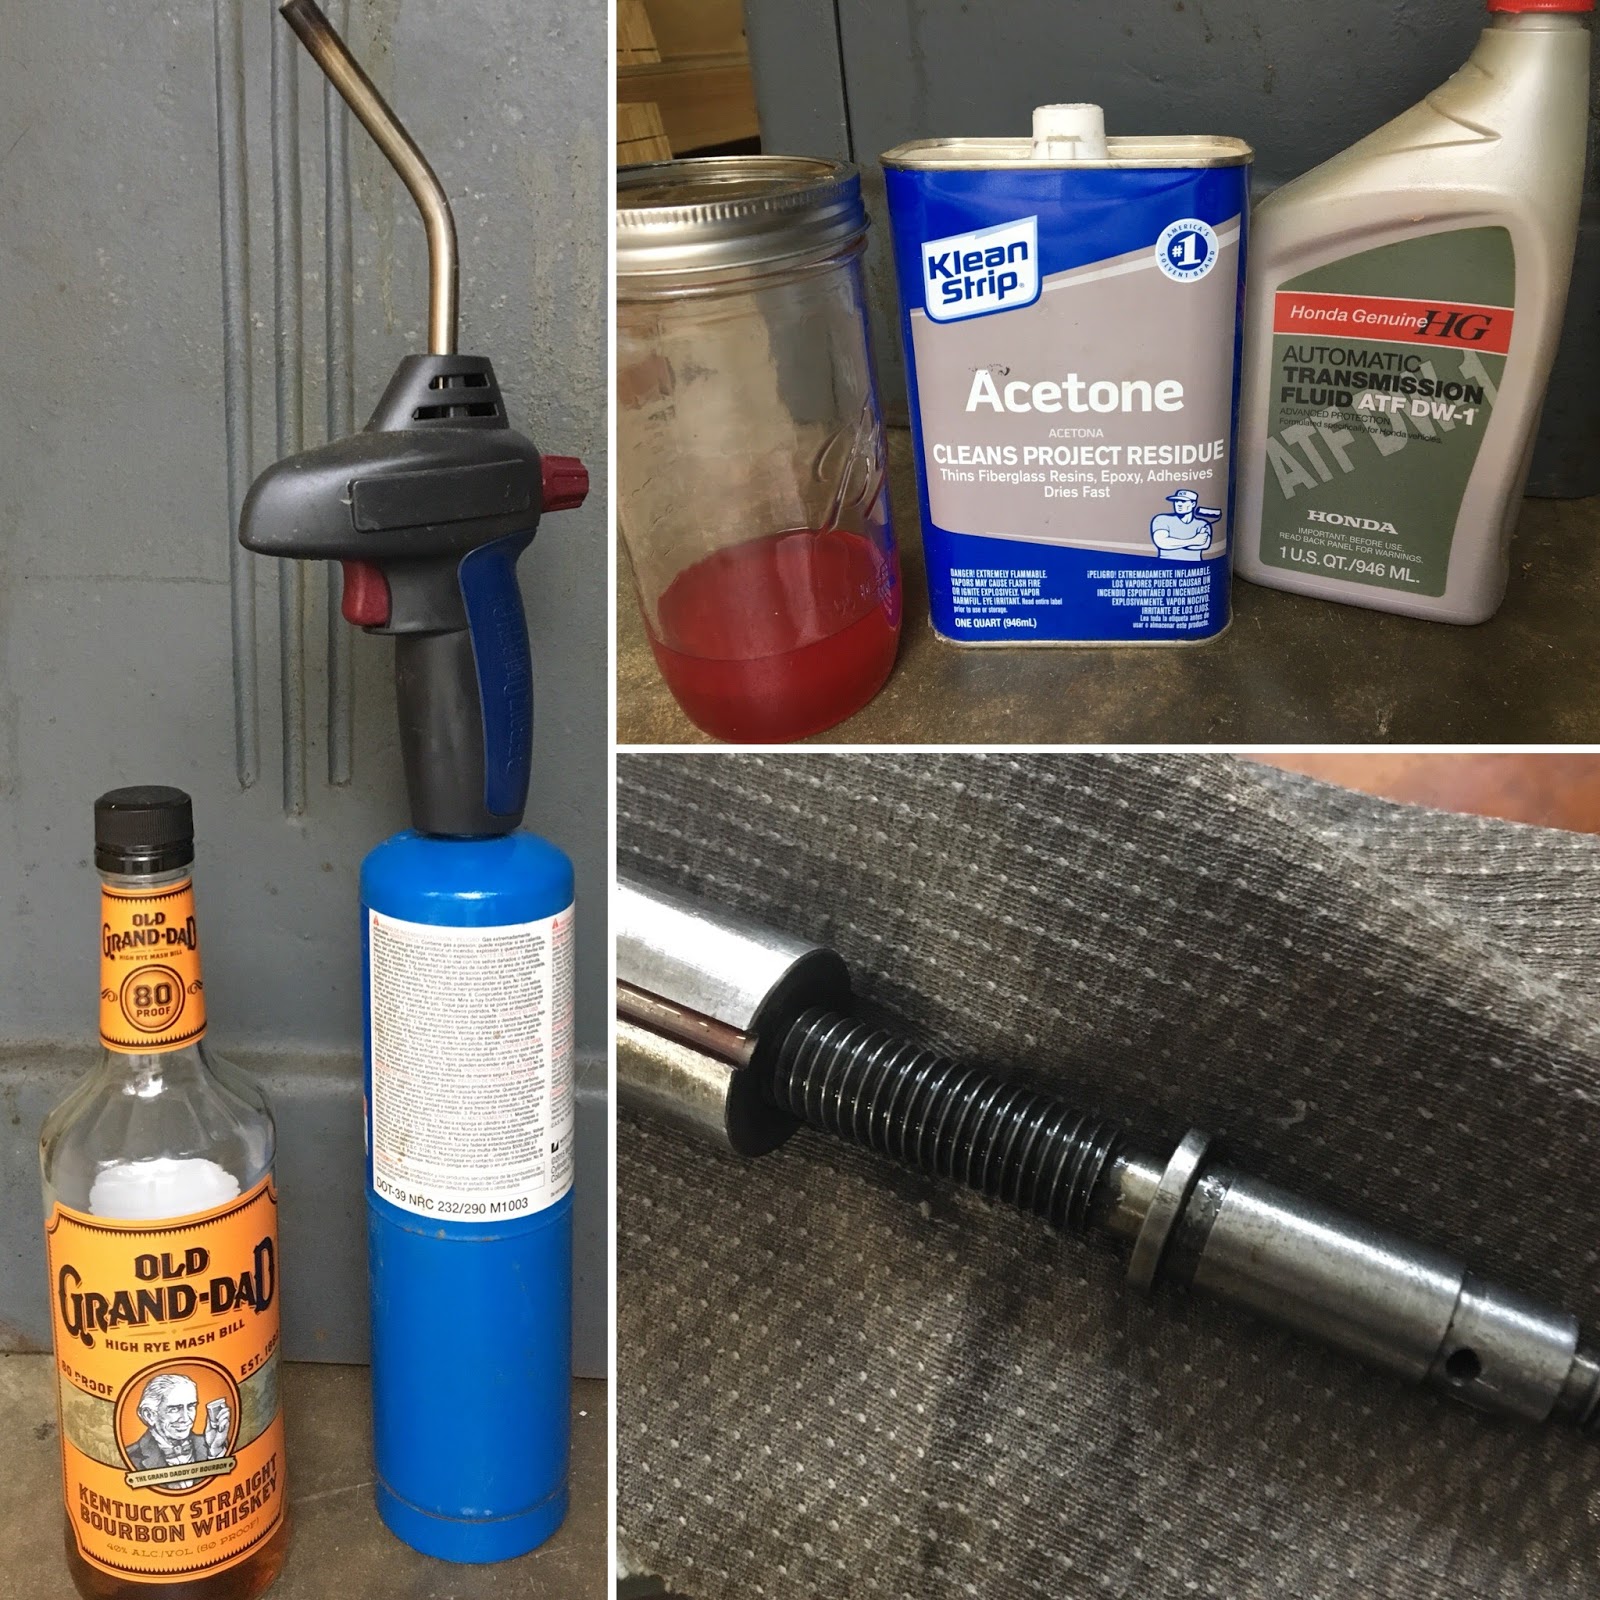
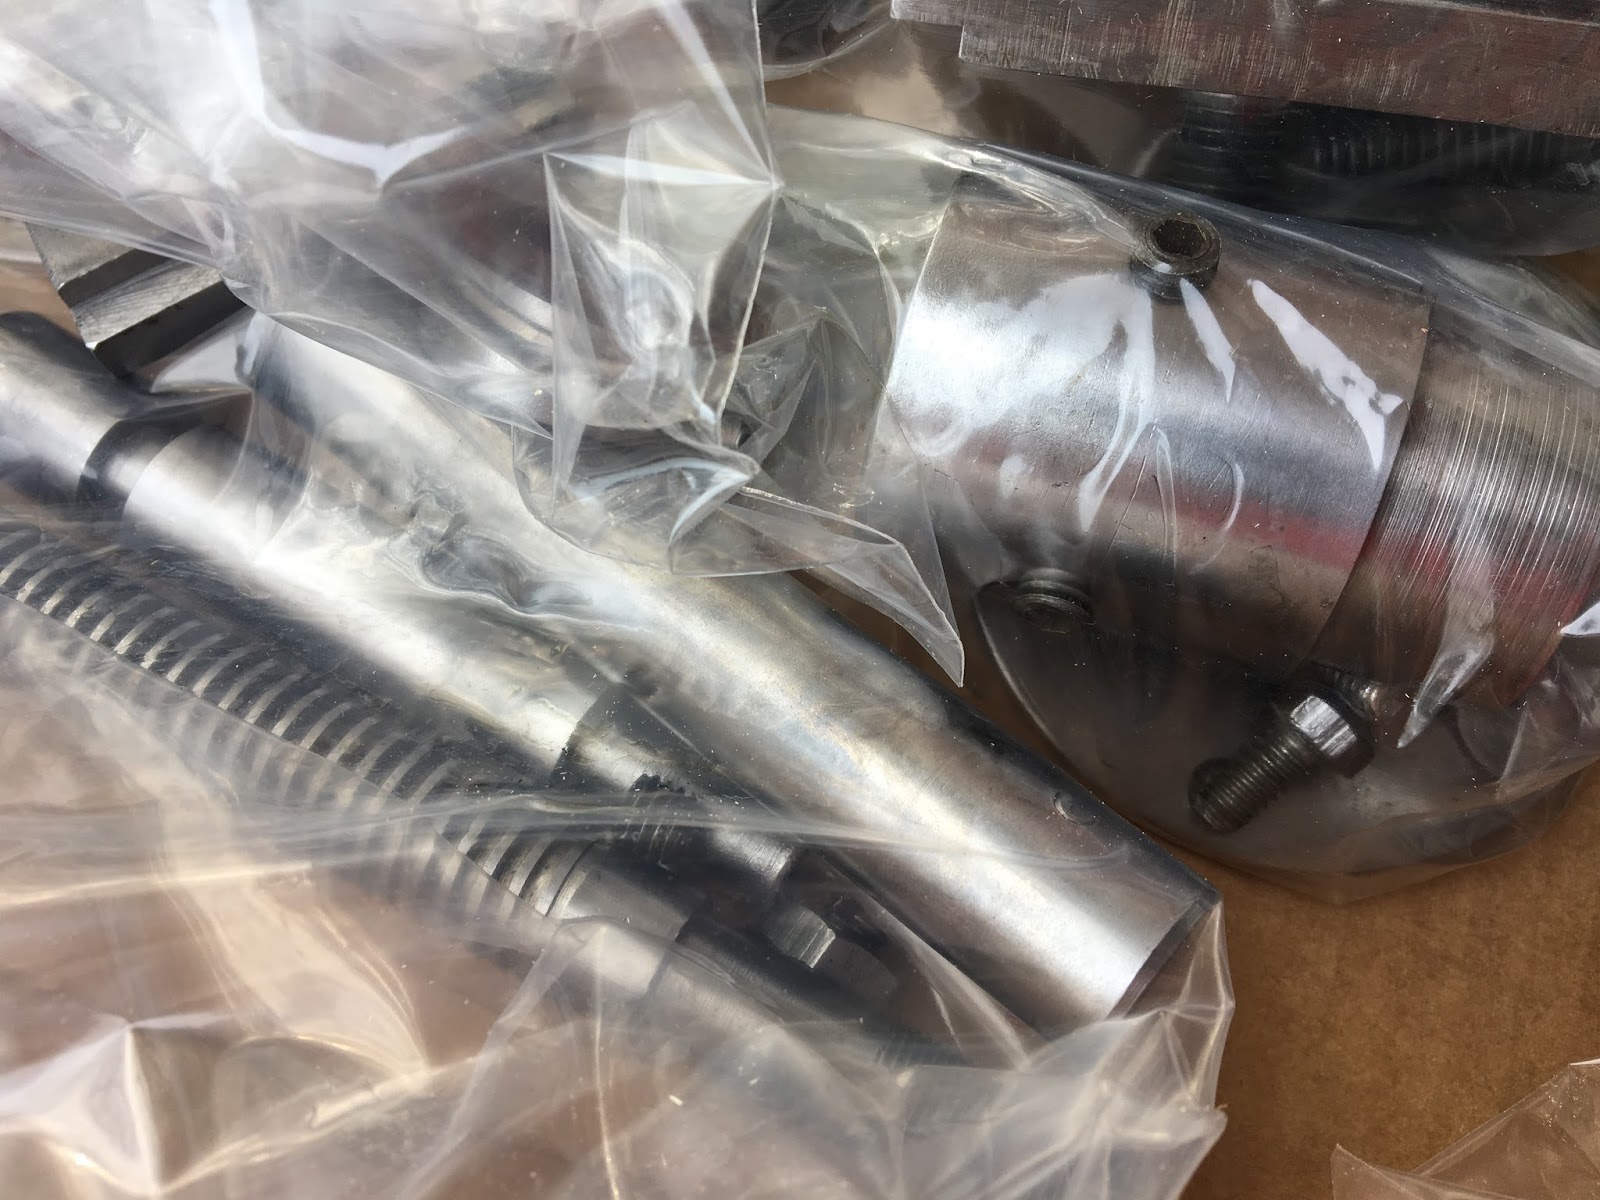
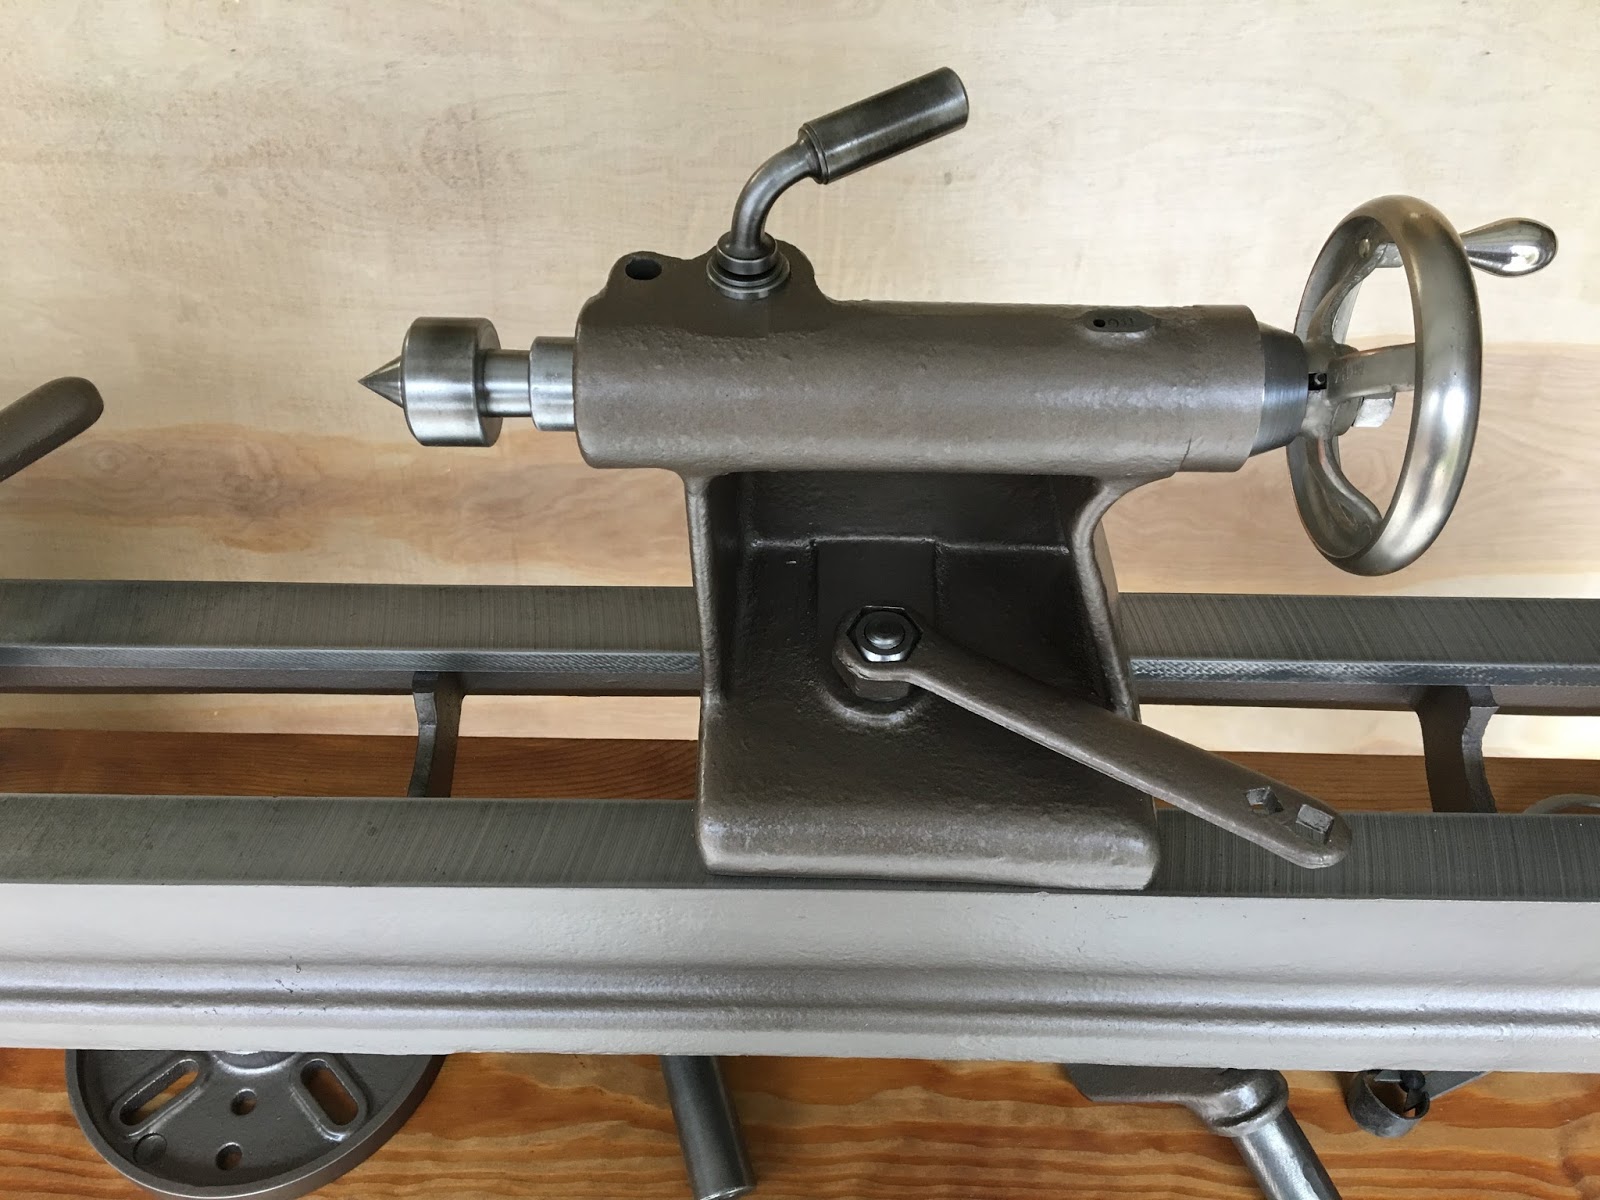
This is the quill from the tailstock. This little bugger caused me the most stress out of the whole restoration. It’s 2 pieces, a threaded end that threads/unthreads inside the quill which makes it advance in and out of the tailstock. They were stuck together. My attempts to bust them loose wasn’t working so I did some research.
There’s an ‘old timer’ homemade penetrating oil recipe that people swear by. Apparently it requires less torque to separate frozen parts than any other product. So I mixed my acetone and automatic transmission fluid with a 50:50 ratio. I found a YouTuber who claimed a splash of whiskey to be even more effective (other chemists agreed in the comments – eh). I needed all the help I could get so I asked a neighbor if they had some whiskey I could have and they also let me borrow their blow-torch! 😂 Anyways, I’m not sure if it was the home-made brew+heat or if it was because I used more torque. Either way, there was a ‘pop’ and it was loose!
I unbolted the lathe bed from the motor and cabinet.
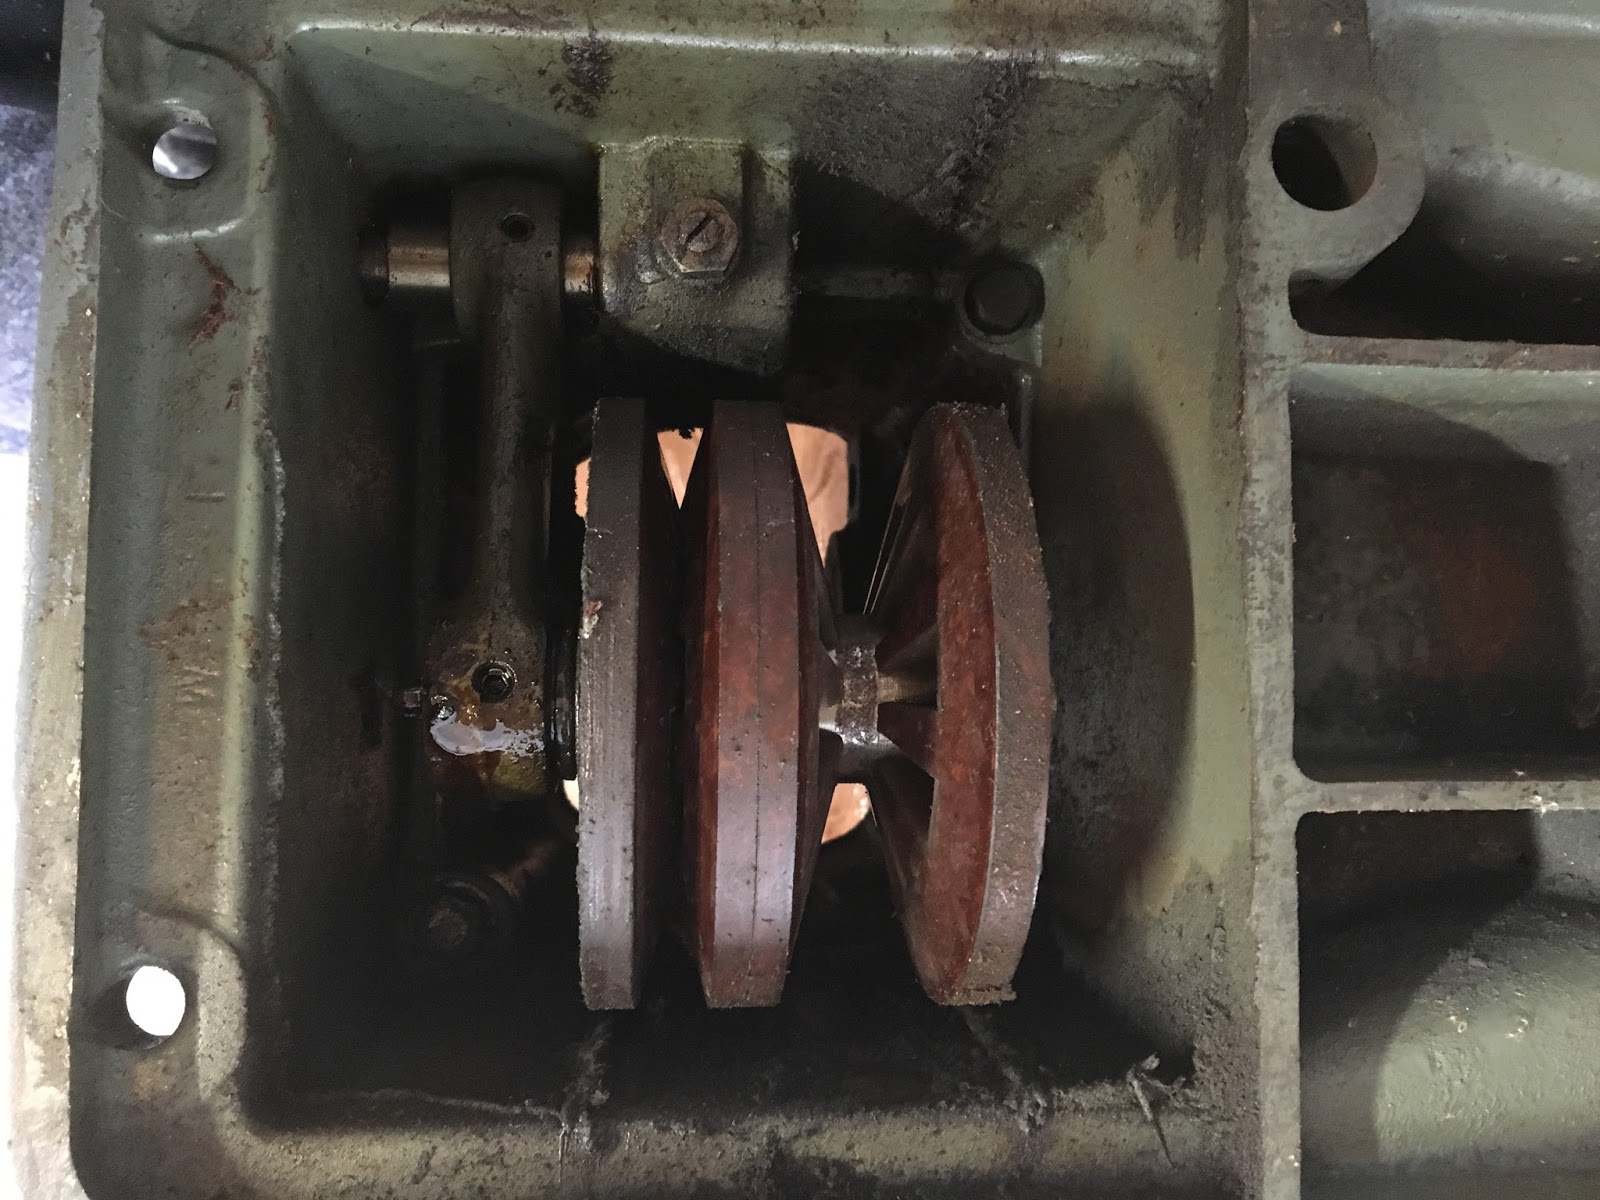
I wasn’t sure if I wanted to stress about taking the reeve’s drive apart (and getting it back together) but after looking at how dirty everything was decided it would be worth it.
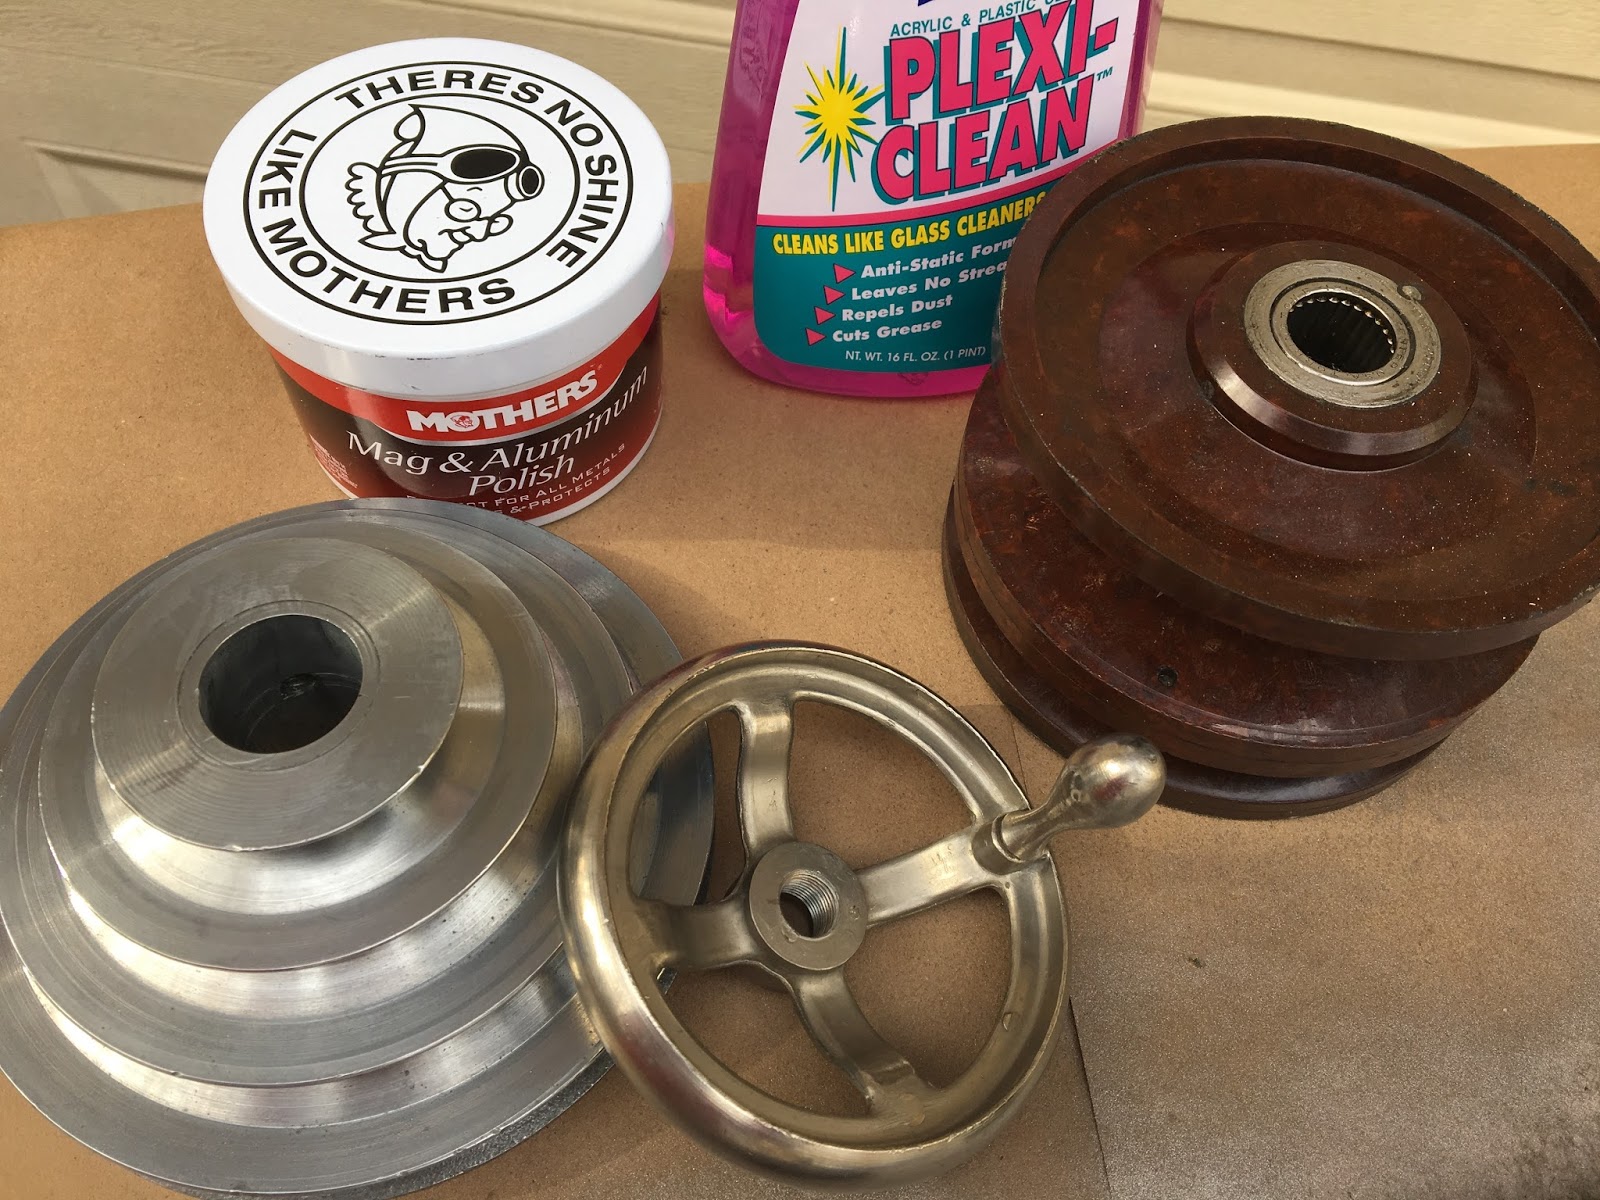
The reeve’s pulley was caked with grease. I was sure to be very carefull with it because bakelite can break easily.
It’s amazing what polish and cleaner does! I used ‘plexi-clean’ on the bakelite – not sure if it did much (I had to wipe over and over to get the grease off).
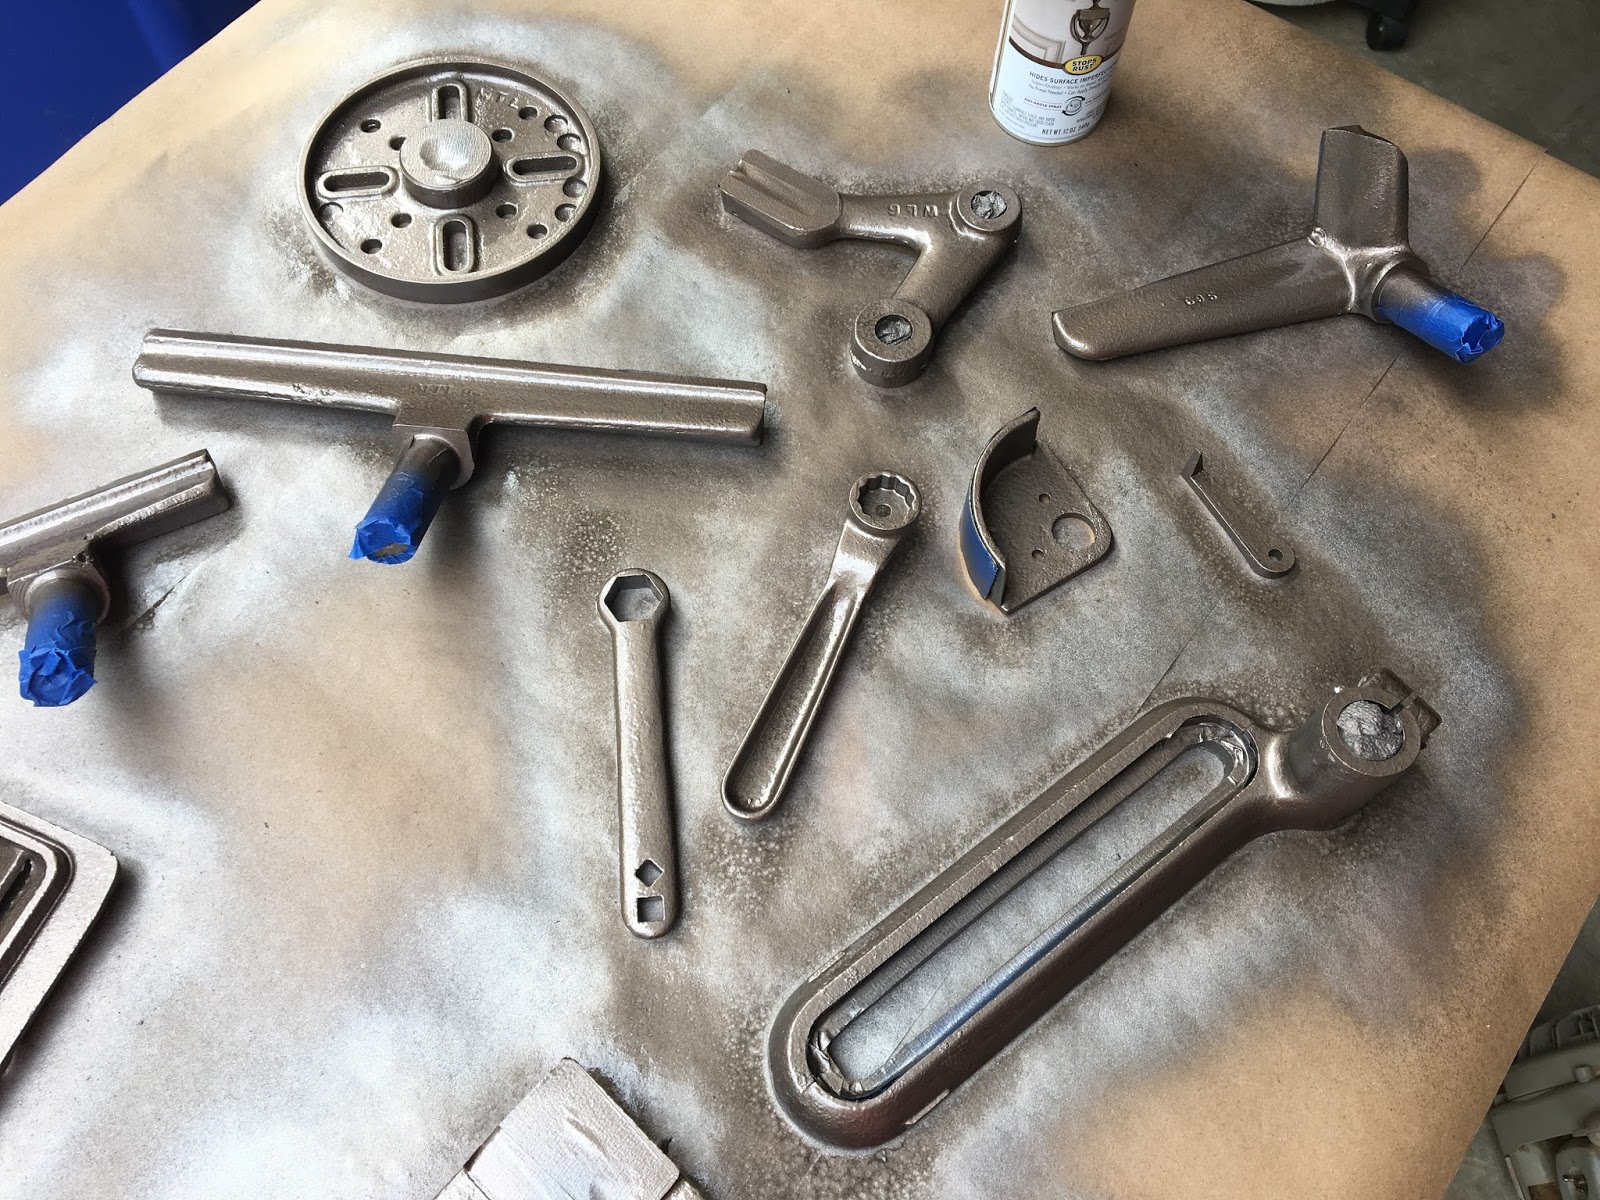
I used wire wheels, brushes and mineral spirits to prepare all the small pieces for paint.
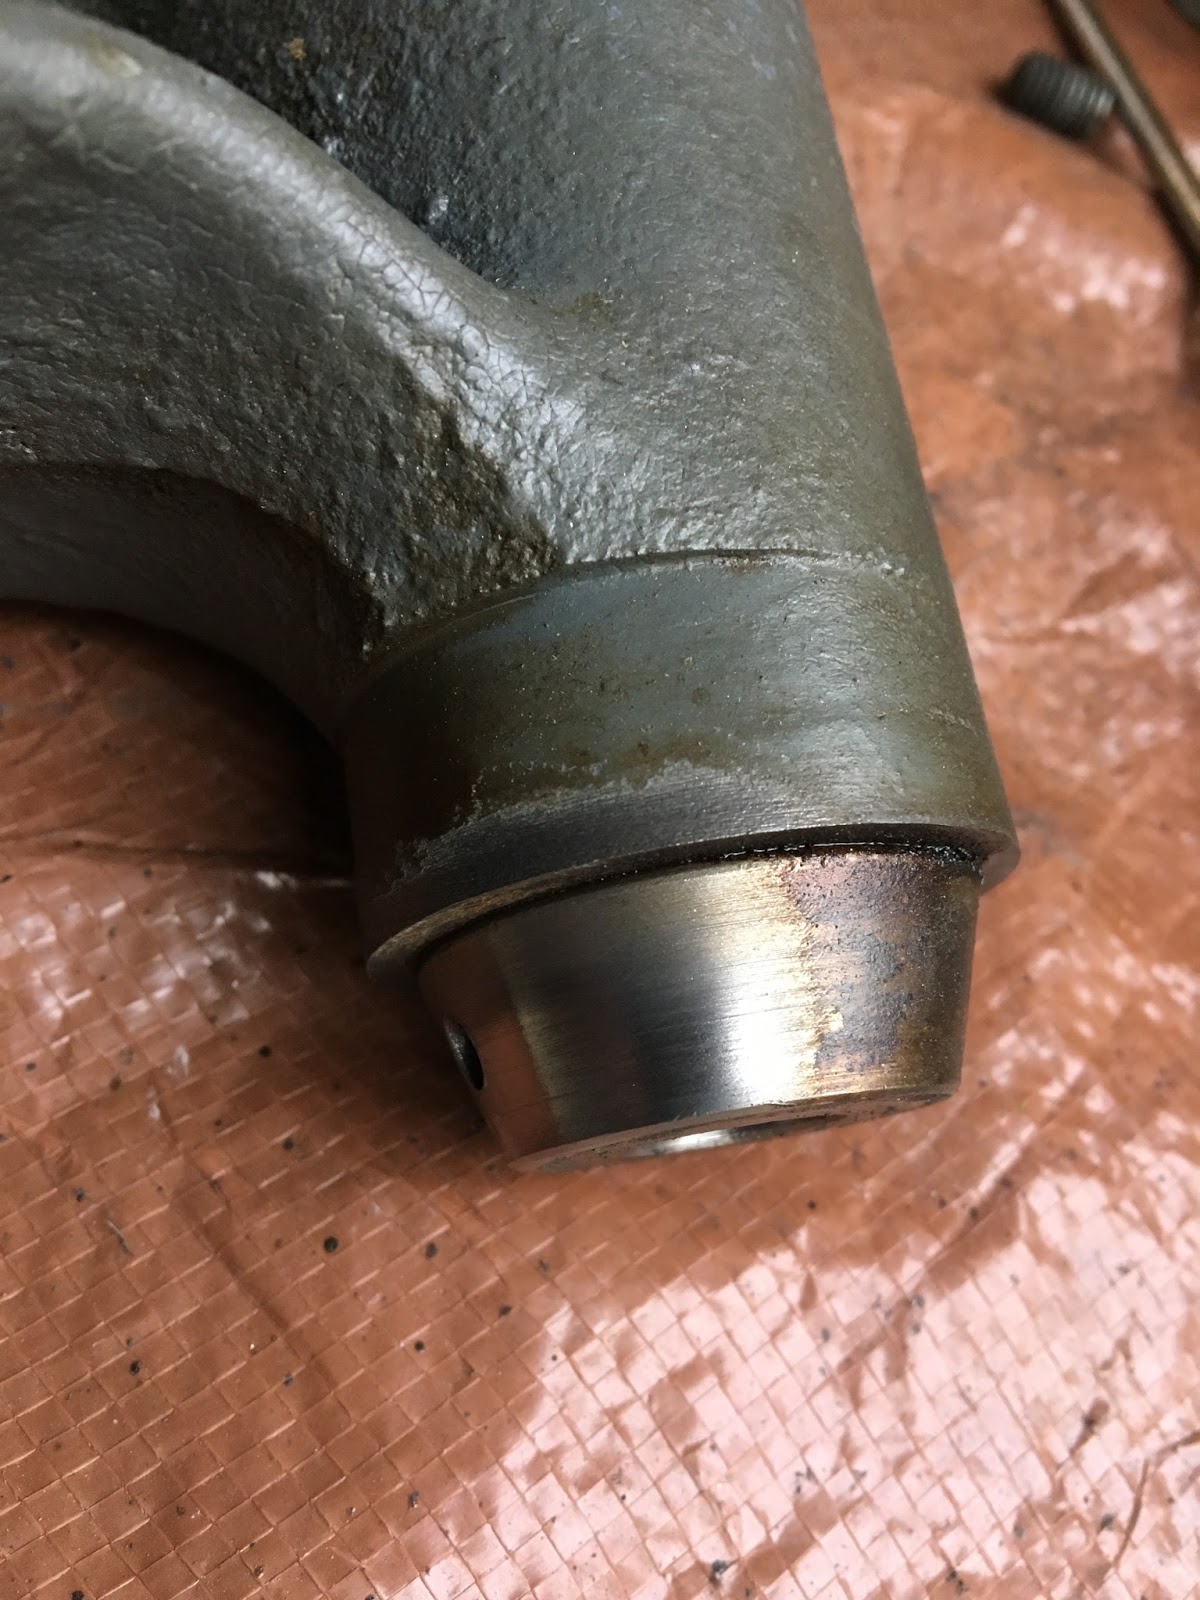
This shows you a small sample of the results you can get with a fine wire wheel on a bench grinder – see how it got the metal collar beautiful and shiny.
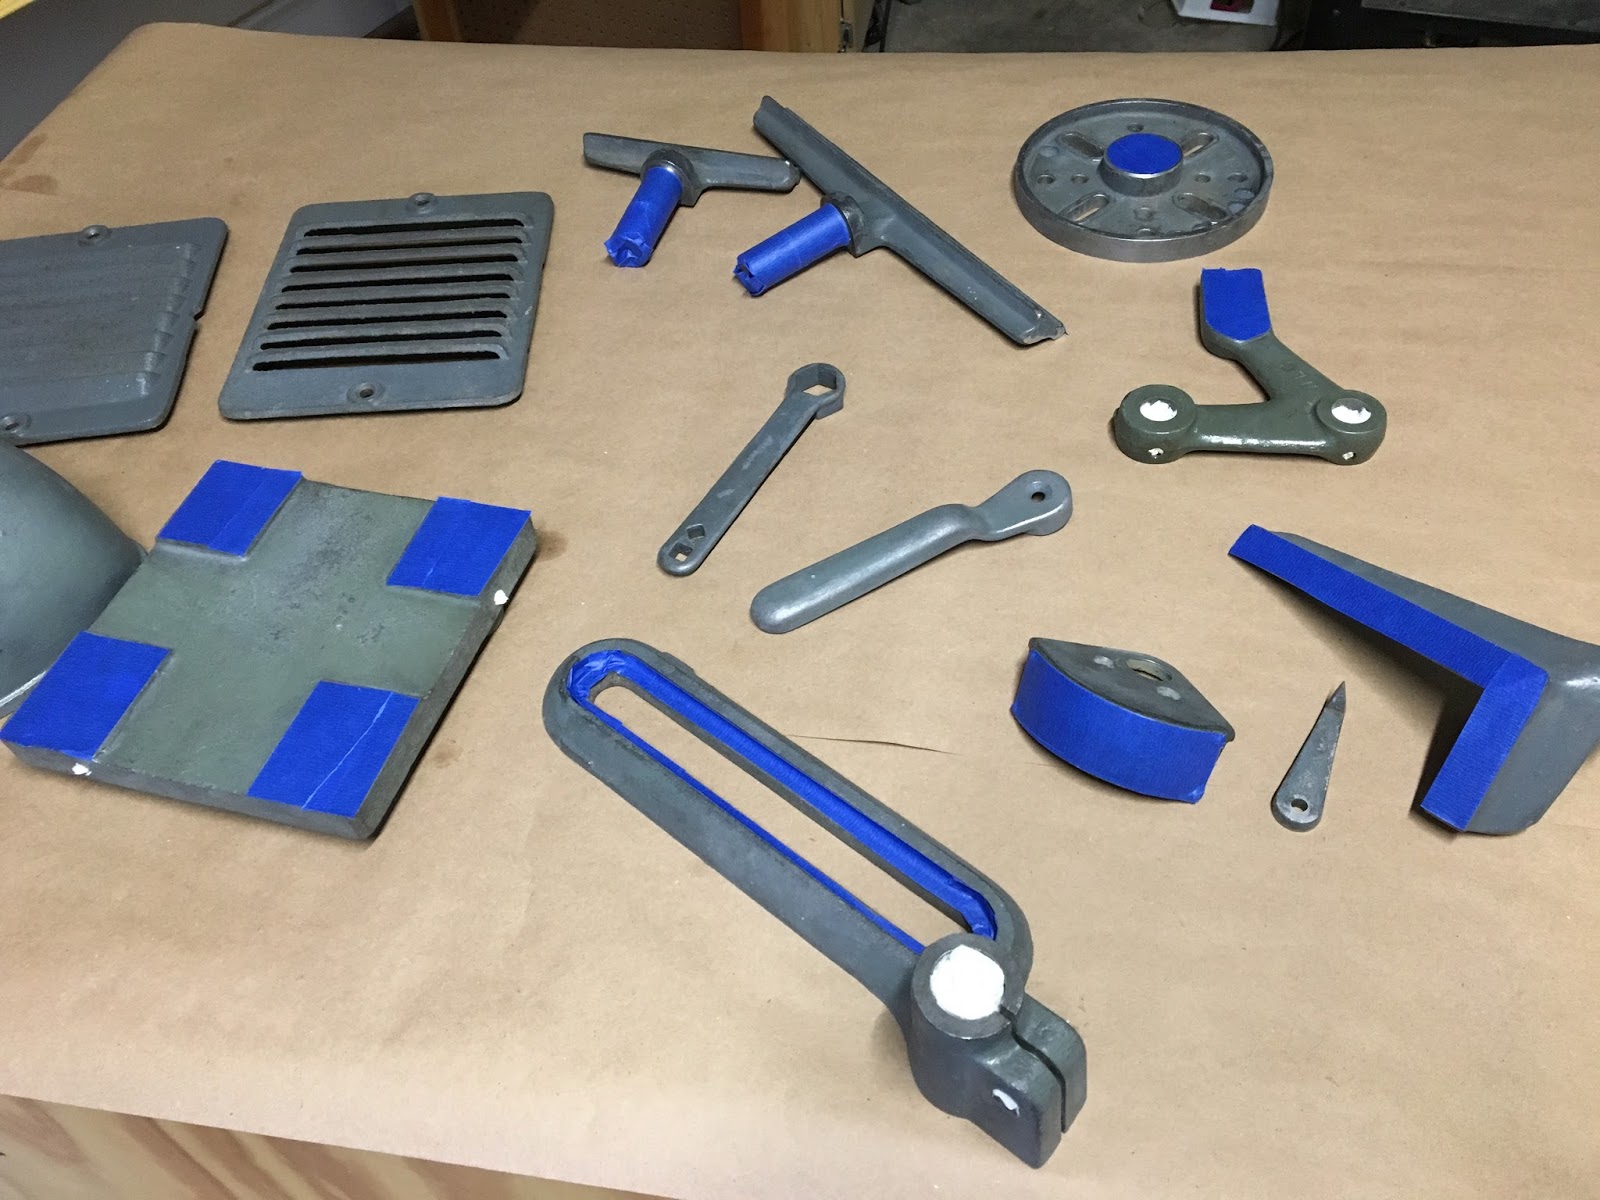
Primed and 3 coats of paint!
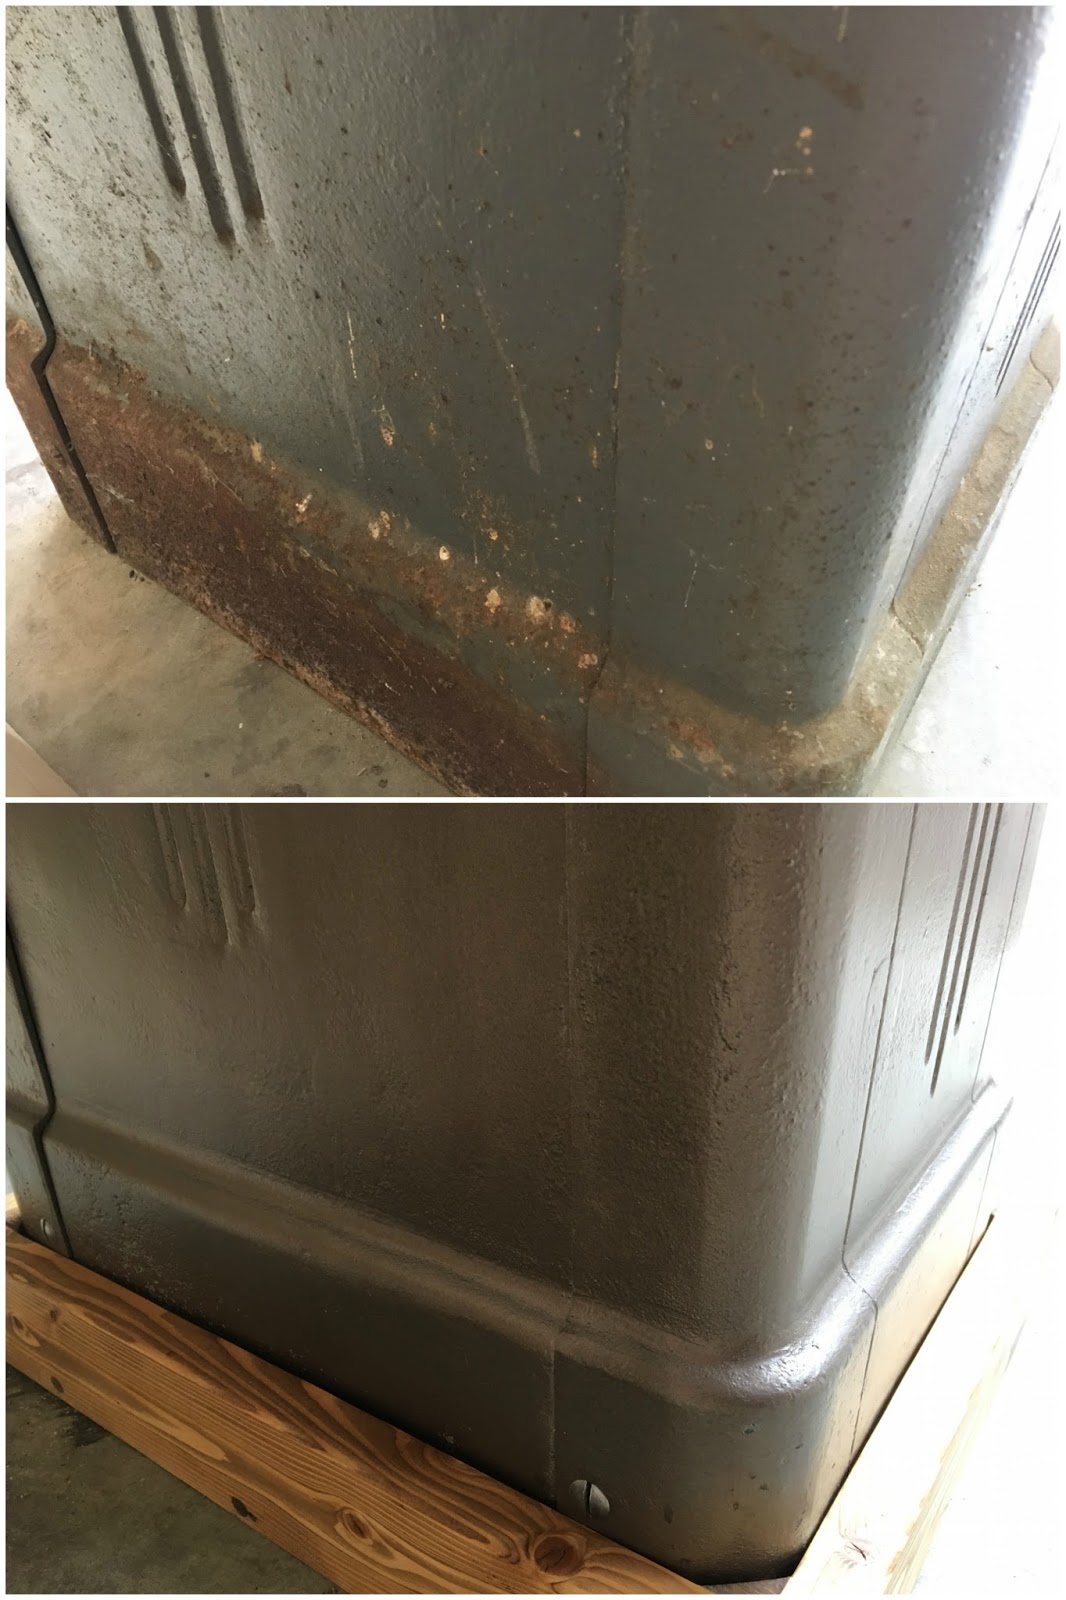
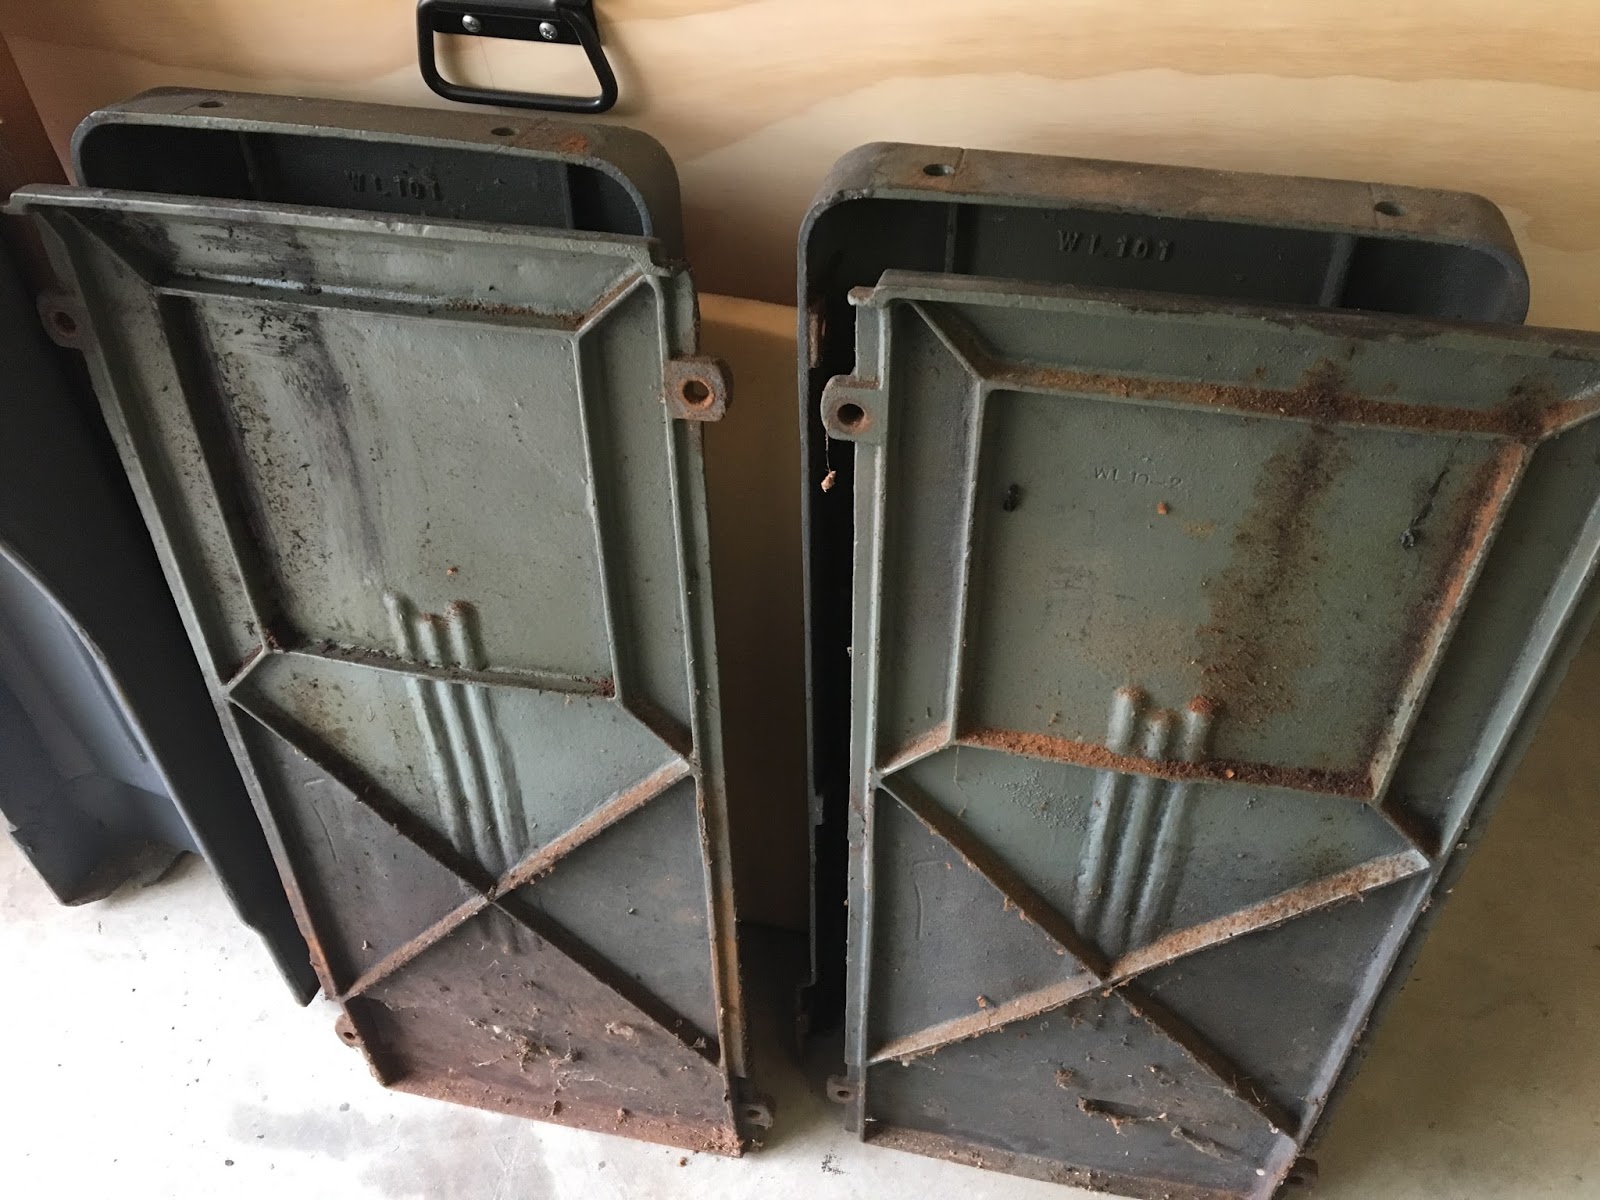
I disassembled the cabinet…
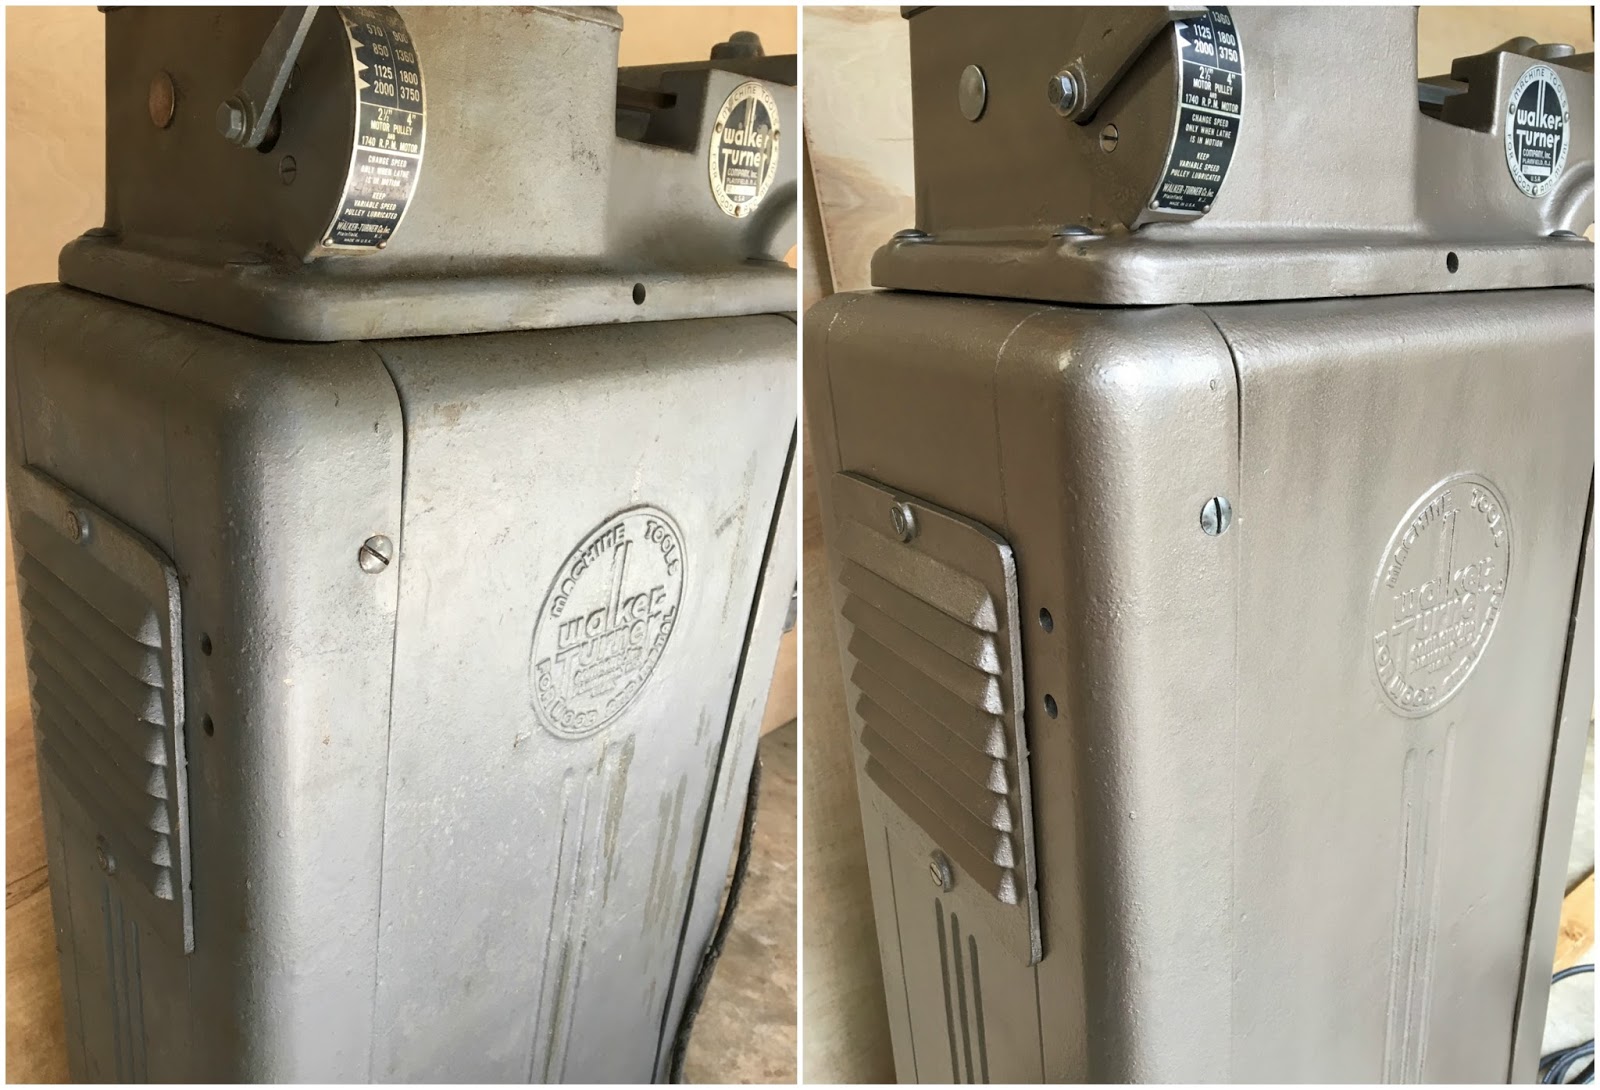
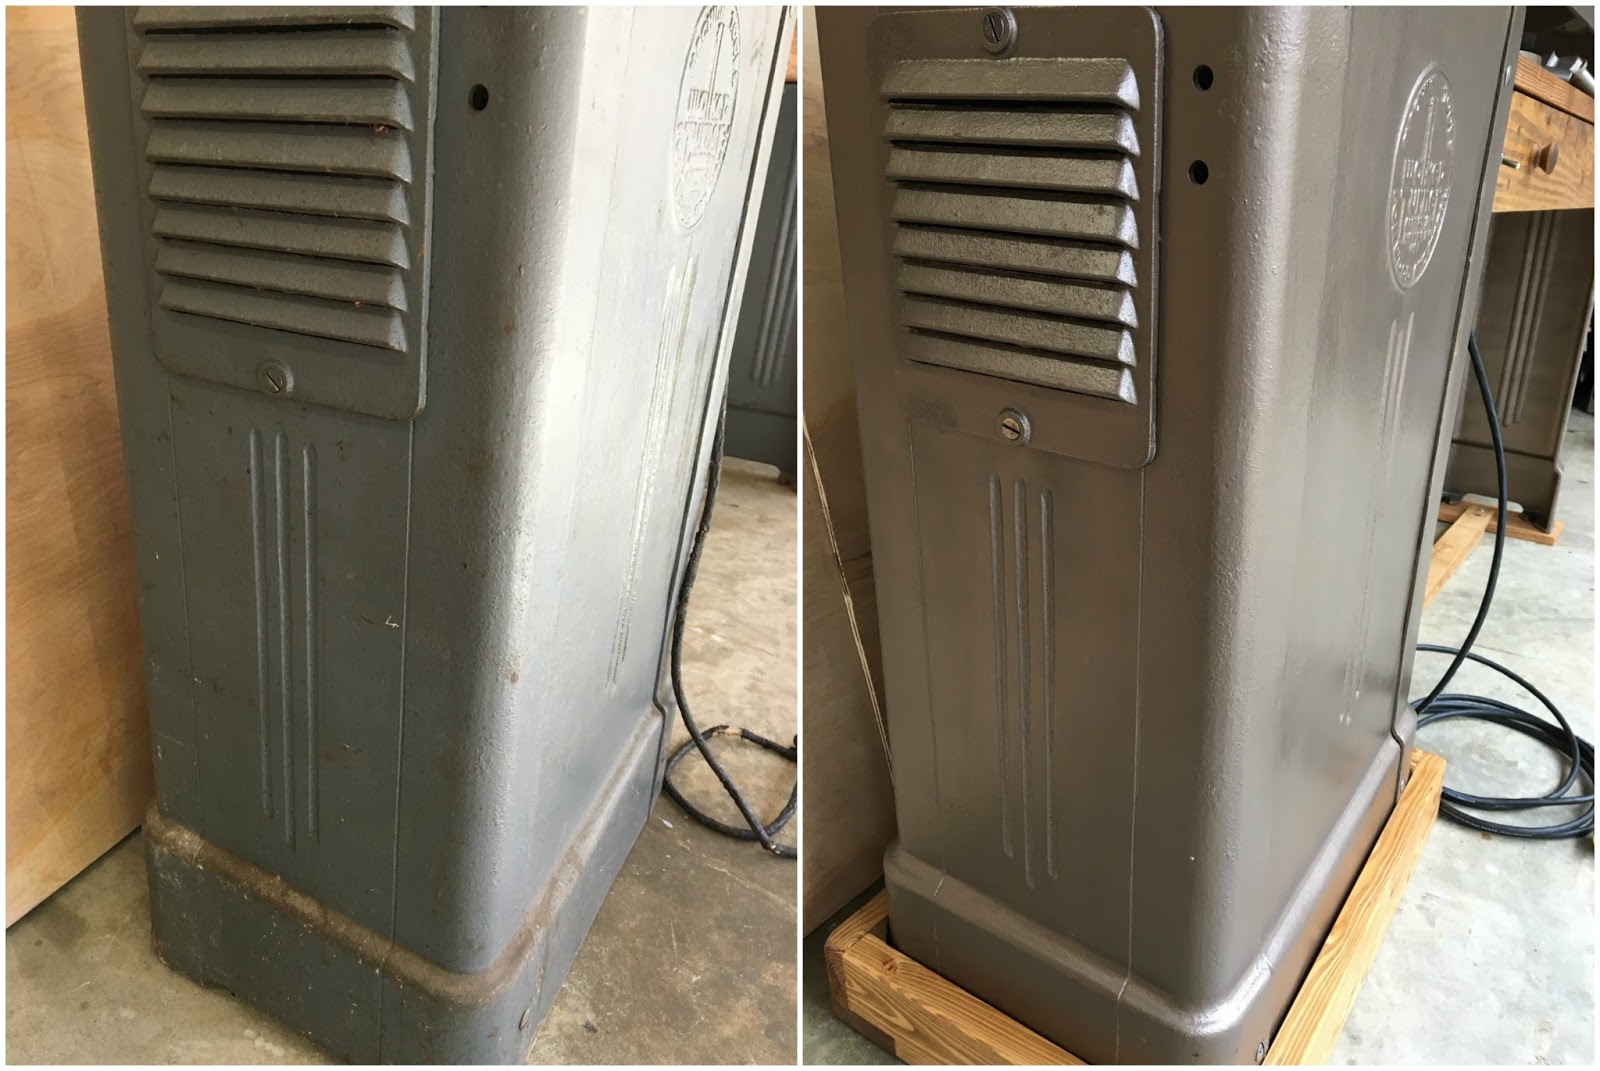
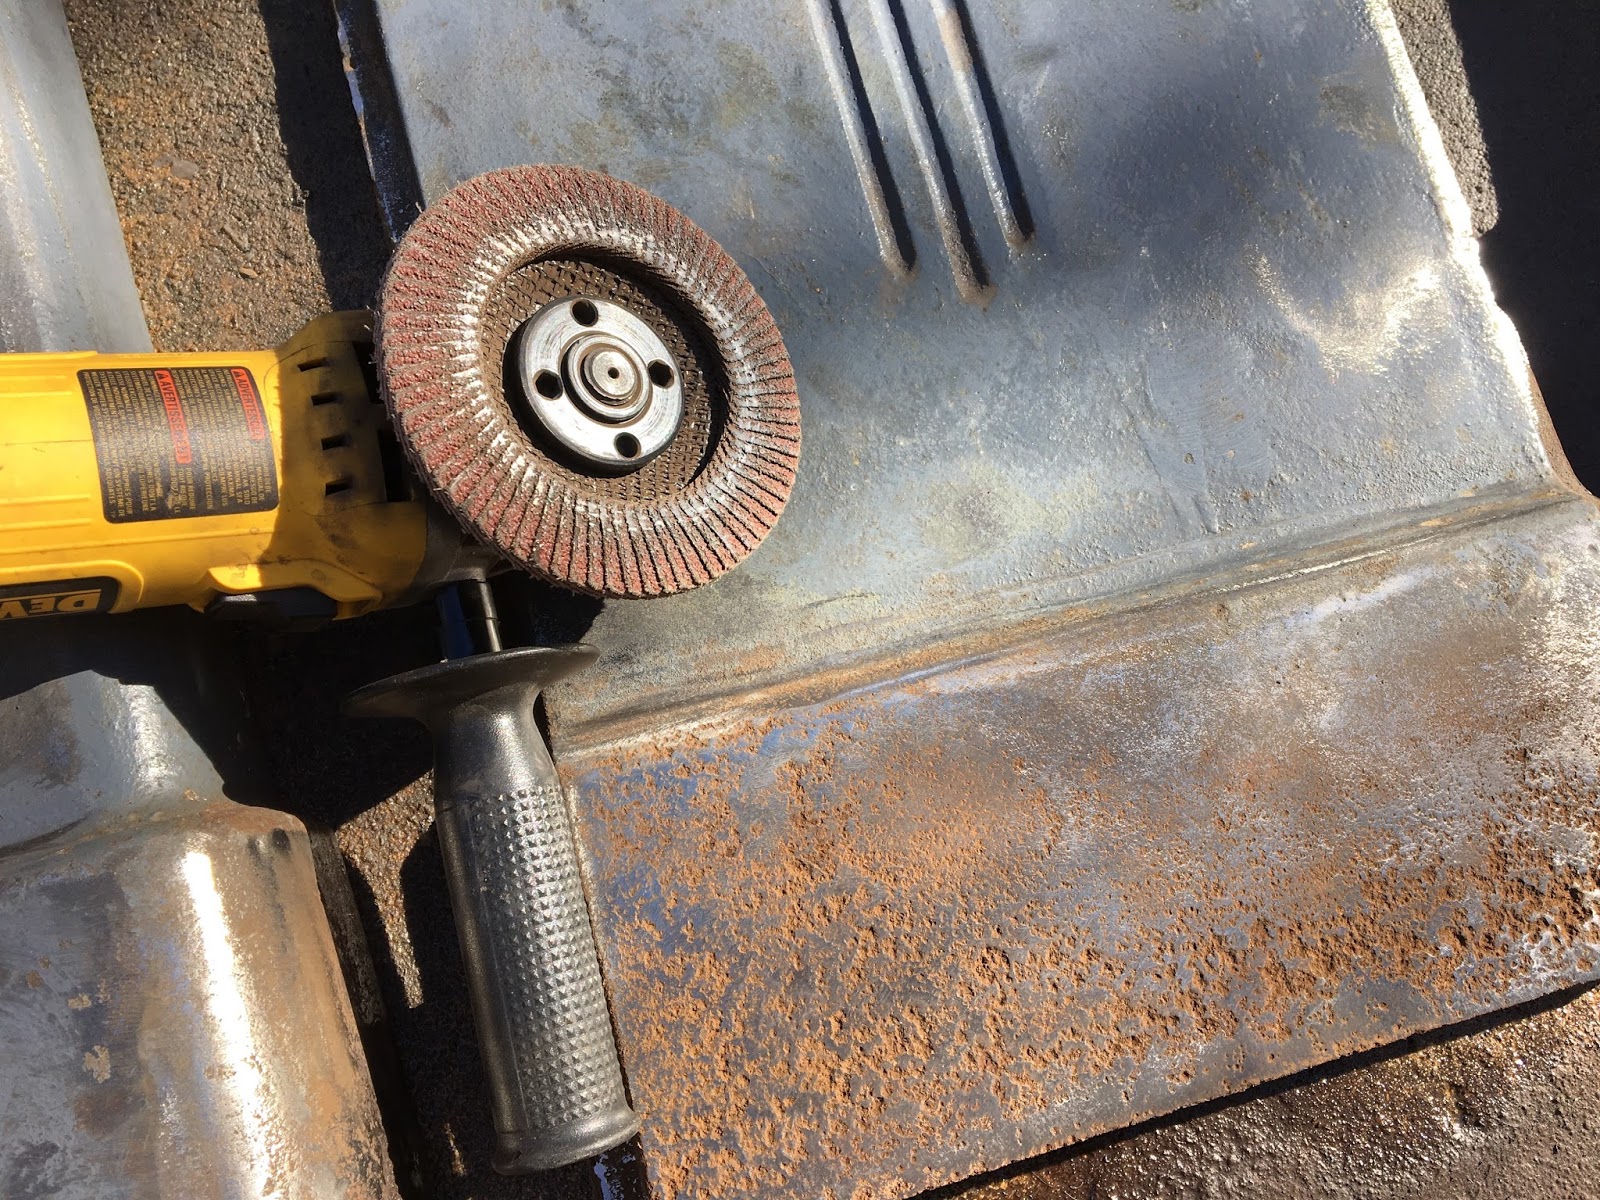
…used my grinder to grind rough spots away in the casting and remove the heavy rust along the back of the cabinet.
The pieces got a few coats of primer and several coats of paint.
Half primer, half paint. I love this new paint color by Rustoleum (Hammered-Matte)!
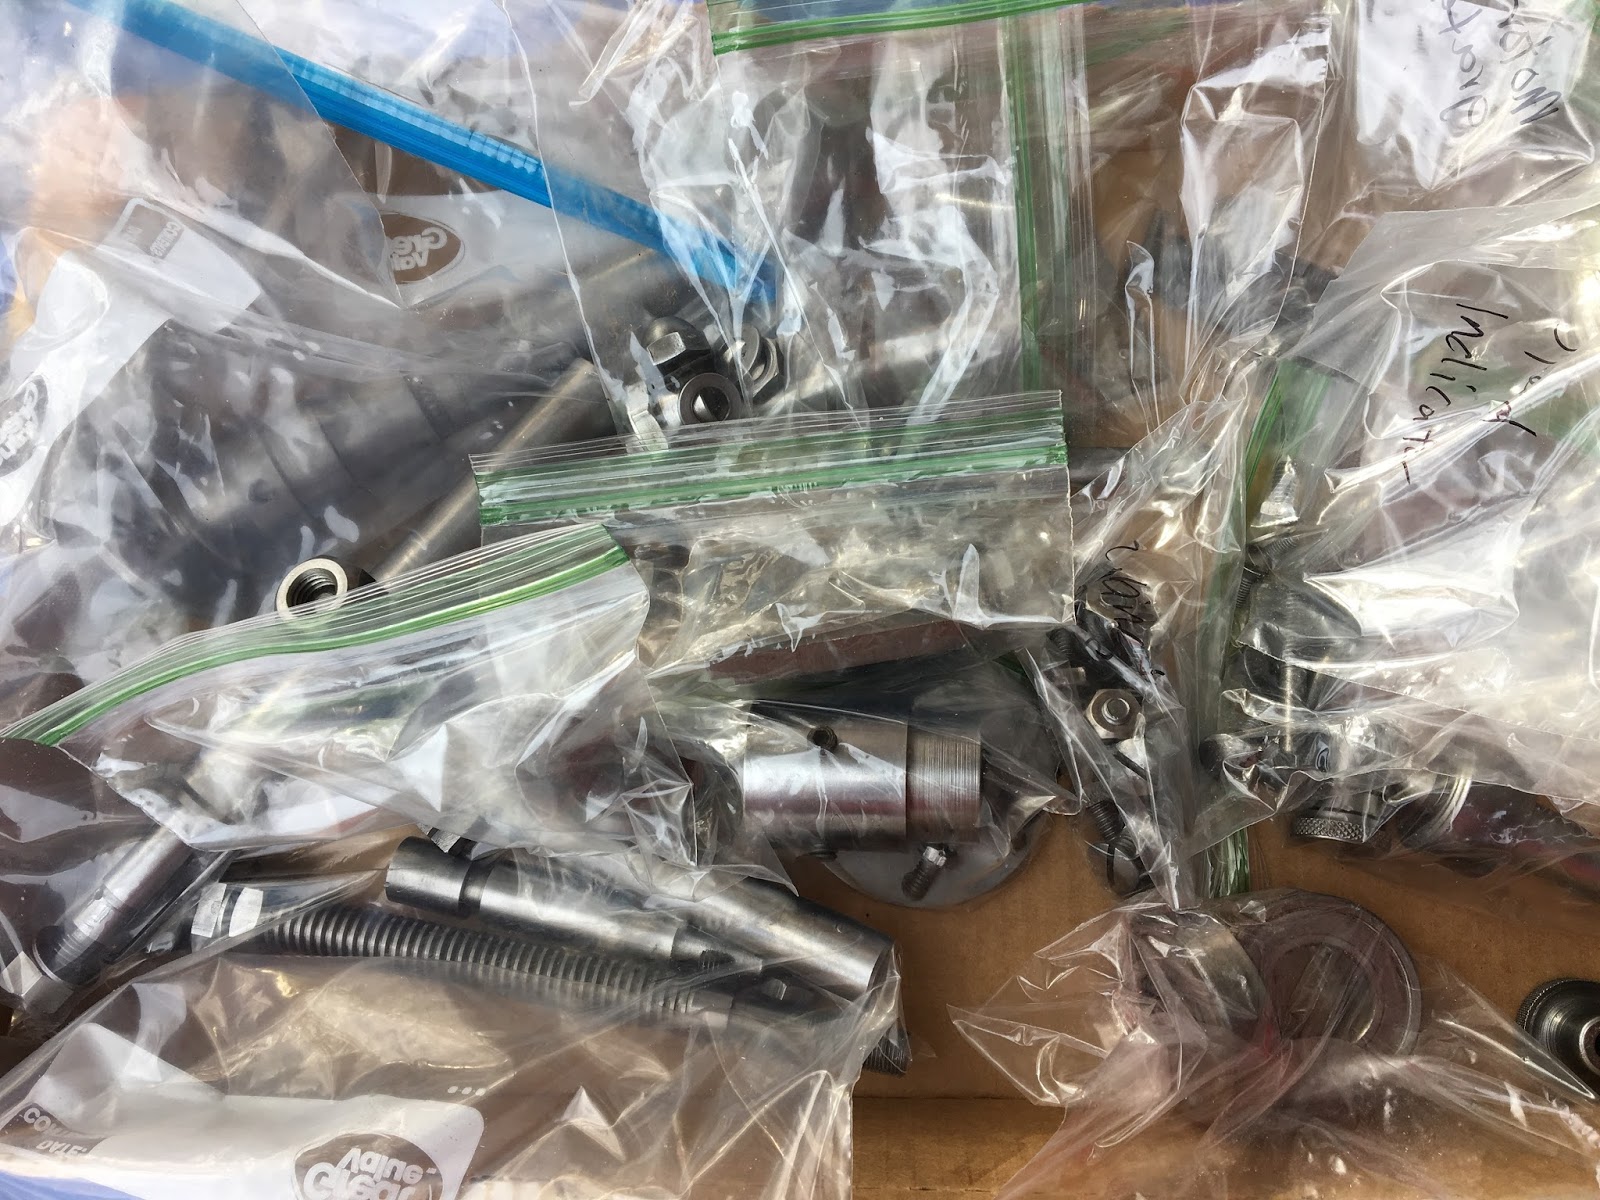
As I disassembled, all the parts got put into labeled bags and thrown into a bucket. For several days I worked on opening each bag and cleaning every single nut, bolt and washer on my fine wire wheel. Each piece got rubbed clean with WD40 and put into a clean bag.
Clean parts make me happy!
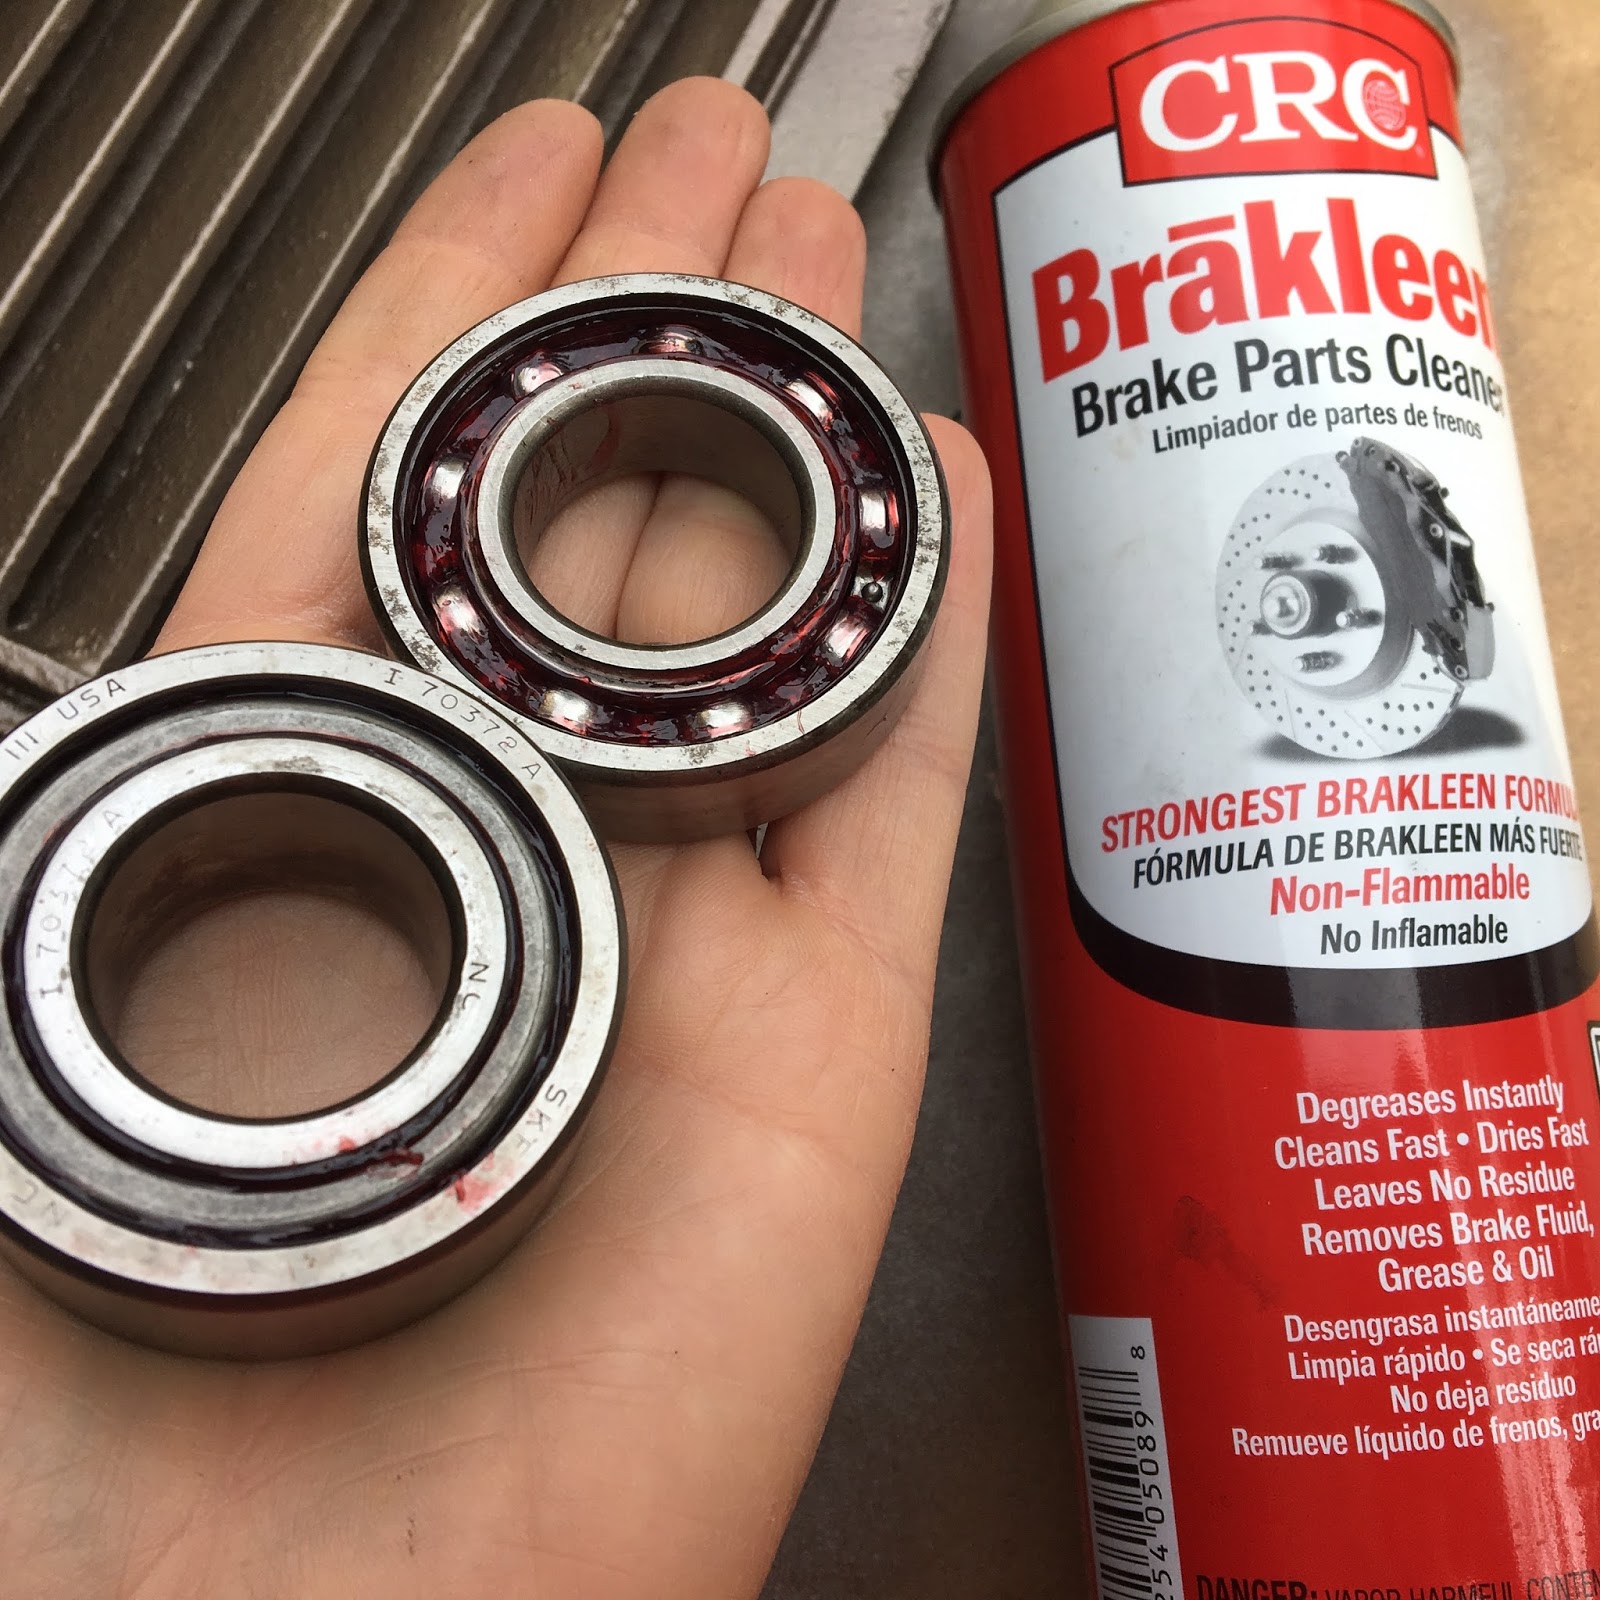
The bearings were full of dirty-old grease. I wore goggles and gloves and sprayed brake cleaner inside. The old grease ‘melted’ away in seconds. I set the bearings out to dry for a few days… hoping most of the cleaner would evaporate. I rinsed them with water to wash away anything that remained and blew excess off with the air compressor. I set them in my warm oven to ensure they were completely dry. Next I put a glob of ‘Red & Tacky’ grease in the palm of my gloved hand and mashed the bearings over it to pack in the new grease. Packing 30% is just right.
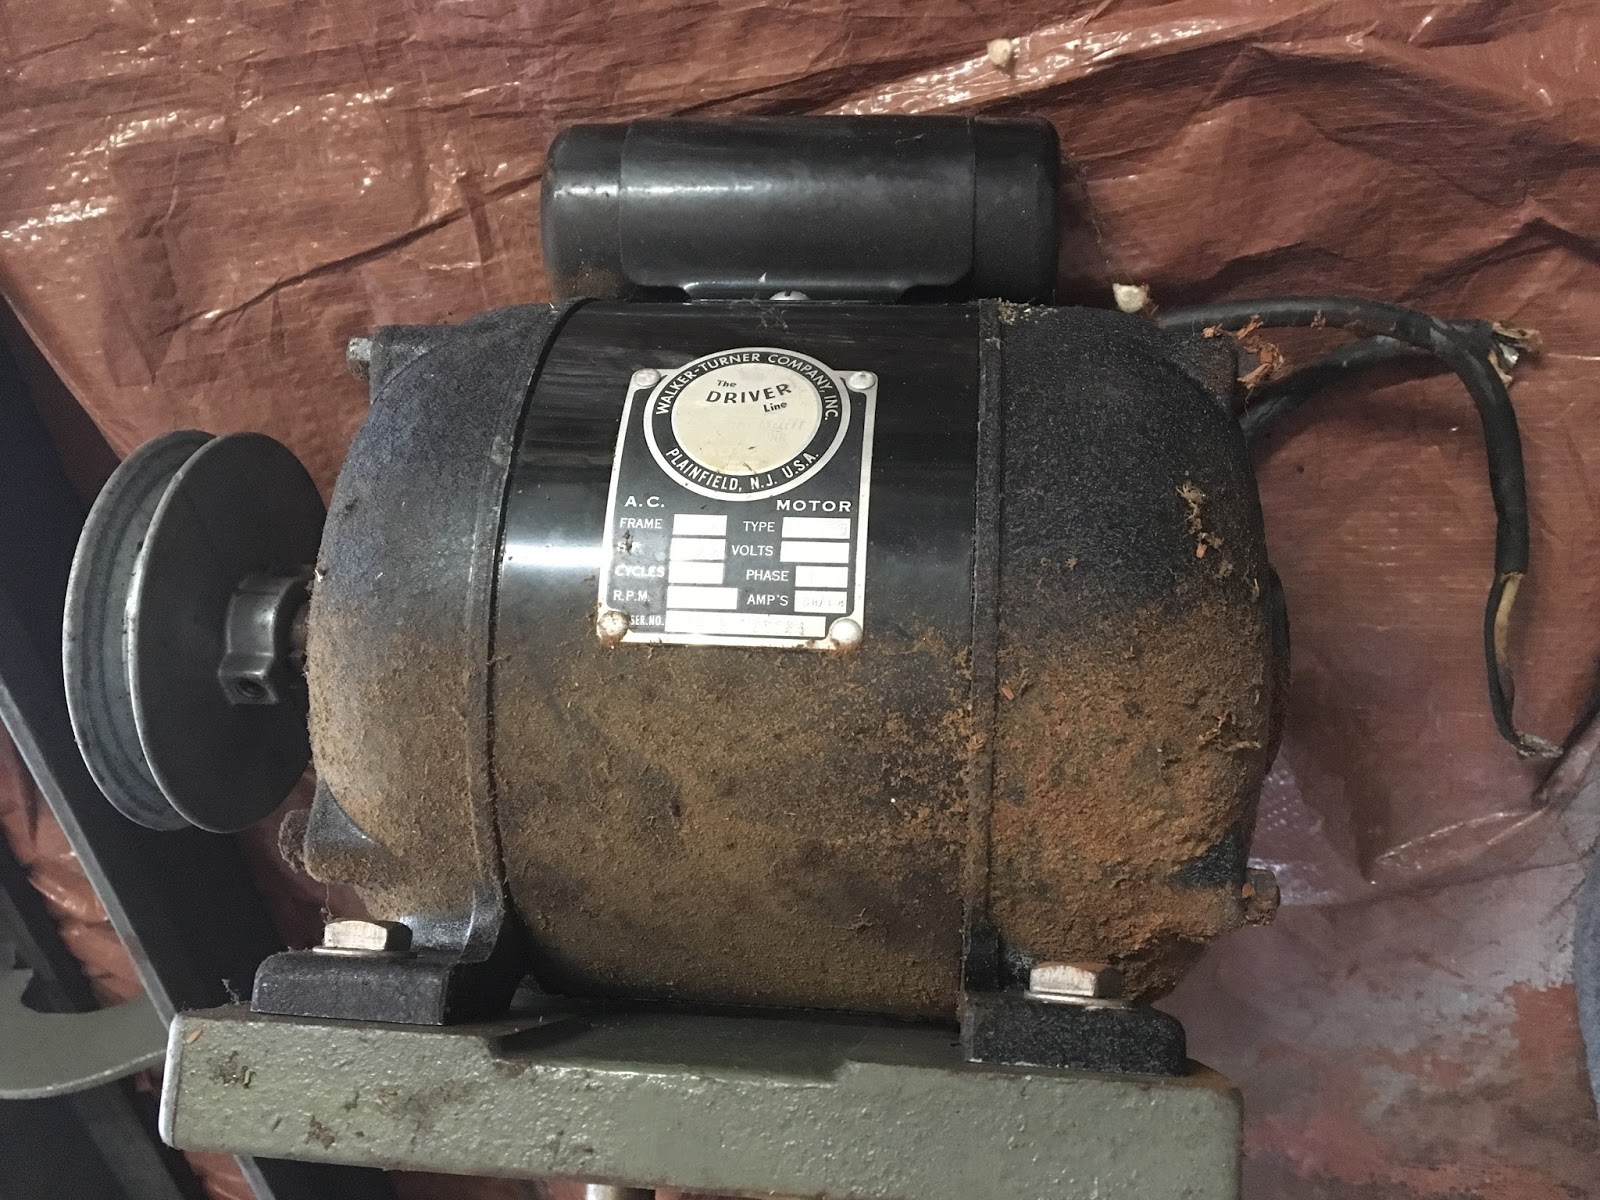
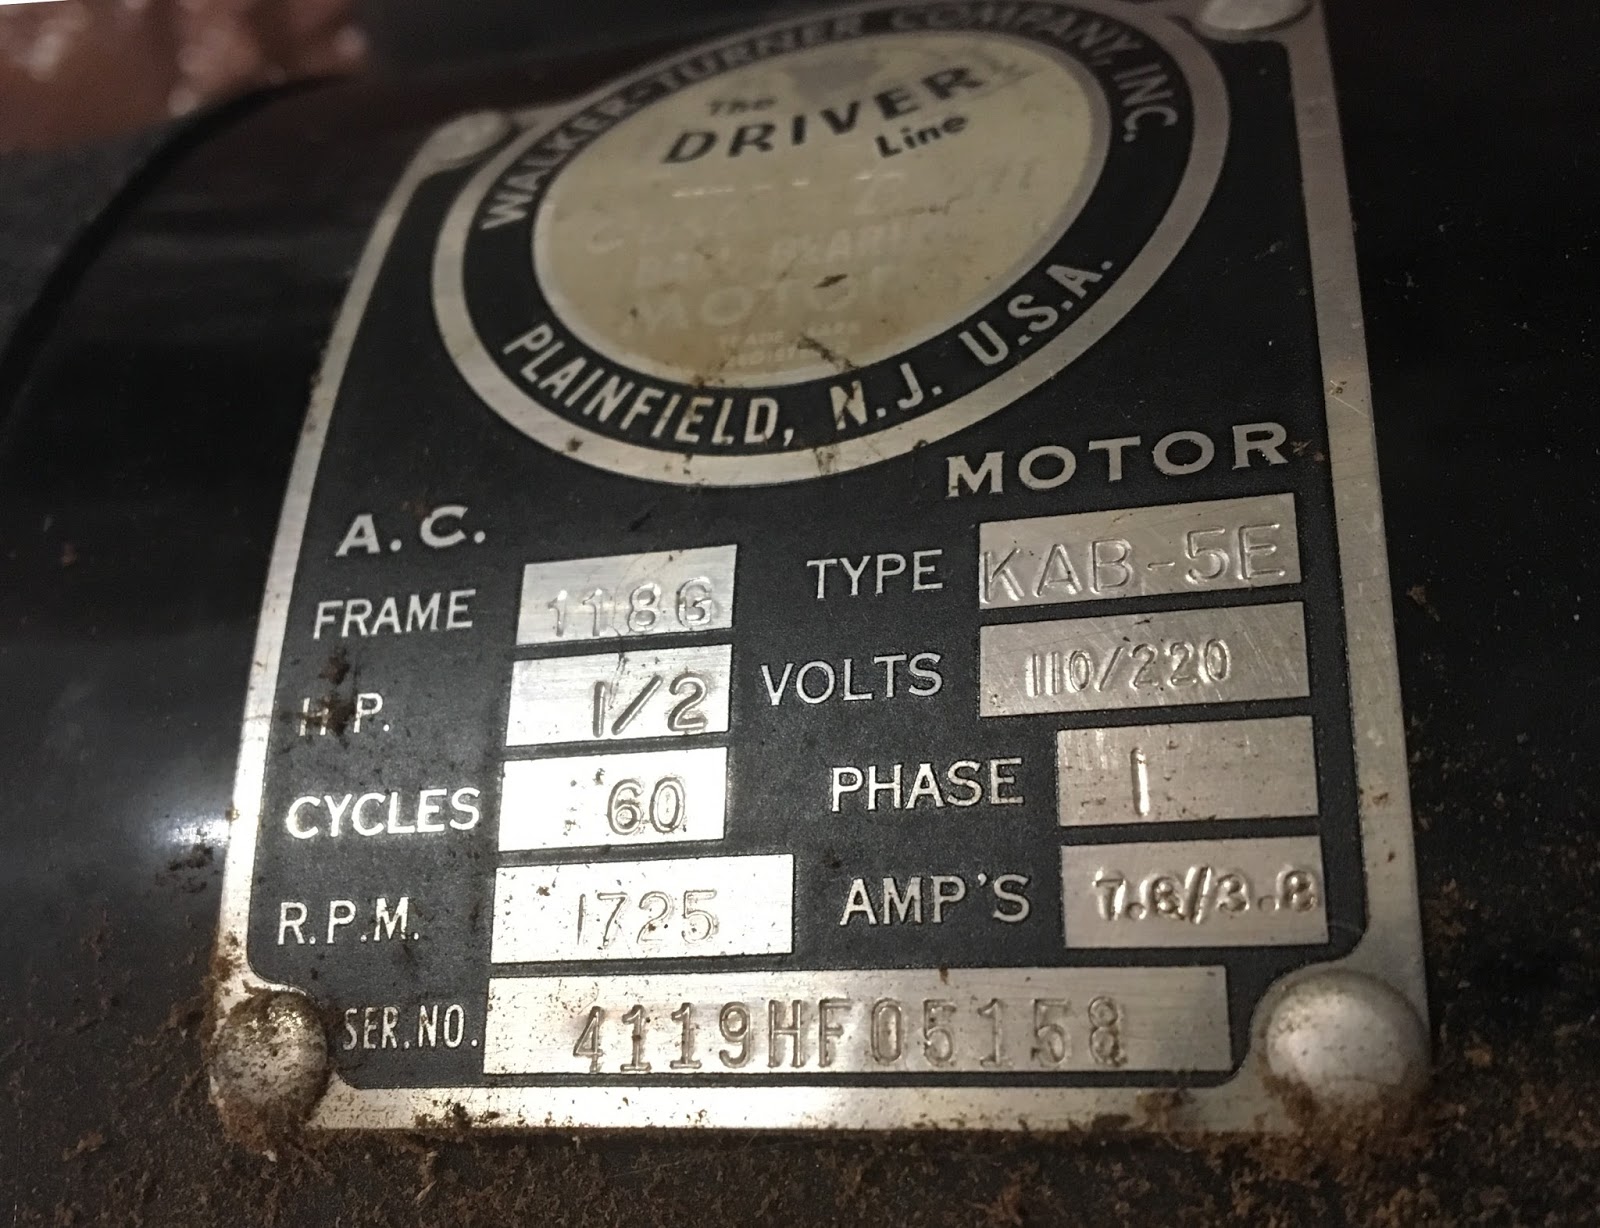
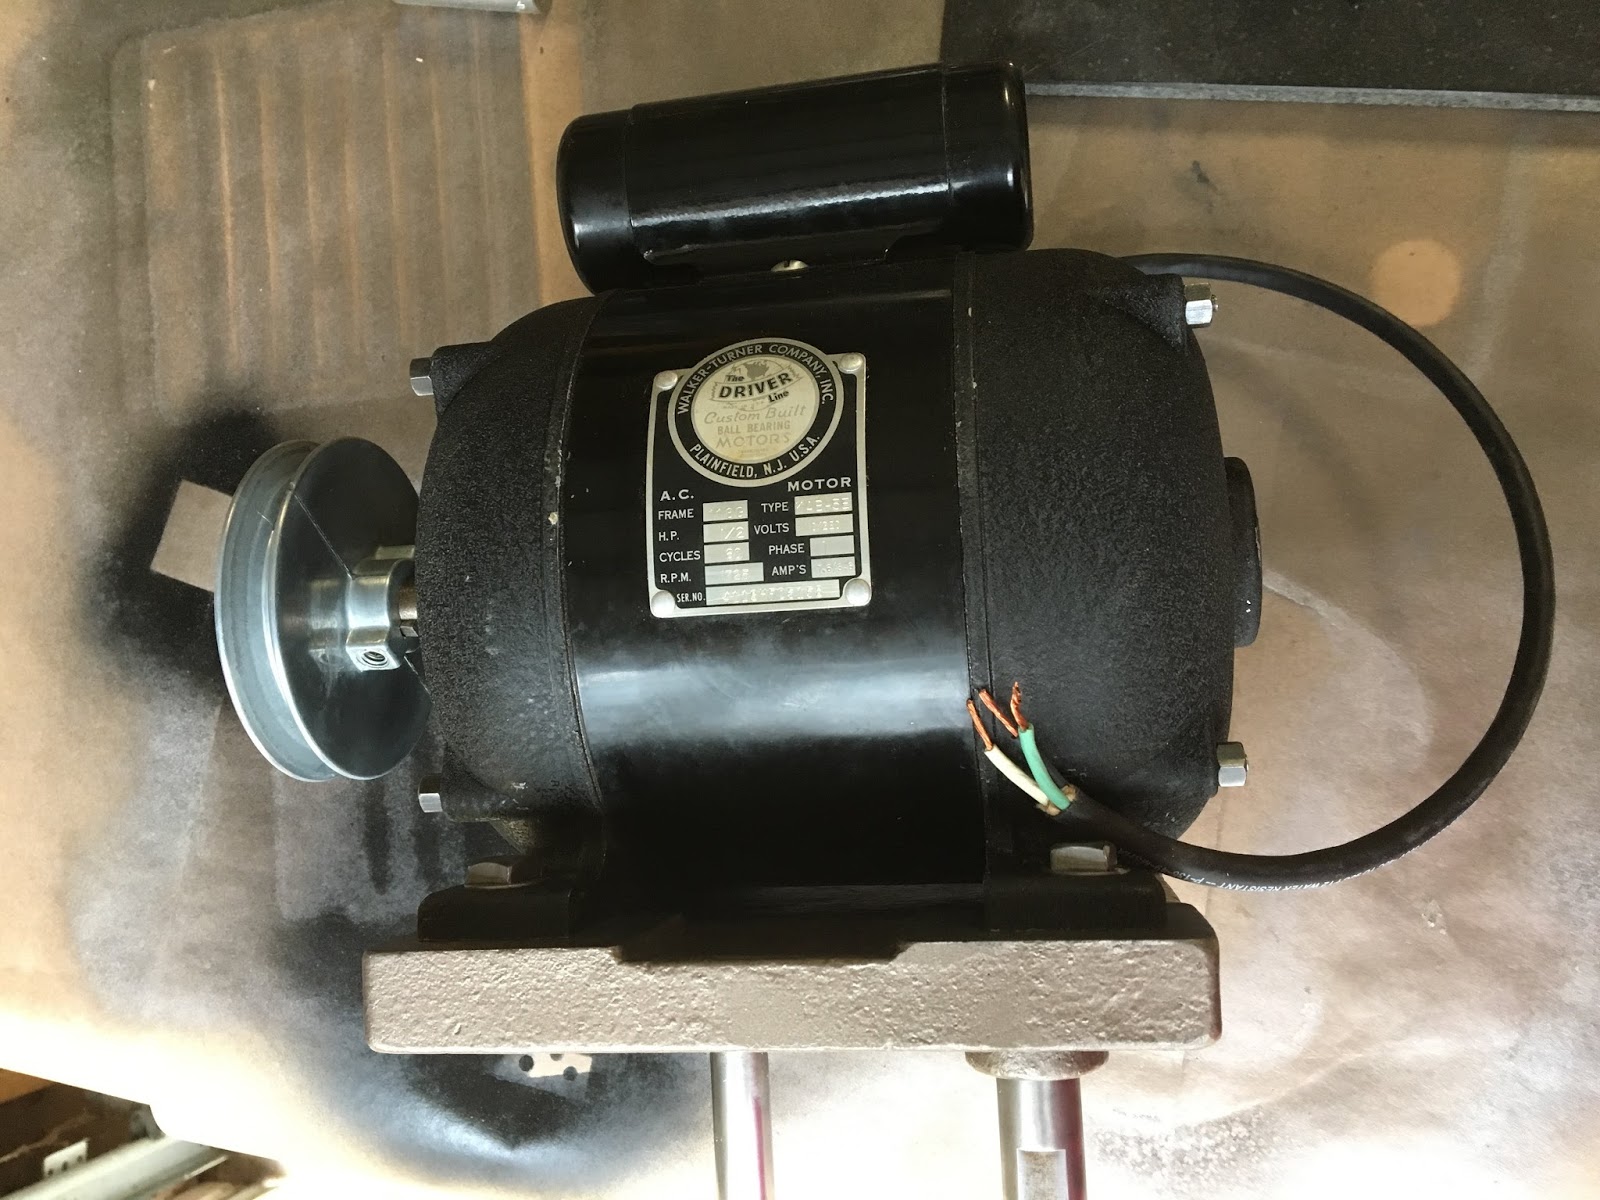
The motor was another part of this restoration that created a lot of stress for me. I successfully added new wires for 110v and tested the motor and was so happy to find that it ran – wahoo!!
My problems came when I decided I wanted it to be wired for 220v. There’s many benefits and I wanted those benefits. 😁
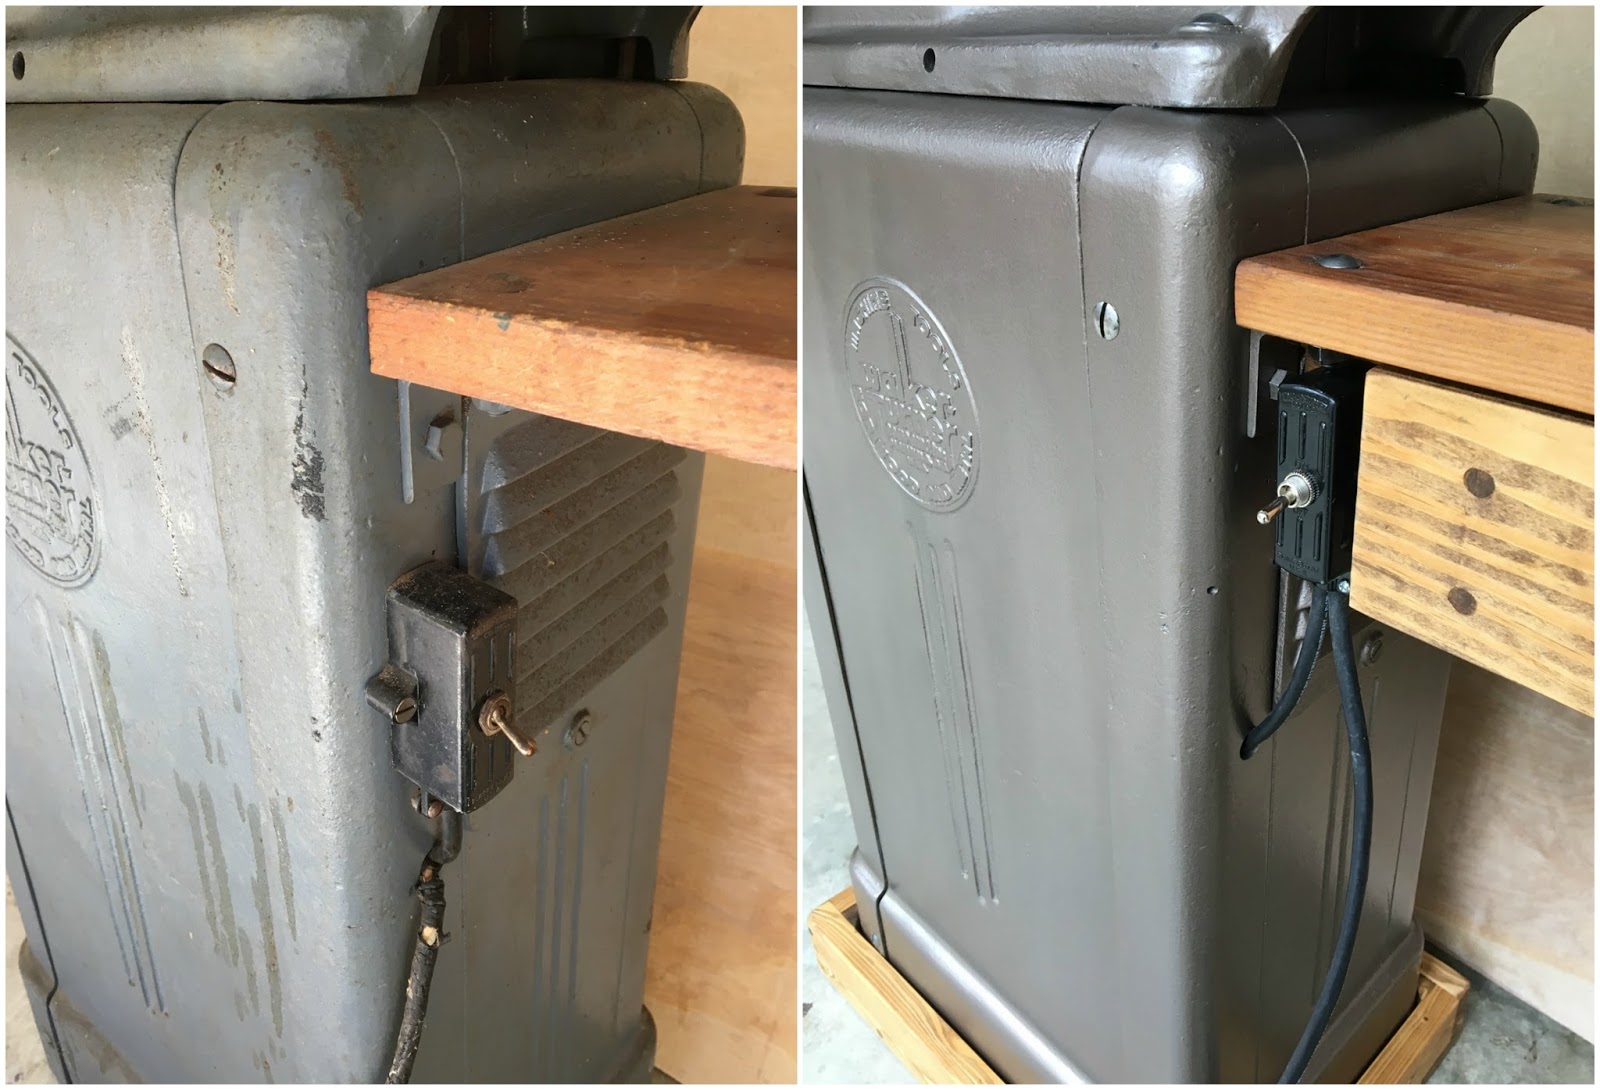
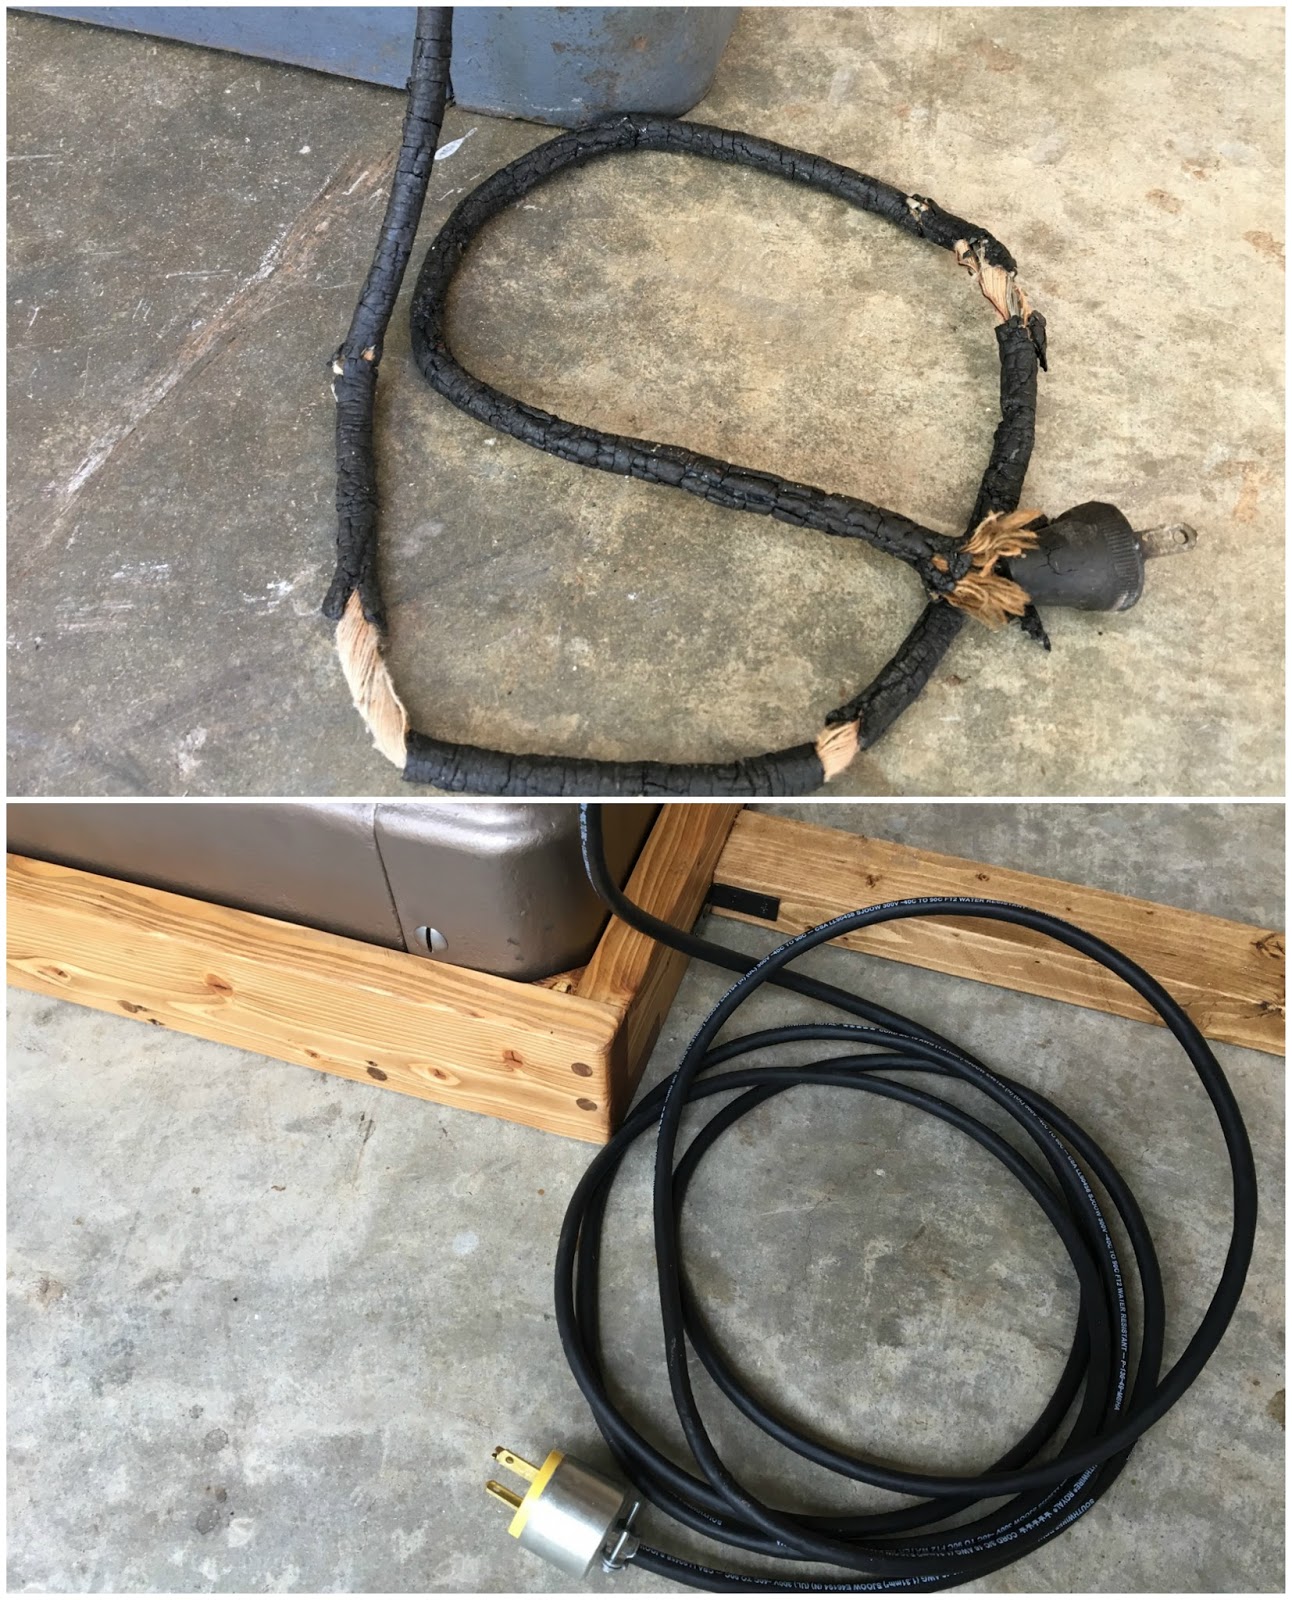
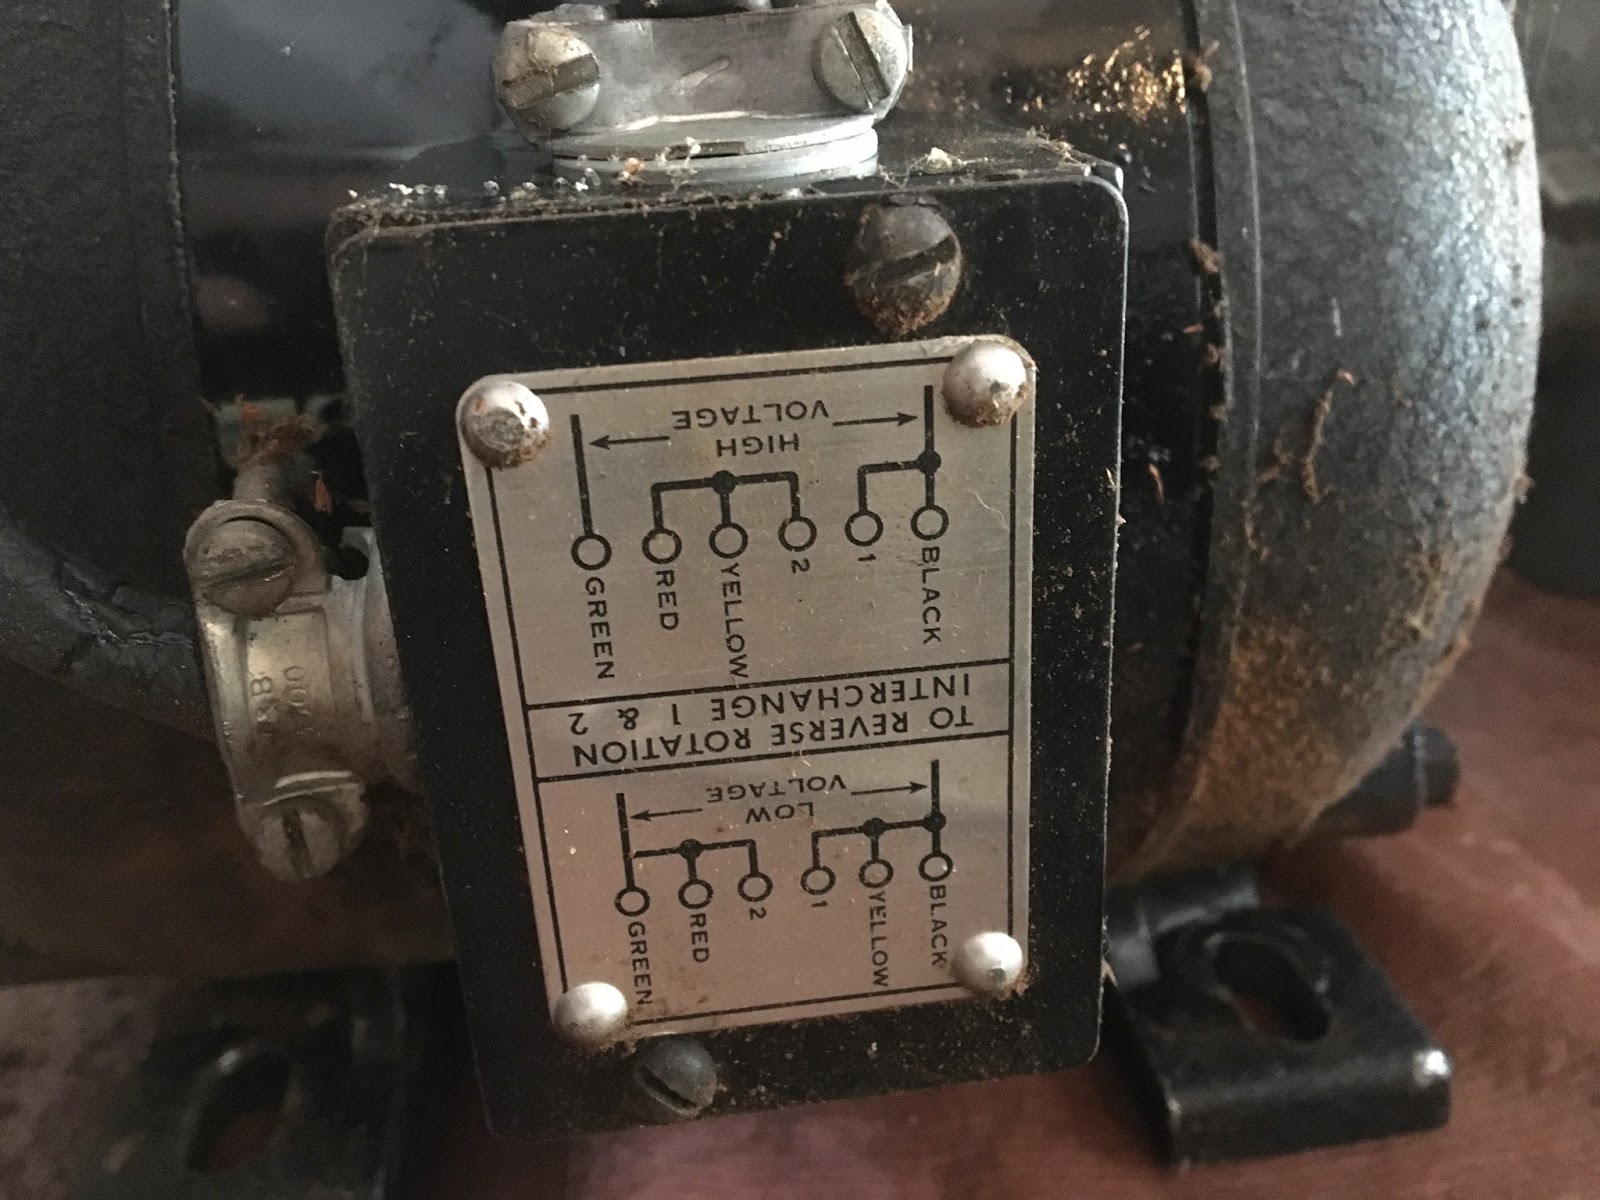
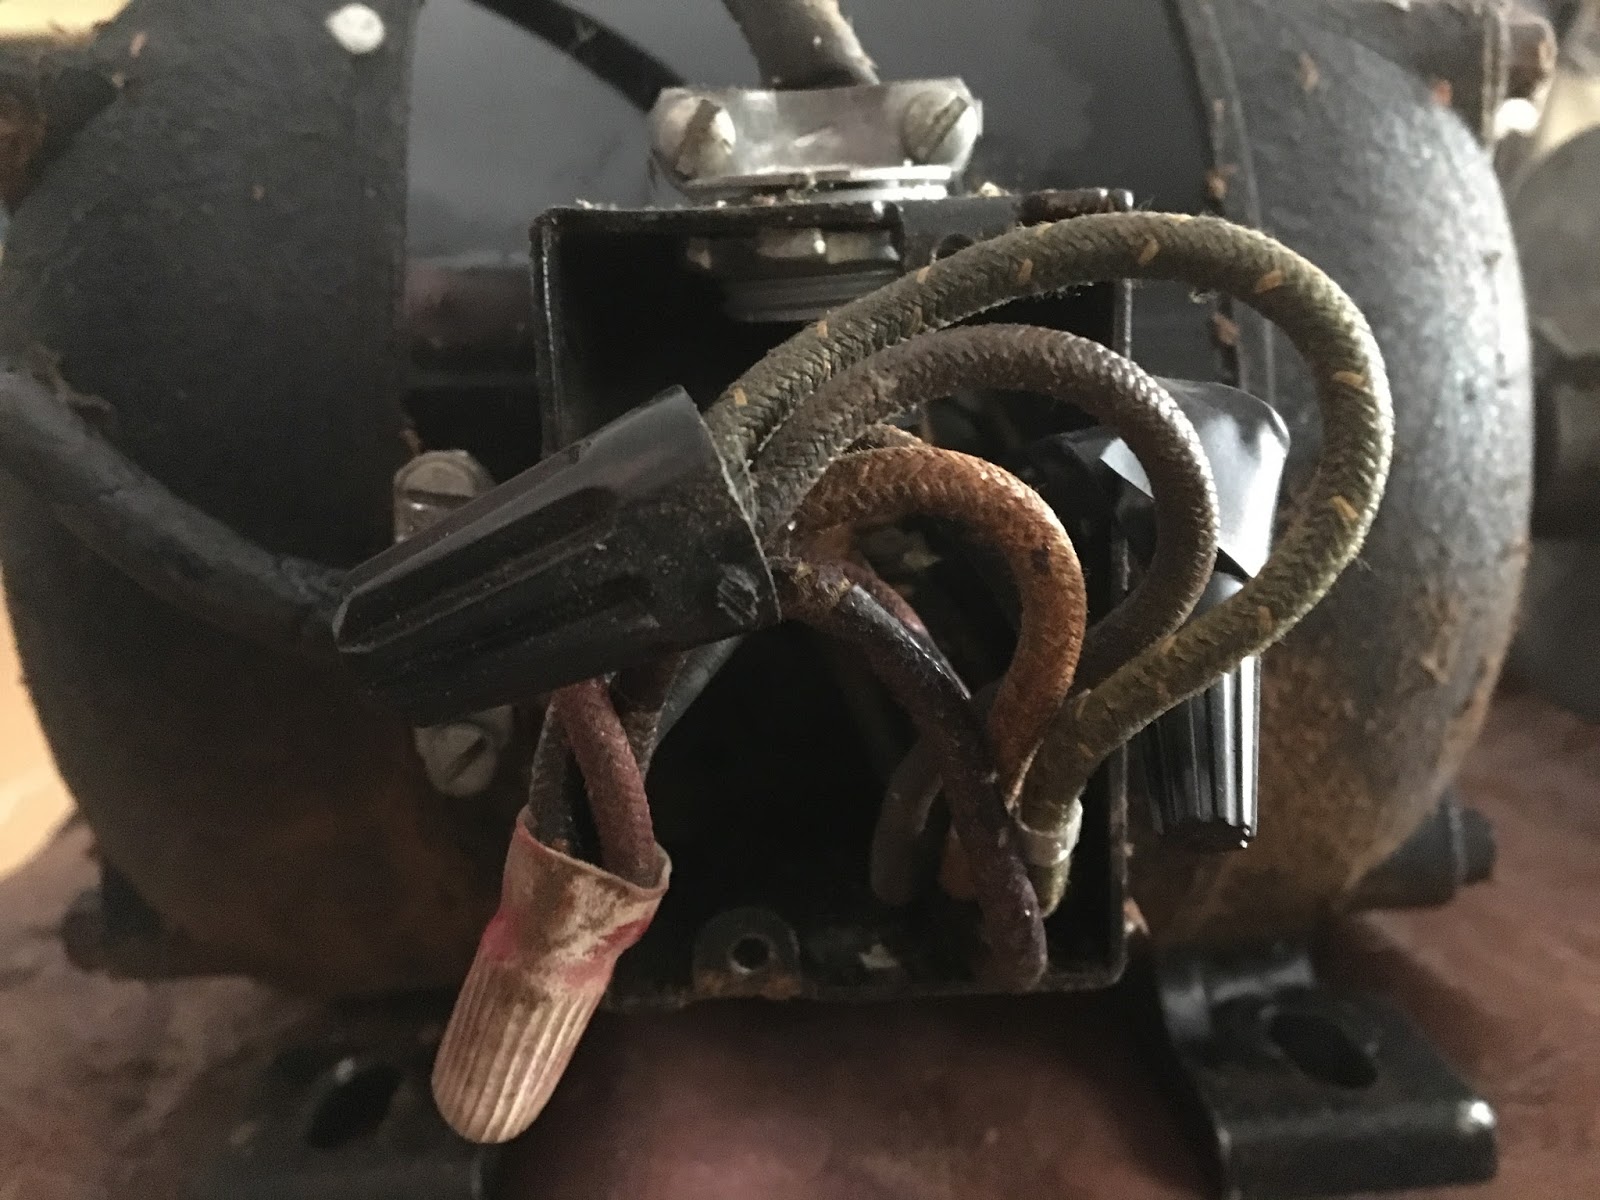
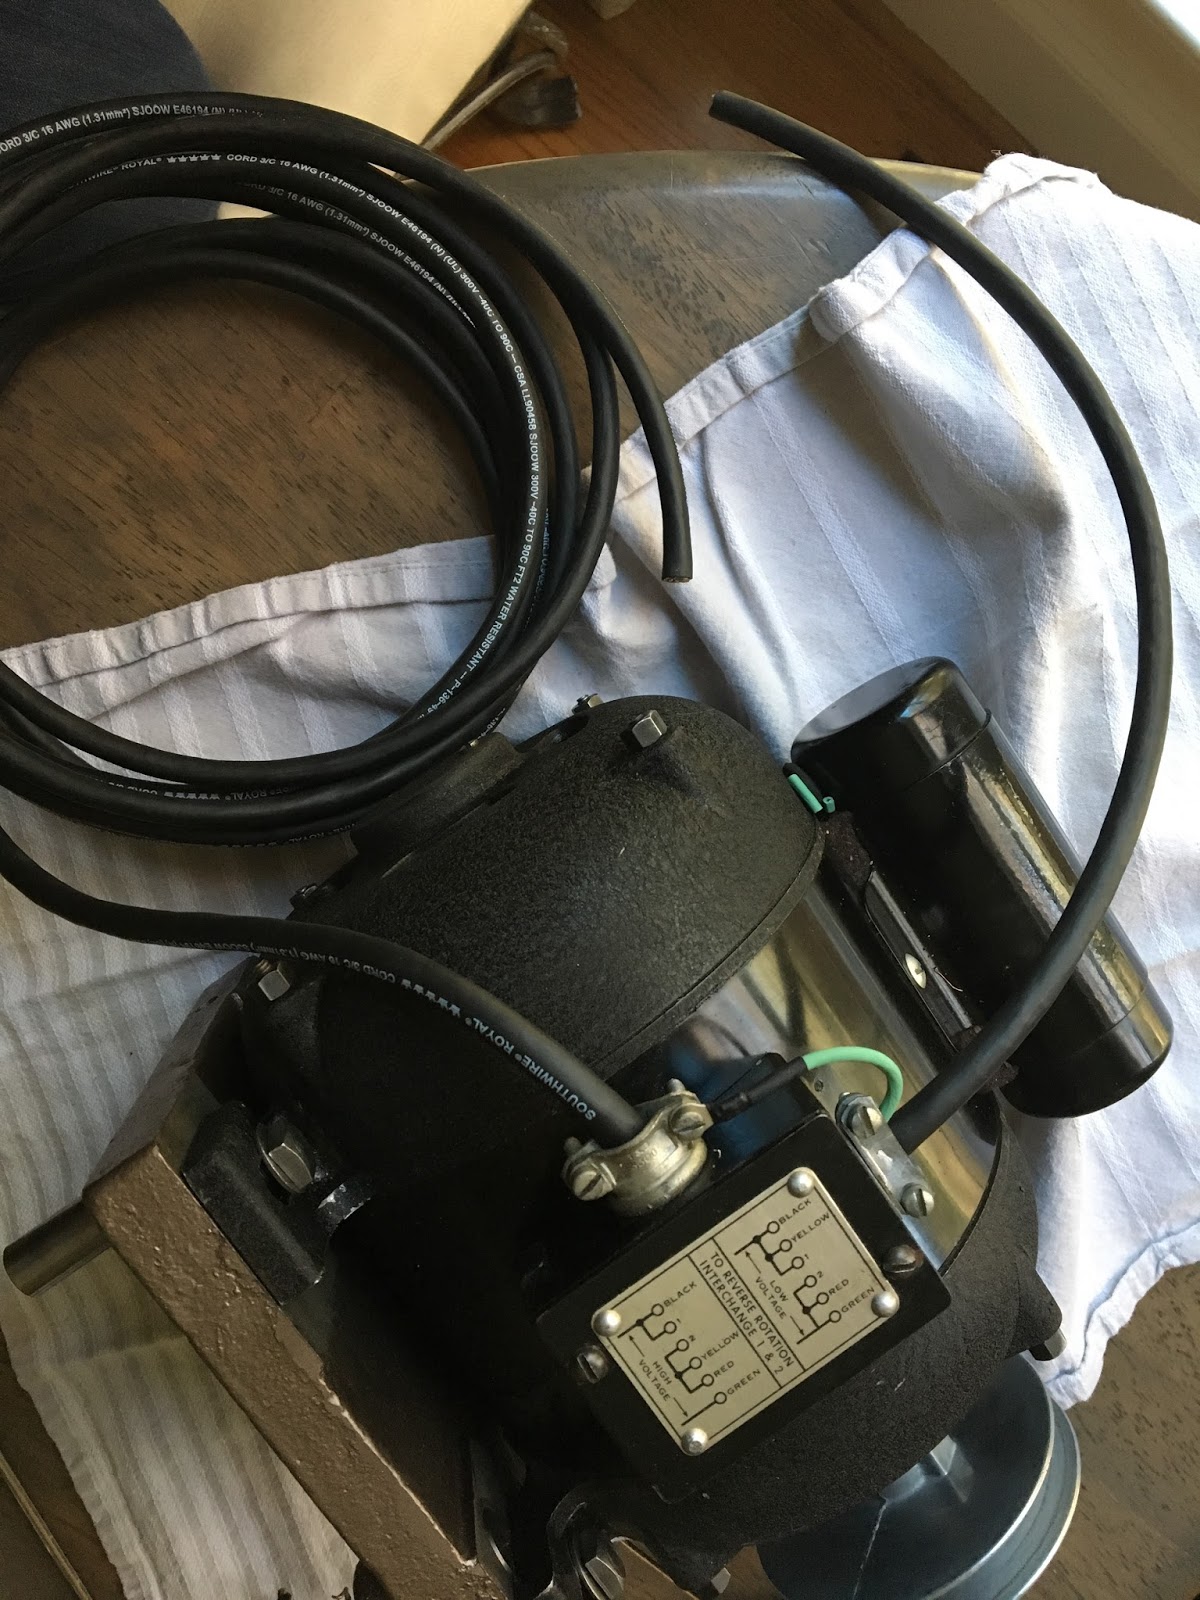
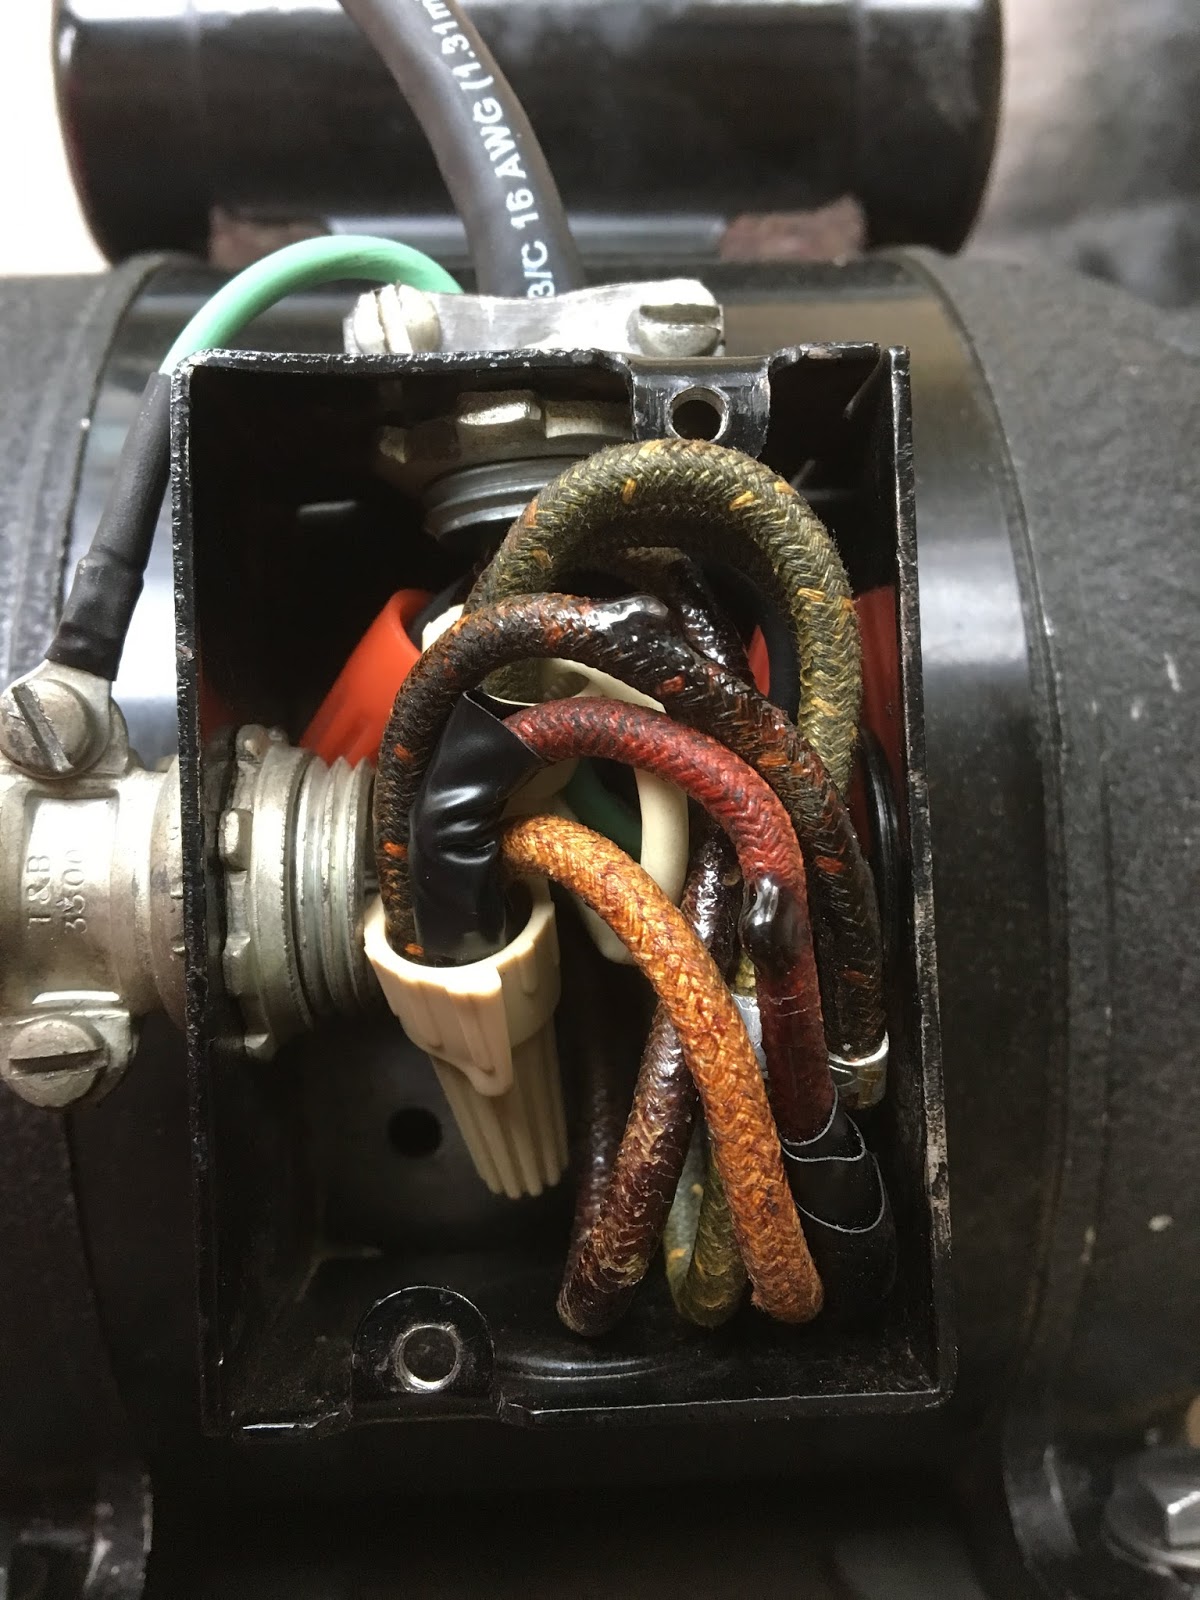
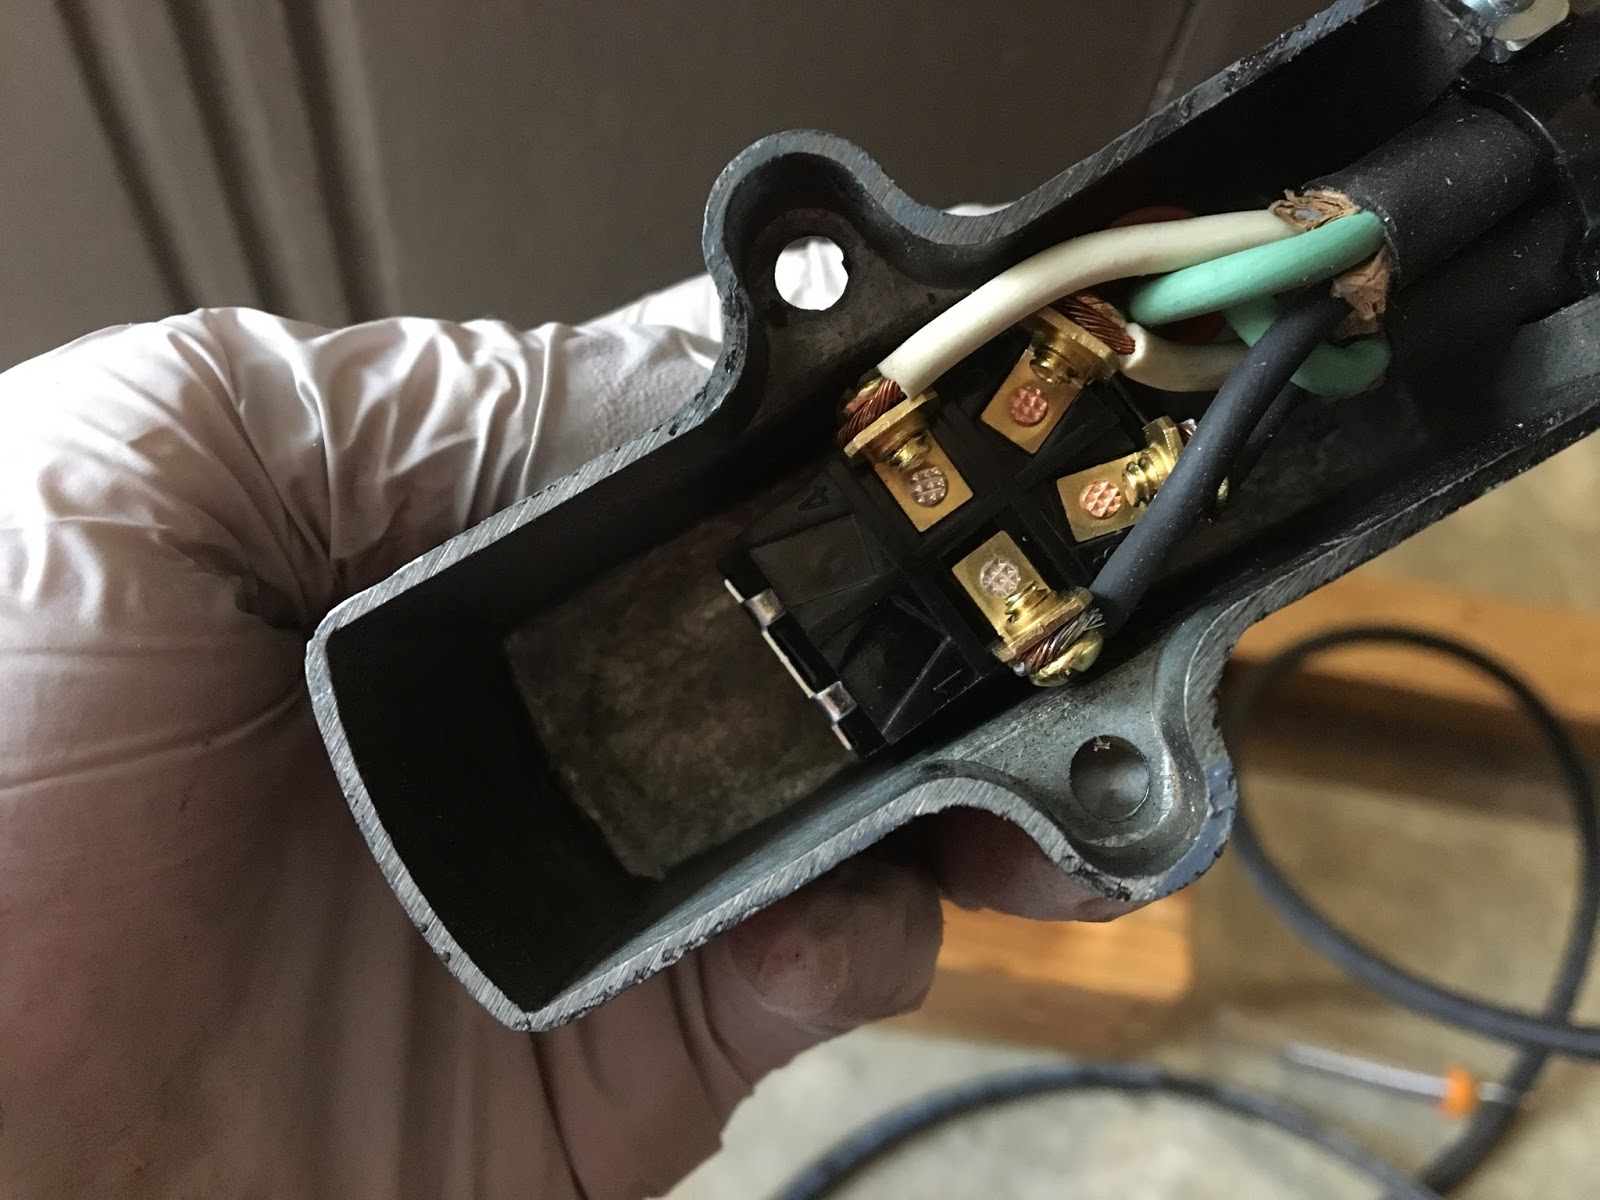
Below are pictures of the switch/motor/wires how they were found originally:
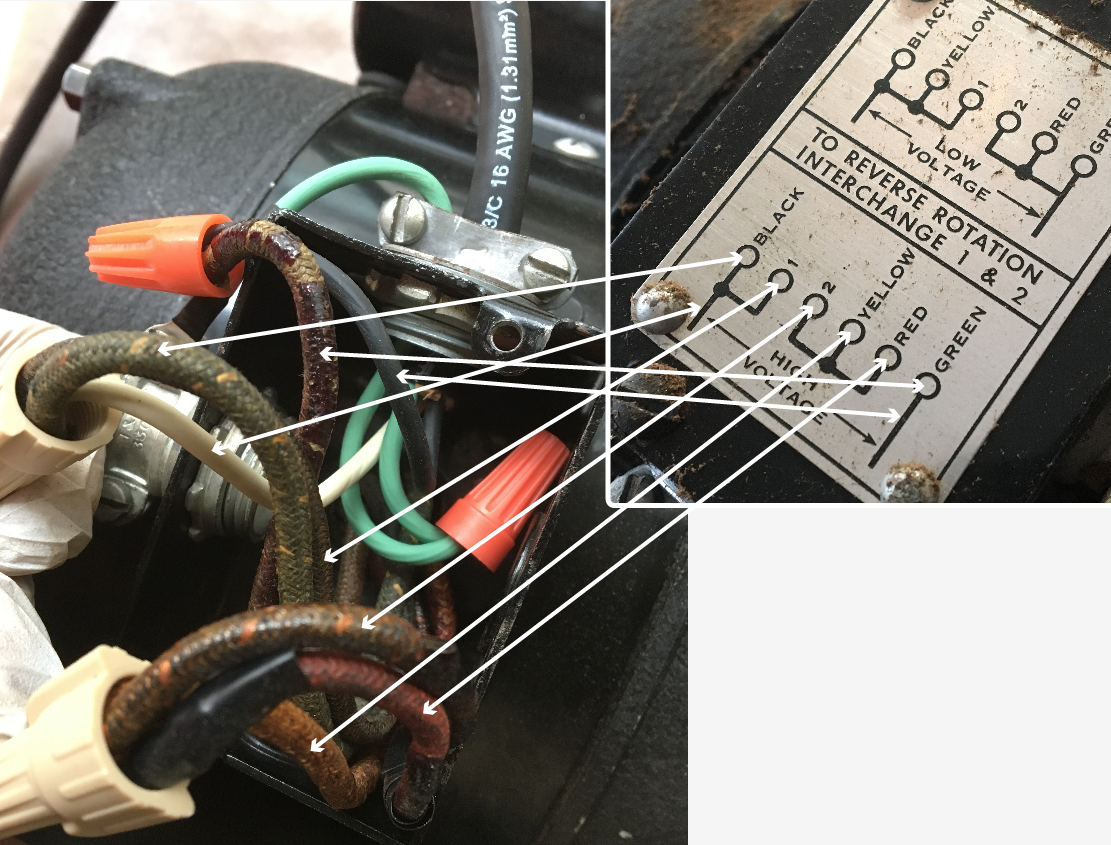
I wasn’t confident switching over to 220v by myself from the wiring guide off the motor. I took it to an Electrical Motor Repair Shop in Durham, NC. He showed me what wires to bundle together and where to attach the ‘switch’ and ‘plug’ wires inside the junction box.
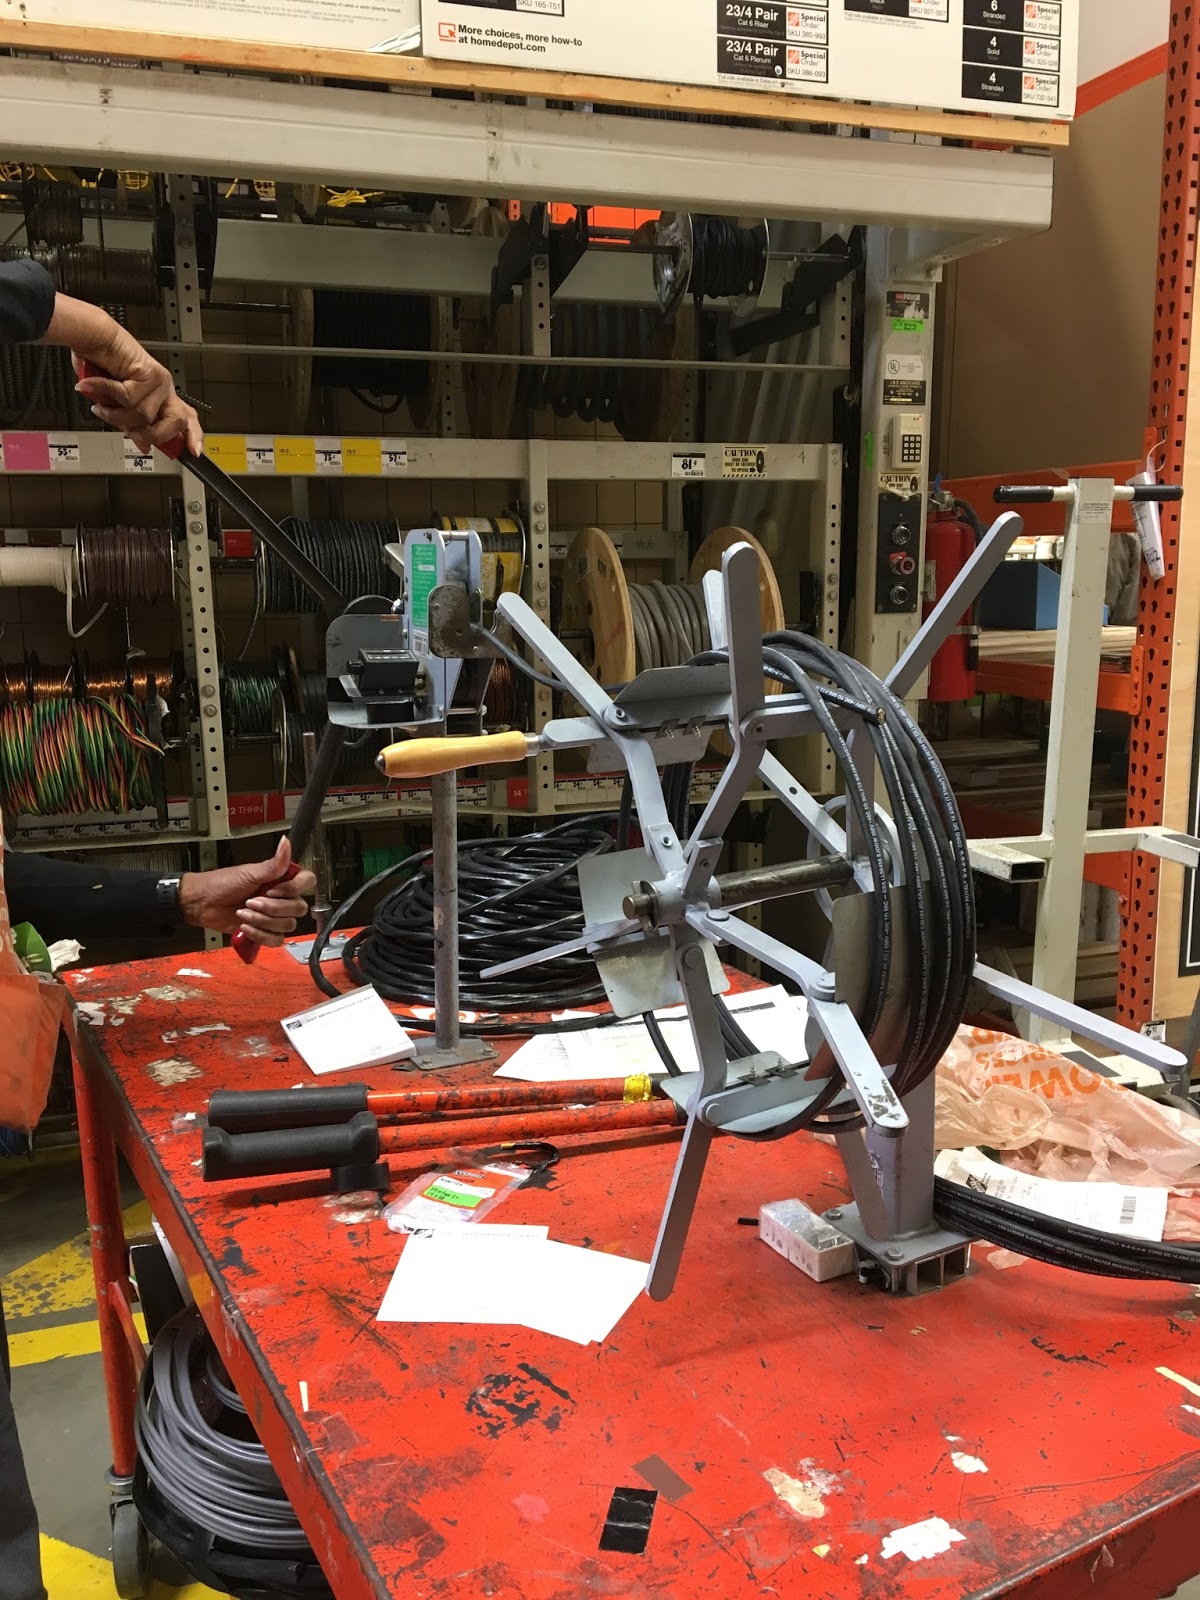
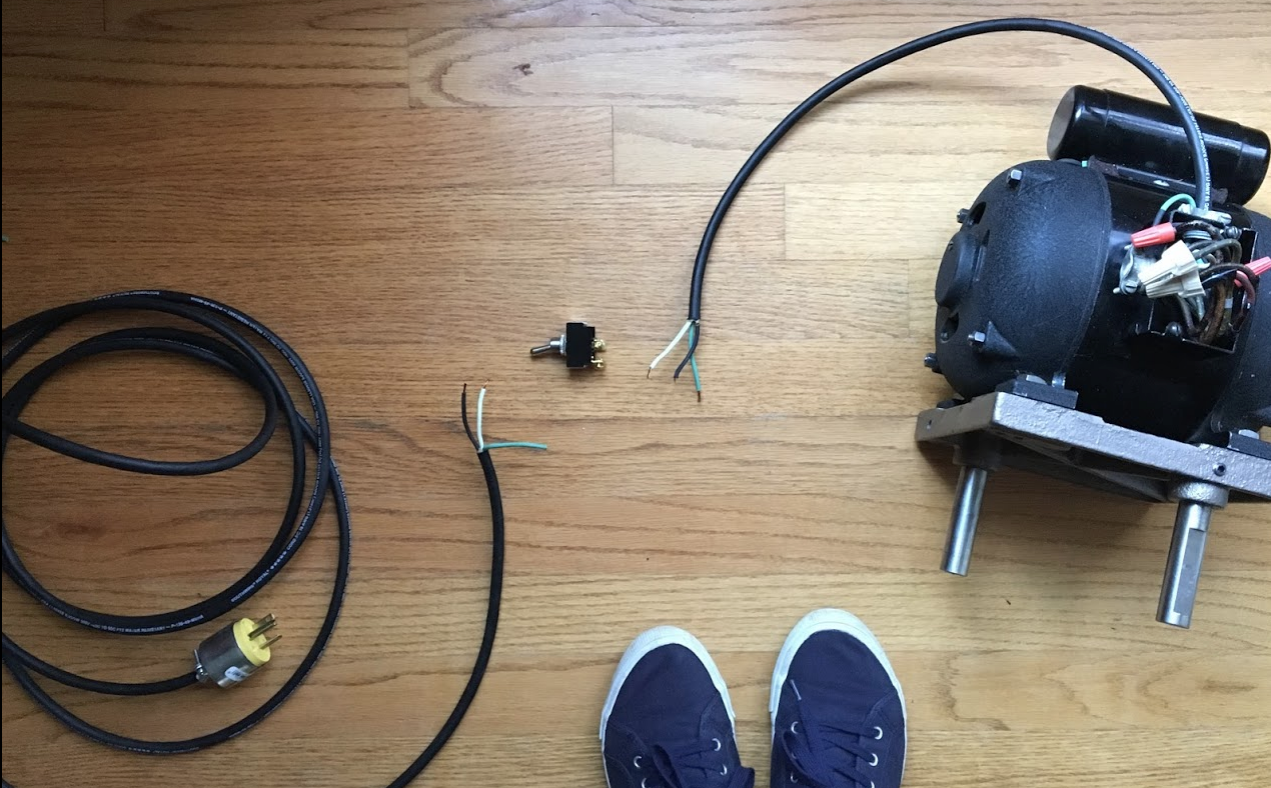
I ran to Home Depot and got myself some 16/3 cord while I had the details fresh in my head. This cord feels so much better than the stiff-pre-packaged kind you can buy. I wanted my cord to be at least 12-feet long from the lathe because I wasn’t sure where I was going to place it in the garage (I only have one outlet). I bought a total of 16-feet to ensure I had enough.
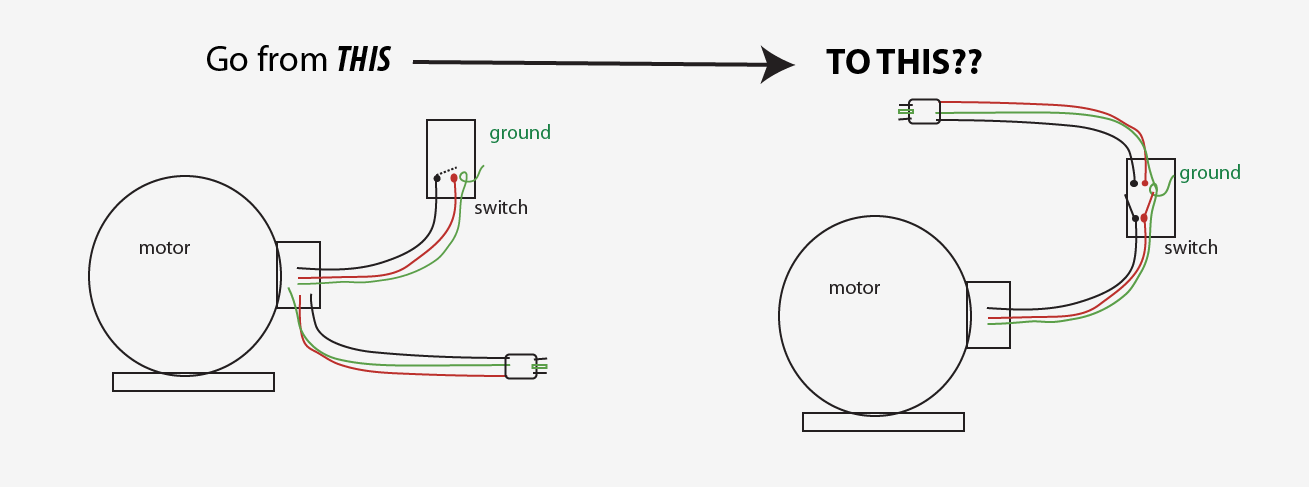
After wiring it I discovered adding the right switch wasn’t going to work with these cord configurations. With this set-up I only had one cord leading up to the switch with 2 total hots and 1 ground (the long cord is the plug end).
After reading forums, asking questions to repairs shops and switch companies, making phone calls, etc… I felt good that taking the ‘plug’ cord out of the junction box would give me the solution I needed. Such a simple fix to such a simple problem – but I really am such a newbie to this!
Once the ‘plug’ cord was out of the junction box, this is what the wiring looked like when I was done.*
*DISCLAIMER: Don’t take my word for it. Every motor is different. Do your own research and hire an electrician if necessary.
This will be the end result – switch between the motor and plug.
The cords fit nicely right back into the box and screwed the ground to the outside of the box.
It’s ready to be bolted to the lathe!
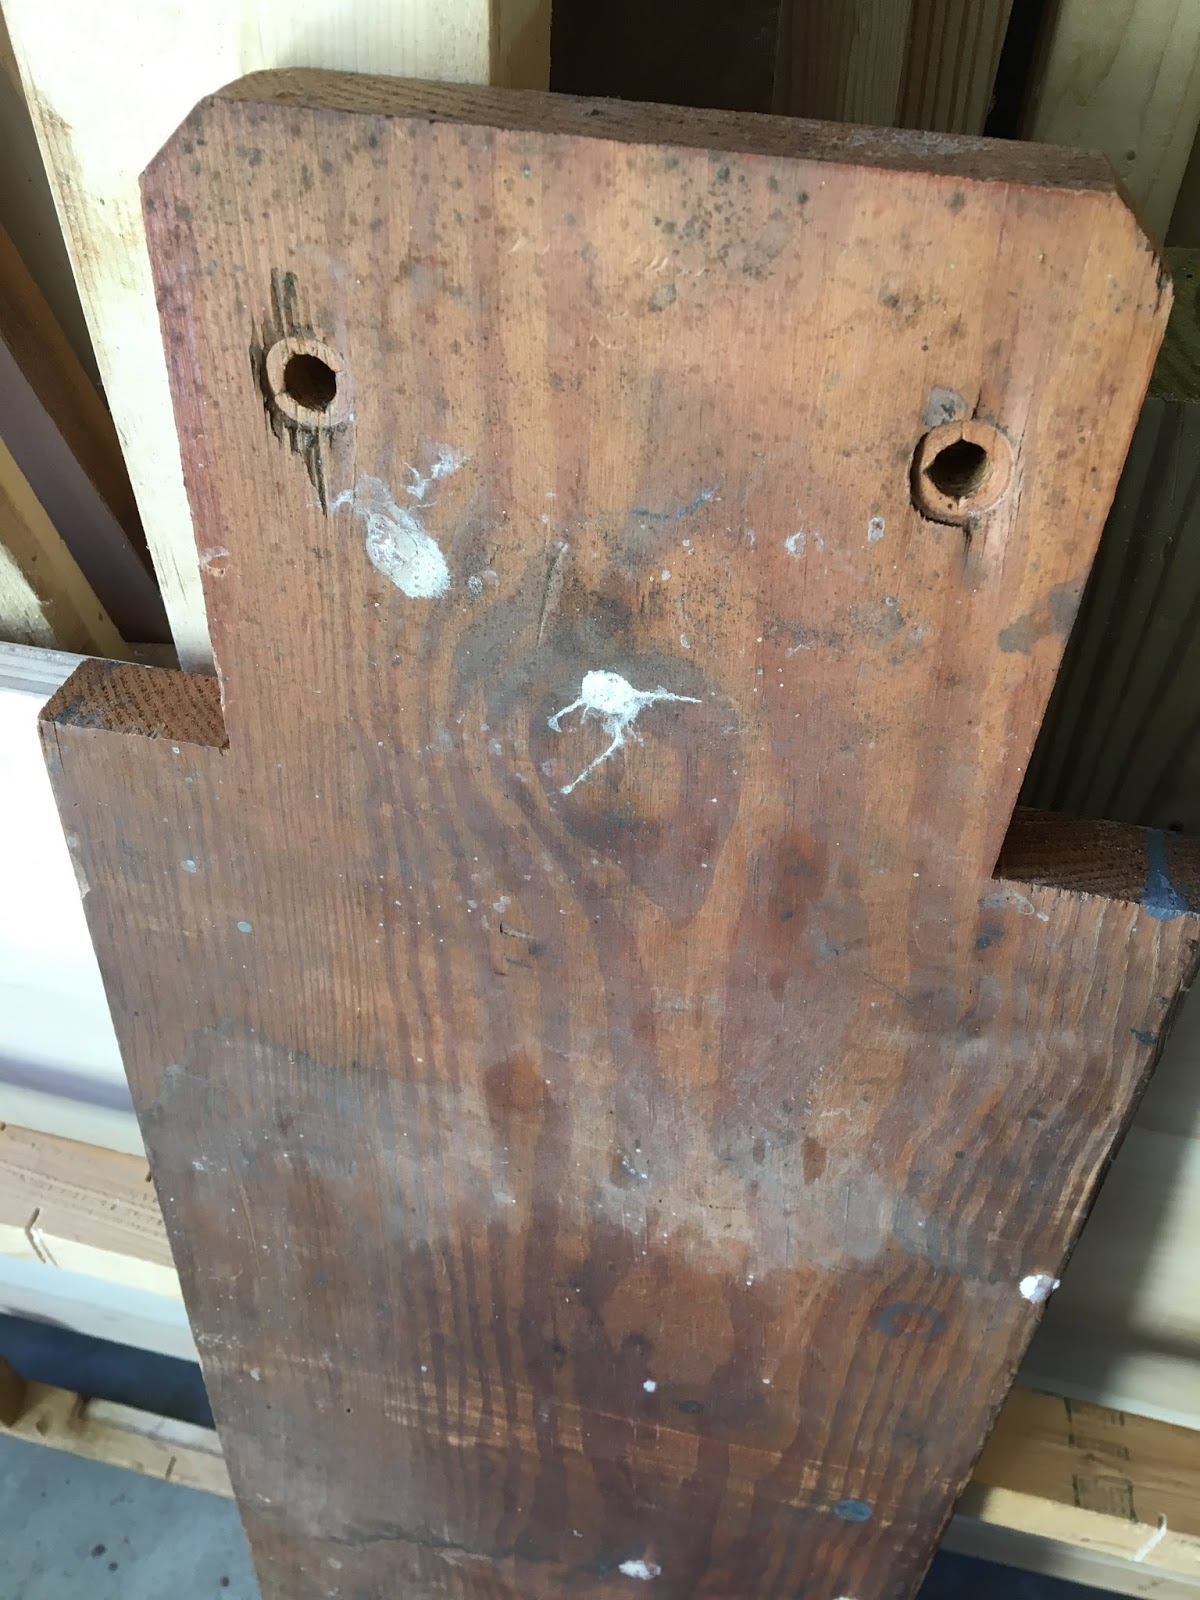
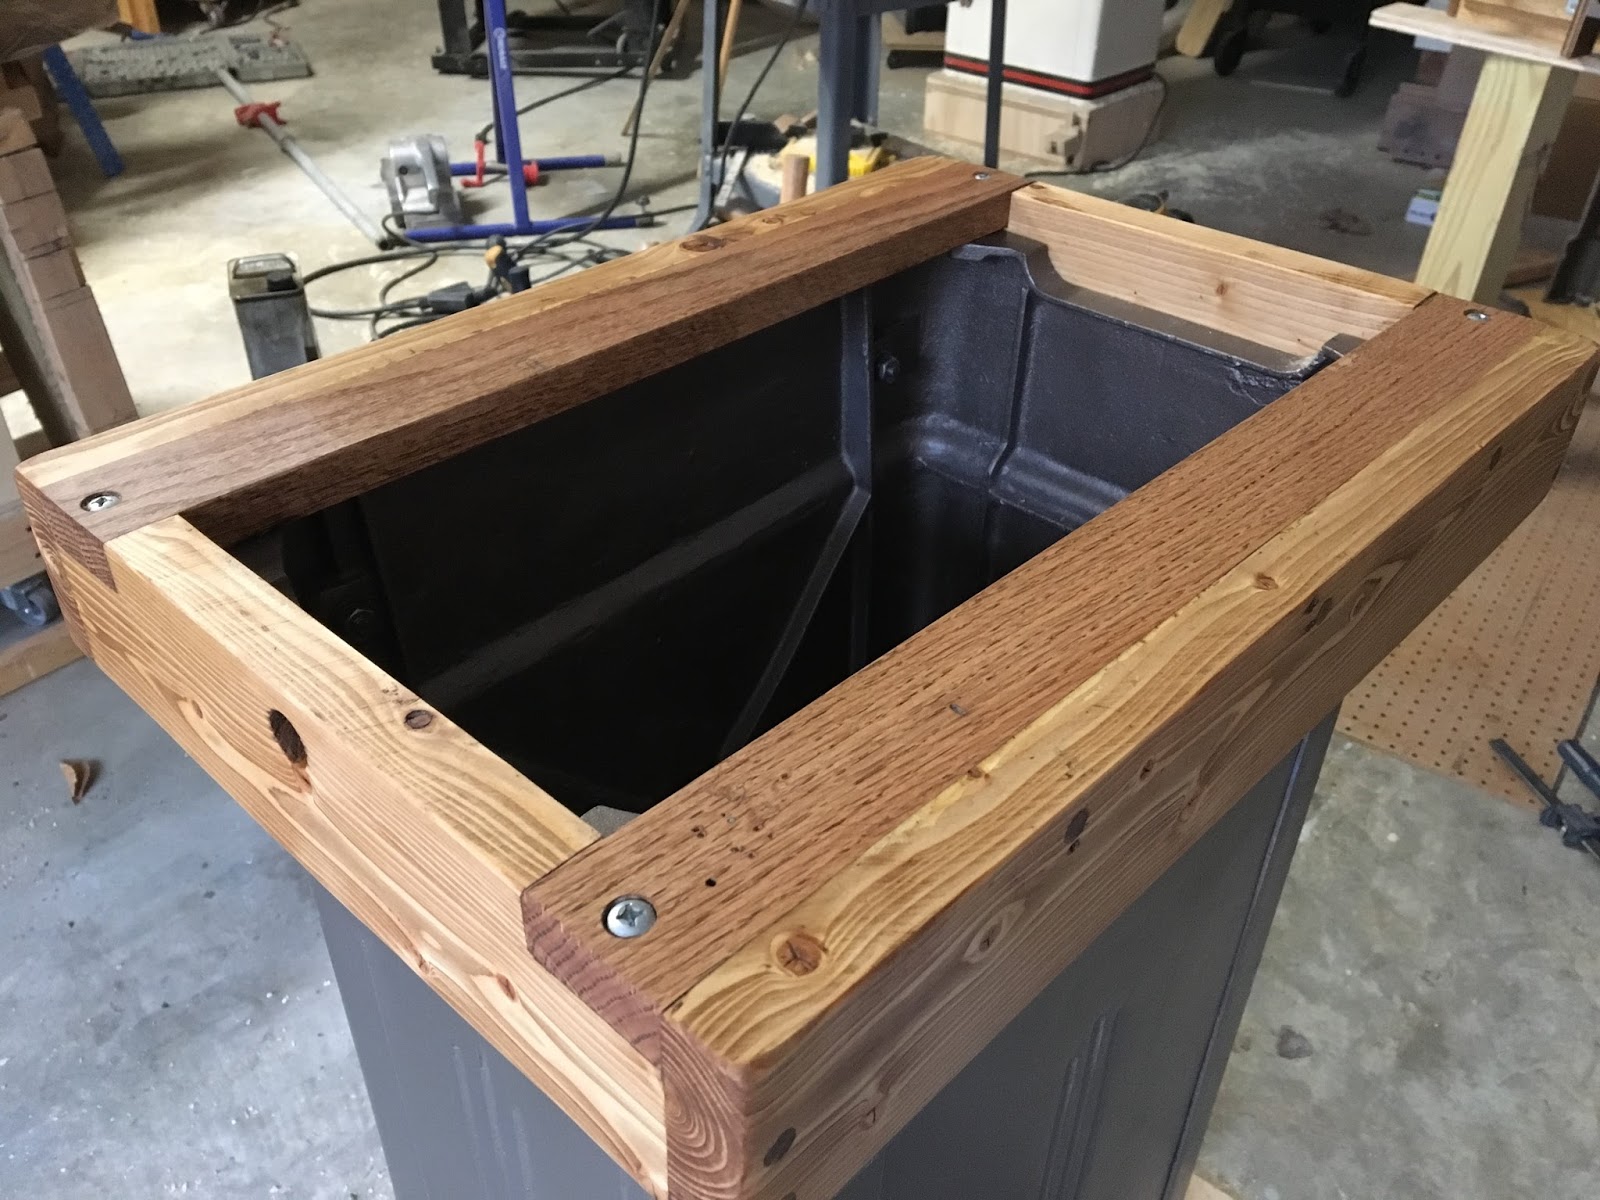
Before I could assemble the lathe I had some woodworking to do. The shelf went through the planer and jointer to clean up…
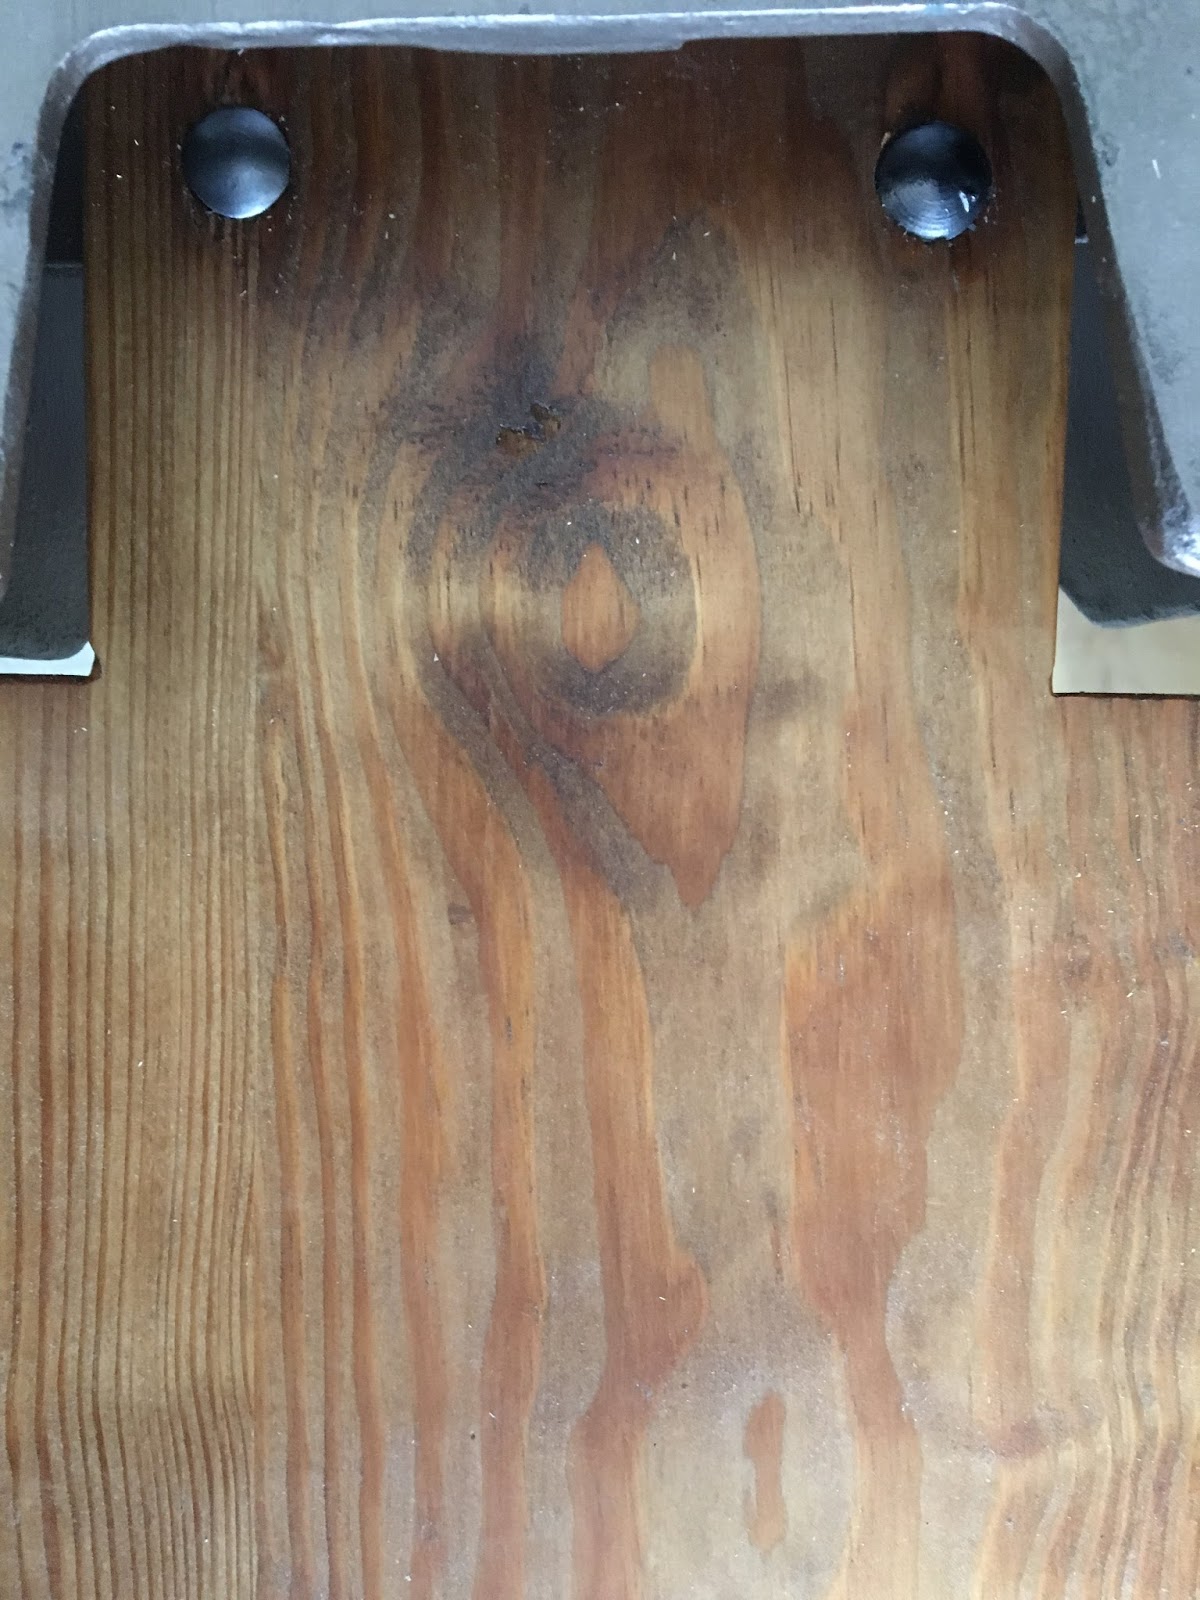
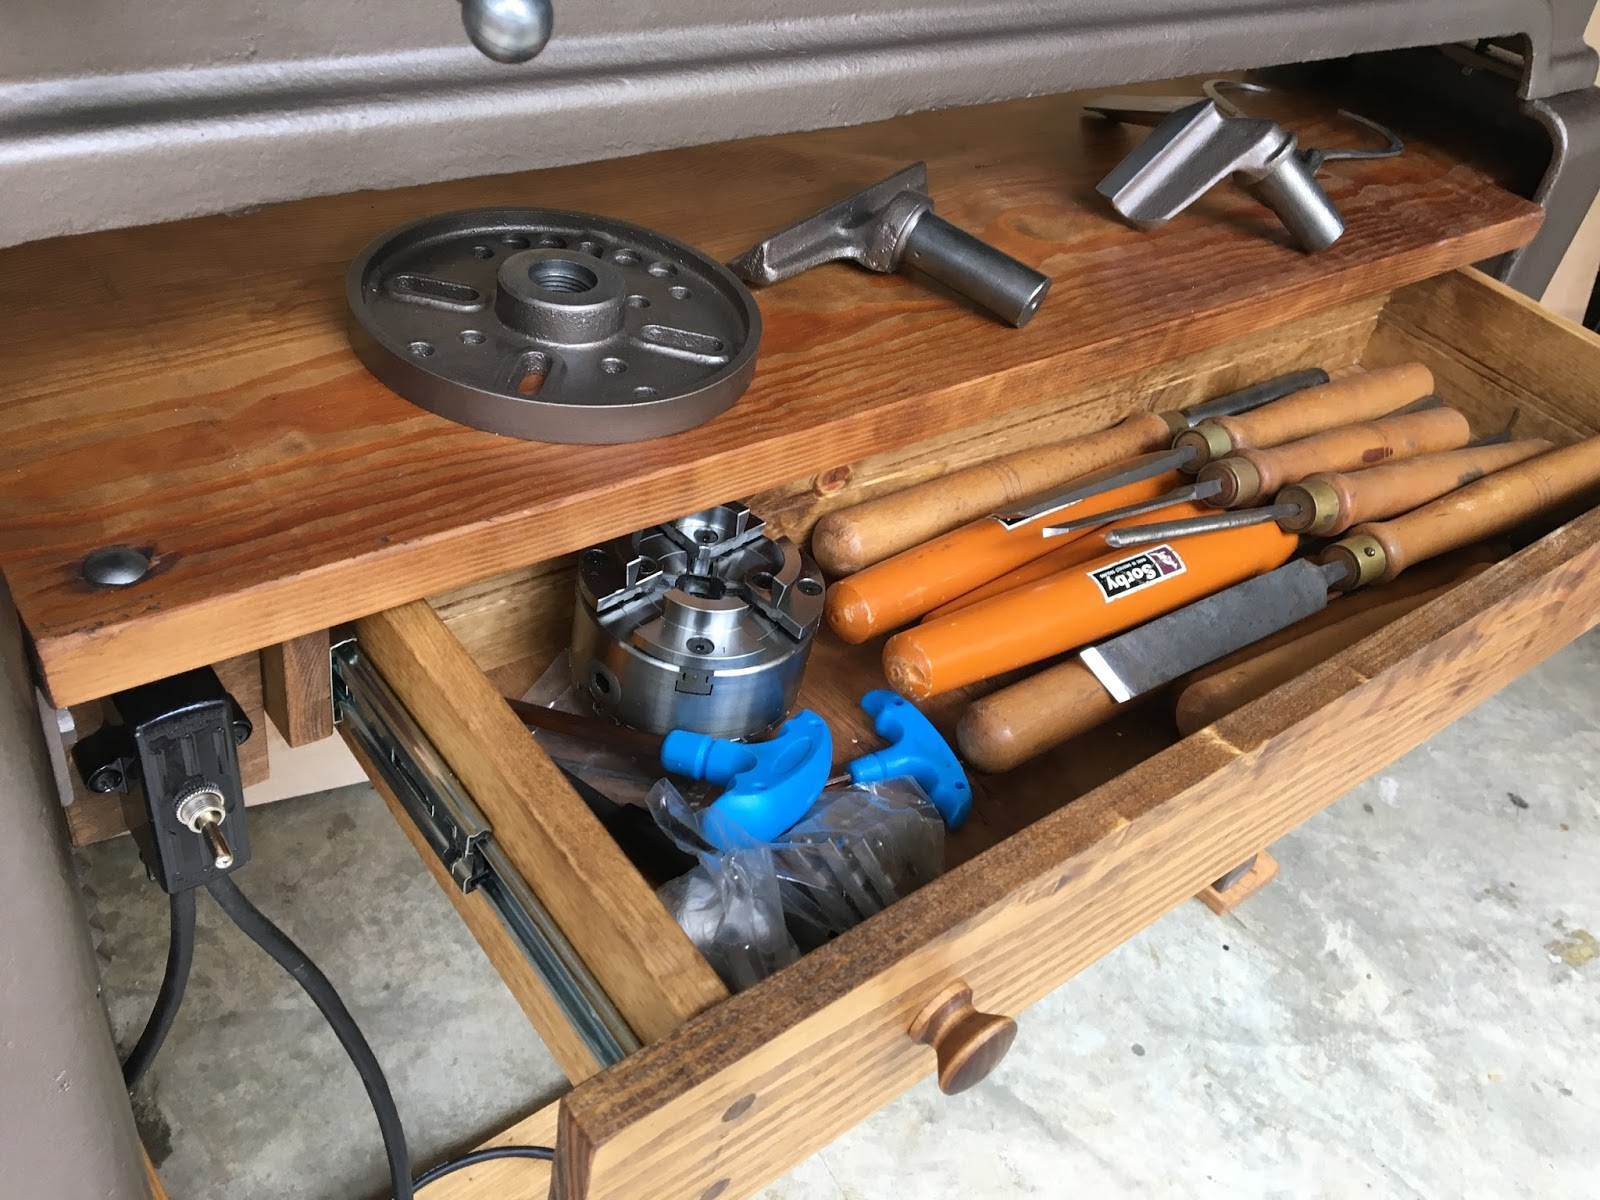
…and got a new coat of oil and wax. I built a drawer underneath.
Ideally the lathe would have casters but I figured it wasn’t going to be moving much around the garage. I decided a wooden base would help it slide along the floor easier while protecting the metal casting. I also wanted to add extra width to the lathe (I worried if something big fell against it that it would tip over since it was top-heavy). The lathe was also lower then I felt was right so the oak stretchers along the bottom add 3/4″ to the height.
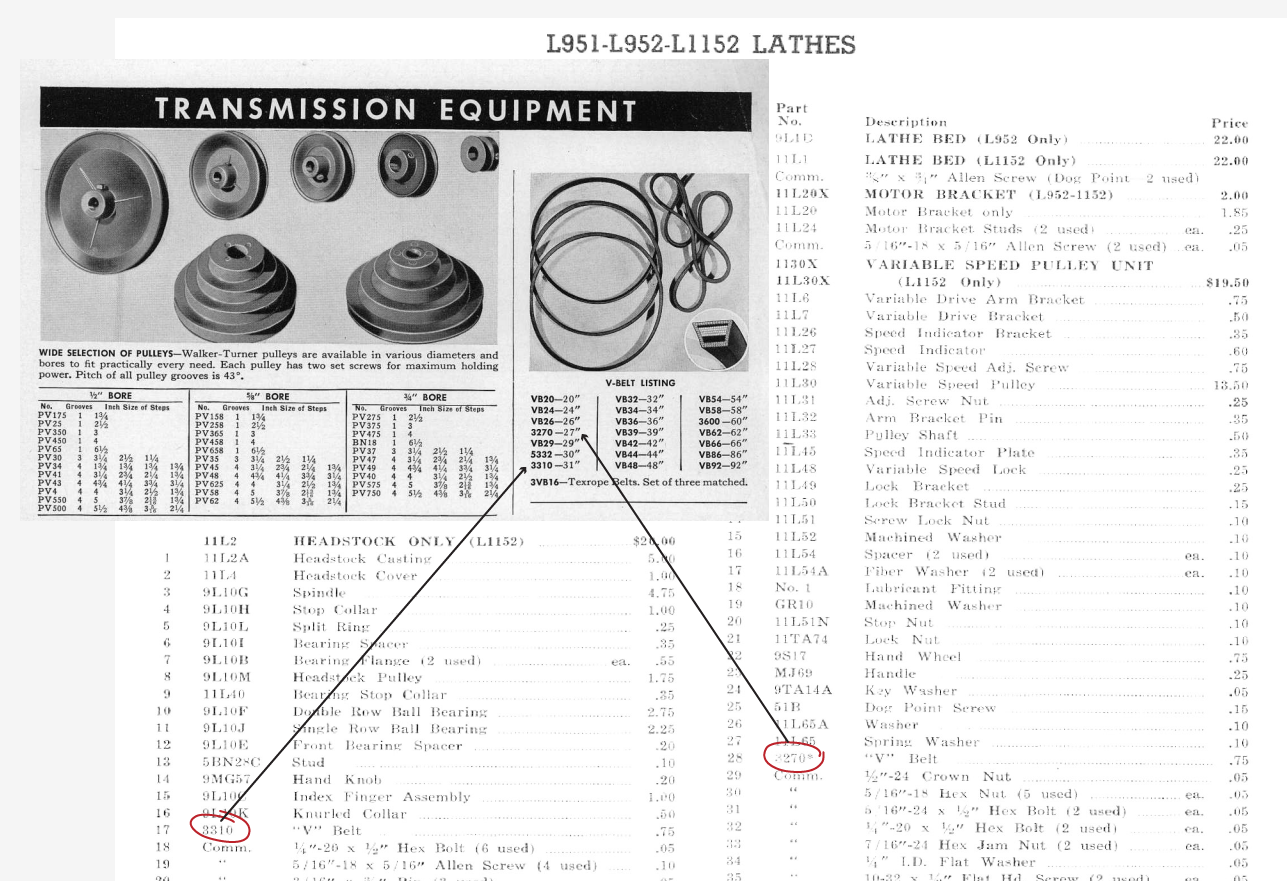
I fretted over what type of belts to get (adjustable, cogged, etc) and also wondered if the belt lengths that came on the lathe were original or not. Turns out the motor to reeve’s drive belt is 27″ and the reeve’s drive to spindle is 31″. I ordered cogged belts because they were really flexible for going around the small diameter on the reeve’s drive.
Now on to assembling!
Putting the reeve’s drive back together had it’s moments of struggle but not any harder than I expected.
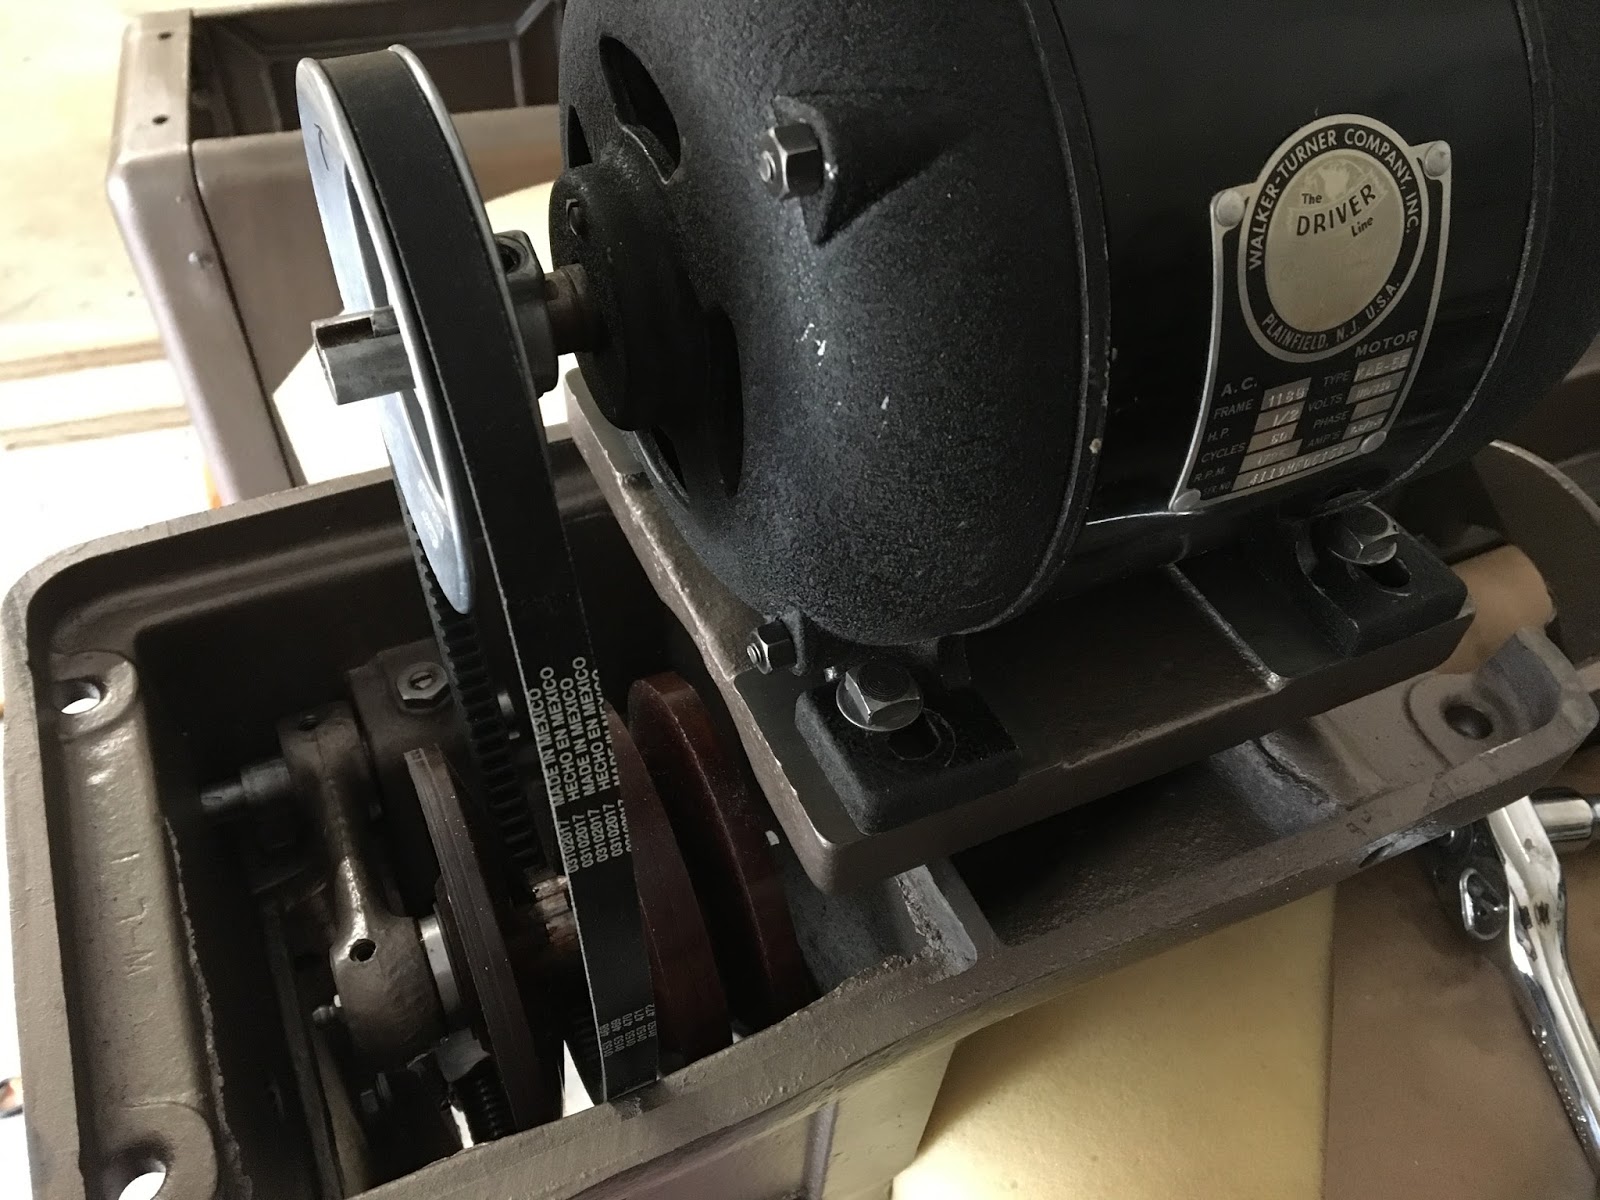
Motor is bolted down. I screwed the set screws on motor bracket tight at it’s shortest distance to the reeve’s drive and once the whole lathe is put together the set screws can be loosened to let motor settle into it’s natural resting position, effectively tightening the v-belt.
Before assembling I ensured the motor was rotating the correct direction. Set lathe onto cabinet and bolted down.
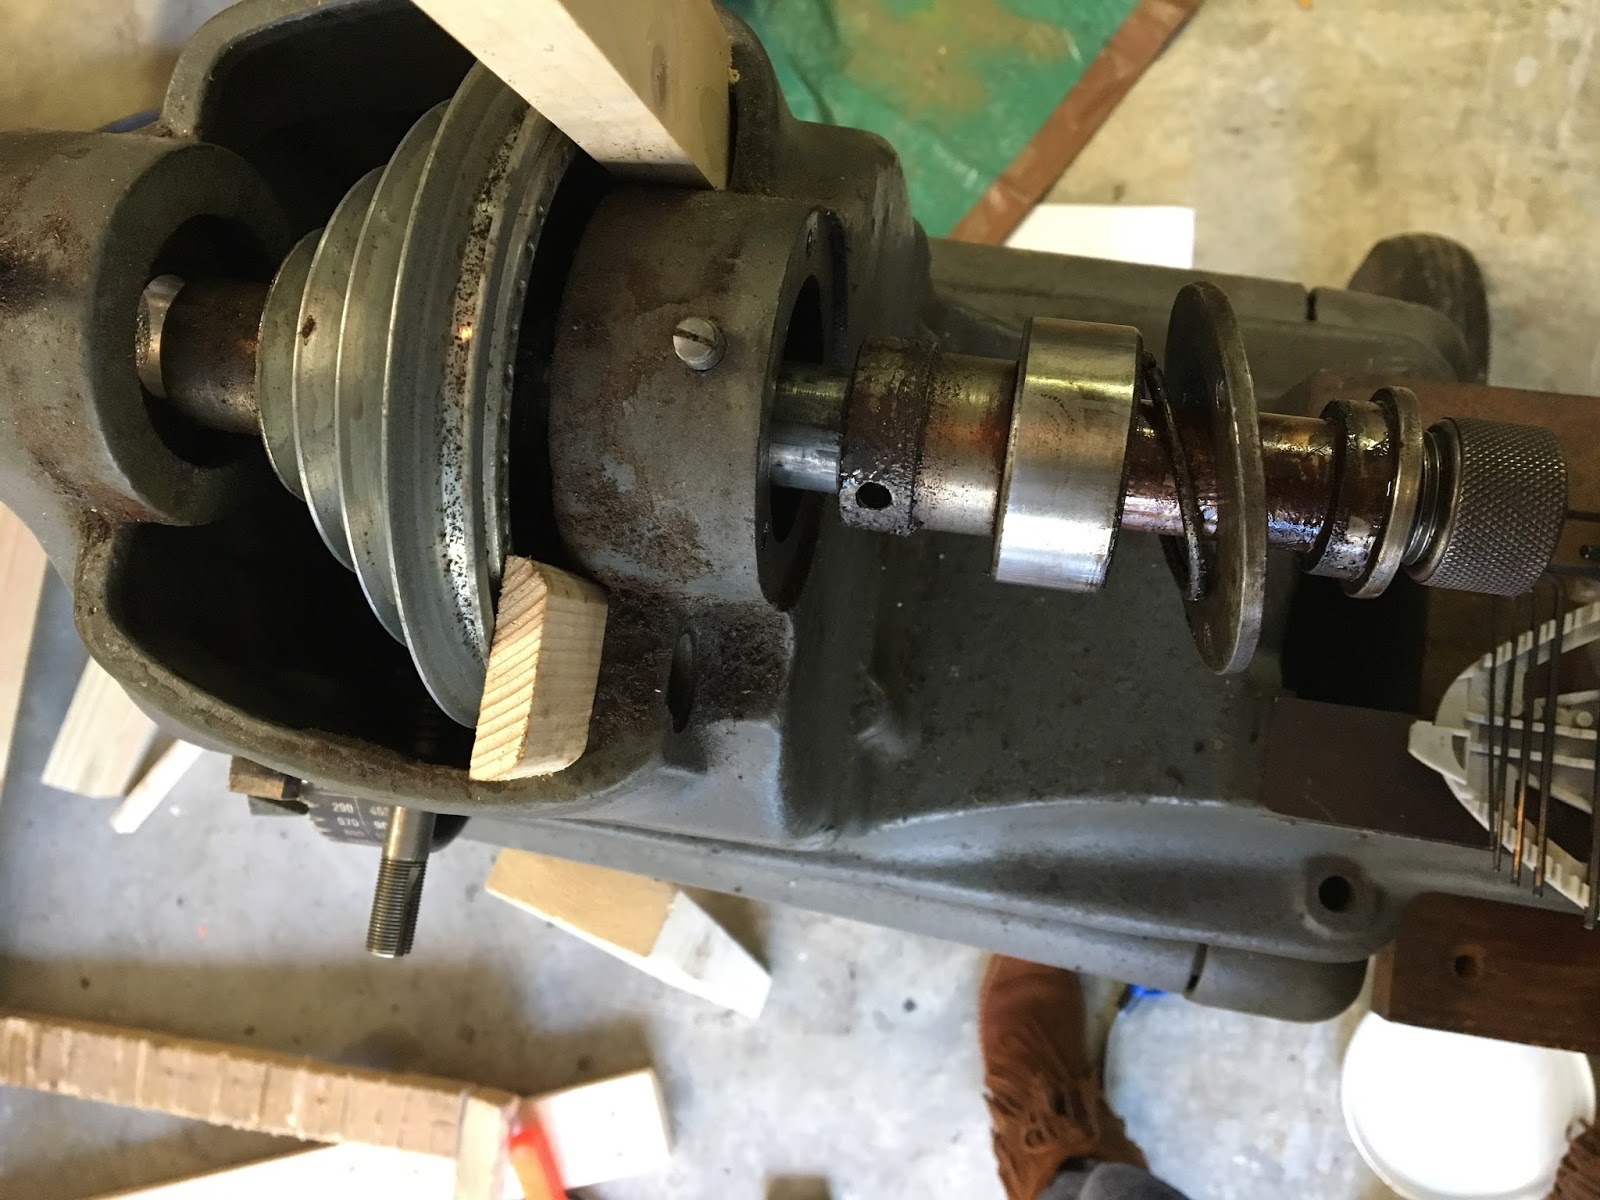
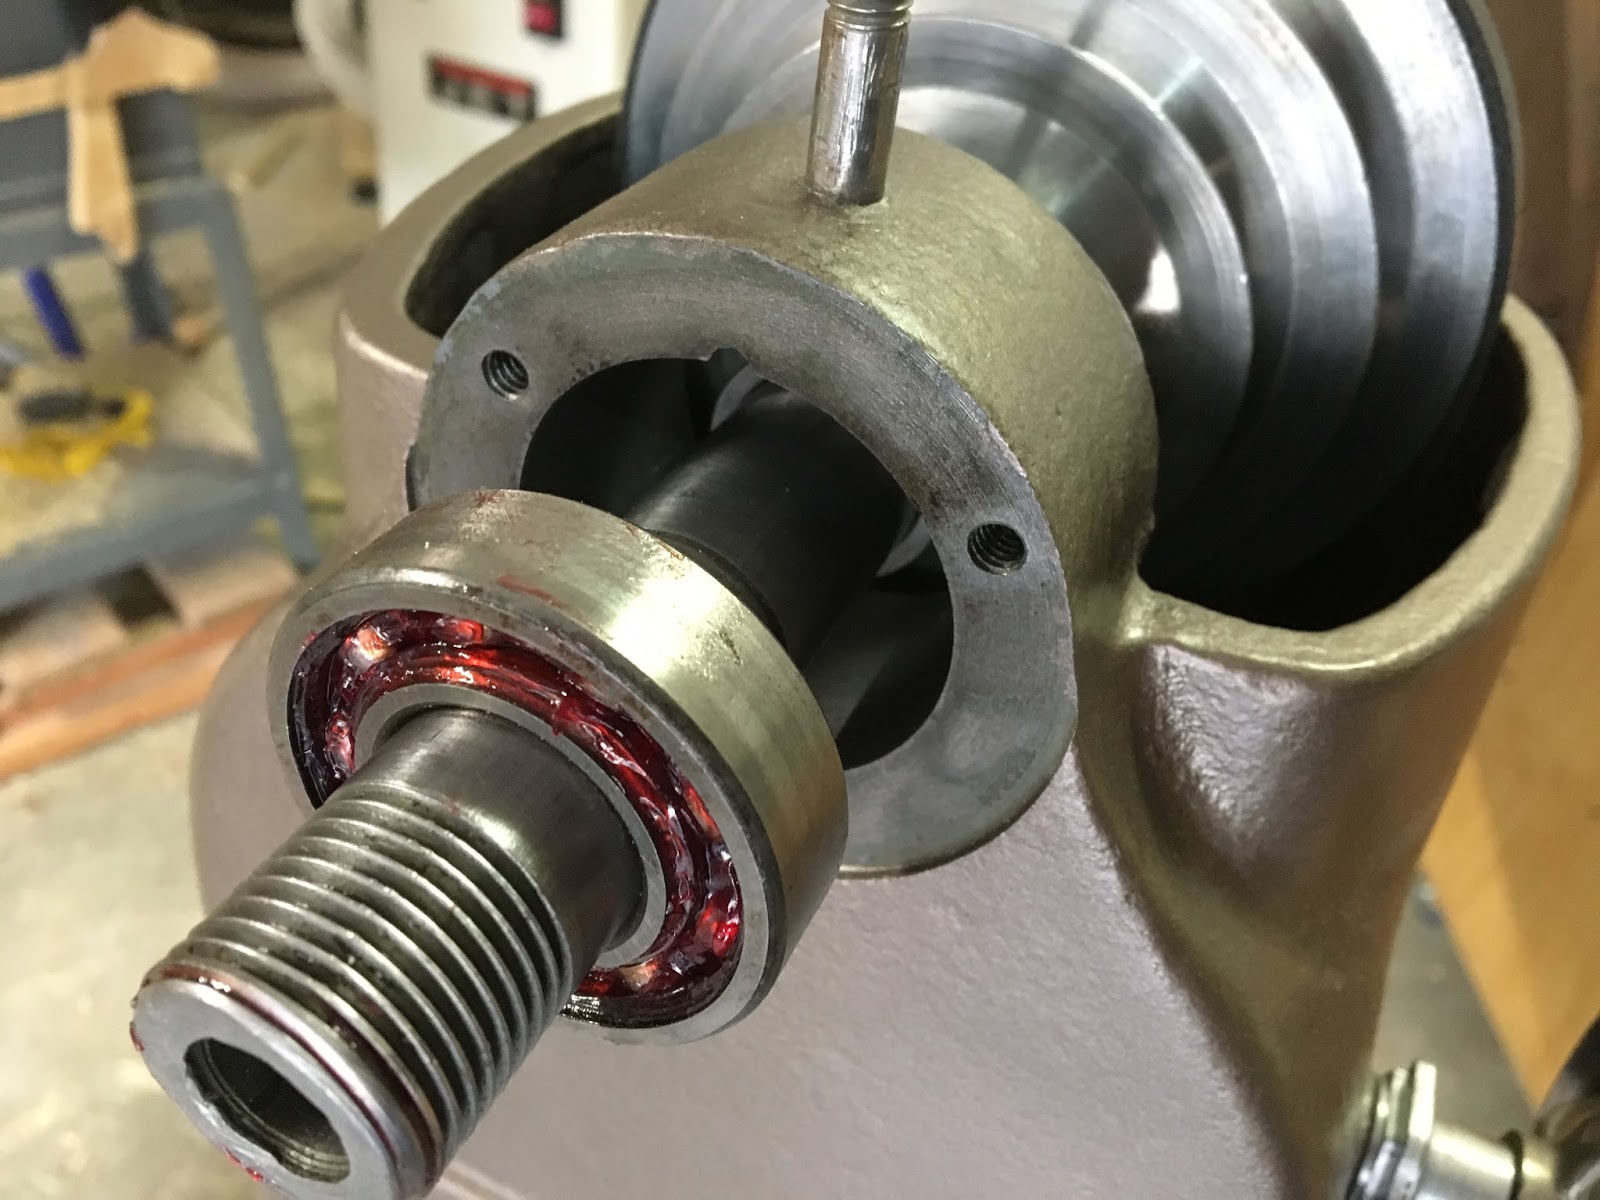
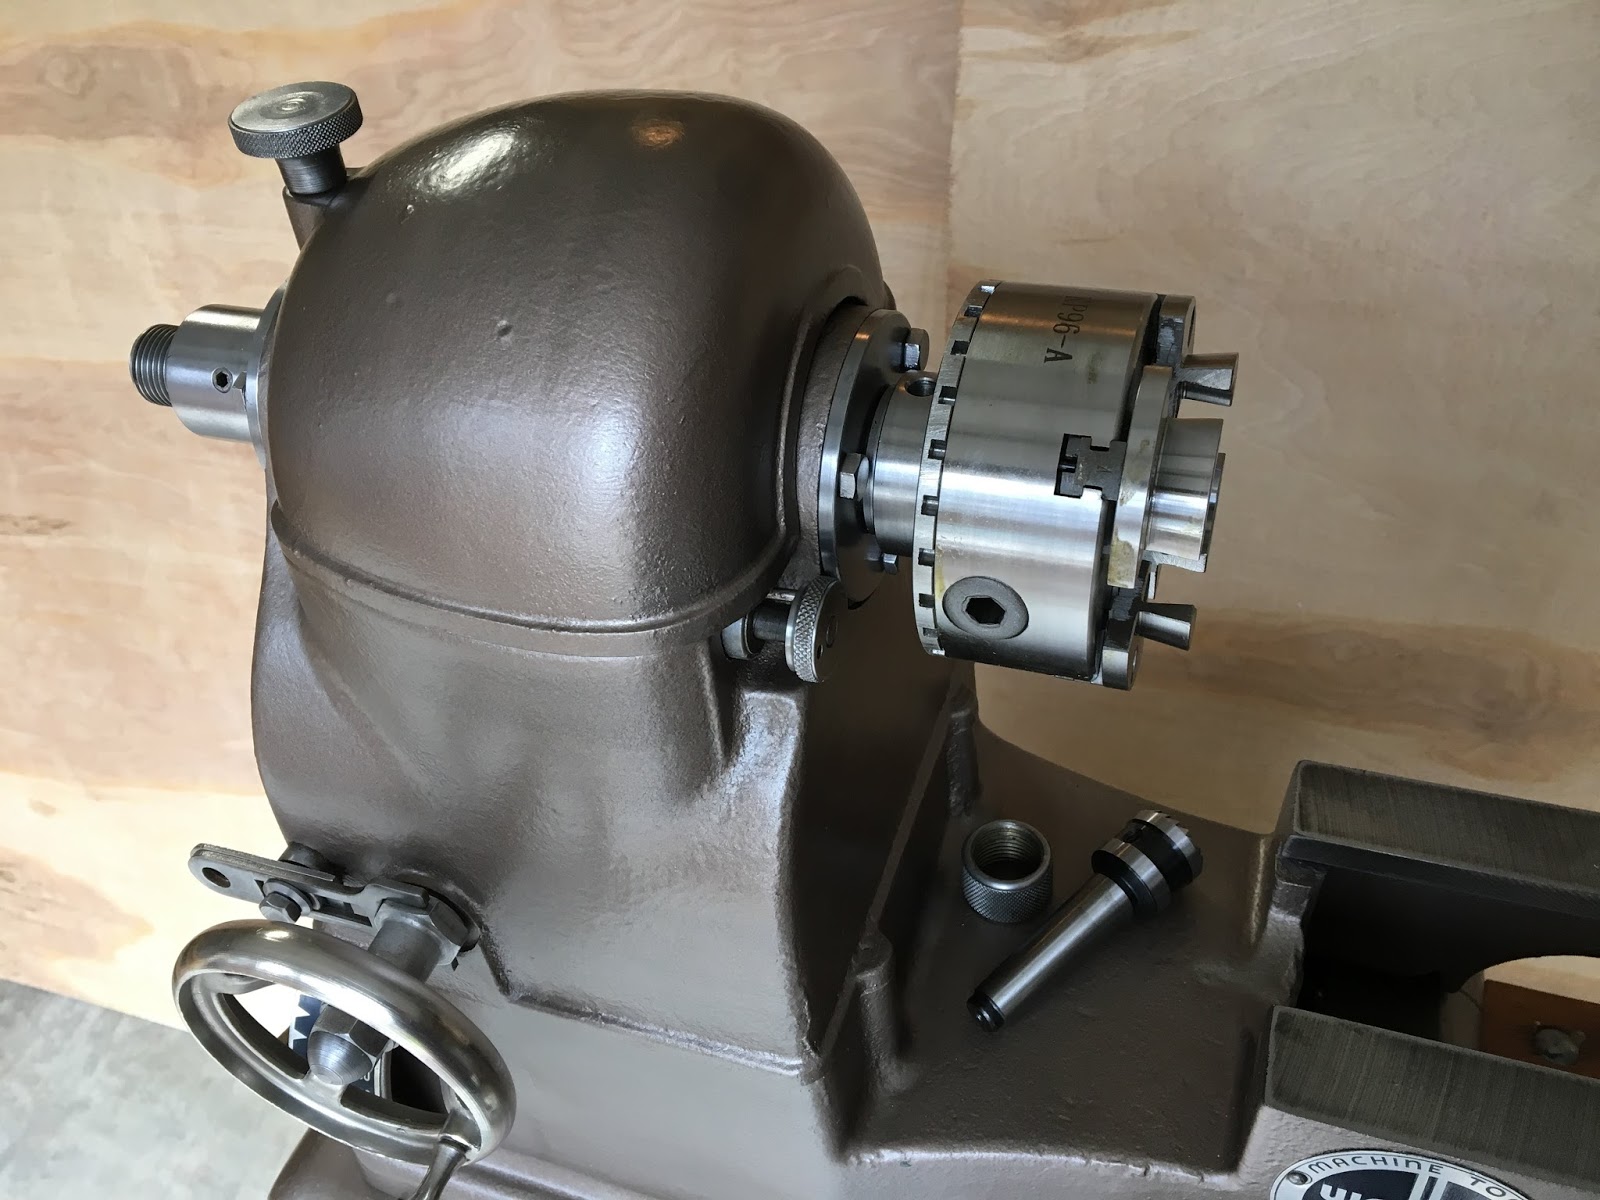
Assembling the headstock was a breeze compared to taking it apart (thankfully). Remember to place your 2nd belt on the reeve’s drive before you do anything. Have your belt going over pulley as you put the spindle through.
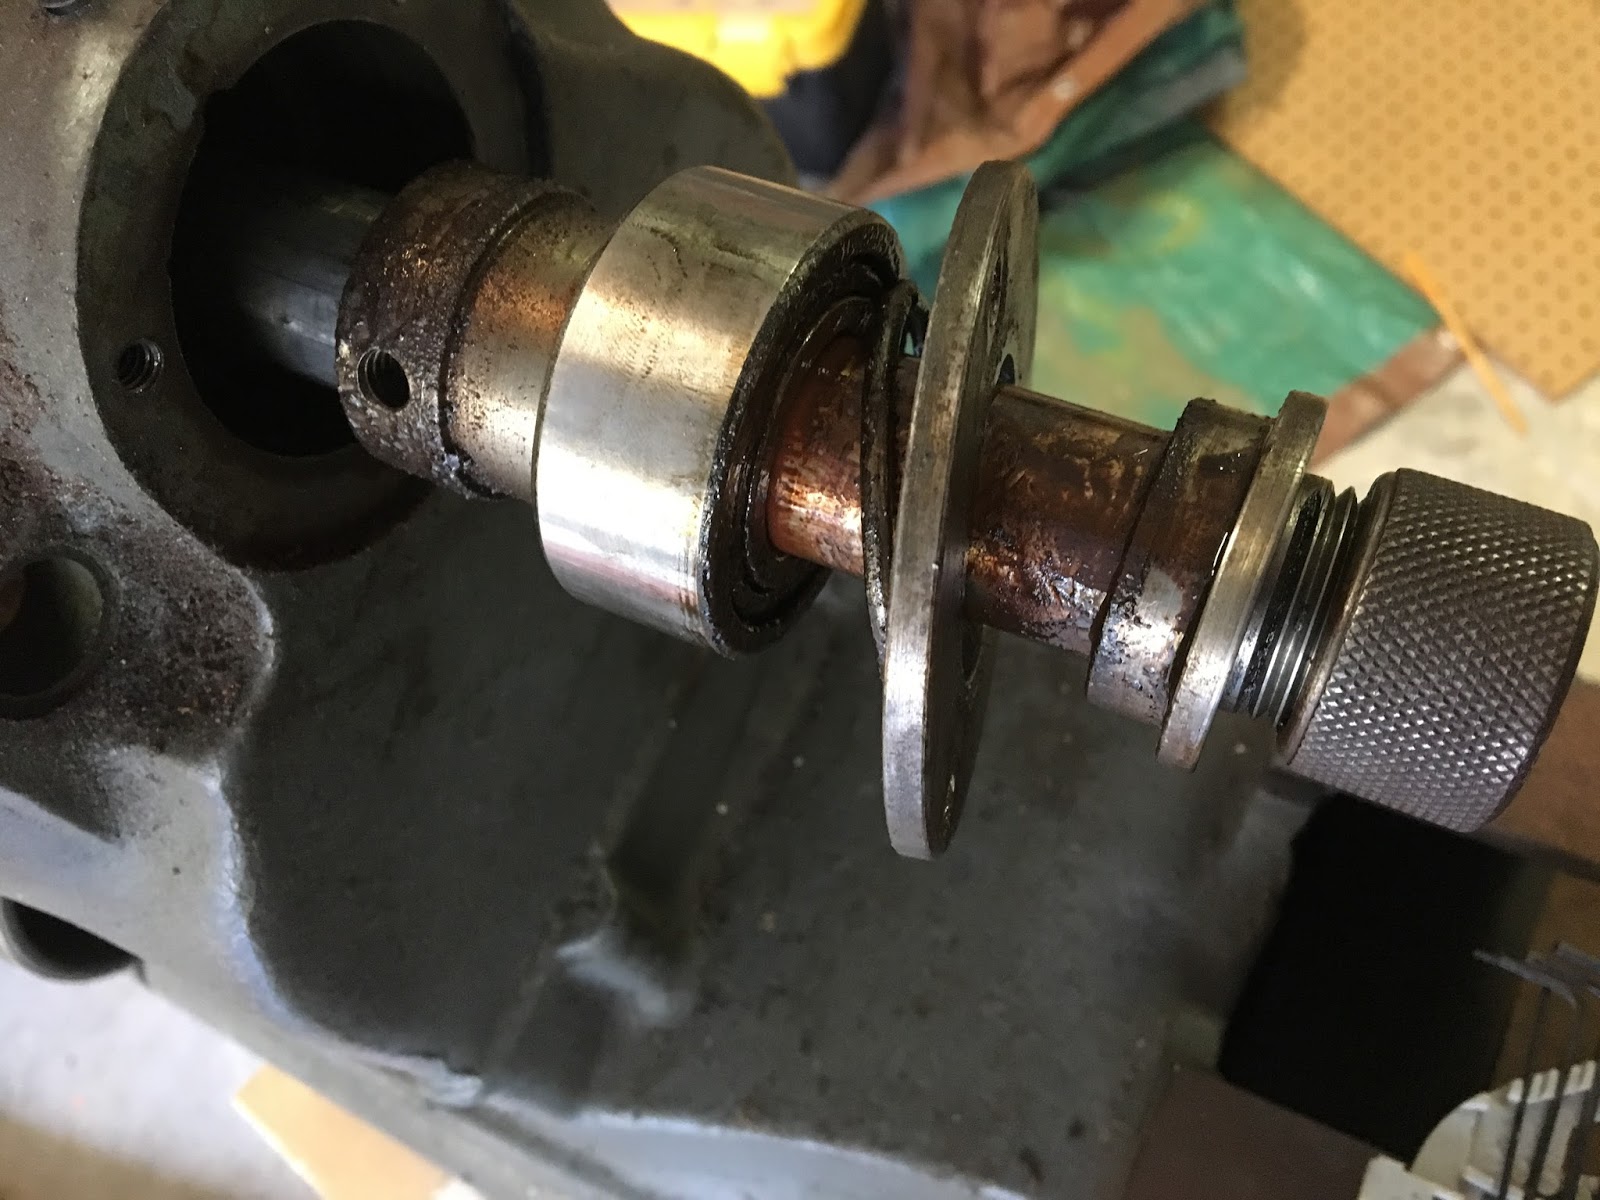
The double-row bearing seated easily inside and all that was required was a light tap with a mallet to get everything together. TIP: use wooden shims behind pulley to protect from marking up.
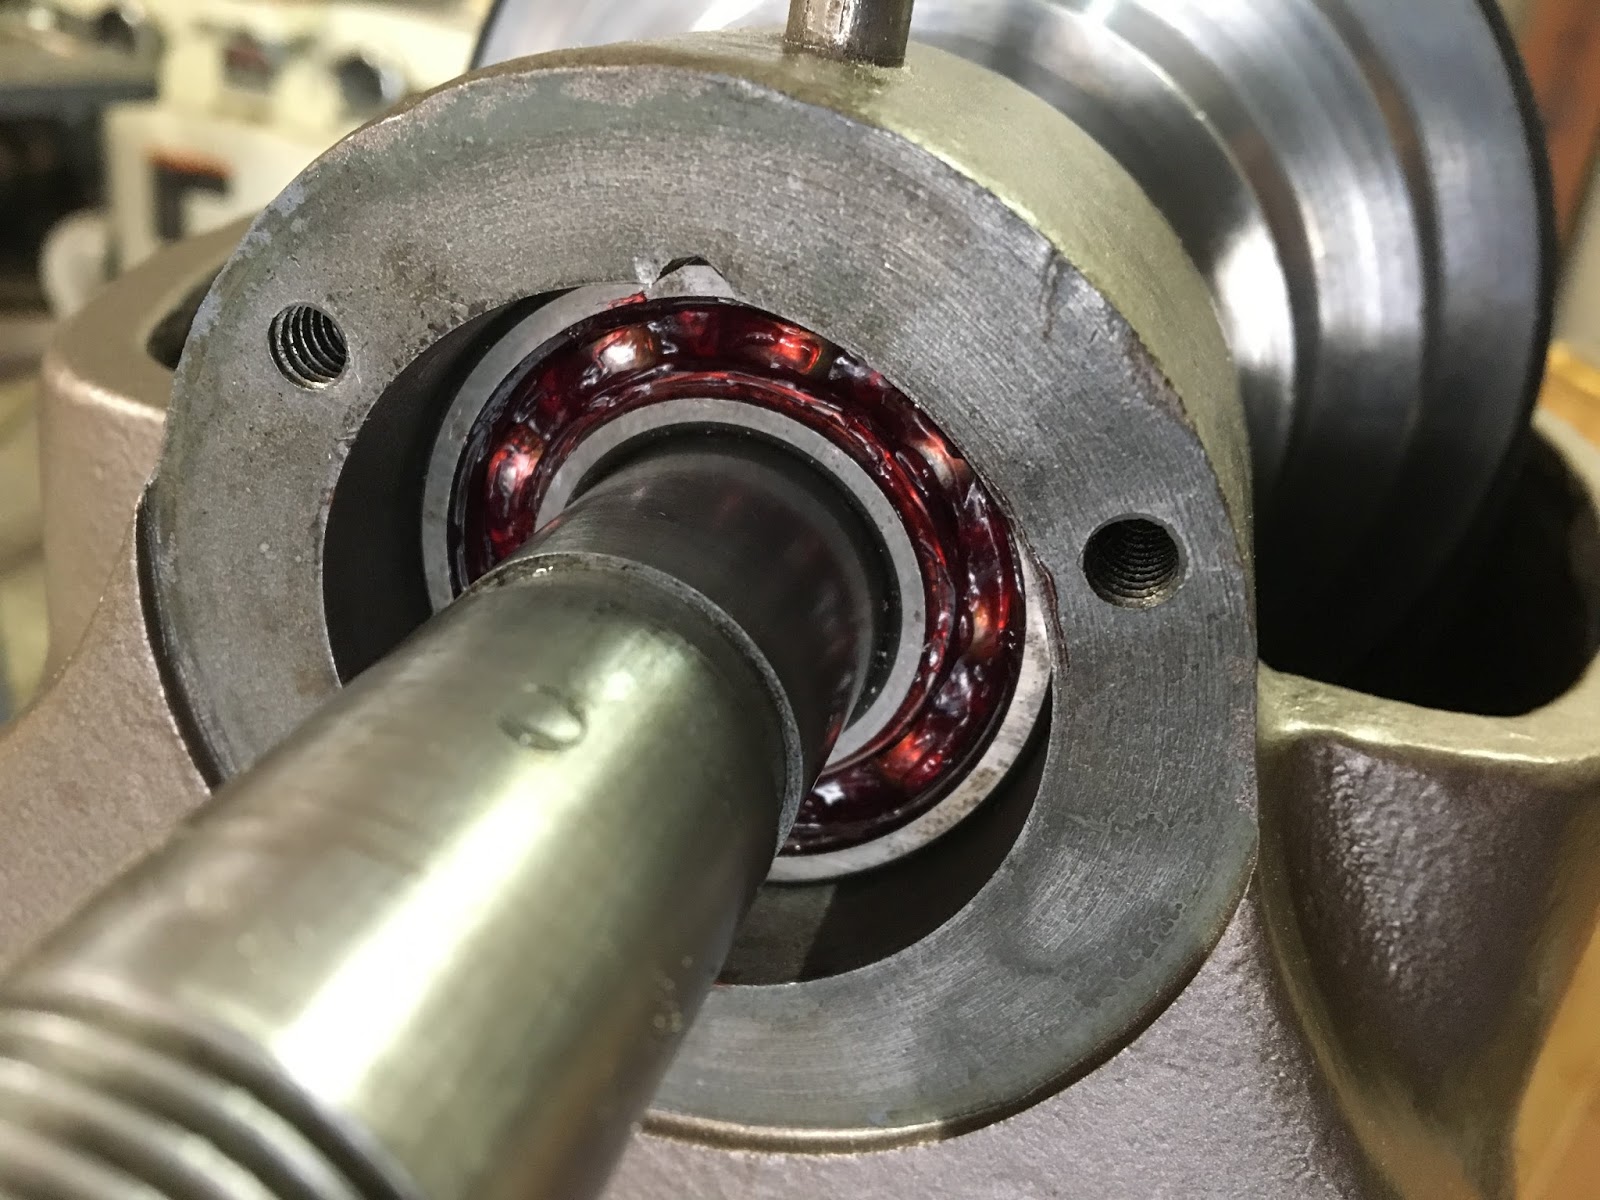
The second bearing went in easy too!
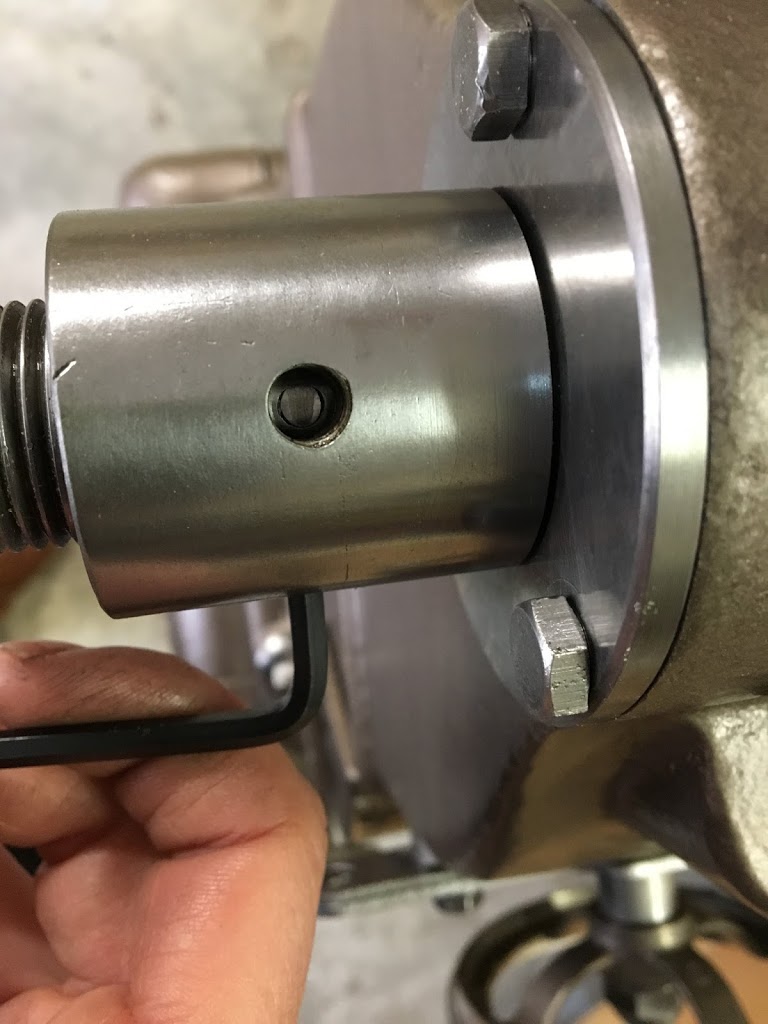
It was comforting to see that the set screws lined up how they were originally. Win for Dani!
The last step is to add the switch and plug!*
*DISCLAIMER: Don’t take my word for it. Do your own research and hire an electrician if necessary.
I ordered a DPST toggle switch so I could use the original switch cover. There will be a wiring diagram on the back of the package, but for mine the motor cords were placed on the bottom screws and the plug cords were placed on the center. The white cords were placed on the right and the black on the left. Grounds tied together.
Everything fits nicely into the housing.
The original clothe goes back in to keep connections from touching metal housing.
I screwed the switch next to the drawer so I wouldn’t have to bend over to operate it.
Hi Dani! Great restoration work. I just picked up my first lathe. A Delta 46-510 which is very similar to yours . There are some differences but this post was very helpful. Thanks for taking the time, writing this and sharing it. -James
Great info and very helpful! Someone gave me a disassembled L1152, but it's missing the Reeves drive. I hope to find a replacement so I can finish my resto. Thanks for taking the time to post the details of your project. It came out awesome!
I read somewhere that someone found after market parts for s reeves drive. Unfortunately I can’t remember where. I love this lathe – I truly wish you luck with the restoration! Thanks for the comment!
Dani, any chance you could give me the outside diameter of the pulleys? I'm looking at some tractor part suppliers for variable speed pulleys….. Thx, Bill
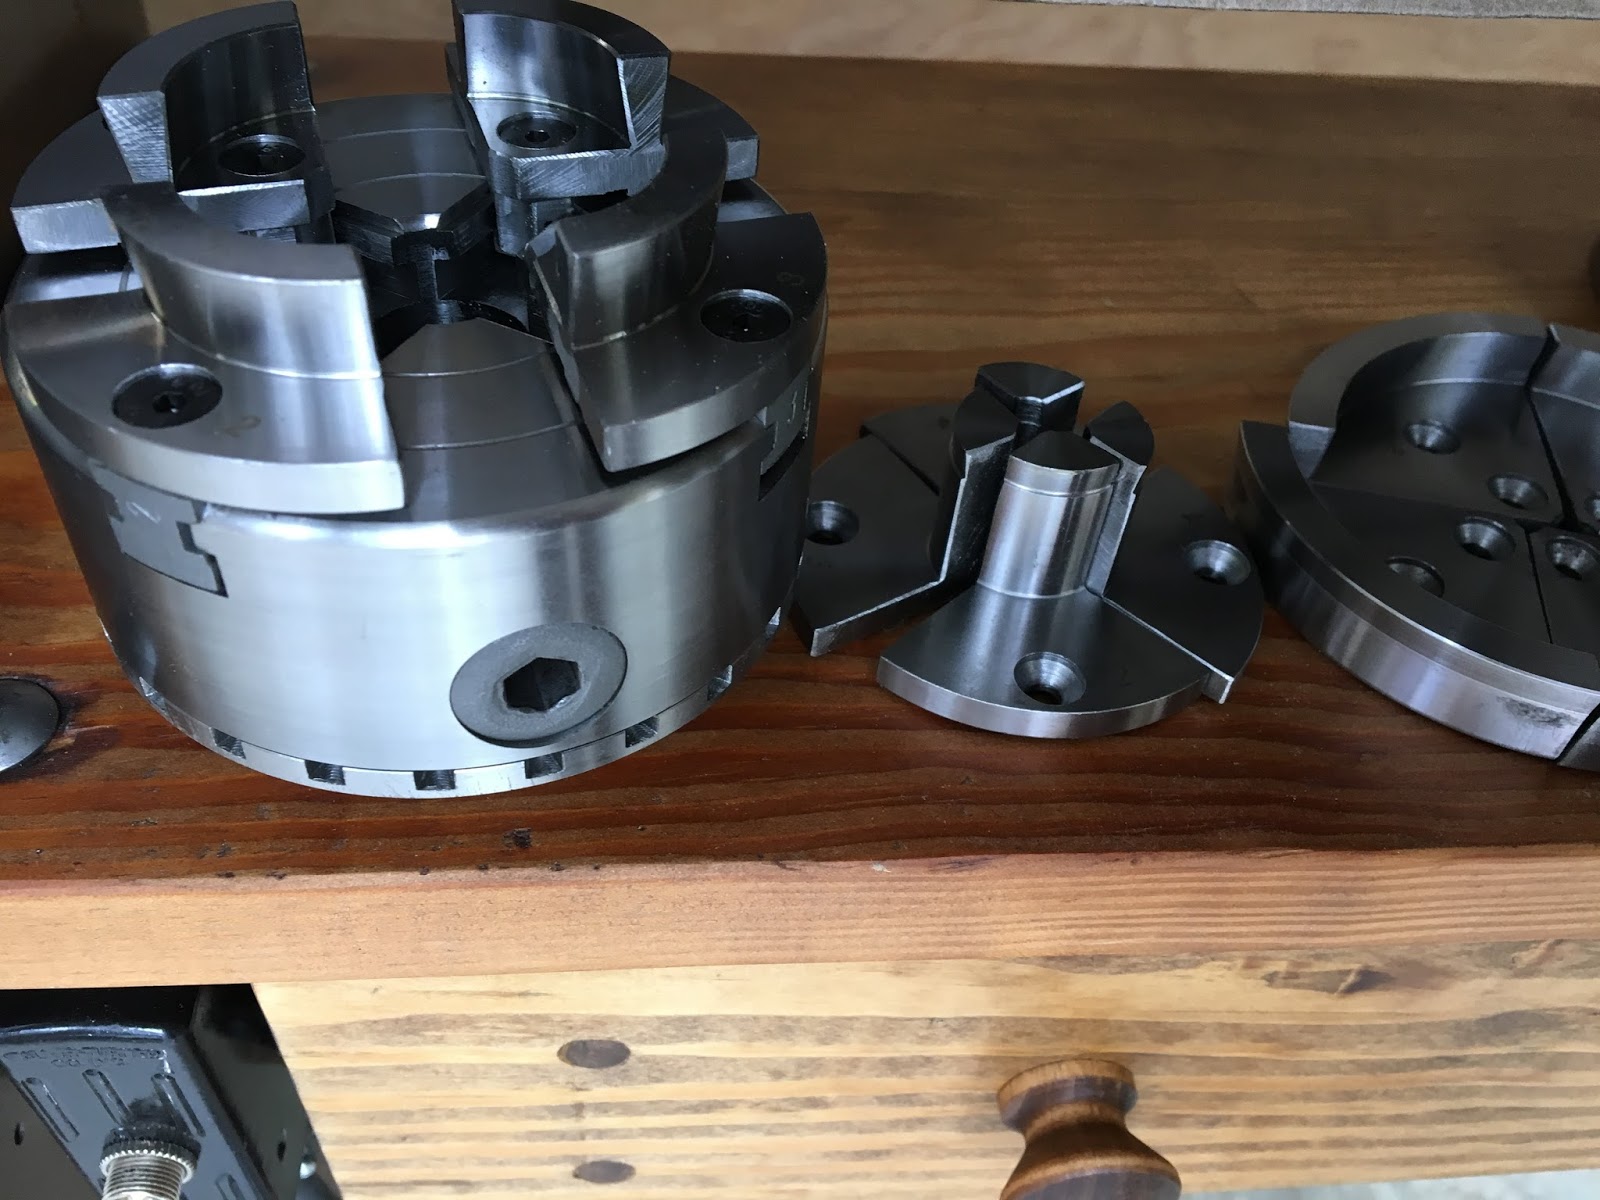
Hey, I just went out to try and measure and it's nearly impossible with everything assembled. I looked at the picture in my posting that has the step-pulley next to the variable speed drive – the 2nd largest step is the closest in size to the variable so I measured that… it's 4-1/2" across. That will give you a ballpark of the size, sorry I can't be more precise!!
Holy cow that’s awesome! Great job on the restoration. I found a Walker Turner L1152 in the garage of a house I just bought. It needs some work and now I see there is hope for it. Thanks for a great post, pics and video.
You just gave me hope for my new (old) toy. Have you noticed any chatter from your bearings? I’m still trying to find replacements for mine but if yours are working out I might just go with a good clean up.
The bearings seemed fine – I never heard anything from them or noticed anything was off.
I found a guy through an online forum that sells the Walker Turner bearings -I believe they’re an after market that he has gotten manufactured. I’ll forward you the email from him regarding pricing and information!
Beautiful job on the lathe. I just picked up the same model and have begun the restoration process. Did you use Rustoleum Hammered finish to paint the lathe. I really like the colour. Could you tell me what colour that is? Thanks and fantastic restoration!
Holy crap, so glad I found this page! I just brought home this exact lathe model that had been my grandfather’s. It had been at my folks house for over 20 years since he passed away. As far as I know, he was the original owner, and I have several of the bowls he made on this tool in my kitchen now. Inspiring rebuild and now I have some work to do…
So glad the post was useful/inspiring! It was a big restoration but definitely worth it in the end! You can tell the tools are much happier once you clean them up and breathe new life into them. Good luck!
Good photography and excellent thoroughness! Thank you for taking the time to put this on the internet. There’s a guy selling a similar Walker Turner lathe down the street and it gives me confidence that I’m not going to end up with a boat anchor on my hands if I pick it up. It’s the same price you paid and comes with a host of accessories and tools, so I think it’s worth getting. Thanks again!!
Impressive job, Dani. The belts on my WT shredded during a Christmas Eve rush job and your site came up through a Google search – I was unsure of the lengths, one was marked 3270 and measured 27 inches, but any markings on the other were gone and my abilities of estimating belt length have always fallen short. Your motor pulley is larger than mine – I should check the RPM with my tach and see if it jibes. It’s usually a good thing to check ball bearings for brinelling or corrosive pitting – one way being to clamp the bearing lightly in a vise and look for “cogging” or roughness. A good bearing can be clamped and still move smoothly. Bearings from industrial sup[pliers are relatively inexpensive and shielded bearings would run smoother and more quietly – mine tested good and are shielded. Keep up the good work!
Thanks Charles! I almost bought new bearings but at the time the $50 price tag was more than I wanted to pay, ha! I’ve since sold the lathe to a machinist – I have a sneaky suspicion that he might change the bearings if he hasn’t by now. Thanks for your message!
Maybe the inside needs to be cleaned/greased? Does the handwheel adjustment need to be tightened to the shaft? I don’t have the lathe anymore so I can’t remember exactly how it’s assembled.
Dani,
I just purchased a model L951 Walker Turner Lathe that I’m restoring and was very pleased to see your restoration on your site. Not only is your restoration fantastic and thorough but your documentation and photo’s are extremely helpful to someone such as myself who can use the information you supplied to complete by restoration. I can tell you have a passion for restoration. I noticed that there was a manual download option on your site but I was not able to do so. Is that still available? Thanks again.
Look great but I need orientacion about the parts for change speed if you have the plan dimencion or where to get all the parts I have the same lathe please need direccion thanks


38 Comments
Great job on that W-T lathe! I have almost that exact motor on an old atlas / craftsman drill press and it is amazingly smooth and powerful.
KG
February 13, 2018 at 5:52 pmThank you! The motor has been great so far and I'm assuming it to last my lifetime 🙂
February 13, 2018 at 5:53 pmHi Dani! Great restoration work. I just picked up my first lathe. A Delta 46-510 which is very similar to yours . There are some differences but this post was very helpful. Thanks for taking the time, writing this and sharing it. -James
February 26, 2018 at 8:55 amYou're welcome!
March 13, 2018 at 7:26 pmThanks
March 19, 2018 at 11:34 amYou’re welcome!
March 19, 2018 at 11:35 amGreat info and very helpful! Someone gave me a disassembled L1152, but it's missing the Reeves drive. I hope to find a replacement so I can finish my resto. Thanks for taking the time to post the details of your project. It came out awesome!
March 23, 2018 at 8:11 pmI read somewhere that someone found after market parts for s reeves drive. Unfortunately I can’t remember where. I love this lathe – I truly wish you luck with the restoration! Thanks for the comment!
March 23, 2018 at 8:12 pmDani, any chance you could give me the outside diameter of the pulleys? I'm looking at some tractor part suppliers for variable speed pulleys….. Thx, Bill
March 24, 2018 at 8:38 amHey, I just went out to try and measure and it's nearly impossible with everything assembled. I looked at the picture in my posting that has the step-pulley next to the variable speed drive – the 2nd largest step is the closest in size to the variable so I measured that… it's 4-1/2" across. That will give you a ballpark of the size, sorry I can't be more precise!!
March 24, 2018 at 8:40 amThat's a huge help – thank you!
March 24, 2018 at 4:14 pmHoly cow that’s awesome! Great job on the restoration. I found a Walker Turner L1152 in the garage of a house I just bought. It needs some work and now I see there is hope for it. Thanks for a great post, pics and video.
April 15, 2019 at 5:54 pmYou’re very welcome! I hope it’s a great resource for you with your new tool! Have fun with it!
April 16, 2019 at 4:23 amYou just gave me hope for my new (old) toy. Have you noticed any chatter from your bearings? I’m still trying to find replacements for mine but if yours are working out I might just go with a good clean up.
April 23, 2019 at 10:22 pmHi Jesse!
The bearings seemed fine – I never heard anything from them or noticed anything was off.
I found a guy through an online forum that sells the Walker Turner bearings -I believe they’re an after market that he has gotten manufactured. I’ll forward you the email from him regarding pricing and information!
It’s a great lathe – you’ll love it!
April 24, 2019 at 5:09 amBeautiful job on the lathe. I just picked up the same model and have begun the restoration process. Did you use Rustoleum Hammered finish to paint the lathe. I really like the colour. Could you tell me what colour that is? Thanks and fantastic restoration!
February 24, 2020 at 6:32 amHi Erin! Yes, I used Rustoleum Hammered Matte finish. It’s odd but it doesn’t have a color listed on the bottle 🙁
March 13, 2020 at 1:06 pmNeed info hown to get parts or someone to make new parts of the variable speed control walker lathe L1151 thanks
January 27, 2022 at 7:28 pmI’m sorry I don’t have that information
January 29, 2022 at 2:29 pmWow! That is beautifully done!
June 8, 2020 at 10:17 pmThank you Jeremy!
July 4, 2020 at 9:39 amHoly crap, so glad I found this page! I just brought home this exact lathe model that had been my grandfather’s. It had been at my folks house for over 20 years since he passed away. As far as I know, he was the original owner, and I have several of the bowls he made on this tool in my kitchen now. Inspiring rebuild and now I have some work to do…
September 14, 2020 at 10:59 pmSo glad the post was useful/inspiring! It was a big restoration but definitely worth it in the end! You can tell the tools are much happier once you clean them up and breathe new life into them. Good luck!
September 18, 2020 at 9:39 amGood photography and excellent thoroughness! Thank you for taking the time to put this on the internet. There’s a guy selling a similar Walker Turner lathe down the street and it gives me confidence that I’m not going to end up with a boat anchor on my hands if I pick it up. It’s the same price you paid and comes with a host of accessories and tools, so I think it’s worth getting. Thanks again!!
December 7, 2020 at 9:55 pmI’m so glad my post was helpful! I hope the lathe serves you well! Thanks for the comment 🙂
December 8, 2020 at 8:26 amImpressive job, Dani. The belts on my WT shredded during a Christmas Eve rush job and your site came up through a Google search – I was unsure of the lengths, one was marked 3270 and measured 27 inches, but any markings on the other were gone and my abilities of estimating belt length have always fallen short. Your motor pulley is larger than mine – I should check the RPM with my tach and see if it jibes. It’s usually a good thing to check ball bearings for brinelling or corrosive pitting – one way being to clamp the bearing lightly in a vise and look for “cogging” or roughness. A good bearing can be clamped and still move smoothly. Bearings from industrial sup[pliers are relatively inexpensive and shielded bearings would run smoother and more quietly – mine tested good and are shielded. Keep up the good work!
December 30, 2020 at 10:02 amThanks Charles! I almost bought new bearings but at the time the $50 price tag was more than I wanted to pay, ha! I’ve since sold the lathe to a machinist – I have a sneaky suspicion that he might change the bearings if he hasn’t by now. Thanks for your message!
January 29, 2022 at 2:45 pmI have the same lathe. My variable speed controller has stopped working. Any tips on what to do?
January 22, 2021 at 4:31 pmMaybe the inside needs to be cleaned/greased? Does the handwheel adjustment need to be tightened to the shaft? I don’t have the lathe anymore so I can’t remember exactly how it’s assembled.
January 24, 2021 at 10:23 amDani,
March 5, 2021 at 1:36 pmI just purchased a model L951 Walker Turner Lathe that I’m restoring and was very pleased to see your restoration on your site. Not only is your restoration fantastic and thorough but your documentation and photo’s are extremely helpful to someone such as myself who can use the information you supplied to complete by restoration. I can tell you have a passion for restoration. I noticed that there was a manual download option on your site but I was not able to do so. Is that still available? Thanks again.
Thank you Will!
Somehow all my documents got deleted from my Google Drive account that were linked to my website 🙁 Sorry!!
January 29, 2022 at 2:36 pmGreat restoration. Thanks for the detailed description.
April 9, 2021 at 9:35 pmYou bet!
April 9, 2021 at 10:38 pmYou really did a wonderful job, thank you for sharing!!!
December 31, 2021 at 9:12 amThank you so much!
January 29, 2022 at 2:30 pmThat paint job looks super nice! Well done, I might just have to go with that style of paint on mine.
February 6, 2022 at 3:12 pmLook great but I need orientacion about the parts for change speed if you have the plan dimencion or where to get all the parts I have the same lathe please need direccion thanks
May 8, 2022 at 10:25 amI’m sorry I don’t have that information and no longer have the lathe 🙁
May 19, 2023 at 7:09 am