DIY – Make Your Own Wood Storage Bins + TV Armoire Renovation
February 16, 2017
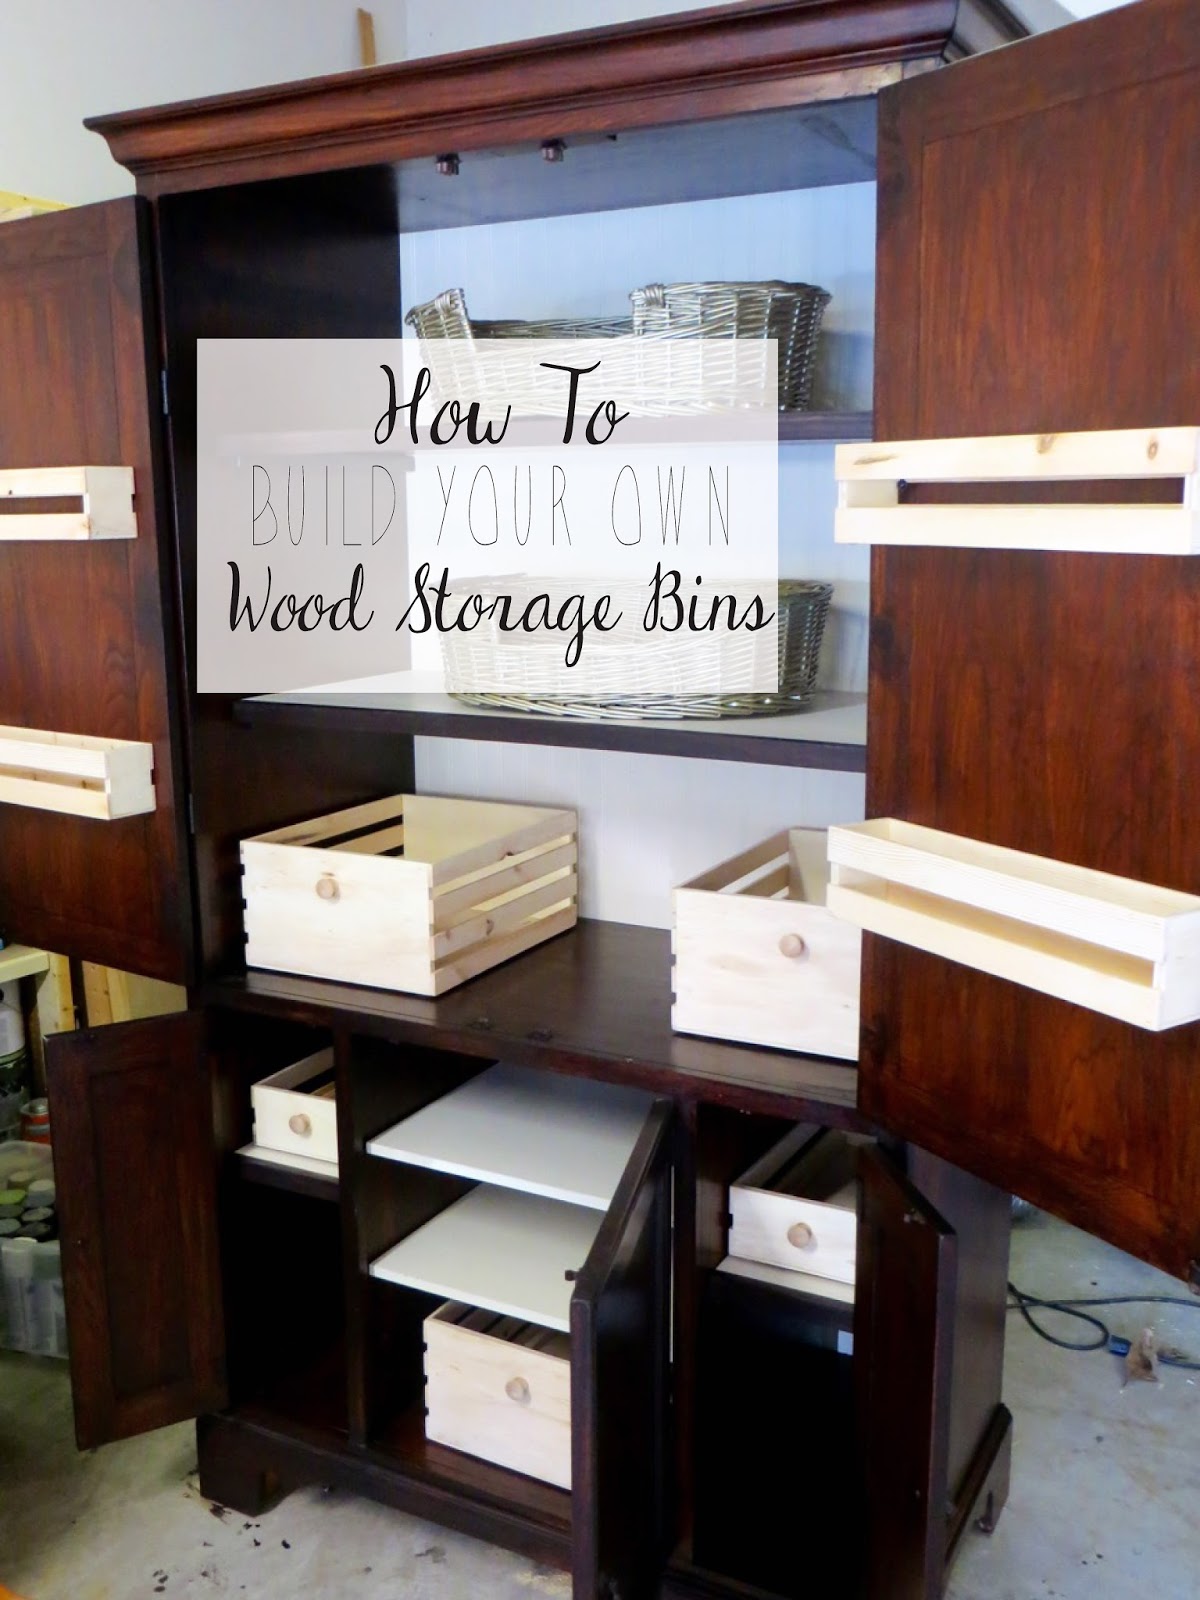
I made some wooden bins that would fit perfectly on the shelves and doors of this old TV stand and took pictures of how I did it so YOU can do it too! They’re easy peasy and super inexpensive!
I’ll also show you how you can turn a TV armoire into a place where you can store and organize whatever you want (pantry items, craft supplies, clothes, games… you name it)!
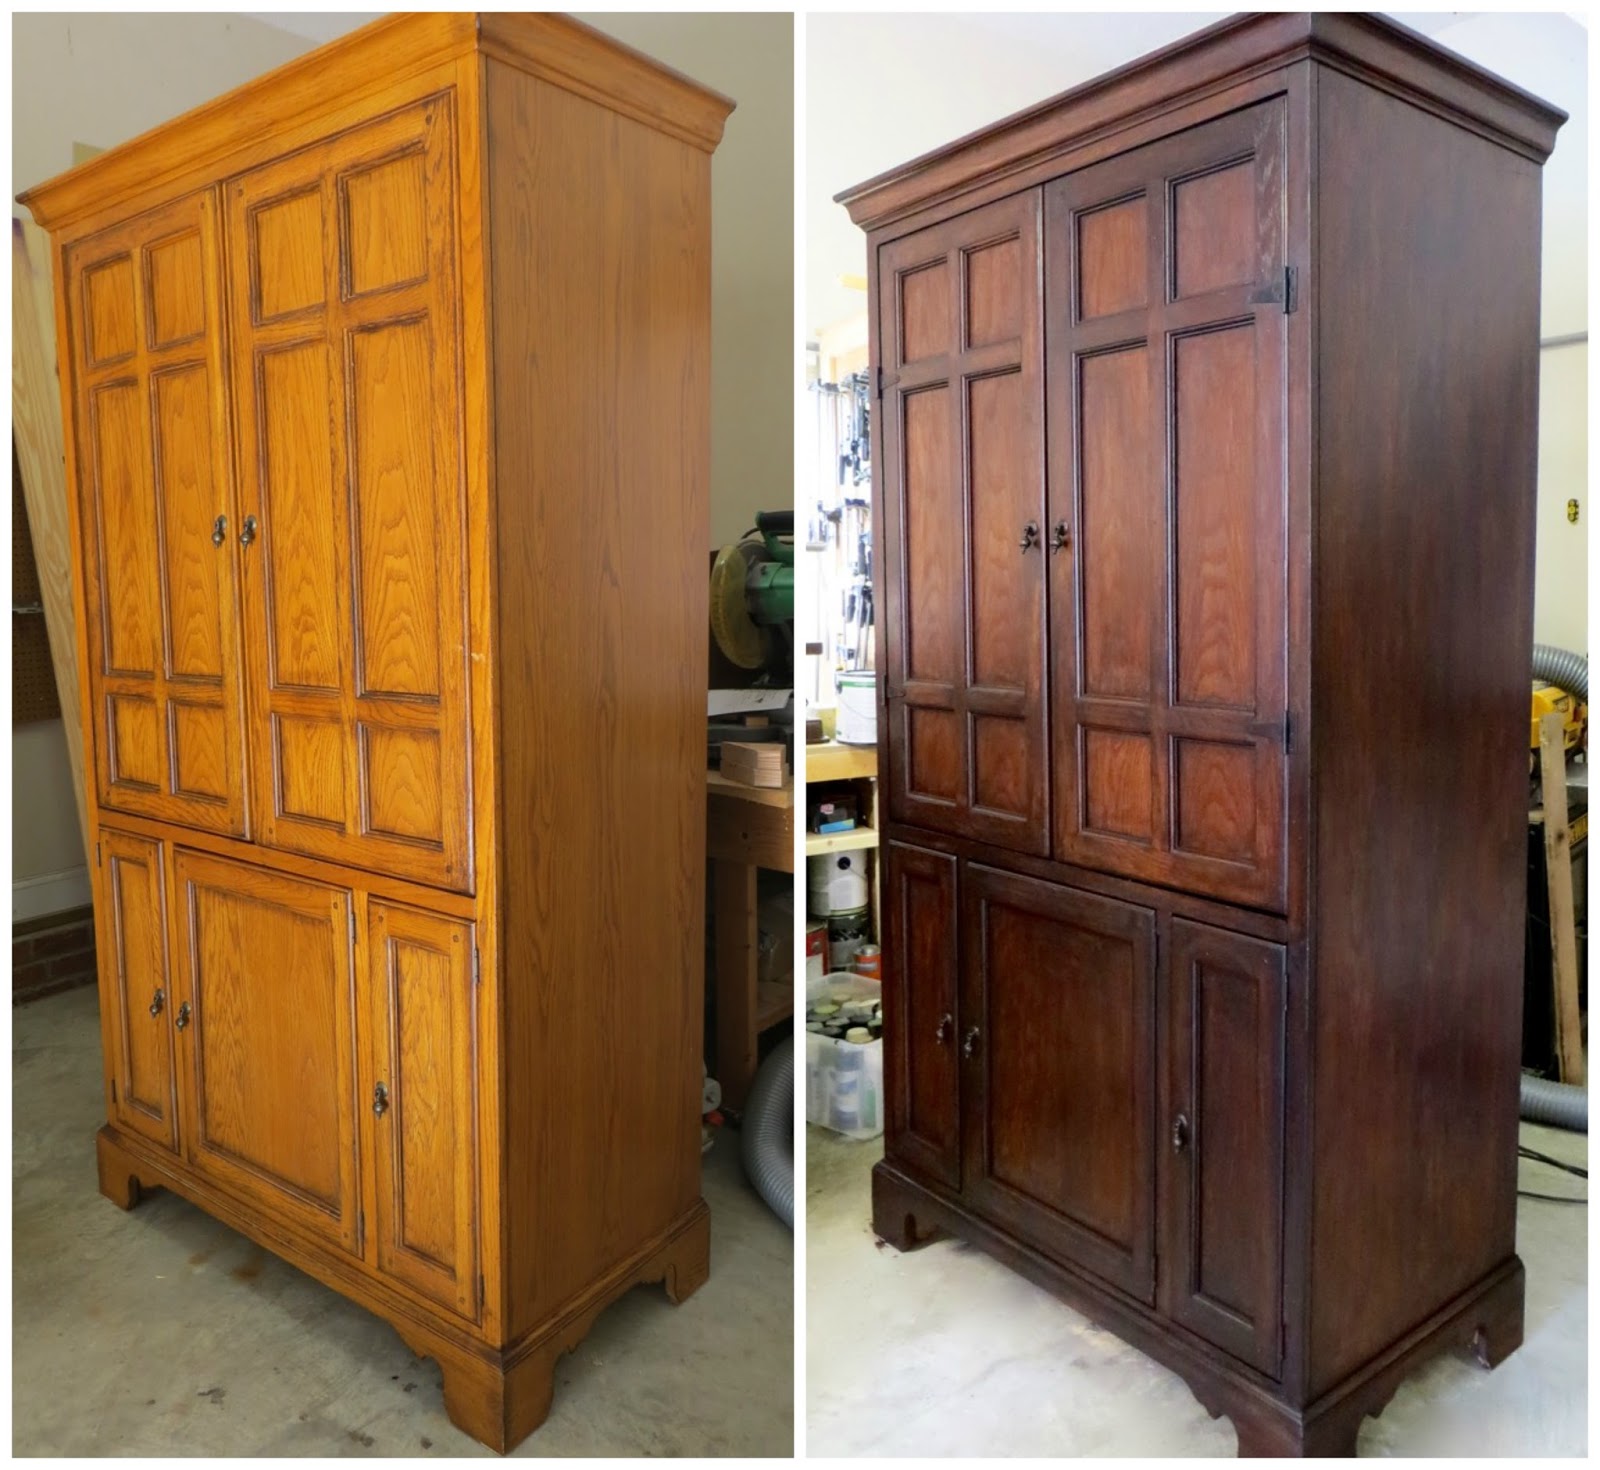
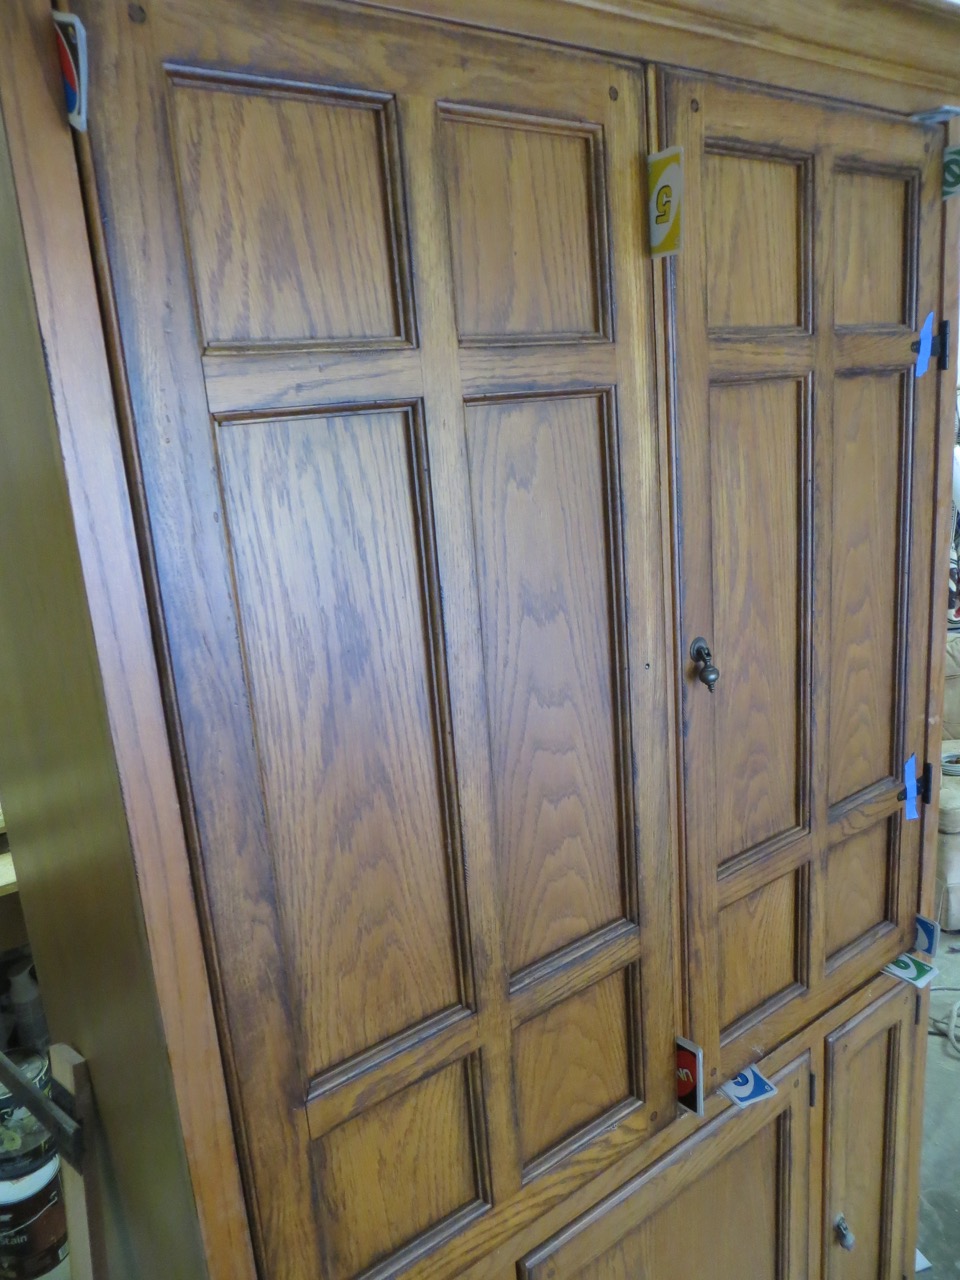
BEFORE and AFTER:
The doors opened and rolled into the cabinet so I had to take the old slides & hinges off off and attach hinges on the outside so I could add shelves.
The small shelves pulled out on slides with CD/DVD organizers so I took those all off and made my own stationary shelves.
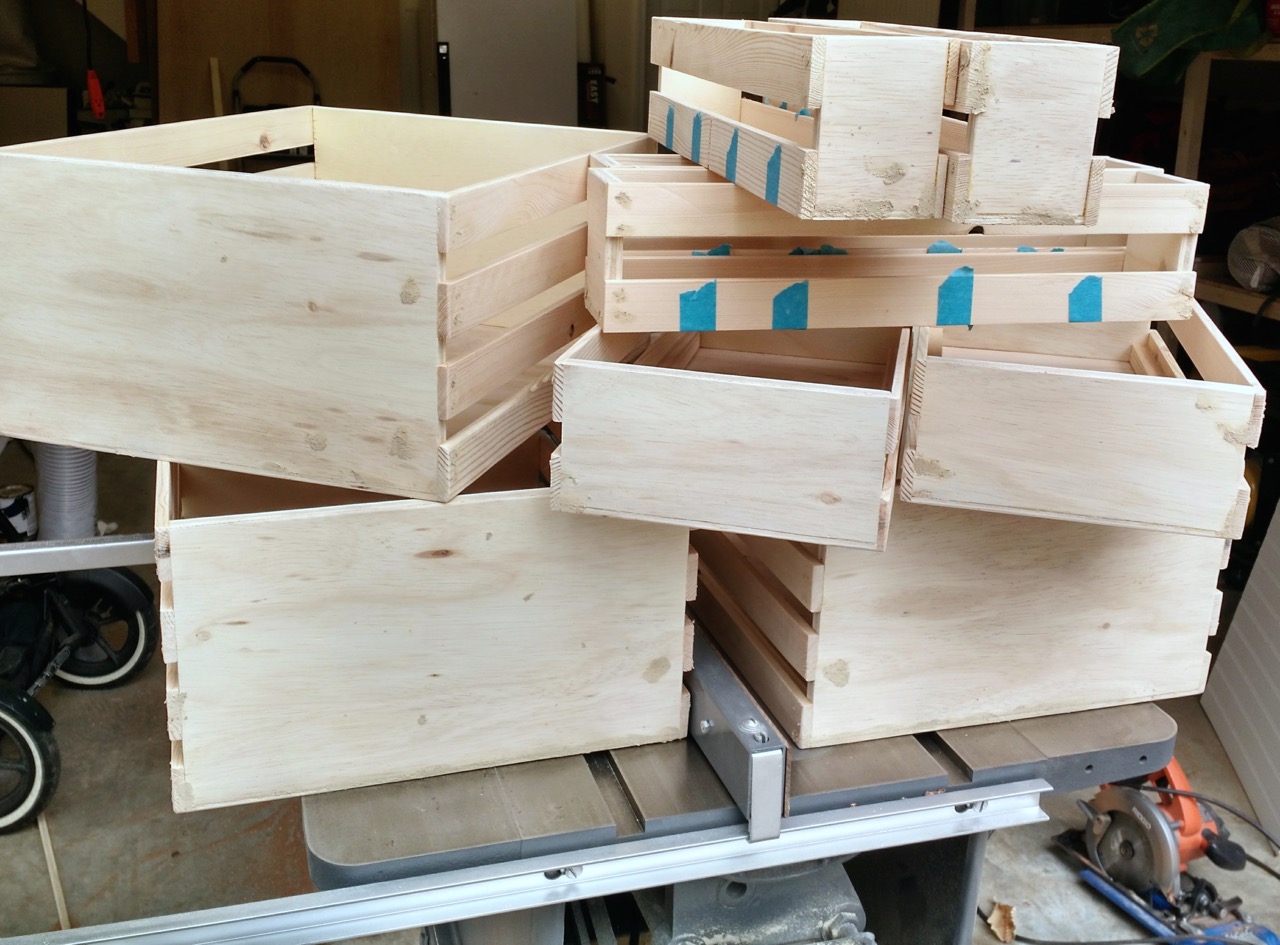
WOOD BINS HOW-TO
Supplies Needed:
-2x boards (any width works)
-1/2″ or 3/4″* plywood for ends
-1/4″ plywood for bottoms
-Wood Knobs (optional)
-Wood Glue
-Painters Tape
-Wood Filler
*I used 1/2″ because that’s what I had on-hand but I recommend the 3/4″ plywood because it gives you more surface to nail through.
Tools Needed:
-Table Saw
-Palm Sander +Assorted Sanding Pads
-Brad Nails (Air Nailer Recommended)
-Drill & Bits
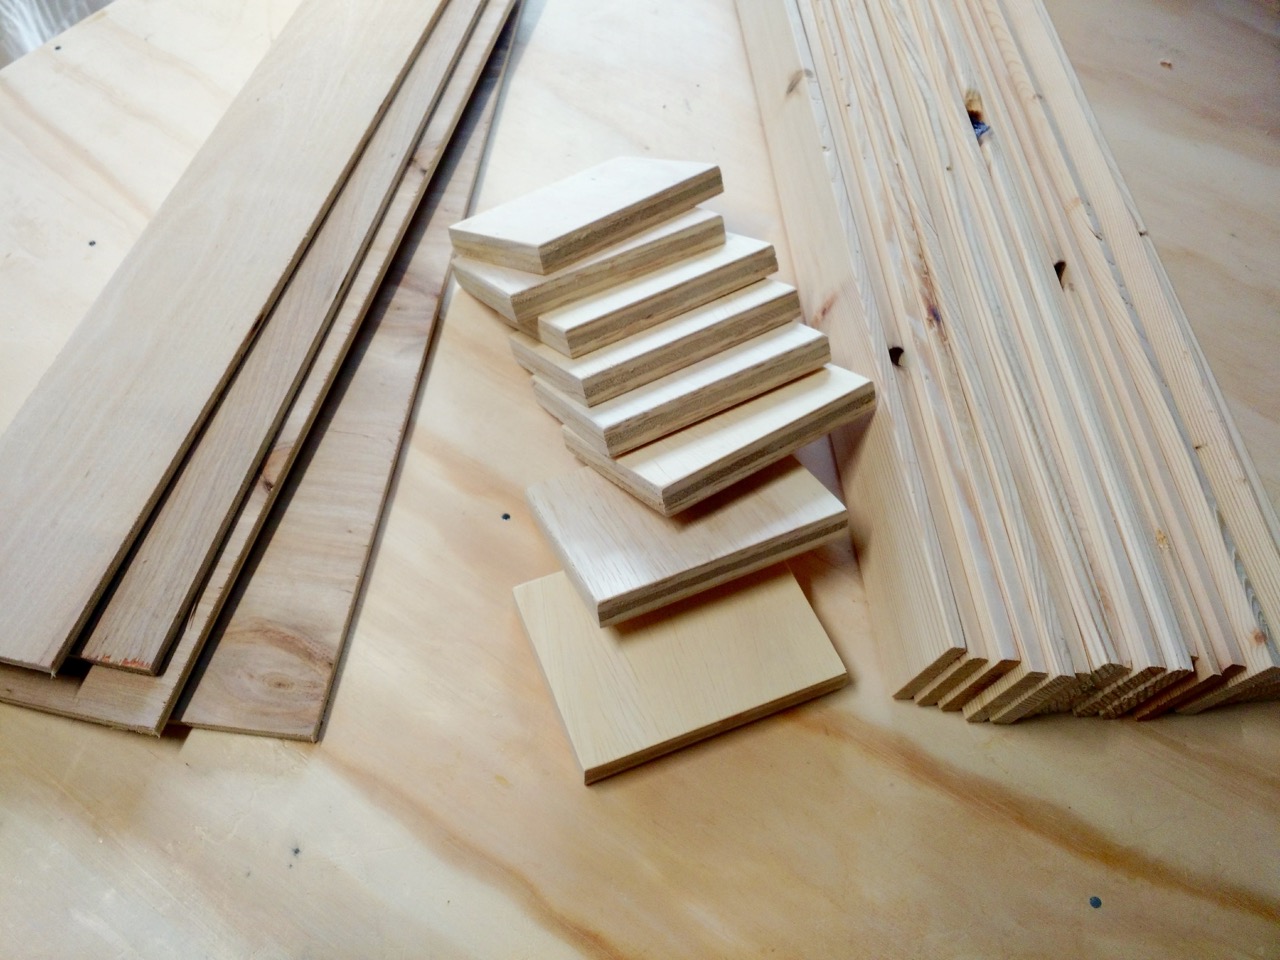
picture showing the pieces I used to make the 4 bins on the doors of the cabinet
CUT LIST:
From 2x board
Rip your dimensional 2x board down the length into 1/4″ strips on your table saw. Cut strips into the finished length you want your bin to be. You can figure out how many slats you’ll need by laying them out over the height of your bins (x2 for each side).
From 1/4″ plywood
Cut your 1/4″ plywood for the bottoms so it is the exact size you want the bottom of your bin to be. The length of your bottoms will also be the length of your slats.
From 1/2″ or 3/4″ plywood
Cut your 1/2-3/4″ plywood for the ends of your bin so they’re the size you want minus the thickness of your bottom piece and minus the thickness of your wood slats on each side. That sounds harder than what it is.
Sand all your pieces up to 150 or 180 grit to prepare for assembly.
Start by laying your pieces out like this. All the surfaces you see are what will be on the inside of your bin (so pick your pretty sides for the outsides).
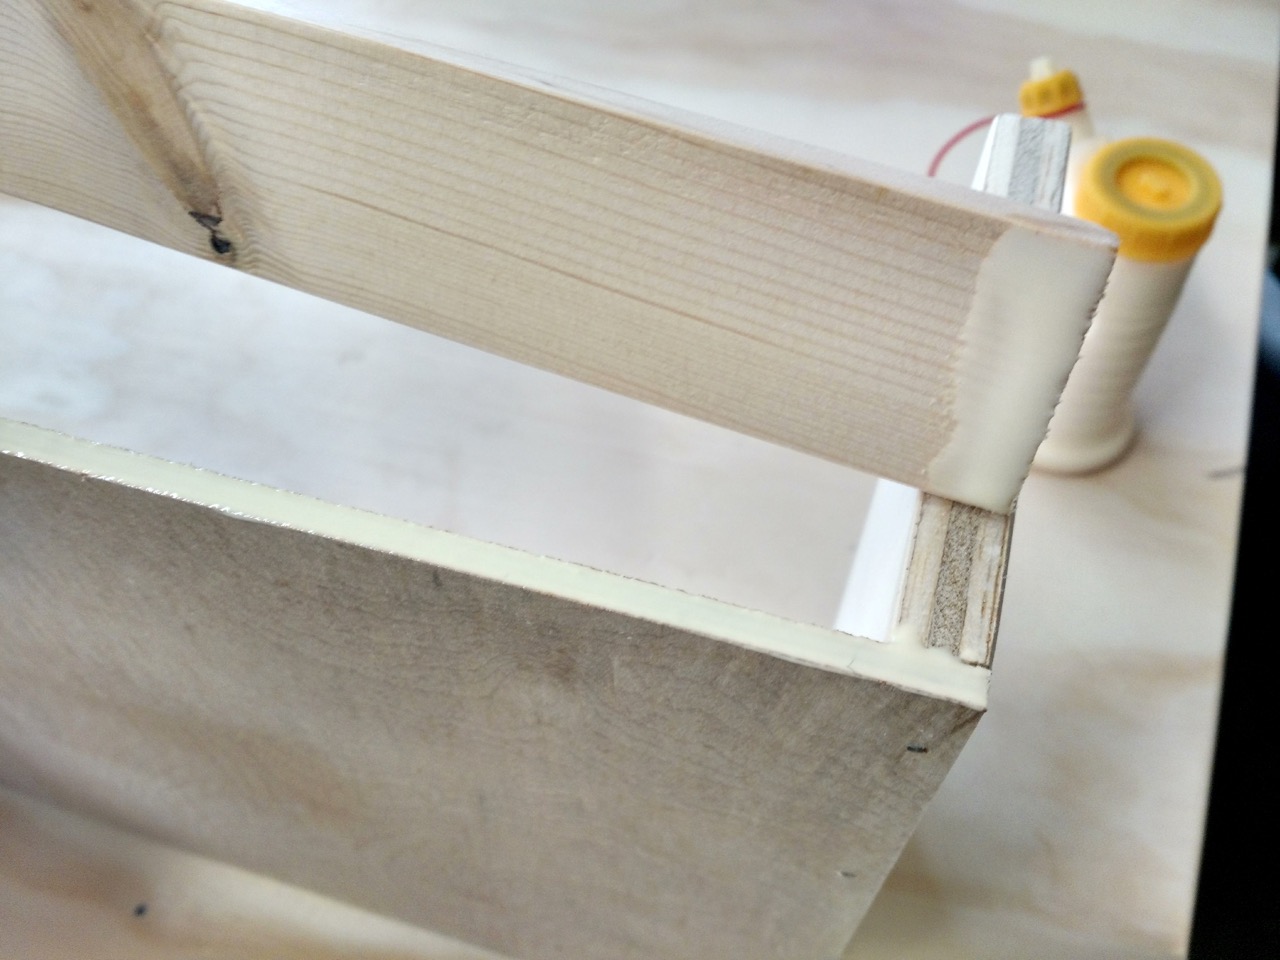
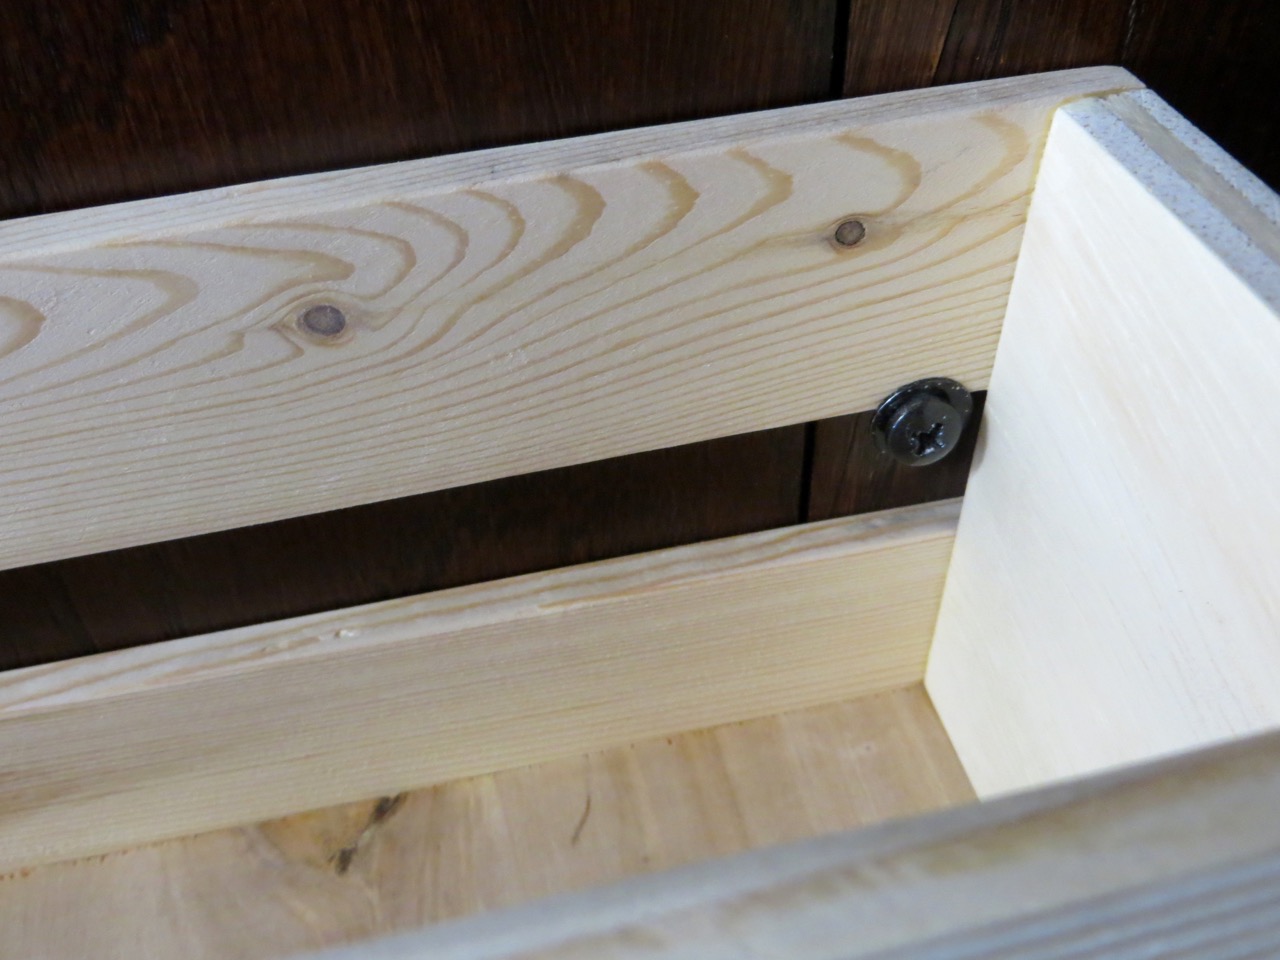
Lay a bead of glue down on the long side of your side pieces and smooth out with your finger or brush to coat entire surface. Hold in place flush with the end of your bottom piece and nail in place. I space my nails every 3-4″ or so. Do this for both end pieces.
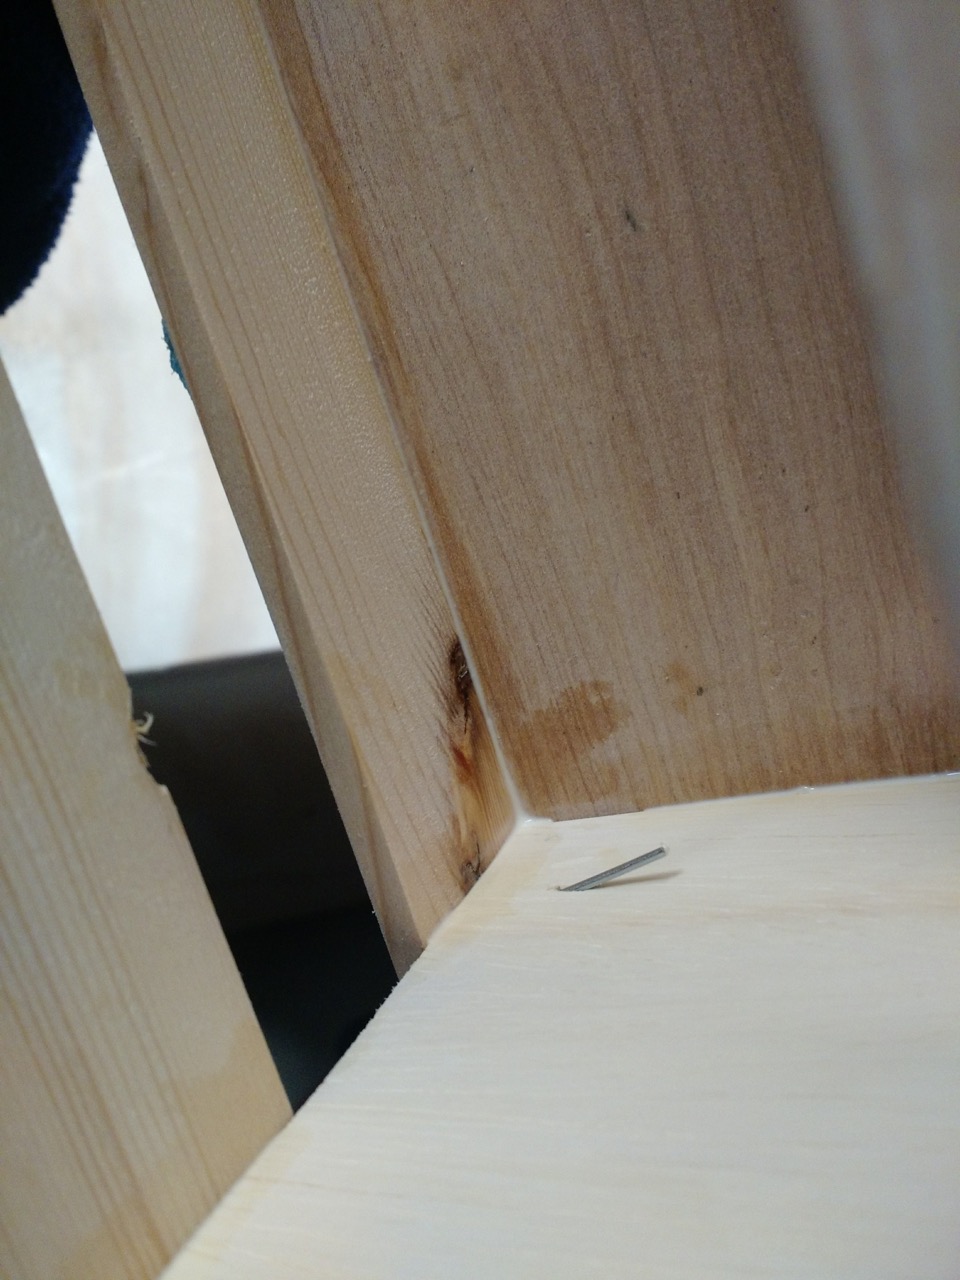
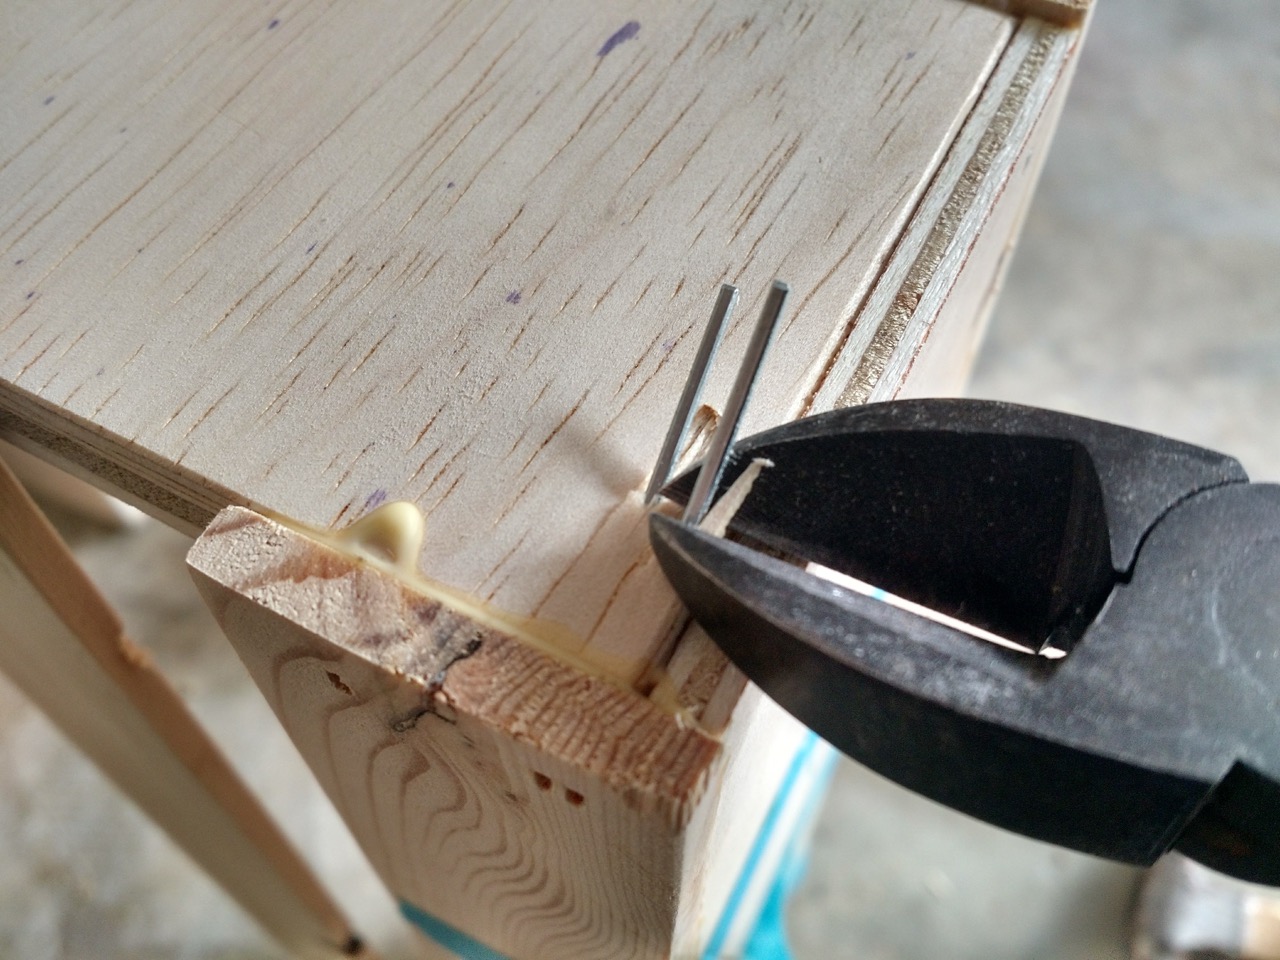
*WARNING*
If you are using a nail with thin finish nails please be aware that they have a mind of their own. They bend easy and will follow the grain of your wood and pop out of the sides. DON’T hold your wood around the area you are nailing or you may get a nail through your finger! The nails were highly affected by my pine slats, especially if there was a knot (see picture above). I would say 10% of my nails shot through the sides like this which was SUPER frustrating because I had to clean clip them off and fill with wood filler later. It’s for this reason I suggested using 3/4″ plywood to give yourself more ‘shooting room’. In the future I hope to get a nailer that will accept sturdier nails so avoid this problem.
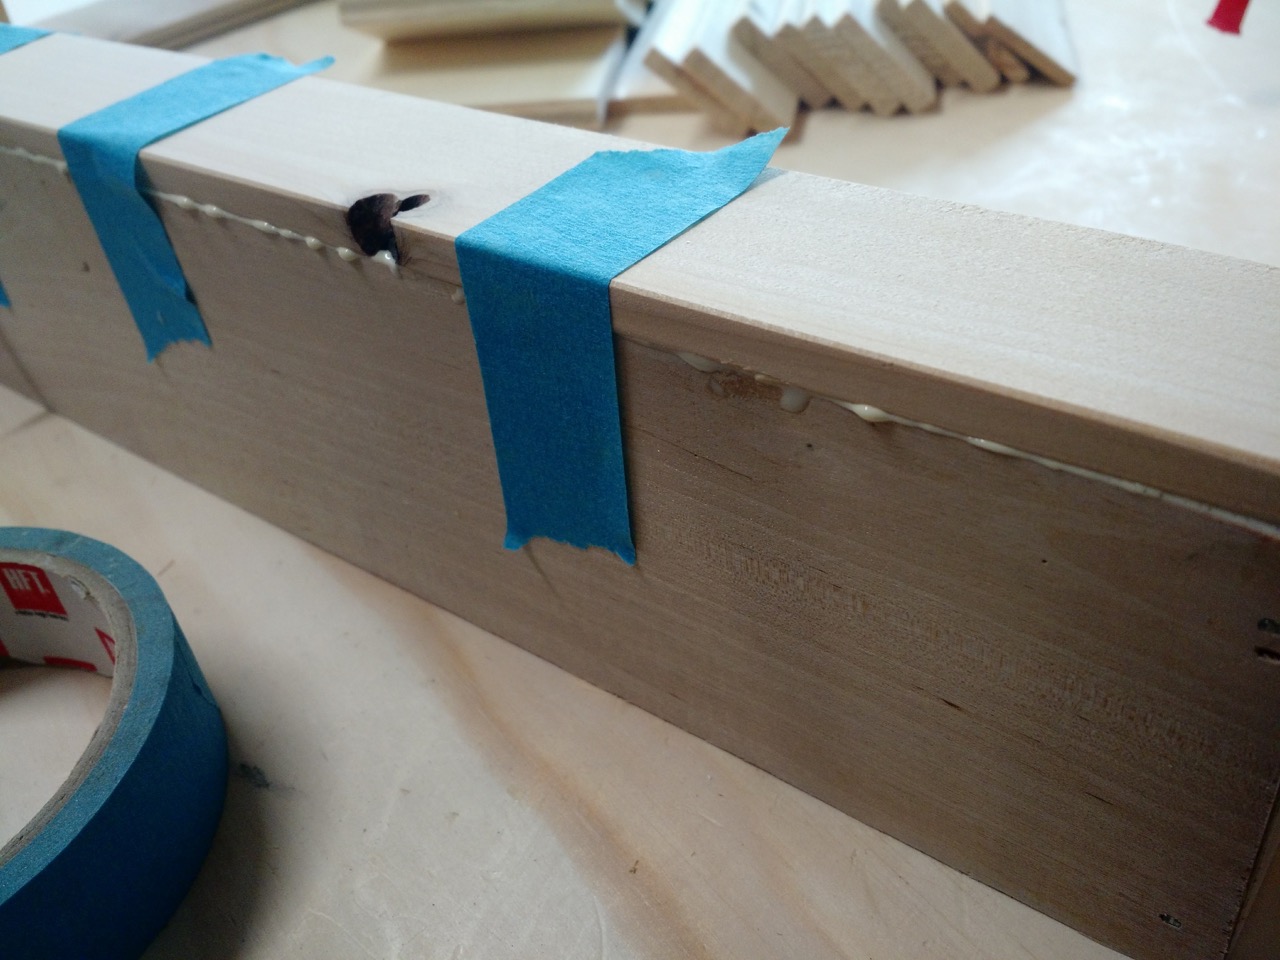
Next you’ll attach the slates to one side, starting with the bottom one. Put a bead of glue along the rough edge of your bottom piece and smooth out with your finger…
Glue along both ends of your slat and hold in place while you put 2 nails on one end…
…and use masking tape to clamp down the center of your slat over your bottom. Pull the tape tight. Nail the last side of your slat to the side.
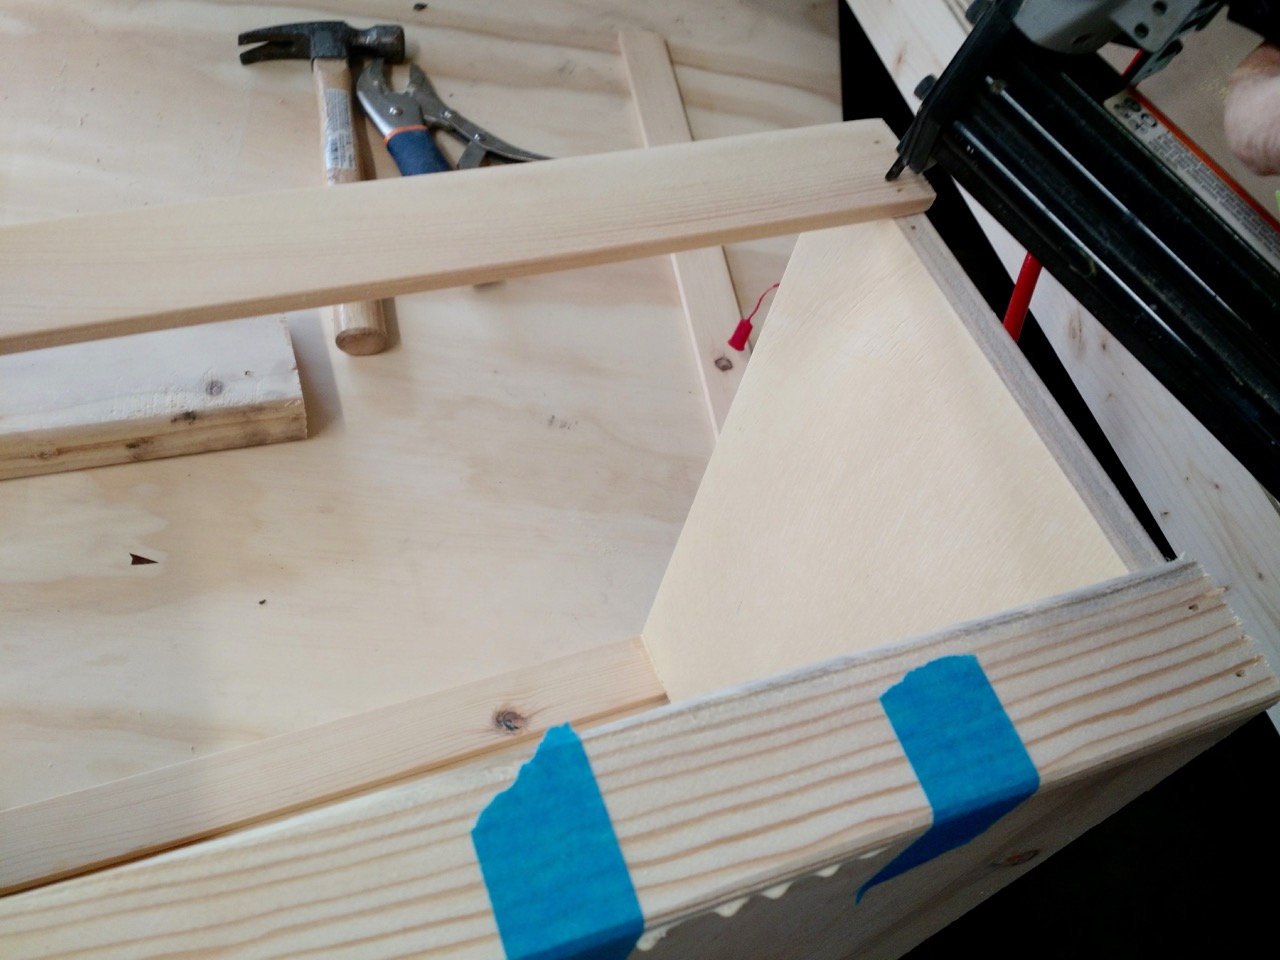
Next you’ll glue and nail the ends of your top slat so it is flush with the top of your sides.
If you’re doing a large bin with many slats you’ll space out and glue/nail them last.
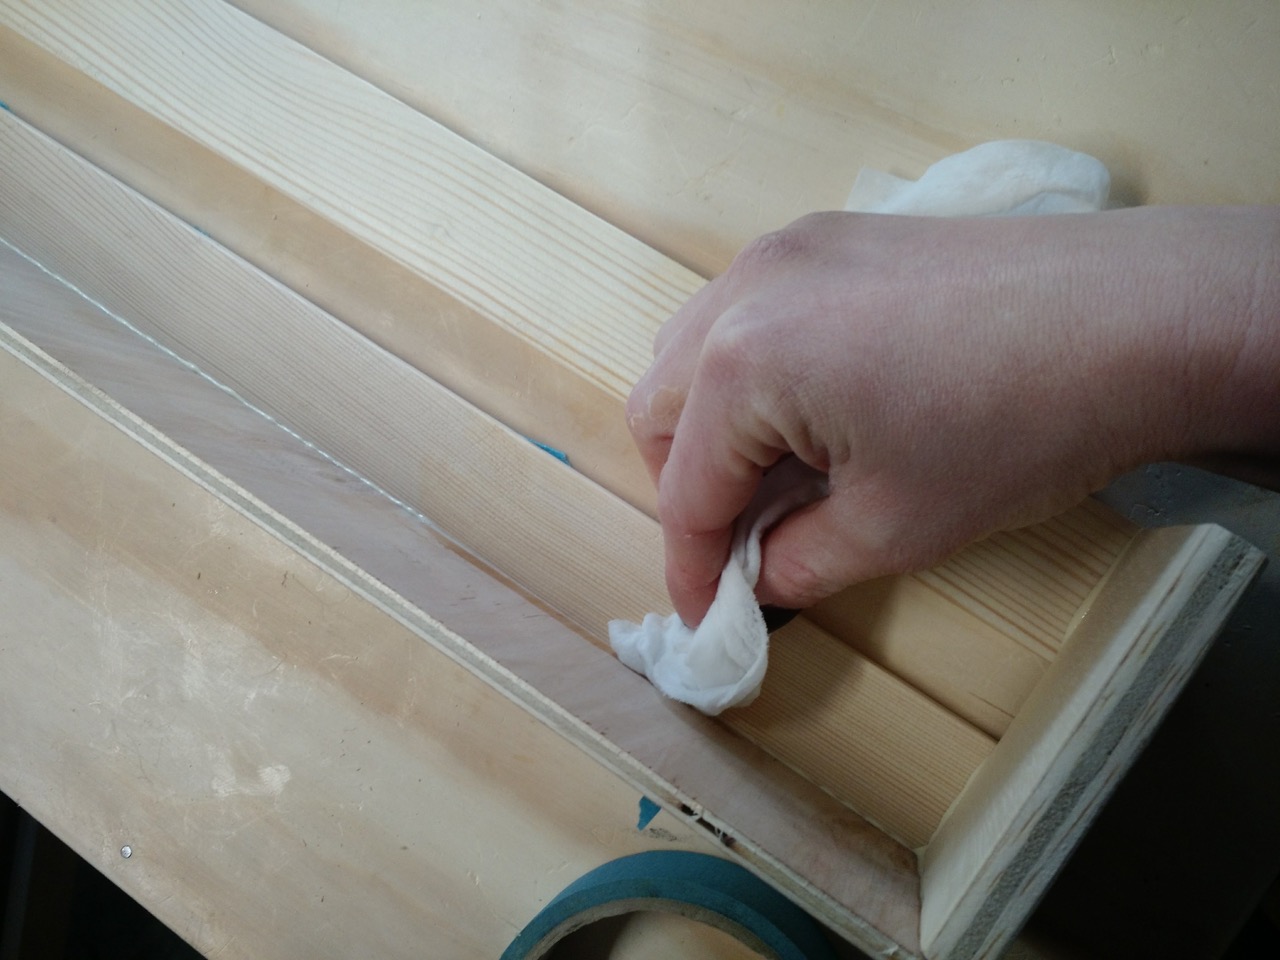
I use baby wipes to clean-up glue as I go – a damp paper towel or sponge work well too!
This shows you how bad those darn nails are! I clipped them off with wire cutters and wood filled+sanded to fit the blemish.
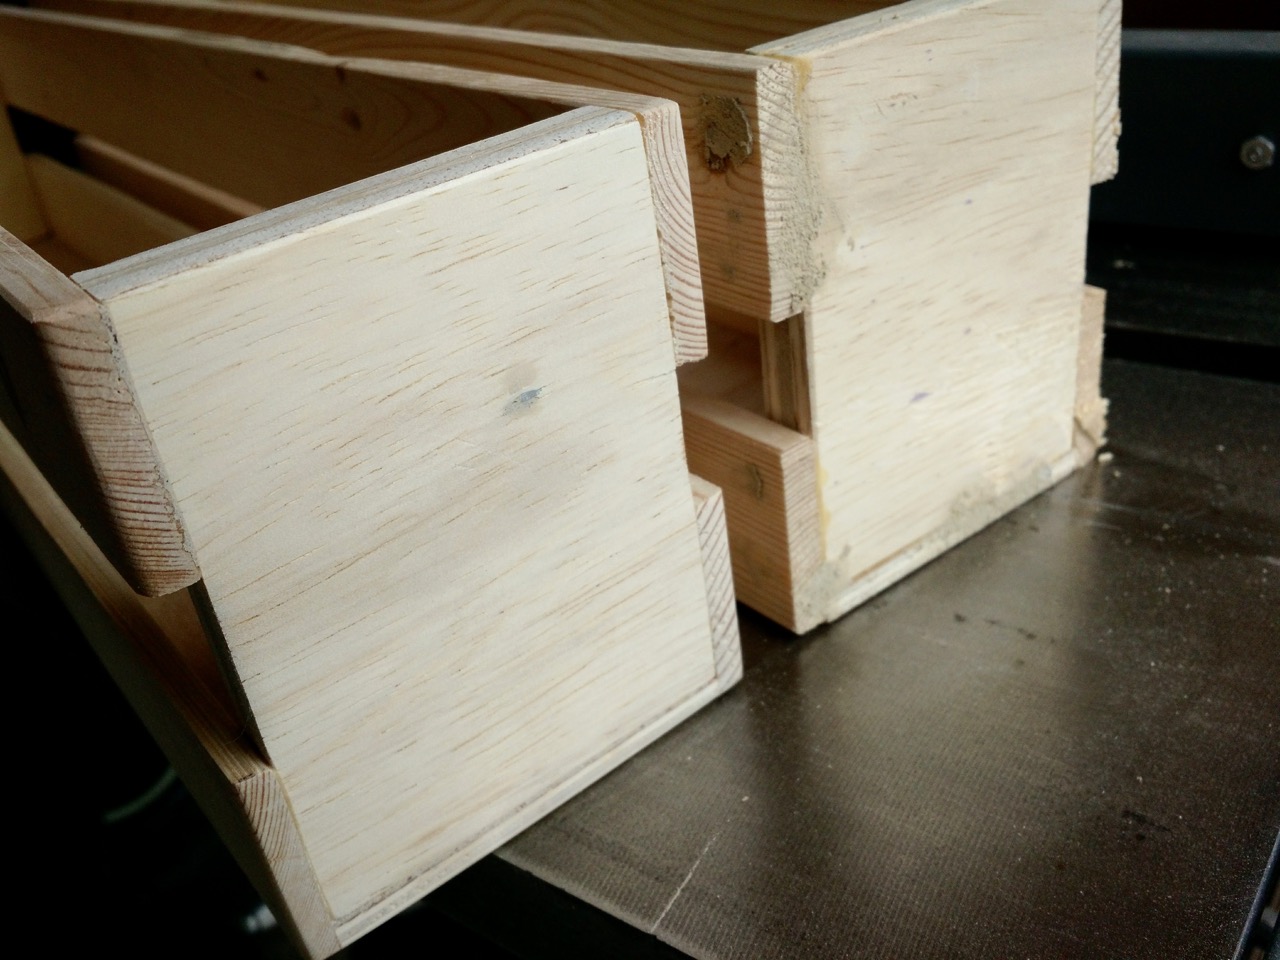
Wood fill over each nail hole and any cracks you see. Let dry for a few hours before sanding with 180 grit paper.
Here you can see the difference sanding and rounding corners makes between these 2 bins!
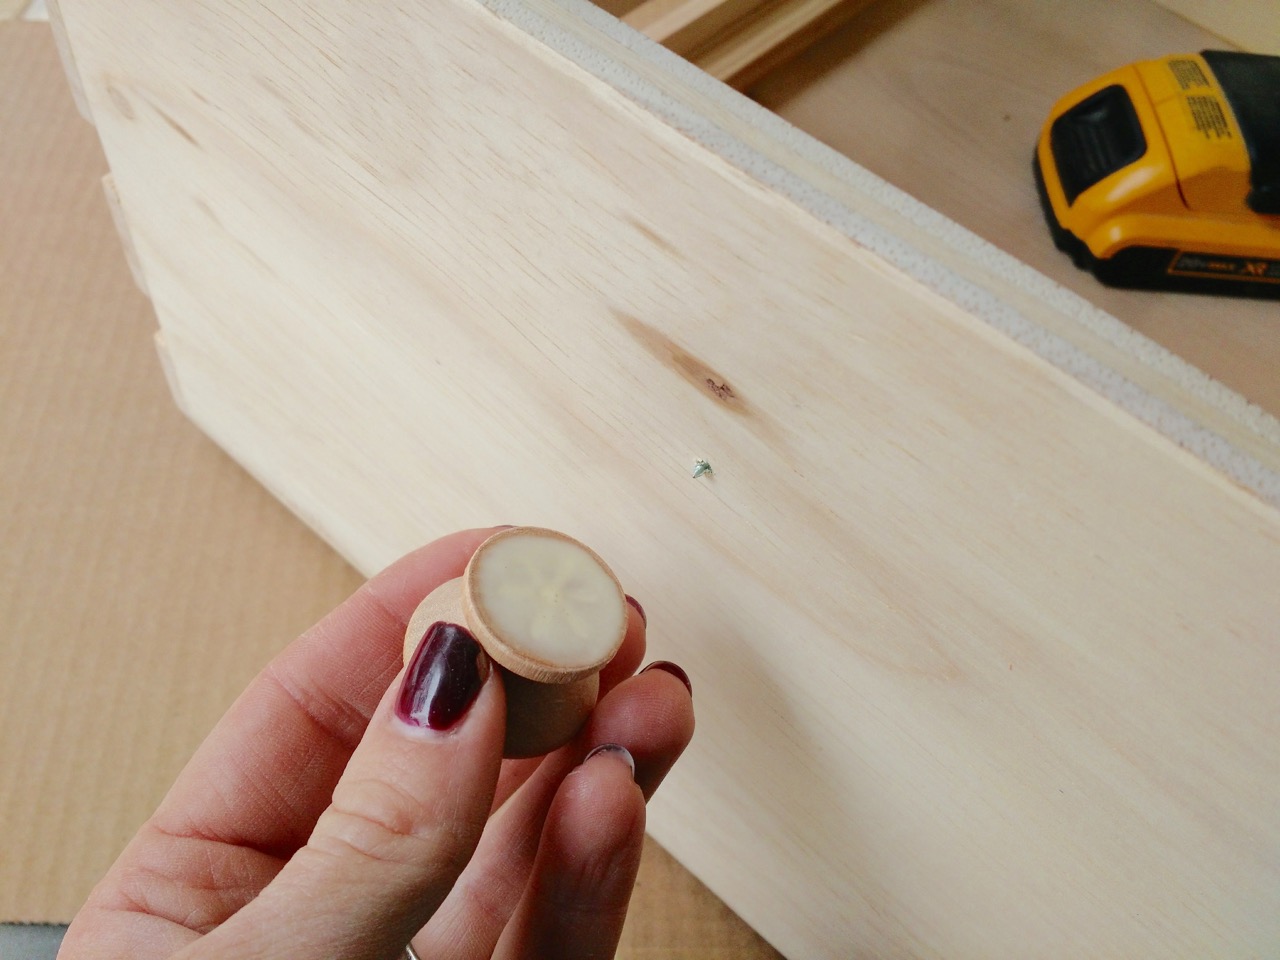
I marked where I wanted my knobs and pre-drilled a hole before screwing my screw in just so it was poking out of my wood (this helps you place your knob just right). I add glue to my knobs, although it’s not necessary. I set it over my screw and hold in place while I screw it on the rest of the way.
It’s so easy to make your own bins, isn’t it!?
TV Cabinet Restoration:
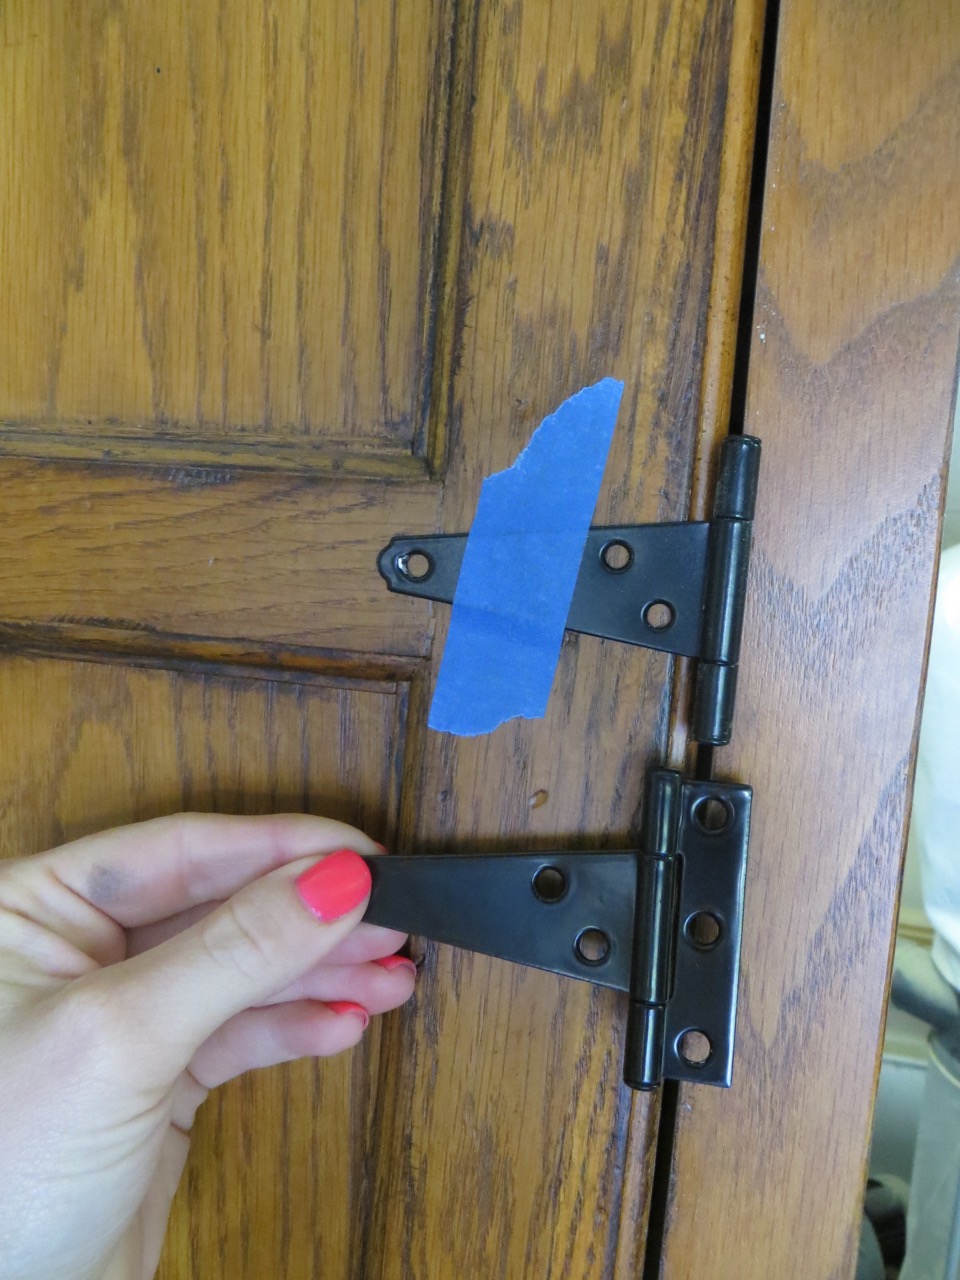
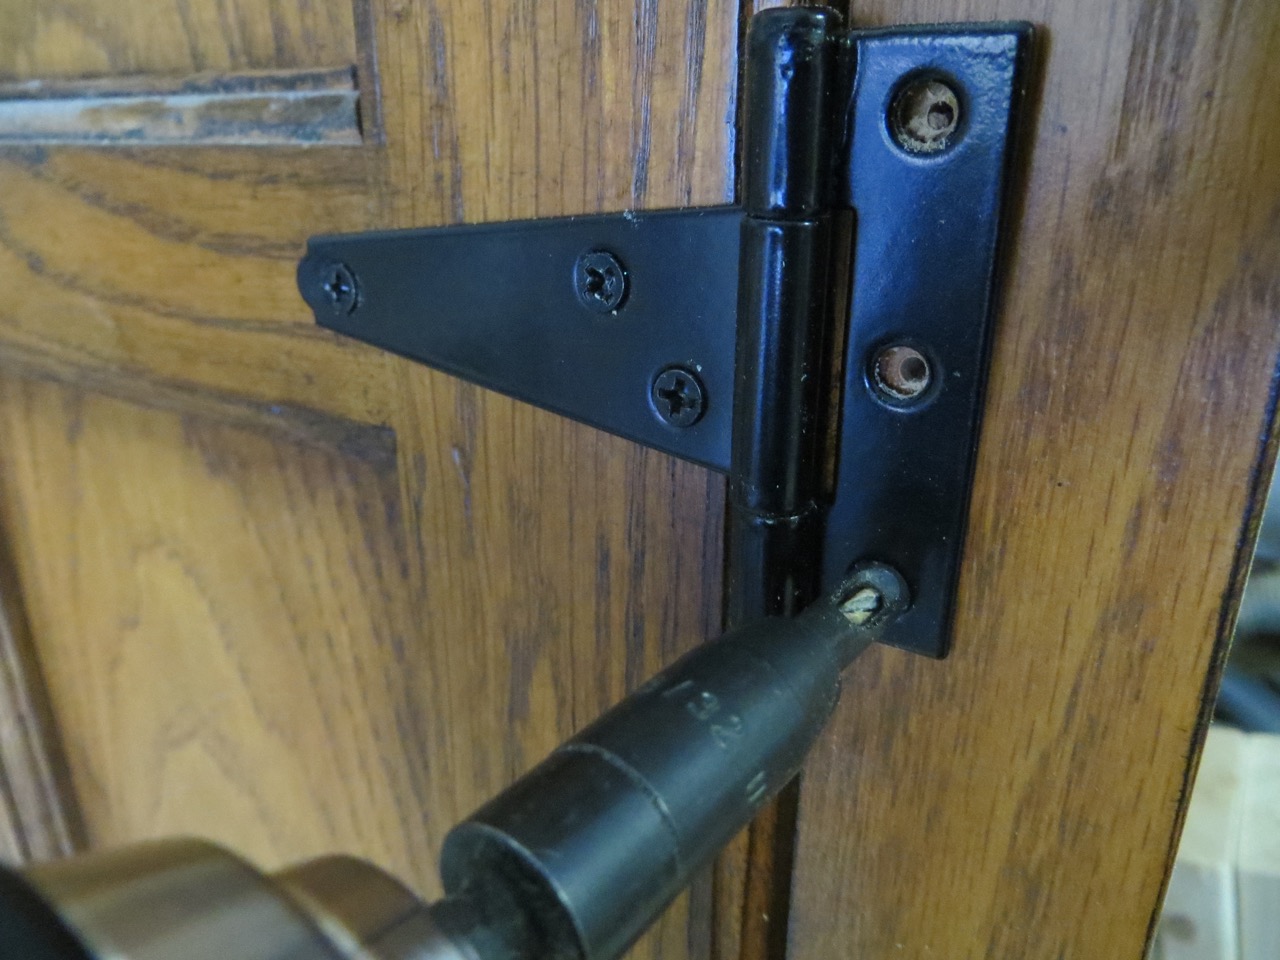
The first matter of business was taking the old hinges/slides off. To add new hinges on the outside I spaced the doors appropriately using the kids UNO cards. Cards are great spacers because you can add just as many as you need to fine-tune exactly the space needed.
To attach the new hinges I taped them in place and had the flat end tucked between the door and cabinet frame so it would not only be more stable for pre-drilling but so the actual hinge part would be in just the right position (and all 4 hinges would be the same). I’m holding up a hinge to show how they will look when the flat end is out. I COULD have screw the hinges on so the flat end would stay tucked inside – to do that you would want to screw the flat end on the cabinet frame first.
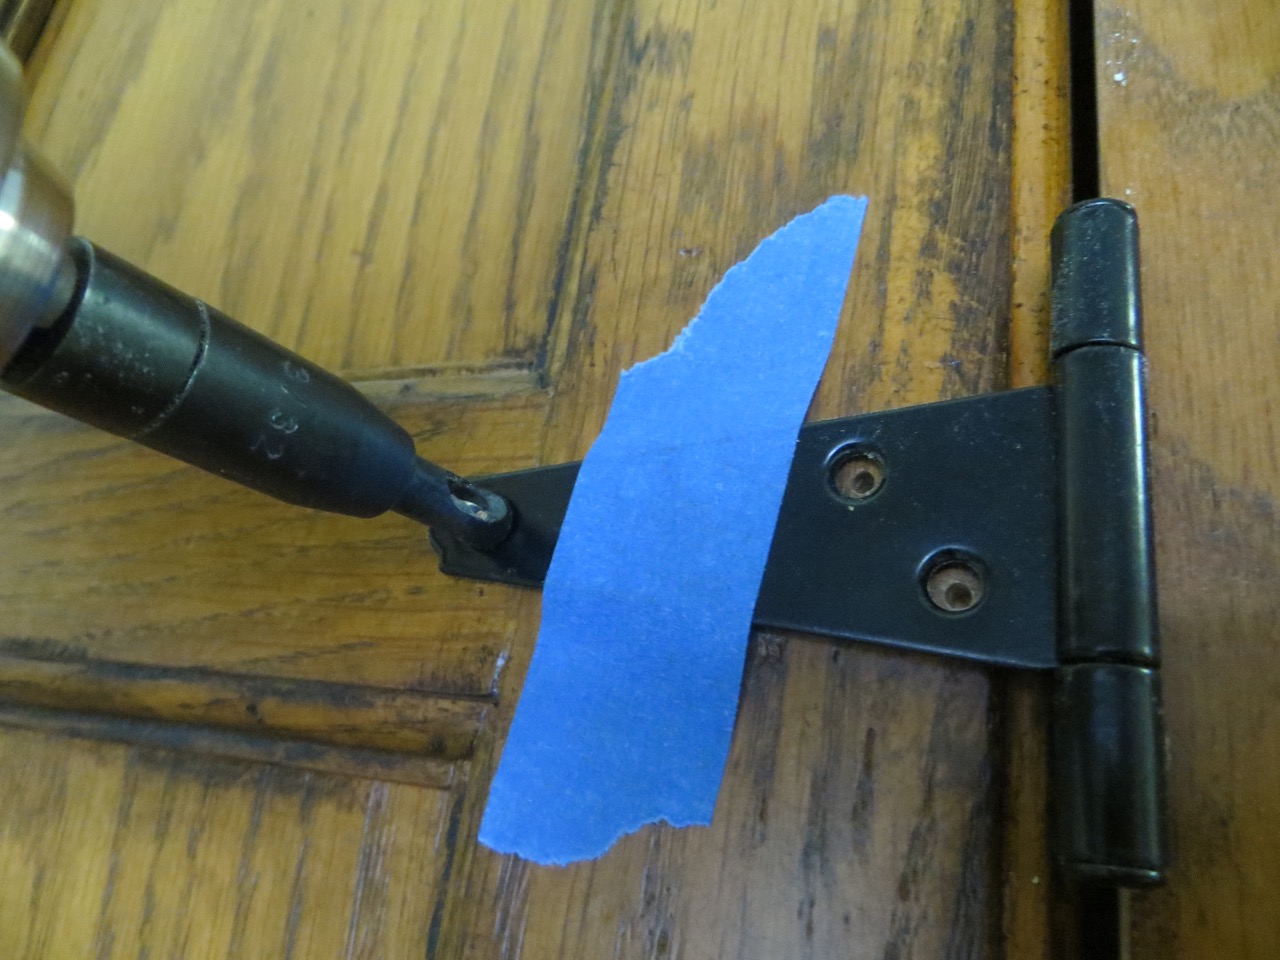
This is where a self-centering drill bit will change your life! Pre-drilling holes has never been easier! I got mine here.
Once the holes were predrilled I took the flat end of the hinge out before screwing it on.
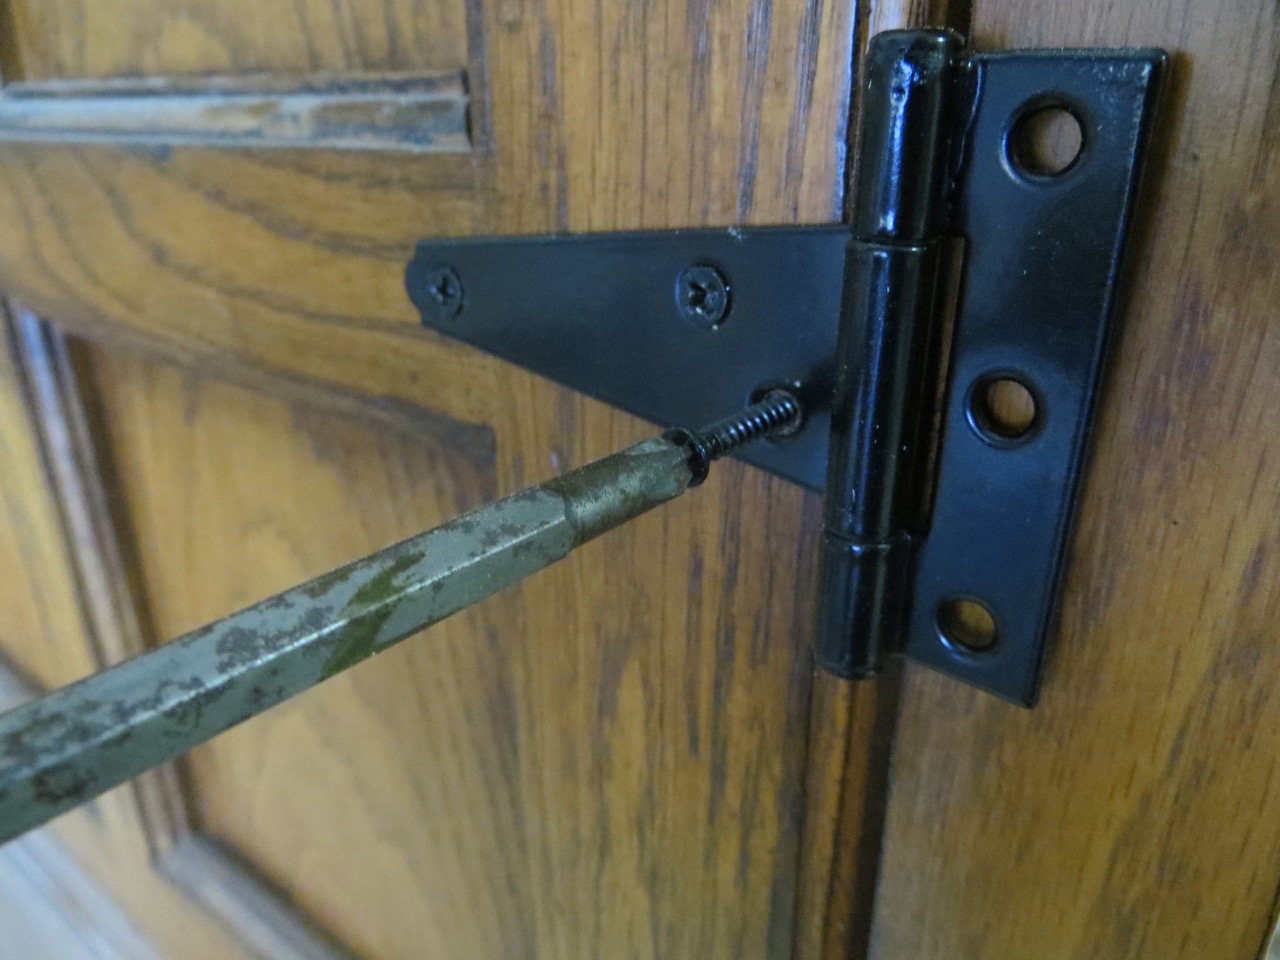
Pre-drill the other side.
That was easy!
I had to fill the LARGE holes the original hinges left – I made a thick dowel the size of the hole and glued it in, cut the excess off with my flush cutting saw and filled the small gaps with wood filler.
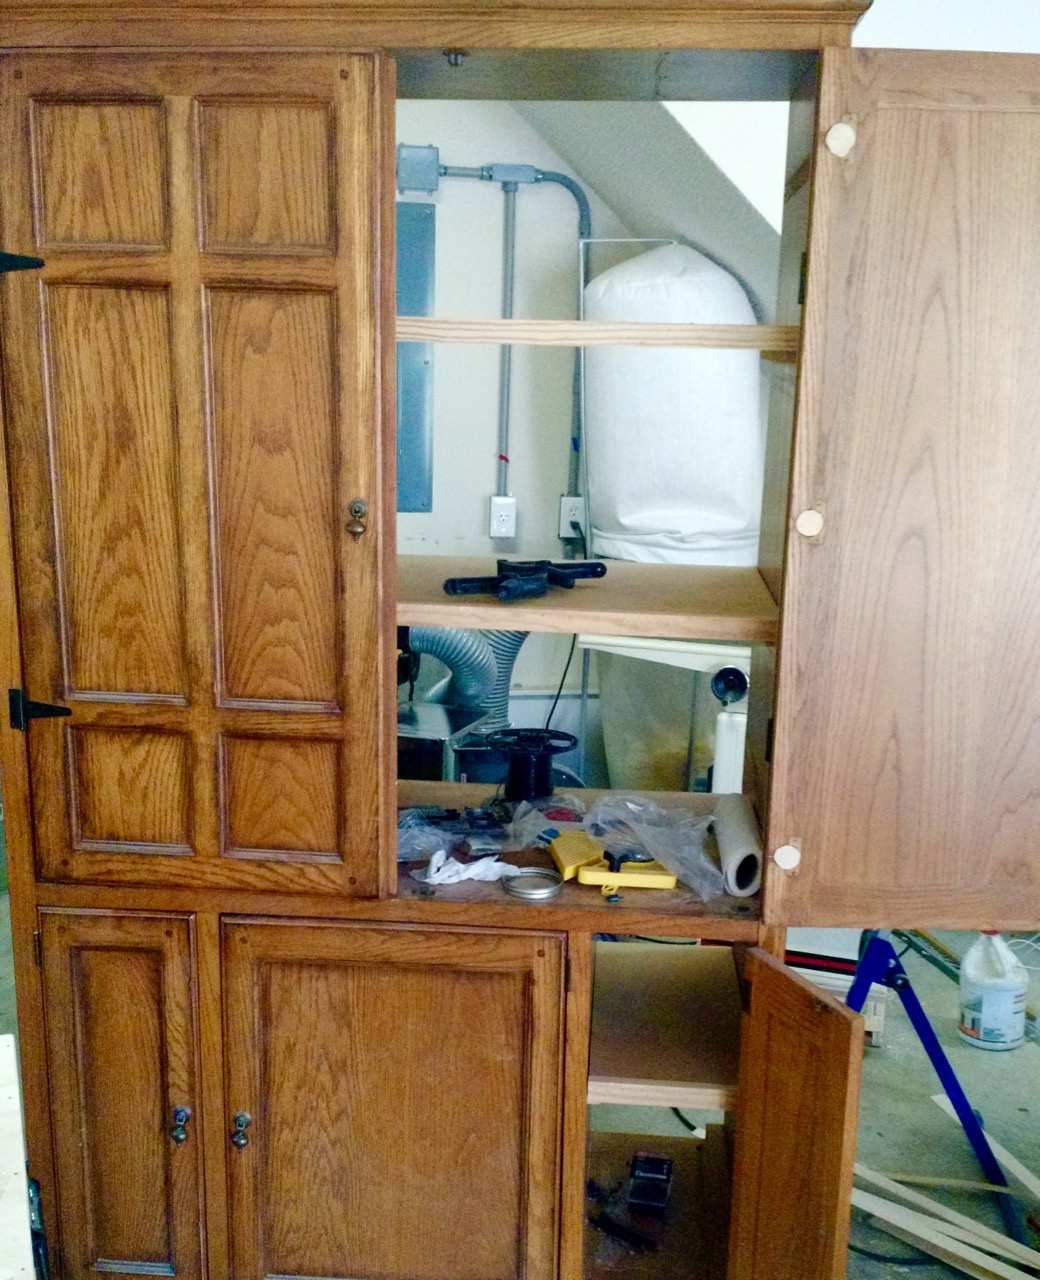
I used MDF to make all the shelves and glued/nailed strips of pinewood on the fronts to give them a nicer look.
(photo taken from merrypad.com)
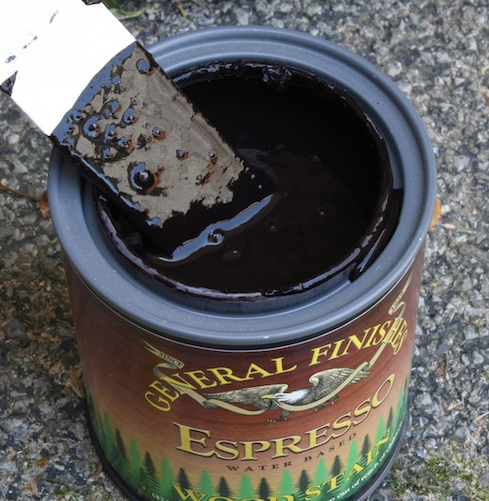
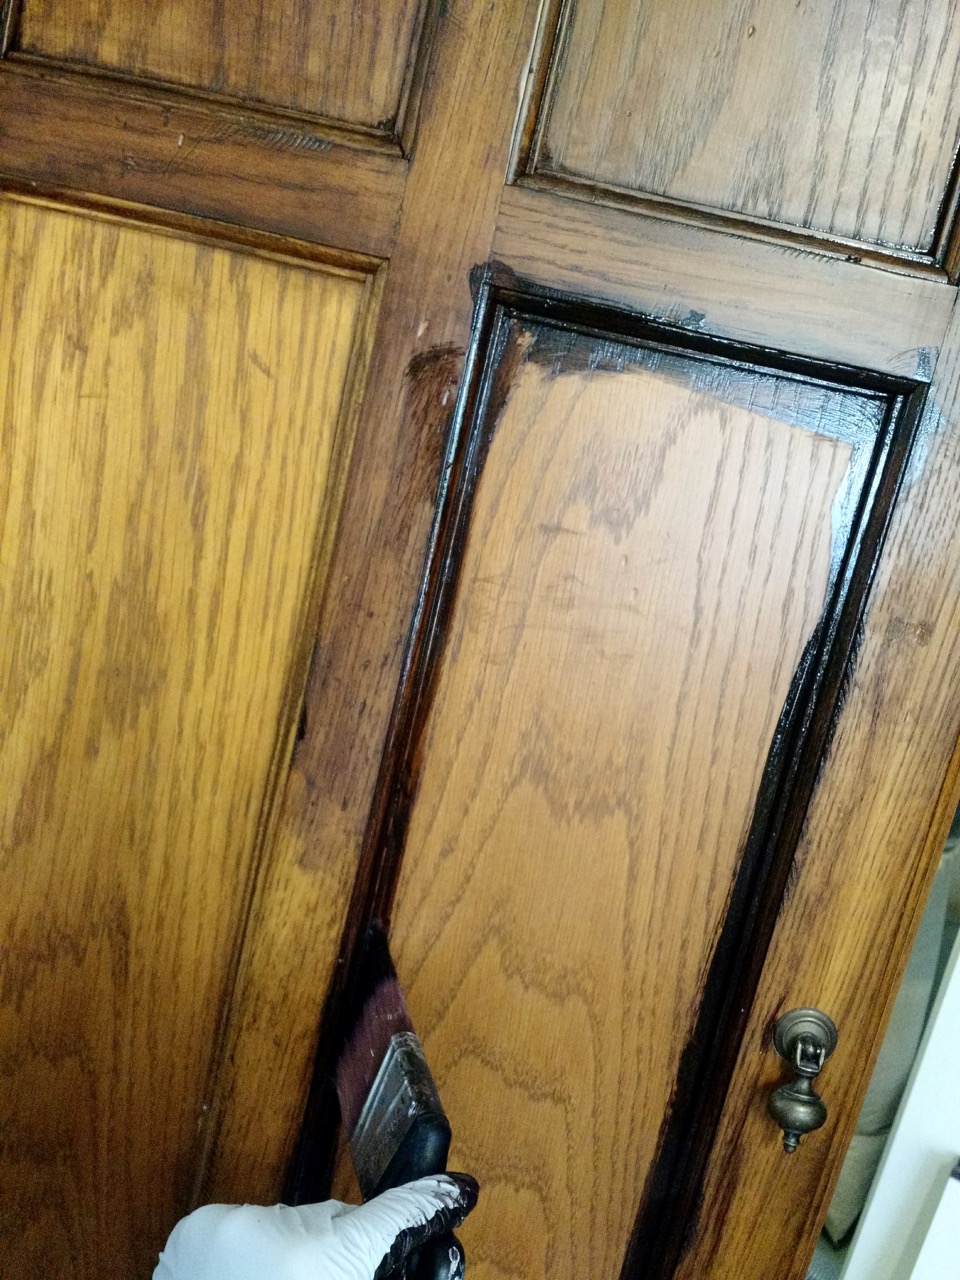
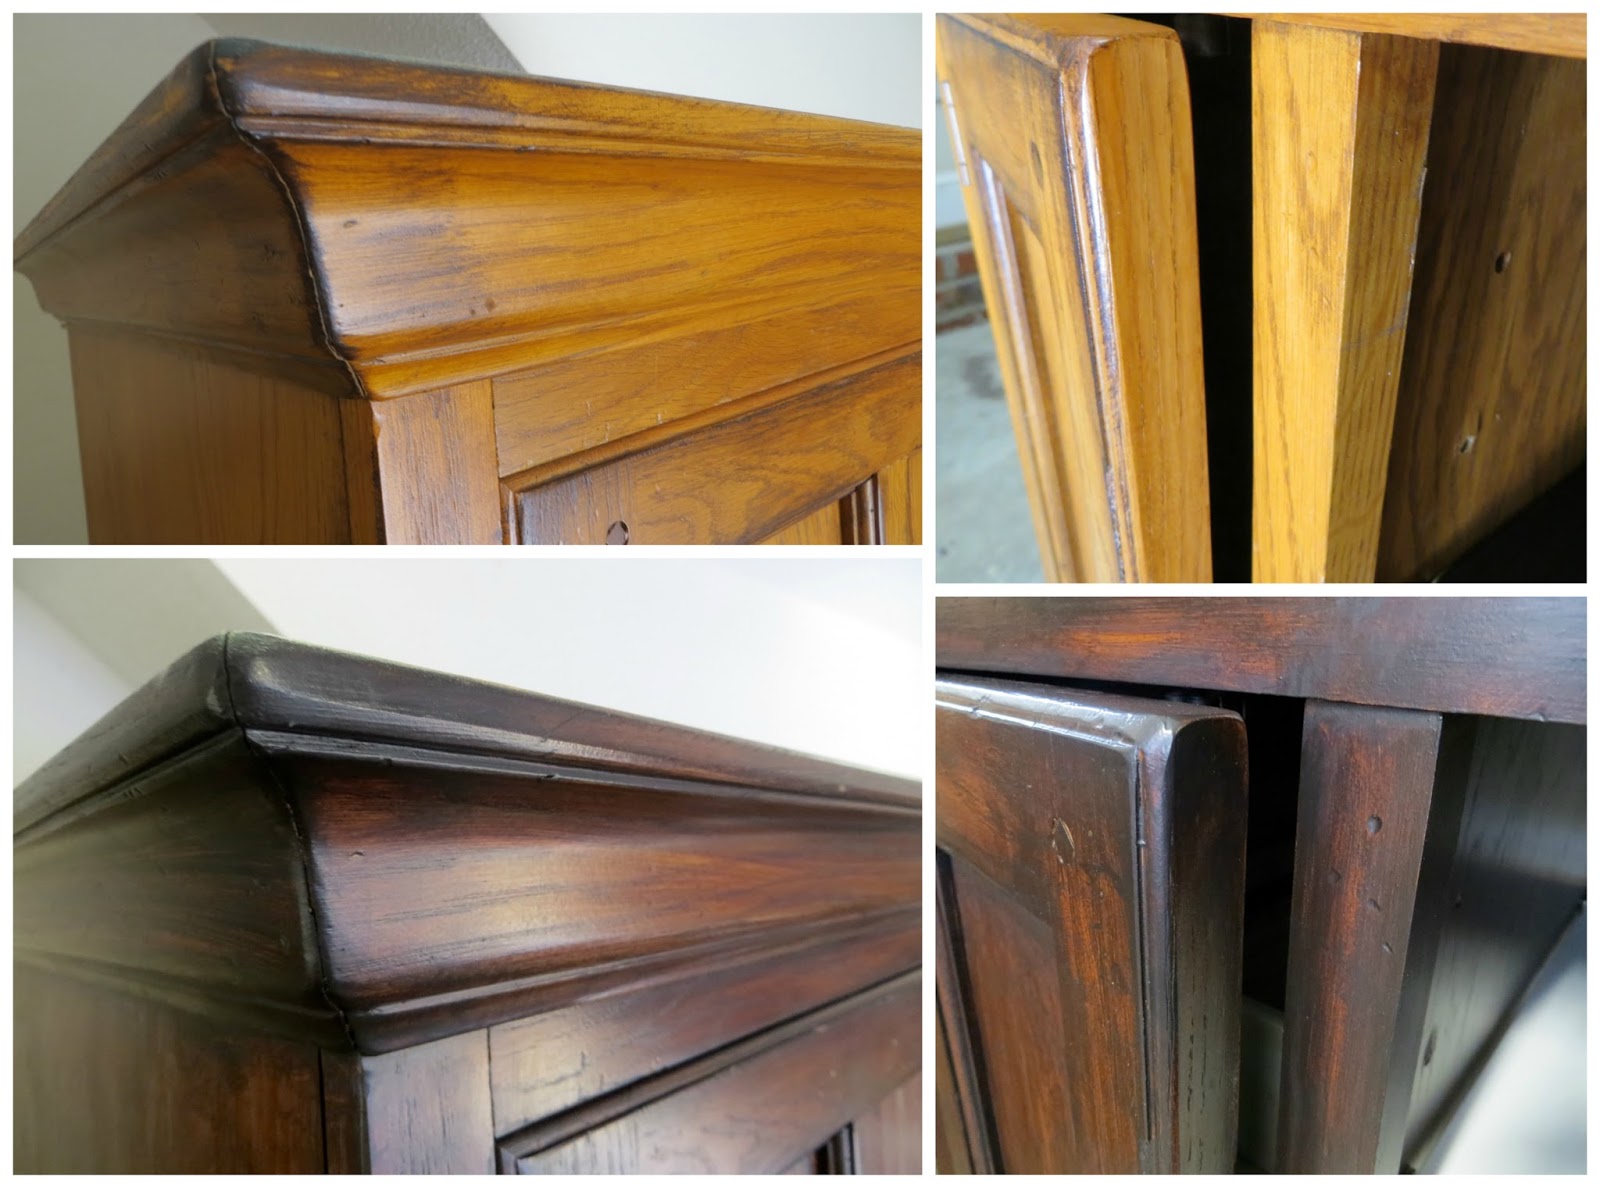
I didn’t like the bright honey color the wood was before so I used General Finishes “Espresso” stain to darken the whole appearance.
I can’t tell you how wonderful these stains are! They dry quickly, go on easy (and over existing finishes), no harsh odors, you can reapply for darker color and they leave your wood feeling super smooth!
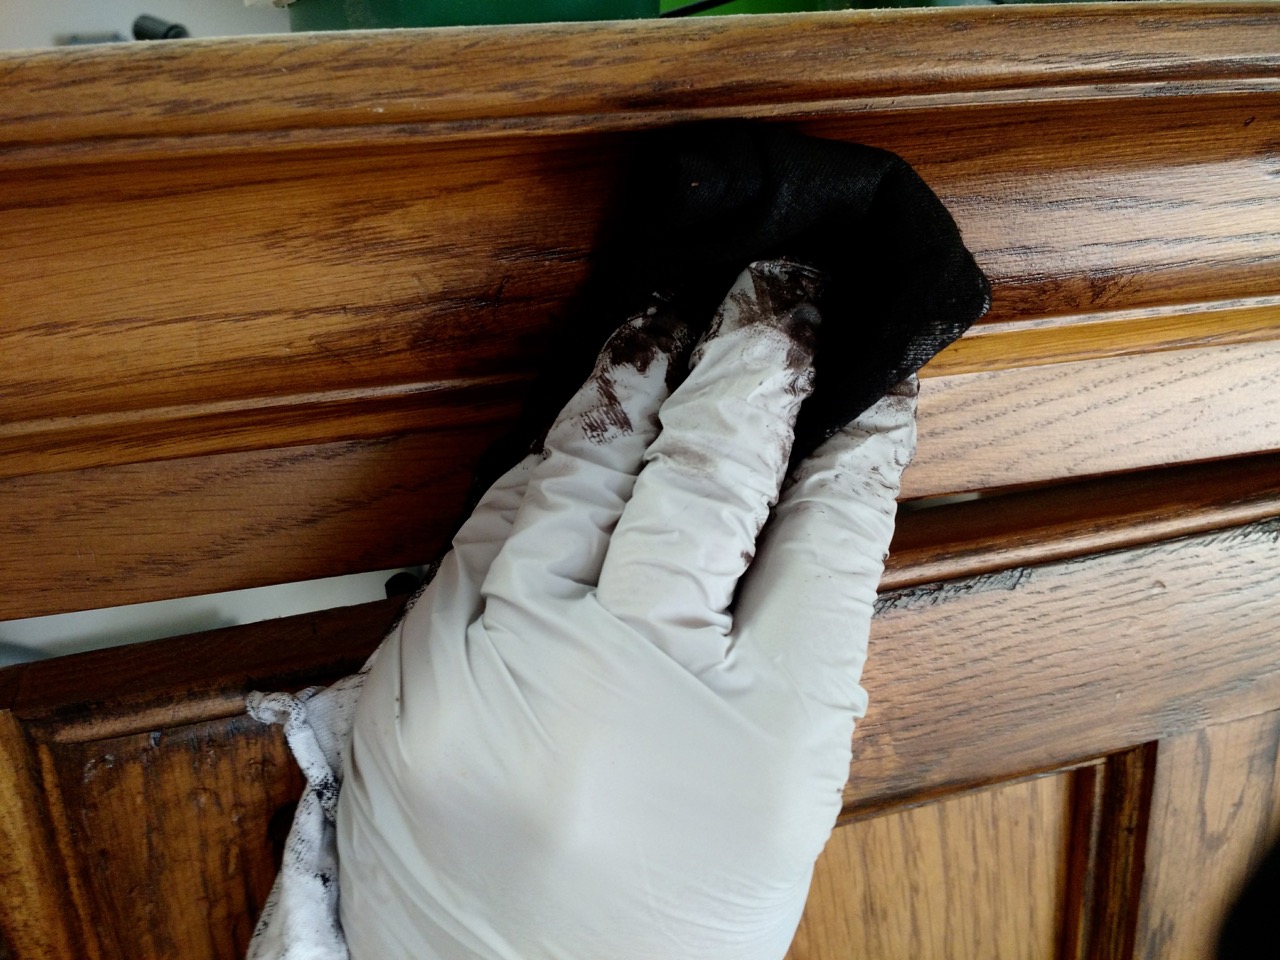
For the large areas I used a rag to wipe stain on…
…and I used a brush to get it into the corners and moulding first. Work in sections and keep a wet edge at all times so everything blends. This stain dries somewhat fast so you need to work quickly. If you’re doing 2nd and 3rd coats you can blend your work more easily!
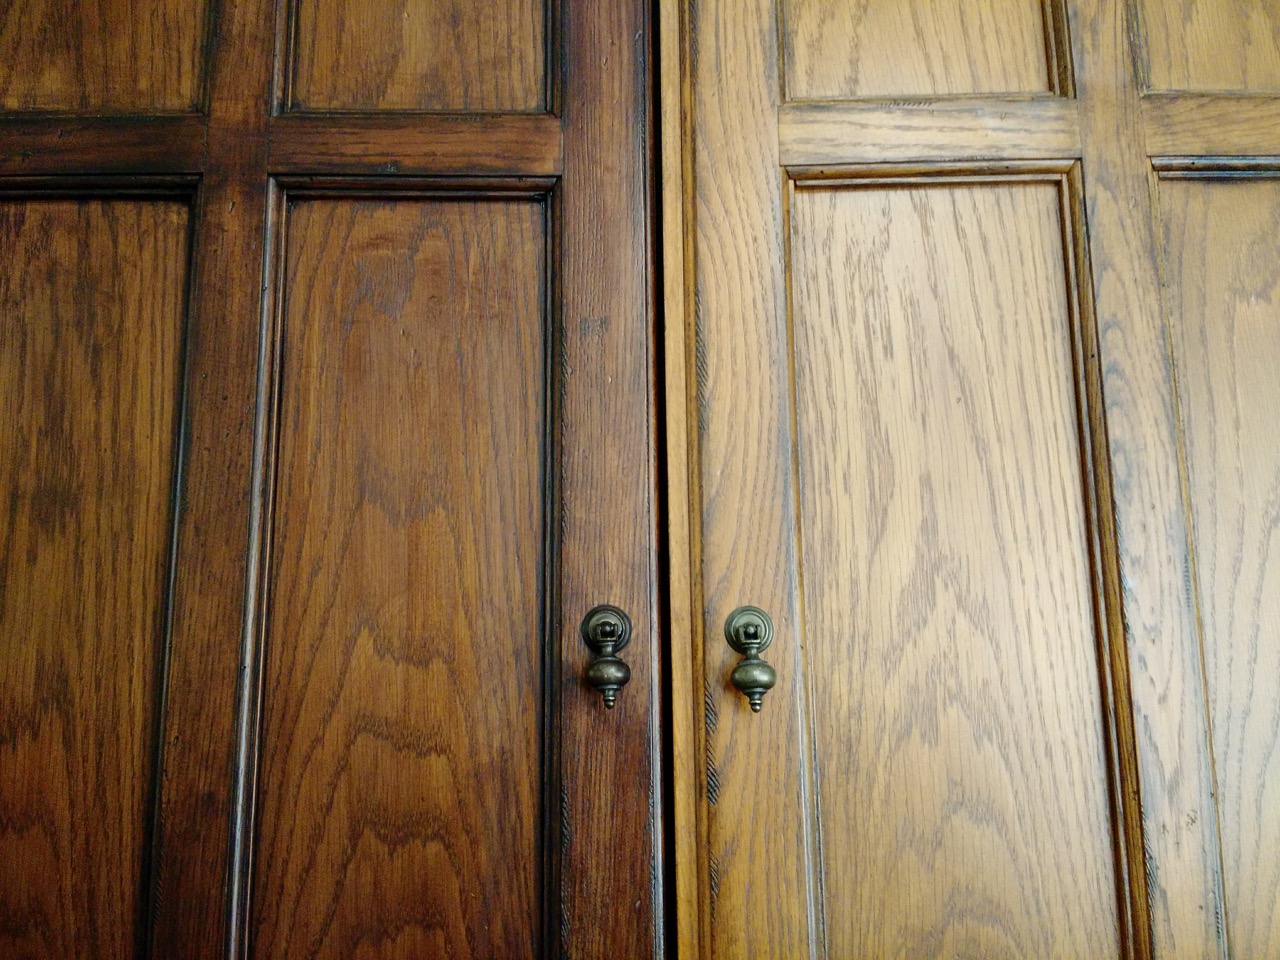
This shows the difference between 1 coat. Amazing, right!?
I did 2 full coats on the entire cabinet and used only 2/3 of the can.
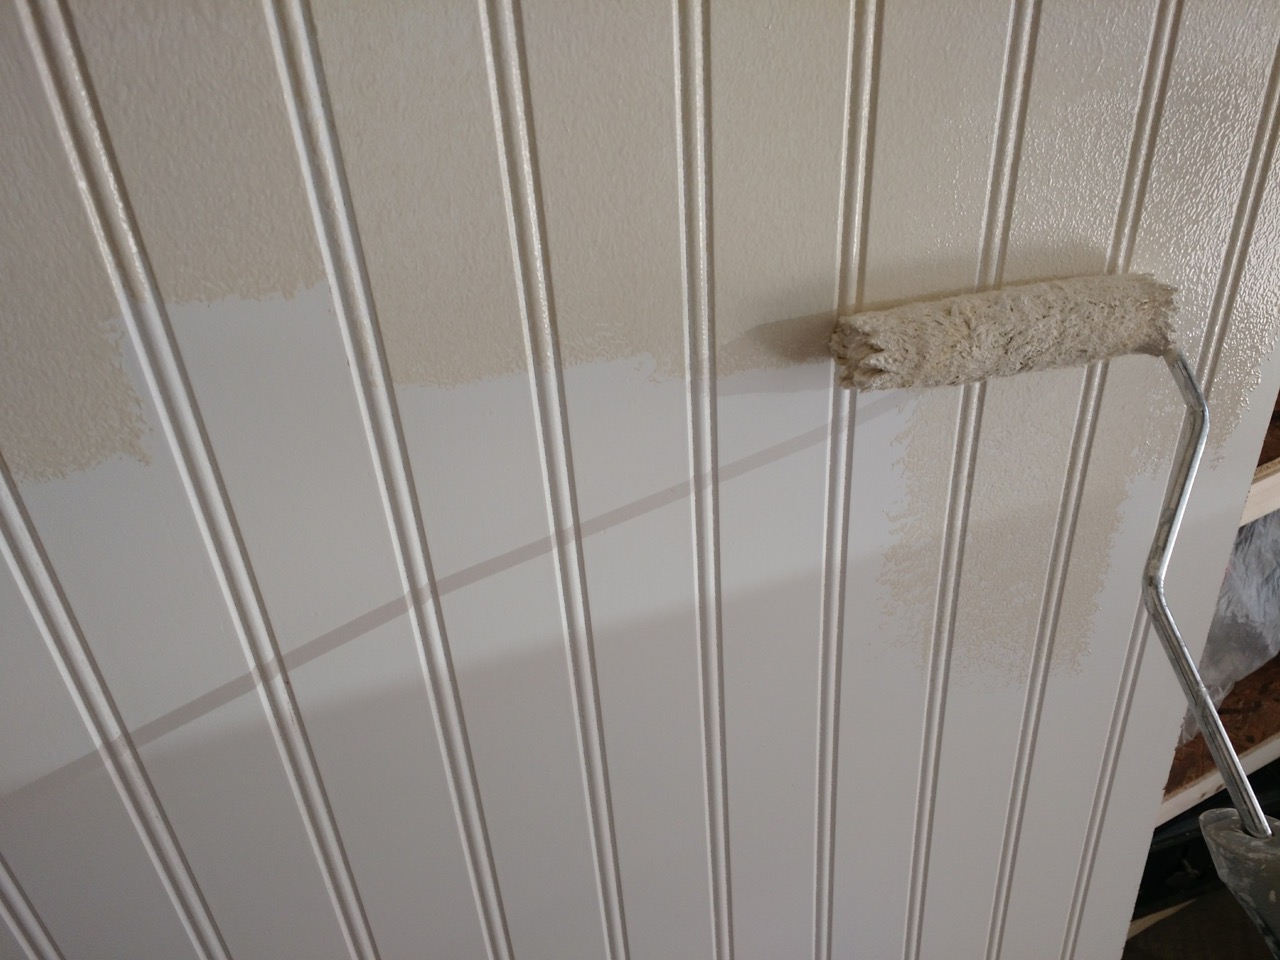
I painted the shelves and backing board with 2 coats of latex paint.
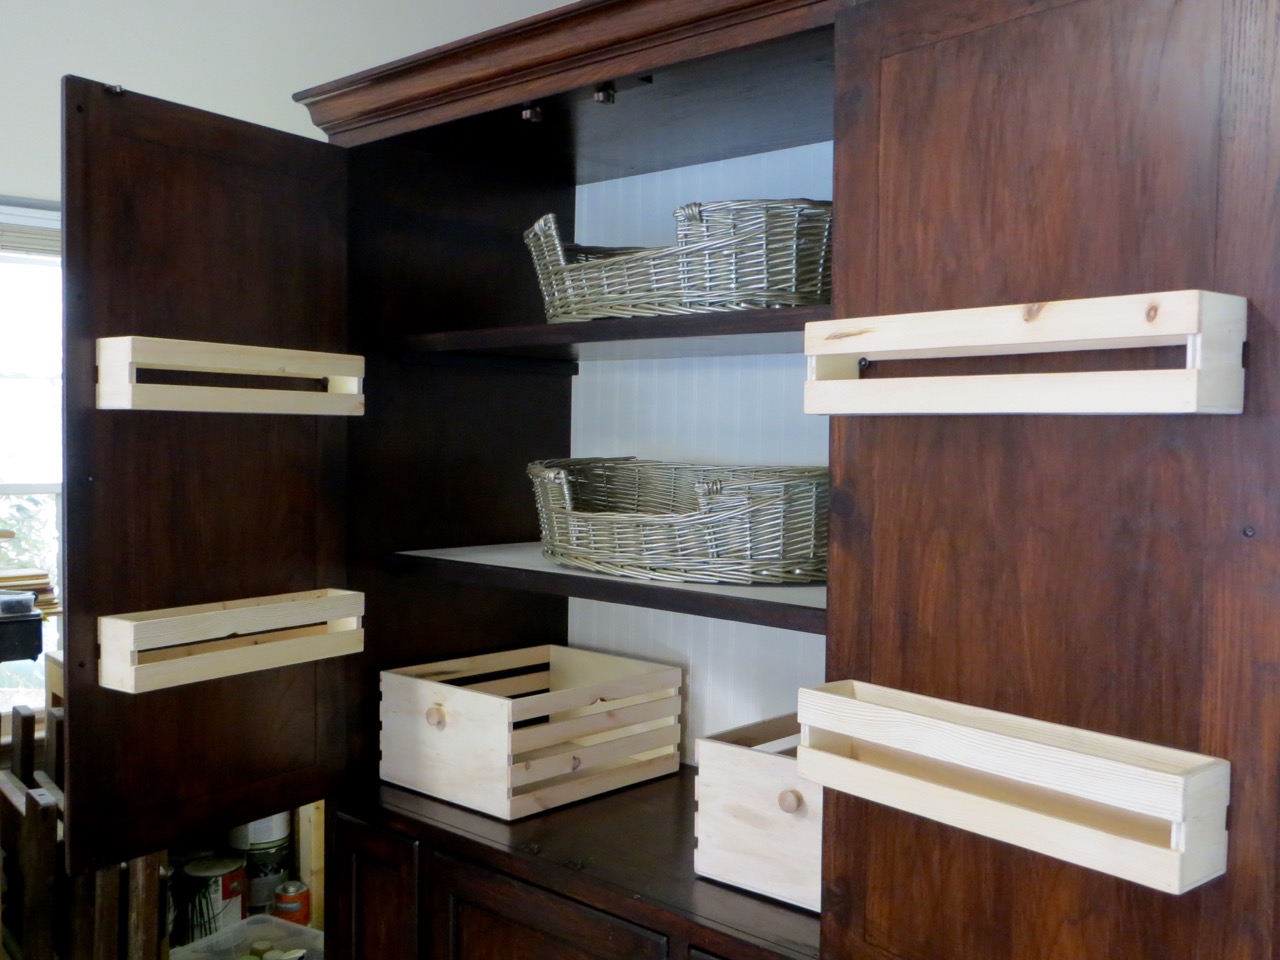
I used a screws and washers to attach my smaller bins on the doors. It was a quick and easy solution that allows the bins to pull right off if needed. They stick out just enough to catch onto the top slat.
I made sure to place the bins on the doors so they wouldn’t bump into the shelves once the doors were closed.
I put felt pads on the bottoms so they could slide in and out with ease and not scratch the shelf.
It’s super functional and pretty now.. and I’m so glad it’s done!
Great job, they look so nice!! I have a question : on the before-last picture, it seels there are two additional slats along the bottom sides. Is it for reinforcement? Thanks for your great blog, I will follow your projects! Nathalie.
You're totally right! I didn't take a picture of that process so forgot to mention it! They're 1/2" a 1/2" strips I glued in the corners of the bins to give reinforcement. For the smaller bins or bins that won't be holding heavy items this isn't necessary. Thank you!!


4 Comments
What a nice job done!
February 17, 2017 at 12:35 pmThank you!
February 25, 2017 at 12:09 pmGreat job, they look so nice!! I have a question : on the before-last picture, it seels there are two additional slats along the bottom sides. Is it for reinforcement?
March 20, 2017 at 12:26 pmThanks for your great blog, I will follow your projects!
Nathalie.
You're totally right! I didn't take a picture of that process so forgot to mention it! They're 1/2" a 1/2" strips I glued in the corners of the bins to give reinforcement. For the smaller bins or bins that won't be holding heavy items this isn't necessary. Thank you!!
March 20, 2017 at 12:40 pm