
 These Christmas tree ornaments are fun and easy to make. It only took me an hour from start to finish!
I don’t usually hand out treats or presents to neighbors/friends but decided last minute to make some for the families my husband and I care for from church.
These would be a fun way to sit around the table with extended family and make your own decorations!
Have fun with it!

Supplies Needed:
Oven Bake Polymer Clay (about 1 oz per ornament)
Rolling Pin
Cookie Cutter + Straw
Metal Stamp Set (I like 1/4″ Size)
Objects for Imprinting
Parchment Paper + Baking Tray
Embellishments/Ribbon/String
Work your clay until it’s soft. Ovoid folding air bubbles inside (my kids were playing with my clay and mine was full of bubbles – oops!). Roll out on a non-stick surface to be 3/16″-1/4″ thick. Cut out shapes with your cookies cutter and place over parchment paper on a baking tray.
Preheat oven according to manufacturer directions.
 Use stamp set to imprint whatever you want to put on your ornament. I work from the last letter to the first letter to make sure I keep enough room from the edge.
 Set greenery or whatever you’re imprinting over and press using a flat object. Because the clay is pretty solid you’ll need to press harder thank you think.
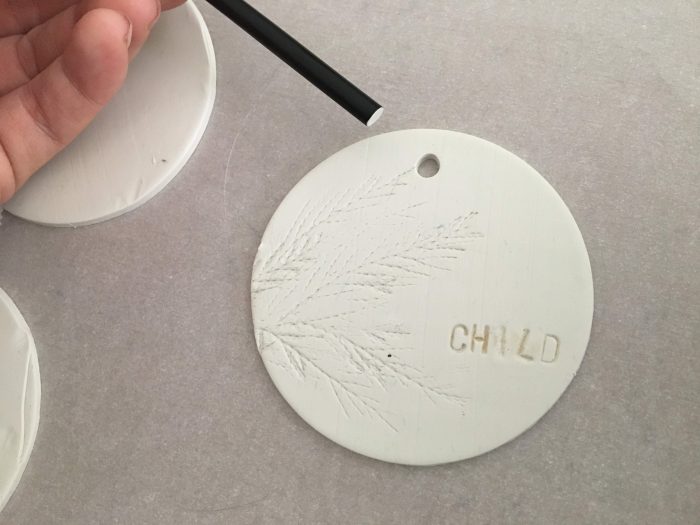 Use a straw to cut out the hole for hanging – leave about 1/4″ of clay at the top to ensure the edge isn’t weakened.
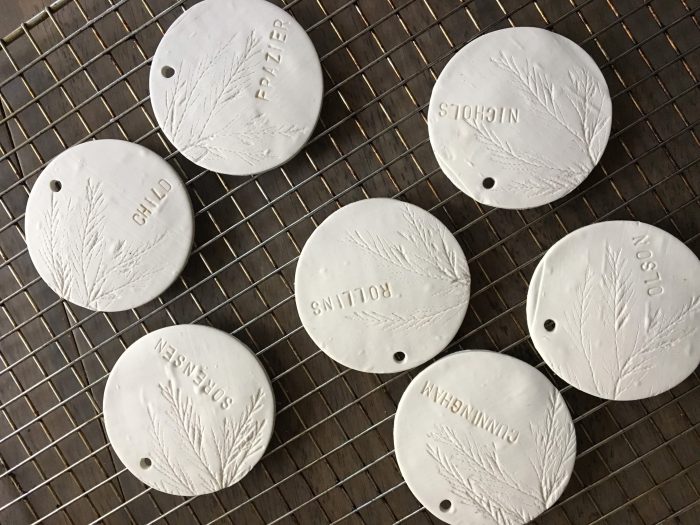

Bake and let cool on a rack. (You can see I had some air bubbles – ack! Oh well, it gives it that handmade touch!)
 Add hanging string and any other embellishments you want.
 I put ours in little clear bags with greenery as filler to hand out.
MERRY CHRISTMAS YA’LL!

2 Comments
Do you need to seal these afterward baking?
September 27, 2020 at 4:00 pmHi! Yes, I brushed them with Mod Podge afterwards!
September 30, 2020 at 2:05 pm