
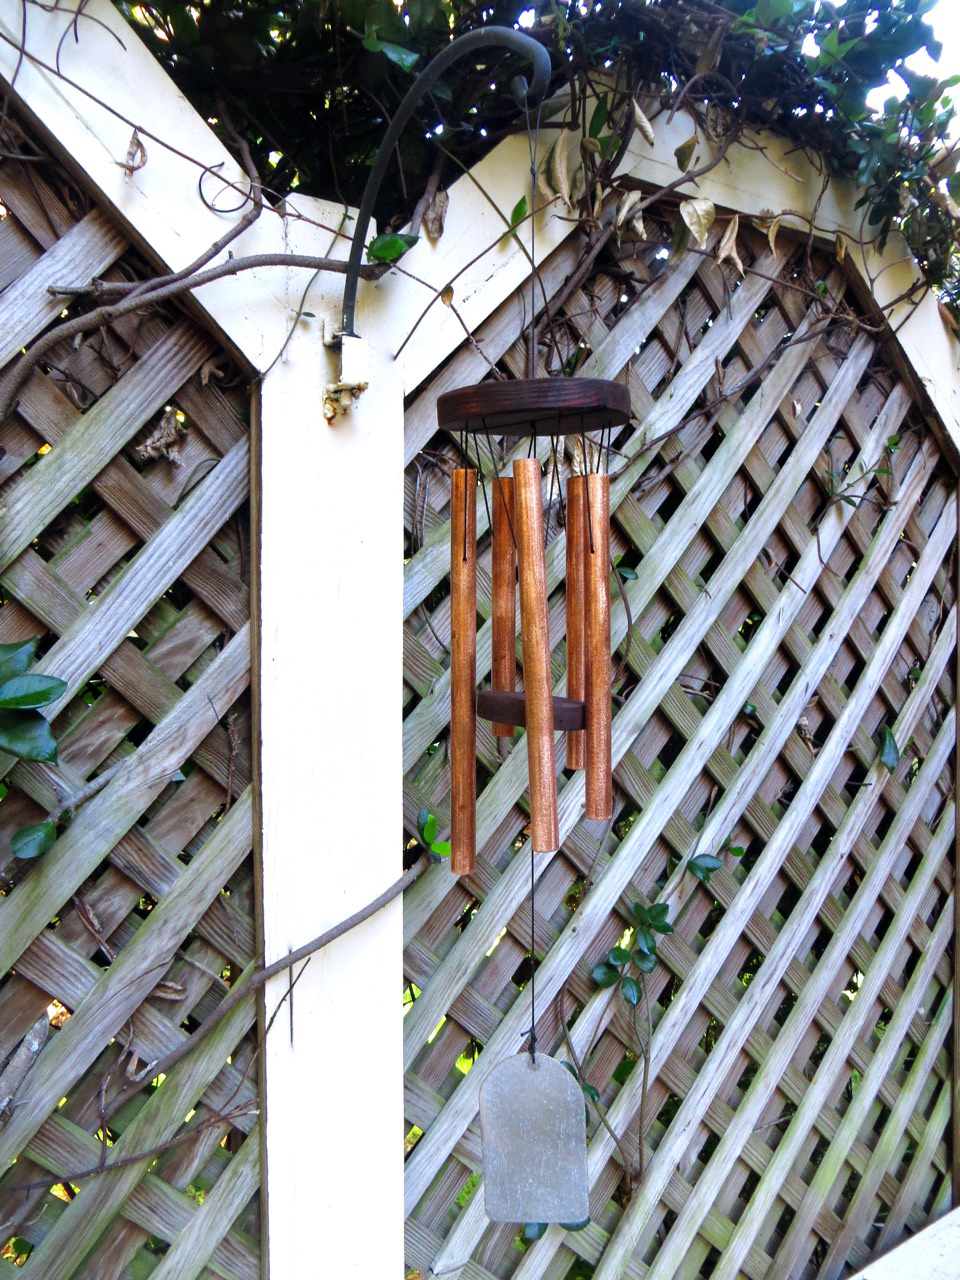
Hey there! I was decorating our Christmas tree just yesterday when I thought about adding some copper ornaments, which got me to thinking about the copper pipe we had in our garage, which got me to thinking about wind chimes I saw at the store a few days before, which of course led me to making my own (now you know how distracted I can get)! It was easy peasy and took my only a few hours!
I can’t take all the credit, though, because I didn’t know anything about making a wind chime – and most certainly didn’t know how long to cut the pipes. Upon researching the matter, the first thing I stumbled upon was this very informative video:
In the video you can see that the type/size pipe you use will ultimately determine the length of the tubes and it is a precise calculation for the right sound.
The video and all the information on Lee Hites website can be a little overwhelming so I decided to make this post to show you how easy it really is! You need very few supplies/tools. I used scraps of what I already had on hand so I’d like to think it was free… but the pipe scrap was probably $6 worth.
SUPPLIES I USED:
4′ scrap of 1/2″ Copper Pipe
4′ scrap of 1/2″ Copper Pipe
Wood Scraps for Striker & Hanging Plate (Support Disk)
Galvanized Metal Scrap for Wind Catcher
Waxed Cording
Painter’s Tape
Wood Finish
TOOLS I USED:
Metal Grinder
Bench Wheel Grinder
Table Saw
Drill and Bits
Circle Compass Tool
Leather Gloves/Eye Protection
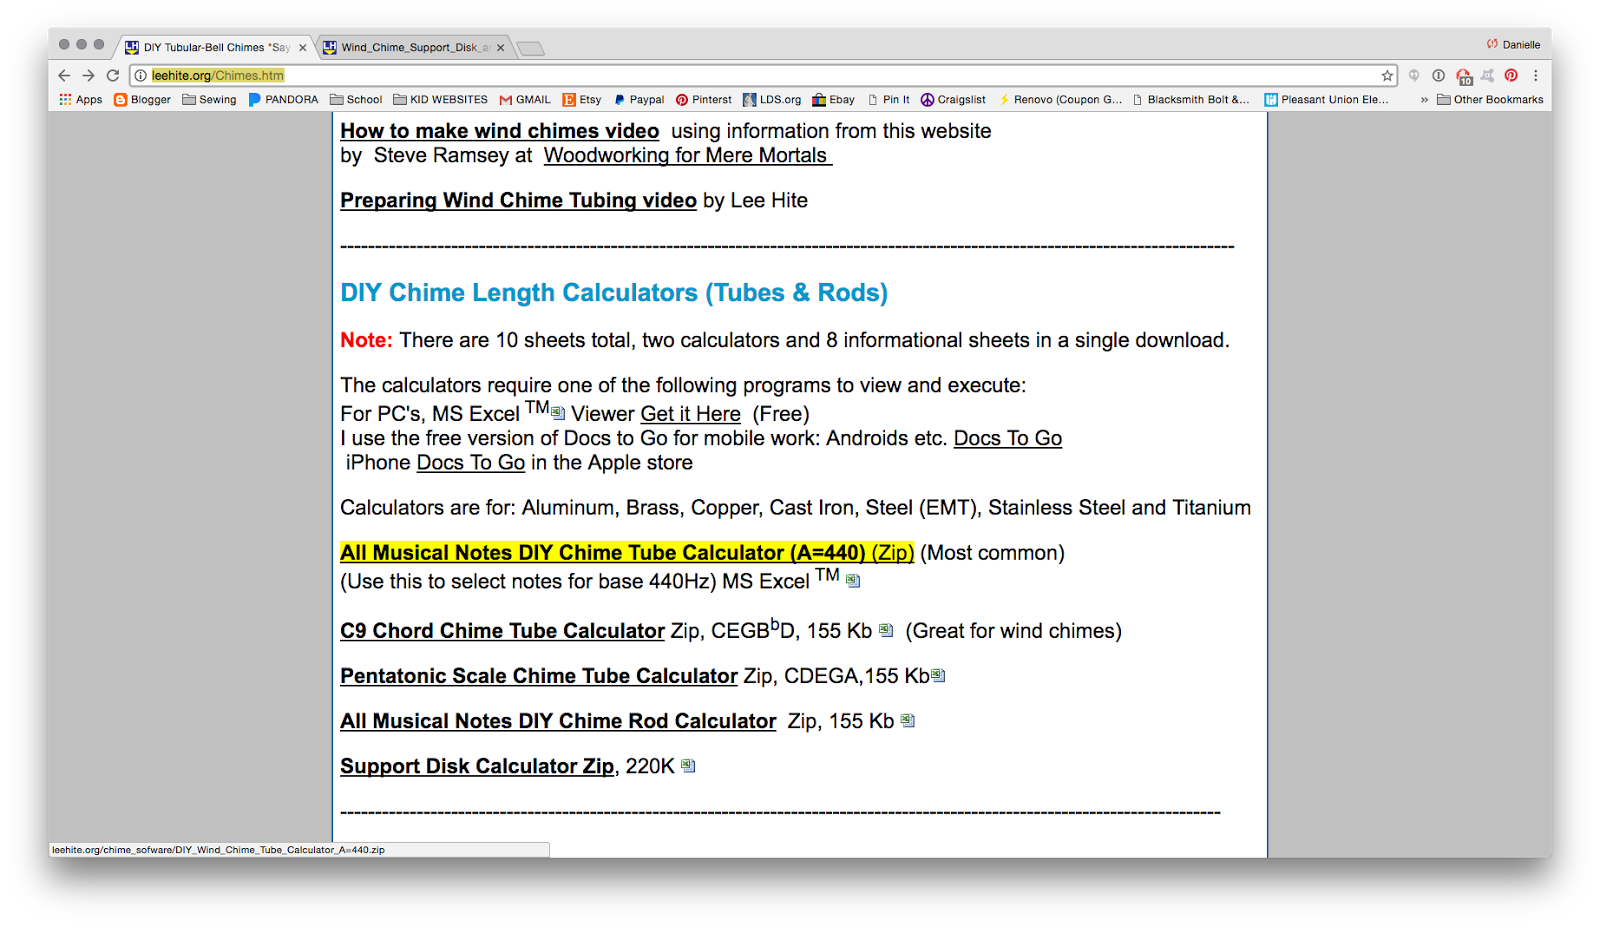
There are a few options on his website for different excel spreadsheets – I used the one highlighted.
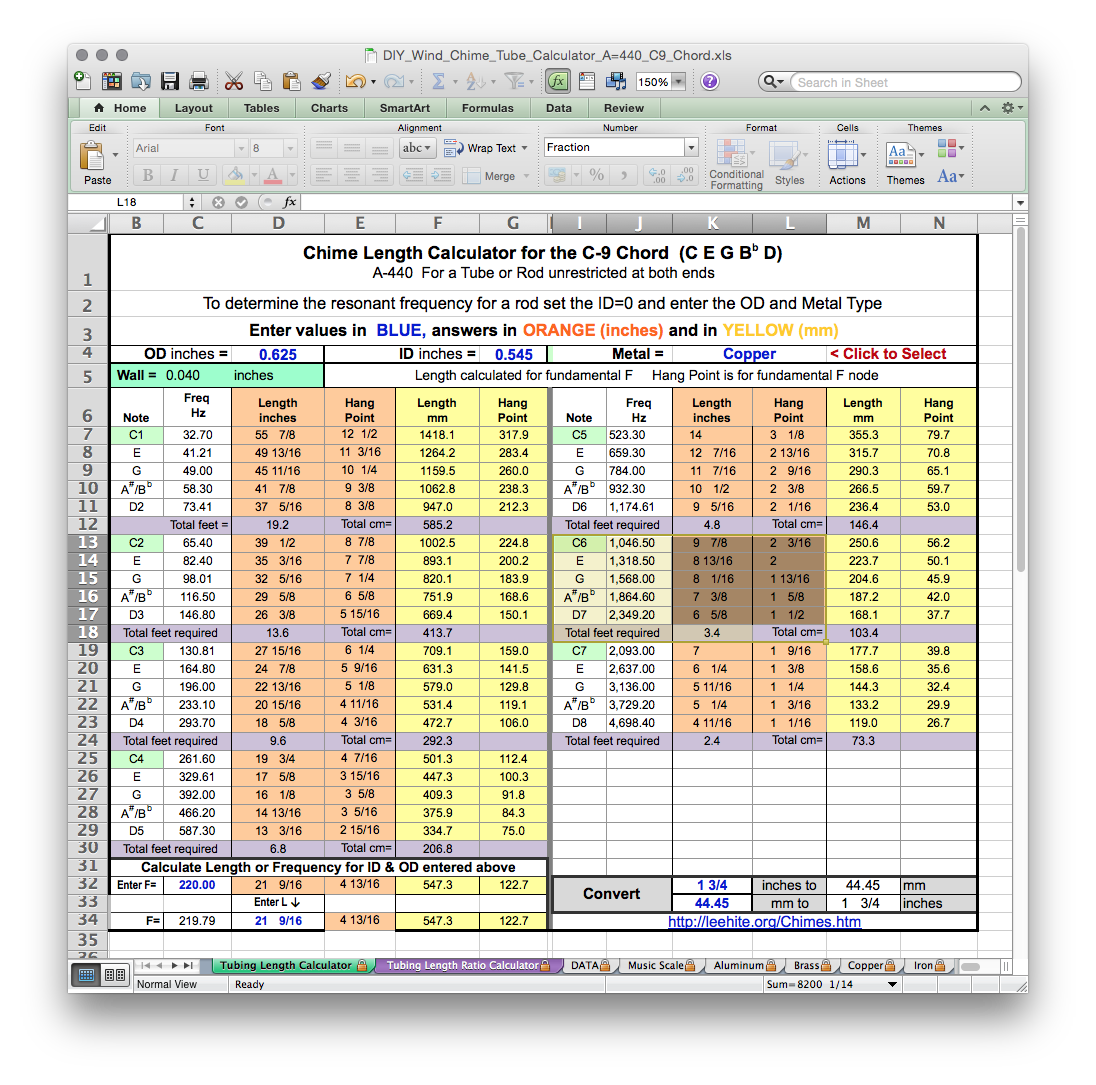
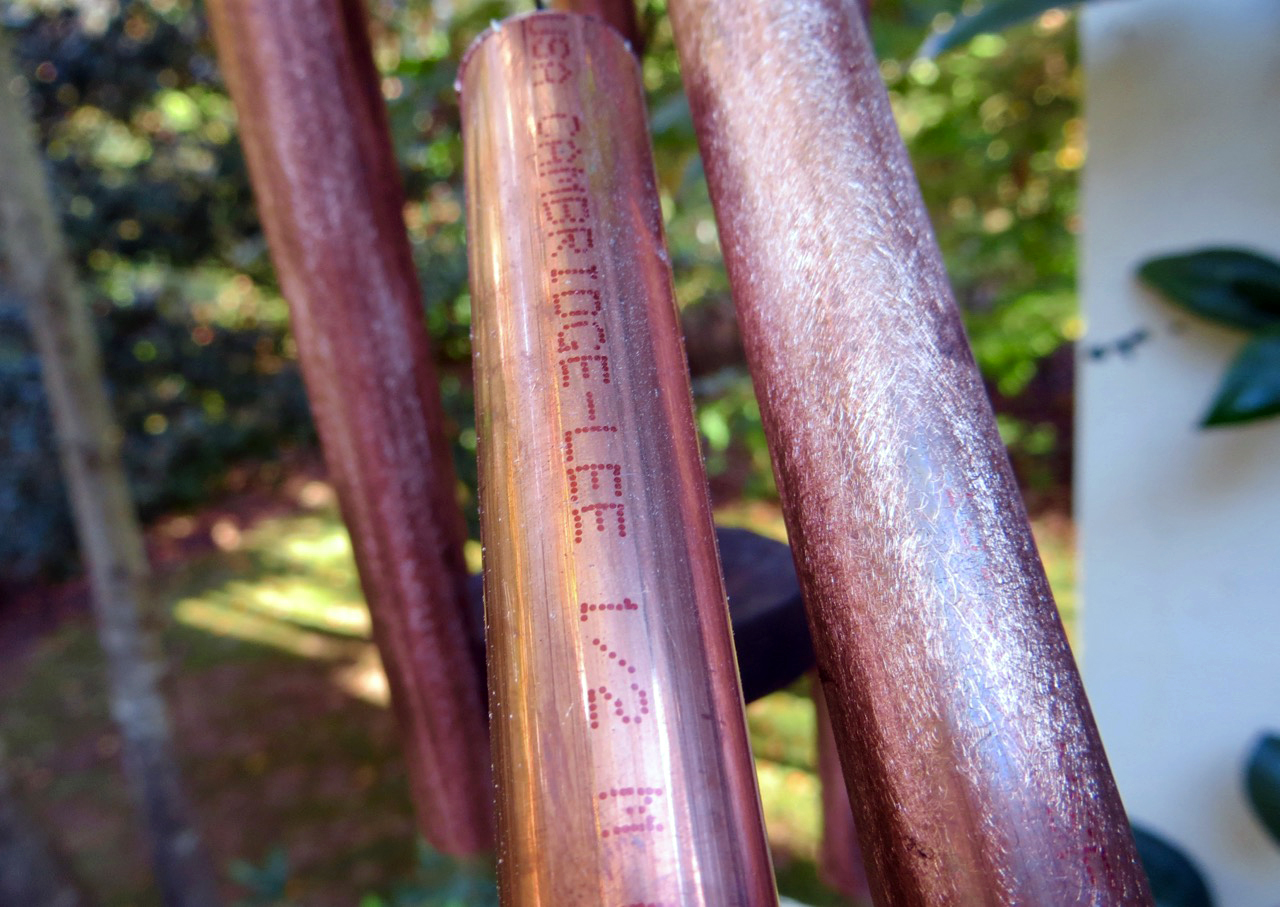
Once I downloaded the excel spreadsheet I put my information in the top bar (line 4): that I had a copper pipe and it had a 1/2″ diameter. If you go to the “Copper” tab down at the bottom of the spreadsheet you can see the point value of a 1/2″ tube (specifically the ‘M’ type that I was using). In my case the OD was 0.625 and the ID was 0.545 which you see on line 4.
If you notice on the spreadsheet there are 7 green highlighted boxes which are different notes/tunes you can choose between. I don’t know much about tones/notes but you’ll see that C1 has the longest size tubes starting around 55″ which would give you a very low sounding chime (right?) and the total amount of pipe you’d need for that set is 19.2 feet! I only had 4 feet to work with so that meant the largest chime I could make was from C6 (3.4 feet needed).

This is all the information I needed to start cutting my pipes. The first orange column was the length of tubes I needed to cut and the second column was where to drill the holes for the hanging point on the tubes.

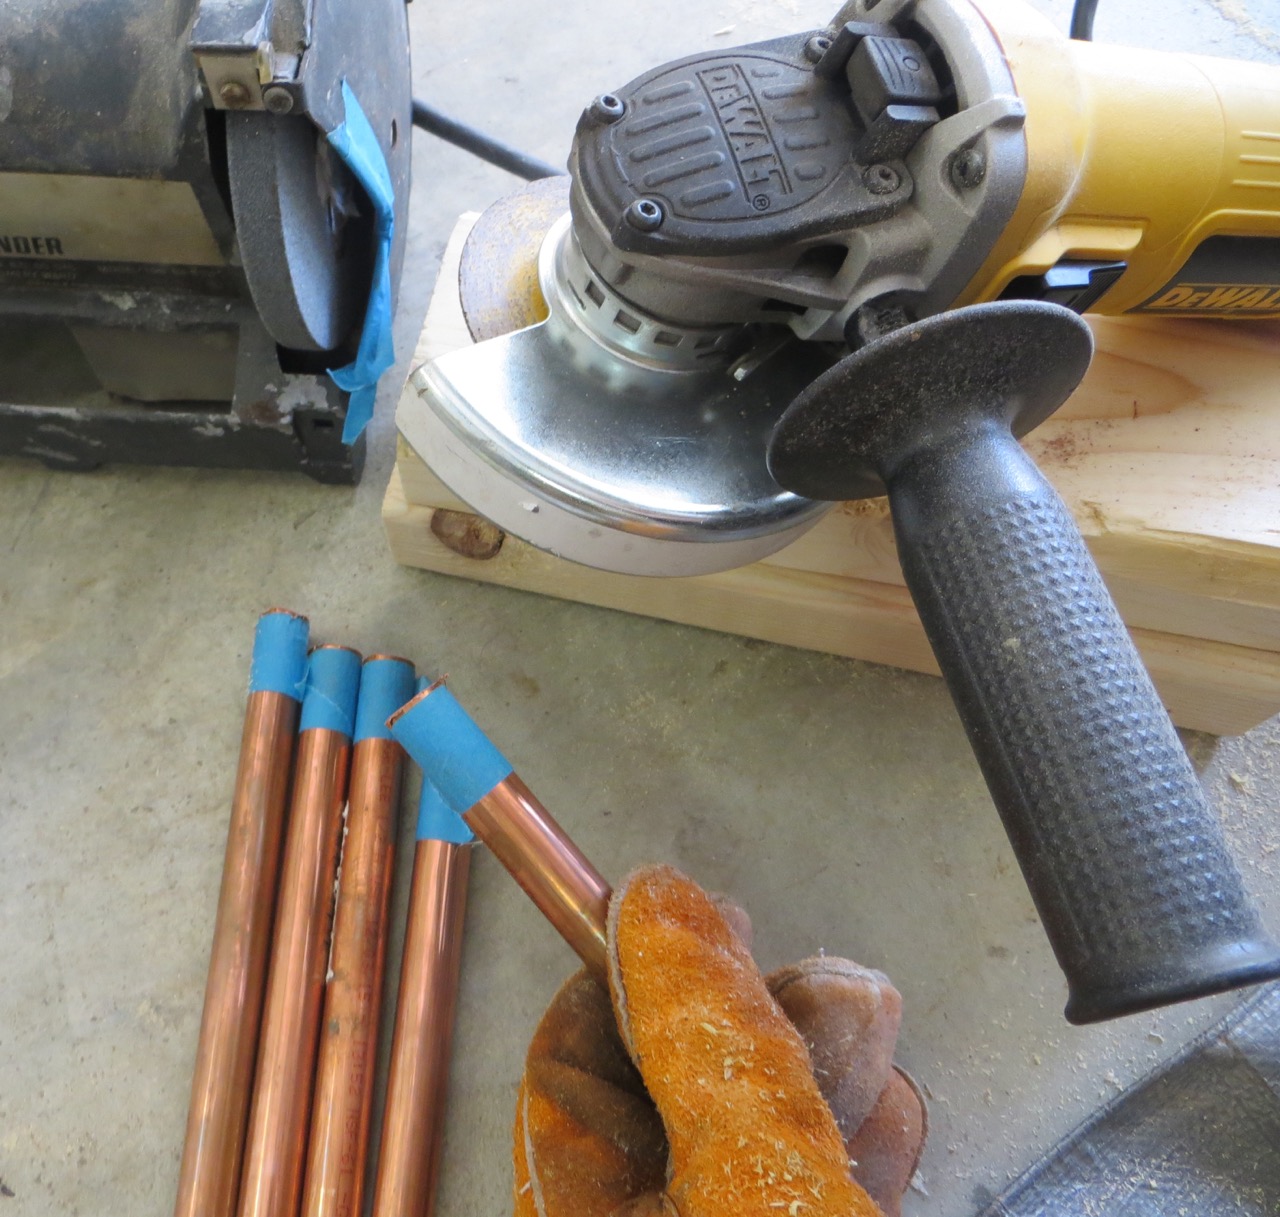
I cut my 5 lengths slightly larger than necessary with my hand grinder because the cuts are never straight and perfect.
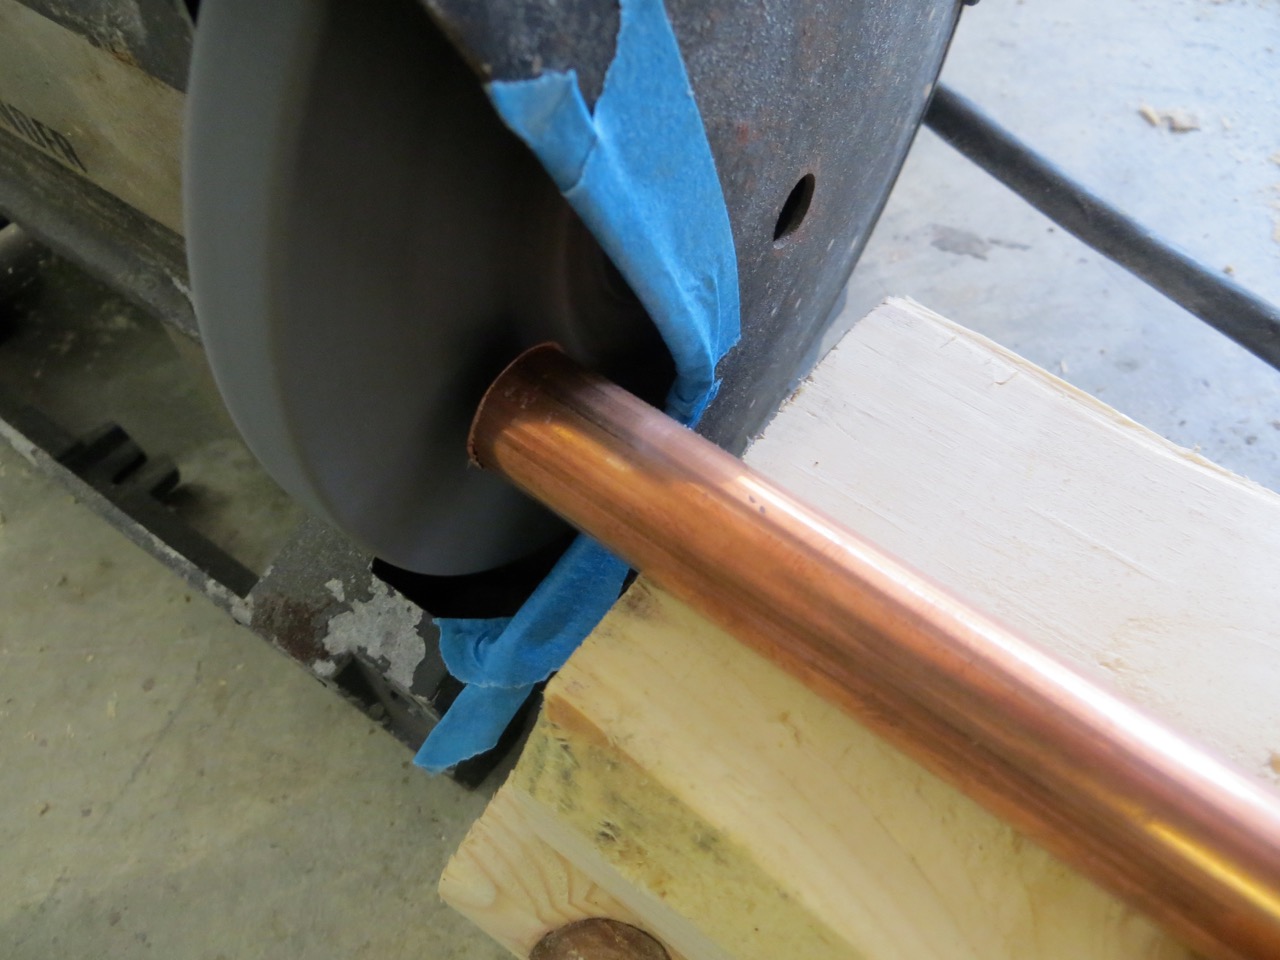
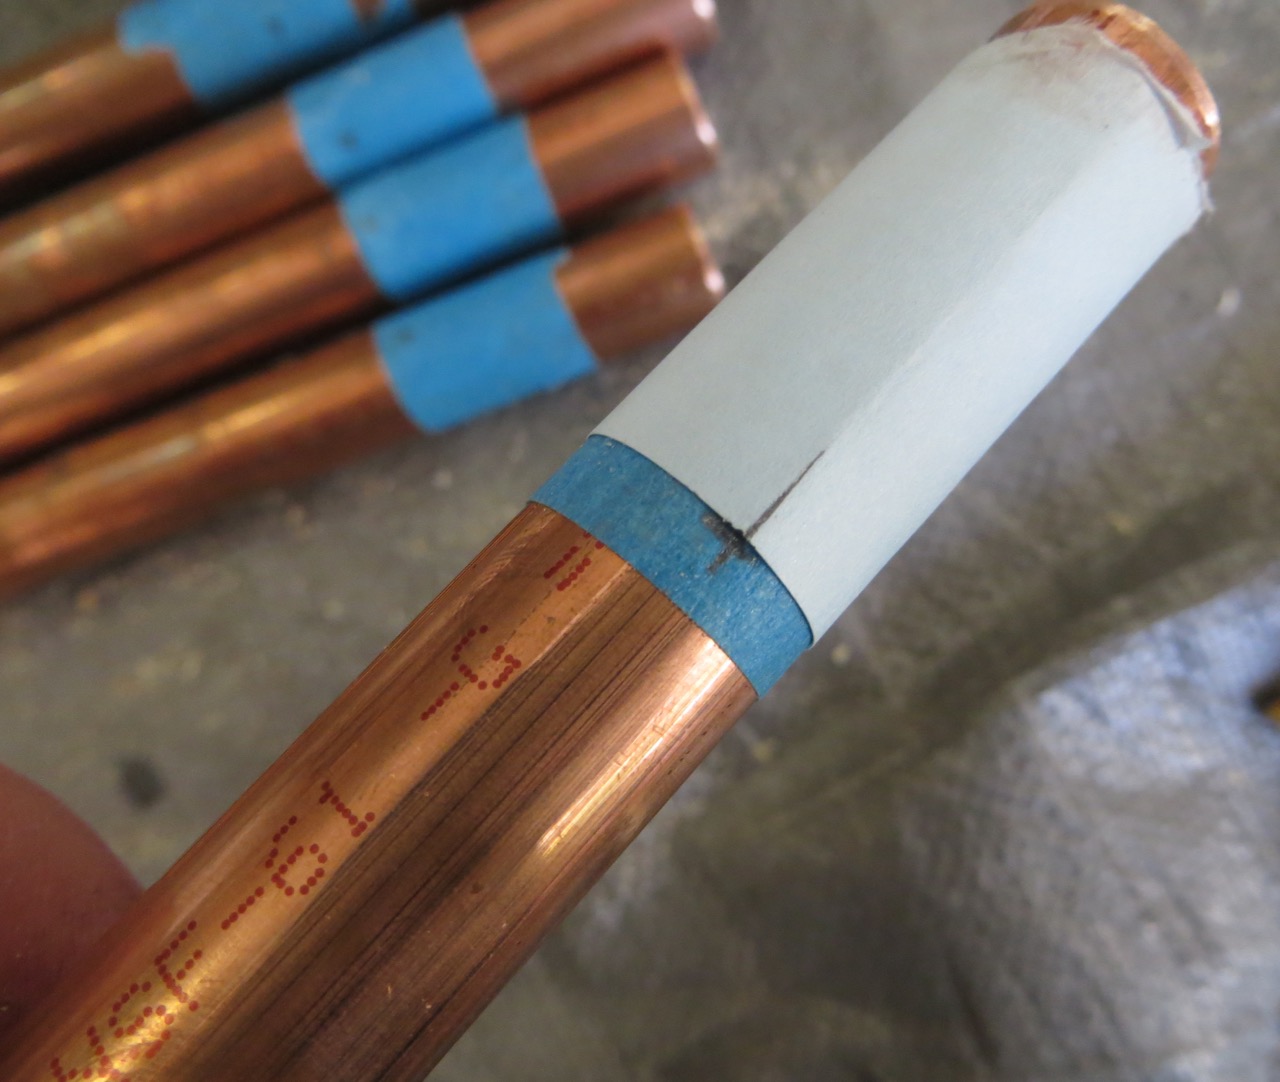
To fine-tune the length I first straightened one side up using my bench grinder. I used wood blocks for a steady surface and to keep the pipe straight.

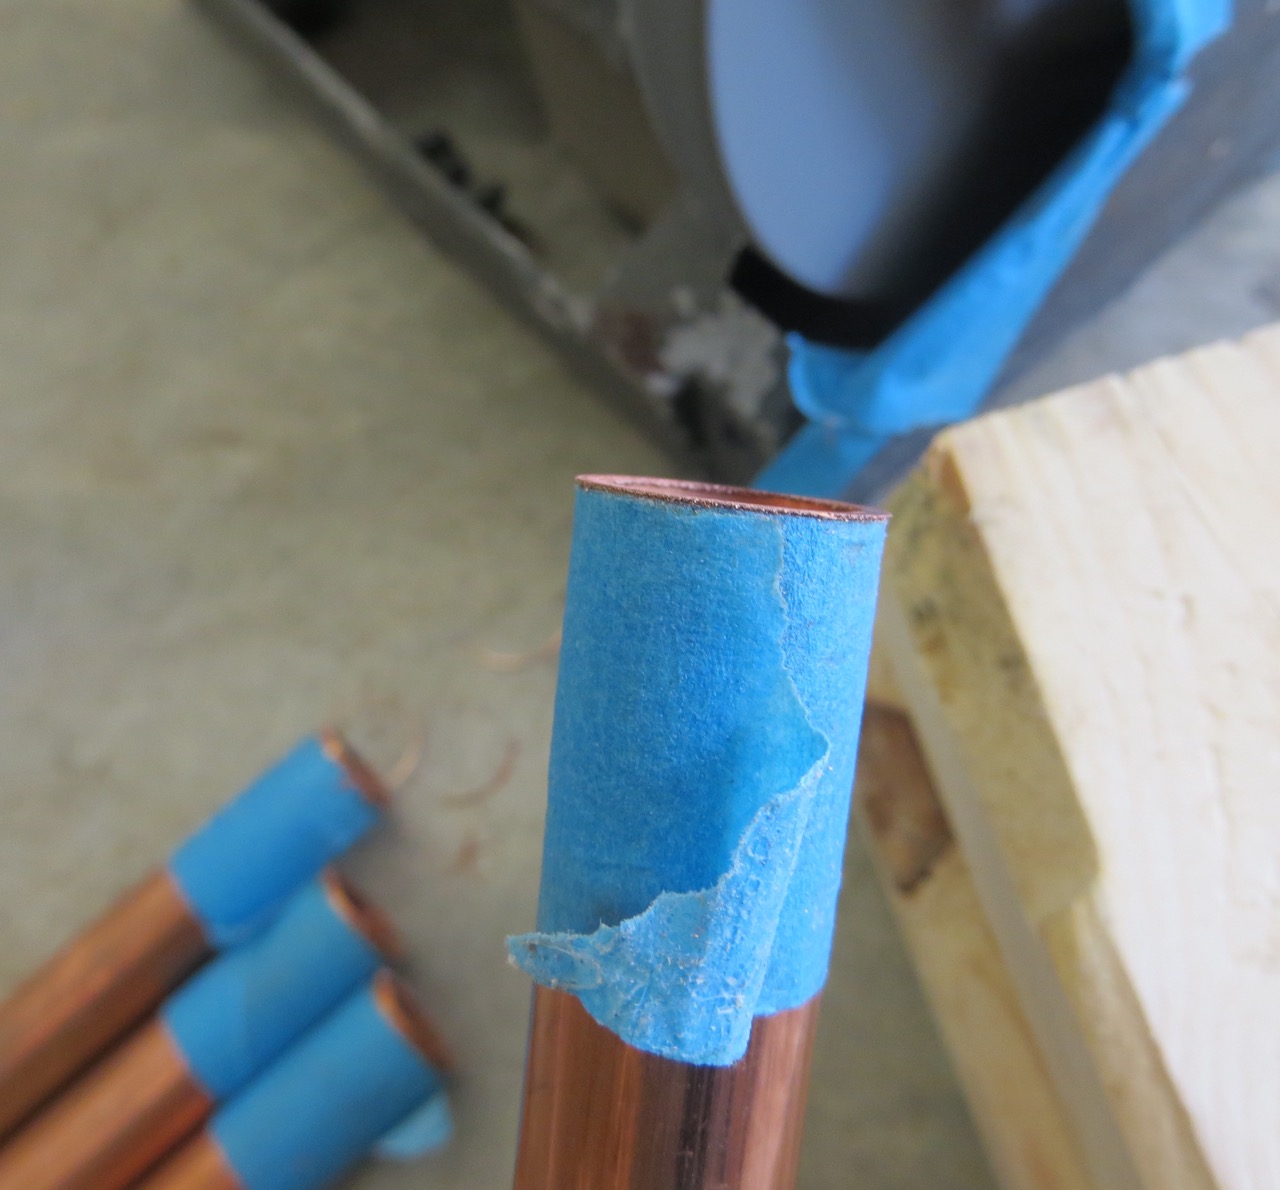
I measured from the clean-straight edge to mark my other ends with the precise length. I used painter’s tape to mark around the entire pipe at that mark. This gave me a defined line to grind up to on all sides.

You can see I had quite a bit of material left.
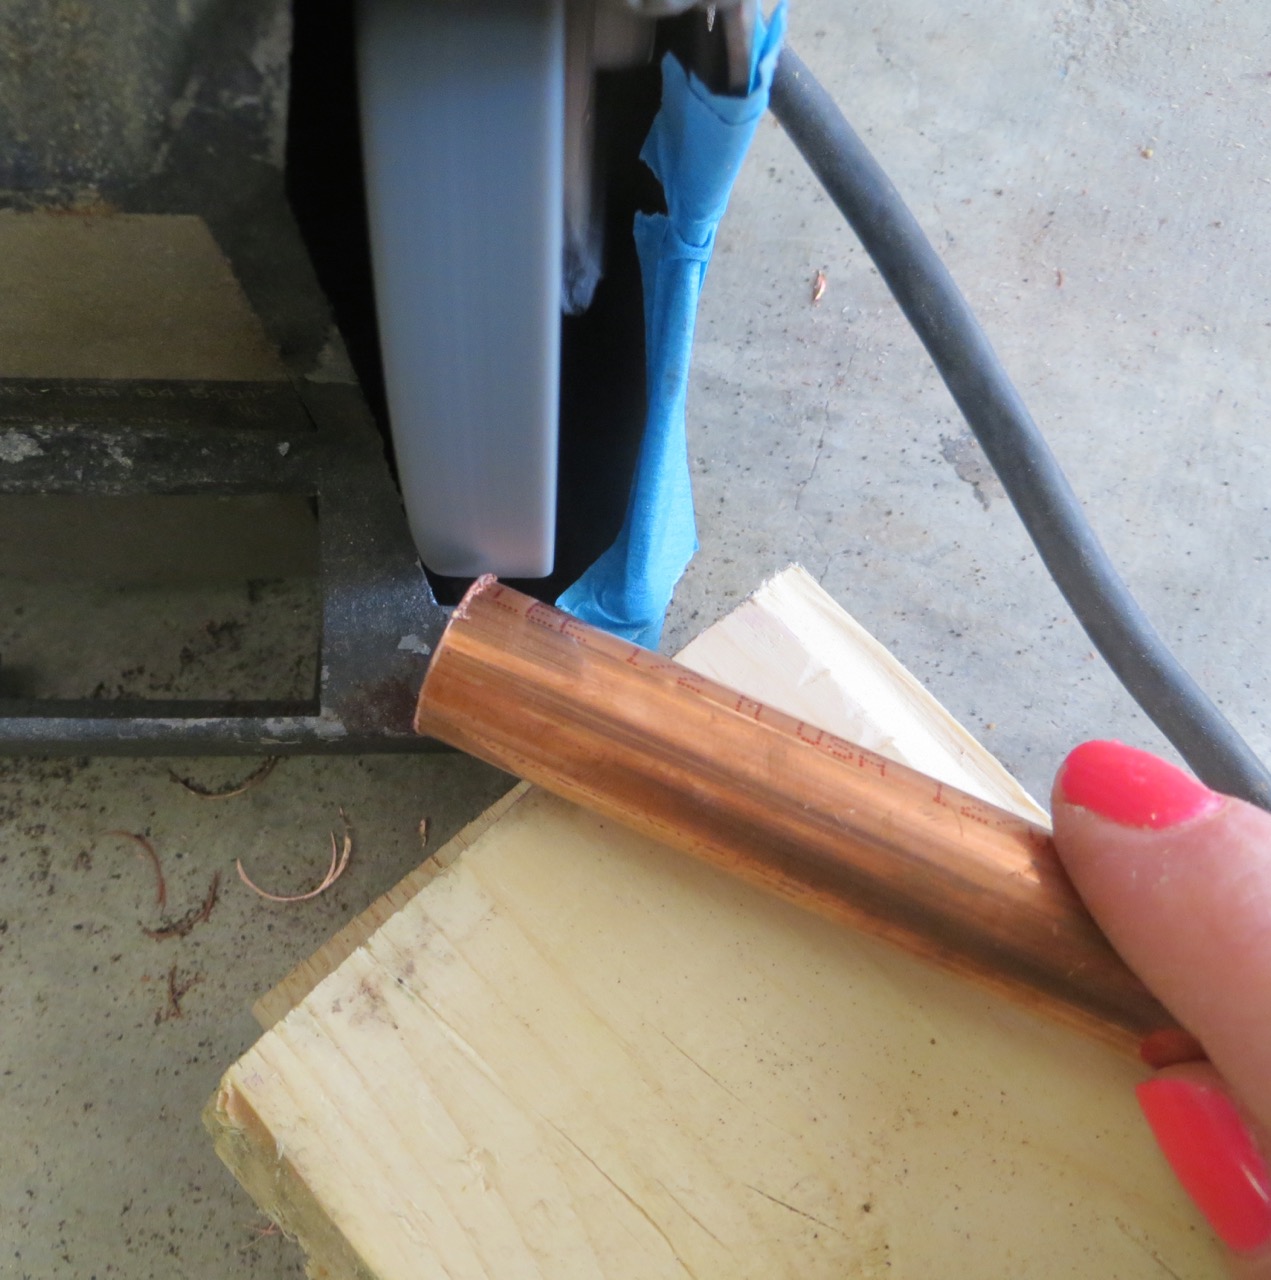
I first used my hand grinder to cut off most of the excess…
…then got a more precise cut on the bench grinder.
Next was filing away at the burrs around the edges. I didn’t want to use a hand file so I turned the pipe against the wheel of my grinder at an angle.
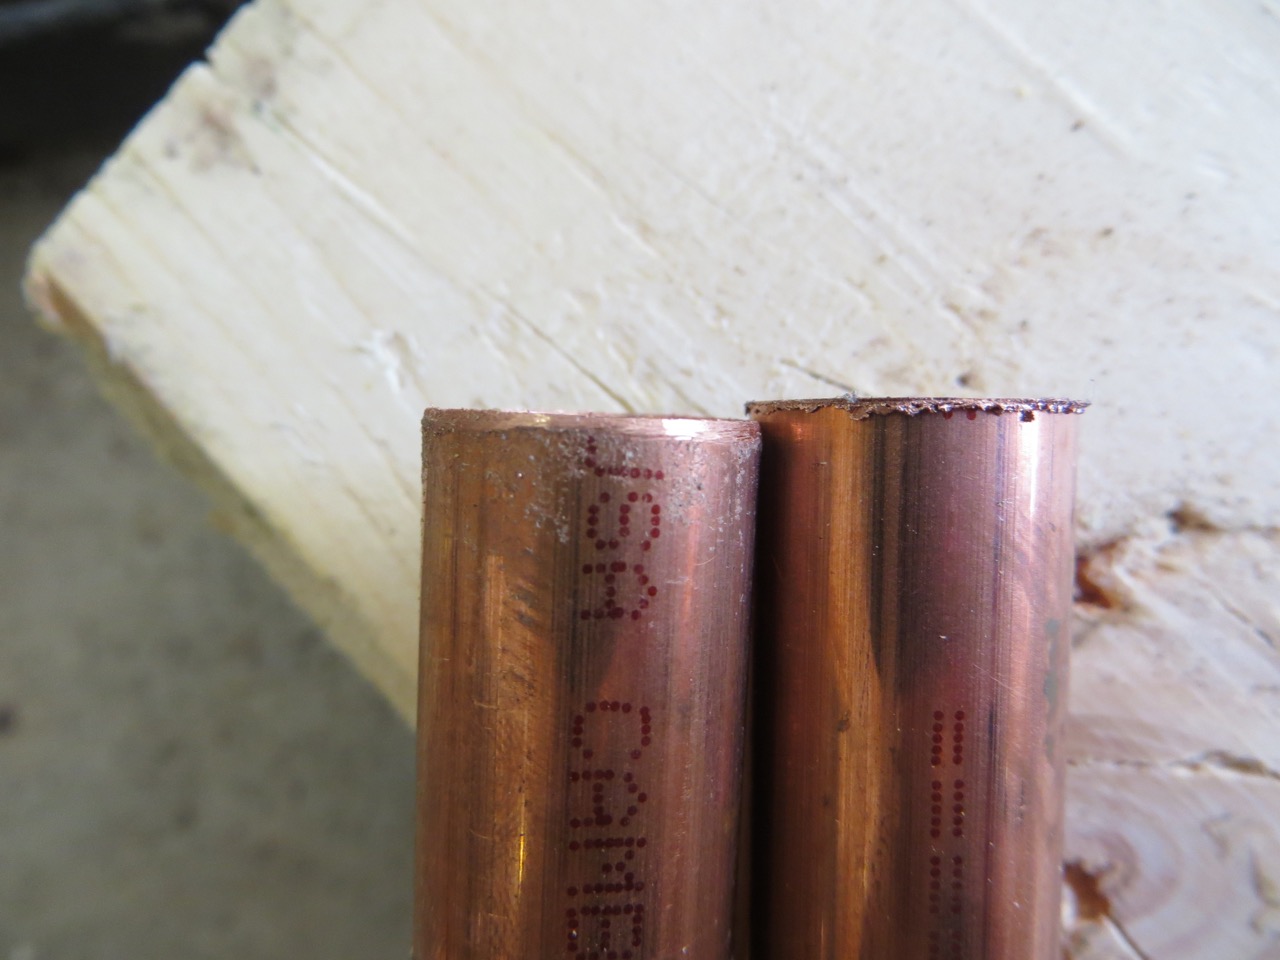
Looks much better!

For the inside I didn’t have a round file so I used a step-drill bit I had.
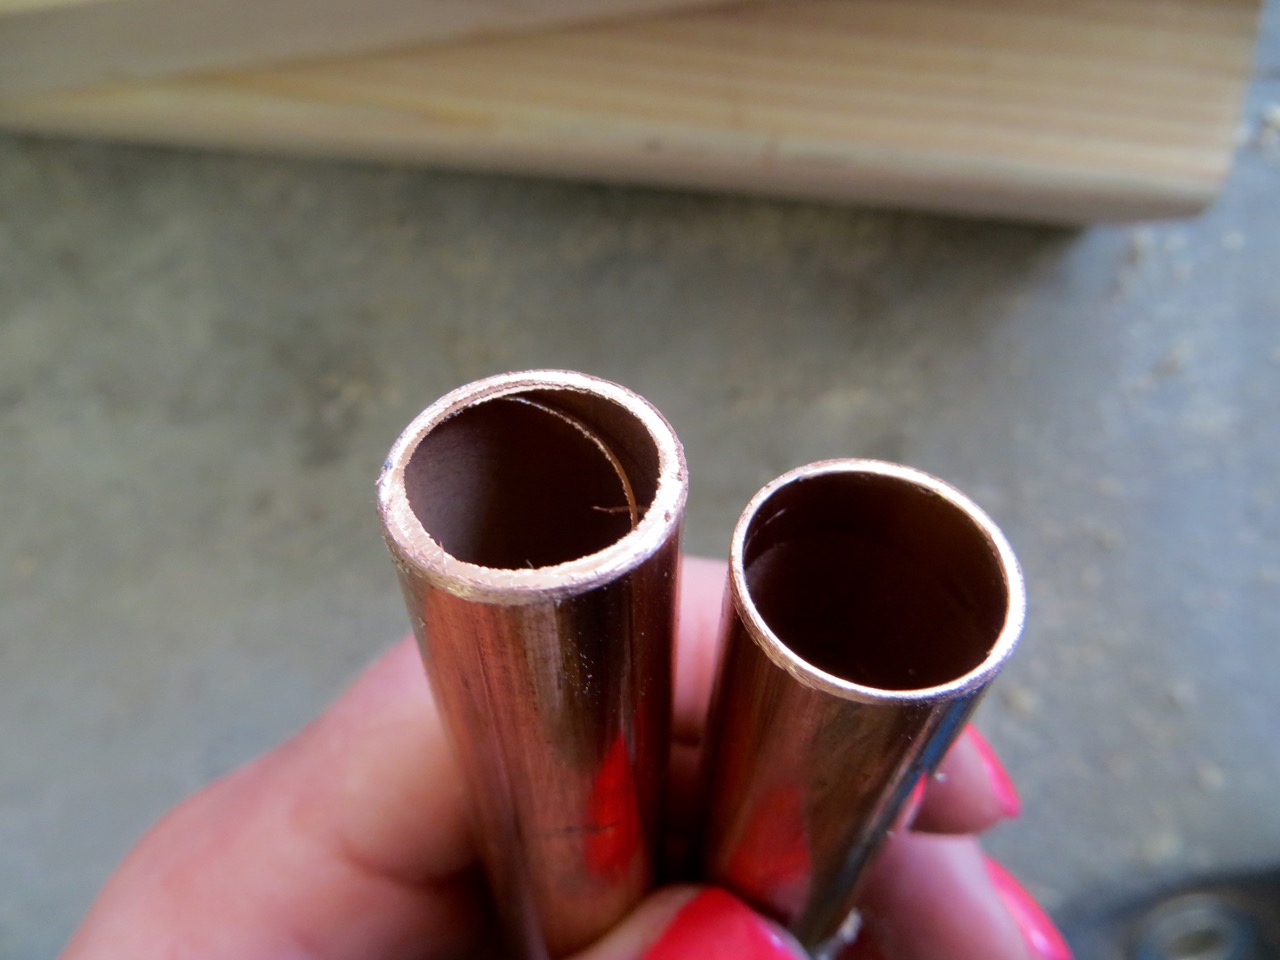
You can see the pipe on the right is all cleaned out – worked like a charm!

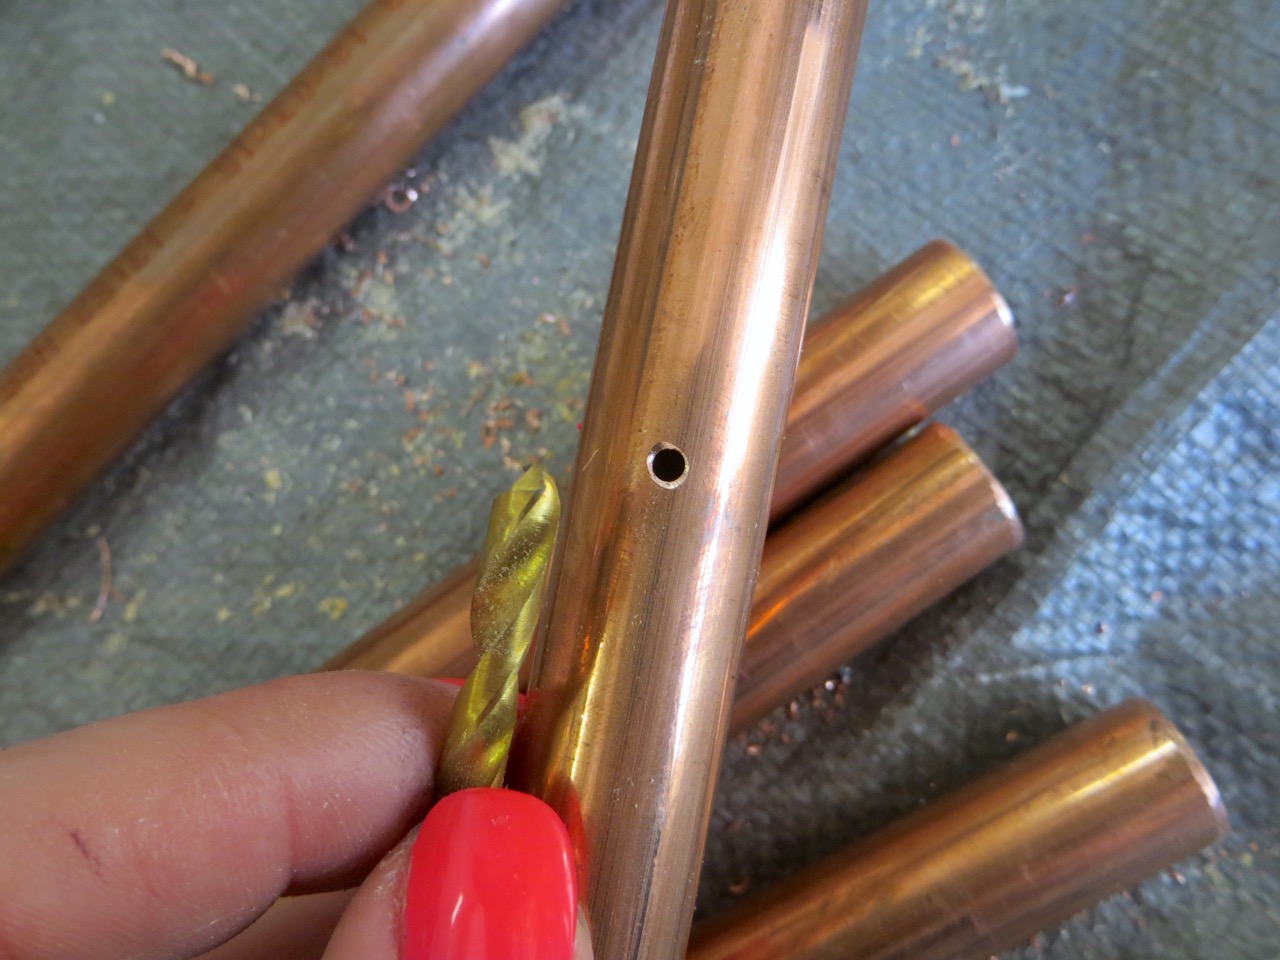
For drilling the holes for hanging I didn’t have a drill press or proper jig to keep the pipe steady so I needed to use my regular drill and drill from each side. Use masking tape around your pipe so you can see your mark better. Mark your measurement from the spreadsheet for your hanging placement on each pipe (they’re different for each pipe length).
To figure out the exact-centered placement for the second hole on the back Lee gave a great suggestion about using a ‘cigar wrapping’ technique. I simply tore a sticky note in half and wrapped it around my pipe…
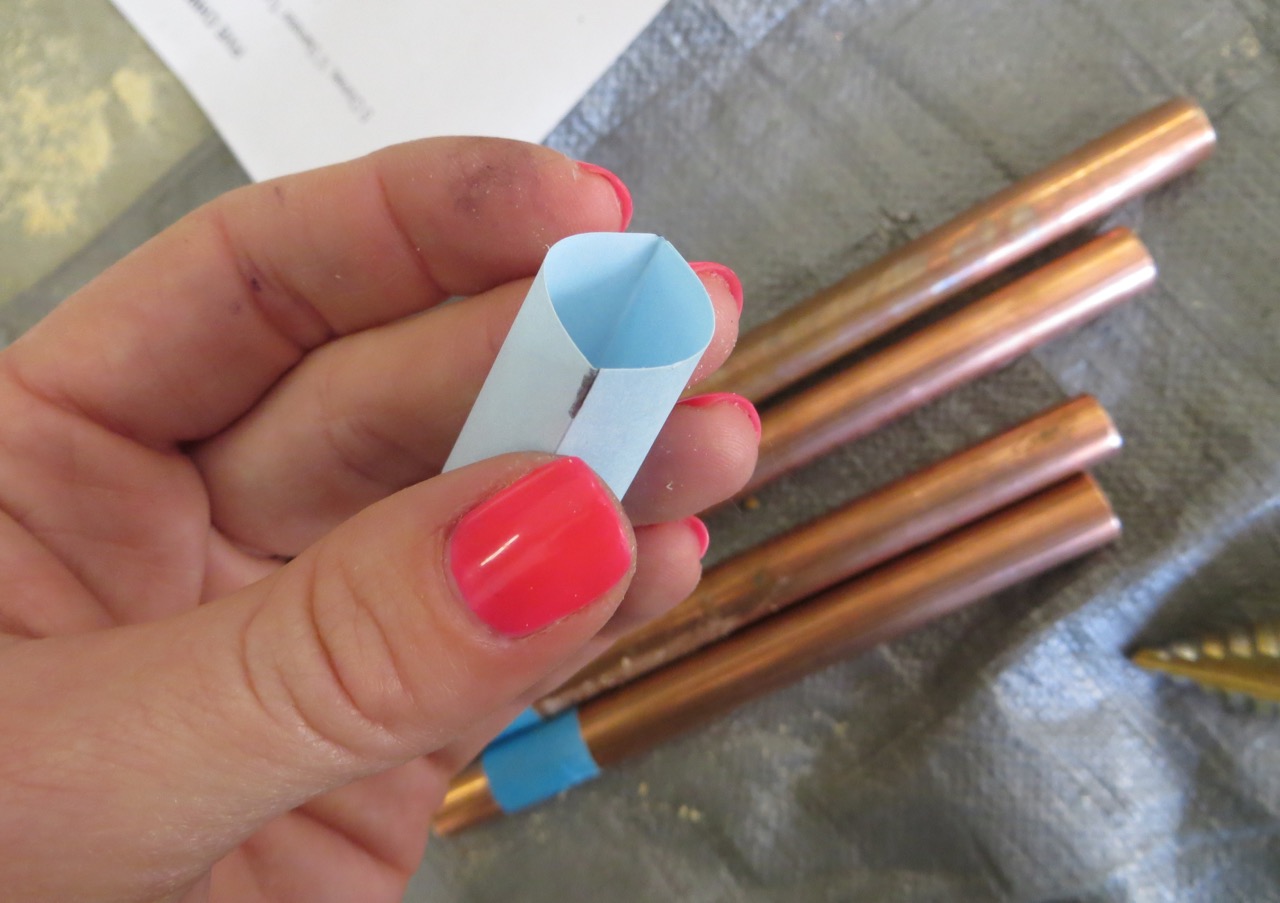
…pulled it off and smashed the paper tube flat and mark each fold. Slide the paper back on your pipe, line up one of the marks on the paper with your first mark on the tube – your last hole will be indicated on the paper – transfer to pipe. That was easy! I used the same paper for marking the rest of my tubes.
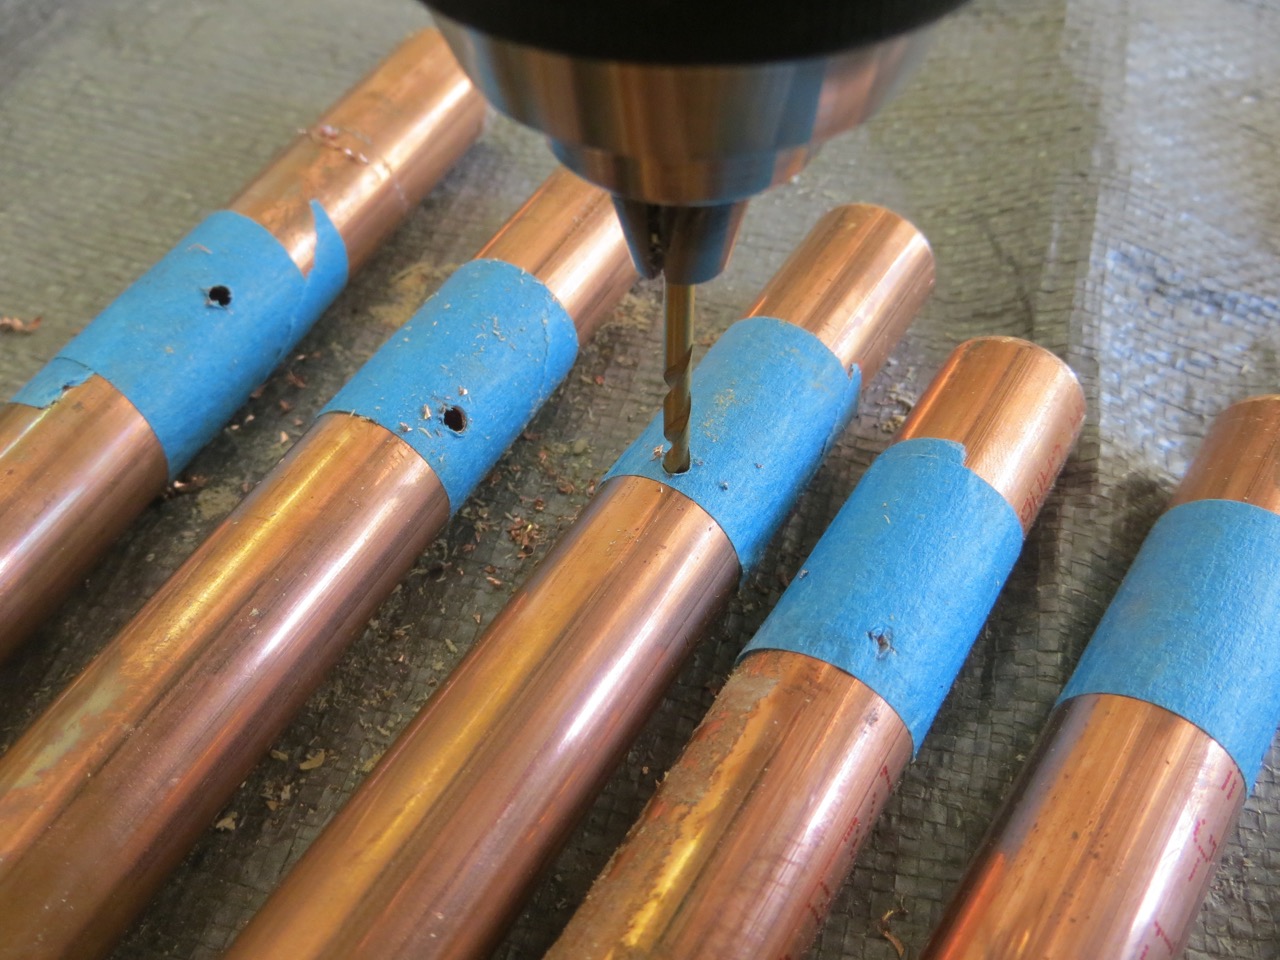
I first hammered a nail gently over my marks to dent the tape a little so my bit wouldn’t slide around. I used a metal drill bit to drill carefully. Copper is soft and it cuts really easy!
I used a larger bit to de-bur the hole.
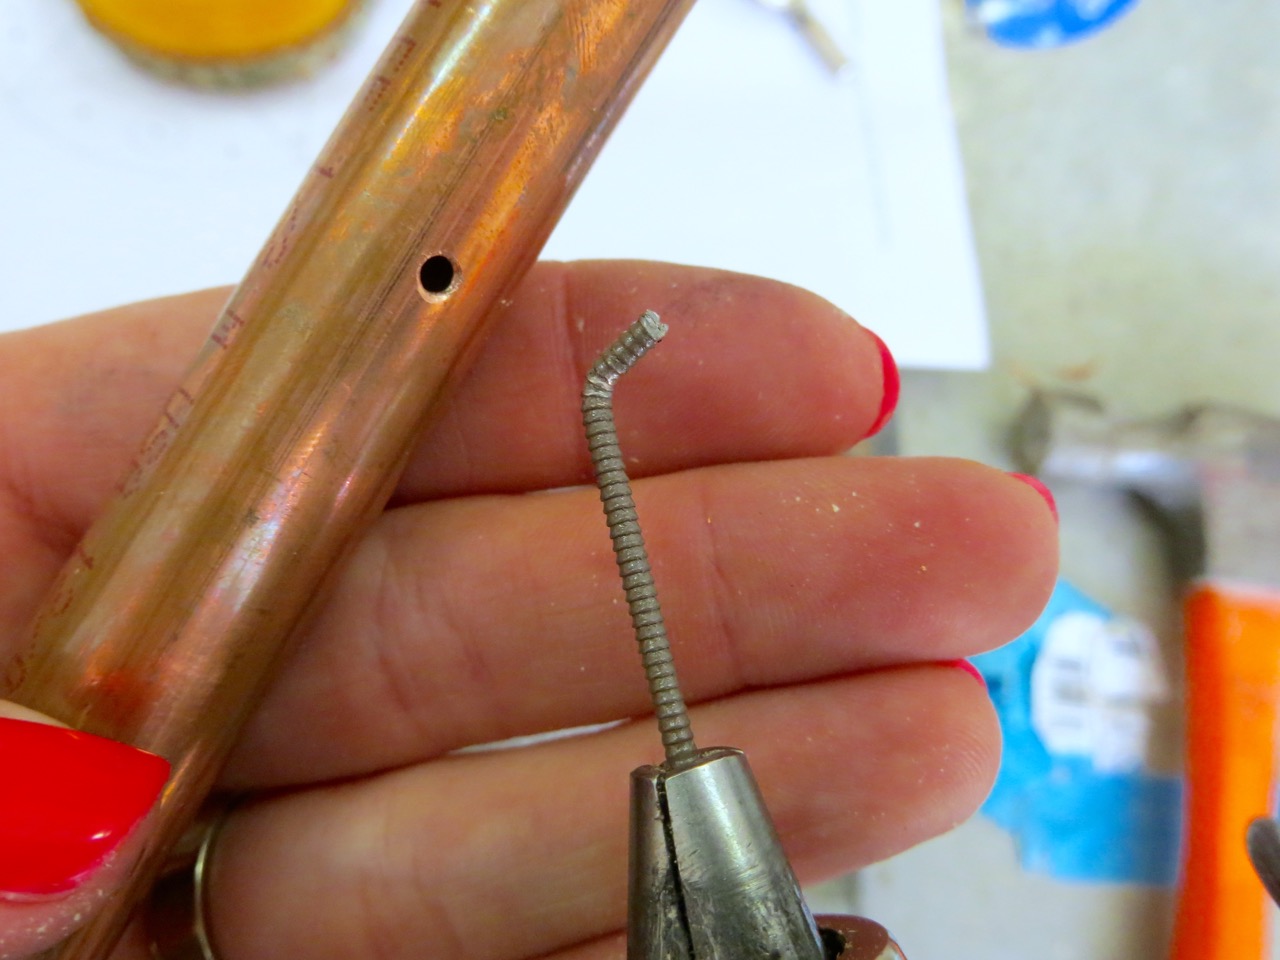
Lee gave the suggestion of using a bent clothes wire in the drill to stick through the hole to de-bur the inside. I used a nail and cut off the head.
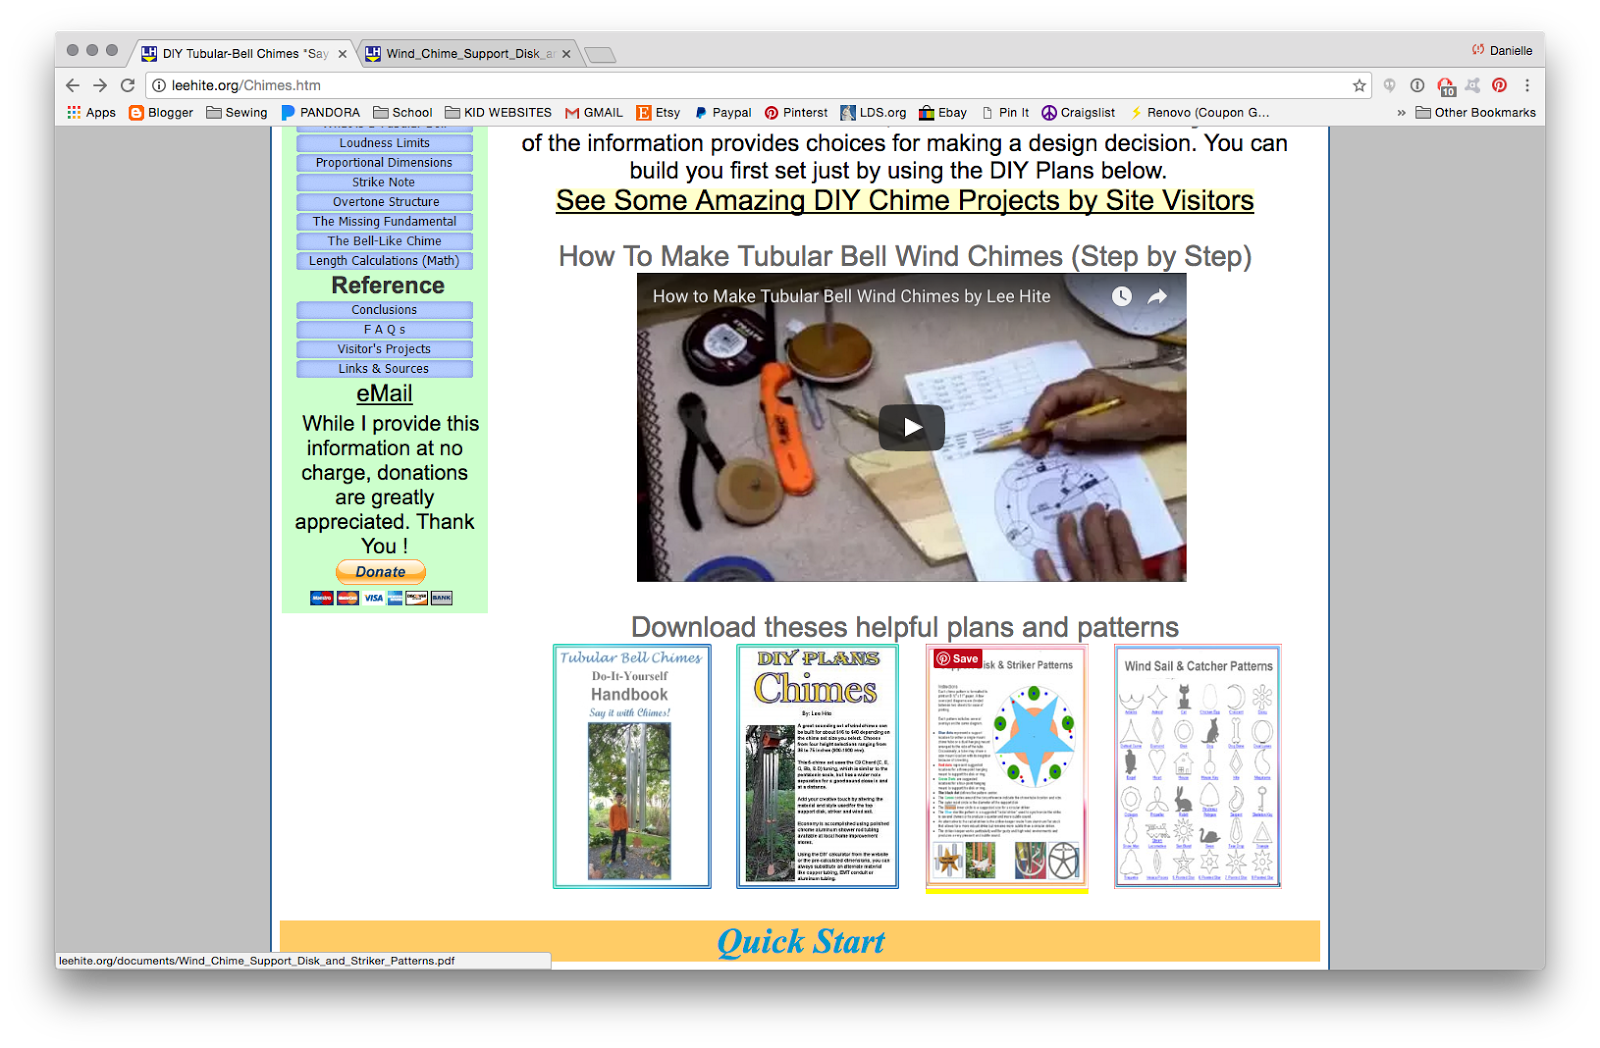
My next step was to make the striker and hanging plate. On Lee’s website you can see the 3rd thumbnail underneath his video “Support Disk and Striker Patterns”.

Once you open the document you find the right template by how many chimes you’re doing and their diameter. Make sure your printing settings are set to ‘no page scaling’ or ‘scale to 100%’. I had 5 chimes at 1/2″ diameter so my template was on page 13.
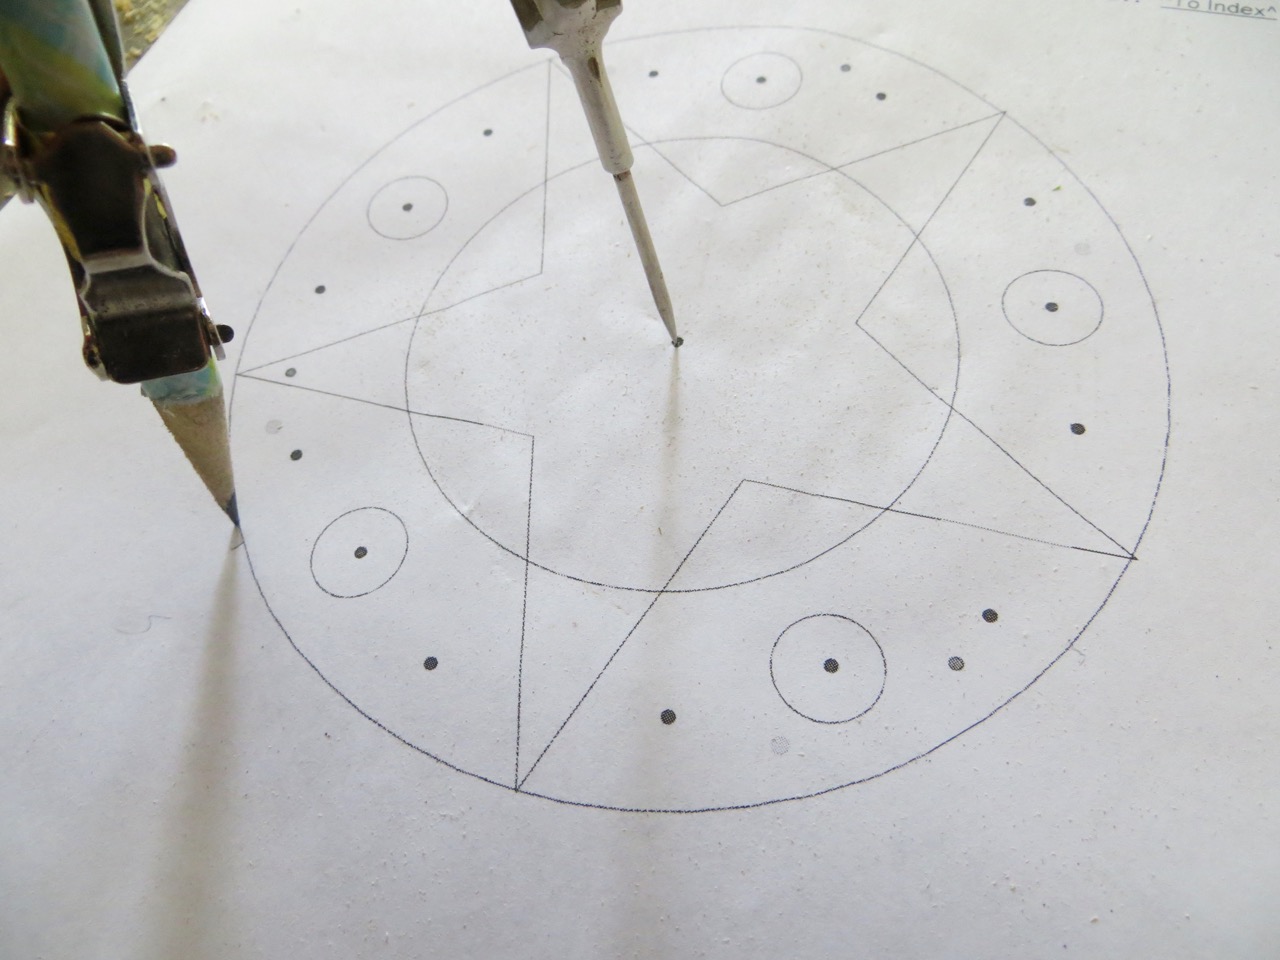
Use your circle compass to find the diameter for the outer circle (hanging plate/support disk)…
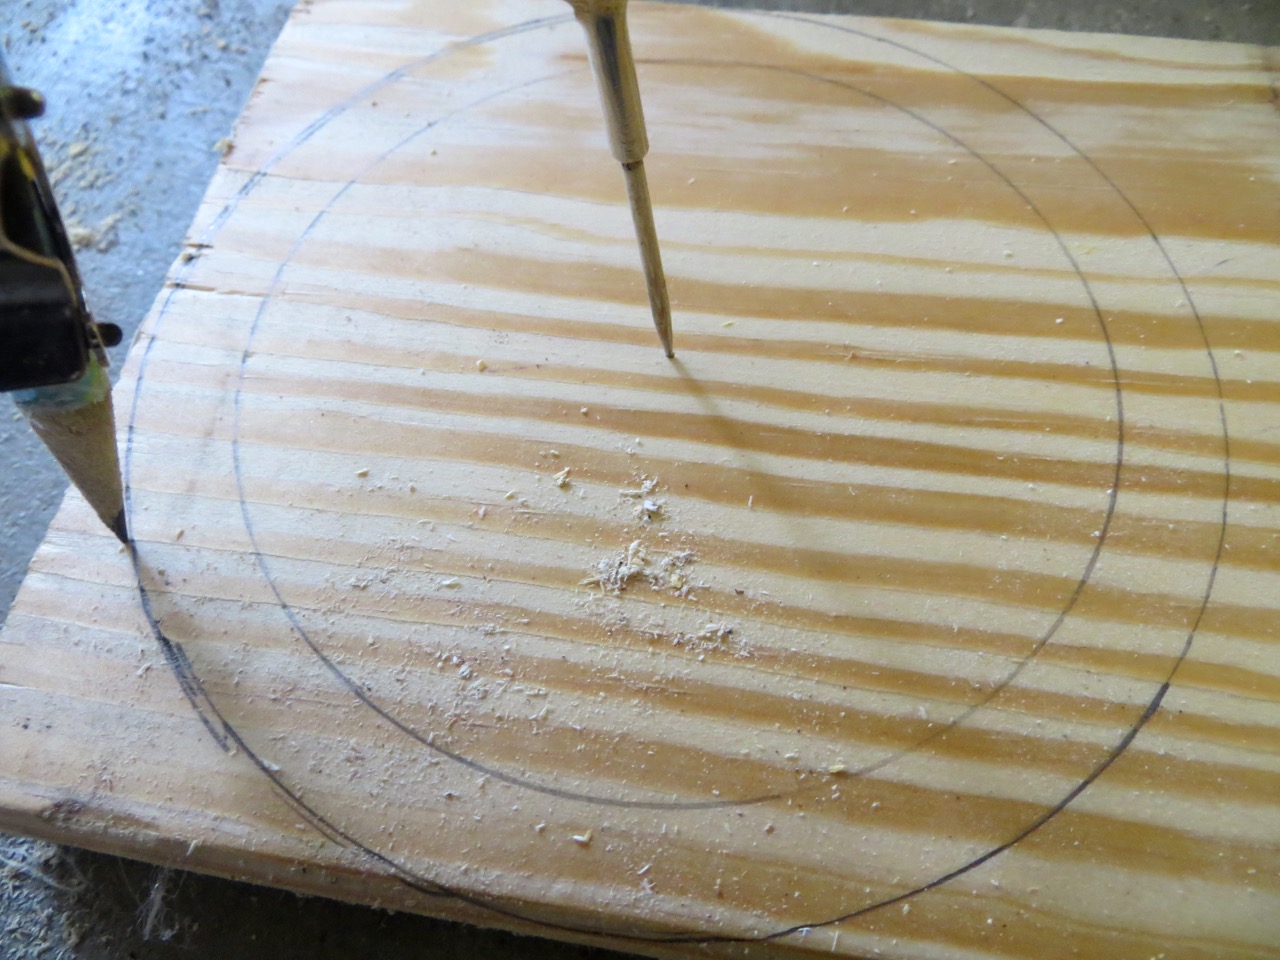
…and transfer it to a block of wood. I used a 3/4″ piece. I also transferred the smaller circle which would be the row of dots where your chime placement is as well as the holes for supporting from the template.
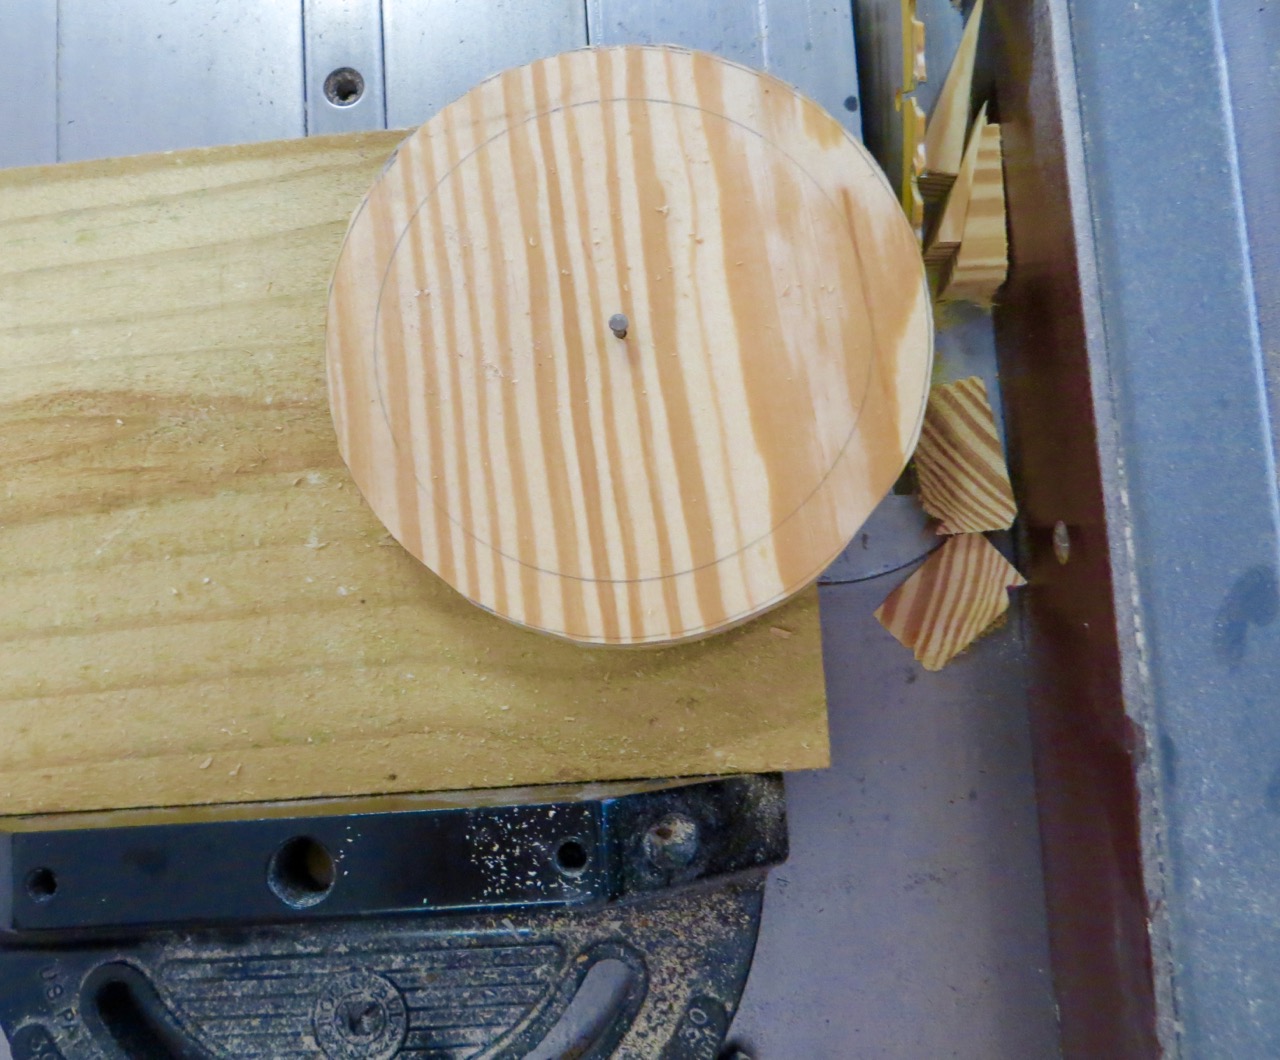
I don’t know if this is a conventional way of cutting a circle but I’ve seen something like it before. Rather than use a jigsaw I drilled a small hole through the center of my ‘circle’ block and hammered a nail through to another piece of wood to use as a turning jig. Notice my circle block was hanging off the edge of my ‘jig’. I held the wood ‘jig’ board tight against my miter gauge at the right distance where it would cut along the marked circle. I cut/pulled back, turned slightly, cut/pulled back, turned, etc. until I had a jagged cut all the way around. For the last cut I kept my circle against the teeth of my blade and turned a full turn to skim off any extra bits.
I repeated the previous few steps to mark and cut my smaller striker circle from the template.

Use your compass again to measure the distance for your chime placements and transfer to the inner circle on your circle block. These points don’t particularly matter to me except they acted as measuring points where to mark the hanging points from. I measured from the ‘chime placement’ marks and on each side placed a mark where I wanted to drill for my strings to run through. TIP: circle your ‘chime placement’ marks so you don’t confuse them with your ‘string placement’ marks. Drill holes for strings.
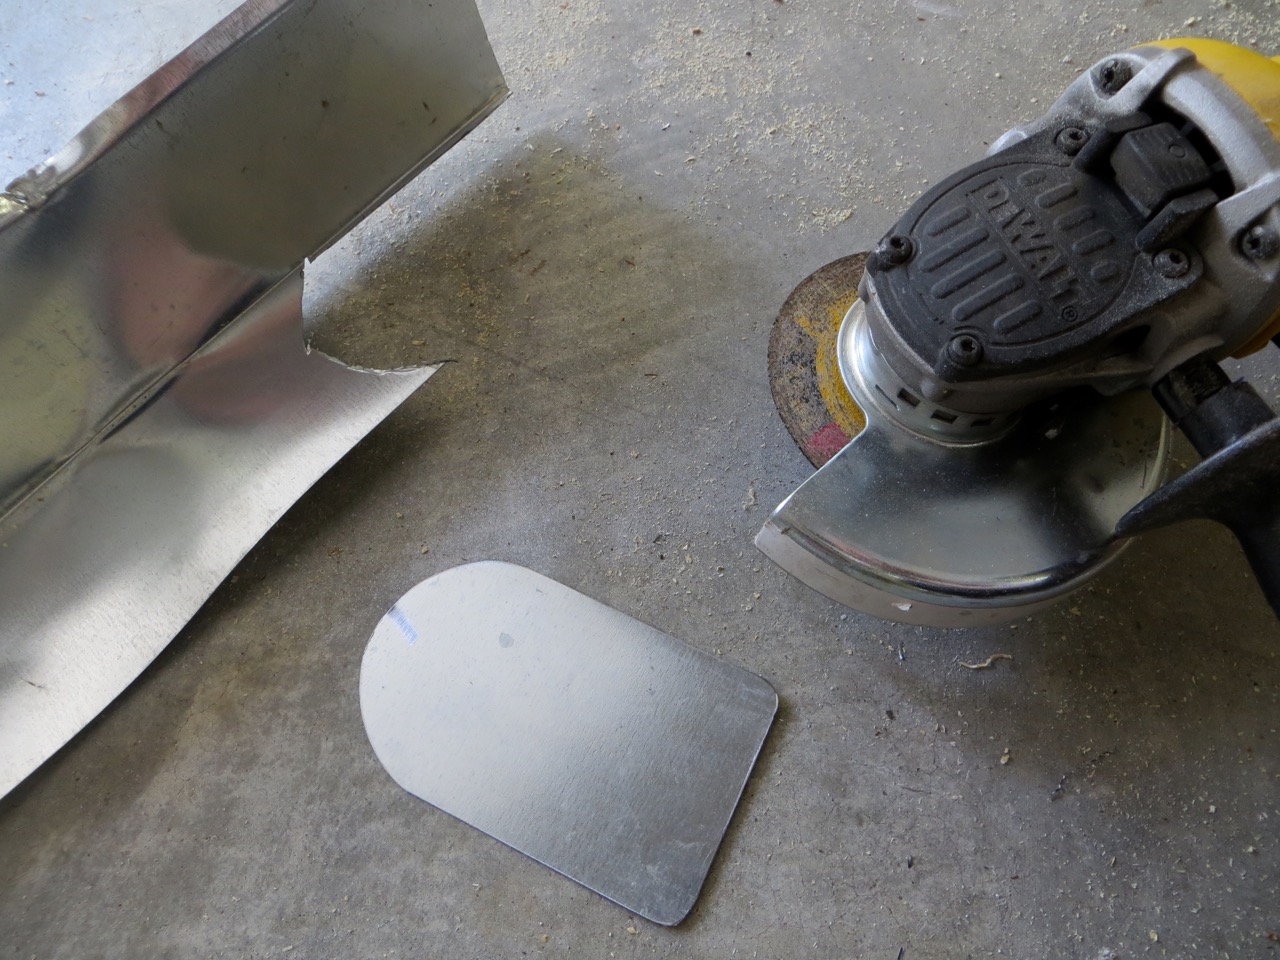
I had some scrap galvanized metal roofing trim so I used my metal grinder to rough cut a shape for the wind catcher. I used the bench grinder to smooth out the shape and de-bur.
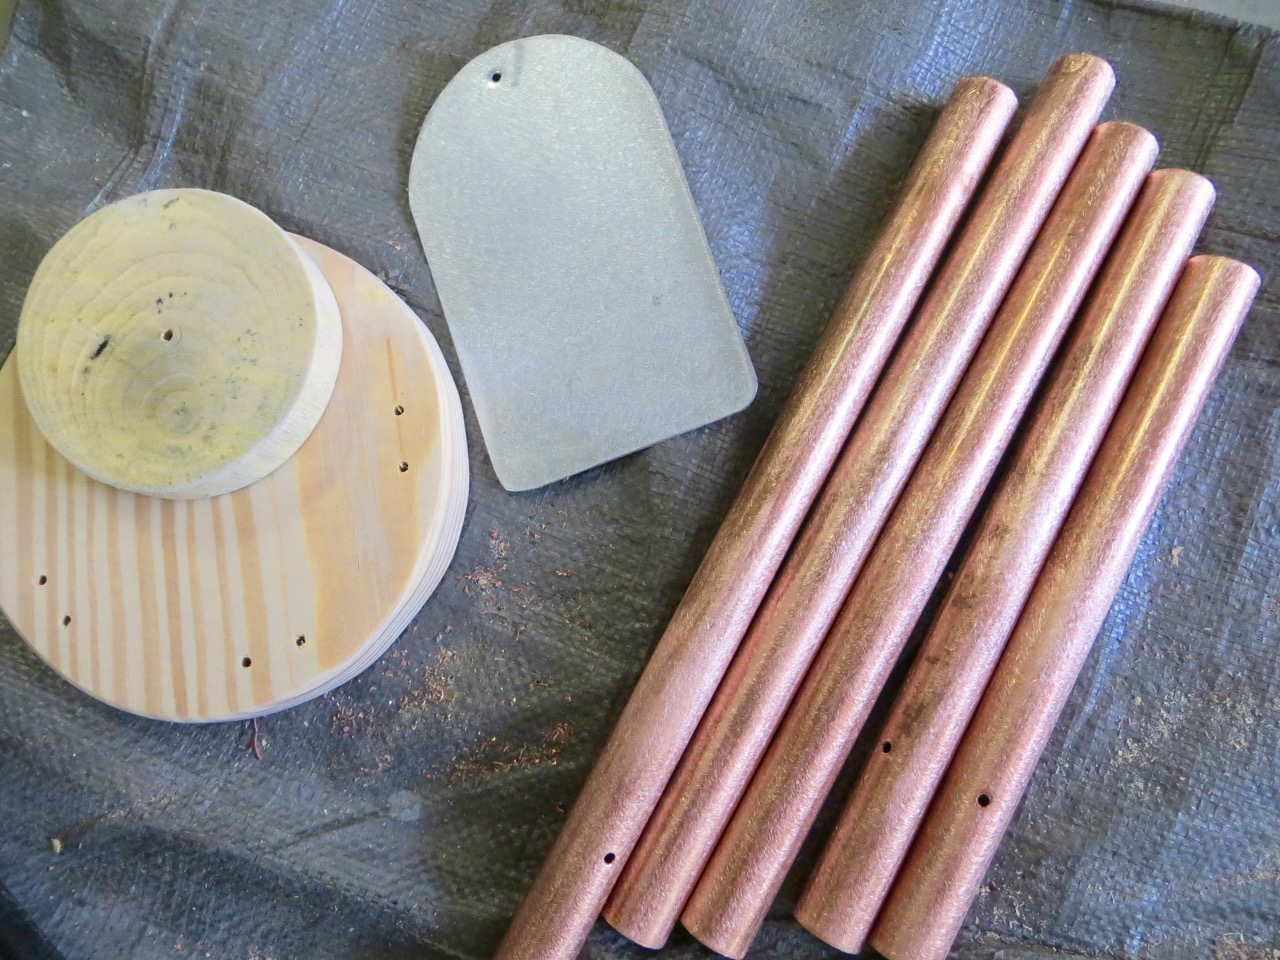
My last step was to sand the wood blocks smooth and while I was at it I decided to sand my pipes and wind catcher to give it a ‘brushed’ look.
This is what the pipes look like sanded.
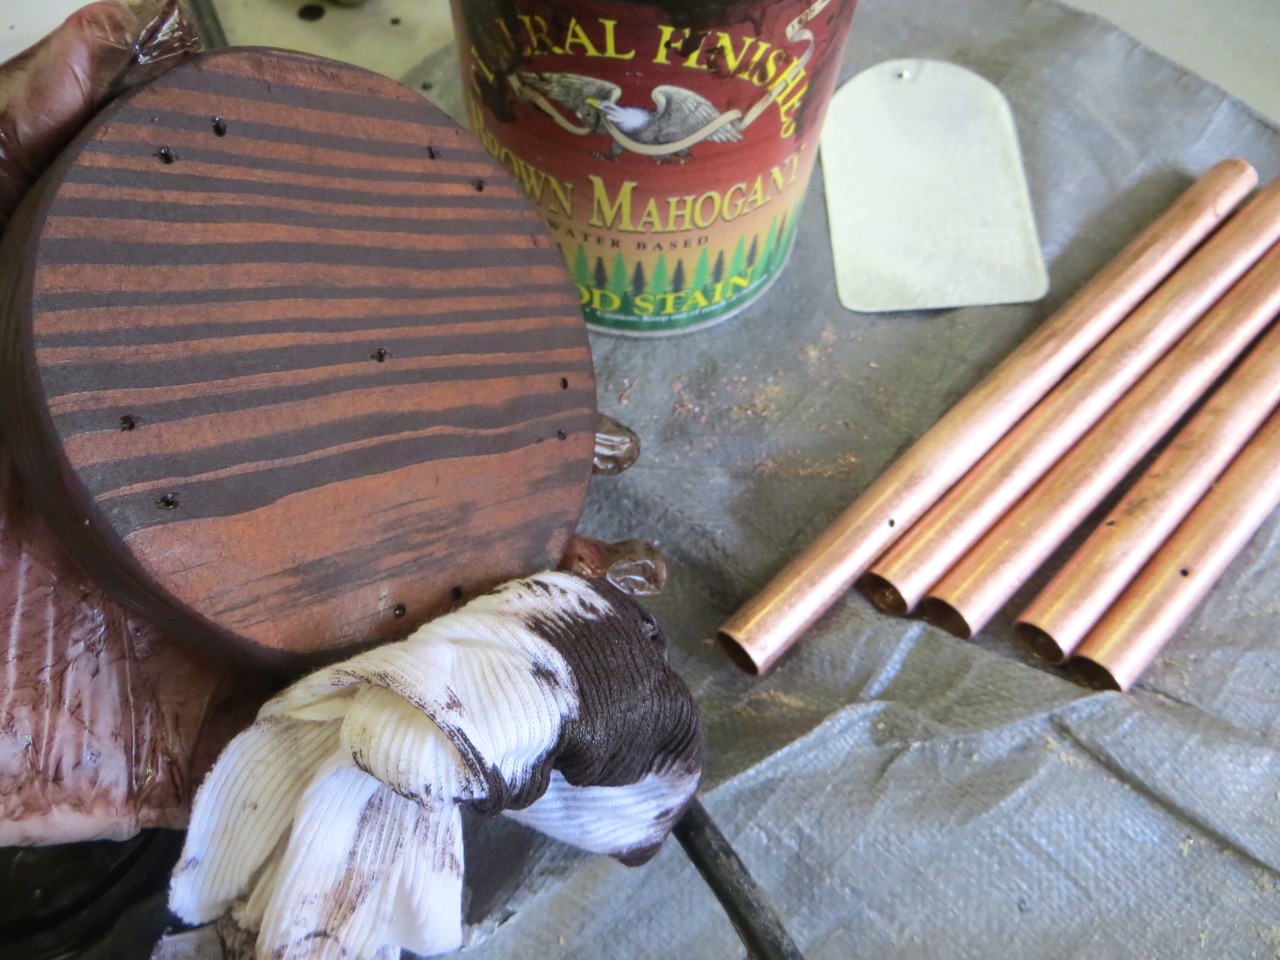
I used General Finishes stain in “Brown Mahogany” to color my wood pieces. Since this will be outdoors add a protective finish that will be durable and protect from the elements.

I hung the hanging plate through the center hole with my waxed cord, knotted a few times underneath the ‘plate’ and attached the striker block with a few knots under that as well. Although I didn’t have eye hooks, I think I still prefer the knots anyways. Next I hung my chimes using a continuous cord and knotted the final knot inside one of the chimes so it wouldn’t be visible.
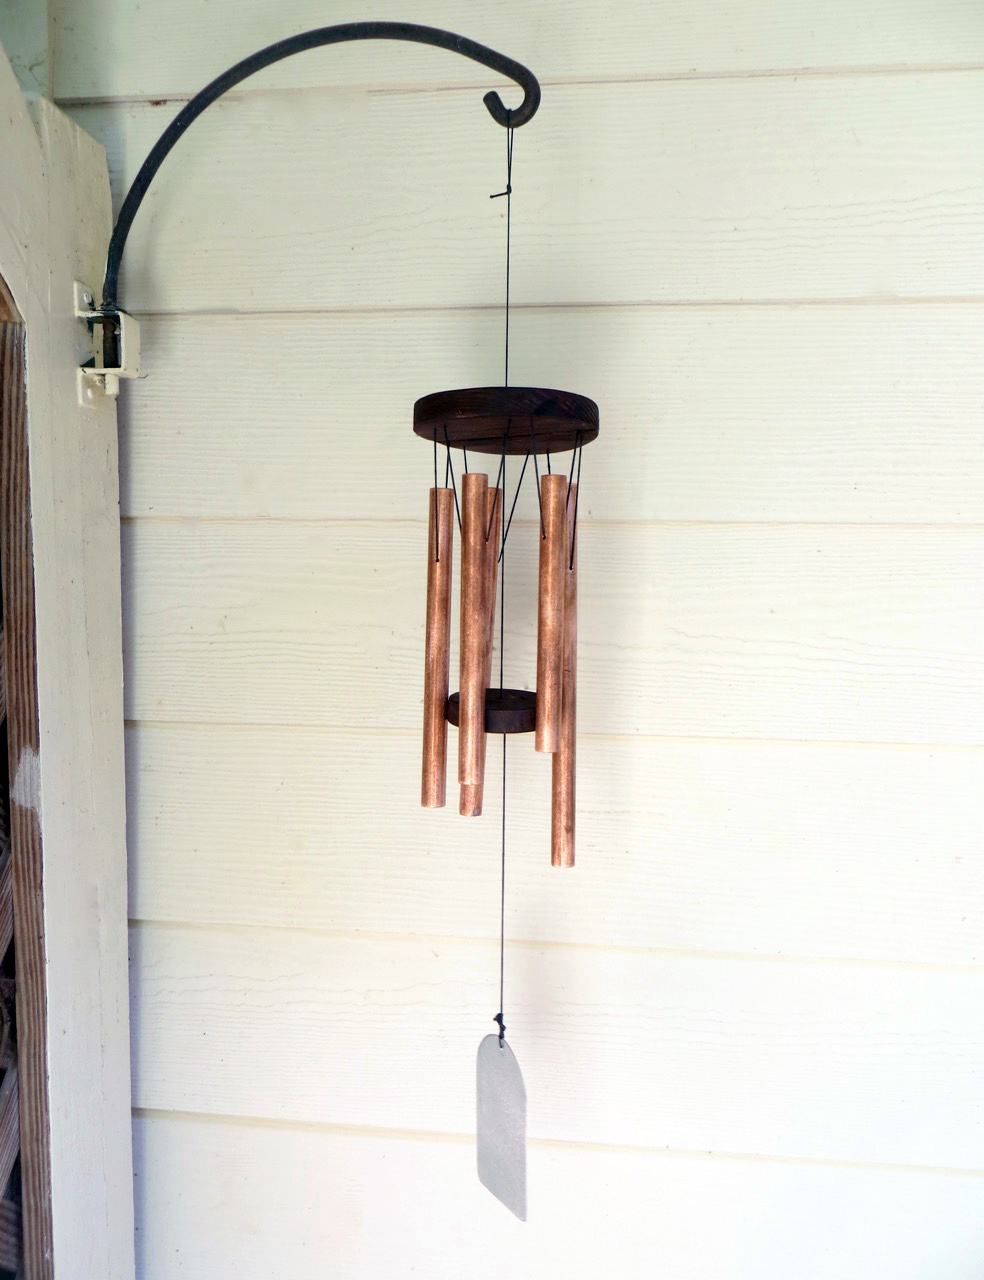
See – wasn’t that easy!
I feel like I *must* make a bigger one with more ‘chime’ now!

5 Comments
Well done. When I see the prices of some of the windchimes, I was wondering the cost my DIY. Thanks for the explanation.
July 13, 2020 at 7:52 amThanks for the instructions! I made one set for me and the wife and one set for my daughter and family! I made the next size up, 14″ long piece, and they sound very nice. I used a pipe cutter so eliminated some of the extra work of smoothing the ends.
July 26, 2020 at 6:05 pmThanks again, great project!
So glad to hear! Thanks for writing!
September 30, 2020 at 2:07 pmIf you are serious about making a few windchimes I suggest you pick up a pipe/tubing cutter. It makes it very easy to cut exact lengths and most come with a flaring knife that removes any small burr you might be left with. This will eliminate some steps and also create a level of safety when cutting.
January 3, 2022 at 10:10 amThanks Ken! I have since bought a tube cutter and just used it the other day to make curtain rods actually! You’re right, much safer and super easy!
January 3, 2022 at 11:07 am