
My previous post was about building a “hen house” and this post will give you enough details on how to make a gravity fed watering system using watering cups. I can’t take credit for coming up with this system because I was inspired by “Homesteadonomics” to give it a try. A huge bonus for me was that I already had a barrel!
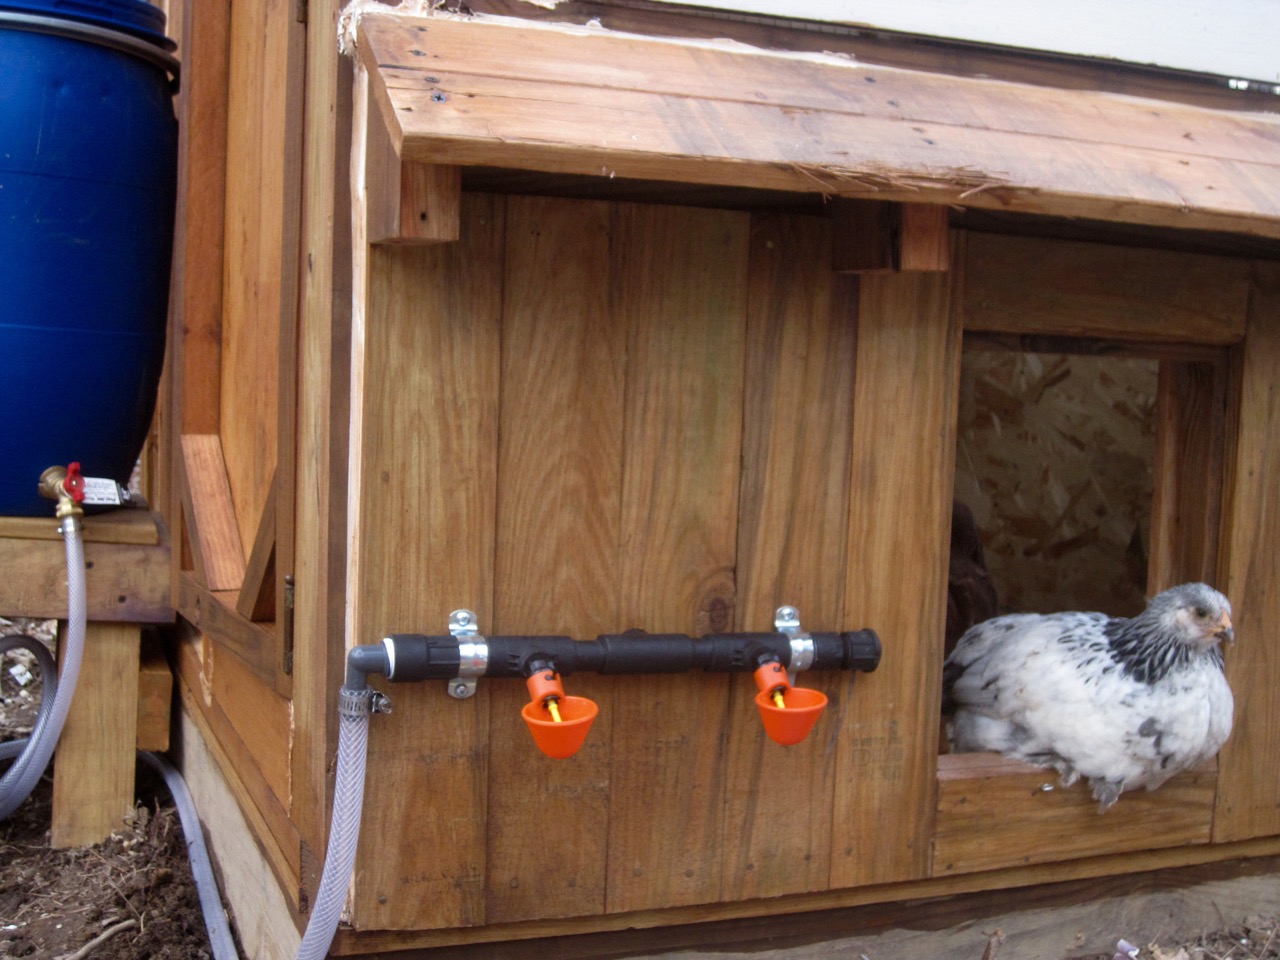
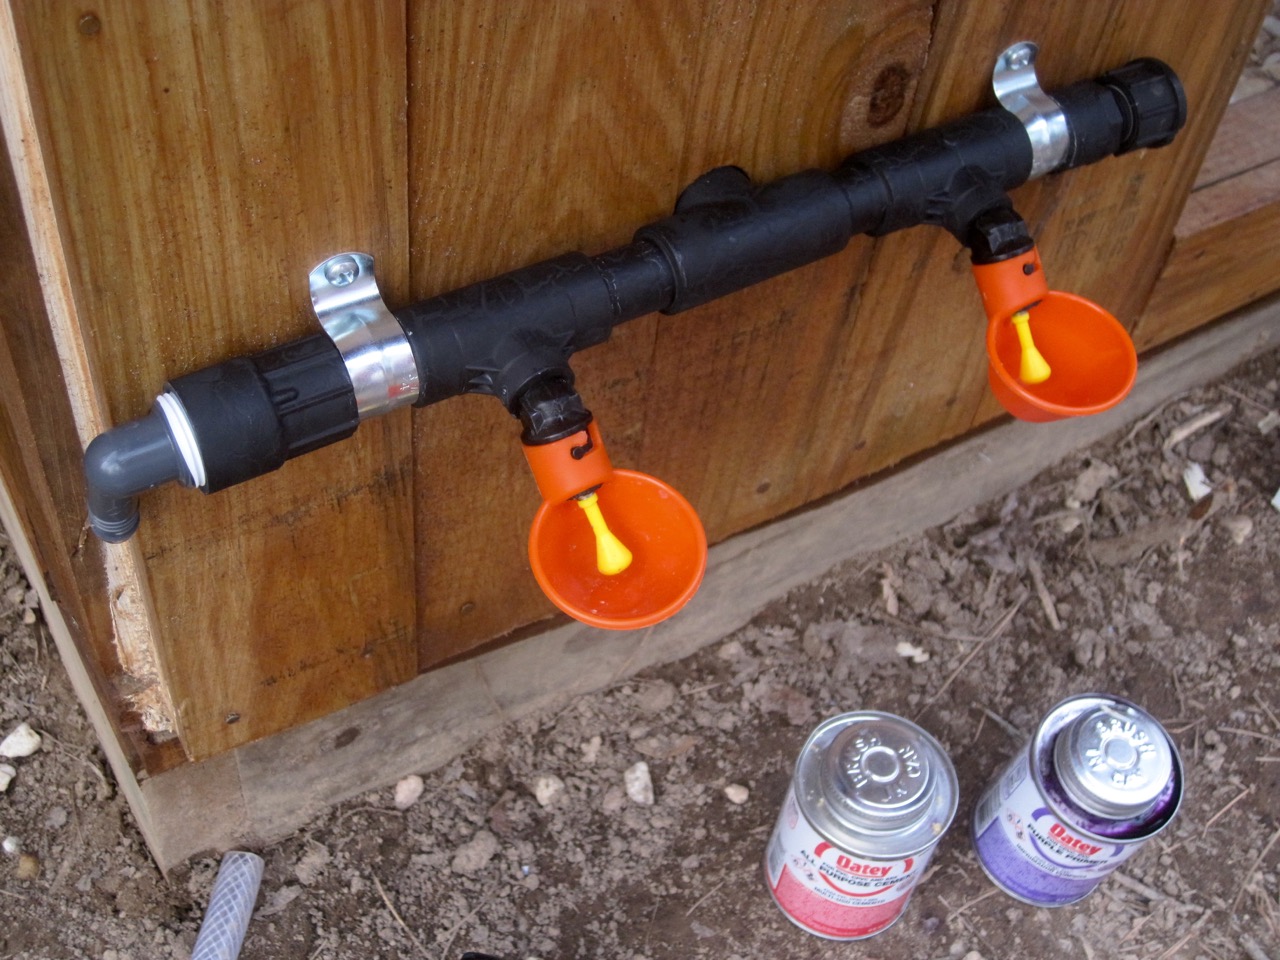
This is what my system looks like.
The biggest difference from what I did was adding a PVC ‘tee’ to my watering cups outside so I could route one to the inside of the coop. I worried about this being permanently attached on either side of the wall because I was originally going to make it so I had PVC fittings that screwed the 2 sides together so I could undo it if needed but I went with the more permanent solution in the end and am very pleased. I also considered splitting the rubber tubing with a ‘barbed tee’ and having 2 hoses, one for outside and one for inside but that would add more tubing to worry about.
I’m making this post because I spent nearly 2-3 hours over several trips to Home Depot in the plumbing section, being completely overwhelmed with 2 kids in the cart and a gazillion options for creating different outfittings. Hopefully this post saves you from wandering up/down the isle like I did (I wasn’t able to find the same parts as Homesteadonomics).
To start I’ll say that I spent $75 total for this system (not including the water barrel). Is it worth it? YES! Our hen’s are about 10 weeks old and changing/cleaning their water dish has been the worst daily chore for me. No amount of elevating the dish kept it from getting pine shavings and poop in it. I tried the nipple waterers only to be frustrated. They leaked or dripped when the chickens pecked at them and got the pine shavings wet which would STINK!
So, watering cups – AMAZING! The hens got used to them right away and I could see it was easier for them to get water than from the nipples. They’re easy to install and I like that they can be attached to a horizontal surface, unlike the nipples that need to be attached to the bottom of a container.

SUPPLIES:
Water Barrel
-Everything else I got from Home Depot-
1/2″ PVC Cap (x2)
3/4″ Pipe Strap (x4) and Screws
Rubber Sheet (making custom gasket)
Caulking
Teflon Tape
PVC Primer & Glue
Hacksaw
Step Drill Bit (recommended) (~3/4″to fit brass adapter in barrel)
Forstner Bit (fitting PVC through wood) (1-1/8″)
My first concern was finding fittings that would be leak proof for my barrel. They have large-ugly PVC ones specifically for rain barrels but I didn’t want that – plus I’d need a lot of different adapters just to hook up my hose… so I rigged up my own with brass fittings.
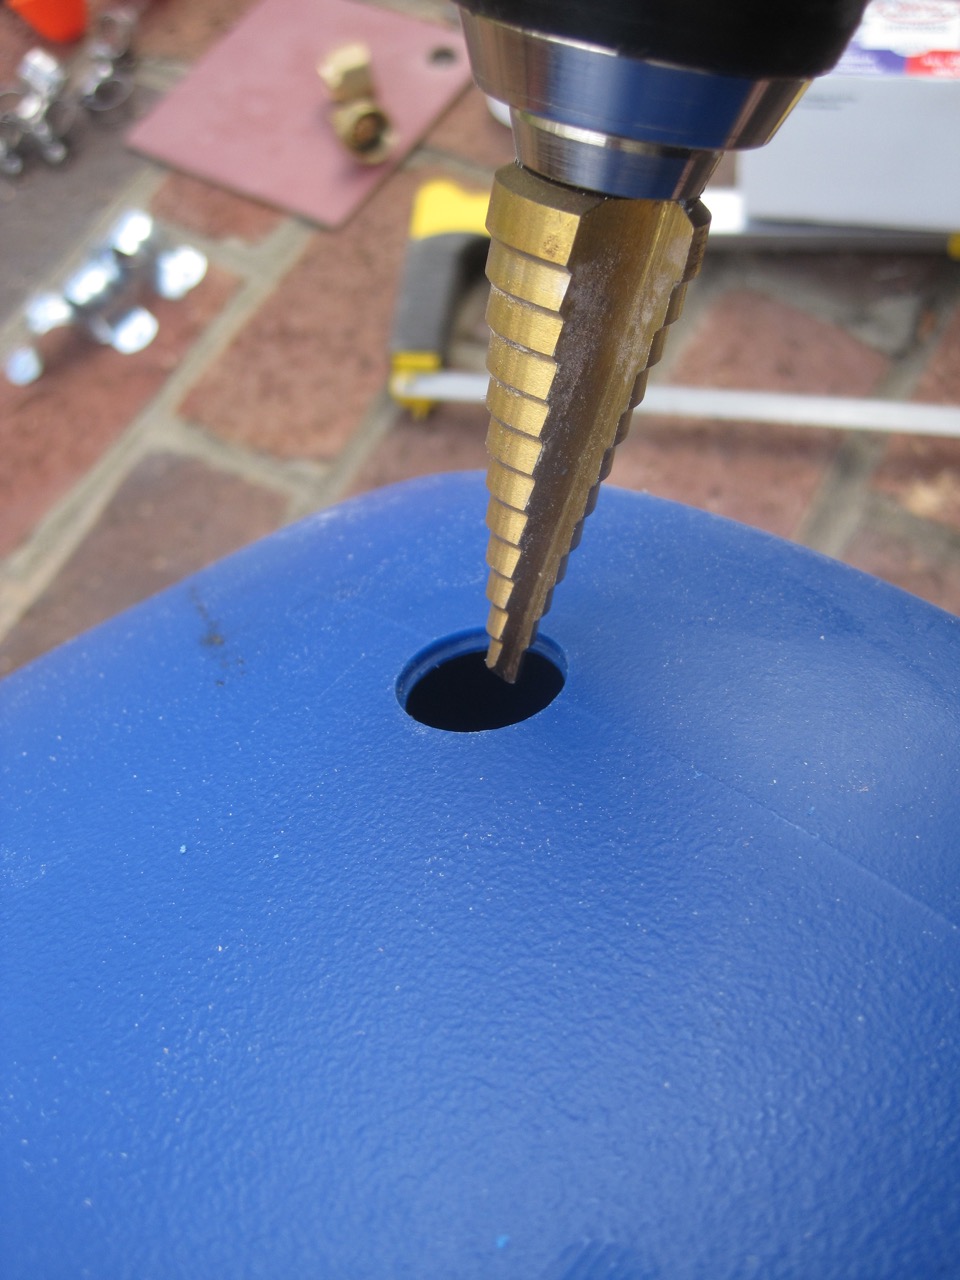
You’ll want to drill a hole just big enough to screw your brass adapter piece in from the inside. Snug is better than loose. I really liked having a step drill bit for this because I could test the fit as I went.
Because the brass adapter has longer threads than what the ball valve will accommodate I knew I would need to “fill in the gap” which was great because I could add gaskets as an extra barrier from the water leaking out.

I used the rubber sheet to customize 2 gaskets that would fit over the threads of the adapter (one will go inside the barrel and one on the outside). I used my step drill bit for making the inside hole of the gaskets (putting the rubber matt over wood to stabilize it).

I left the inside gasket square because you wouldn’t see it but shaped the one on the outside so it was the same shape as the base of the ball valve.
You can’t see the gasket here because I caulked around it already. I also used teflon tape around the adapter threads before screwing everything together (it was dark and I couldn’t take pictures, sorry)!
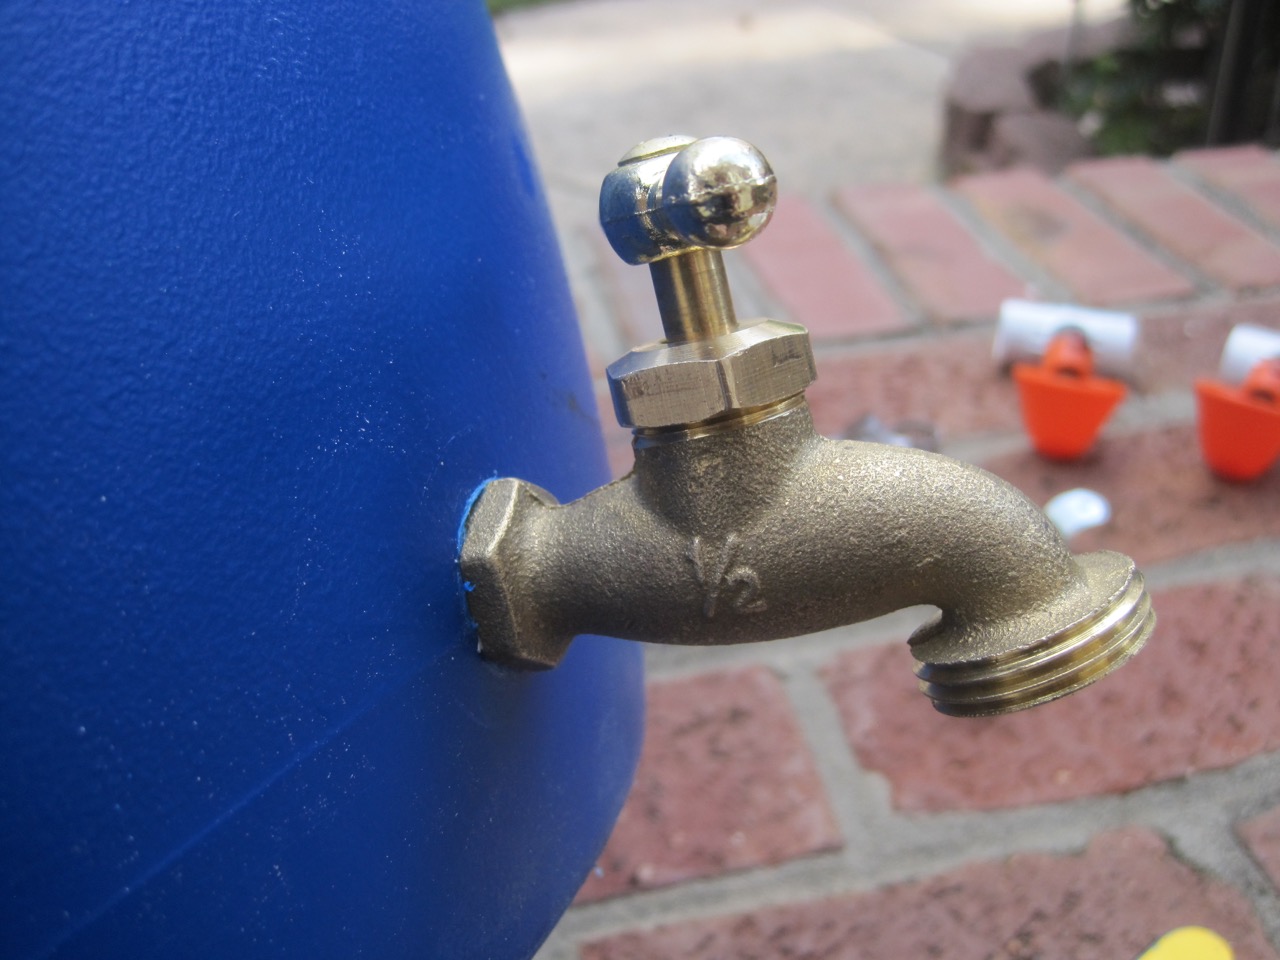
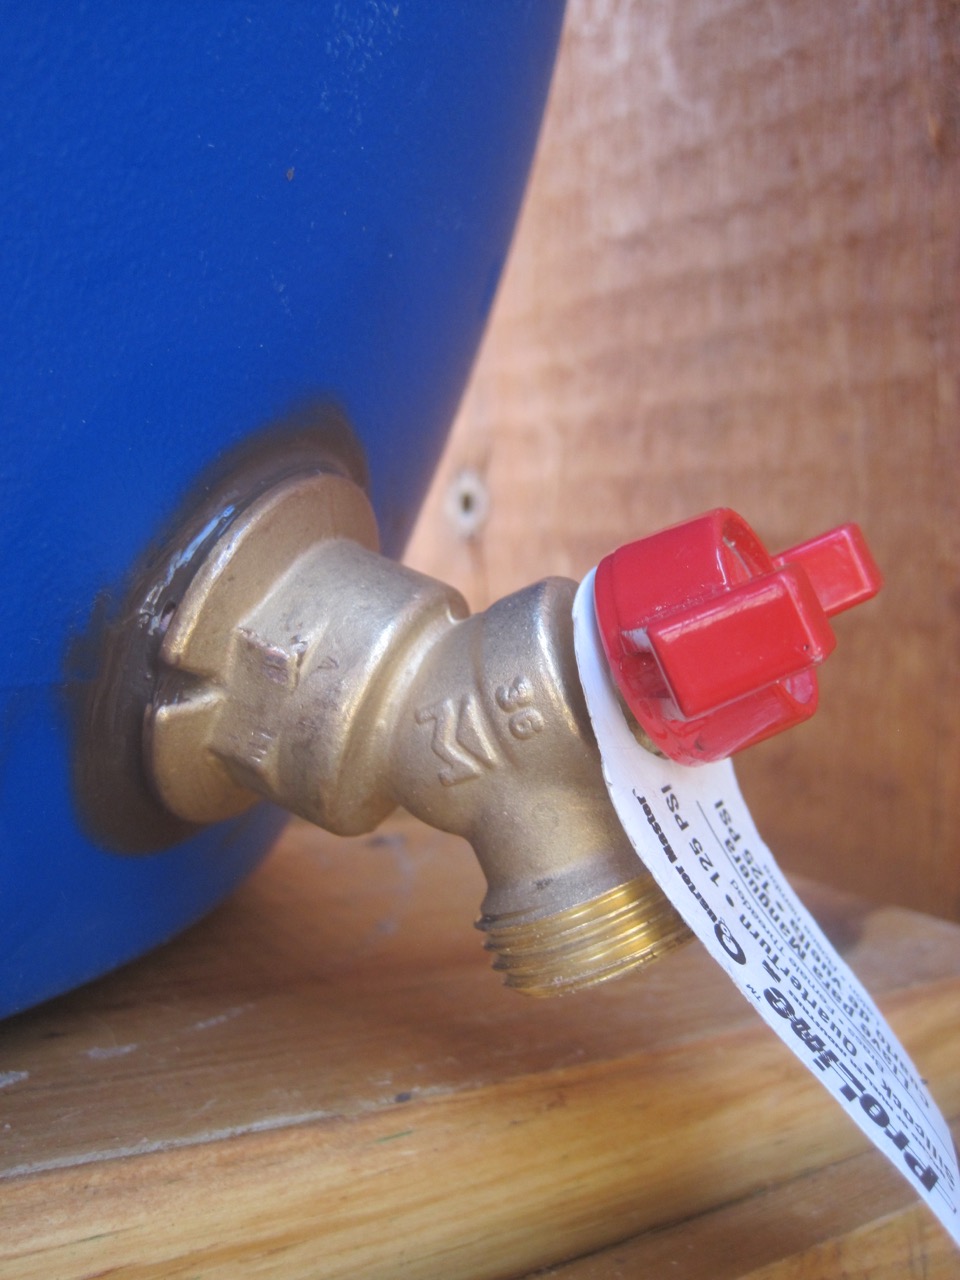
As a side note, I originally purchased this valve for the barrel but the base against the barrel was so narrow I didn’t feel comfortable with it, plus the threads inside the barrel weren’t long enough to put a gasket in between.
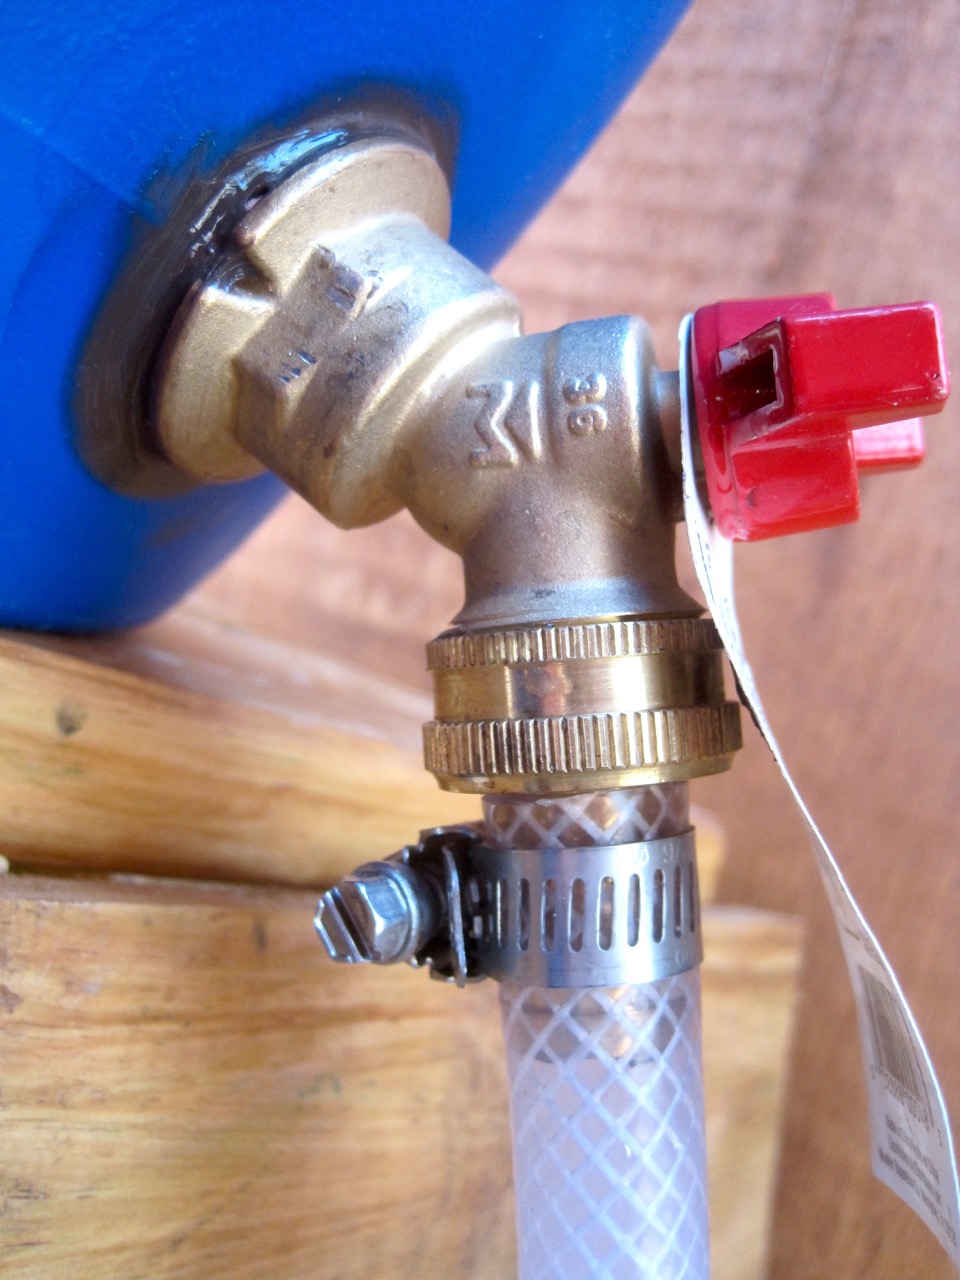
Now you can attach your brass hose adapter to your ball valve, and put a steel clamp over your hose and attach securely.
Now time to work on the PVC fittings!
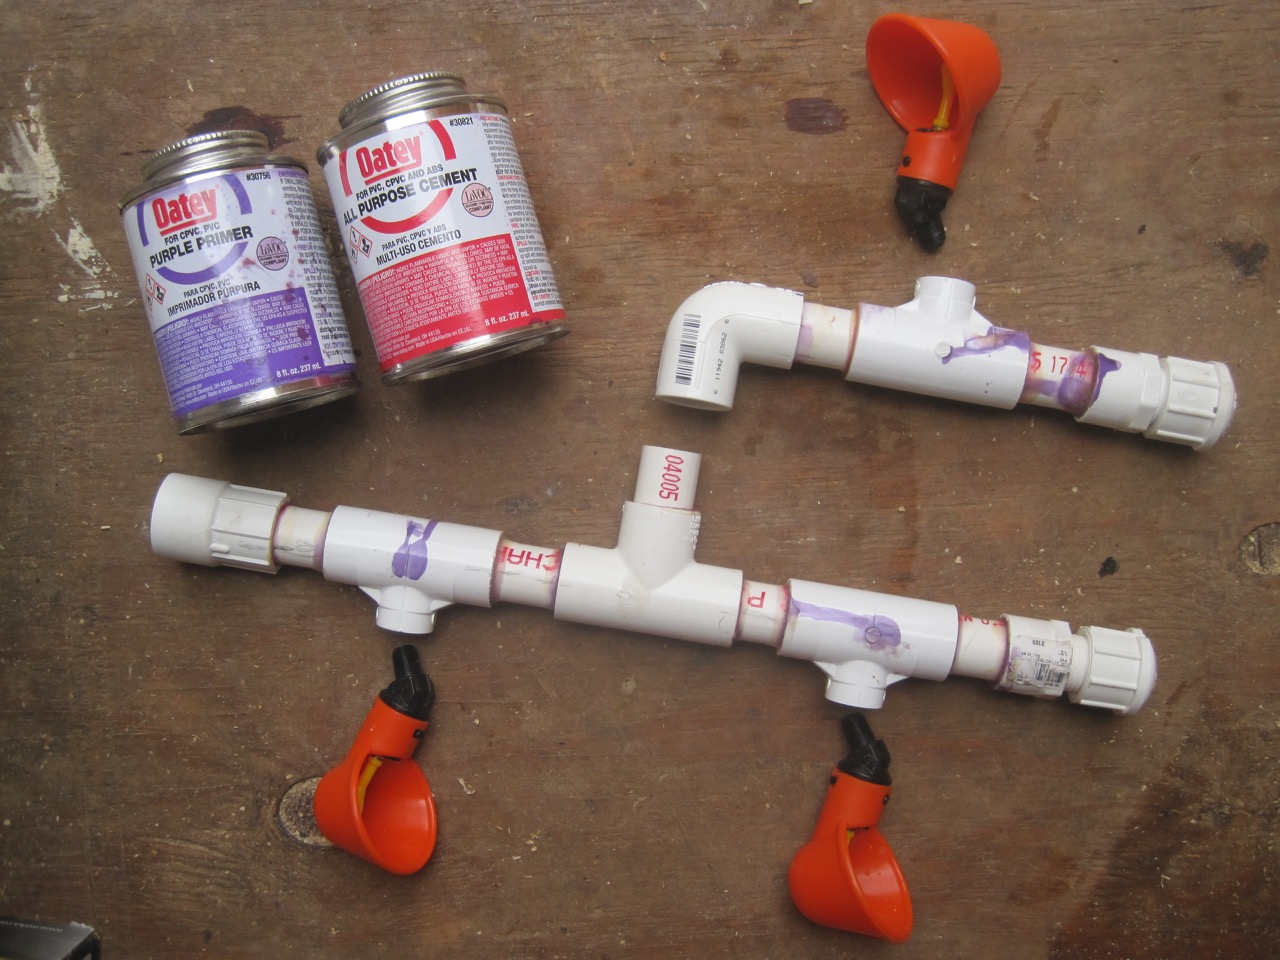
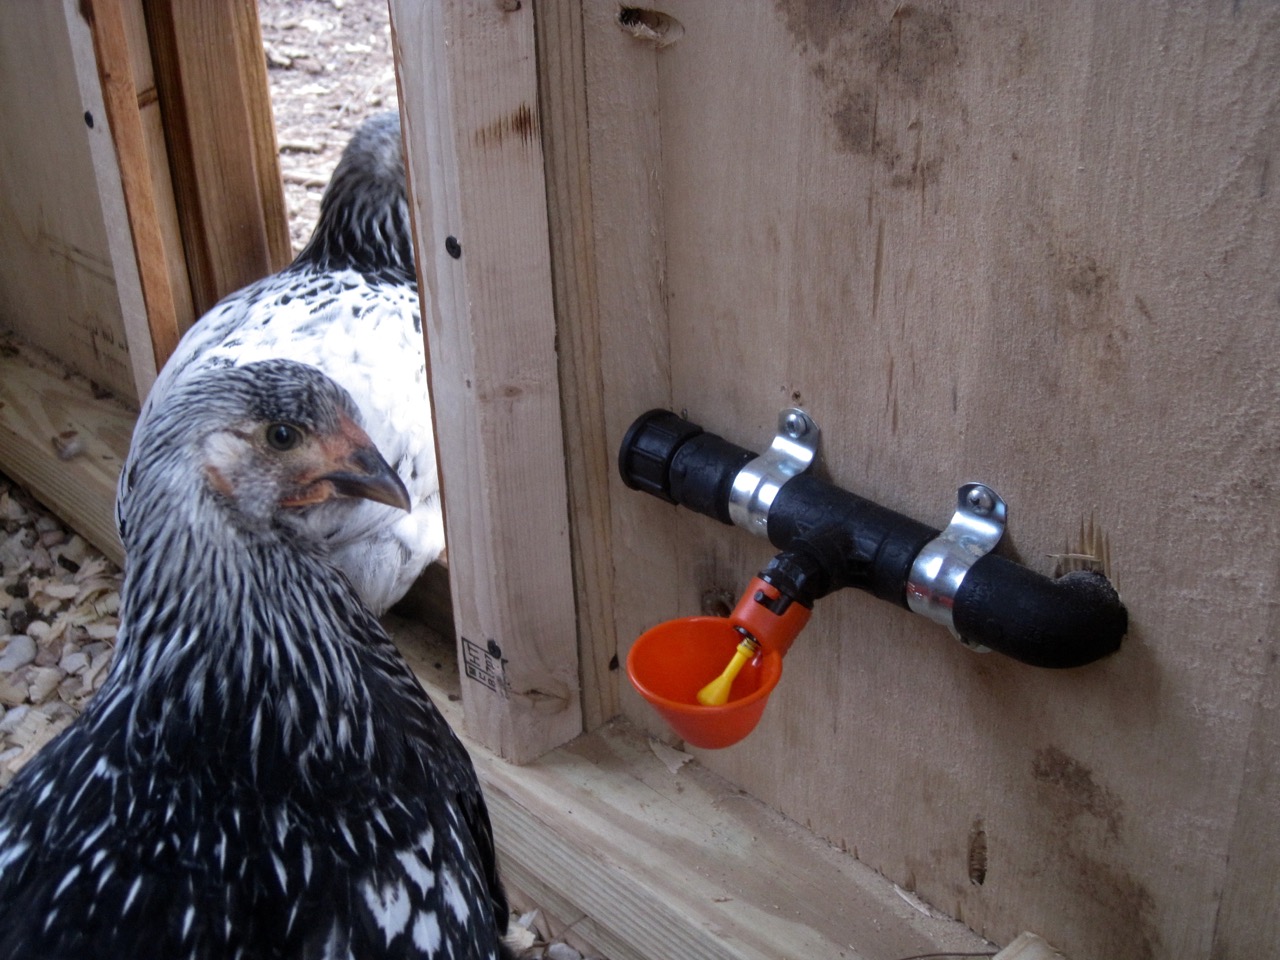
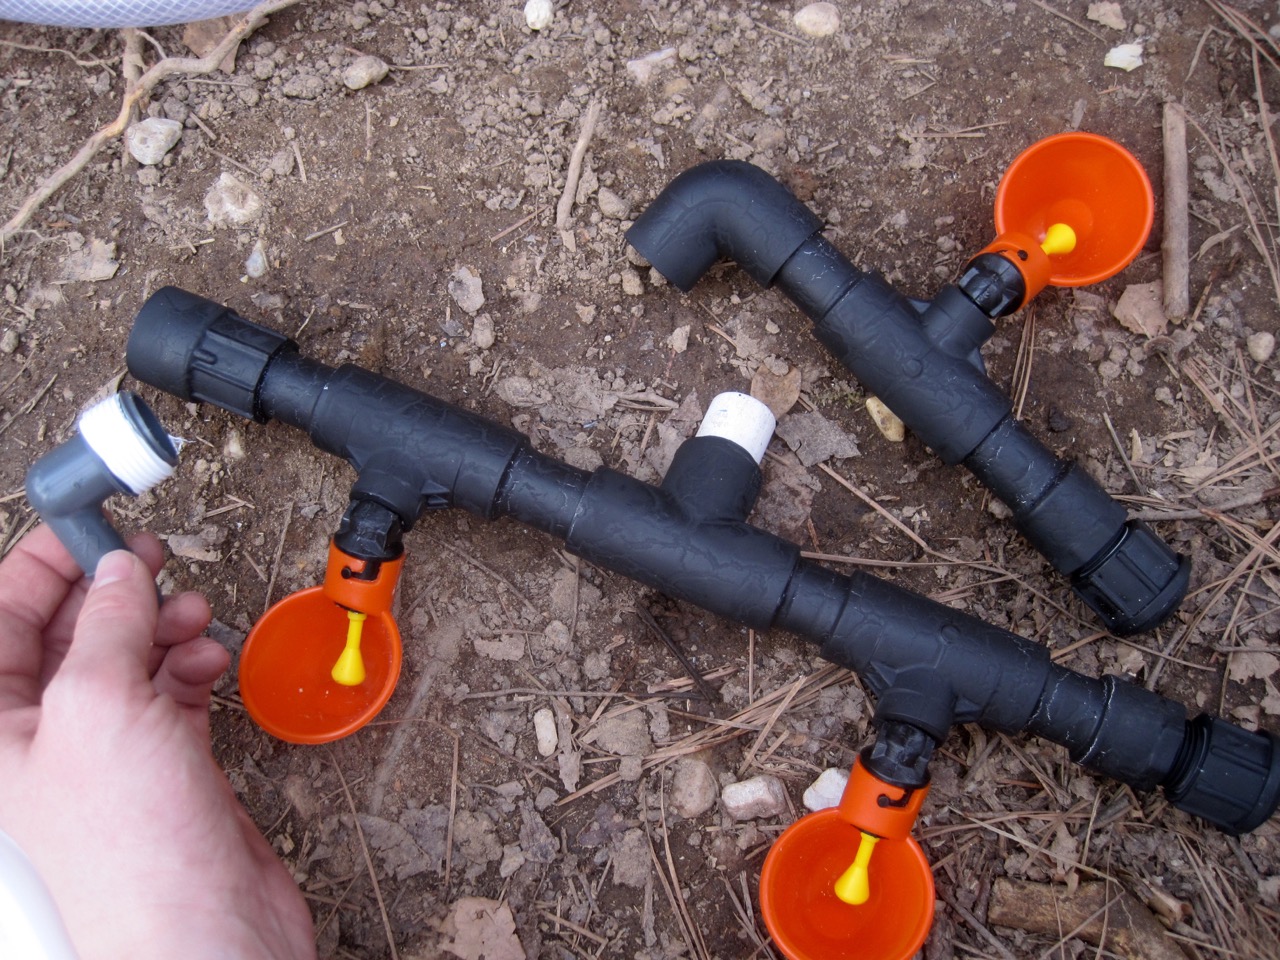
You’ll want to design and customize your PVC sections with what works best for your coop. Dry fit as you go to make sure it’s what you really want before gluing. You can see on the right sides of my sections are the threaded caps with the threaded male adapters and on the very left of the large section is the female reducing adapter which fits the gray irrigation elbow (not pictured)… everything in between should be easy to see. I was really careful to make sure the small section of PVC between the tee and elbow was the correct size to fit through my coop wall.
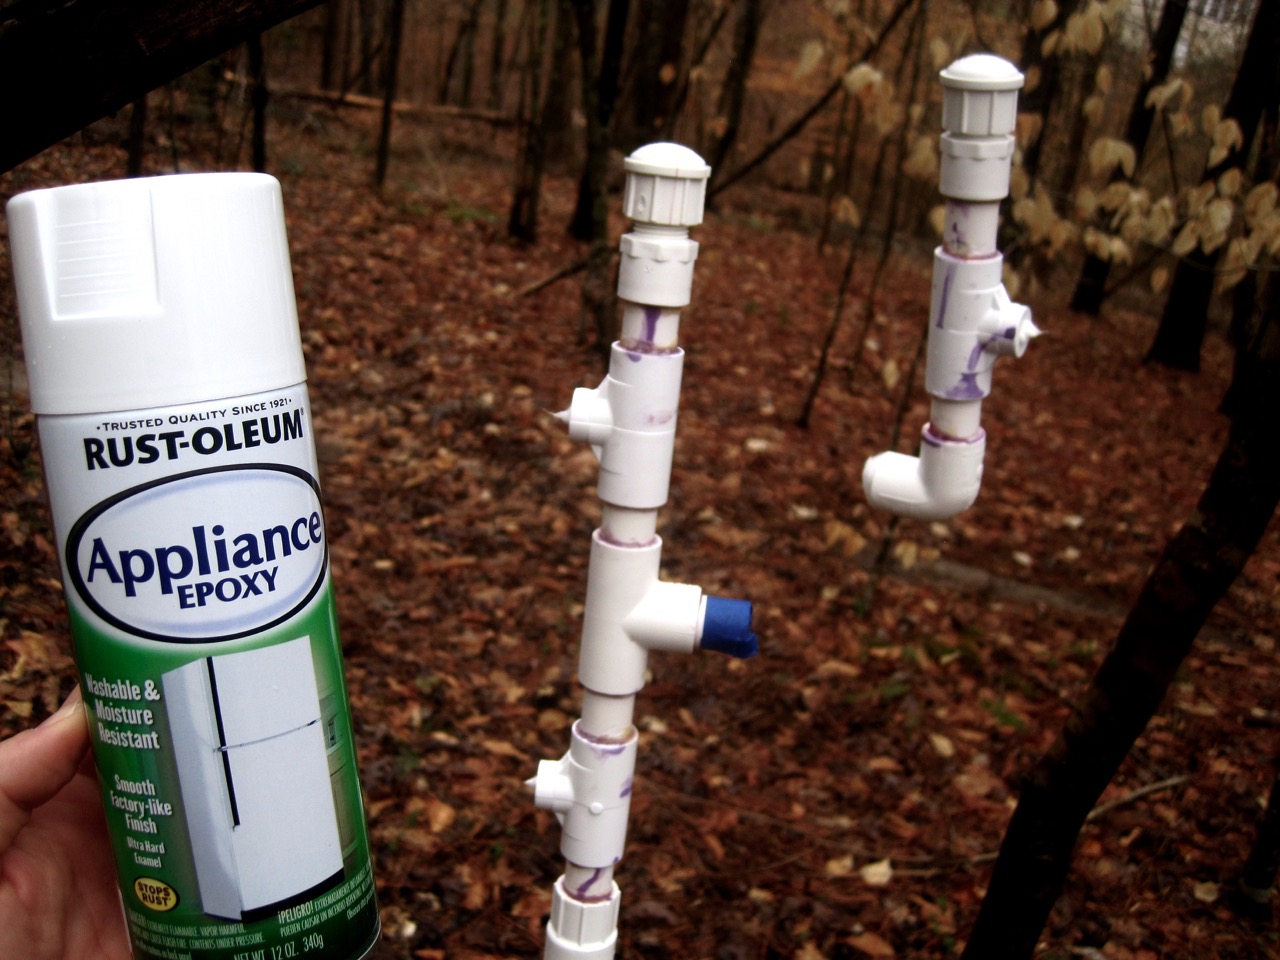
I just HAD to paint my PVC because I really can’t stand the way it looks. I’ve read it’s nearly impossible to get anything to stick to PVC but that wasn’t going to stop me! I filled the holes with cotton balls and taped the PVC section I still needed to glue then I rubbed acetone thoroughly over all surfaces (it dulled the finish) and then sprayed with an epoxy I had in the garage. If you’re wondering how my PVC is floating in the air, I screwed fishing string into the caps!

The white epoxy was supposed to cure for about 9 hours but I was too impatient and sprayed it black while it was still tacky.

It was fun to see this crinkle affect in just a few seconds!
I sprayed a few more coats of black and pulled out the cotton balls to add the watering cups. Use teflon tape on all the threads of your PVC sections or it WILL leak.

I used my forstner bit to make a hole in the coop.

I screwed my small section onto the inside of my coop with the metal straps so that I could glue my other section without needing someone holding it from the inside for me. Yes, I know I did a sloppy glueing job (I was nervous and there were chickens all around me pecking at my shoe laces)!
Attach your metal straps!

Now you can attach the other end of your house and you’ll be up and running in no time! Add your metal clamp BEFORE you push the hose on.

I added a metal strap to hold the barrel to the wall just to be safe. I used metal eye-bolts and the same galvanized wire I used for the hen door.
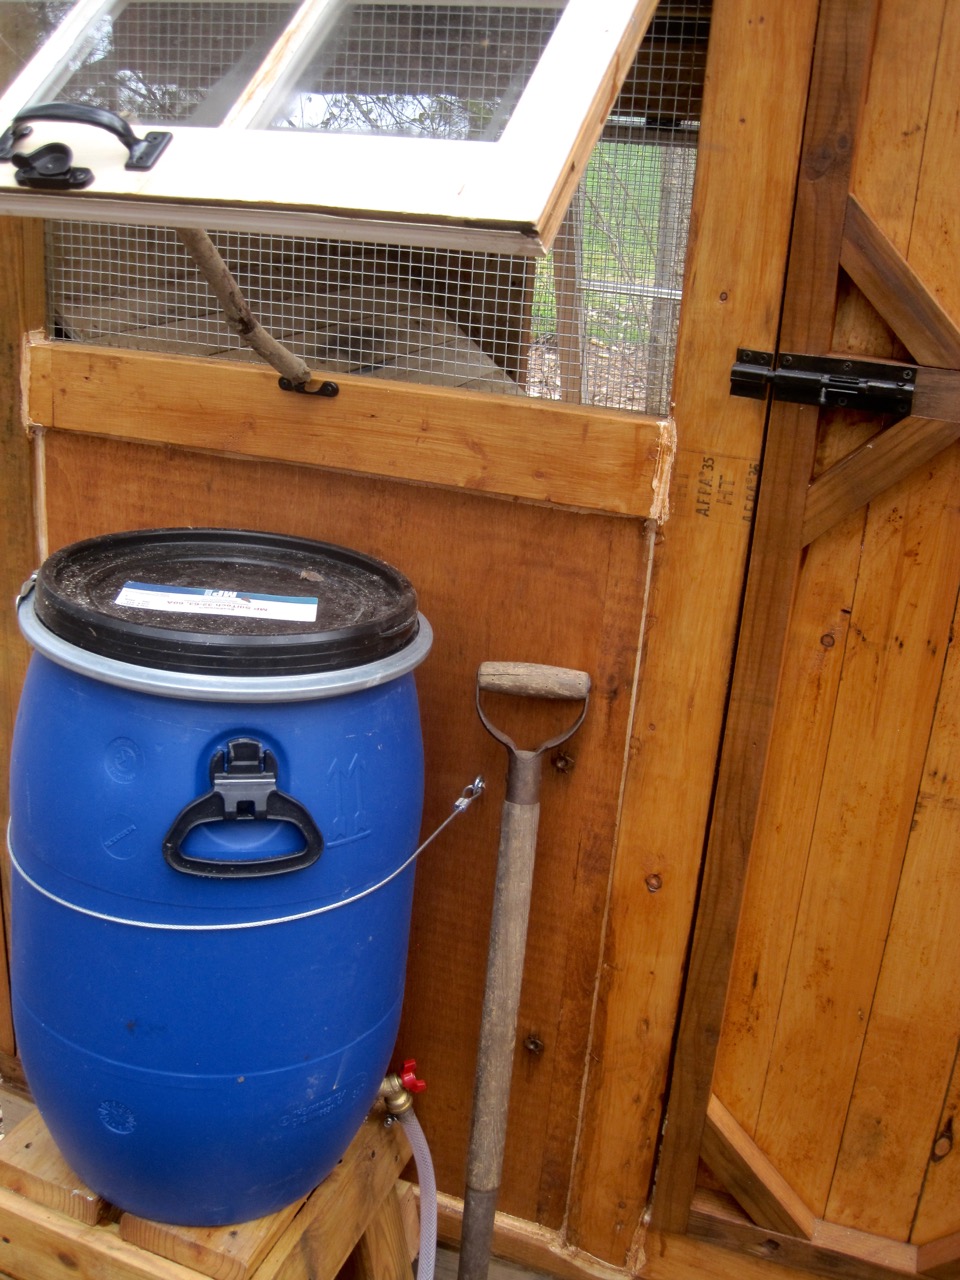
You’ll want the bottom of your barrel above the height of your watering cups – if it’s not high enough it won’t work.
Did that help you? I’d love to know!
Other Chicken Project Links:
Have ducks?

8 Comments
Why does a chicken coup have two doors? Because if it had four doors it's be a chicken sedan.
March 21, 2016 at 11:38 pmLol.. You are so funny!!
March 21, 2016 at 11:39 pmThis is very nice! I saw this posted in a contest.
June 3, 2016 at 10:38 amHi there! I wonder, what contest?
June 3, 2016 at 10:39 amThis has me wonder now. I'm thinking maybe someone has stolen your profile pic, name, and all your projects, and has entered them into a contest to win free tools.
June 3, 2016 at 1:59 pmI just entered on Ryobi Nation actually – but I never gave any information about my project blog or anything – I guess I was just confused how you found my blog, lol. Hopefully it's the Ryobi contest and someone didn't steal my stuff – ACK! 🙂
June 3, 2016 at 2:01 pmhttps://www.ryobitools.com/nation/projects/list/contest/30
RYOBI's CONTEST…I sent you the link, if that isn't you who entered into the contest, I would email Ryobi and tell them that your identity was stolen.I'd hate to see someone fake gain from your hard work.
June 5, 2016 at 9:08 pmGood luck with the contest!! 🙂
June 5, 2016 at 9:08 pm