Most strollers I’ve seen don’t come with an organizer – I’ll show you how to make your own in this tutorial!

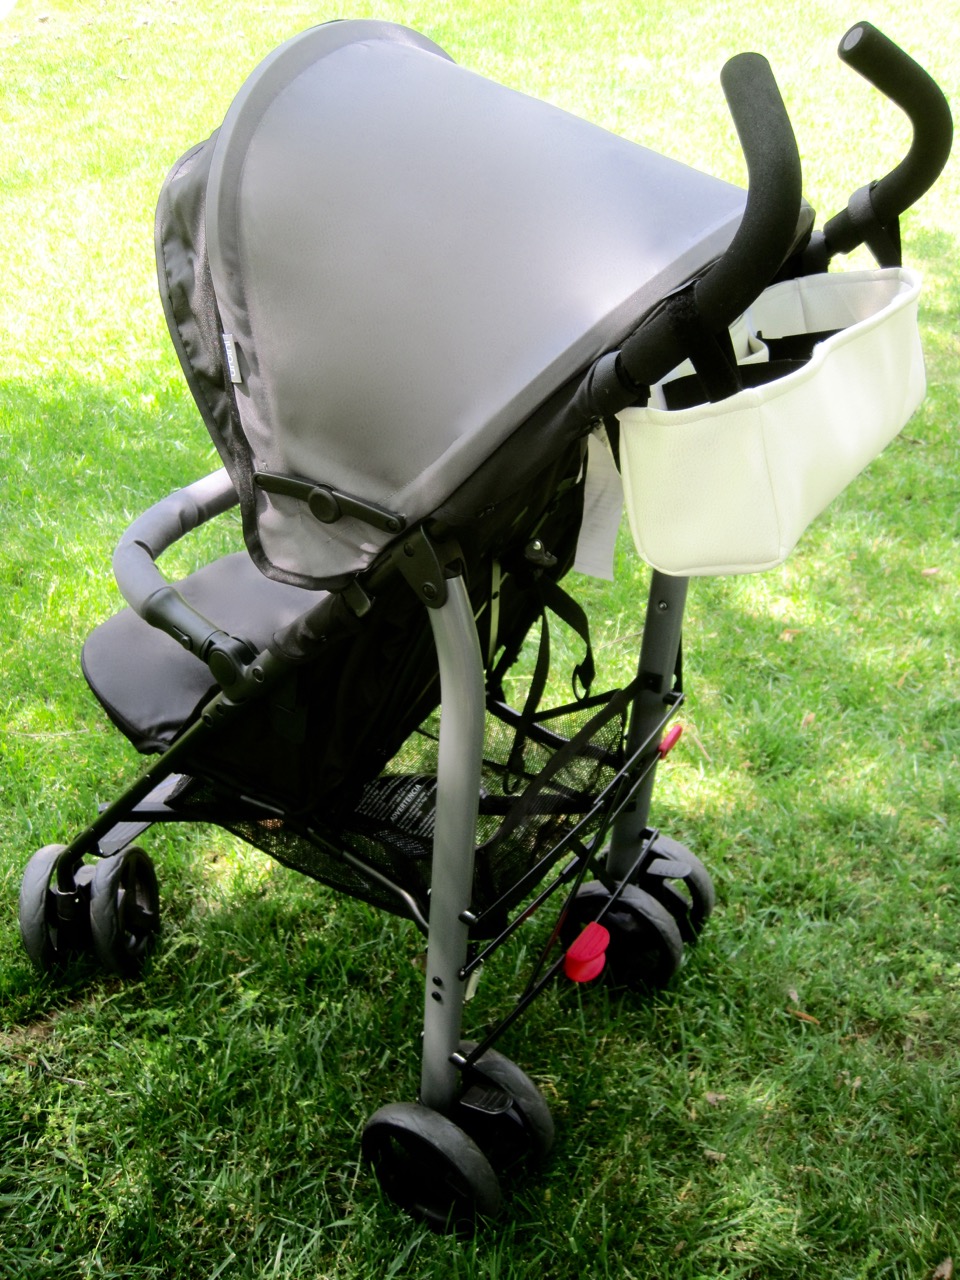
Having my keys, phone, drink, wallet, binky, snacks, etc. handy has been such a stress reliever with my kids in tow. These organizers are great because the Velcro straps allow you to get a good fit on almost any stroller and you can take it off easily for washing – I just throw mine in with a regular load of clothes!
The first one of these I made was about 7 years ago!

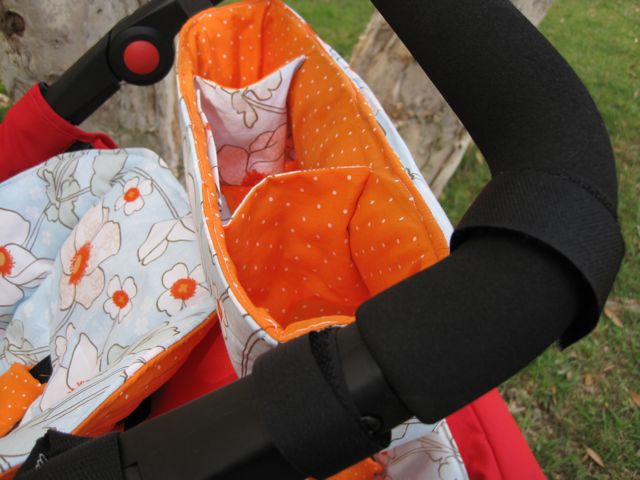
I changed the organizer a little bit from my original by adding Velcro dividers rather than permanent ones – this makes it easier to sew, it looks nicer, and it’s more versatile! You could also sew more Velcro strips inside the organizer for more divider positions as well!

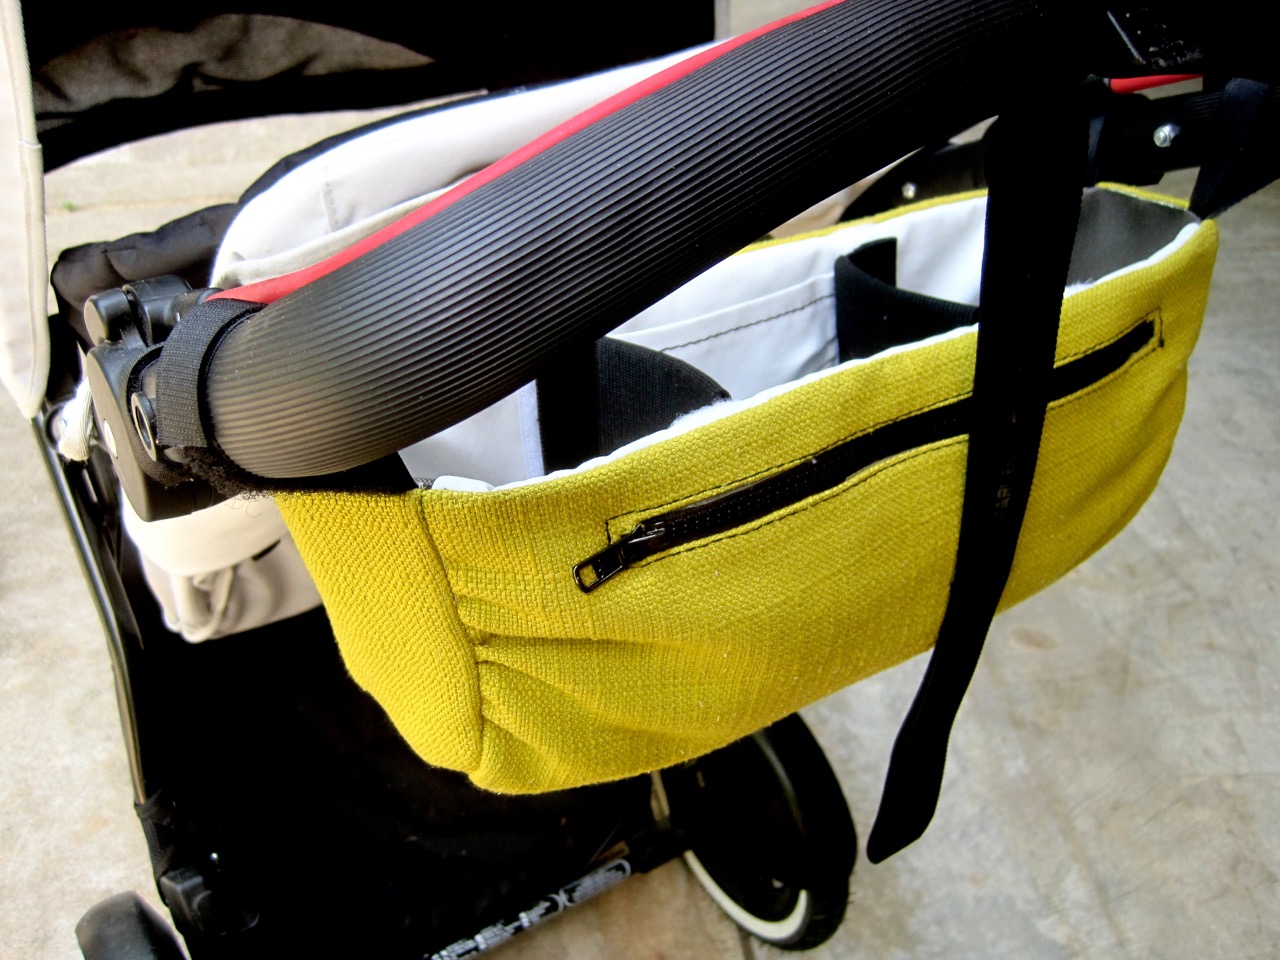
For this tutorial I am going to give you a supply list for an organizer with the inside and outside shell made out of the same fabric, with black dividers and black straps for attaching to the stroller. Feel free to make your divider how you wish and buy supplies according to your wishes! For simplicity sake I’m not going to show how to add a zipper* or gathered front like the green one pictured above (but feel free to customize yours however you’d like)!
*If you’d like to know how to make a zipper pocket, click here.
Consider using a waterproof fabric for the inside – easy to wipeout spills! Also consider using a medium-weight to heavy-weight fabric for the outside shell so the organizer holds its shape and is more durable. TIP: keep in mind what your sewing machine is capable of sewing through when you choose your materials – a layer of vinyl, heavy-weight fabric and Velcro can be difficult to sew over, especially on the seams.
SUPPLIES:
15″ Fabric (at least 45″-wide)
1 yd Black Elastic (2″-wide)
28″ Black Velcro (3/4″-wide)
28″ White Velcro (3/4″-wide)
Yardstick and Marking Tool
Cutting Matt & Rotary Tool (Highly Recommended!)
CUTTING LIST:
TIP: Because we’re working with thicker materials, the lining is 1/4″ smaller on two sides so it will fit nicely inside the outer shell.
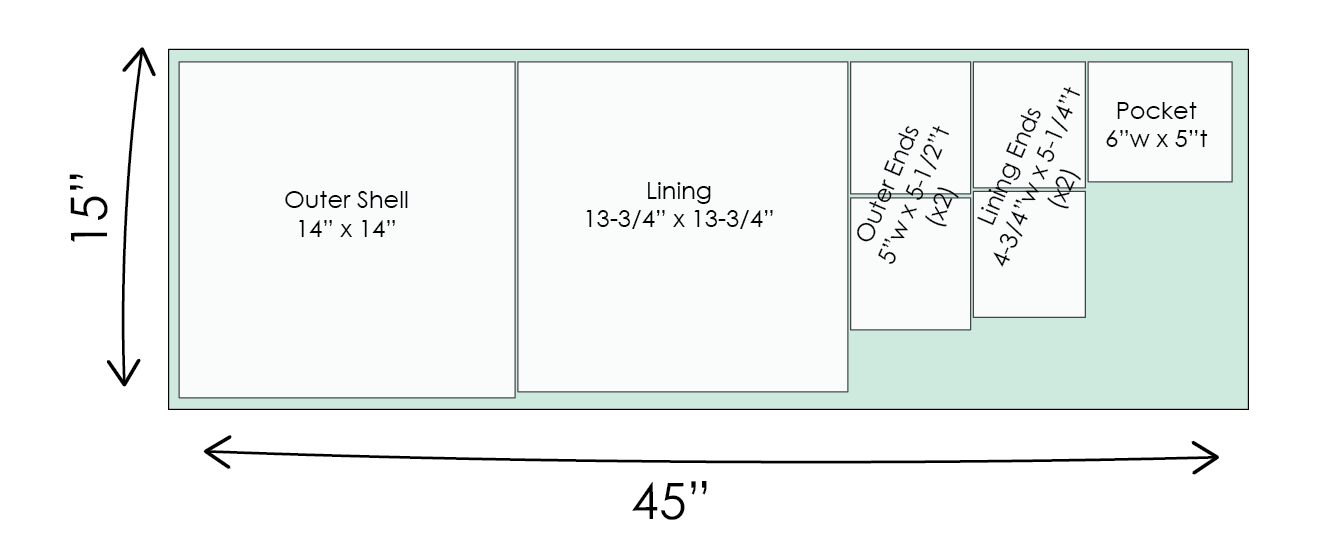
FABRIC:
(follow the diagram below for cutting fabric)
Outer Shell: 14″ x 14″
Lining: 13-3/4″ x 13-3/4″
Outer Ends: 5″-wide x 5-1/2″-tall (x2)
Lining Ends: 4-3/4″-wide x 5-1/4″-tall (x2)
Pocket: 6″-wide x 5″-tall
ELASTIC:
2 – 10″-long pieces
2 – 6″-long pieces
VELCRO:
Black:
4 – 4″-long pieces of hook & loop (Straps)
6 – 2″-long pieces of hook (Dividers)
White:
2 – 14″-long pieces of loop (Attaches Dividers to Organizer)
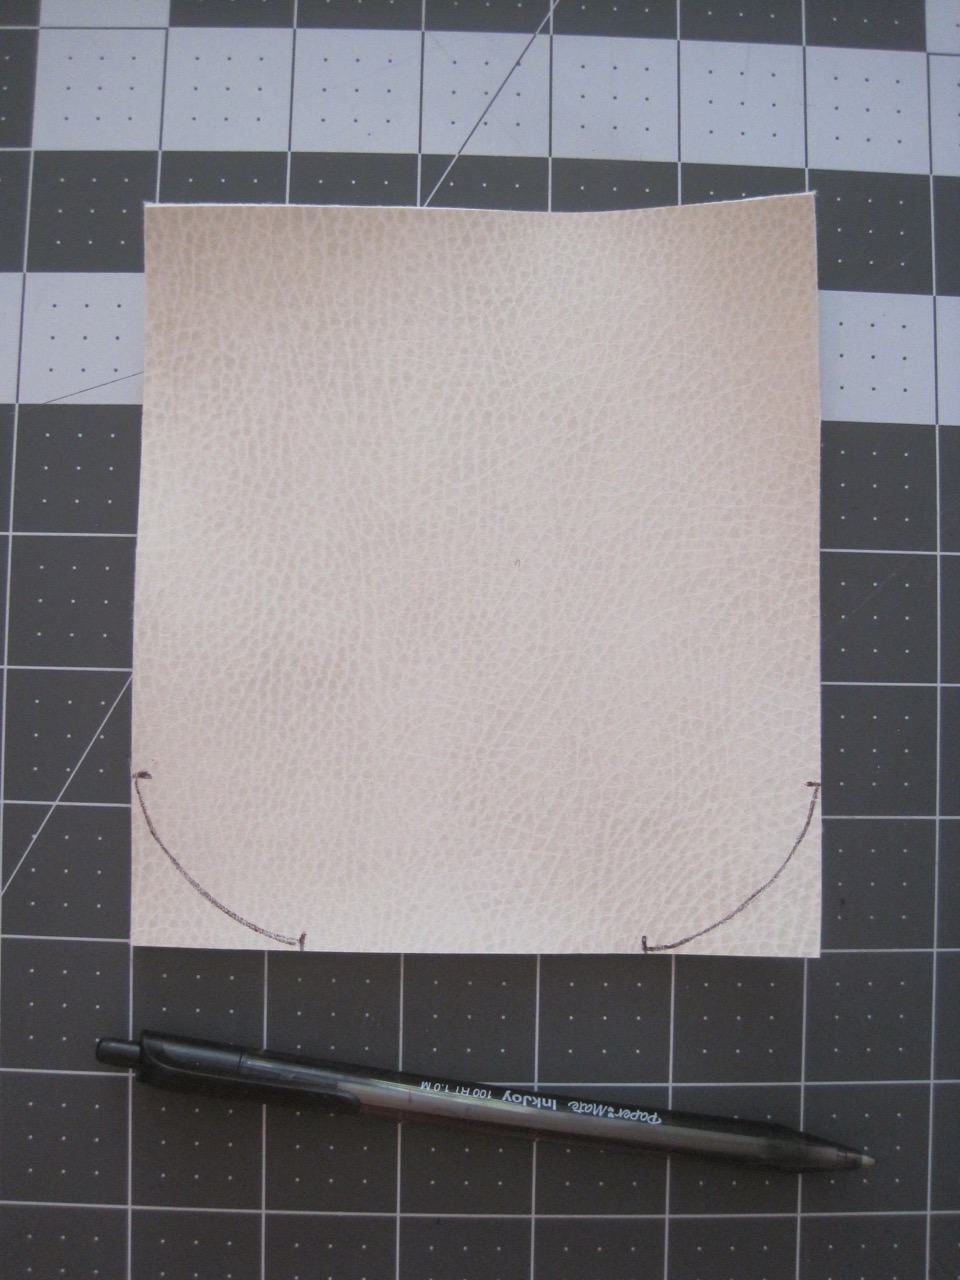
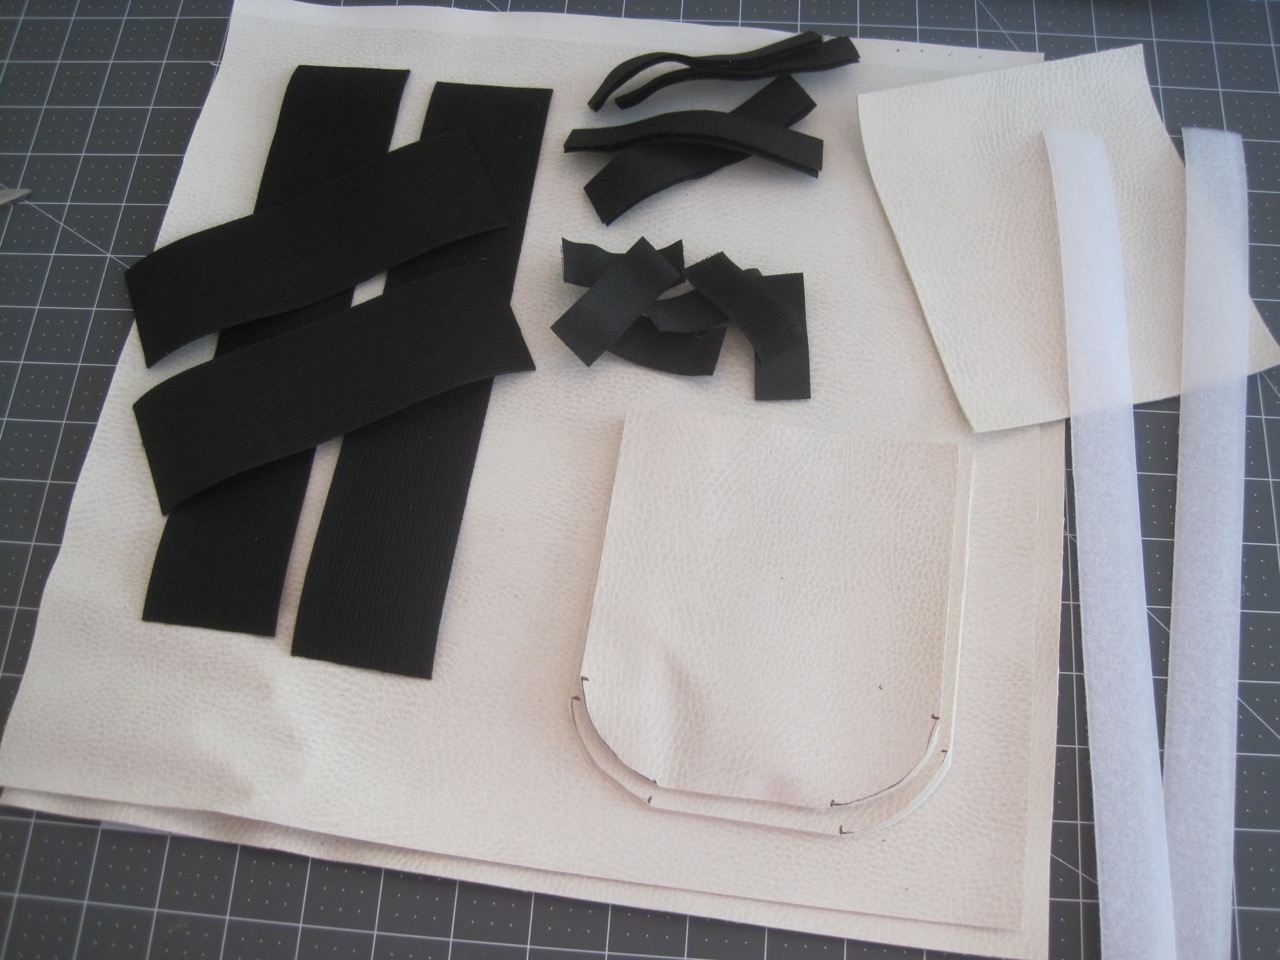
Create the curves on the bottoms (on the short ends) of your end pieces by measuring 1-1/4-inches inwards and connect with a curved line. Trim along line.

Here you can see all 4 ends are cut and ready to sew!
POCKET & VELCRO:

Sew the top edge (long edge) of your pocket with a 1/4-inch seam.
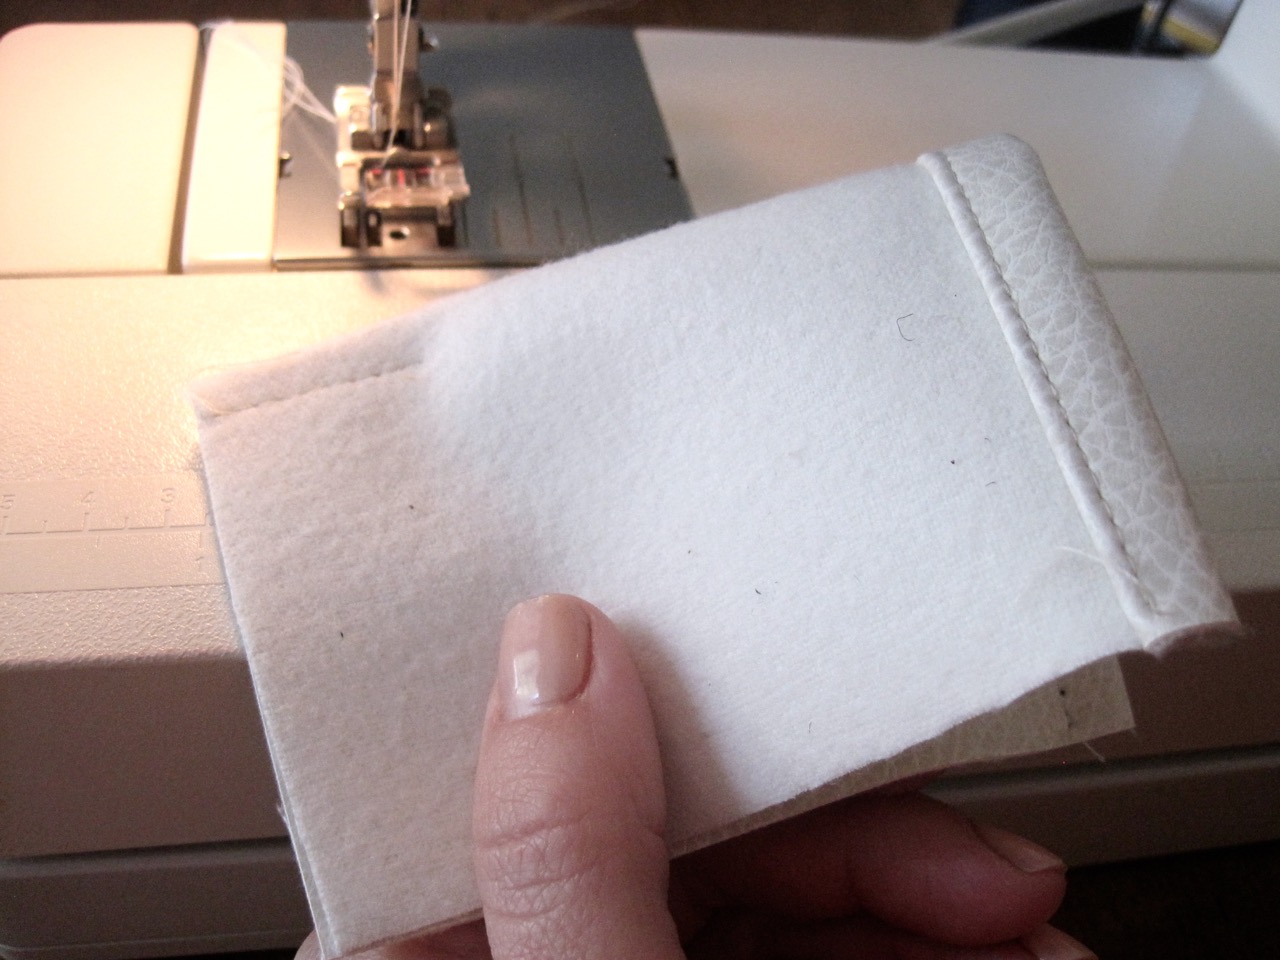
Fold pocket in-half with right-sides together and make a 1-inch long pleat from the bottom edge, 1/4-inch in from the fold.

Measure 5-inches down from the top of your lining fabric and create a horizontal line that is centered (6-7/8-inches is center; mark as well) and about 5-inches long.
While you have your yard stick and pen, mark where to place the Velcro by marking 3-1/2-inches towards the center from both the top corners and bottom corners.
Place your pocket along the bottom side of the line you created, with the wrong side facing up and the pleat centered with your center mark.
Sew the pocket with a 1/4-inch seam.

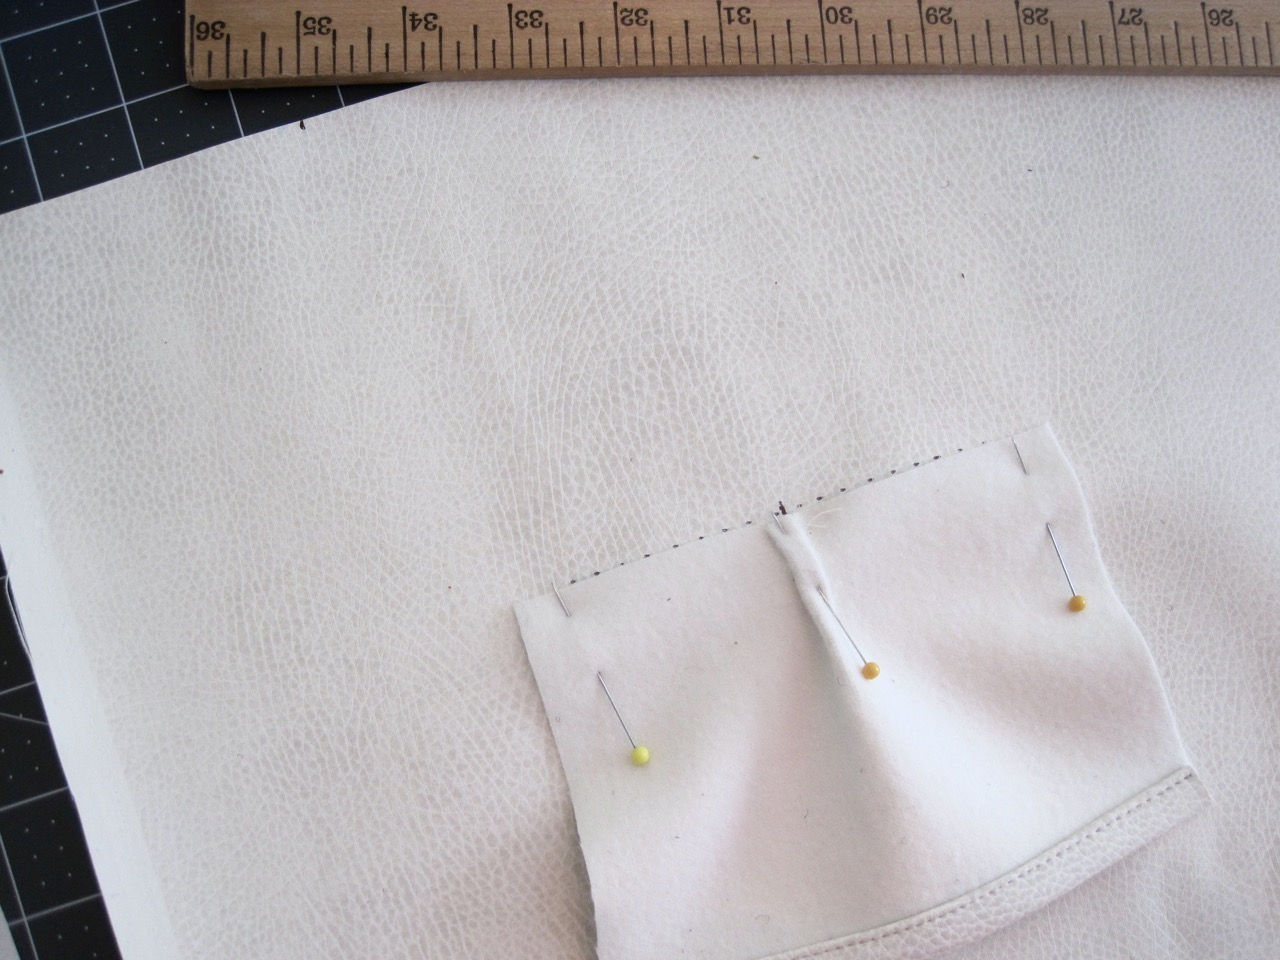
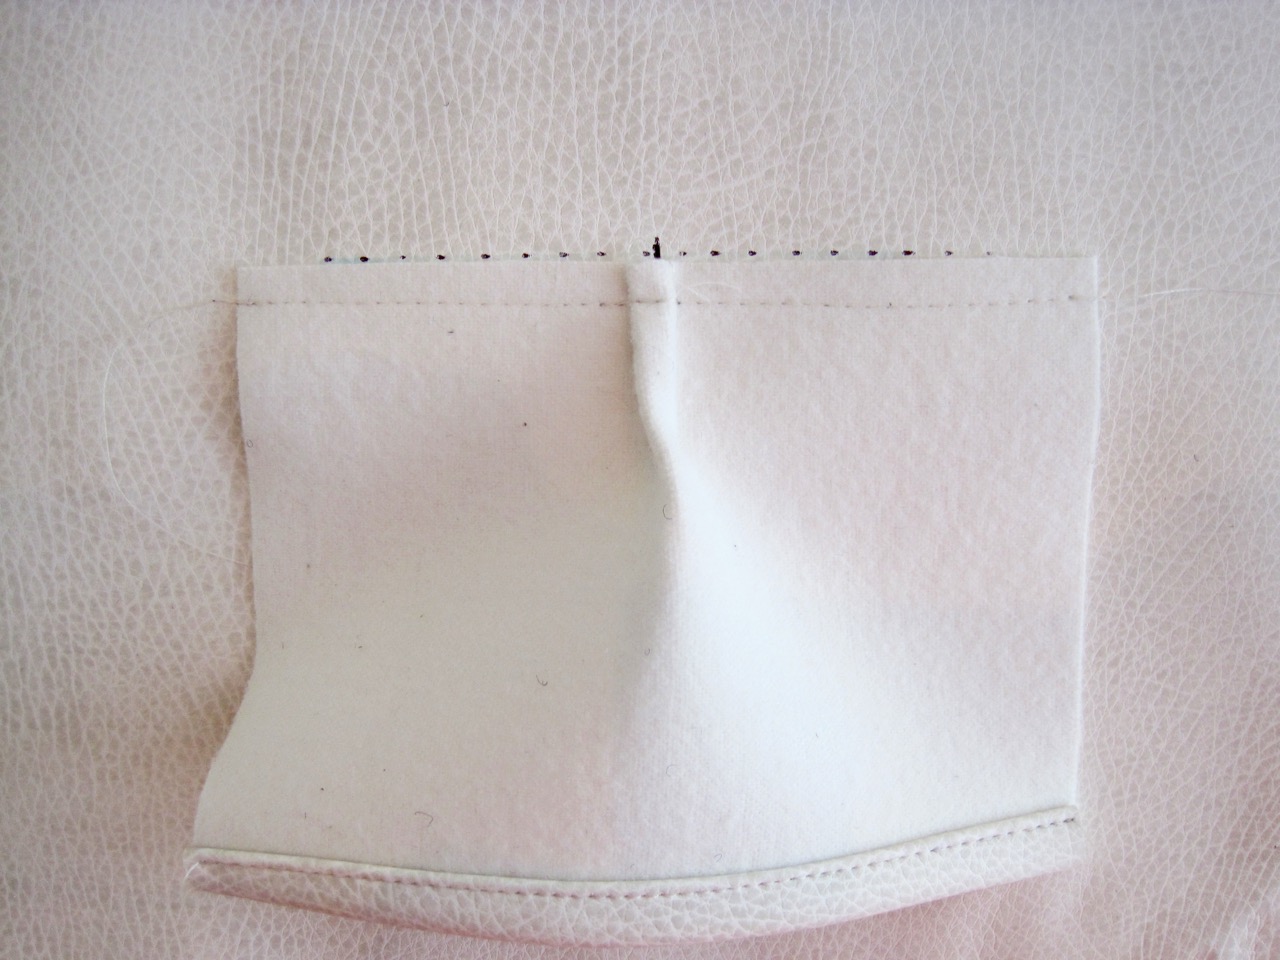
Flip pocket up and pin so pocket edges are 90-degrees with the bottom seam you just made. TIP: the pocket will pucker at the top because of the pleat on the bottom.
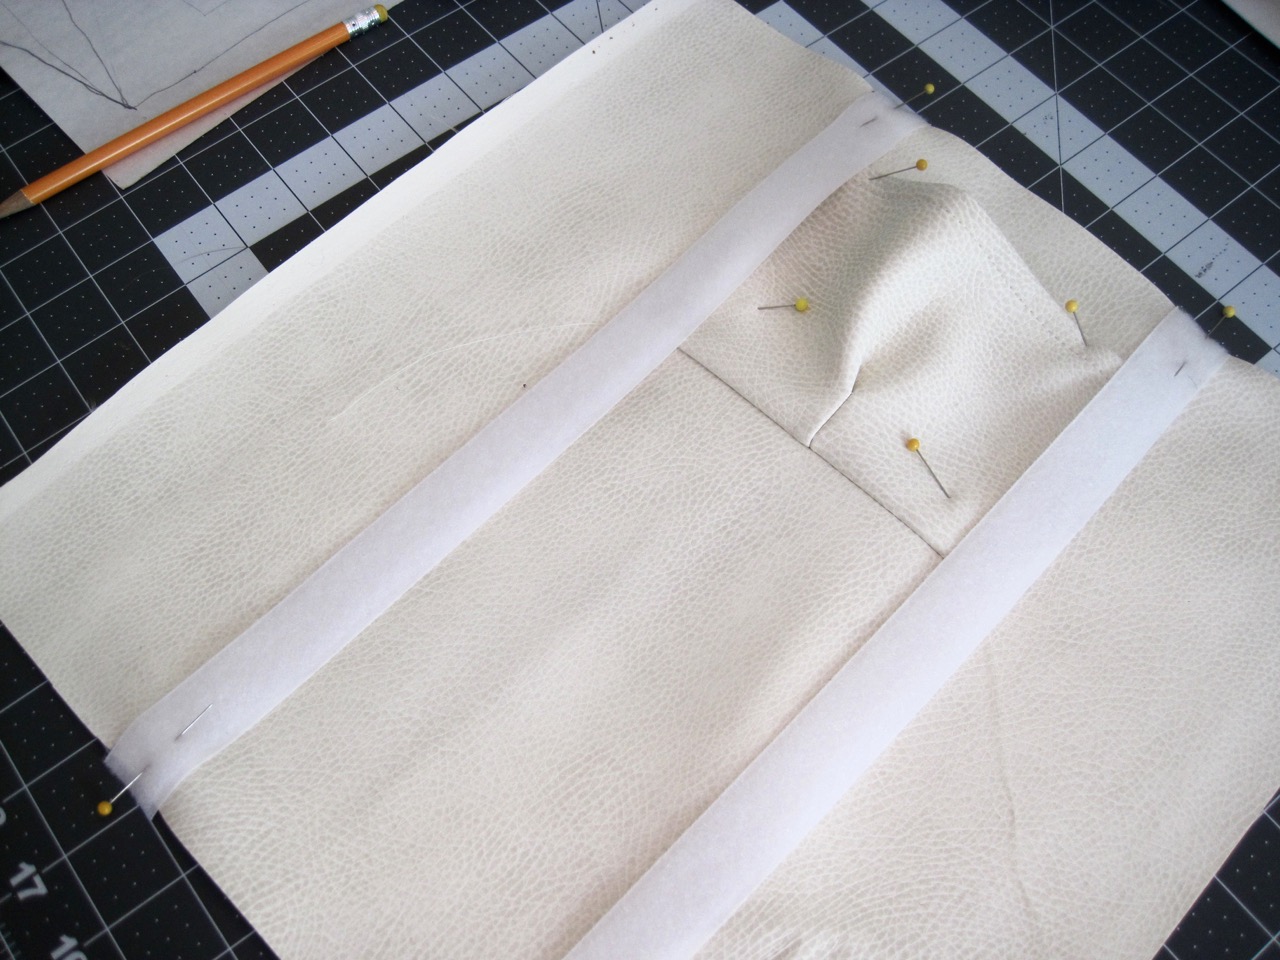
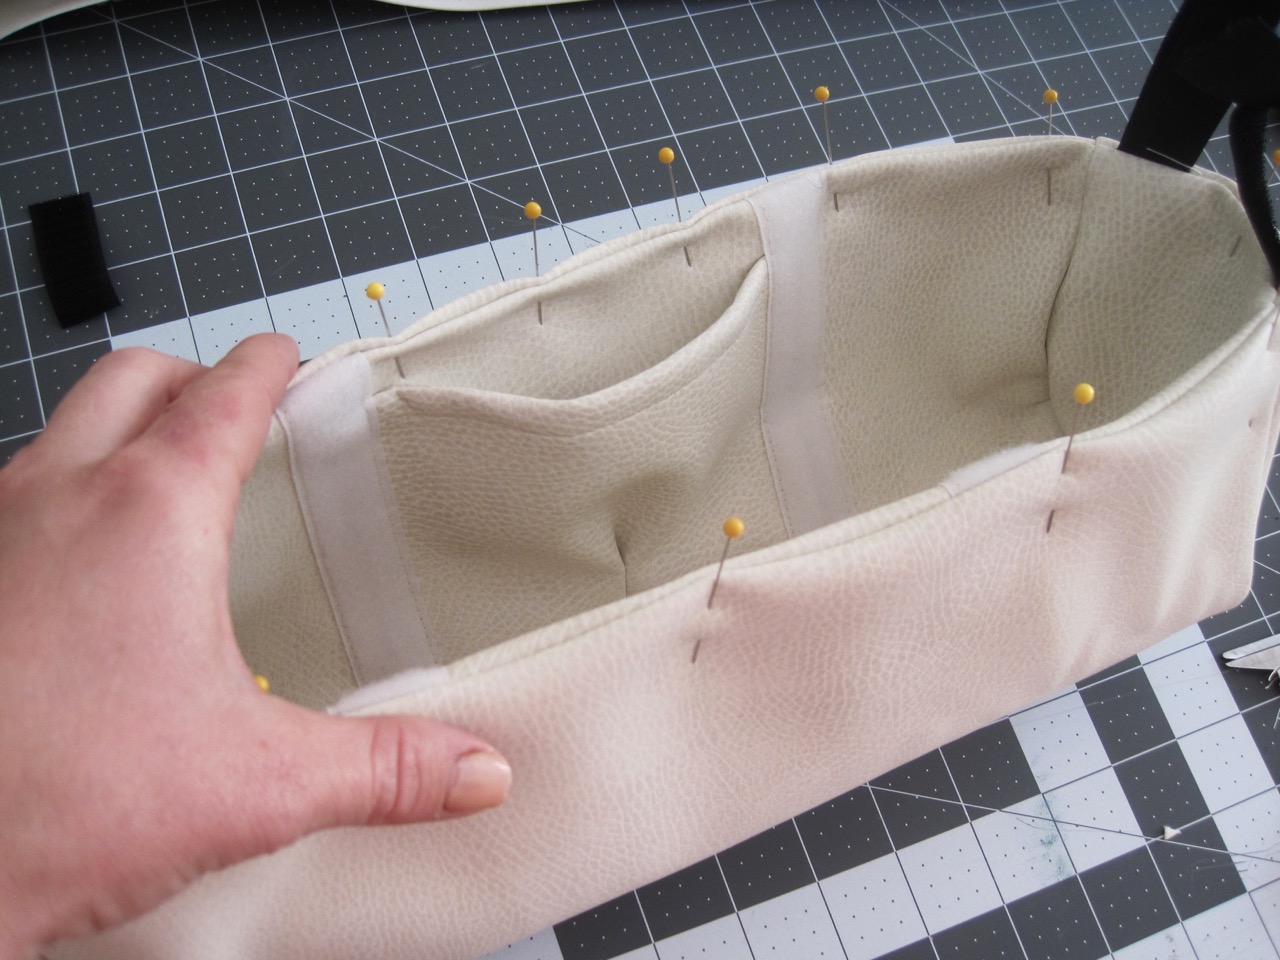
Pin your white loop Velcro along your 3-1/2-inch markings, having the Velcro on the inside of the markings. The Velcro should cover the open sides of your pocket.

Sew along the edges of your Velcro strips.
PIN & SEW SIDES:
Find the center between the curved corners of your end pieces by folding in-half and clipping 1/8-inch into seam allowance. You’ll also want to find the center of the 2 sides where you will be attaching the end pieces to your outer shell and lining pieces (hopefully this should is self-explanatory); clip 1/8-inch.
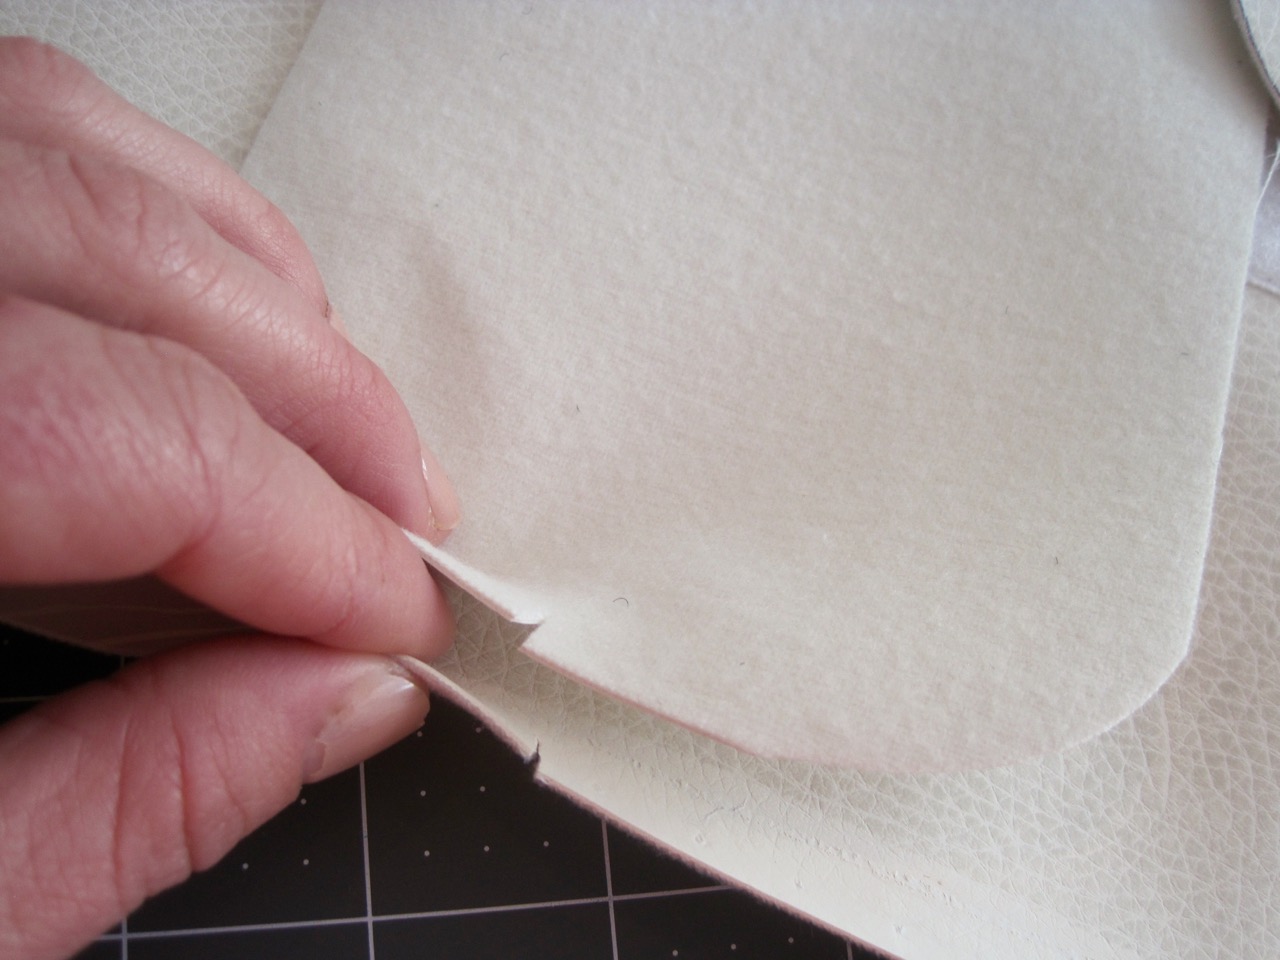
With right sides together and clipped-centers matching, pin lining ends to lining and outer ends to outside shell just along the first edge (see below picture).
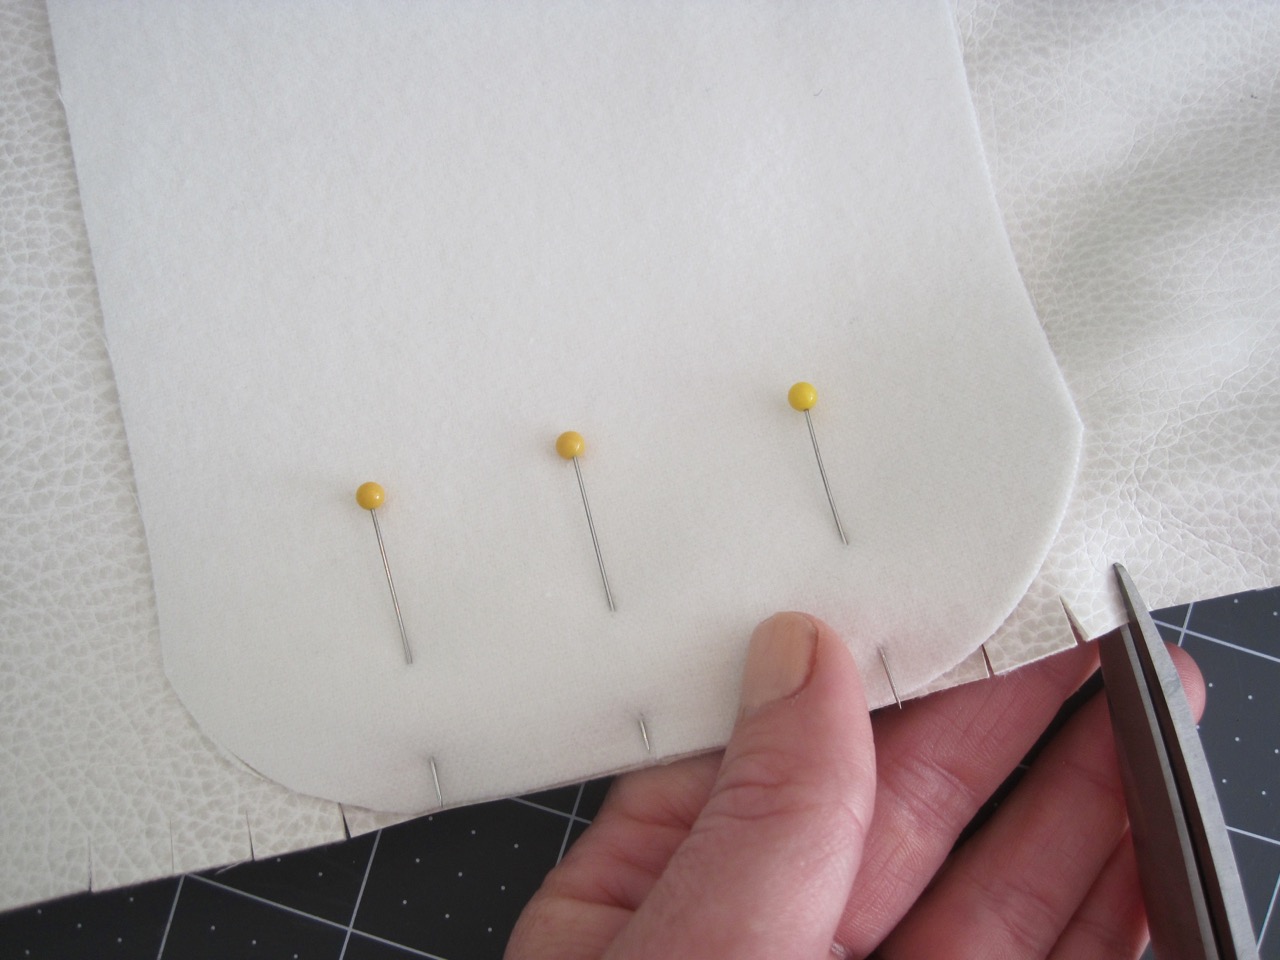
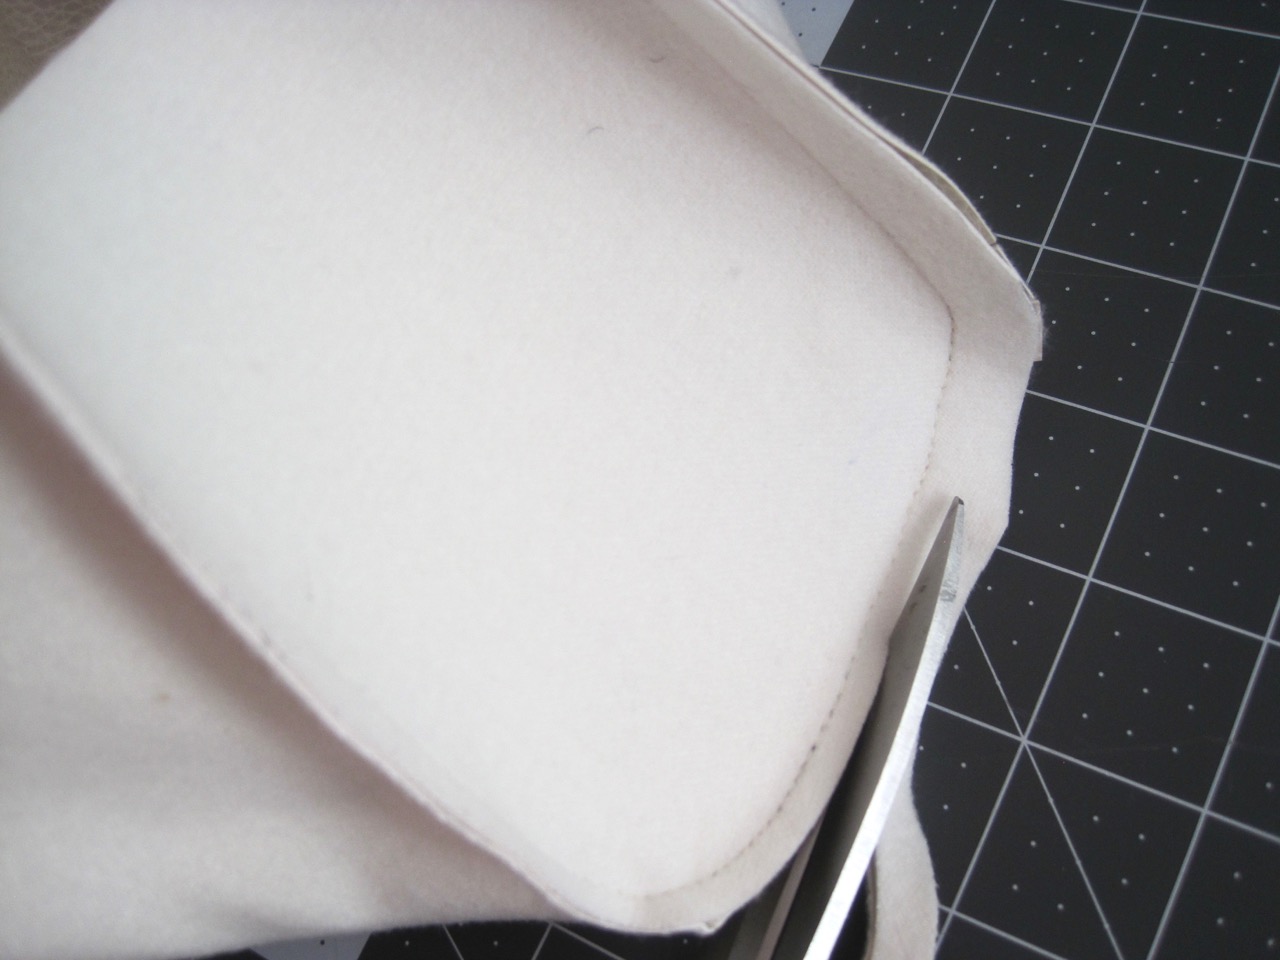
Clip into the seam allowance 1-1/2-inches to either side of your end pieces to allow the bottom fabric to contour to the curved corner – make clips about 1/4 to 3/8-inches deap into the seam allowance.

Next, match up the corners and pin. Pin along the flat side making your way to the corner. Once at the corner, take your time aligning and pinning.
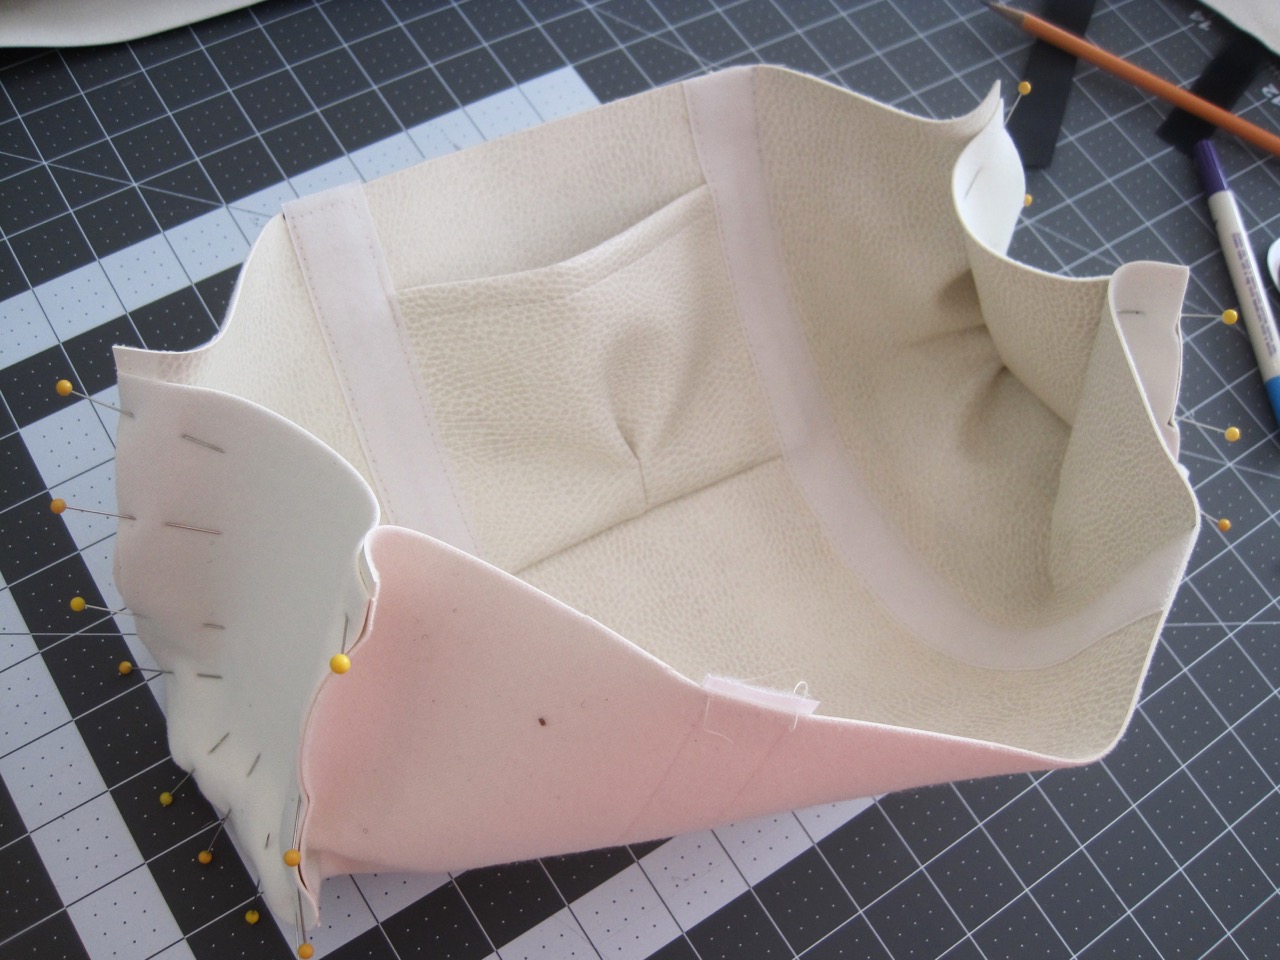
Your pieces should look like this for both the outer shell and lining (lining is pictured).

Sew your ends with a 1/2-inch seam allowance.
Trim seam to about 1/8-inch.
VELCRO STRAPS & COMPLETEING ORGANIZER:
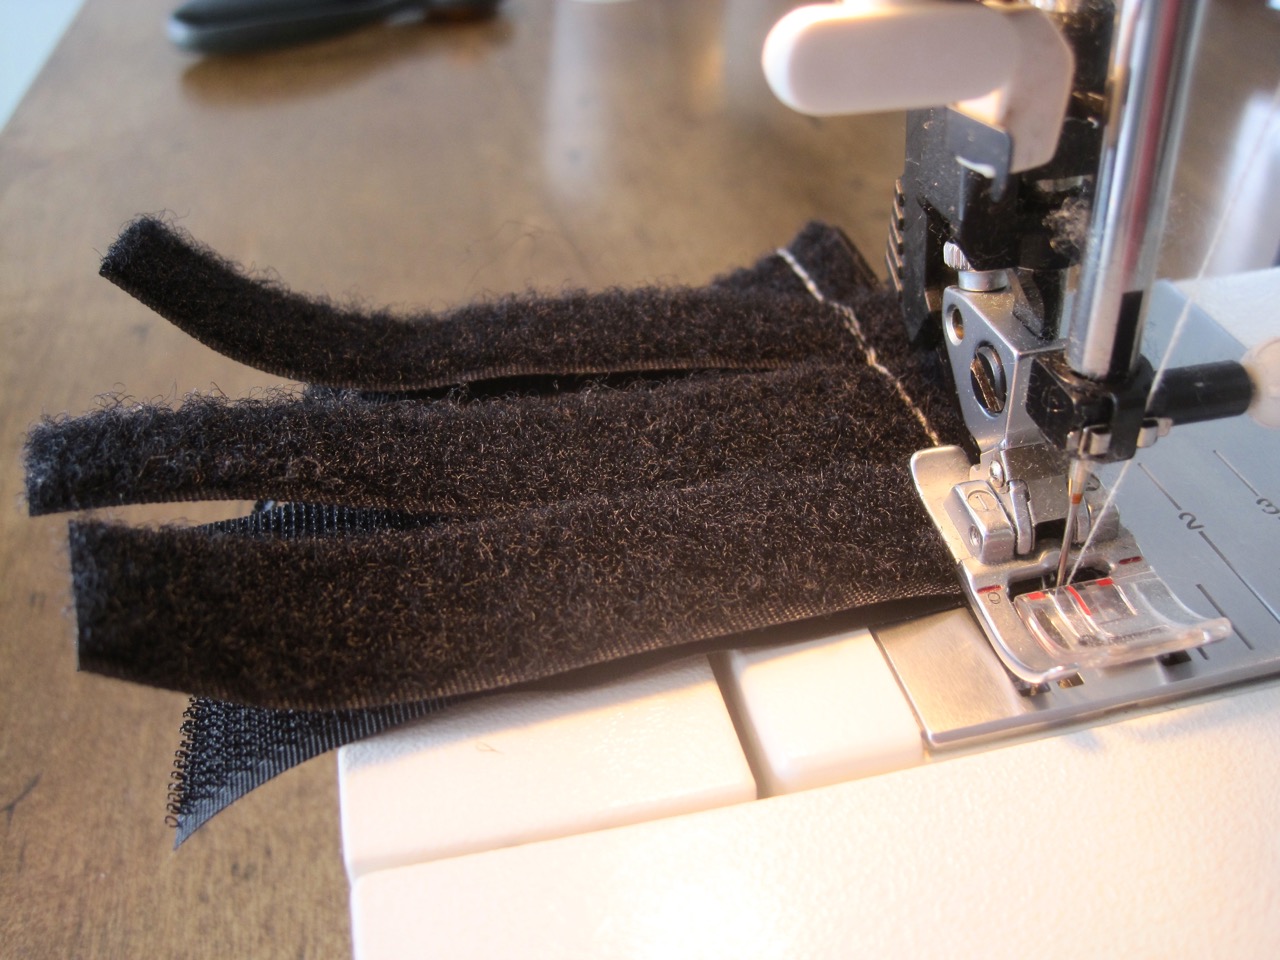
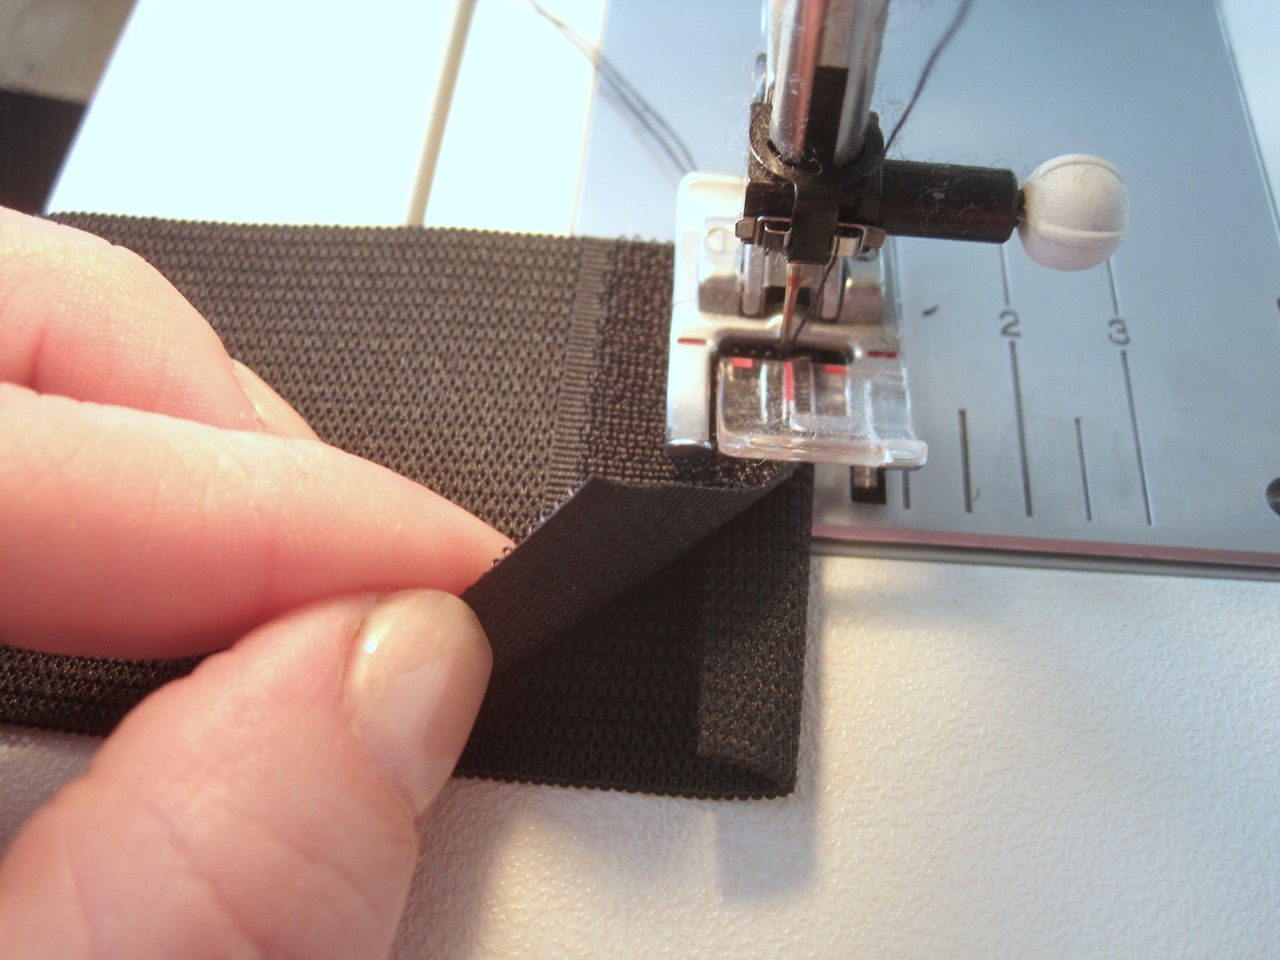
Baste your 4-inch long black Velcro pieces together on one end by having the hook side facing up on the bottom and the loop side facing up on the top.

Baste your Velcro straps so the soft-loop side is facing down against the right-side of your outer shell. Have them about 1/4-inch from the seam (so it’s not too bulky to sew over the seam AND the Velcro later on).

Have the outer shell right-side IN with the lining placed inside so right-sides are together. TIP: it’s important to do it this way because the outer shell is slightly bigger to accommodate the lining 🙂

Pin around the top, matching edges and seams. You’ll want to leave an opening for turning and the best spot is in-between the white Velcro on one of the long-straight edges (I marked with blue so I wouldn’t forget)!

Sew around with a 1/2-inch seam making sure to backstitch really well at the start/end. Clip seam to about 1/4-inch but leave the opening fabric UNCUT (this allows you to sew the opening closed easier because you have more fabric to work with).

Turn your organizer right-side out very carefully!
Pin around the top edge, rolling the fabric in-between your fingers as you go to get the seam out as much as possible.
I top-stitched around the edge about 3/8-inch, closing the opening as I went, however, you can slipstitch it closed with a needle/thread if you prefer not to have a seam showing – or there’s always the chance that your sewing machine won’t even be able to go through all the layers to do a top-stitch, too! 🙂
ELASTIC DIVIDERS:

Fold one of your 10-inch long elastic pieces in-half and fold the raw ends over 1/4-inch together.

Sew a 2-inch long Velcro piece over the folded ends, tacking them down and hiding them at the same time! Do this for your other long piece.
You’ll do similarly as above with your 6-inch elastic pieces, but with only one layer of elastic (not folding it in-half) and you’ll do it to both ends (having Velcro on the same side of elastic).

With Velcro facing up on all pieces, slide your ‘shorter’ elastic through the folded elastic. You’ll want the shorter elastic centered with and pushed up tight against the fold; pin in place.
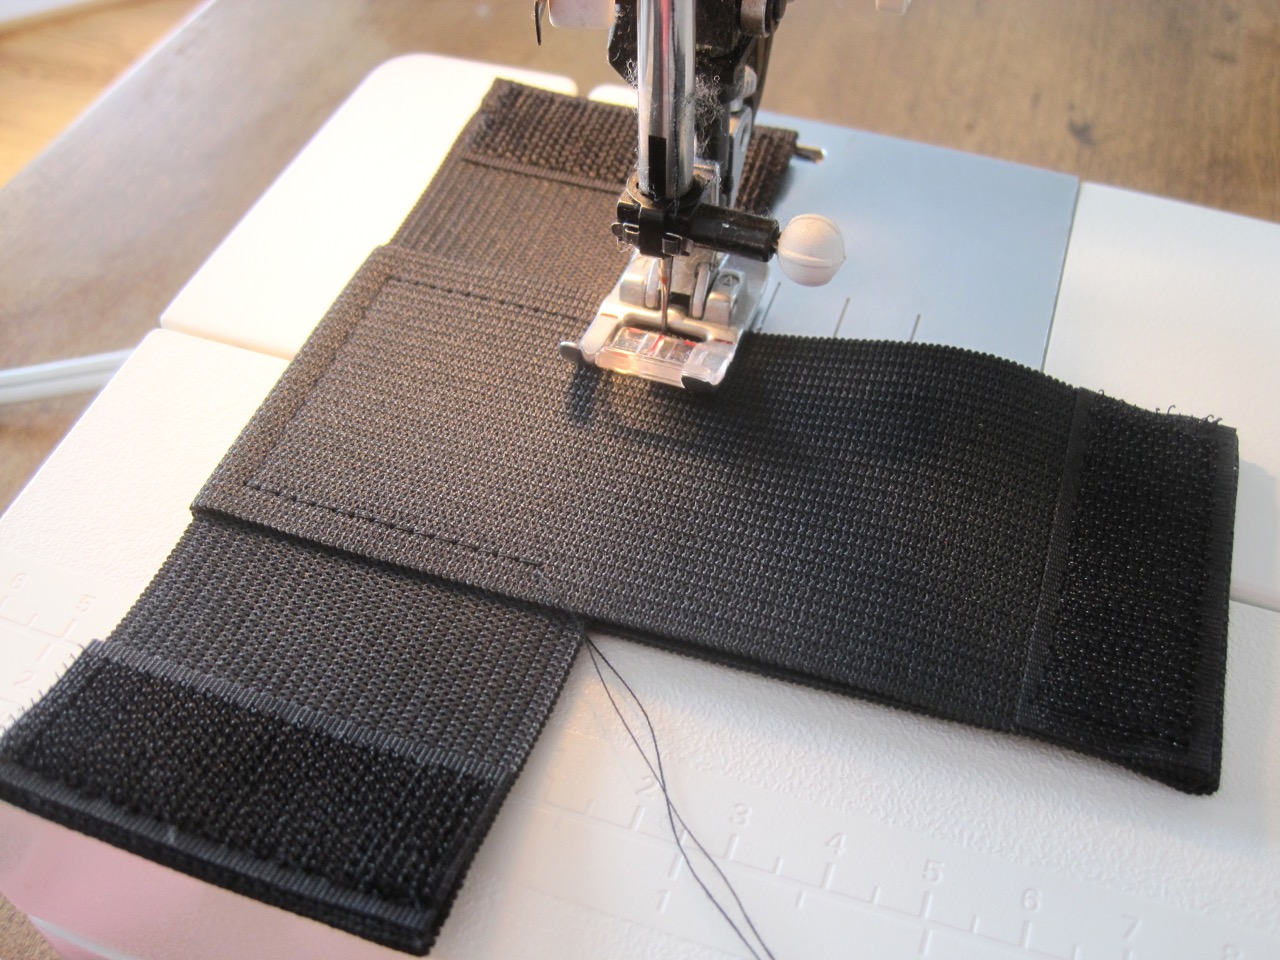
Sew a box around the elastic with a 1/4-inch seam to keep the pieces together.
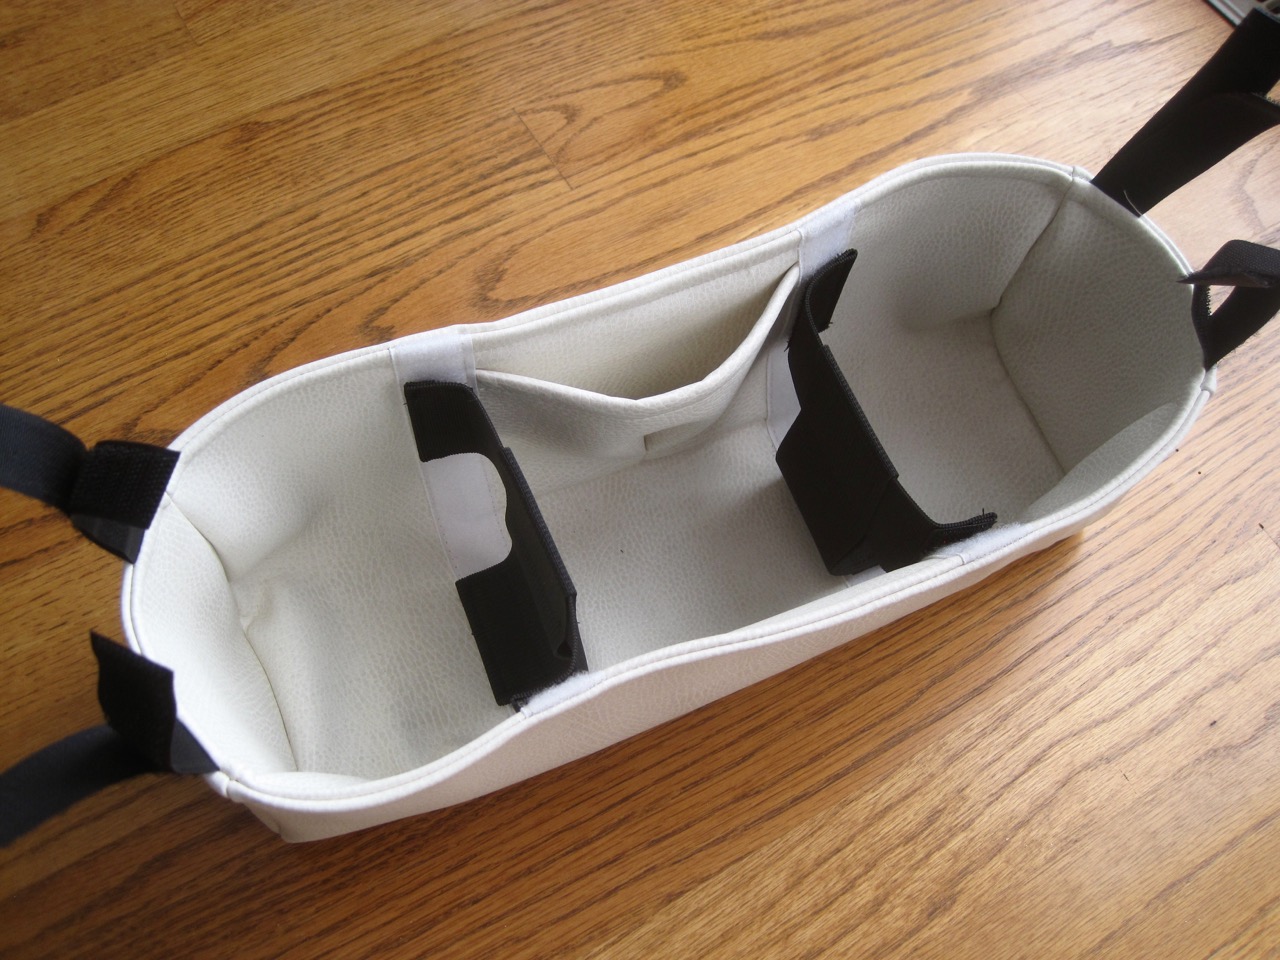
I like to attach the dividers by first centering the Velcro on the bottom and then attaching the sides.

If you want your ‘cup holders’ to be smaller you can flip your dividers around like this!
DONE!

10 Comments
This is great. Thanks so much for sharing! Will be attempting to do one. I like the zipper pocket of the green organizer. Do you have a tutorial for the zipper option? Thanks!
June 27, 2016 at 10:14 amI should totally add a tutorial for that! I have pictures from a different project I can upload.. let me try.
June 27, 2016 at 10:15 amI added a new post to help with adding a zipper pocket. Good luck – they're fun to do! 🙂 http://theprojectlady.blogspot.com/2016/06/tutorial-for-sewing-zipper-pocket.html
June 28, 2016 at 1:08 amWhat type of fabric did you use for the white one??
April 29, 2017 at 8:34 pmThis looks awesome…thank you
Hi there! It's a soft vinyl I found at JoAnn fabrics in their red tag department.
April 30, 2017 at 1:52 amThanks so much for this tutorial. It was really easy to follow… Although it did take me a day to complete! I used a waxed fabric on the inside (like you suggested, so its easier to wipe out spills)! Pity i cant add a pic here…anyway thanks!
May 12, 2017 at 7:11 amYou are so welcome! I love getting messages from people – it's so good to hear the tutorial was easy to follow 😀
May 12, 2017 at 7:13 amthank you for sharing
October 30, 2017 at 8:19 amYou're welcome!
October 30, 2017 at 8:19 amWhat type of fabric did you use in the white one?? Thank you so much!!
January 31, 2018 at 8:39 pm