
This post is part of a series of posts for building a table out of raw lumber. See my original post that introduces the table and all posts for the series – How to Build a Farmhouse Table (Harp Design copycat).
See my previous post where I explain how I sprayed a protective finish on the aprons & legs.
In this post I will show what the finishing details are for assembling the table using the off-set clips and adding a wax coat for an extra protective barrier.
For this project you will need:
-off-set furniture clips from step #3
–wax brush & rags
-measuring tape
-wood clamps & ratcheting strap (opt)
One of the biggest things to consider while assembling anything made out of wood is the environment you built your table and the environment you’re taking it into. For instance, I was building this table out in my garage where it’s been very hot and humid. If I assembled the top to the aprons outside and brought it into a very dry/air conditioned environment it would start to loose moisture and shrink. Because the clips ride inside grooves, it wouldn’t necessarily crack because it’s allowed to move but I did need to worry that if it shrunk too much that the clips wouldn’t have any wood to grip. If it was the opposite circumstance where I built the table in a dry/air-conditioned environment and it was going to a hot/humid climate I would worry about the wood expanding.
I could have waited several weeks for all the wood to acclimate to it’s new environment before assembling, but rather I decided that the change wouldn’t be enough to affect my table top since I was using the clips which allow movement. I waited 2 days to allow the wood to start the acclimation process and figured it would shrink about 1/4″ total after that. This means that I screwed the clips in flush against the aprons as tight as I could while assembling, and over the course of a few weeks they would have up to a 1/8″ gap between them and the apron. I checked this when I went to my friends house after she had had the table for around 2 months and the clips were in good shape inside the grooves with only a small gap. There would be room for the table top to shrink more as well as expand with a very humid environment.
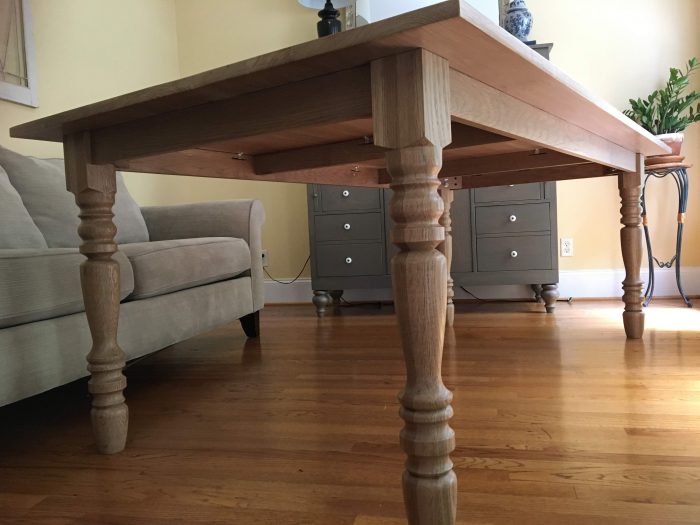
 Ok, on to getting the base ready! Use your measuring tape to make sure everything is square – do this by measuring both sets of opposite corners. One side was 3/8″ off so I used ratcheting straps to pull the longer set of corners together. Once both corners match I was good to go.
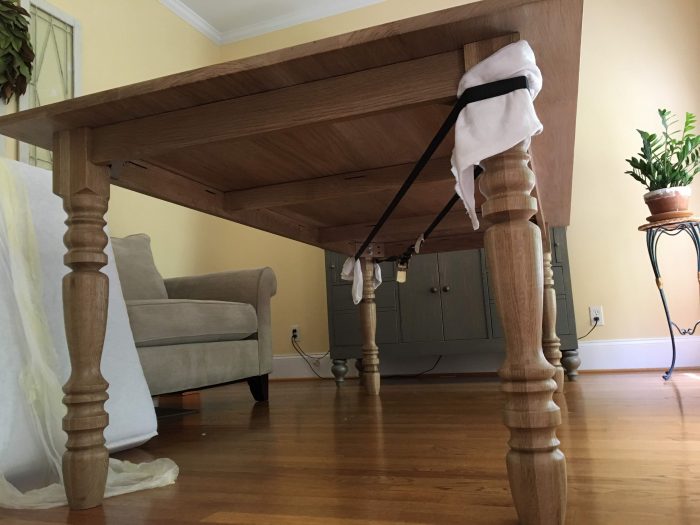 Once you place your top on you can measure the overhang and adjust it until all the sides have the same amount. Take small wood clamps and clamp your top to the aprons in each corner.
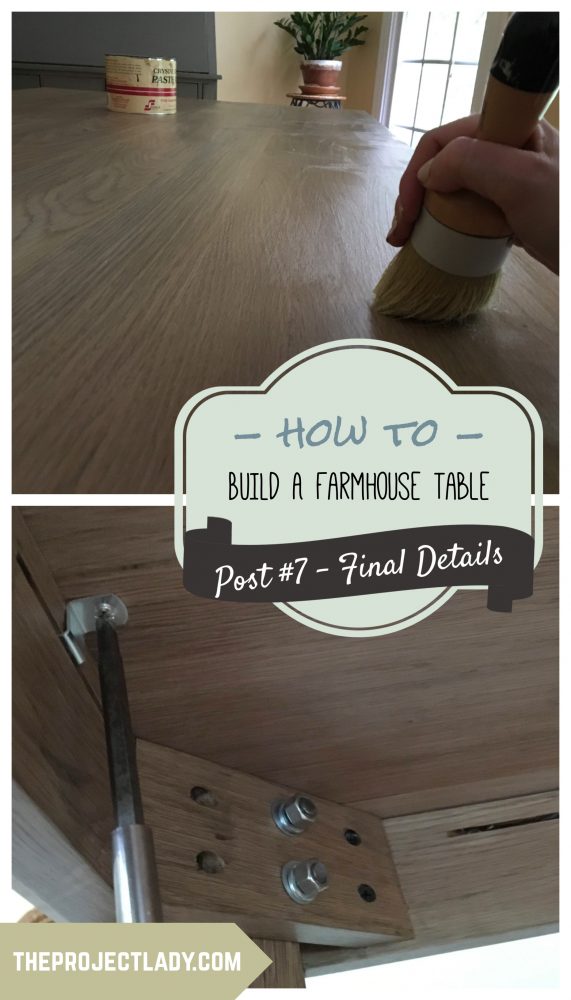
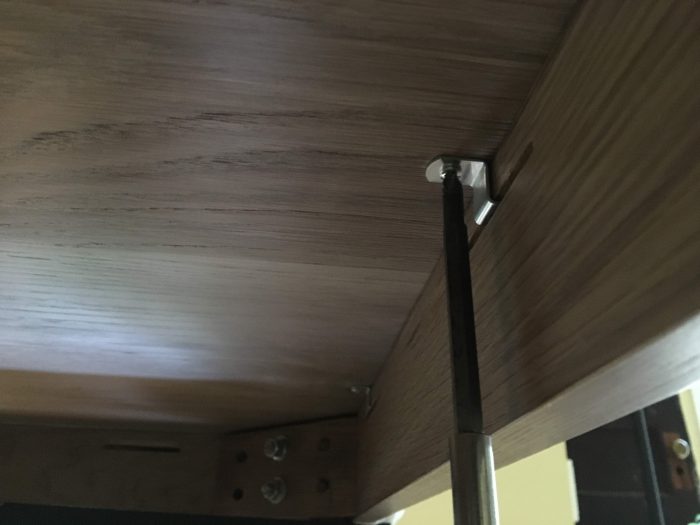 Center each clip into your groove and pre-drill a pilot hole for your screw.
 I love these clips! They make the top easy to install and they’re solid, but most importantly it give you peace of mind that your top won’t crack.
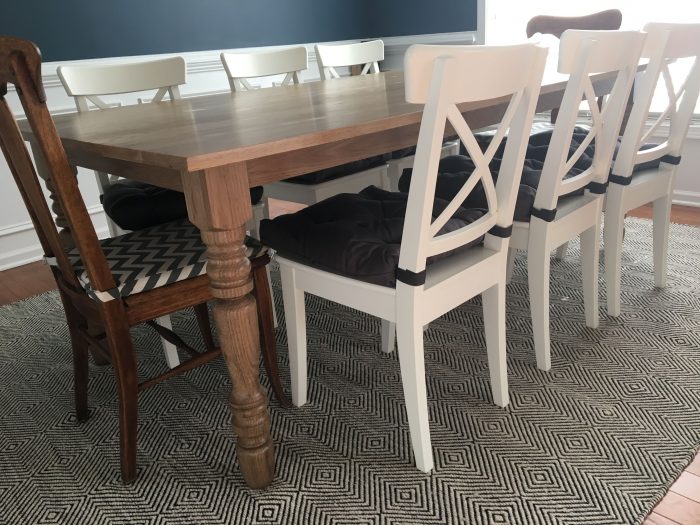
 I add a coating of wax to all my projects because it adds an extra barrier of protection but also give a smooth finish.
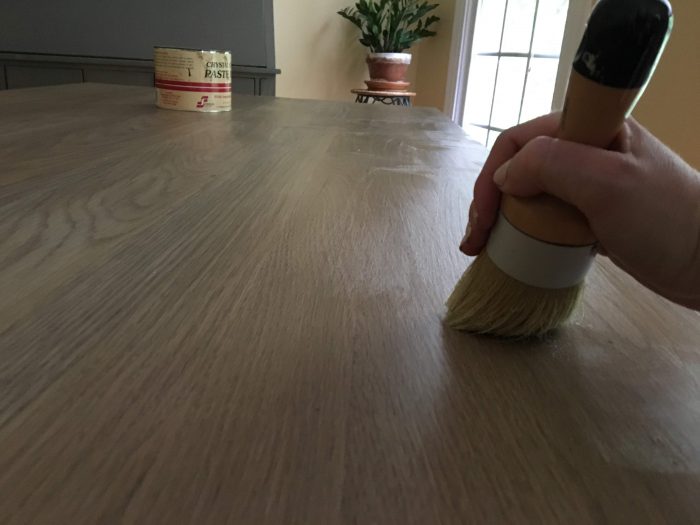 The wax brushes on and after 3-5 minutes you can go back and buff away with a rag. You can do several coats like this after the previous coats have cured for a thicker finish.
 It’s done!! Whew that was a lot of work but so rewarding!


No Comments