
If you have an old Singer sewing machine please look at the electrical cords before you plug it in! Old cords can be very dangerous and you should never operate a machine when the cords have been compromised in any way. I’ve had a bad experience myself when exposed wires sparked at the base of the machine and started an electrical fire all the way down the cord to the wall outlet like it was a stick of dynamite!
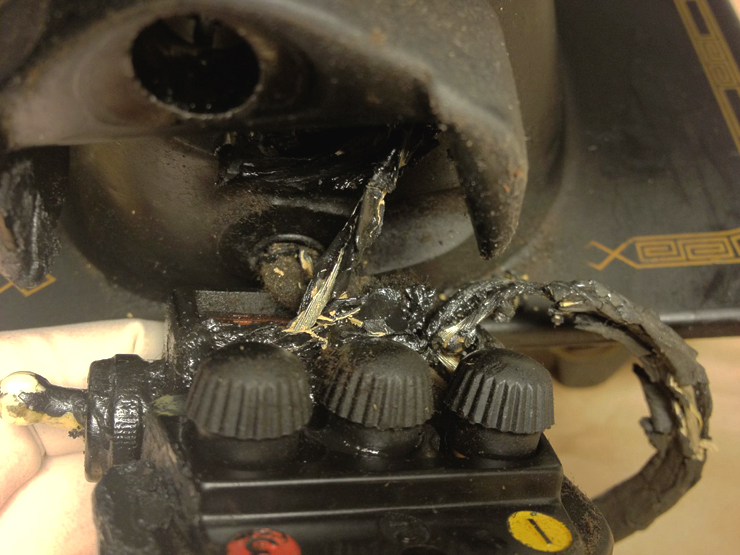
This picture shows you how bad they can get. It looks like these wires got hot enough that the casing melted and have now left wires exposed! Look to the right and you’ll see the casing is dry and brittle and tearing open.
This isn’t a very good picture unfortunately but with this machine the wires were so brittle that they crumbled with the slightest movement. As soon as I unscrewed the terminal from the machine pieces of the casing fell to the ground. See how exposed the wires are!?

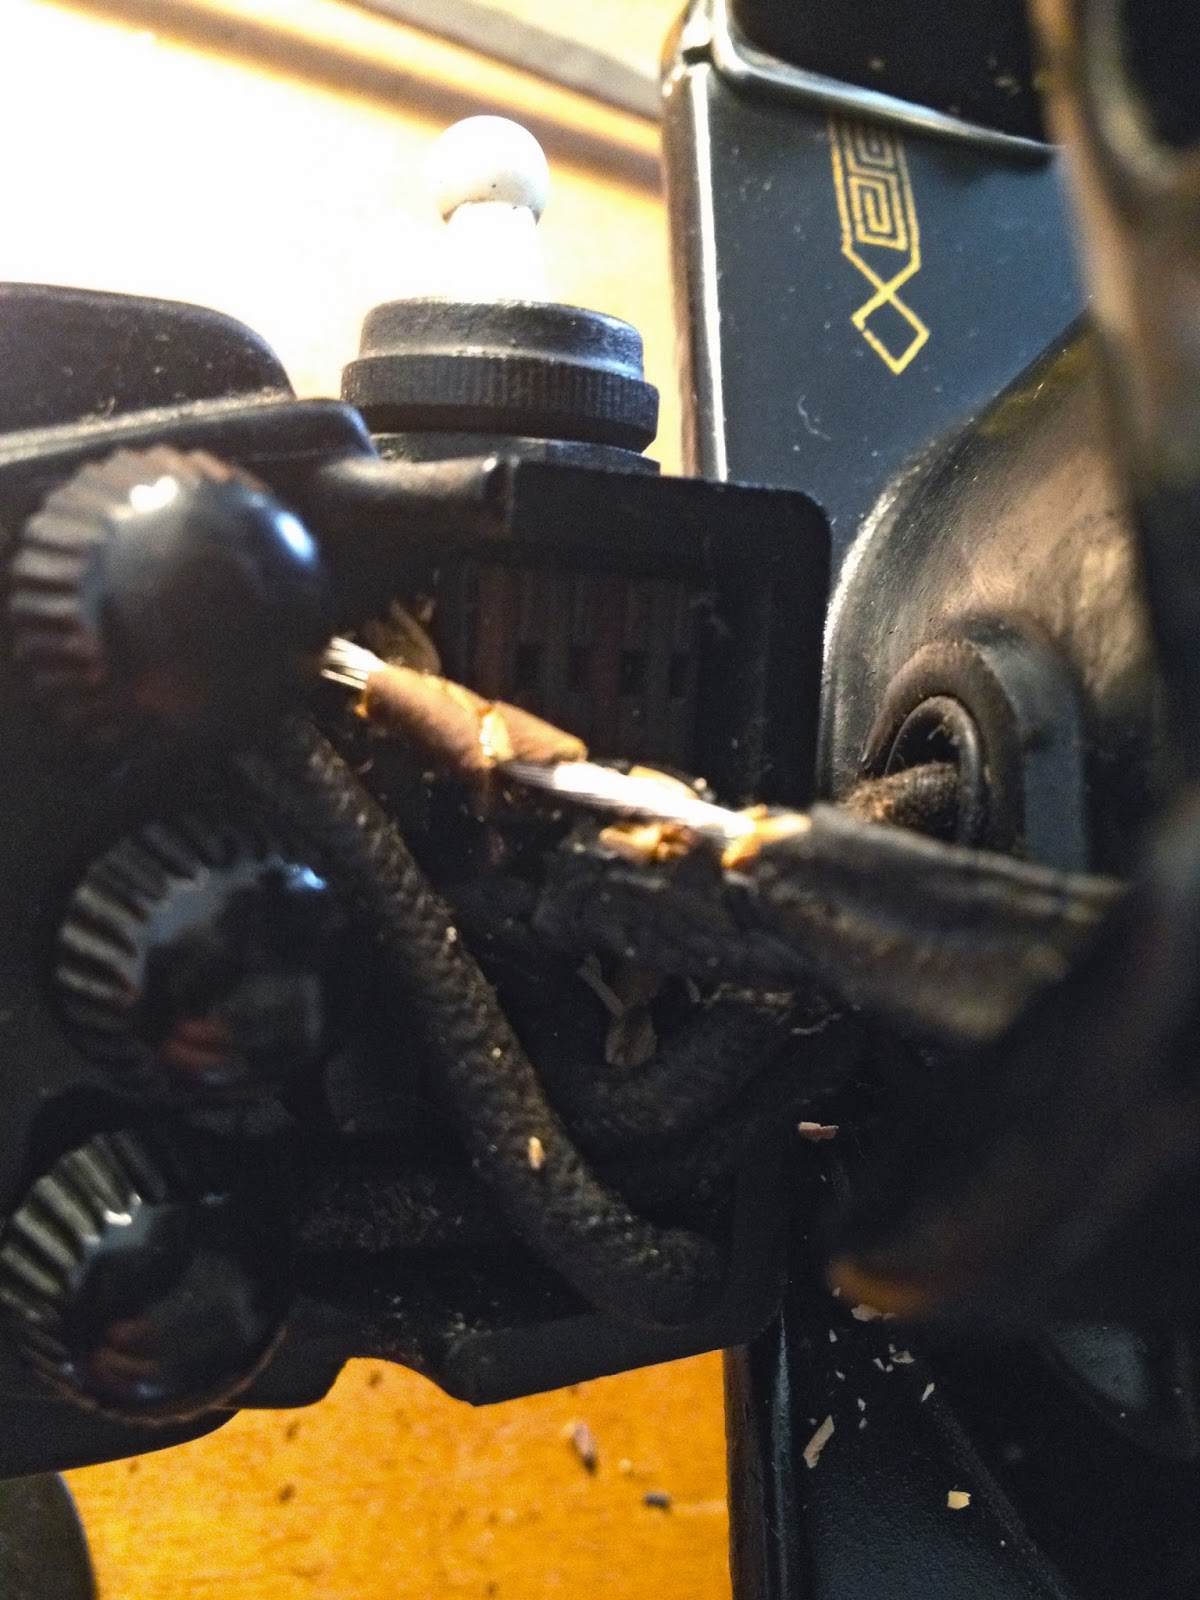
This poor Singer 201 had the cords melted onto it and the casing on the cords got so hot at one point I could see how it actually dripped down and made a petrified puddle on the base of the machine.
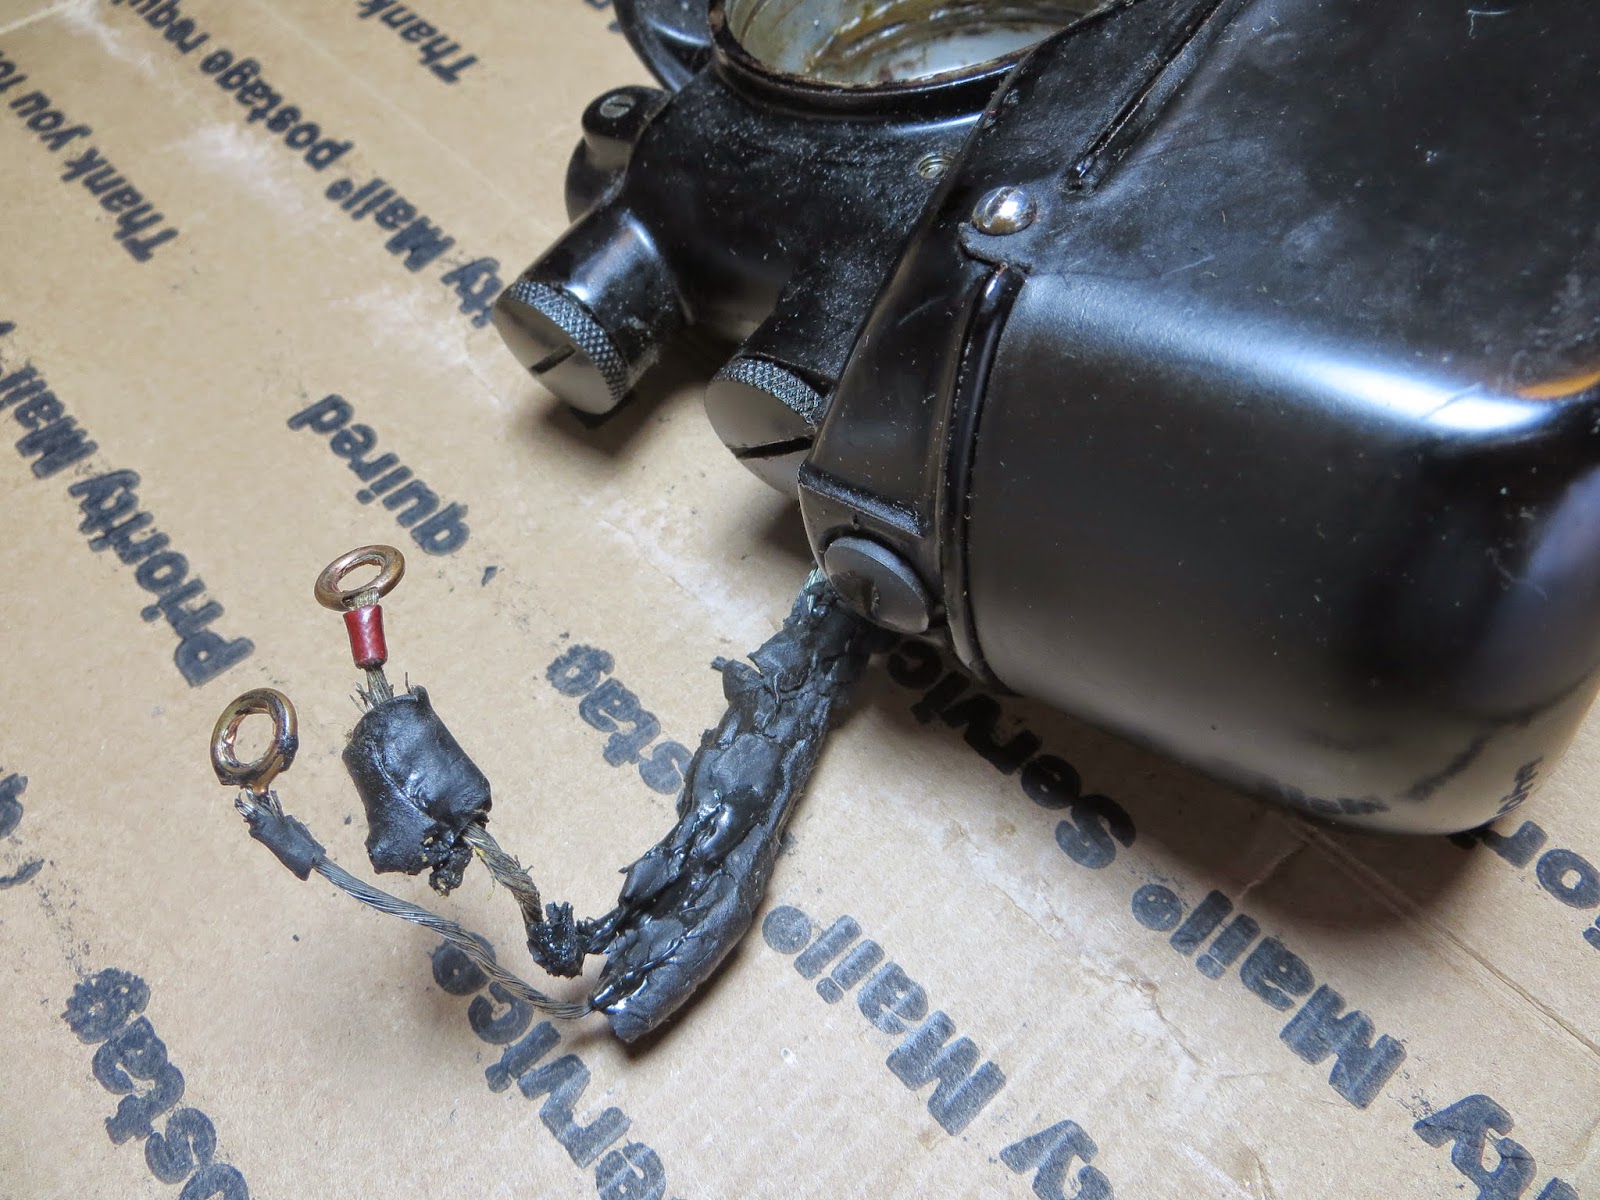
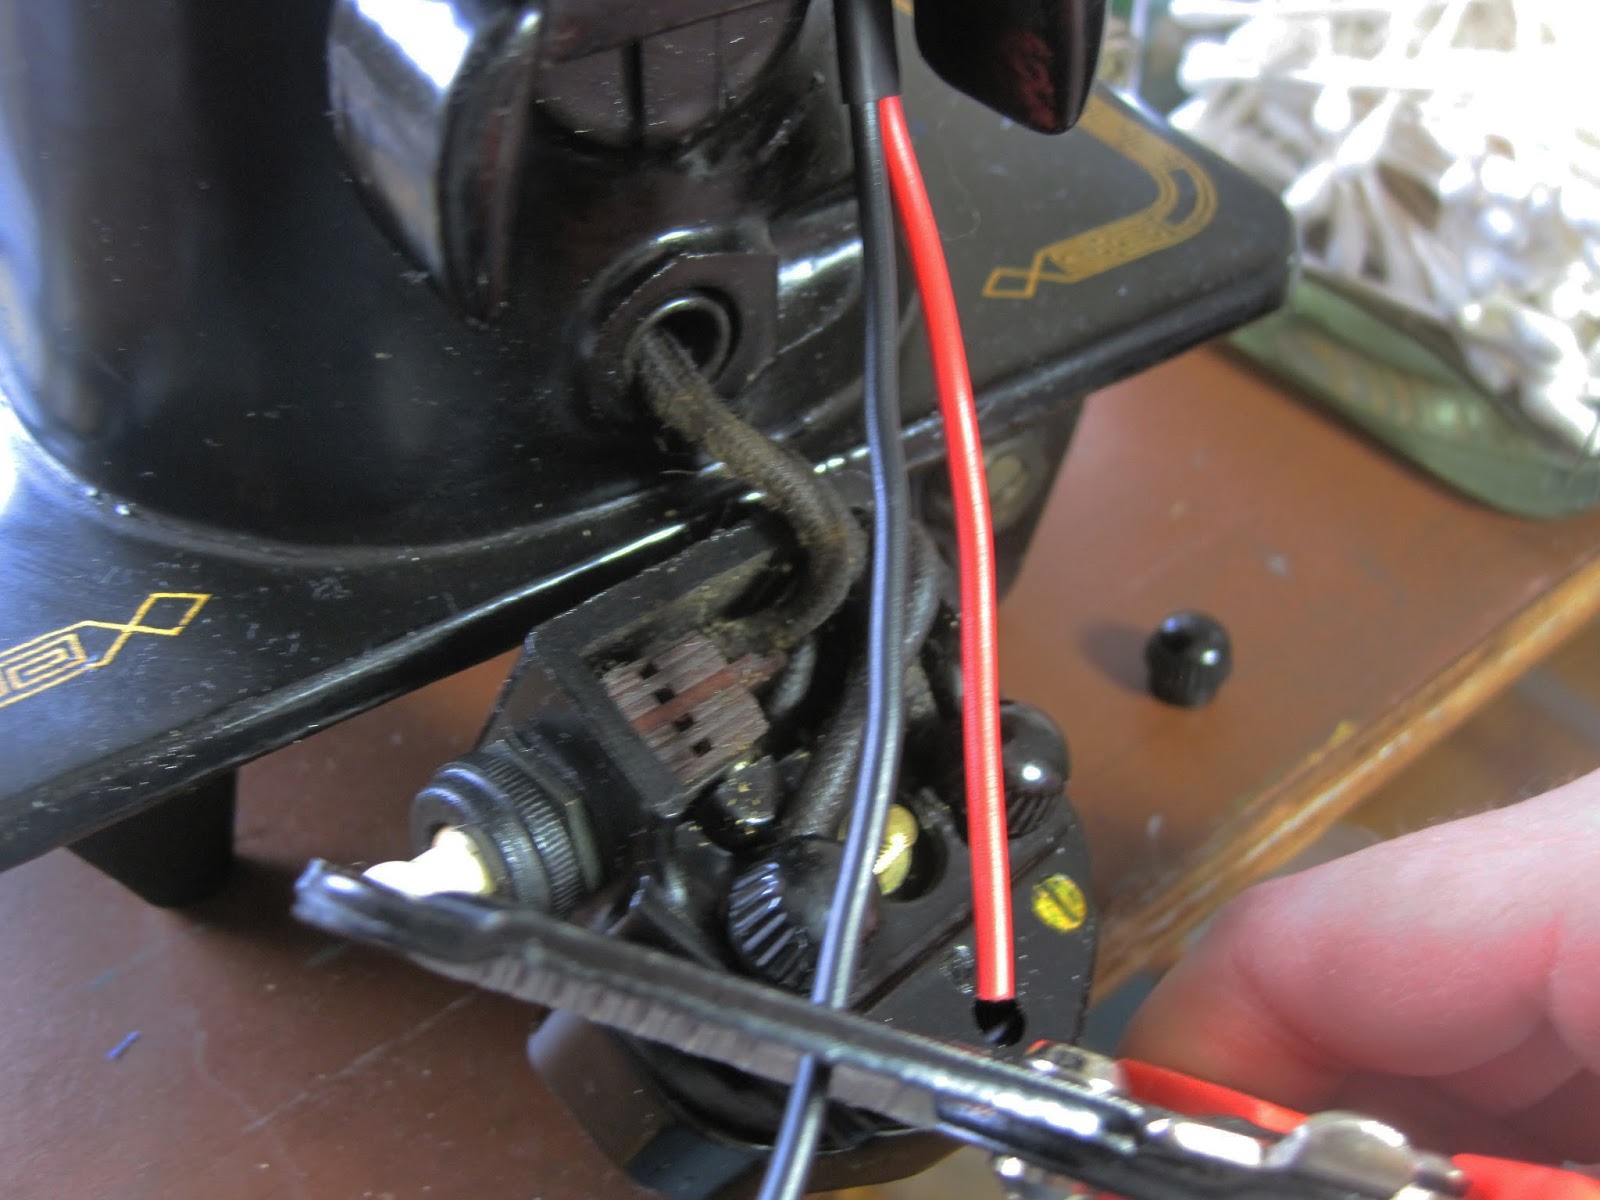
After I managed to get the motor off this is what the cords looked like.
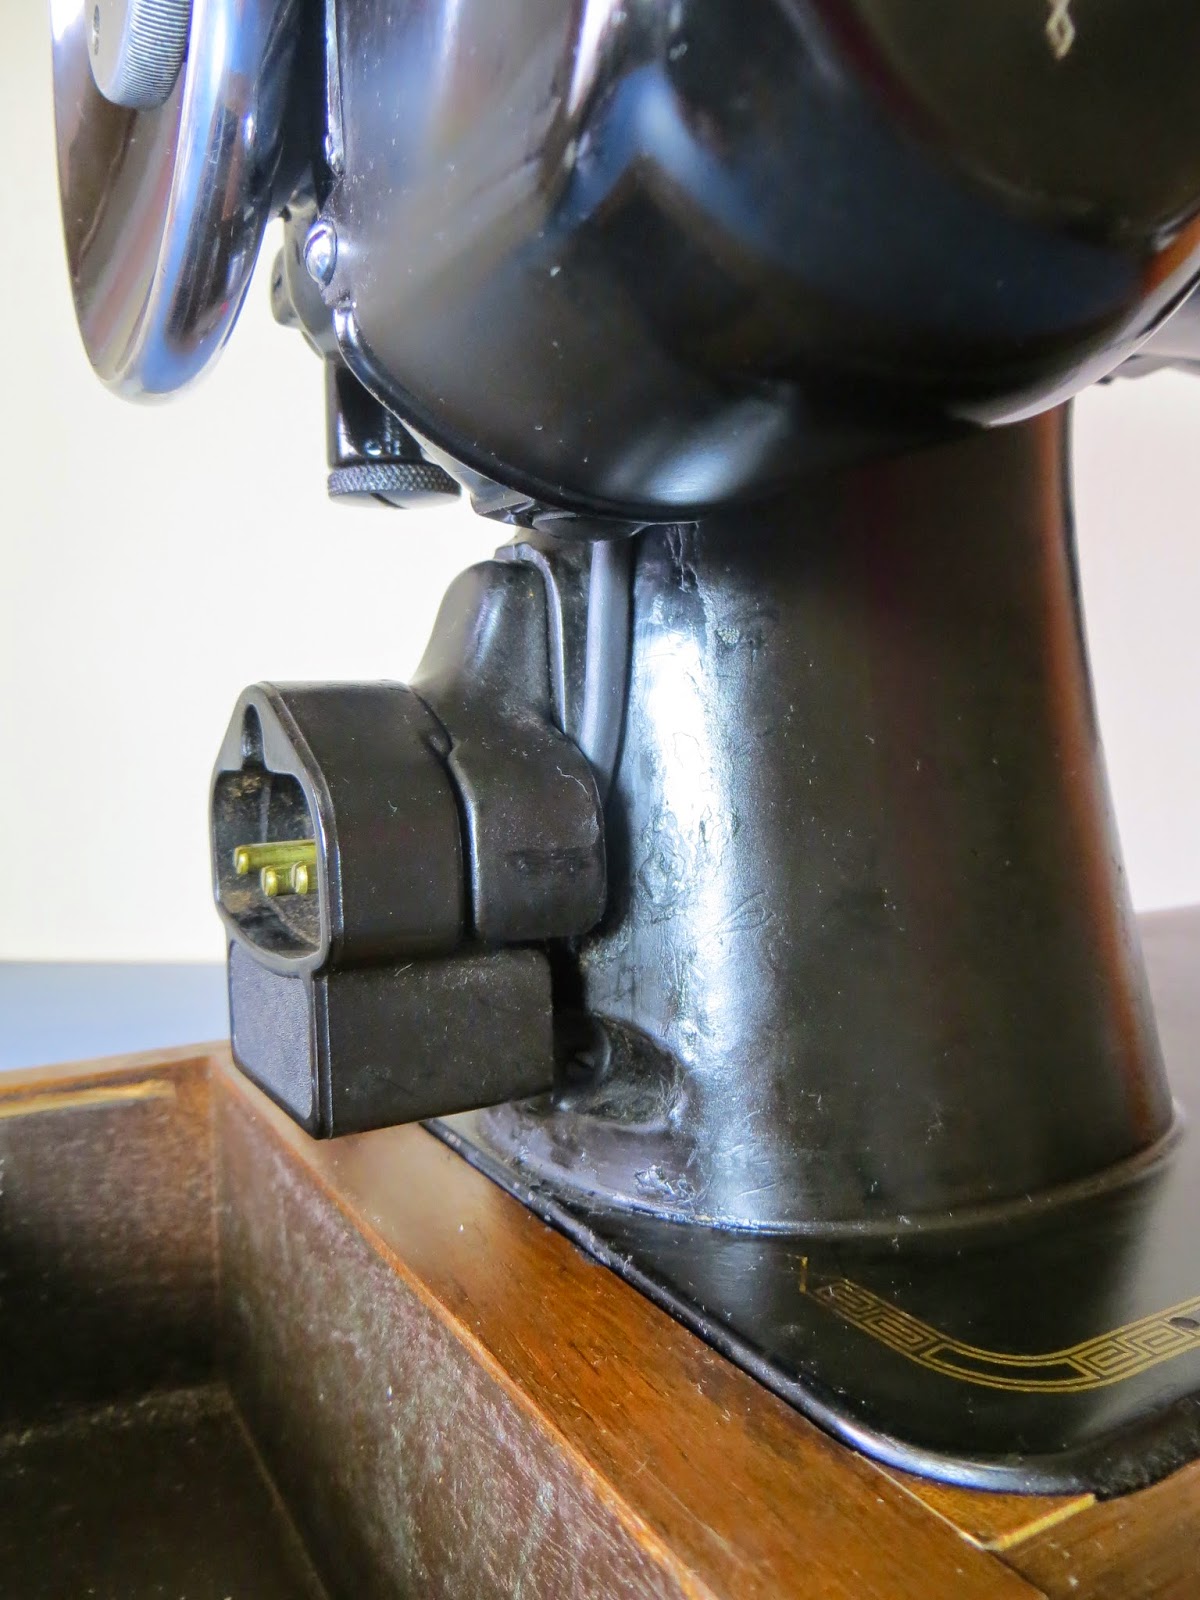
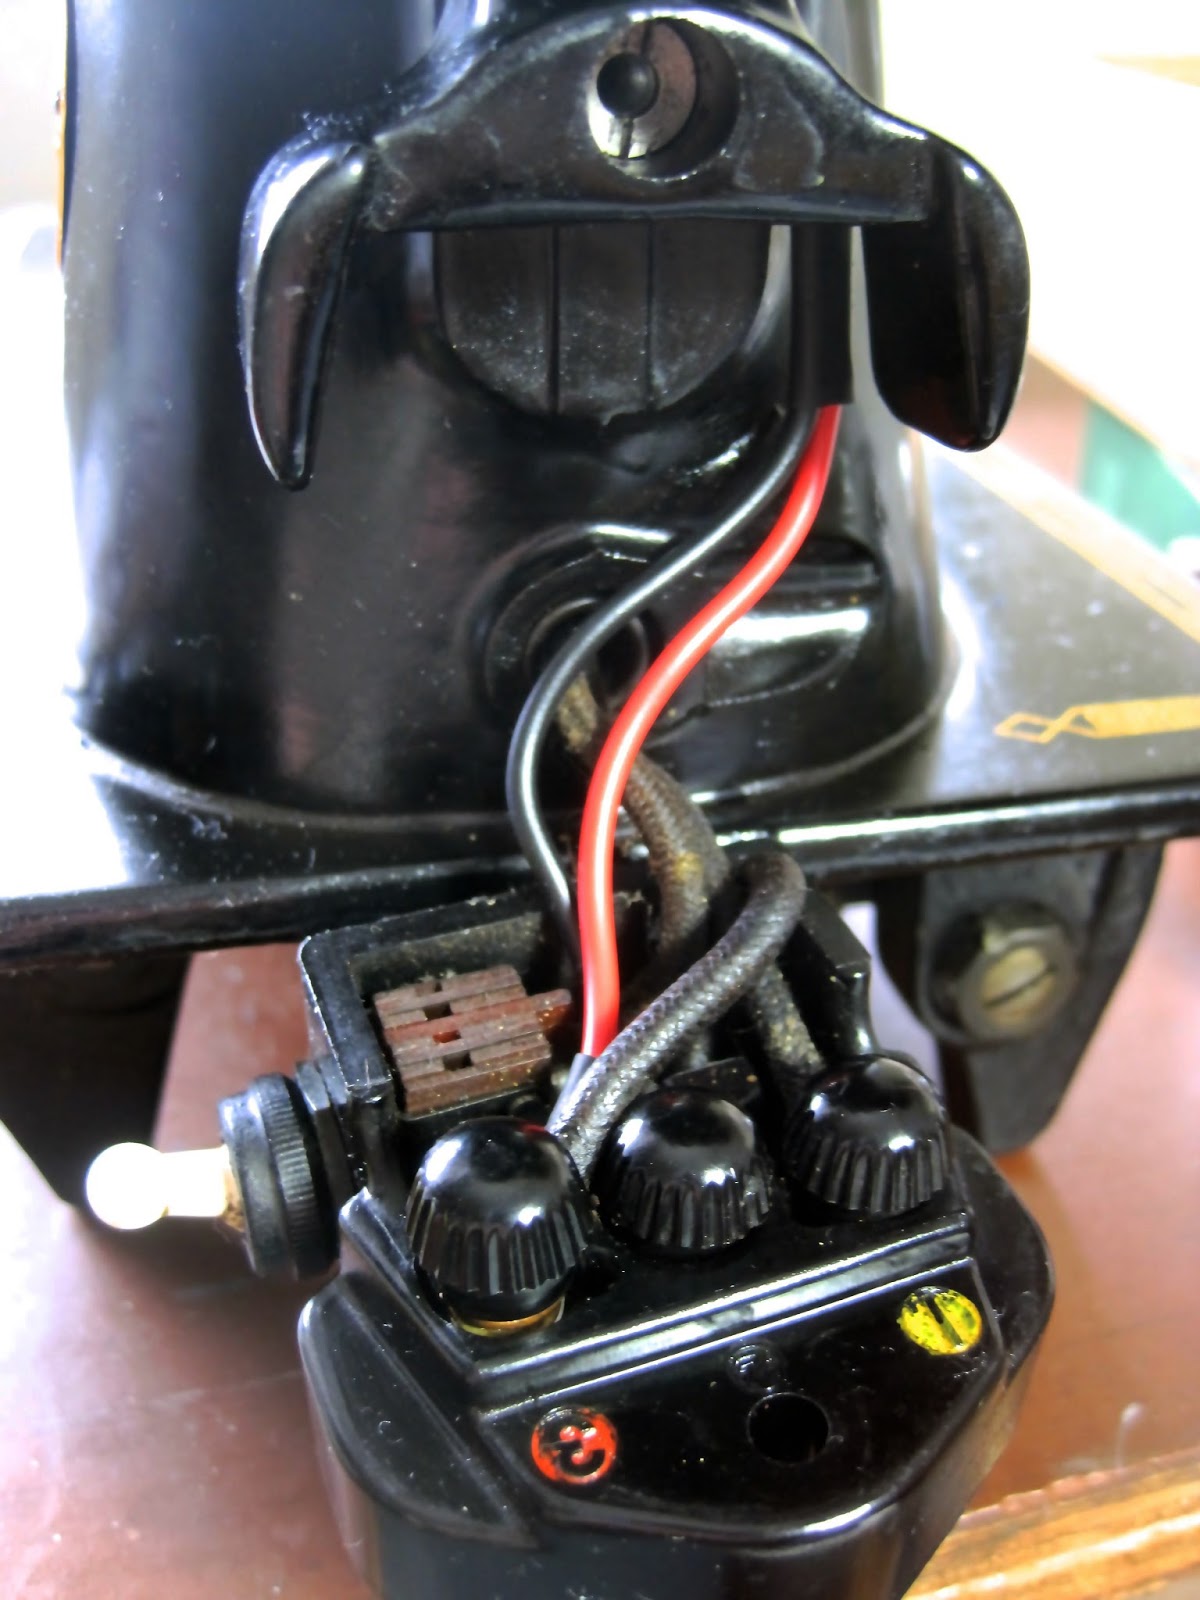
After a re-wire this is what it ended up looking like. Much better!
Doing a re-wire is easy if you can solder two wires together (or find someone who can). A total re-wire of the motor takes me about 2 hours and that includes cleaning all the housing and adding new lubricants.
Here’s what the process of a motor re-wire looks like:


Doing my first re-wire I spent about $50 getting all the necessary pieces and it took about 7 days to find everything and in some cases, get it shipped to me. Because it was so much work and so expensive I decided to put little kits together to make it easier for anyone else.
HERE’S WHAT THE KIT CONTAINS:

OTHER ITEMS YOU’LL NEED:
Wire strippers, soldering iron and Singer motor lubricant

Of course I can’t take credit for figuring out how to re-wire a sewing machine motor. Thanks to the Vintage Sewing Machine Blog with step-by-step instructions I was able to learn how to solder and re-wire up to a dozen machines in just a few years!

28 Comments
Just have to say – this is genius! I'm in the middle of rewiring my potted motor and it seems like the biggest headache of this whole process was acquiring the materials. My Home Depot in Brooklyn is theee worst and RadioShack has turned into a glorified phone store. Wish I came across this before I got all my things.
PS. I think it would be awesome if you did a deluxe kit too. Like include sewing machine lubricant, carbon brushes etc.
March 10, 2016 at 8:21 pmI agree with all that you've said about RadioShack… it isn't what it used to be! Home Depot or Lowe's didn't have the correct wire I was going for – but my local hardware store did! Now you know where to get a kit for the next time (there's always a next time, ha)!
I've thought about offering more items with my kids like brushes and grease.. we'll see! 🙂
March 10, 2016 at 8:26 pmDani,
Just ordered your kit…going to do this myself, I can't find a sewing shop that will do a potted motor rewire.
I agree it would be nice to have the brushes included in the kit-might as well replaced the brushes while the motor is disassembled.
The lube and oil can be bought separate should be in the maintenance tool set for any sewing machine.
Thanks so MUCH,
May 13, 2016 at 8:44 pmDR
Hi Denny!
I got your order and it's in the mail headed your way!
If you do decide you'd like to change the motor brushes they're super easy to get to with the machine/motor still intact. There's 2 little black 'screw caps' opposite of each other on the motor housing that you open and the brushes will pop right out. I haven't seen a Singer machine that needed to have these replaced yet, surprisingly; they've all been about 1/2" long (I think 1/4" is when you need to change them)!
May 13, 2016 at 8:48 pmThank you for having all of these items in a convenient kit form. I ordered one yesterday.
What wire would one need to rewire the power cord and foot pedal cord?
Pamela
June 1, 2016 at 7:01 pmHi Pamela! I hope the kit gets to you soon! Give me your email address and I'll send you more details about the pedal/power cords. It's very easy and very inexpensive!
June 1, 2016 at 7:03 pmHi Dani, I received your kit a few weeks ago. Thanks for putting this together! This is all new to me-collecting, taking apart, rewiring sewing machines, but I'm learning so much and loving it! We just got the motor off–was having a difficult time getting it off. I have been reading everything that you have written and Vintage Singer Sewing Blog tutorials. I am going to have to rewire the power cord and foot pedal cord also. Would you be so kind to send me details/hints of how to do this, please? Marlae kampbostenatgmail.com Thank you so much!!
June 7, 2016 at 7:10 amDani:
I want to join the group needing info on how to replace the power and foot pedal cords. Thank you!
Julie
May 25, 2020 at 4:01 pmjuliewrayh@yahoo.com
Hi Julie! You can find that information on my blog under the “Sewing” tab.
July 4, 2020 at 9:41 amHi Dani, I received your rewire kit a week or so ago. We finally got the motor section off of the machine–really stubborn, but my husband managed to get it off after several days of trying. 🙂 This is all new to me–collecting, rewiring, cleaning/oiling etc. . . — but I do think I've found a wonderful hobby and I love hearing the old machines run again. Not only does the 201 need new wiring in the motor, but also for the power cord/foot pedal and light. I was wondering if you have any hints as to what to do first–right now I'm working on the motor–grease pots. I have learned a lot from your blog and am amazed by ALL your projects! ! ! Thank you! Marlae boskamptenatgmail.com
June 7, 2016 at 7:10 amHi Marlae! I know what you mean when you say a wonderful hobby! I started off just like you! 🙂
I'd be happy to send you an e-mail with more information about re-wiring the pedal and power cord. I'm actually going to make a blog post about it within the next few weeks!
If you don't receive an e-mail from me by the morning you can message me again! 🙂
Good to hear things are going smoothly so far!
June 7, 2016 at 6:14 pmHi Dani! It looks like I gave you 2 different email addresses–hmmmmm retirement brain. I'm sorry about that. Yes, those 2 messages "unknown" are both me (Marlae). This is the correct email address: kampbostenatgmaildotcom I'm sorry if you replied to the other one(no longer have it). I've made a little progress since I last wrote you. I'm up to getting the armature out, but having a hard time loosening those 2 screws–I'm worried I'm going to strip them. I've ordered some wire for the foot pedal from sewclassic.com I'm hoping I can get this Singer 201 rewired and put back together by the end of June. 🙂 Thanks for your help!!! Marlae
June 11, 2016 at 5:16 pmHi Marlae! I e-mailed you 4 days ago to both e-mail addresses and the one that went to kampbosten came back saying it couldn't be delivered because it is an unknown address. I just tried again and it said the same thing. If you don't have another address you may need to wait until I get the blog about the pedal re-wire done – which may take a few weeks!! It's pretty simple though. In my instructions I tell you to order the cords from sewclassic 🙂 Are you referring to the screws on the worm gear that are hard to loosen? You'll want a screwdriver that fits the slot PERFECTLY on those screws to avoid stripping! Both the width of the slot and the thickness… and make sure you press really hard when you try to loosen to avoid it from slipping/stripping. You can also try putting a bit into a wrench (I think 1/4" socket fits bits).
June 11, 2016 at 5:20 pmHi Dani! Thank you for not giving up on me and problems with my email. I appreciate your help/patience. I know you have more to do than write me over and over. If you are writing out the word "ten" in the email, you should use the #10 — kampbos10@gmail.com I was trying to be more secure with it. I did order the 18 gauge SPT-2 for the foot pedal and it's on the way from sewclassic. Yes, I was referring to the worm gear screws(still learning all the names of the parts). I'm letting it set tonight and will try again tomorrow. Do you ever put a little Liquid Wrench or anything on a Q-tip to help some of these old screws come loose easier? Thanks!! Marlae
June 12, 2016 at 12:31 amOOOHhhhh.. Yes, I wasn't putting the '10' 🙂 I just re-sent it – hopefully you get it! Feel free to delete your last message with your e-mail so no one else will snatch it up!
June 12, 2016 at 12:32 amDani,
Just SUCCESSFULLY completed rewiring the potted motor! Thanks for your kit!
I did replace the brushes with crappy ones from Ebay…maybe not such a good move. I hope they hold out. If not I still have the old ones at 1/2 inches long.
Know I need to tackle the light…will probably just buy a new one!
Love your blog…
DR
June 27, 2016 at 10:06 amI'm so glad to hear your re-wire was a success! It's so rewarding, isn't it!? I'm sure the brushes will be fine!
I've re-wired one light and it was pretty easy – it was on a Singer 99 though: http://theprojectlady.blogspot.com/2014/04/singer-99-re-wire.html
I have taken a light off a 201-2 to strip the paint off – it wasn't too bad threading the wires back through the machine.. just take note where they're located inside the machine first before you pull them out so you can replace them right: http://theprojectlady.blogspot.com/2014/06/stripping-paint-off-of-sewing-machine.html
Thanks!!
June 27, 2016 at 10:12 amDani
Hi, Dani, we successfully rewired a 201 last spring with your rewiring kit. Now we need another kit to fix a 201 for a friend…but not seeing the kit on ebay at the moment. Can you help us out? Thanks, Char
July 22, 2016 at 3:05 pmHi Char! I'm out of state on vacation so I deactivated the listing for while I'm gone. We'll return on the 26th if you want to look again on that date! 🙂
PS – So glad to hear the re-wiring went well!!
July 22, 2016 at 3:06 pmWill do!
July 23, 2016 at 6:03 pmHello! I just found your blog, and love it! I bought a Singer 15-90 some days ago for 20 euros. It works, but I gues it is best to re-wire it. Can I use this guide also for the 15-90 model? : )
September 19, 2016 at 1:58 pmHi there!
The 15-90 model has a belt-driven motor which is a little different to re-wire but requires mostly the same materials (except for the felt wicks). I did a re-wire on a Singer 99 motor and that will be better to follow: http://theprojectlady.blogspot.com.au/2014/04/singer-99-re-wire.html
Good luck!!
September 19, 2016 at 2:01 pmThank you! Pinned the post and will definetly try it 🙂
September 19, 2016 at 9:05 pmI'm having a problem I can't find the answer to on the web. I have a 99k singer and it doesn't have the three prong plug on the power cord it plugs in using a push on plug on each wire and I don't know how to get the wires out and new ones in without the chance of breaking the piece attached to the wire .can anyone know how it's done?
January 9, 2017 at 1:50 amCan you send me pictures to twirlybirdbaby@gmail.com?
January 9, 2017 at 1:52 amHi there! Such a nice post, thank you!
March 11, 2019 at 7:40 amHello – do you still sell these kits?
August 14, 2021 at 10:56 amYes you can find them at my eBay “store”: https://www.ebay.com/itm/224421921943?hash=item344096c497:g:OMYAAOSwG0taozUJ
August 14, 2021 at 5:23 pm