The most exciting part of a renovation is seeing the transformation. So here it is…
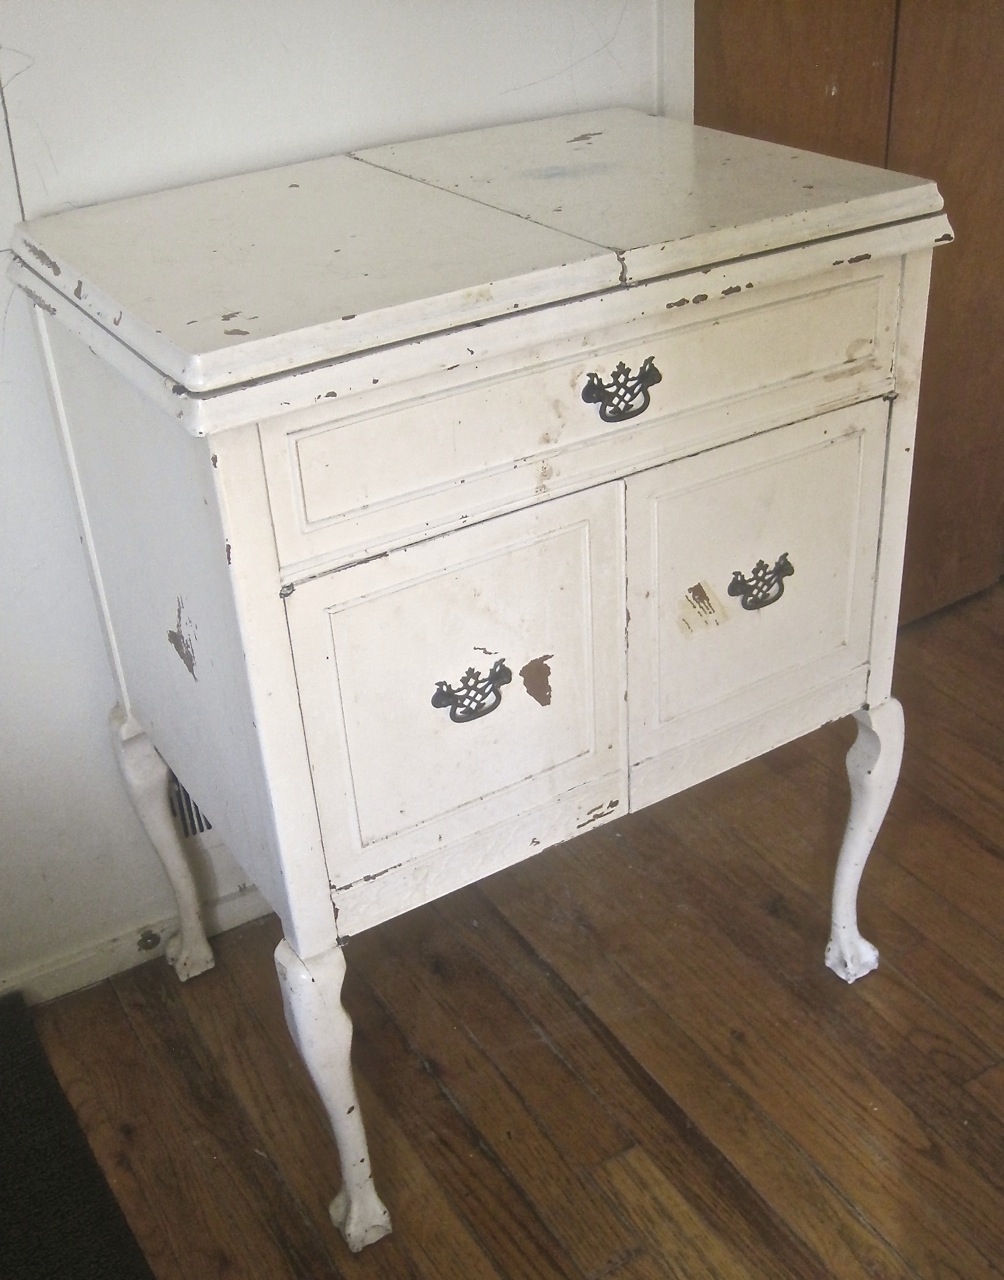
BEFORE:

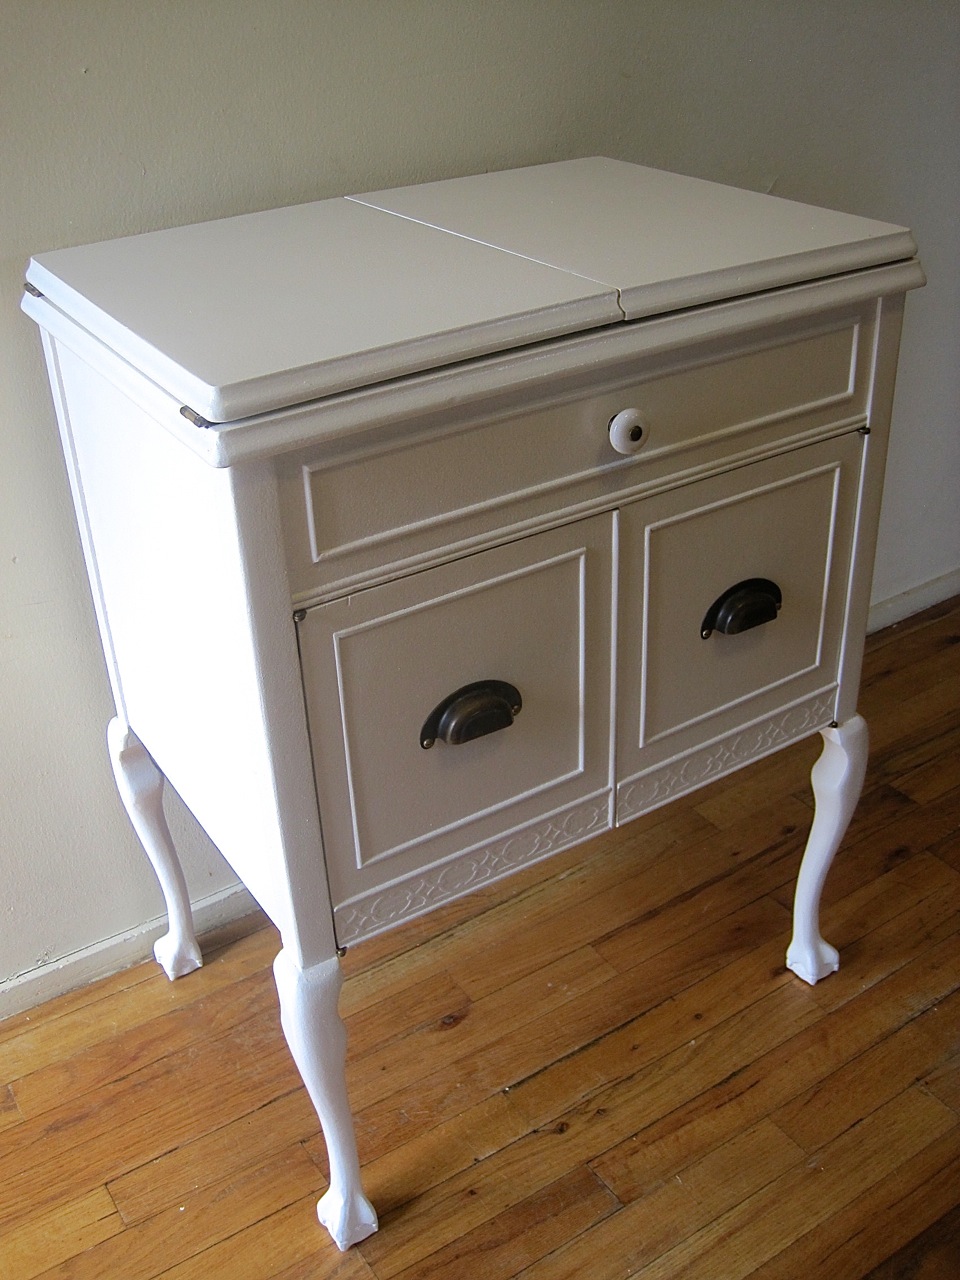
AFTER:
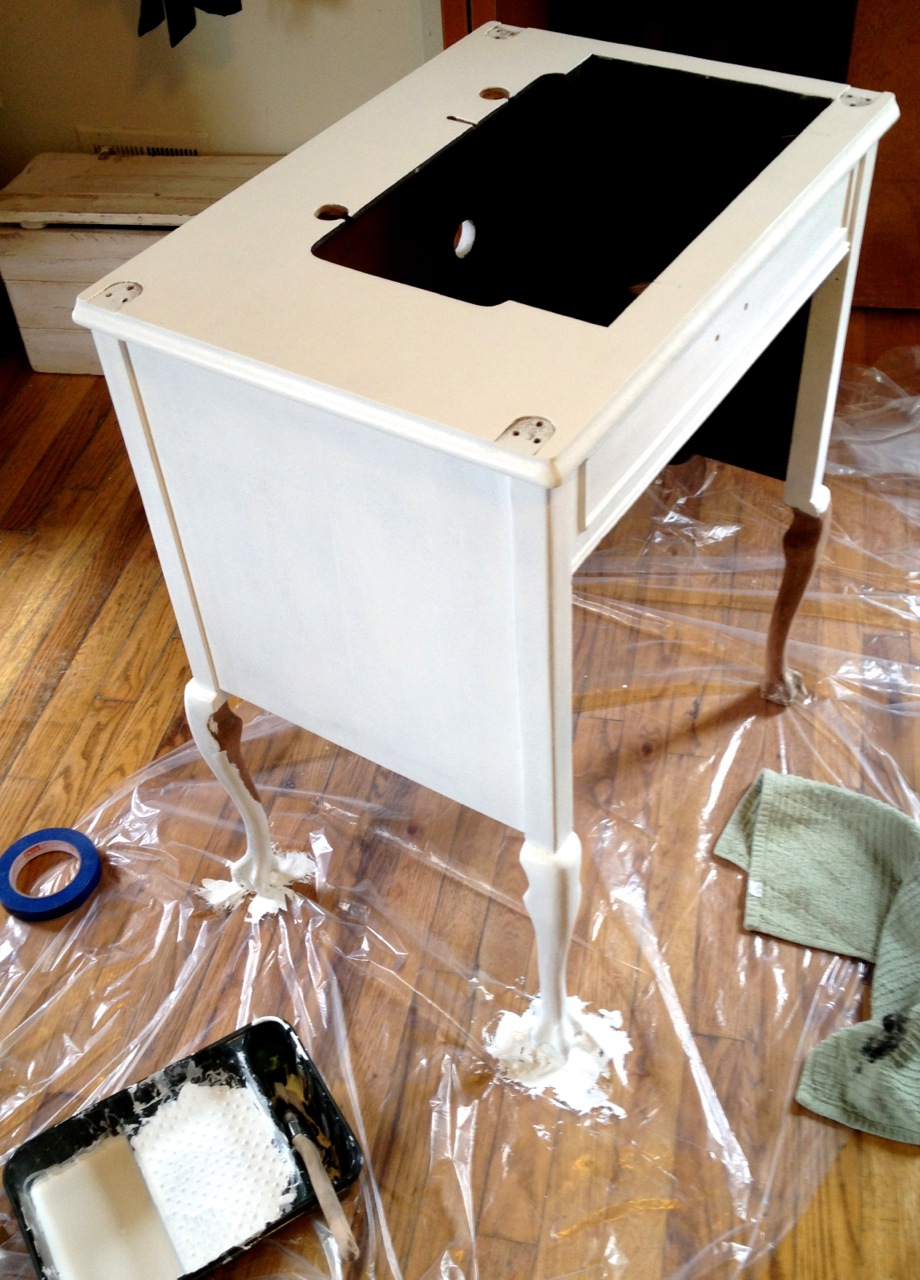
I got this really cute sewing machine cabinet and it needed lots of love and attention. The white paint was so heavily stained nothing would clean it and it chipped easily because it was painted on right over the original polyurethane. There was a Singer 66 sewing machine inside that I took out and cleaned up real nice too.


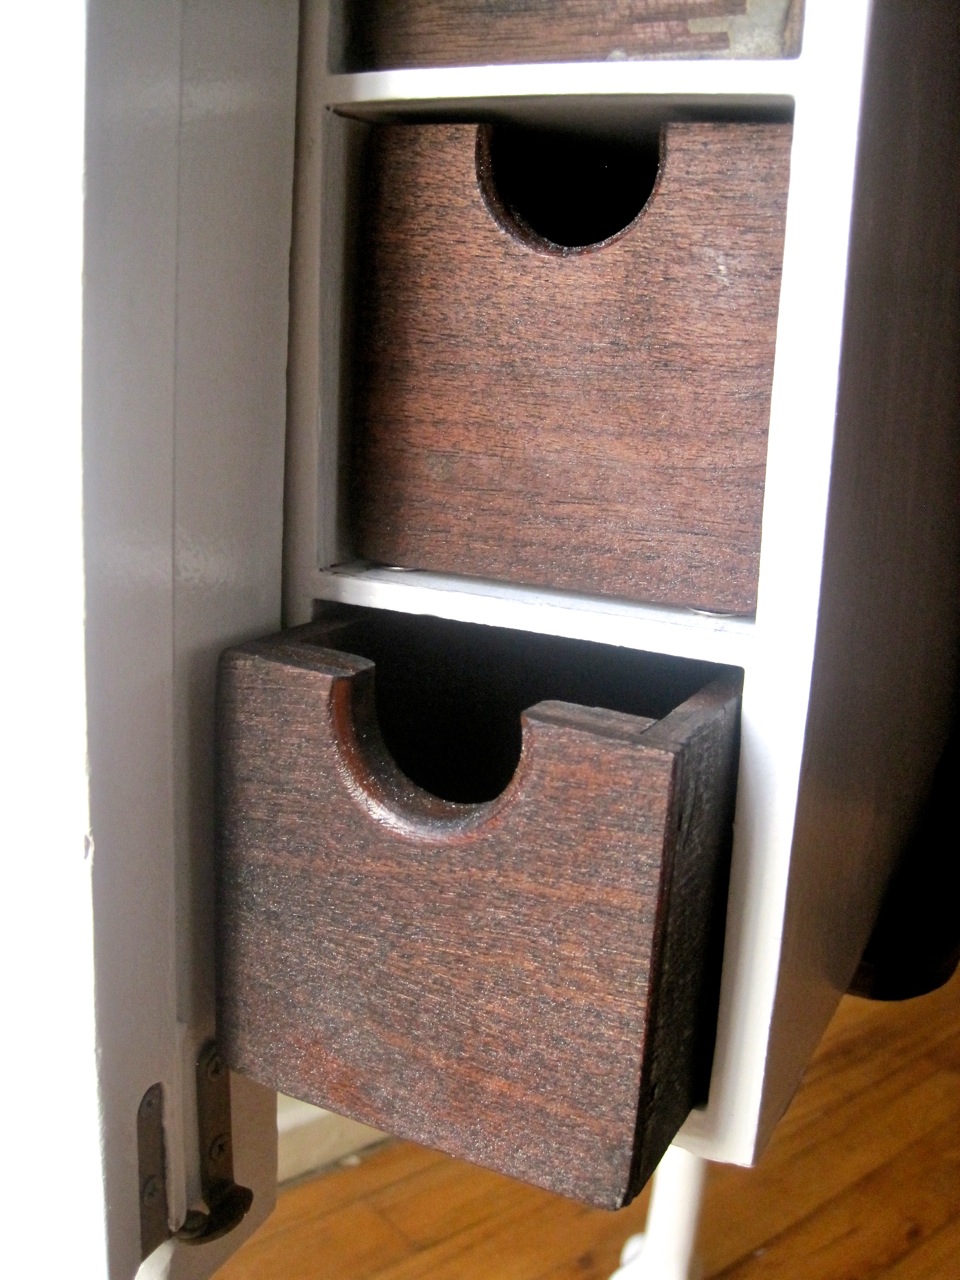
The 3 little drawers inside are just stacked on top of each other in the above photo. The little shelf that held them was broken.
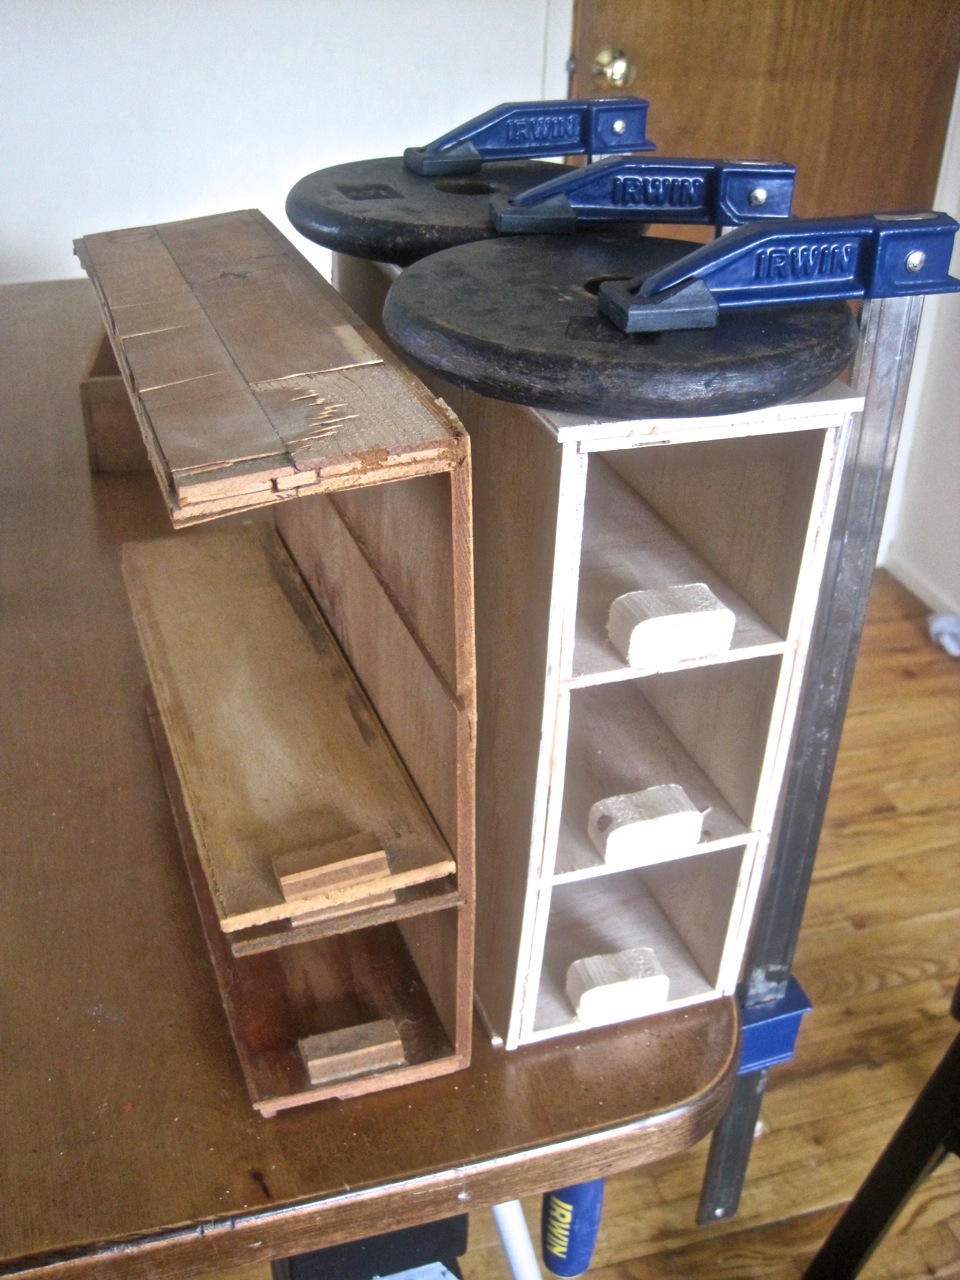
I used 14 different pieces of 1/4-inch plywood to make a replica. In the above picture you’re seeing the back end of the old shelf and the new shelf on the left being glued together.

I used wood filler on the front of the shelf to fill in any gaps and sanded to make a nice finish.

I disassembled the cabinet and used paint stripper to get the old paint off. This took about 2 hours in 30-degree weather!
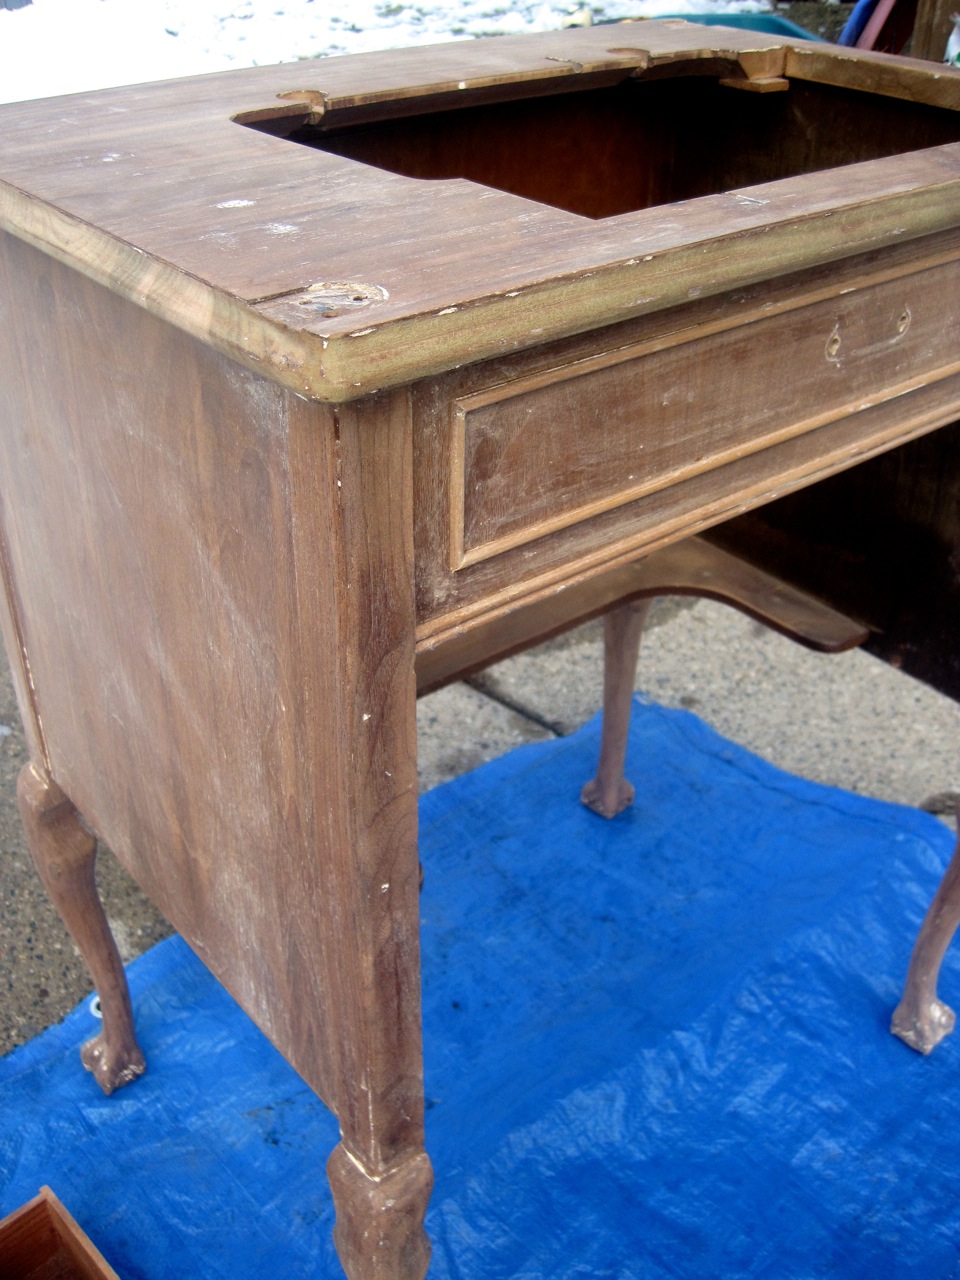
Once I got most of the paint off I used a razor blade to scrap off any remaining pieces and to get in the cracks and crevices. Then I sanded, sanded, sanded!
I rolled on some new paint.
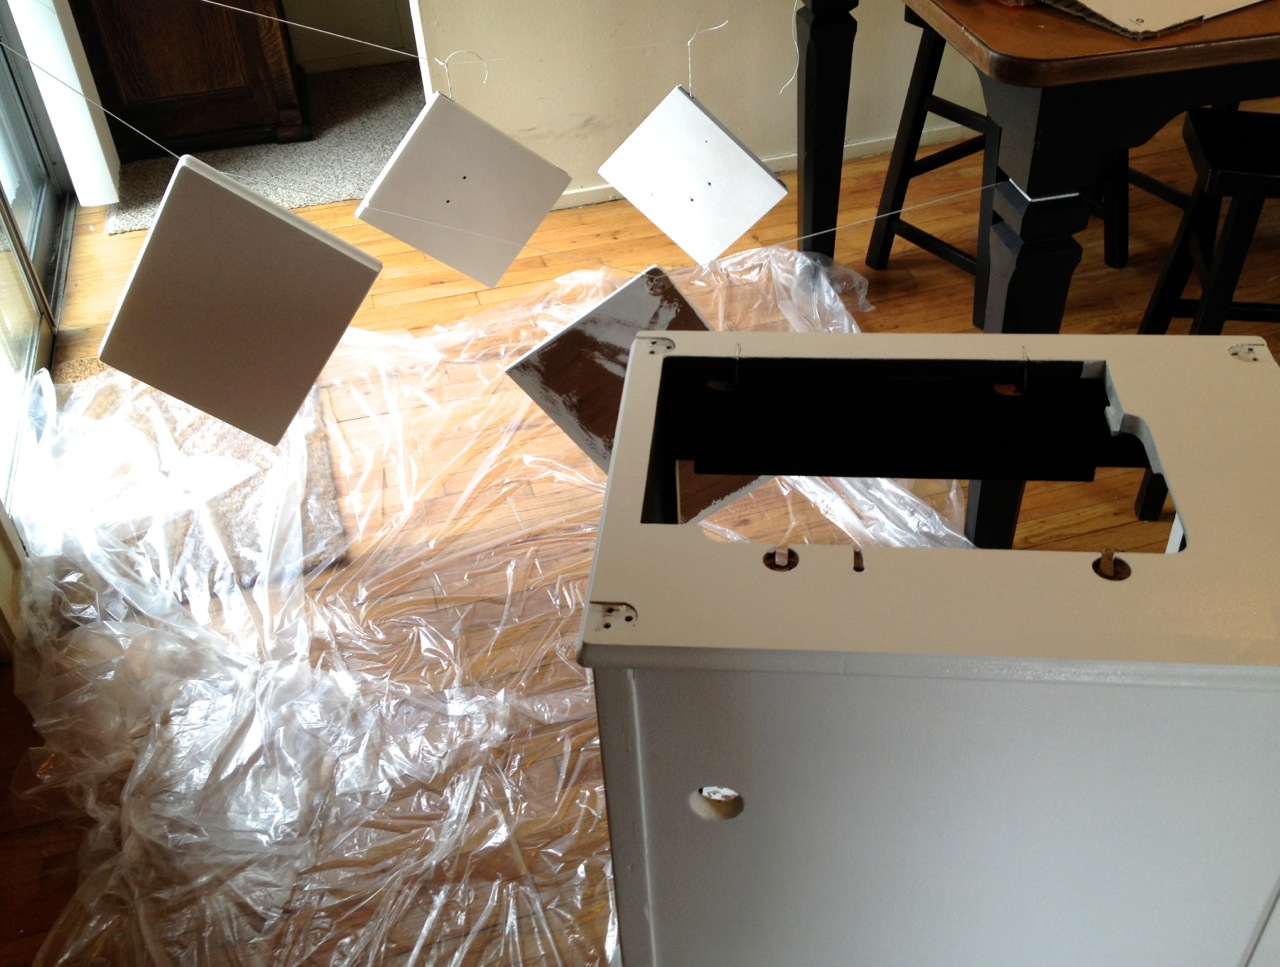
Hung the doors on some string so I could paint all sides at the same time.
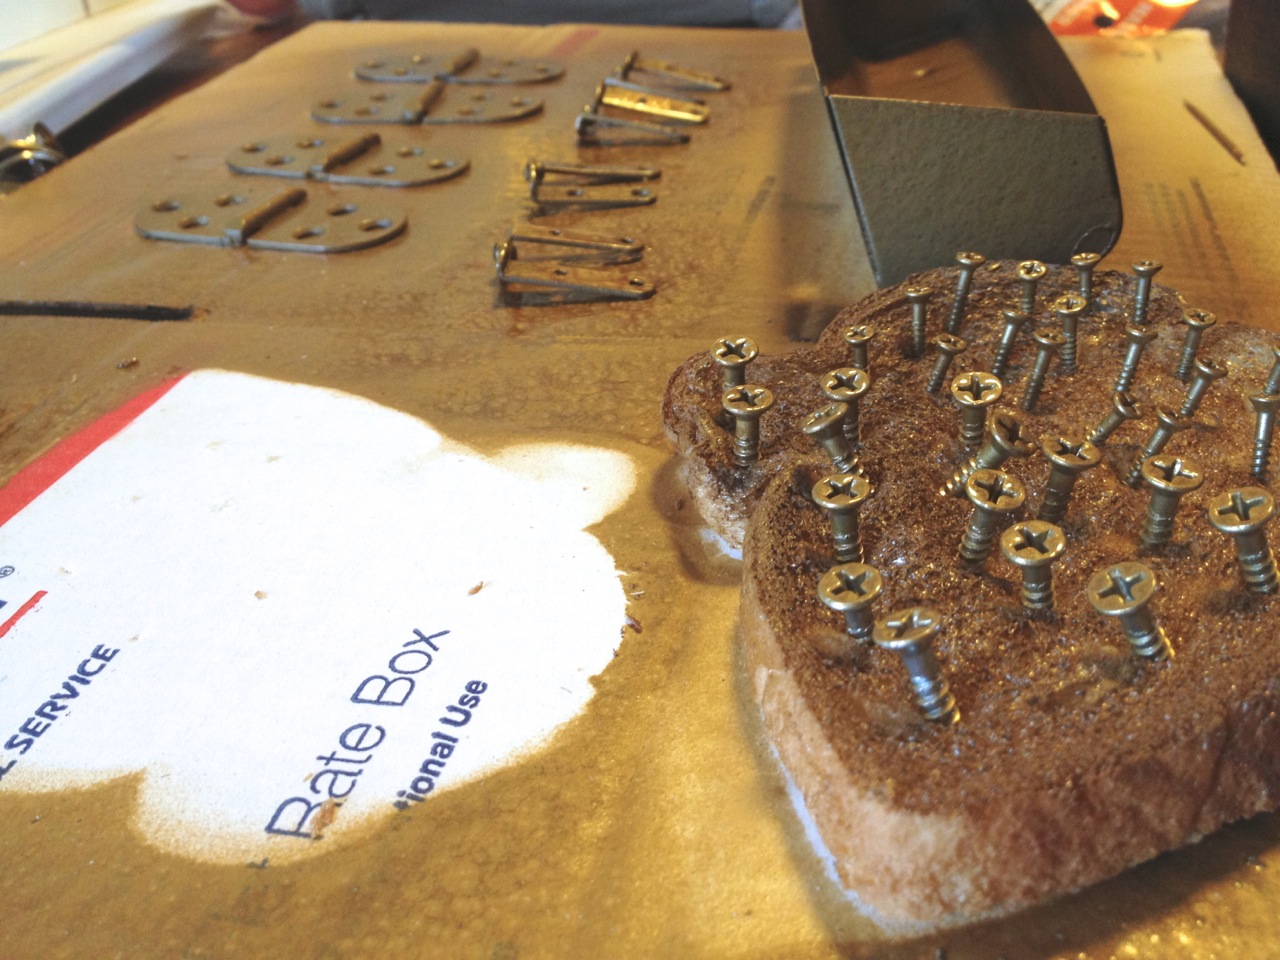
I wanted to spray paint the hardware a nice bronze color. I used bread to stick the screws in so I could paint the tops. Of course it was outside drying when a hungry squirrel came and snatched up my bread (with the screws in it)! By this point I was pissed. I was a few hours from being done with a project that had taken me 2 weeks of hard work.
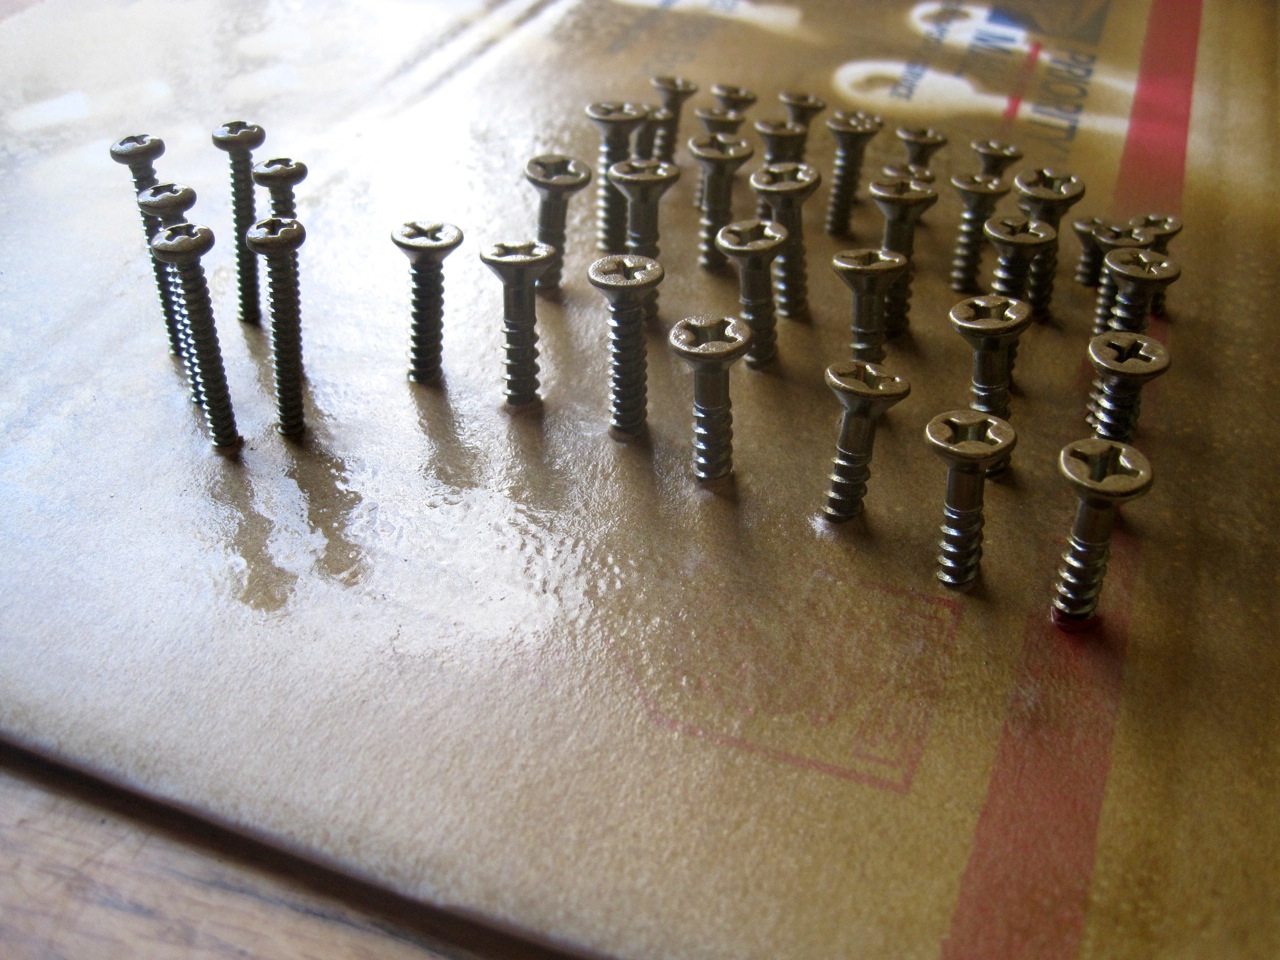
I figured out what screws I was missing and went to the hardware store and got new ones to paint. This time I just screwed them right into the cardboard (wish I’d done that before!). Because the squirrel took off with the bolts that went into the handle hardware I decided it was a good time to use some cuter drawer pulls and knob I had that I liked better anyways. This meant that I would need to fill the old holes on the cabinet, sand and do more painting. Since I was going to do more painting I got a gloss paint instead of the boring eggshell paint I had painted on at first. While painting the last coat outside, the tarp underneath the cabinet flipped up in the wind and got sand all over in the wet paint. What?! Are you serious!? Luckily I was able to pick the sand out and quickly retouch the paint. By the time I finished I wanted to cry because I was so relieved the cabinet was DONE!
Although it took forever, I love how it turned out and I’m so happy with the new hardware I had that worked so great with this project.
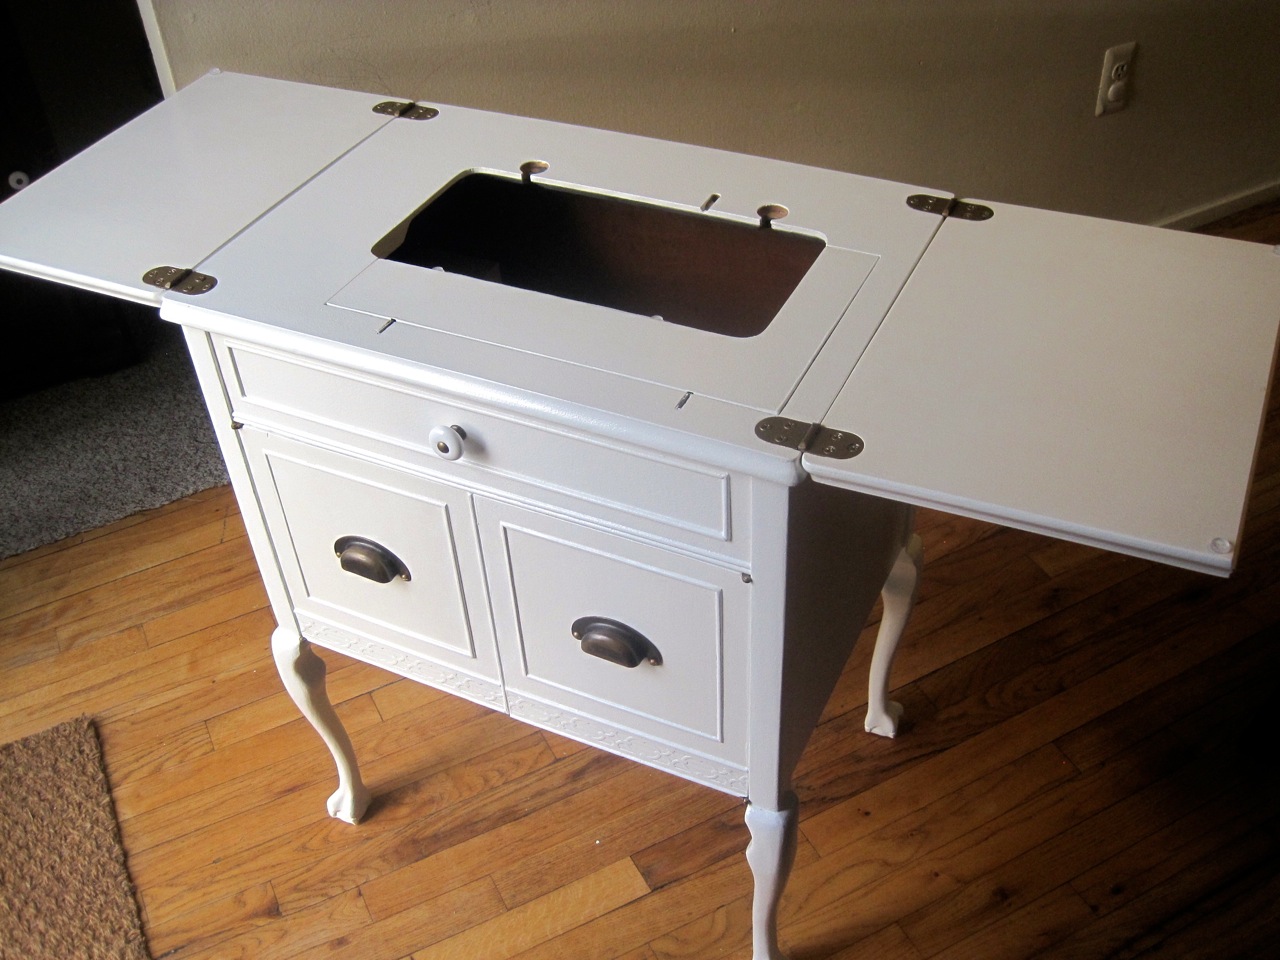
Here’s a top view where the machine goes in.
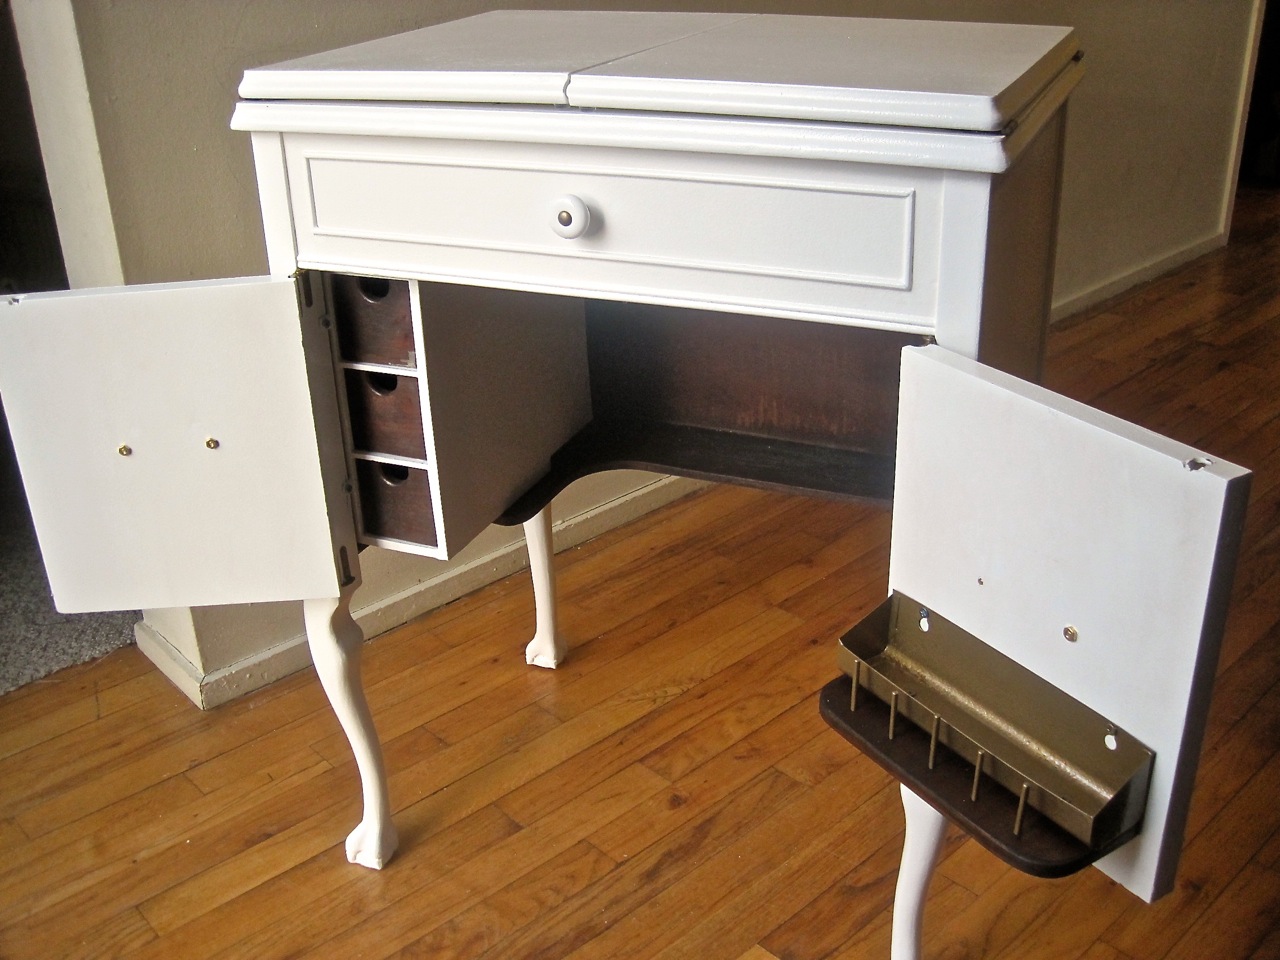
Here’s the inside. I didn’t mention this, but I stained the whole inside a dark color, the 3 little drawers and the little shelf with the thread pins on the door.
The shelf I made turned out perfect!
7 Comments
So pretty! I love it. The squirrel story just makes it that much better.
March 11, 2013 at 9:20 pmI laughed so hard. Those critters can be vicious 🙂
March 11, 2013 at 10:50 pmwow! Good job! How do you keep all your tools and things together with three little boys in the house?
March 12, 2013 at 12:36 amSuch ambition! It looks so great, I love old stuff, it has so much more character and quality! You did an awesome job 🙂
March 18, 2013 at 12:00 pmBeautifull 🙂
April 23, 2013 at 1:59 amDid your cabinet have an arm that popped out to support the top when it was opened?
April 14, 2020 at 5:26 pmYes, I believe it did!
September 30, 2020 at 2:10 pm