What do these 4 pictures have in common?


1938! They were all taken in 1938.. that seems like such a long time ago doesn’t it?
I want to show you something I just bought that was made in 1938 (and kind of reminds me of the black car above). All black, shiny and quite stealthy.

It’s inside here. Just the case is cool – it has a leather handle and you can lock your valuables inside!

What is it!?

A Singer Featherweight 221 sewing machine! Isn’t it the coolest looking little thing you’ve ever seen!?

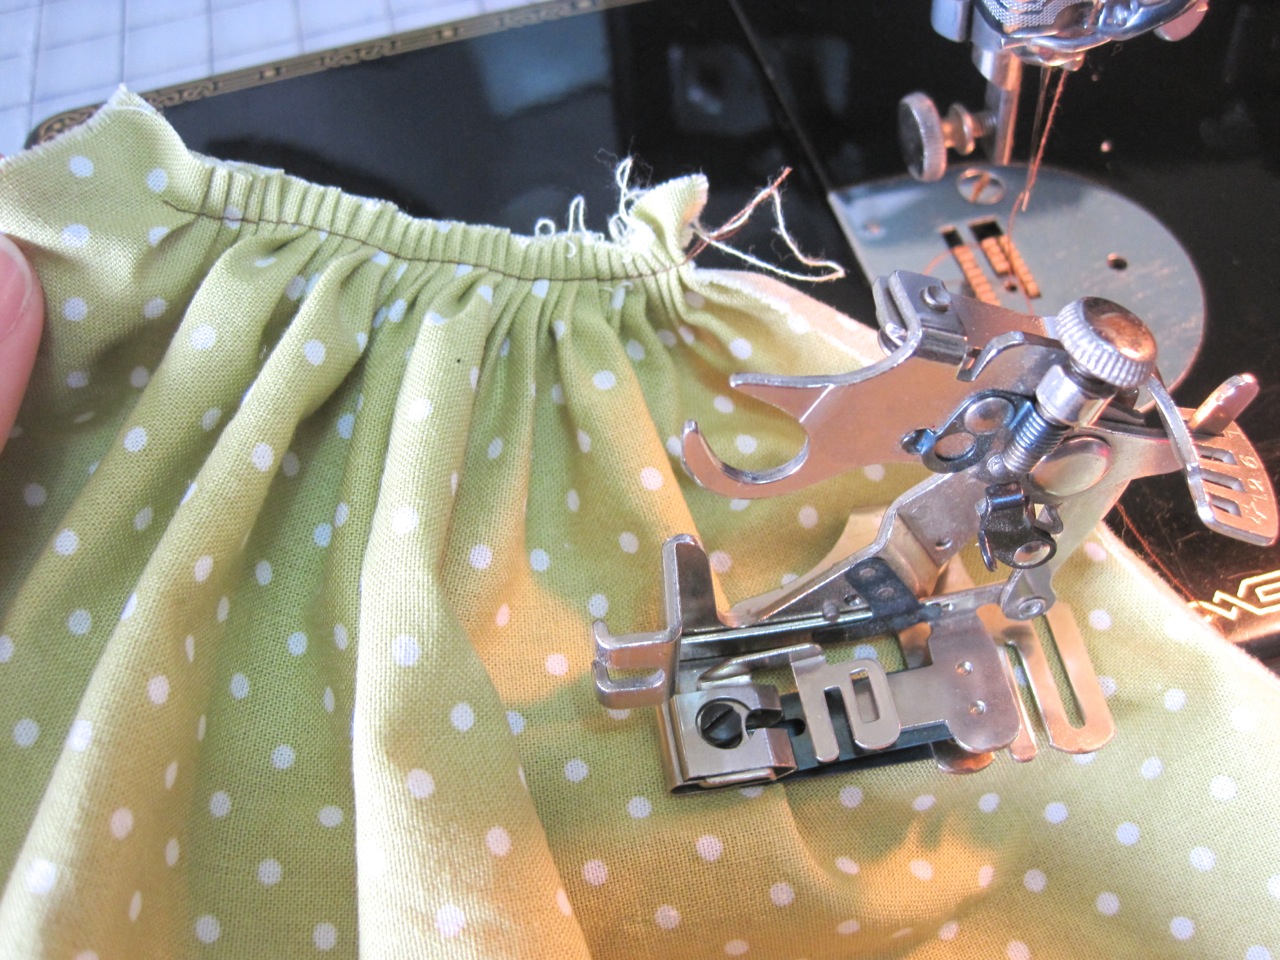
Here it is in front of my other sewing machine (regular size). The word ‘featherweight’ doesn’t mean it’s light-weight though.. just small. But small doesn’t mean it can’t sew either.. oh this baby can sew!
Let me show you more pictures and tell you more – (Oh I’m so excited)! And yes this is a long post – I’m just obsessed if you didn’t know already.
Well, first of all, I’ve seen a few of these online and didn’t think much of them until I saw one in person. It was amazing how cute and small it was, and the little case it came in with all the little accessories caught my eye – plus I’m a sucker for older machines. I went home and did some research on Singer 221’s and even went to a local sewing machine shop and talked to the owner/technician. He’s a fan of these too and has 8 of them himself and declined to sell me one! He gave me a lot of advice when looking for one to buy. The older the better – as time went on they started adding cheaper parts. I don’t know the full history of Singer, but they are one of the first (if not the first) sewing machine companies. They started making home-use “family” sewing machines before the 1900’s. They started making Featherweights in the 1930’s through to the 1960’s. You can date them by the serial number stamped on the bottom (picture below). The older ones have a metal scroll face plate, more elaborate gold scrolling, etc. Some are rare models that have a blue medallion or red ‘S’ where the typical gold medallion is located on the front. Some have a ‘crinkle’ (matte) finish, and some are white or tan. You can find some that are in excellent condition and some very poor condition. Some you can tell were used very heavily and some very little and just stored for years and years.

When I came across this machine on Ebay it stood out to me. It was an older model, looked to be in immaculate condition and had all the little nicknacks I wanted.

These machines are straight stitch only, however, you can buy a zigzag attachment that moves the fabric back and forth under the needle (kind of like the buttonholer that I’ll show below). You can see a little switch on the base plate under the handwheel – that’s the light switch.
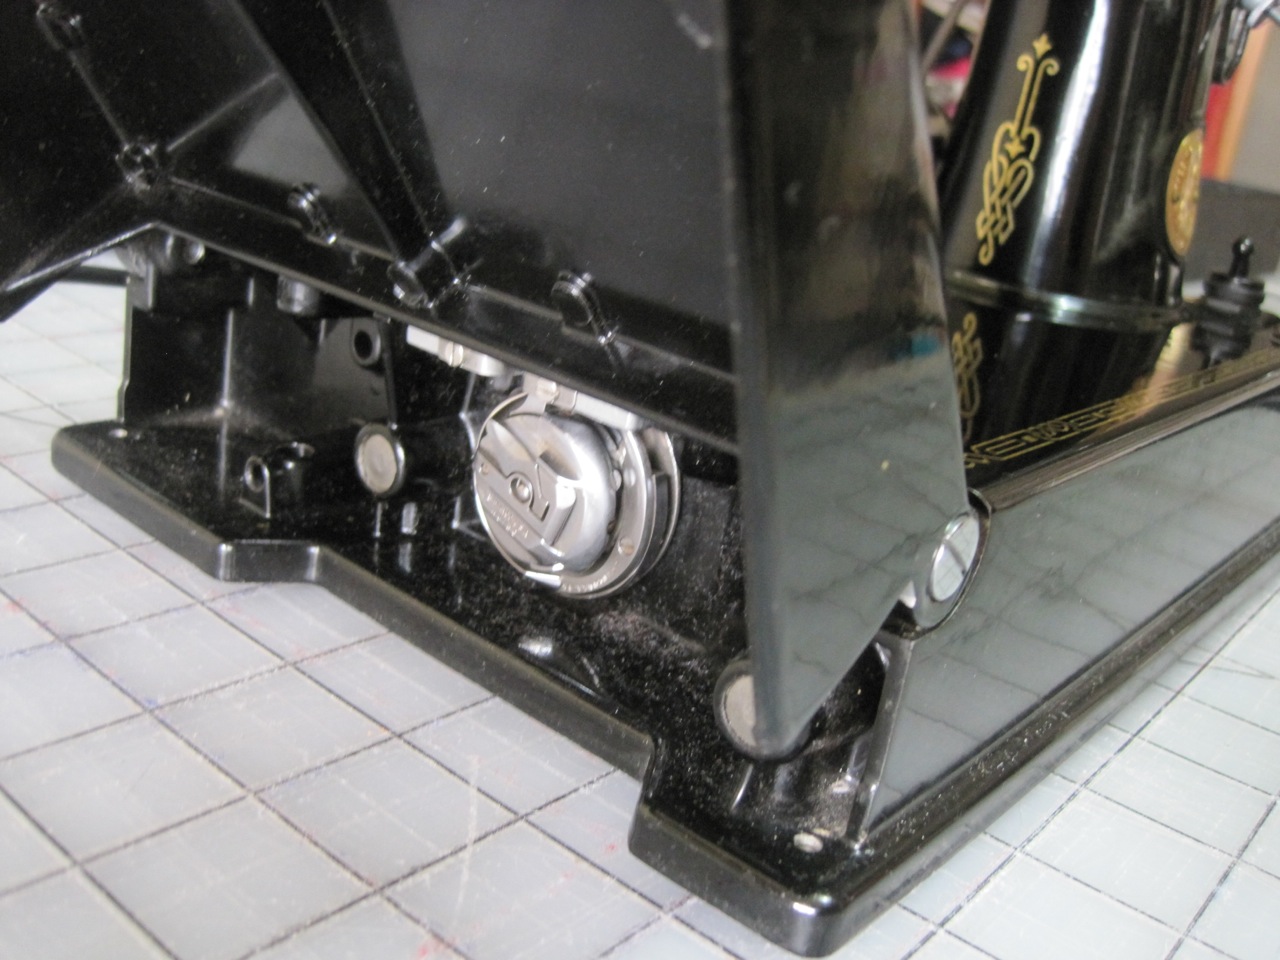
The extension table folds up for storing as well as for changing the bobbin. Many older machines are awkward when trying to change the bobbin – this is nice and easy!
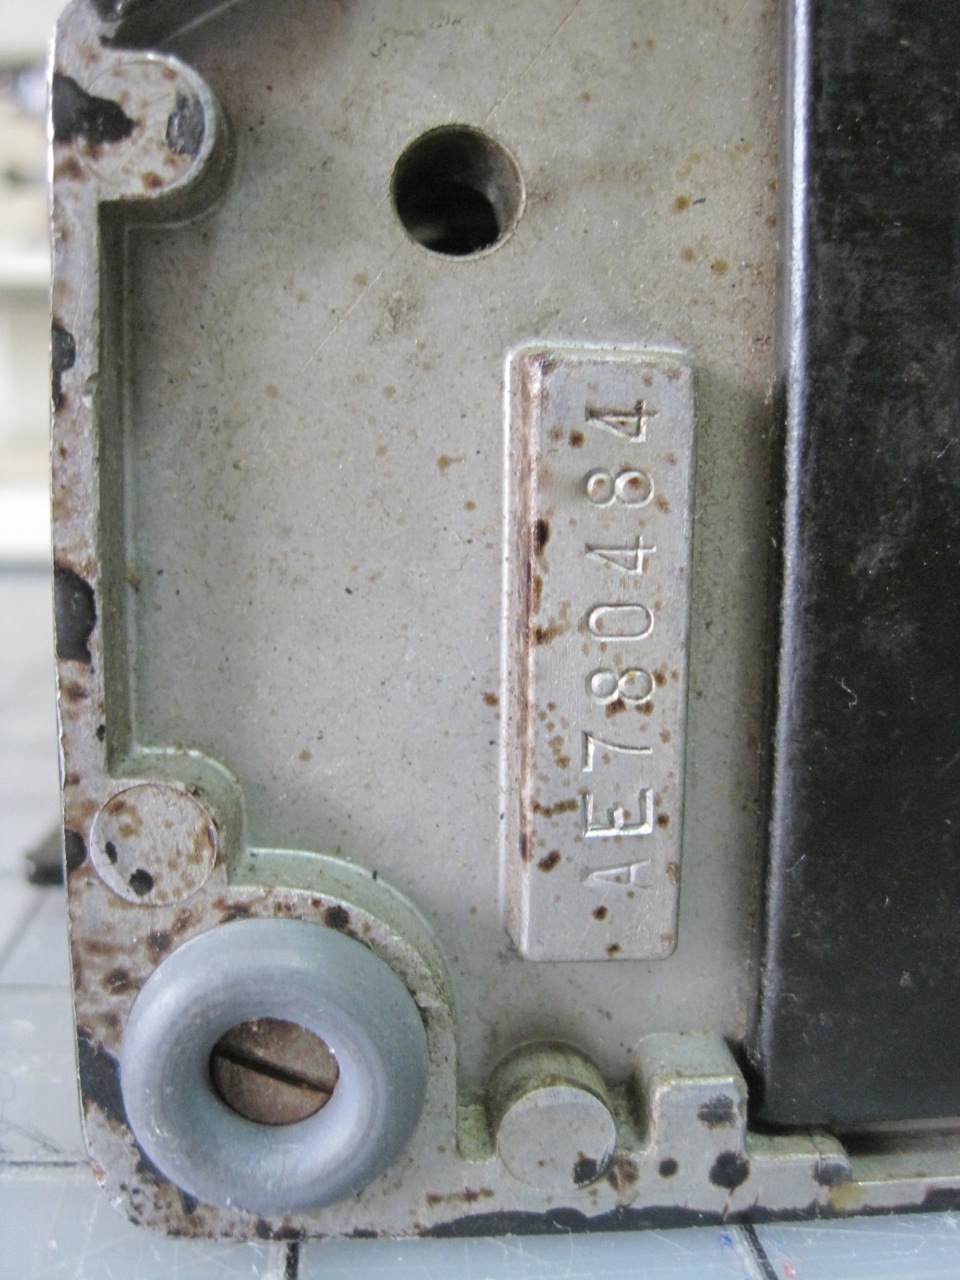
Here’s underneath the machine where the serial number is – dates it to 1938.
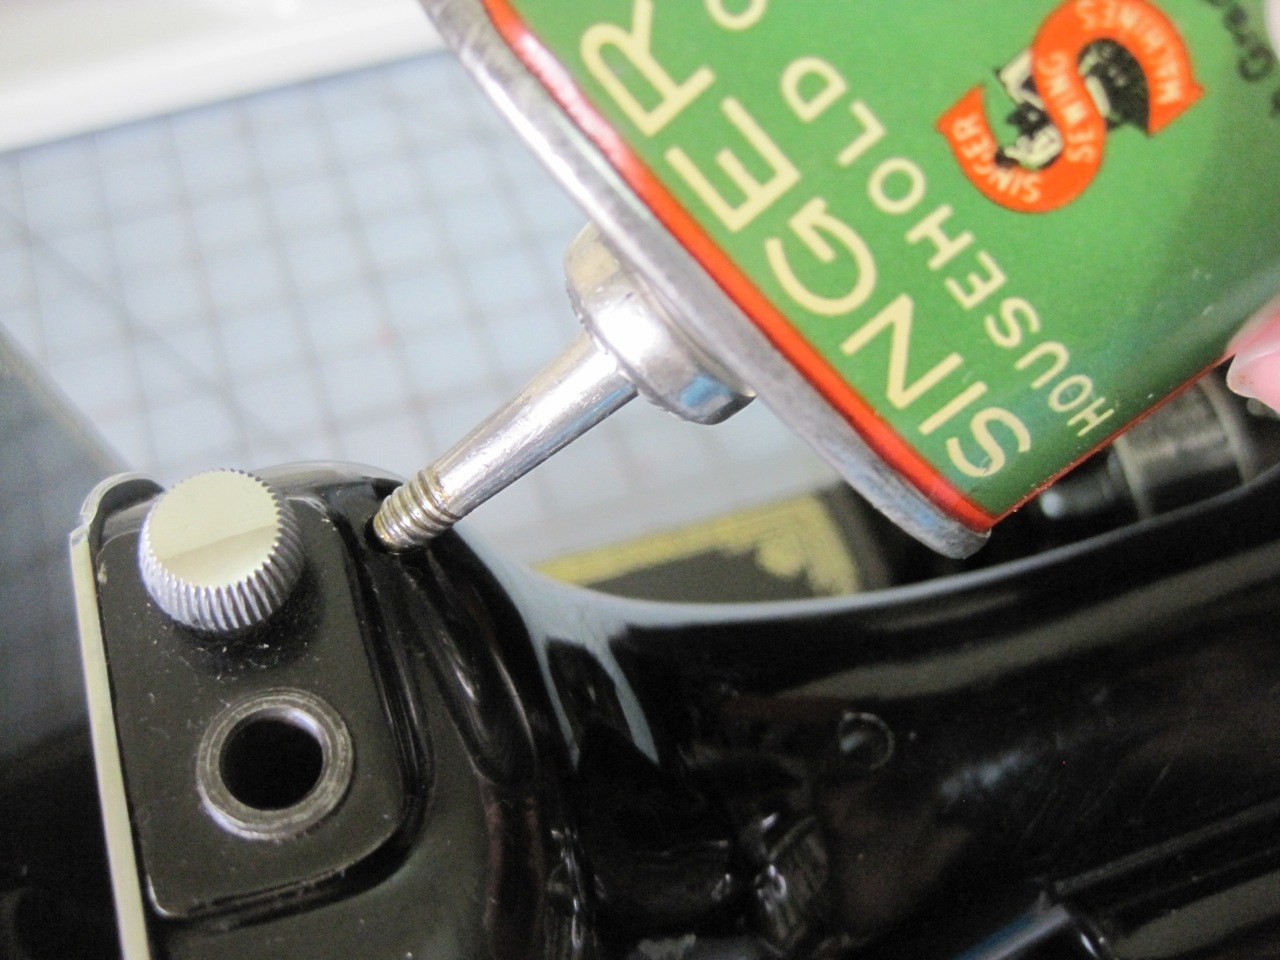
These machines came with tin oiling cans and a tube of motor lubricant. Here’s a picture of the oil tin. There are holes on the top of the machine where you put a drop of oil inside, as well as underneath and a few other places. The oil can was a must have for me!

This thread stand is not a standard accessory by any means, but I had to have it because it eliminates the thread from wobbling/bouncing around on top of the machine while sewing. I read that spools of thread were wound differently back then so they could be unwound from the side, nowadays thread spools need to be unwound from the top! It fits right into the oil hole on top of the machine.
Now let me show you some (not all) of the standard accessories these little things come with.

Rolled-hemmer. Have you tried to sew a narrow hem before? Very hard and time consuming. With this foot, just stick your fabric through the coil on the foot and it’s magic after that. It does take some practice (especially on curves) and I’m not a pro at it yet.
Edge binder. This nifty little foot takes a raw strip of fabric and folds the ends under and places it exactly where it should be as it stitches it onto your fabric. It will also take a piece of binding that is already finished on the edges (you just place it into another groove). It is my first time using one and also takes practice – but how cool is that!?

Pin-tucker. I would have never guessed what this was just by looking at it. It’s a pin-tucker! Oh how marvelous! You fold your fabric, line it up inside the attachment and sew on your folded edge, and while you’re sewing the attachment has a little metal finger that presses into your fabric creating a crease. When you’re done sewing your pin-tuck, your fabric already has a crease made for you to fold and sew your next pin-tuck – so on and so forth. This contraption is completely adjustable to how far apart you want your pin-tucks, and how wide/narrow you want your tucks sewn. I’ve done pin tucks before (on a baby tux shirt) and had to measure, mark, iron, sew for EACH pin-tuck. This is genius. I haven’t seen one of these attachments for modern machines.. have you?

Showing the metal finger that makes the crease in your fabric.

Gatherer/ruffler attachment. This is another strange looking attachment and is a little intimidating at first but once you see what it can do you will fall instantly in love! Stick your fabric right in there and sew.. it gathers your fabric in seconds! You can change the setting so it tucks the fabric in every 1, 6 or 12 stitches and you can also set the depth of the tuck from being very shallow to very deep. You can also sew your gathered fabric directly onto another piece of fabric at the same time (as well as other things… you can see all the openings/grooves just before the needle where you can feed ribbon/trim into).
Here’s the attachment off the machine. You can buy these for modern machines too – you just have to make sure it’s the right one!

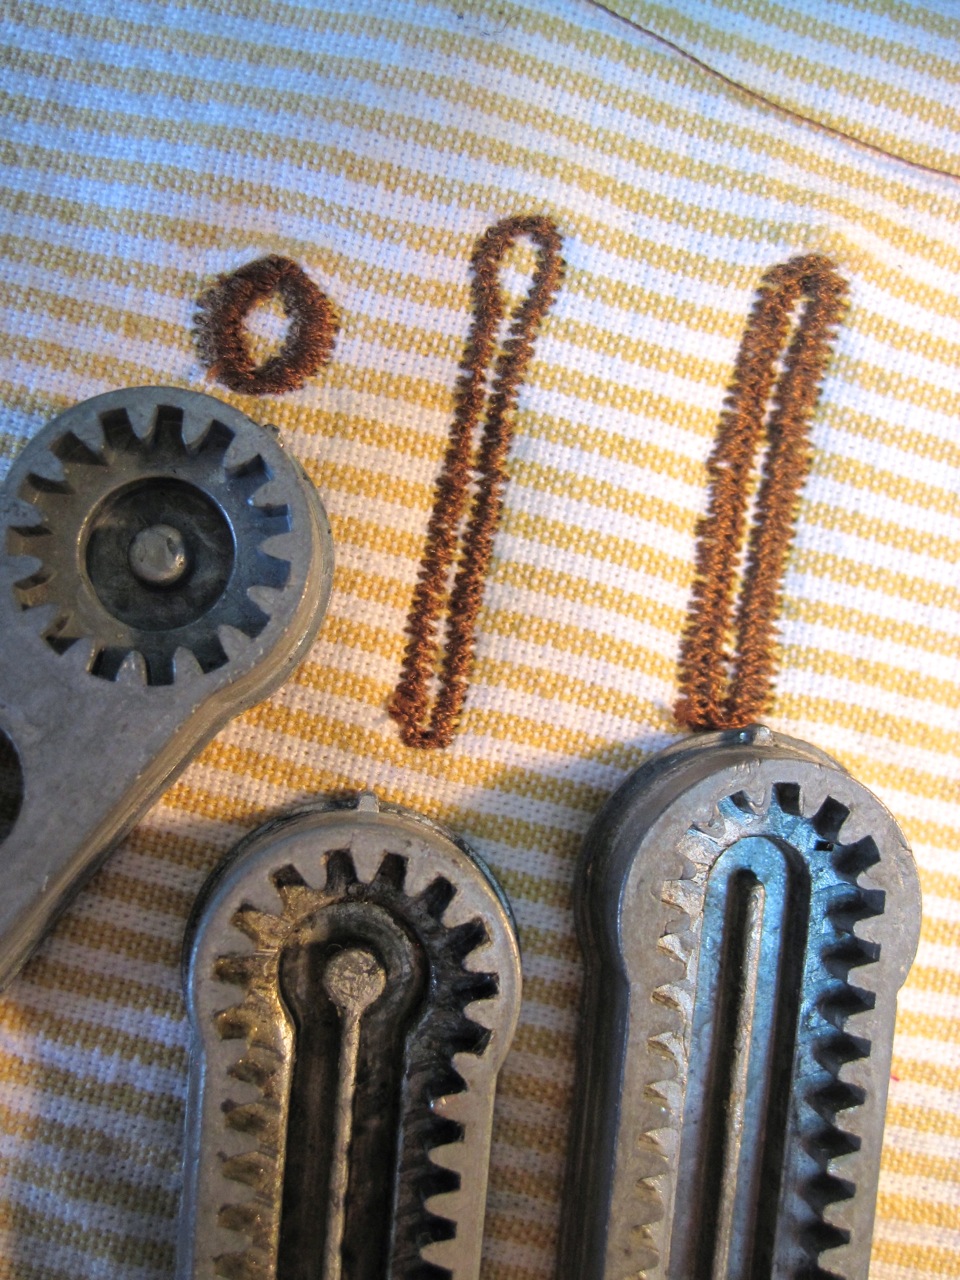
Now look at what we have here! A buttonholer! Like I mentioned above, this machine is straight stitch only, meaning the needle can’t move back and forth – so this little attachment moves the fabric back and forth for you. It comes with buttonhole templates you can see to the right hand side. I think these normally came with 4 and you could buy extras to go with it. I got this buttonholer separately from the machine and it came with a rare eyelet template!

First, you need to cover the feed dogs on the machine with this metal plate that screws into the bed of the machine. Like modern machines these days, you can’t lower/disengage the feed dogs from pulling your fabric through the machine.

Pick the template you want to use and put it into the bottom of the buttonholer.

The buttonholer is so cool. The youtube videos I watched helped out a lot with this one since I’ve never used something like this before. Usually you go around the whole template a few times, and even a 3rd depending on how you want your buttonhole to look. You can change the width of your stitches with a bar on the lefthand side of the device.
My buttonholes aren’t amazing as they should be. I may need to get the machine tuned up because I couldn’t figure out why it skips stitches with the buttonholer on.

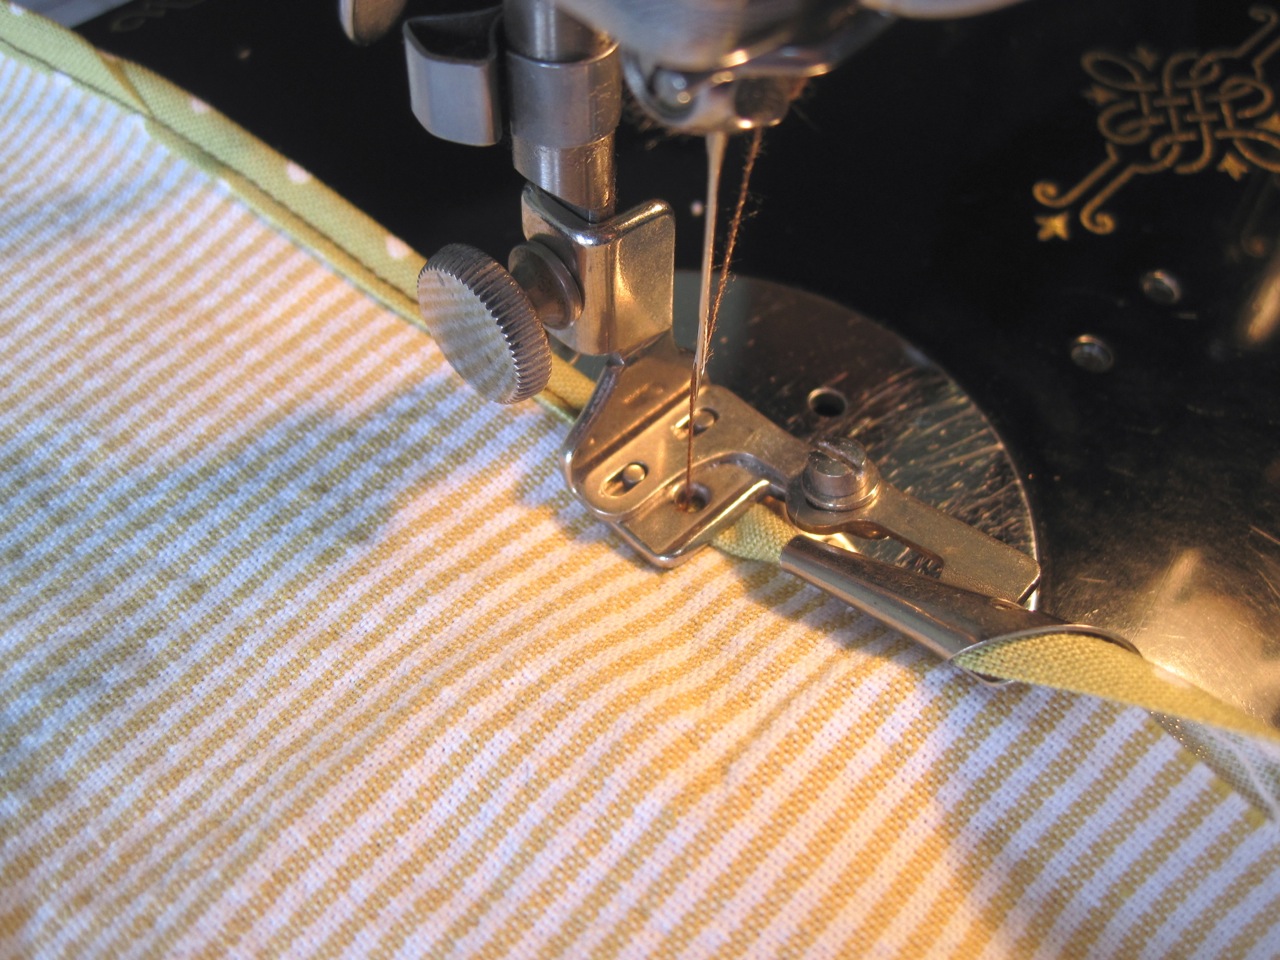
Last but not least, the straight stitch foot for all your regular sewing. It is also great for topstitching along the edge of fabric – something I do a lot of! And guess what.. that is 8 layers of heavy denim this little machine is sewing through just like butter. It could have done more if it would have been able to fit under the presser foot! 🙂
This is a cool, vintage, beautiful, well-kept machine for it’s age but that doesn’t mean I’m going to store it away as a collectors item. Heaven’s no! Machines are for sewing on, I wouldn’t put it to waste!

10 Comments
Dani, you have a Ph.D. and post-doc in awesomeness. I miss you!
February 28, 2013 at 7:21 amIt was made in the USA! Now, every thing is made in China. I was just thinking about recycling today. Back then they didn't need recycling. You could buy something and keep the rest of your life. So cool!
February 28, 2013 at 7:21 amHow many machines are you up to girly? Love it!!
February 28, 2013 at 7:21 amThat is an amazing machine. I would buy one if I needed one! haha
February 28, 2013 at 7:21 amYou're so cute! It's fun to see you so excited. That is a pretty amazing machine for how old it is. I never would have thought there would be such cool attachment made in that year! Looks like a great deal 🙂
February 28, 2013 at 7:21 amOh my goodness! What a beautiful machine!! No wonder you were so excited about it!! It's amazing!!! 🙂
February 28, 2013 at 7:21 amThat is SO neat. I really liked reading about all the nifty things that little machine does. I really wish I knew how to sew. It is incredibly intimidating to me! That is such a great find and I'm happy for you that you got it!
February 28, 2013 at 7:21 amHello. Ar you using the buttonhole attachment to do general zig zag stitches?
January 26, 2017 at 5:27 pmNo, just for buttonholes. They make attachments for zigzag: http://ismacs.net/singer_sewing_machine_company/singer_zigzag_attachments.html
January 26, 2017 at 5:29 pmAmei ver sua postagem. Eu costurei intensamente na máquina da minha mãe, igual a esta, de 1965 a 1973. Era maravilhosa! Fico feliz em ver que estas maquinas de costura tem mercado e procura. Nunca tive nenhum problema de manutenção enquanto usei. Depois ganhei outra do meu pai, quando completei 21 anos.
January 5, 2021 at 12:09 pm