Interested in buying a base? See what’s available, HERE.
UPDATE 1/2014: I made another tutorial with step-by-step pictures of building process that includes the side cubby and full dovetail joints. See it HERE.

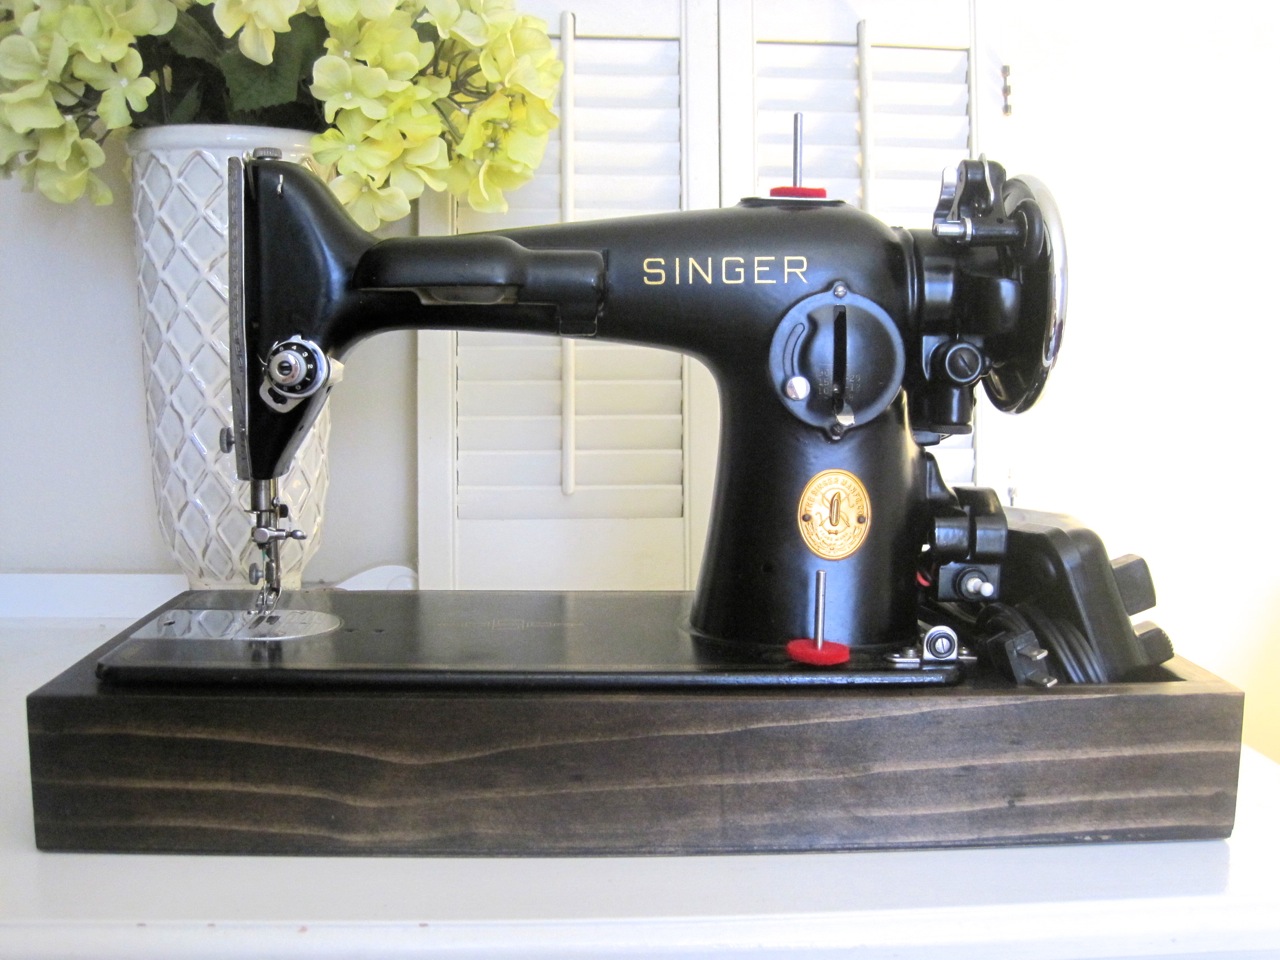
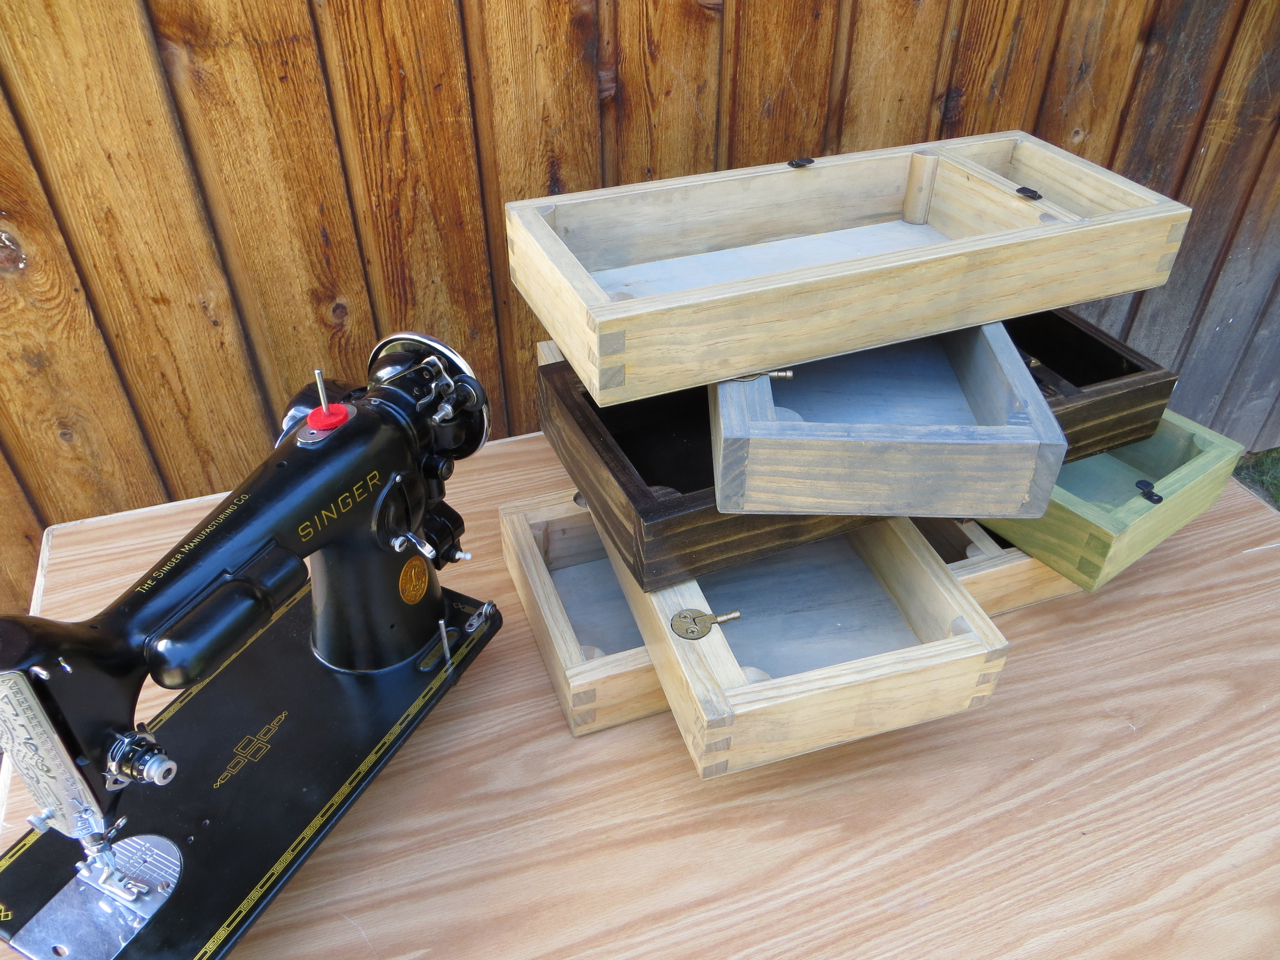
Chances are if you have an old sewing machine and you have the original case, the base looks something like the one in the picture above (bottom). It’s probably falling apart and may even smell bad. I bought a sewing machine last month and it came with the old base pictured above and I was going to *attempt* to save it. I pulled off the old vinyl covering that was peeling off anyways and discovered that underneath the wood was cracked and the glue holding it together was dry and brittle. The old base inspired me to make a much better, stronger version of itself.
So far, I’ve tried this base with my Singer 201-2, Singer 66-16 and Singer 15-90 and it works on all 3. Not sure about other brands or models but you can make your own measurements according to your machine.

Compare the corner braces, wood thickness, etc of the old base vs. new base.
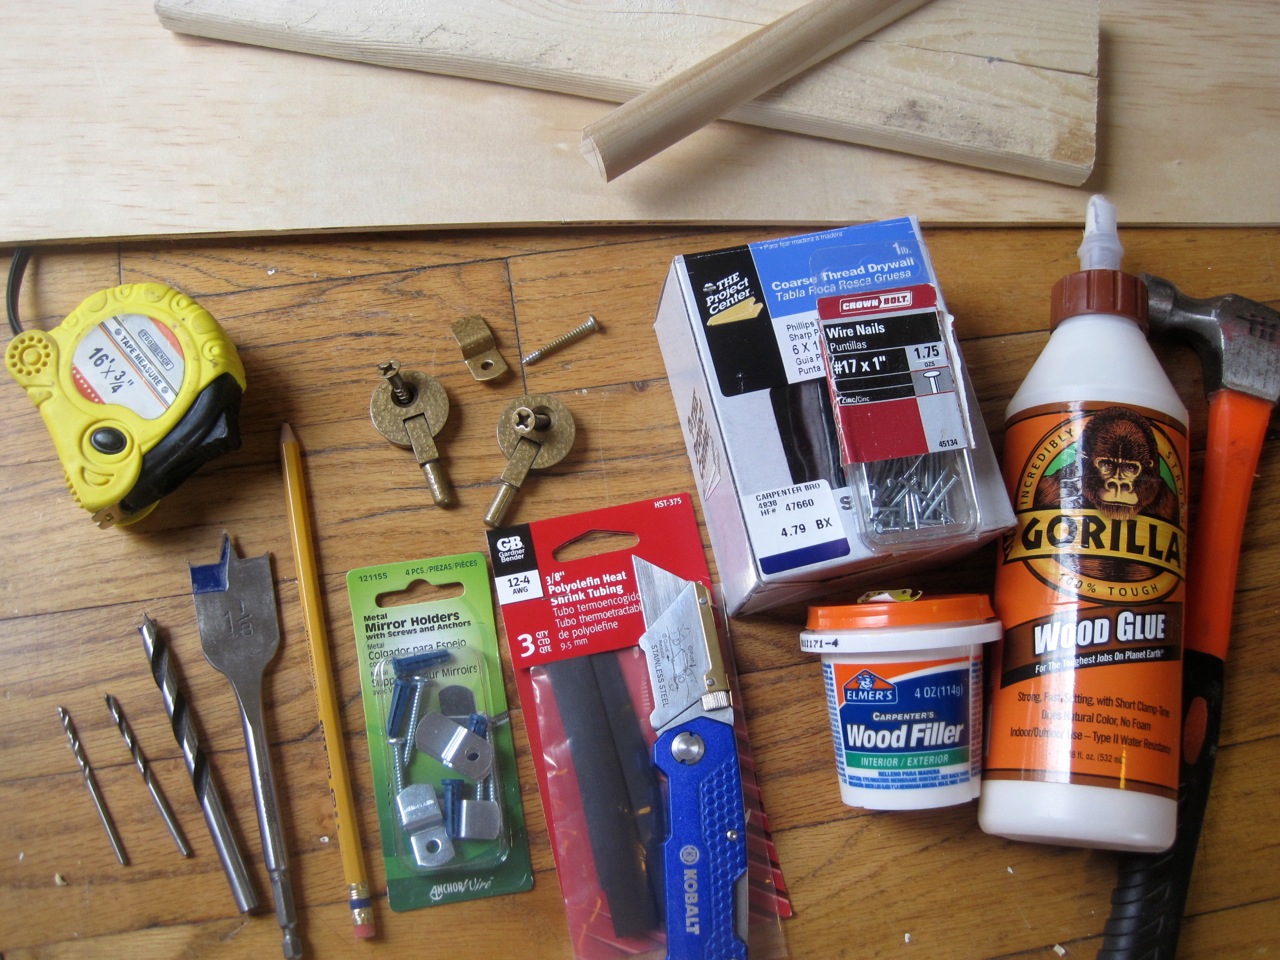
Here are the supplies I used, along with wood clamps, table saw, drill and router (for the base with cubby hole). I used 5mm plywood for the bottom of the base, premium 3″ pine board for the sides and trim pieces for the corner braces. I wasn’t planning on posting this project so I didn’t take pictures of the building process. I cut my wood pieces, glued and clamped them together, drilled holes for my screws, countersunk my screws into the wood and used nails and glue to attach the plywood base.

Next I glued my trim pieces and set them in each corner.
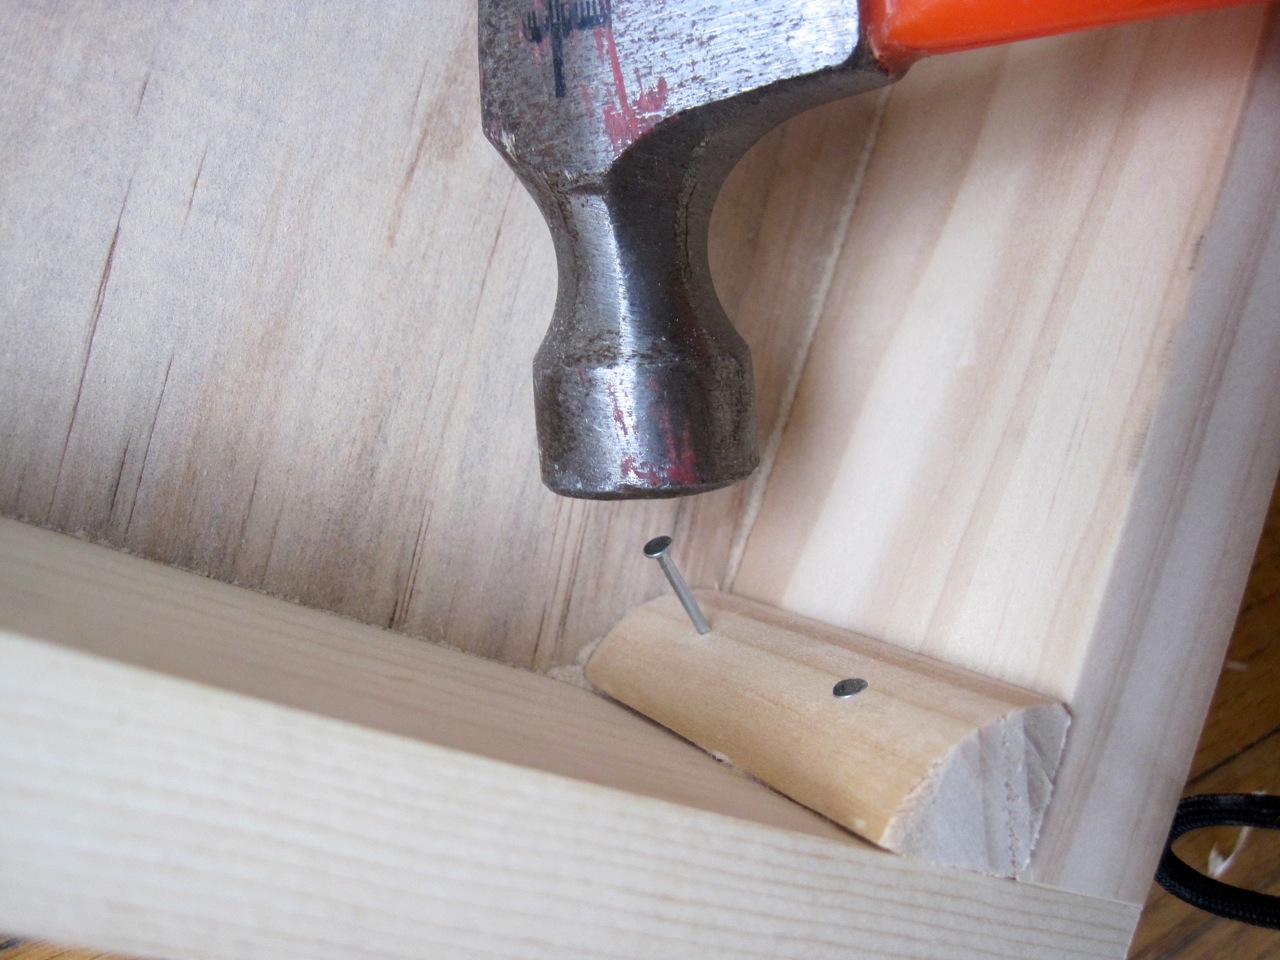
Nailed the corner pieces on for extra hold.

Put wood filler in screw holes and any cracks or gaps.

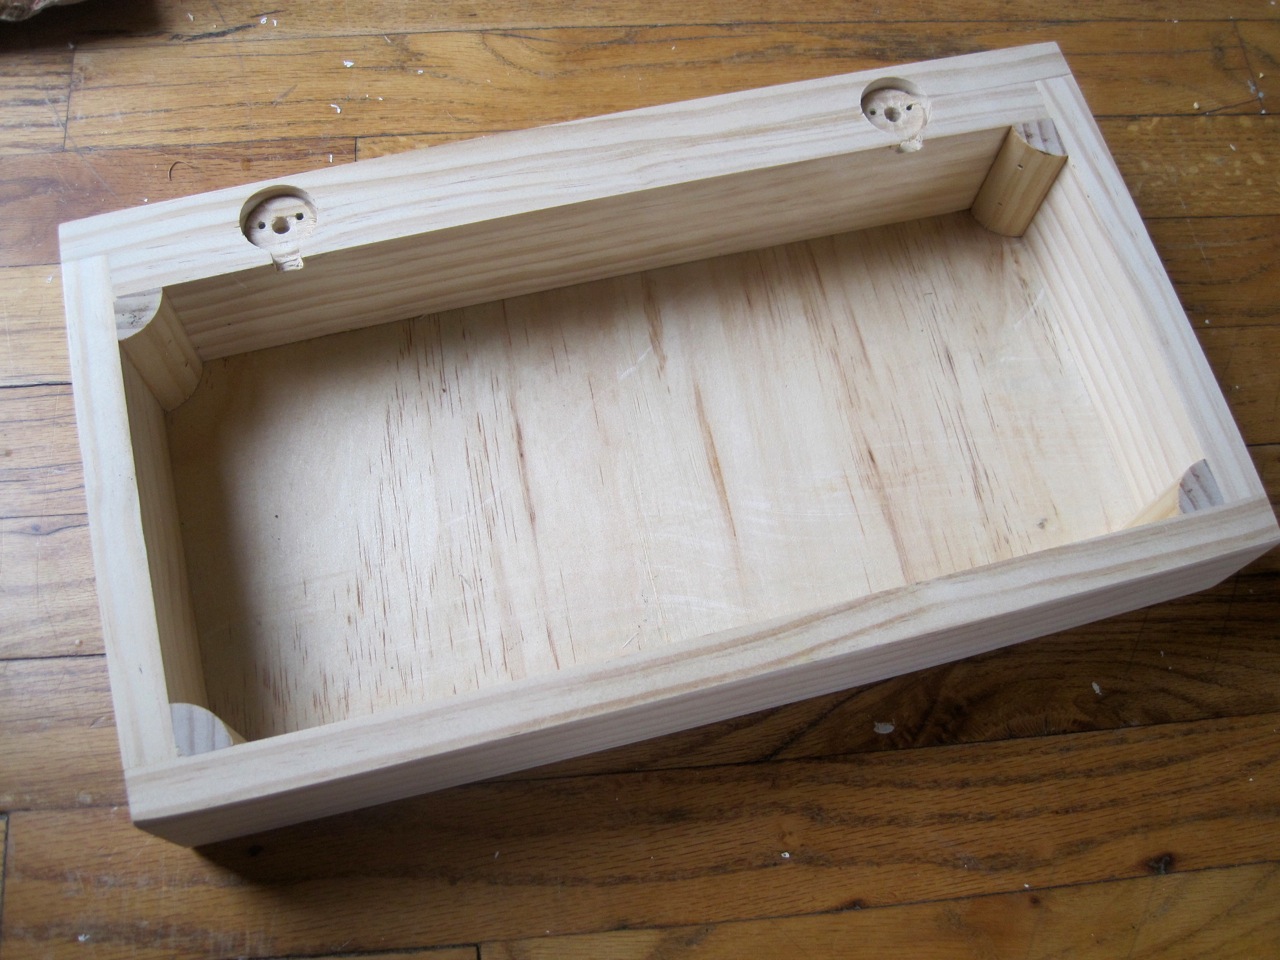
Sanded to perfection. This picture shows the back side of the wood base where I screwed the pieces together.
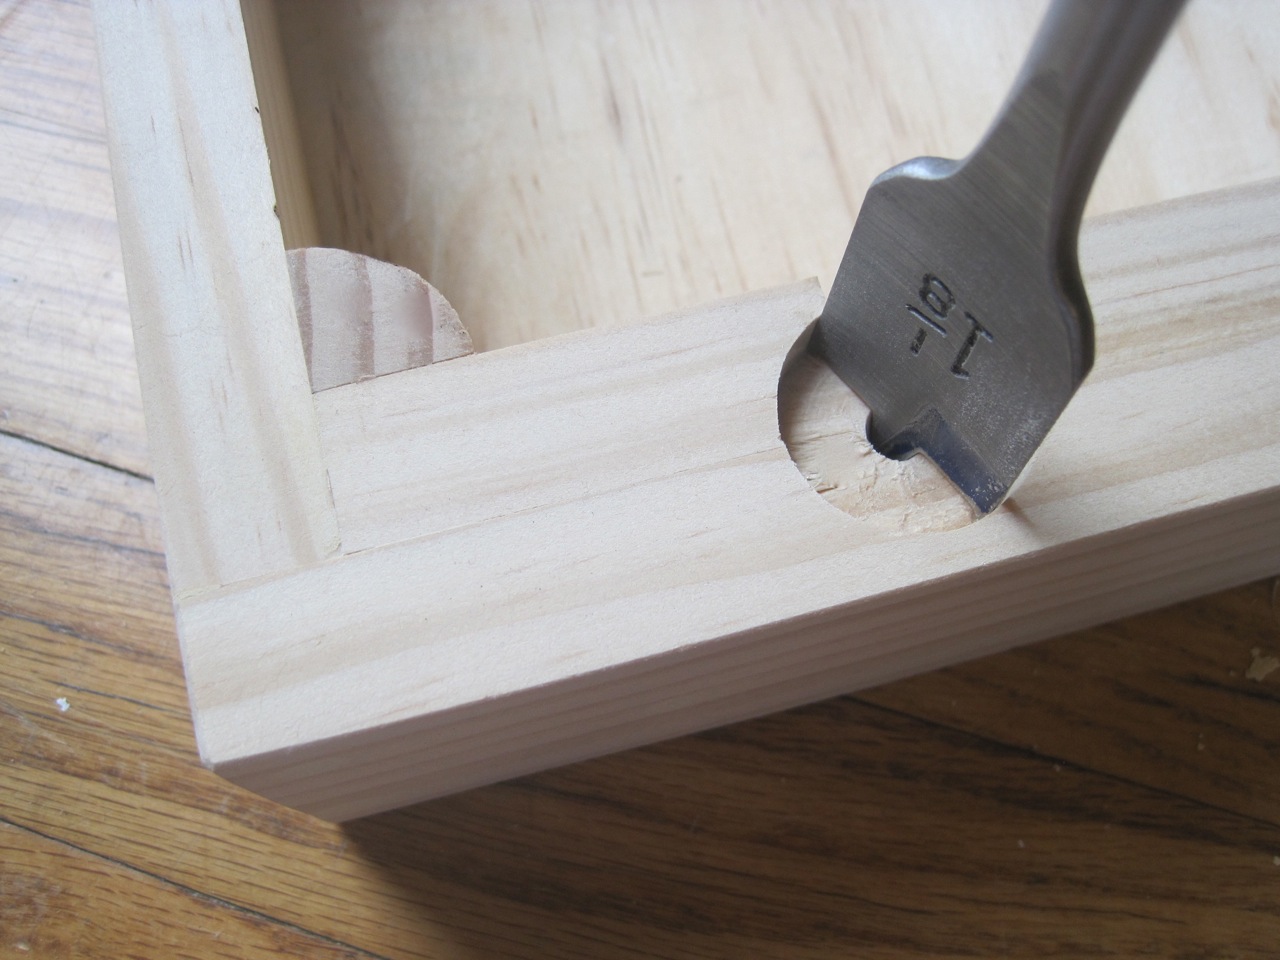
Next I made the holes for the hinges.

Cut out a notch where the hinges exit the wood.

I used the hinges off the old base and bought some mirror hardware for the tab that keeps the machine secured to the base.

I cleaned and painted the hardware to match.

Drilled holes for hinges…
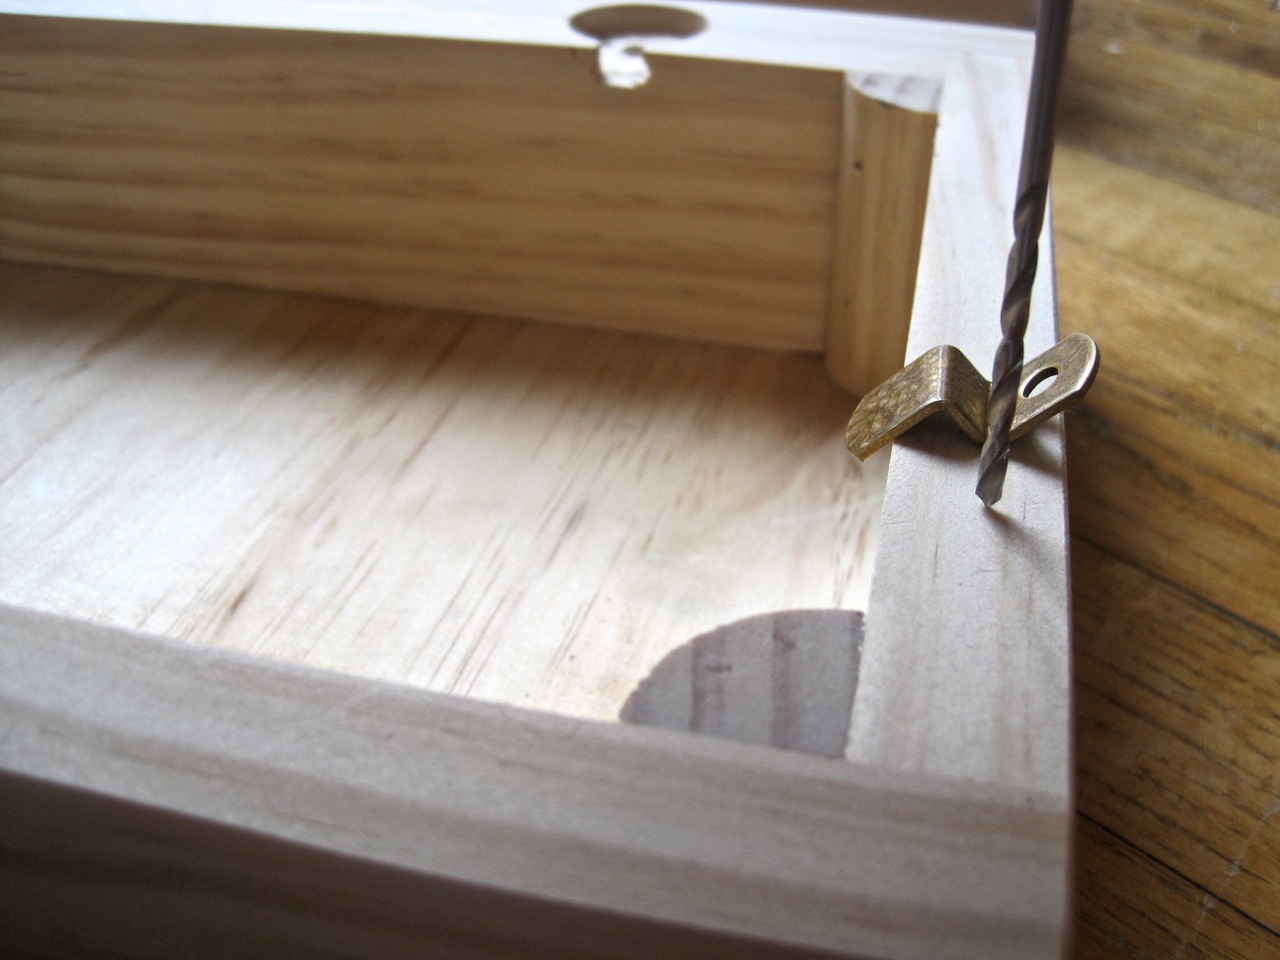
…and the part that holds the machine down.
Lookin’ good!

Shrink wrap tubbing was a great find for me. I didn’t want metal-on-metal with the machine so I cut a piece of tubing and heated it to shrink to the hardware piece that would be up against the machine.

Next I stained and put a polyurethane coat on the entire surface and used a 220 grit paper to smooth everything again. Adding the hardware was the last step!

Love how the character of the wood comes through.

In case you didn’t notice, I made a simple base and one with a cubby hole on the side.
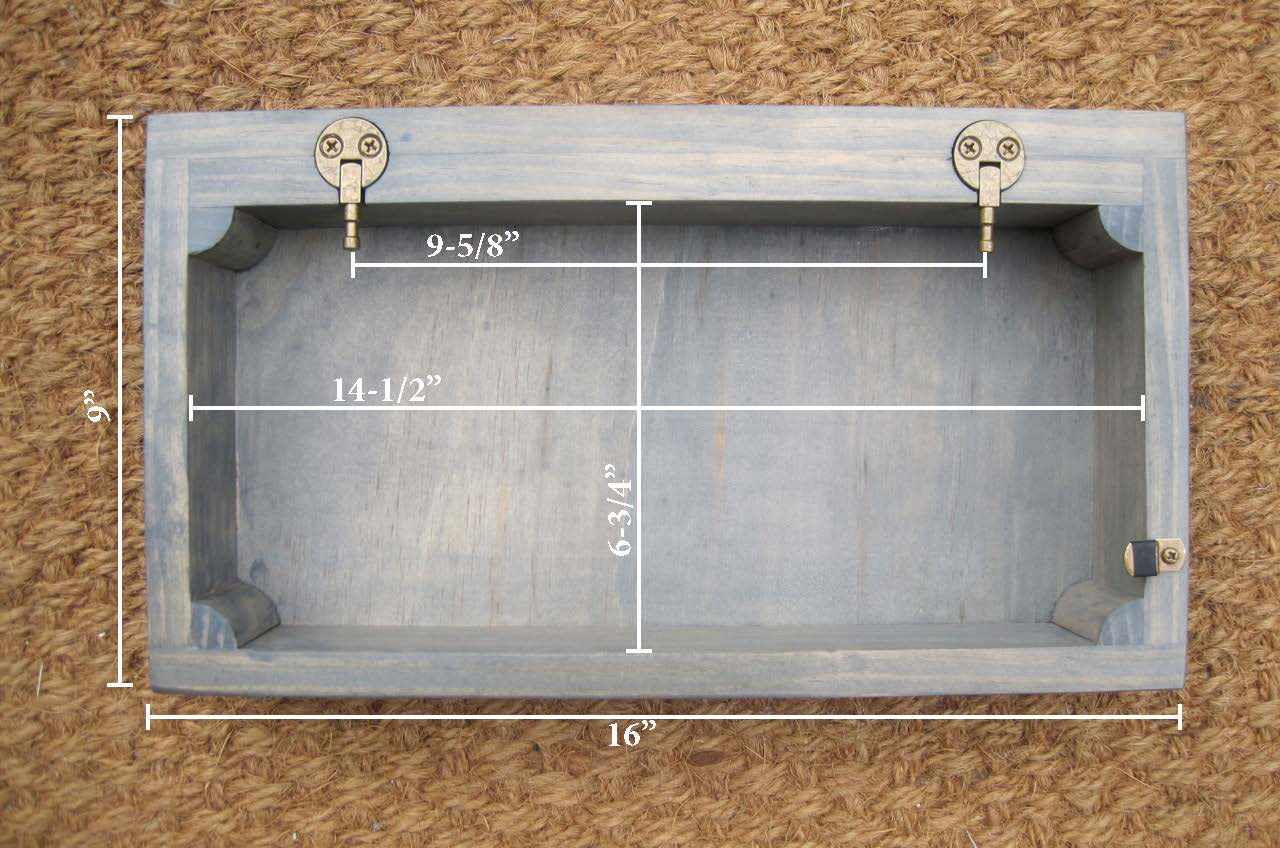
Measurements for the smaller base.
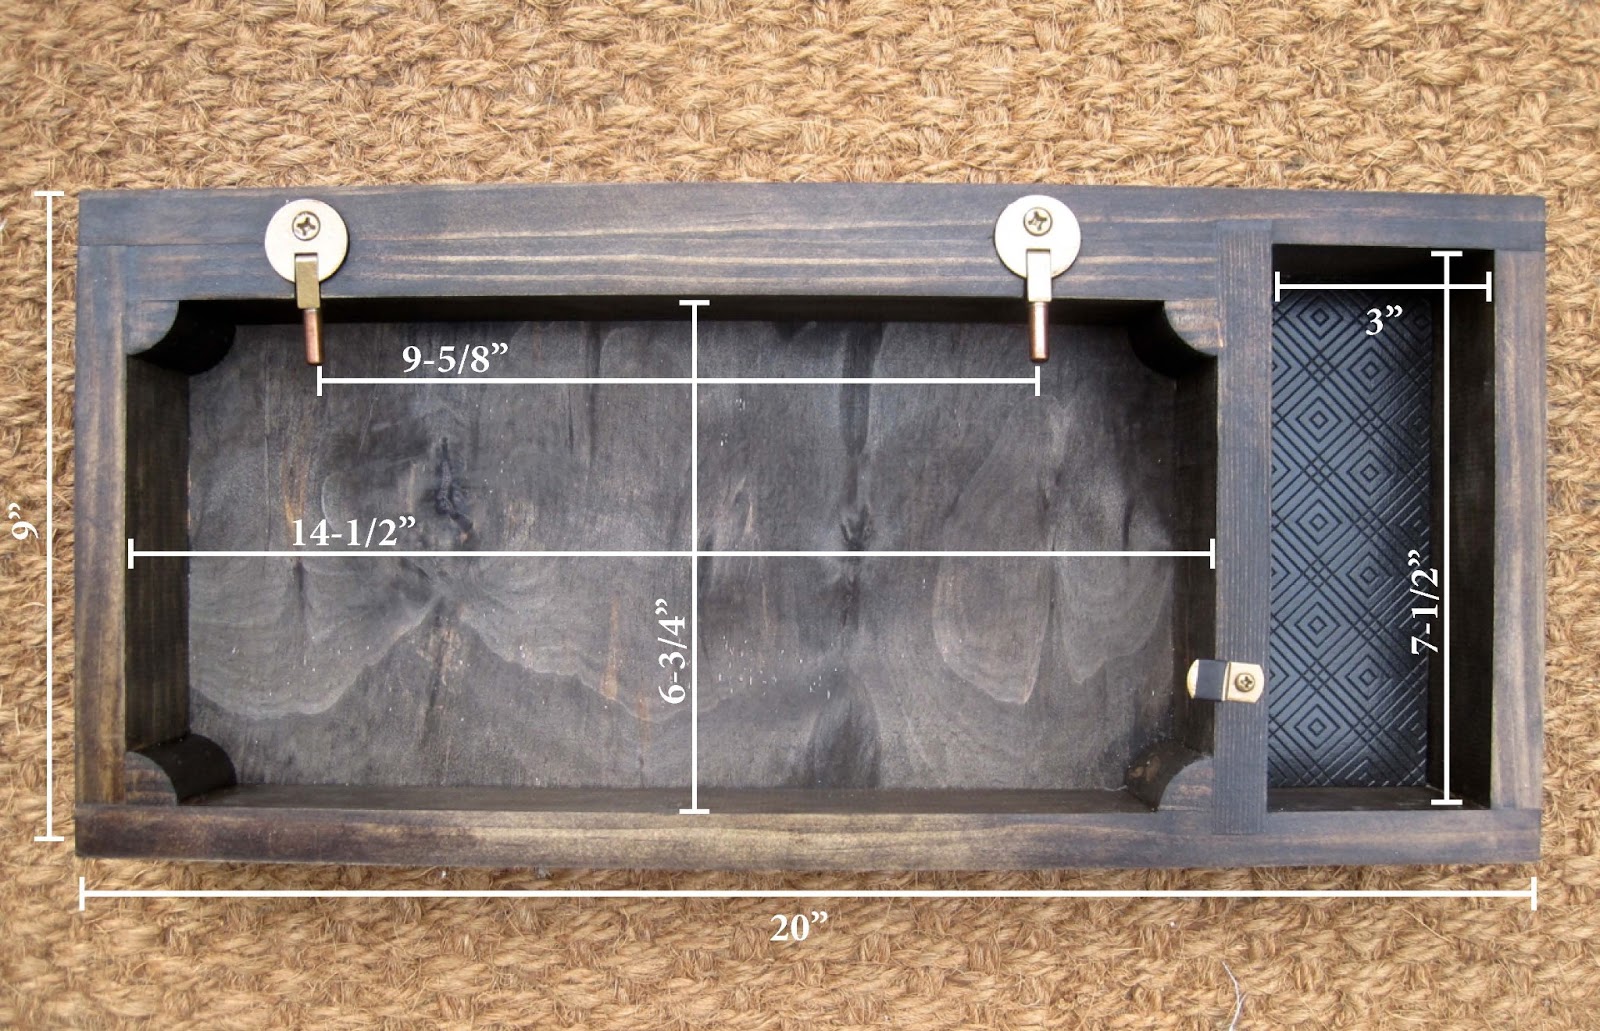
Measurements for the larger base.

Love how it looks!

Your machine should have screws that tighten to hold onto the hinges.

The cubby hole is great for keeping attachments close or you can put your pedal in for storage.

The machine flips up easily on hinges for cleaning. The base also dampens the sound of the gears when the machine is running. I hope this post comes useful to someone out there looking to make their own sewing machine base.
UPDATE 11/2013: I just made a bunch of bases but instead of using old cabinet hinges for the back I just used 2 of the metal clips to hold the machine to the base. When you do it this way you don’t need to add the board on the back of the base for the extra width to accommodate the large hinges. I also did full dovetail joints instead of screwing the pieces together which gives them a great look and it’s a true sign of durable craftsmanship!


44 Comments
That looks sooo nice! You are so ambitious, unbelievable!
March 23, 2013 at 11:25 amDani, you are my hero! This is exactly what I need!
July 1, 2013 at 7:03 pmRonnie, if you're interested I have 2 of the larger brown bases and I grey smaller (without the cubby on the side) if you wanted to buy one. The bigger one is $50 and the smaller is $40 (plus shipping). If you'd like to see pictures or get more info e-mail me at danicarby@gmail.com. Thanks!
July 2, 2013 at 8:26 amThis is wonderful! I have a Singer 99K (a 3/4 size machine) that is in a cabinet and I would love to get it out and into a base like this. Would the bases you have fit a 99K, do you know?
July 3, 2013 at 8:52 amHi Alexis! I've updated the post with some pictures of measurements for the 2 bases. I'm pretty sure your machine would be too small to fit in these bases. If you take measurements of the base of your machine, how deep you need your base and the distance between the holes in the back of the machine for the hinges (this measurement needs to be EXACT) then you can easily design a base off of those measurements.
July 3, 2013 at 10:33 amyou did a beautiful job on your bases. I've attempted to build a couple as well from this site:
http://www.treadleon.net/woodshop/buildingbases/buildingbases.html
Their recommendation is to have the posts slightly shorter than the box sides which allows the machine to sink into the box. Just high enough that the bobbin plate still slides off. That worked really well.
I had a lot of trouble trimming that post opening. It was a mess. I'm going to have to try your method. And I love the mirror hinge method you used.
August 21, 2013 at 12:32 pmThis will definitely be 'pinned' for future reference! 😀
I have eight Singers that need bases so I can display them together. Thanks so much for this tutorial.
August 25, 2013 at 8:36 pmthese are wonderful – thanks for your great tutorial !!!
September 19, 2013 at 8:31 amYes! I knew it could be done! Every machine that I've purchased online with a case has had significant damage done to the case, and I may or may not be able to repair at least a couple of them. Plus several came without bases, and I have a 15-90 and a 500 Rocketeer on the way with no bases. I've been looking on evilBay and Etsy for just cases and they are way too overpriced and usually look pretty shabby. Plus who needs a cover if you want to be able to look at them as well as use them? I don't currently have access to the tools for dovetailed joints, but that's fine, the screwed versions are beautiful! And I'm really liking that option of just using the mirror clips without the hinges, I will try that way first. Thank you so much for this post! (And thanks Ramona for the link to the TreadleOn bases, too.)
October 27, 2013 at 12:39 pmCarolyn.. did you end up making bases for your machines? If so, how did they turn out?
December 20, 2013 at 10:14 amDid you end up making any bases for your machines? I'm interested to hear how they turned out!
December 20, 2013 at 10:15 amDo you have any left? I have a 66 with no base.
April 6, 2014 at 5:46 pmI'm sorry but I don't have any right now
April 9, 2014 at 7:16 amA wonderful idea. I have my grandmother's old sewing machine table and would like to take the machine out for display only.
April 20, 2014 at 4:21 amwhere can I purchase the hinges for a singer 15-90 so I can make a box like this ? are all singer hinges that look like that the same size ? thanks
May 1, 2014 at 2:24 pmI've bought a few pairs off eBay.. Just search for "Singer sewing hinges". For the most part they're all the same and should fit.
May 2, 2014 at 11:40 pmThese look Great!!!
November 11, 2014 at 2:58 pmwhat is the height of the base? I did not see it listed.
November 24, 2014 at 10:42 amThanks
Hi there! It's about 2-11/16" high. If you consider your wood for the sides is 2-1/2" plus whatever the thickness of wood you use for the bottom. I used a base that is about 4-5mm.
Here's a more detailed tutorial I put together: http://theprojectlady.blogspot.com/2014/01/singer-sewing-machine-wood-base.html
November 24, 2014 at 10:44 amFor a base for a 99K the 14 1/2' dimension would need to be shortened to 12" . Measure your machine to be sure, there may be very slight variation from one casting to another. I am looking for a 99K cabinet but hard to find for the 3/4 machine. By the way the 3/4 machines are the 99 series, 28, 128 and 185. Thank you for your excellent base directions.
January 27, 2015 at 12:26 pmDani, I just got a Singer 66 Vintage Machine as a gift. It is currently stacked on wooden blocks as I have contemplated how to make a base for it, which by the way, seemed far too difficult for me to do myself. I was nervous about if it would fit properly and allow everything to move freely as the gearing is exposed beneath. After seeing this wonderful tutorial I feel like I could actually DO this! It was so kind of you to share your talents and information with all of us . . . . Can't thank you enough! Swing those tools girlfriend! GIRL POWER!!!!
March 18, 2015 at 2:05 pmThank you SO MUCH for the fantastic tutorial!!! I just got a Singer 66 Model as a gift and it has no base. It is stacked on little wooden blocks that clearly isn't the best solution. I've pondered what dimensions to make a base for the 3 days it has "lived" here and was scared to take this one. NOT any more! LOL You have made this a project I think I can tackle, Dani! MANY, many thanks for sharing your wonderful project with us. I can't wait to start! Roxanne
March 18, 2015 at 2:05 pmHi, do you have your instructions in PDF format? I have numerous vintage machines (301, 201, 15-91) that I want to take out of the cabinets and use on a table top, but I would need something like this to put them in I think. Your tutorial looks fantastic and I would like to see if my husband can assist me in building them (I am not a wood working girl). THanks!
July 28, 2015 at 8:52 amHi! I don't have them in PDF format but you could copy/paste the post into Word to print.
July 28, 2015 at 8:53 amDo you sell them?
December 12, 2015 at 4:44 pmI have some for sale on eBay! My seller name is Dan1carby
December 12, 2015 at 4:45 pmStone smooth – Well done!
December 19, 2015 at 12:46 amI like the variety with the hinges because you can tilt the machine back. Do you find it to be just as easy with the other system?
December 25, 2015 at 1:40 pmWhere you used the router – I found this great video on making dovetail joints with only a router
December 25, 2015 at 1:40 pmyou may be interested – great box – I will make one https://www.youtube.com/watch?v=mMDNgFqyBLo
Do you still have any of these that would fit a 66-19 for sale?
April 6, 2016 at 6:53 pmI'm also wondering if you have a box that would fit my 15K from 1907? I love the black finish…
September 22, 2016 at 10:00 amHi! I'm sorry but I don't have any more for sale and don't plan on making more – my kids and other projects have me busy. Sorry!
September 22, 2016 at 10:04 amHi there! I'm sorry but I don't have any for sale. If you measure the dimensions of the bed of your machine you may be able to hire someone local to craft something for you. It's fairly easy! If you don't have hinges you can find some on eBay!
September 22, 2016 at 10:05 amAre you "down under" as in Australia? If so, wouldn't shipping be exorbitant? Just basing that on comments made on a wood forum from a fellow in Japan. If the dimensions shown in the above are the same as yours it is possible I could make one, I'll have a better idea by next weekend if this design is ok.
October 2, 2016 at 7:53 amMy wife has two Singers without bases and she has been asking me to make something for them to make them look more presentable. You are a blessing. Very well explained and nicely done. Not sure if the one I'll make will be as nice but we'll see. You are awesome.
She's a quilter and we will be looking at your fabric organizer project.
Thank you. I've book marked this so we can see other things you've done.
November 19, 2016 at 4:55 pmThank you for your nice message! I'm glad my posts have come in help and I'm so happy to hear you're going to subscribe! Feel free to ask any questions!
November 19, 2016 at 5:49 pmThis is just what I need for the Pfaff 130 I just bought. Thank you for posting.
John/Seattle
March 26, 2017 at 5:45 pmIt makes such a difference to have a nice wood base! Good luck!
March 26, 2017 at 5:47 pmBeautiful cases Dani. Do you have any for sale?
July 25, 2017 at 10:03 amI actually have some in my shop right now waiting to be listed! Can you email me and I'll get back to you in a few days when we're back home? Twirlybirdbaby@gmail.com
July 25, 2017 at 10:05 amI'd love a base for my singer 401a. My email is mattgarretson@icloud.com
October 10, 2017 at 6:29 pmI just sent you an e-mail!
October 10, 2017 at 6:30 pmNice work! Can I ask why you didn't set the hinges all the way flush with the wood, rather than having them stand proud a bit? You must have had a good reason!
December 14, 2017 at 8:54 amBefore putting the hinges on I set the machine onto the base and saw that they holes on the machine for the hinges were slightly above the surface of the wood. If the wood corner pieces were a little bit shorter then the hinges could be set flush with the surface.
December 14, 2017 at 8:56 am