

This post is part of a series of posts for building a table out of raw lumber. See my original post that introduces the table and all posts for the series – How to Build a Farmhouse Table (Harp Design copycat).
In this post I will be showing how I glued-up oak posts for turning into legs on my lathe.
For this project you will need:
–leg template (download and print)
-lathe capable of turning blanks 3-1/2″ x 29-1/2″ long (you can also hire someone local or buy legs from Harp Designs directly)
-turning tools: roughing gouge, 3/8″ spindle gouge, skew and round nose scraper (opt)
-caliper
-jointer
-thickness planer
-table saw
-miter saw
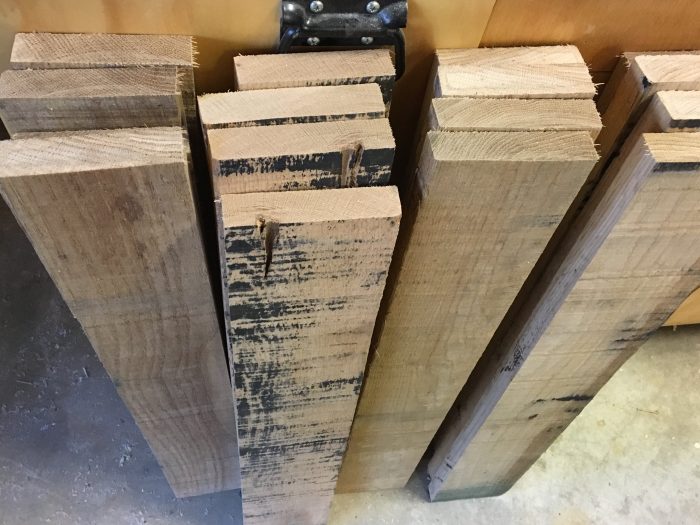 Rough cut your lumber to at least 4″ x 30″. You’ll need 4 stacks of boards that will be at least 4″ high (you’ll be removing wood with the planer in the next steps to get your final 3-1/2″ thickness).
 Run one side of all boards through the jointer to flatten for running through the planer. Plane your boards just until each side is flat.
 Ensure each stack of boards is at least 3-1/2″ tall before proceeding (or you’ll need to add more thickness). My boards were different thicknesses so I mixed & matched until they worked and stacked them up how I’d glue them up (prettiest boards on the outside and imperfections on the inside where they’d be hidden).
 Brush a nice layer of glue between your boards…
 …and clamp together. I clamped 2 sets of legs up at a time with a paper bag underneath to catch the drips.
 I left them to dry for a day and scrapped the glue from the bottom sides then sent that side through the jointer to make sure it was square and flat. I ripped the opposite side off with the table saw to be just over 3-1/2″ wide.
 Send your boards through the planer to finalize to a 3-1/2 x 3-1/2″ blank.
 Square each end off to a final length of 29-1/2″.
 Ready for turning!
 Find the center of each end and create an indent.
CREATE A STORY STICK FOR TURNING
 A story stick is a template that helps you transfer important marking onto your wood for shaping – especially if you want to make several of the same leg. You can use any piece of board that is long enough to cover all the details of the leg – I prefer 1/4″ material. Cut out the template for the leg (link is included above) with ‘no page scaling’. Fold template in-half down the center and place on the edge of your thin board. I like to do this so I can trace my template onto my story stick with a black marker and know what the lines are telling me to do.
 Once traced, take a square on the flat edge of your board and mark a line upwards where each valley & peak is on your template. On the edge of your lines you’re going to cut into it with a hacksaw or bandsaw just a bit to create a groove for your pencil to sit for transferring the lines to your blank (your pencil will want to drift otherwise).
Mark along all 4 sides of your blanks where the square top of your pattern begins to make sure you don’t cut above that. Put your blank between centers and use a roughing gouge to get your blank round.
 I cut the template so it would fit within the rounded section of my blank. With the lathe running, the template steady against my tool rest and the end even with the bottom of my blank I set my pencil on each groove of the template to transfer to my blank. Keep watching and adjusting for template to stay even with the bottom of your blank.
 Use whatever tools you prefer for shaping your leg. If you break it down, all you have to do is shape between each section of lines and move onto the next. Use your calipers against your printed template to ensure you are getting the shape of your blank the correct thickness.
 Ta-da!
Sharpen your tools as much as you need to keep your cuts clean and easy. If you are forcing your tool for it to cut, it’s too dull.
– Stay tuned for the next post where I’ll share how to attach hanger bolts to the legs (allowing them to be removable) –
2 Comments
Hi Dani! These legs look great! I am hoping to make some similar ones. The link for the leg template is broken. Can you send me the file? Thanks!
April 8, 2021 at 3:58 pmHi George!
I’ll update the link to hopefully get the download working – I’ll send the file to your email as well 🙂
April 8, 2021 at 5:45 pm