My dad built our house when I was young and I was fascinated with every step. The pouring of the foundation, the framing, the dry wall, laying the brick, laying the tile, painting, the cabinets, painting the doors, etc. I could sit and watch all day. In High School I took a woodworking class where I learned all about the different wood cutting tools and was able to build my own cedar chest. I was in love with building and how you could create something from scratch. It’s hard to imagine a couple of boards at the hardware store can be turned into something so useful and cute in less than a day!
I’ve been obsessing over Ana White’s website where she posts building plans for all sorts of household furniture. (When we get our own house I plan on building most of our furniture.. hopefully my husband is cool with that!) I also ran into another website, Shanty2Chic, and she is totally my style. I love her decor and she has great project ideas and building plans as well.
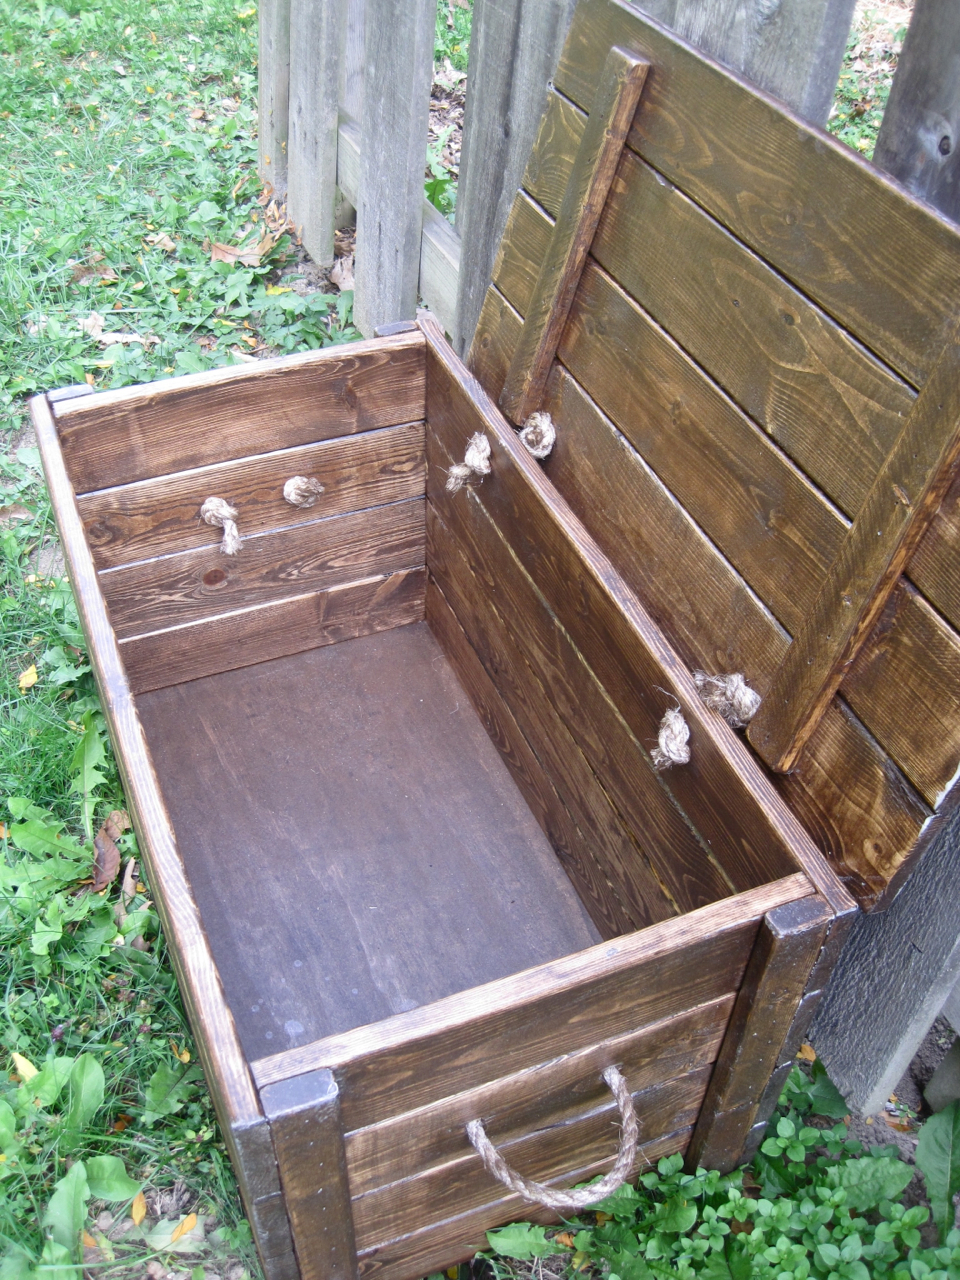
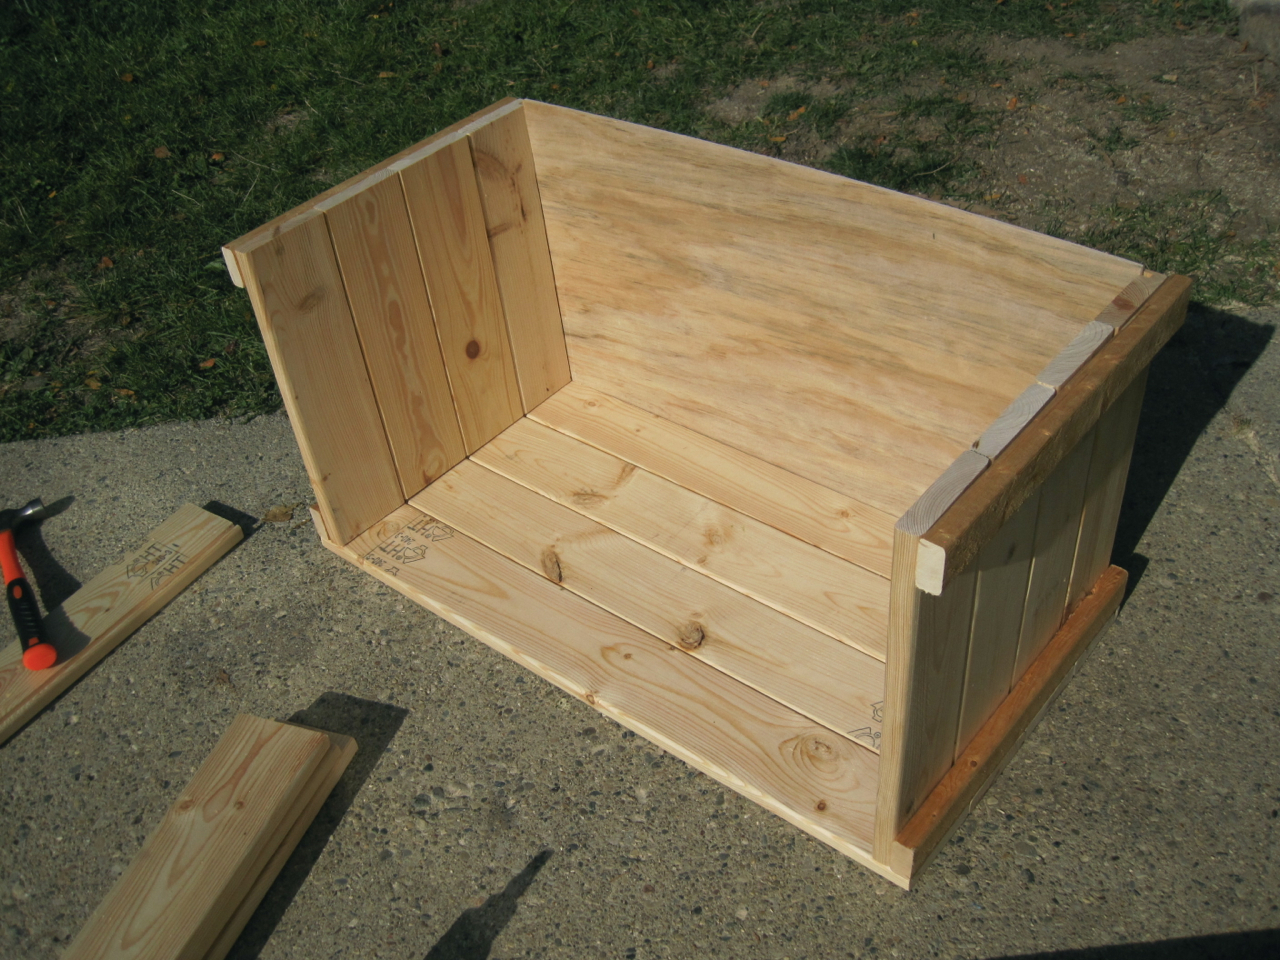
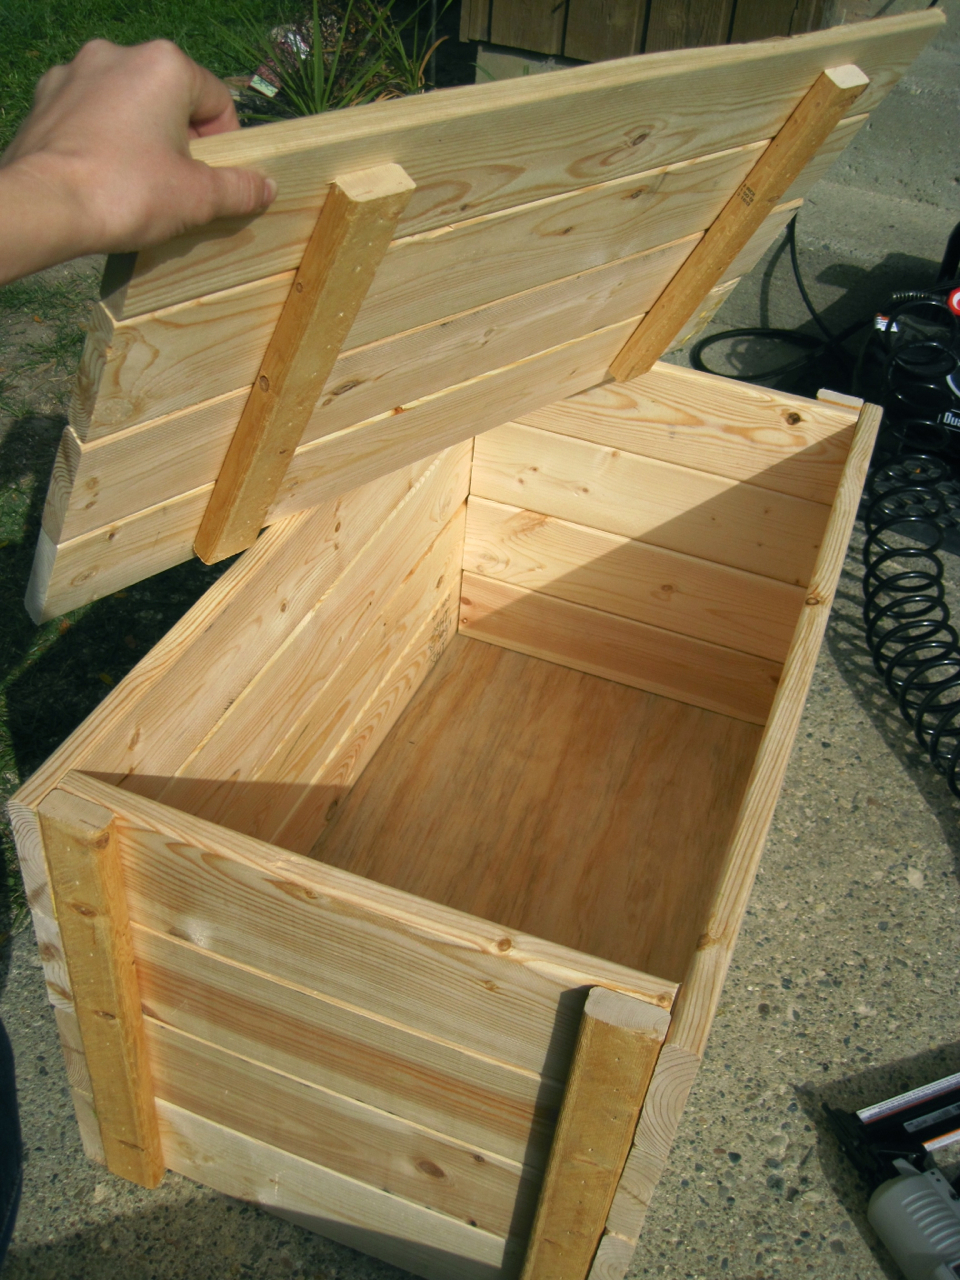
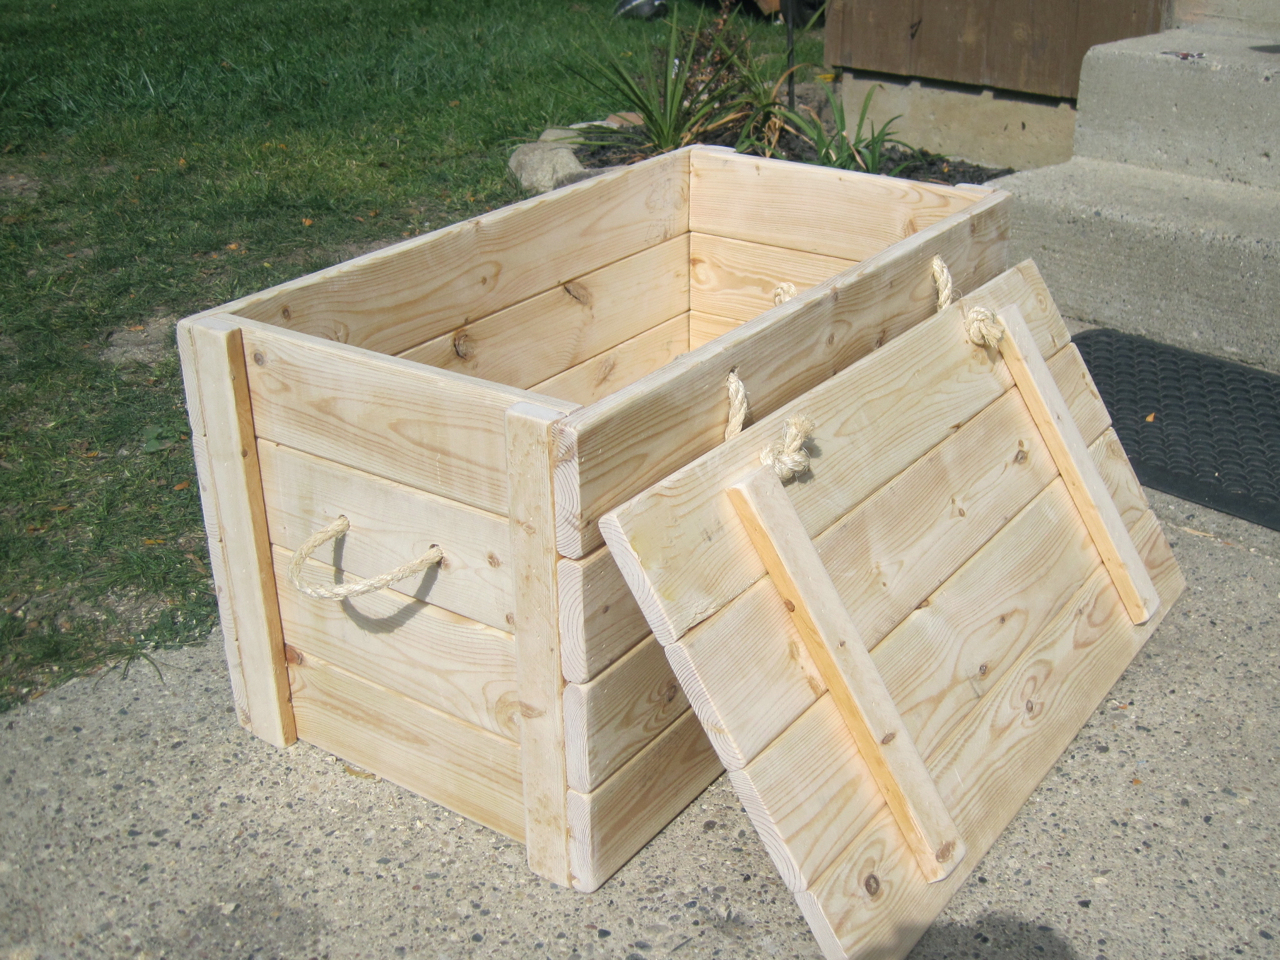
I saw a few ideas online for making a wooden crate. They weren’t exactly what I wanted so I came up with my own ‘wooden storage chest’ (can also be used as a bench). It has a lid with rope hinges and rope handles. It turned out better than I could have imagined and I’m so excited about it. I wanted to share my own building plans with you! It took me about 4 hours from start to finish.


WOOD STORAGE CHEST BUILDING PLAN
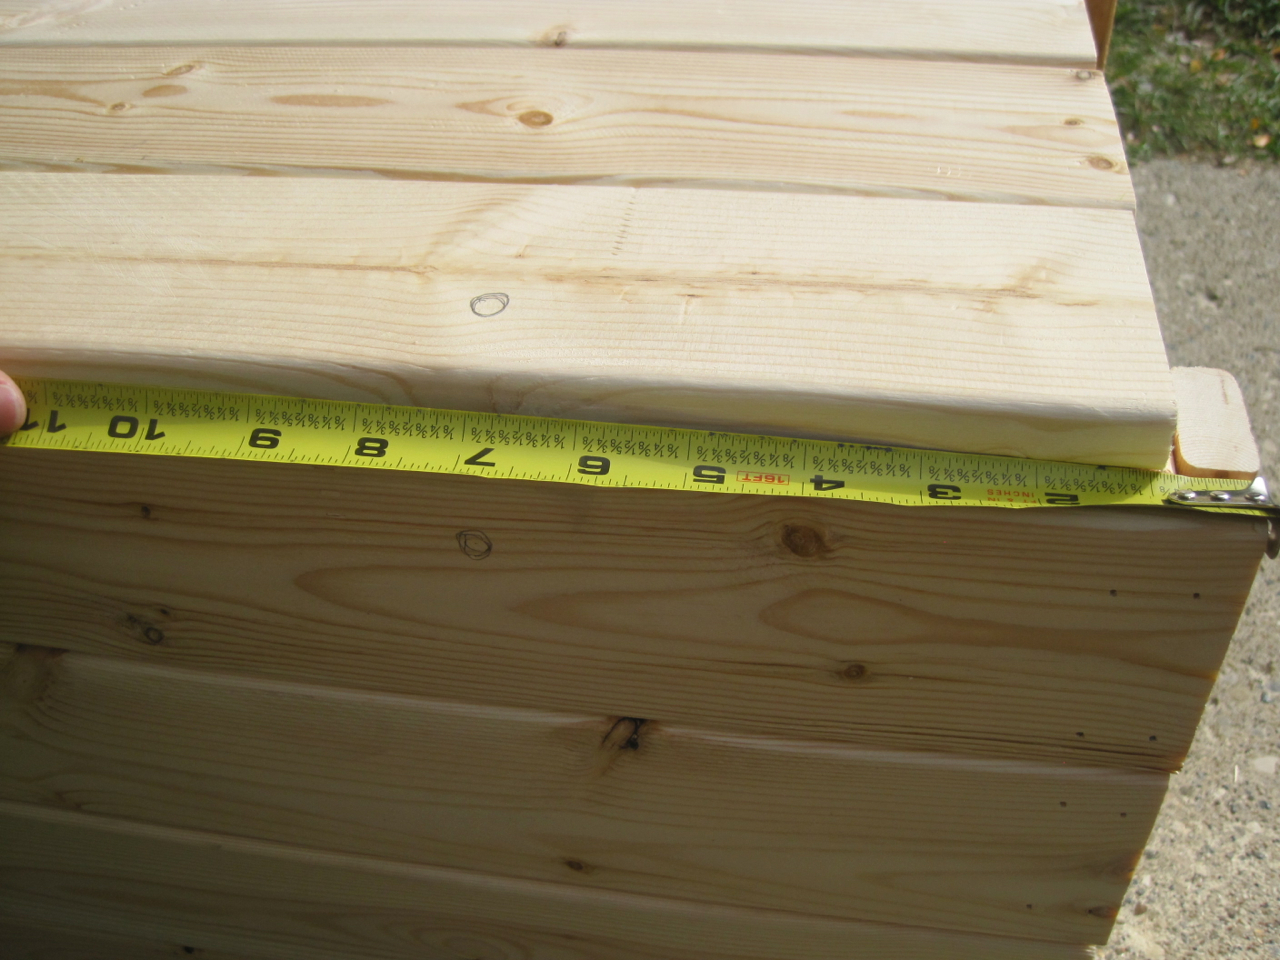
Dimensions: 27″ long by 14″ tall by 14.5″ deep
Materials and Tools Shopping List: ***PLEASE NOTE: If you aren’t familiar with buying lumber, the said dimensions of a board are actually different than the real measurements. If you buy a common 2×4, the actual dimensions are 1-1/2″ x 3-1/2″. It’s weird, I know! When I say 1×4 furring strip, the actual measurement is 3/4″ x 3-1/2″. A 1×2 furring strip is actually 3/4″ x 1-1/2″. The said length is always the actual measurement, so when you see 1x4x8′, the board at the store will measure 3/4″ x 3-1/2″ x 8′(feet)
5 – 1x4x8′*** furring strips
1 – 1x2x8′*** furring strip
1/4″ or 5mm utility plywood (at least 25″ x 13.5″)
8 feet twisted sisal rope (3/8″ diameter)
15/32″ drill bit
1/4″ straight or rabbeting router bit*
1 1/4″ brad nails (for nail gun) or finish nails (use hammer)
Wood Glue
Wood Stain
Tools:
Measuring Tape
Pencil
Safety Glasses
Hammer
Drill
Table or Miter Saw
Router*
Nail gun or Hammer
Sander
Brush for gluing
*if you don’t have a router, you can just nail the plywood to the bottom of your chest
Cut List: REMEMBEMBER: The said dimensions of a board are always smaller, but the said length is exact. So 1X4 @ 27″ is actually your 3/4″ x 3-1/2″ board and you cut it to 27″.
8 – 1×4 @ 27″
8 – 1×4 @ 13″
4 – 1×4 @ 25.5″
4 – 1×2 @ 14″
2 – 1×2 @ 12″
1 – 25″x13.5″ utility plywood
2 – 20″-long sisal rope
2 – 15″-long sisal rope
General Instructions:
I advise you to read through entire plan before beginning. Take precautions to build safely. Always use straight boards. Work on a flat-level surface. Use glue with finish nails for a strong hold. Wipe excess glue off bare wood for stained projects. Ask for help if you need it and have FUN!
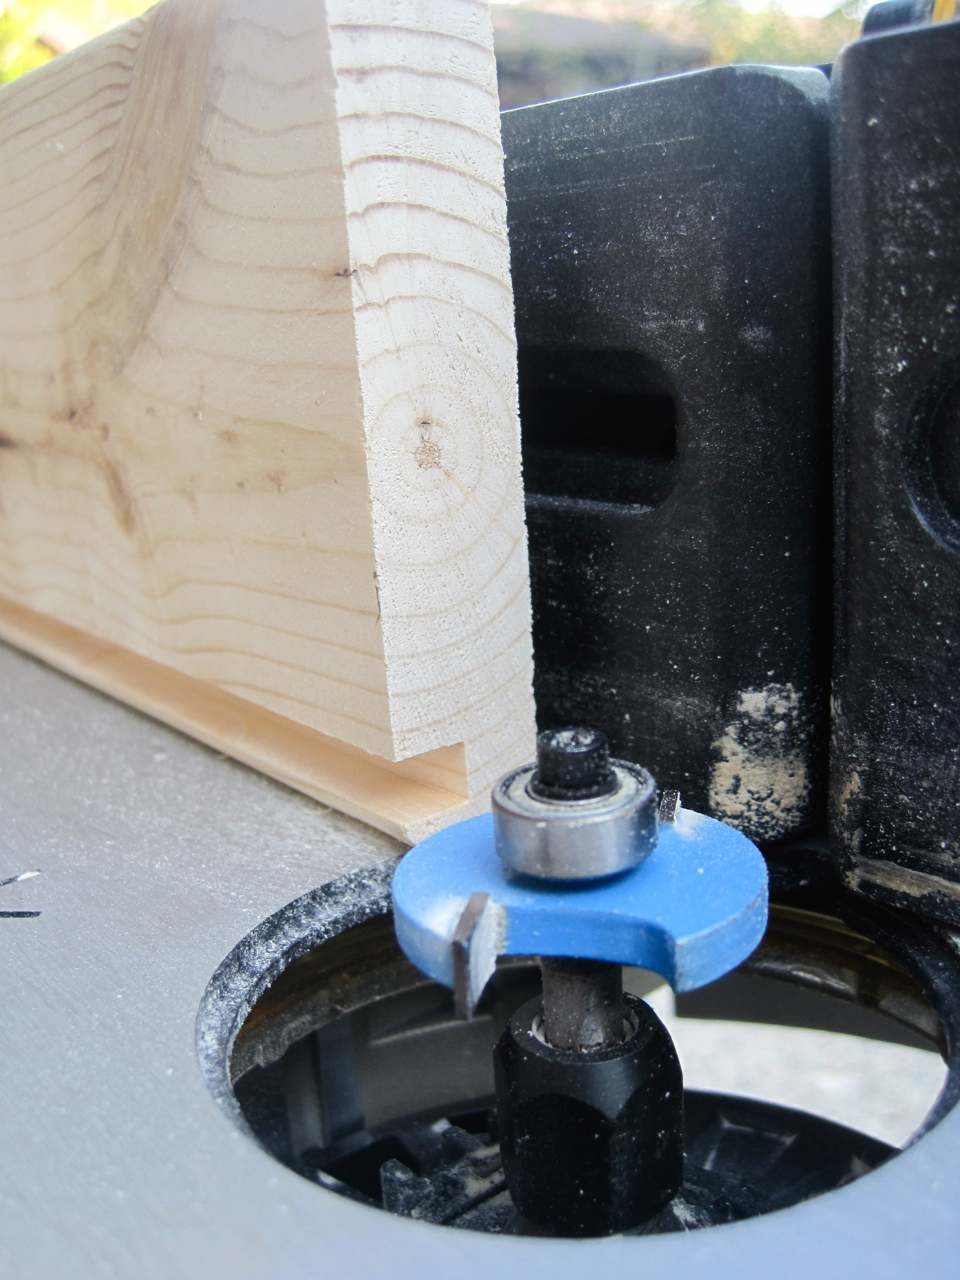
Step 1 – make a groove with your router and bit on the bottom edge of 2 of your 27″ (1×4) and 2 of your 13″ (1×4) boards. You’ll want the groove at least 1/4″ above the bottom edge and 1/4″ deep. This groove is for your panel board to slide into.
Before you start the building, test to make sure your panel board fits inside your routed boards.
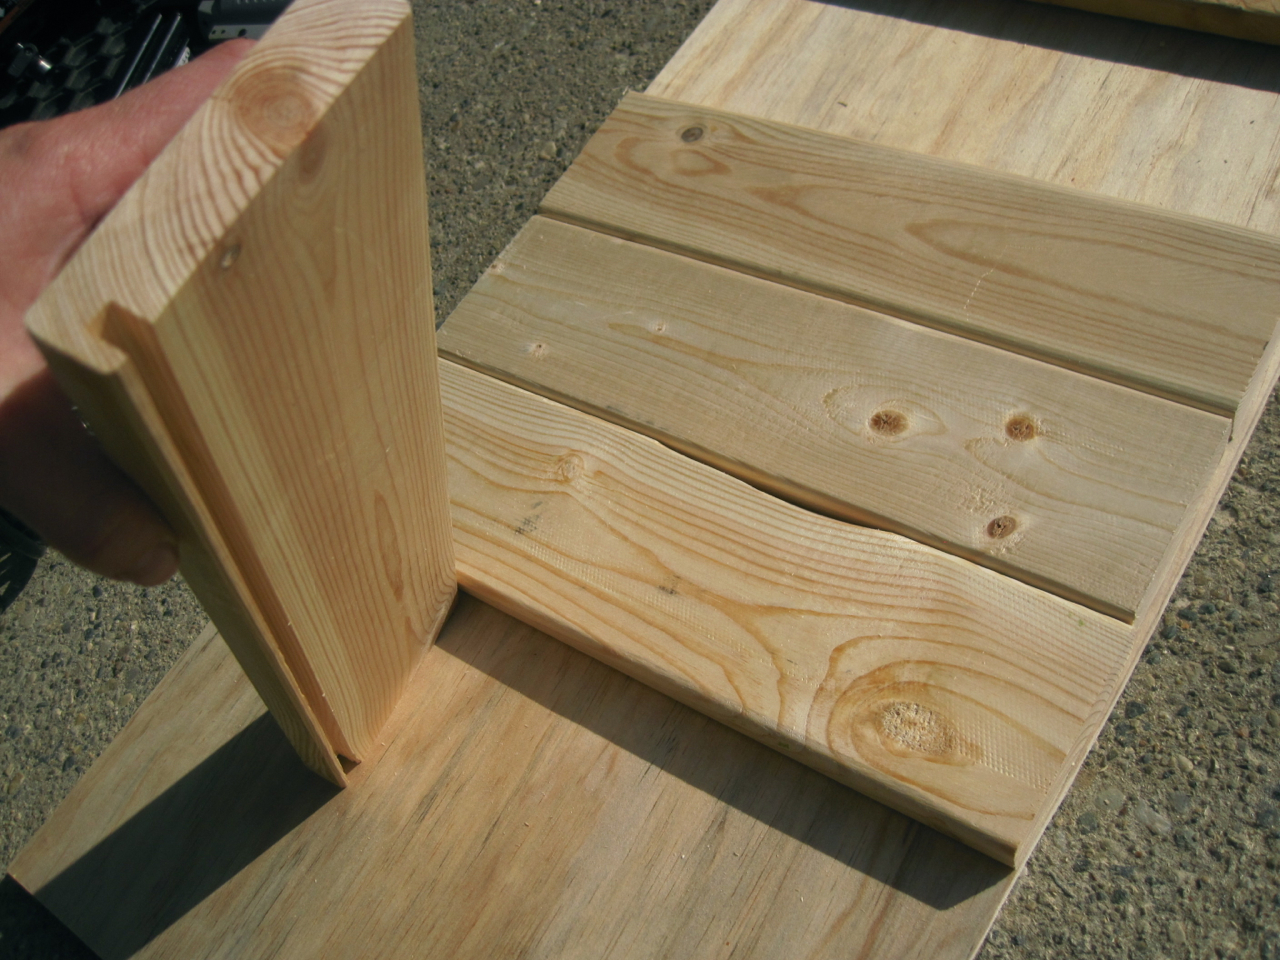
Step 2 – For each of your sides, lay out 4 of your 13″ (1×4) pieces, making sure one of your routed boards is on the bottom, with the groove on the bottom.
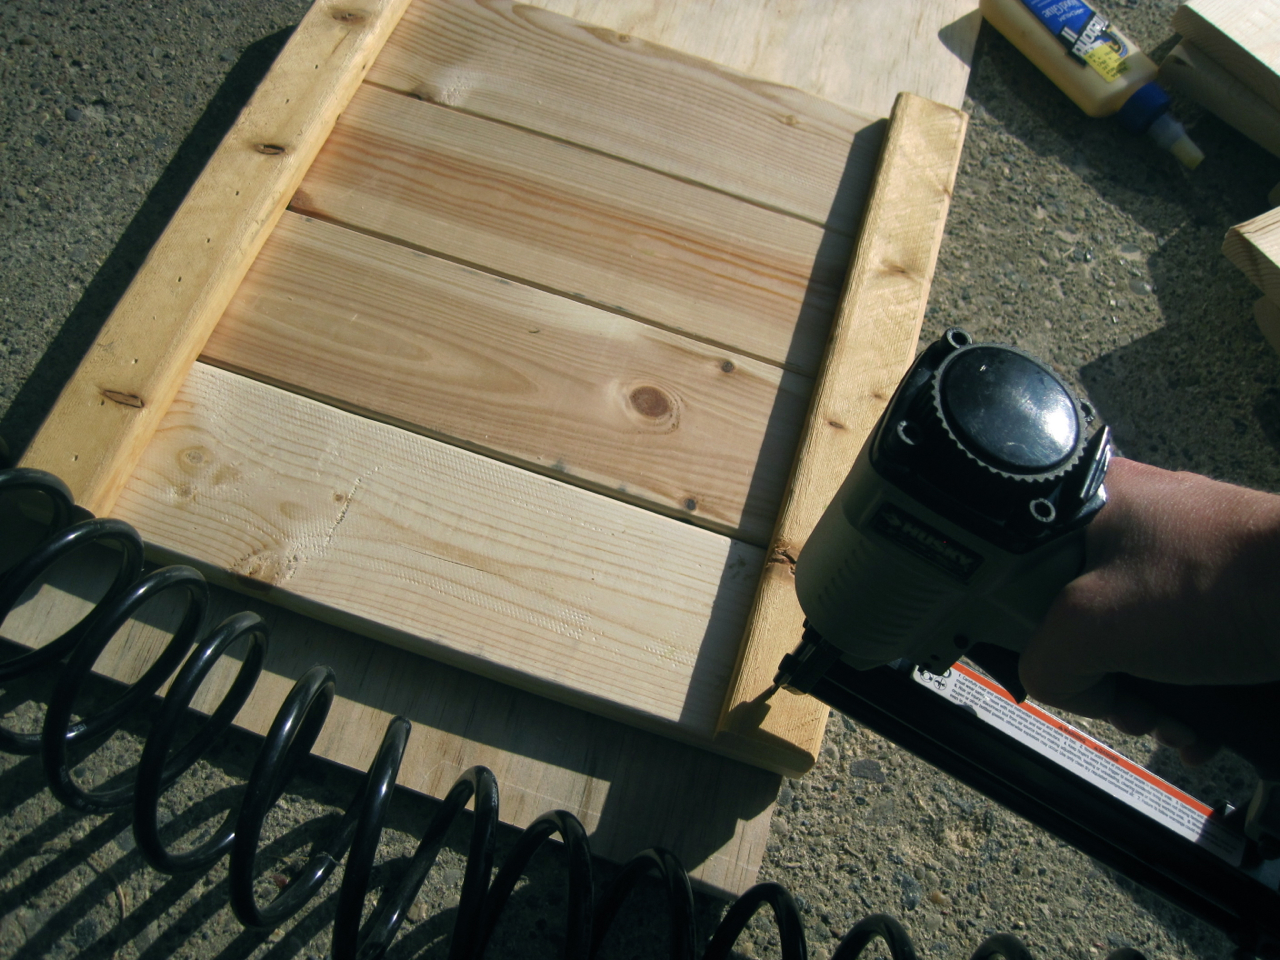
Glue a 14″ (1×2) and put on top of these boards on each side and use your nailer to put 3 brads in each board (or use your hammer and finish nails).
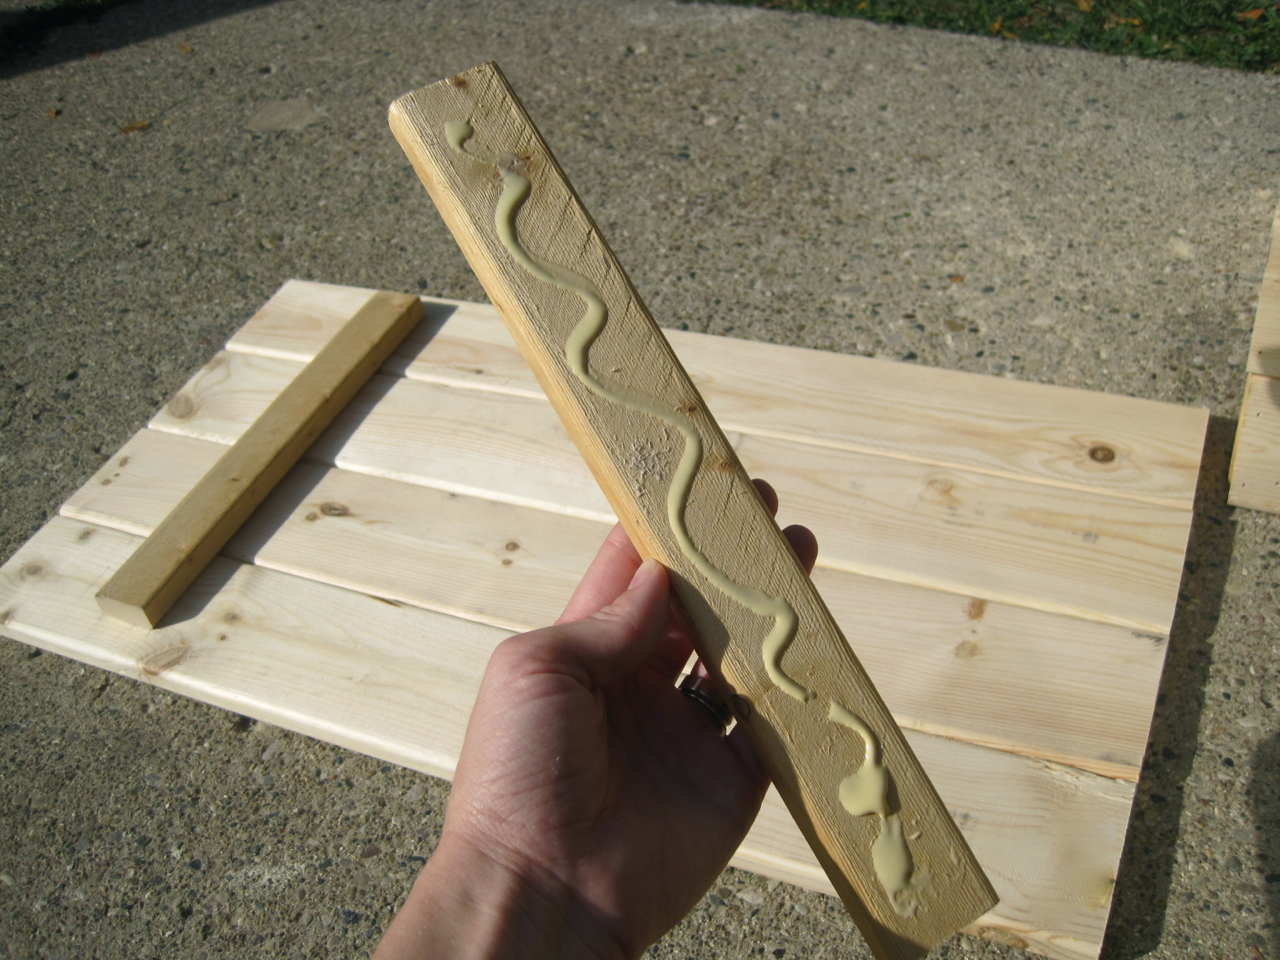
Step 3 – Align, glue* and nail your 27″ (1×4) board with the routed groove to the same end as the routed groove on your sides. I put 3 brads in each board.
*This picture shows a very bad example of how to glue – oops! You’ll want to use a brush to spread your glue over the ENTIRE areas on all boards you are gluing together. You’ll know you have enough glue when you can hardly see the wood underneath.
Align, glue and nail the other 3 – 27″ (1×4) boards.
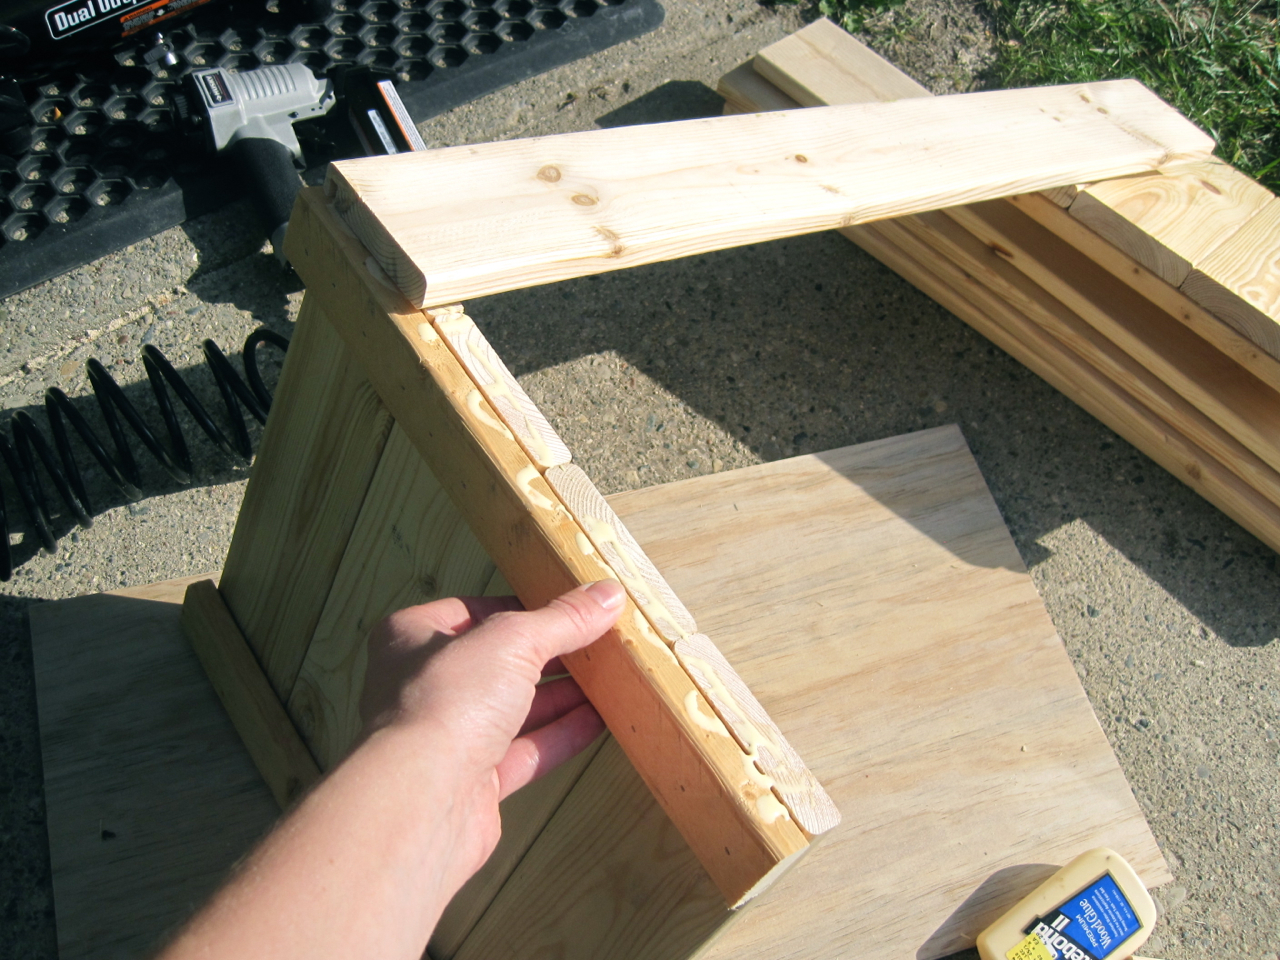
Step 4 – Turn your project over and slide your panel board into the grooves.

Step 5 – Align, glue* and nail your last routed 27″ (1×4) board to the end with your panel.
*Again, brush your glue on all areas of boards being glued together.

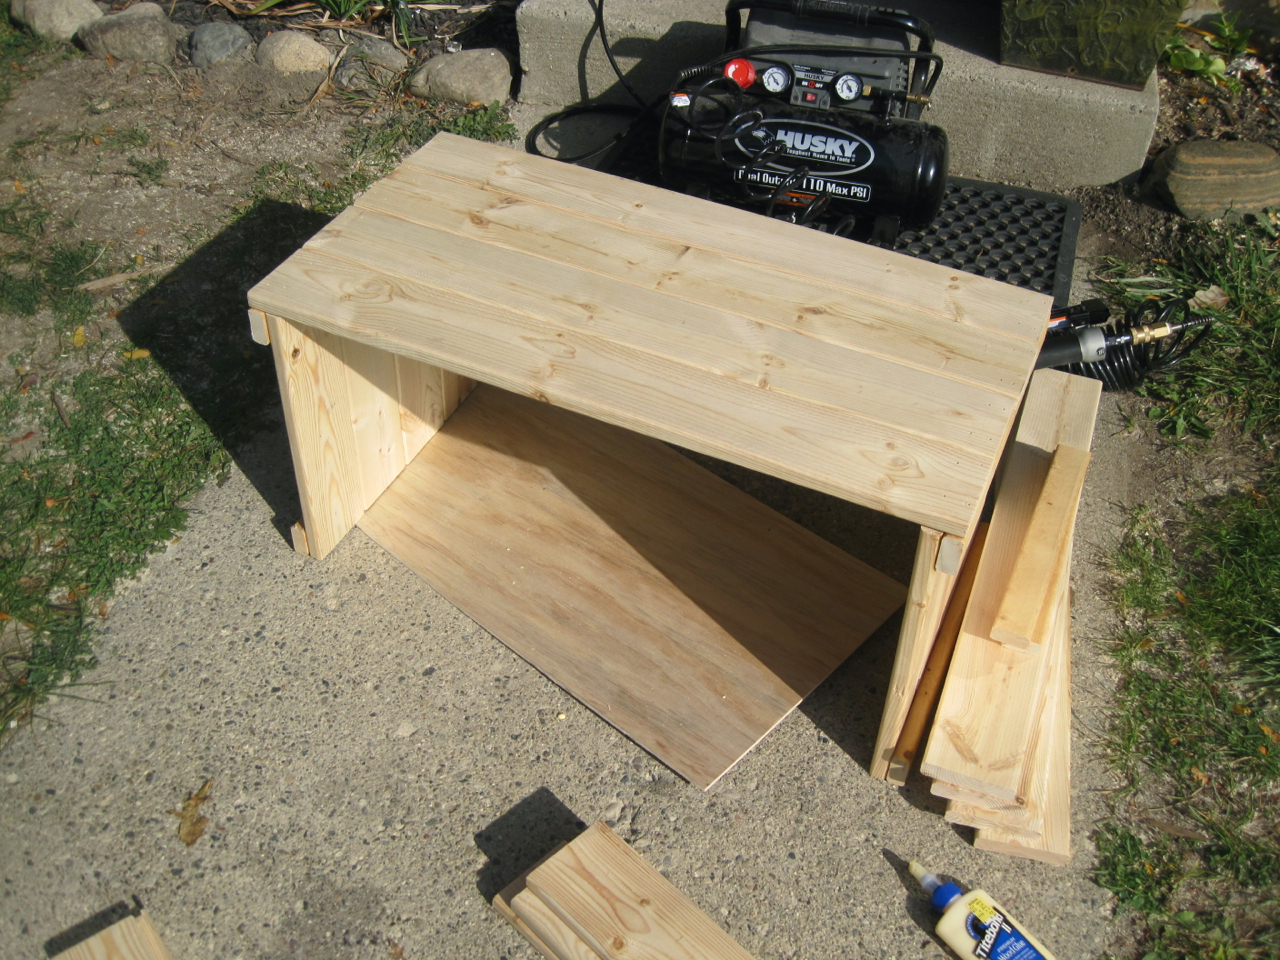
Align, glue* and nail your remaining 3 – 27″ (1×4) boards.
*Again, bad example of gluing – brush glue over all boards.
*Again, bad example of gluing – brush glue over all boards.
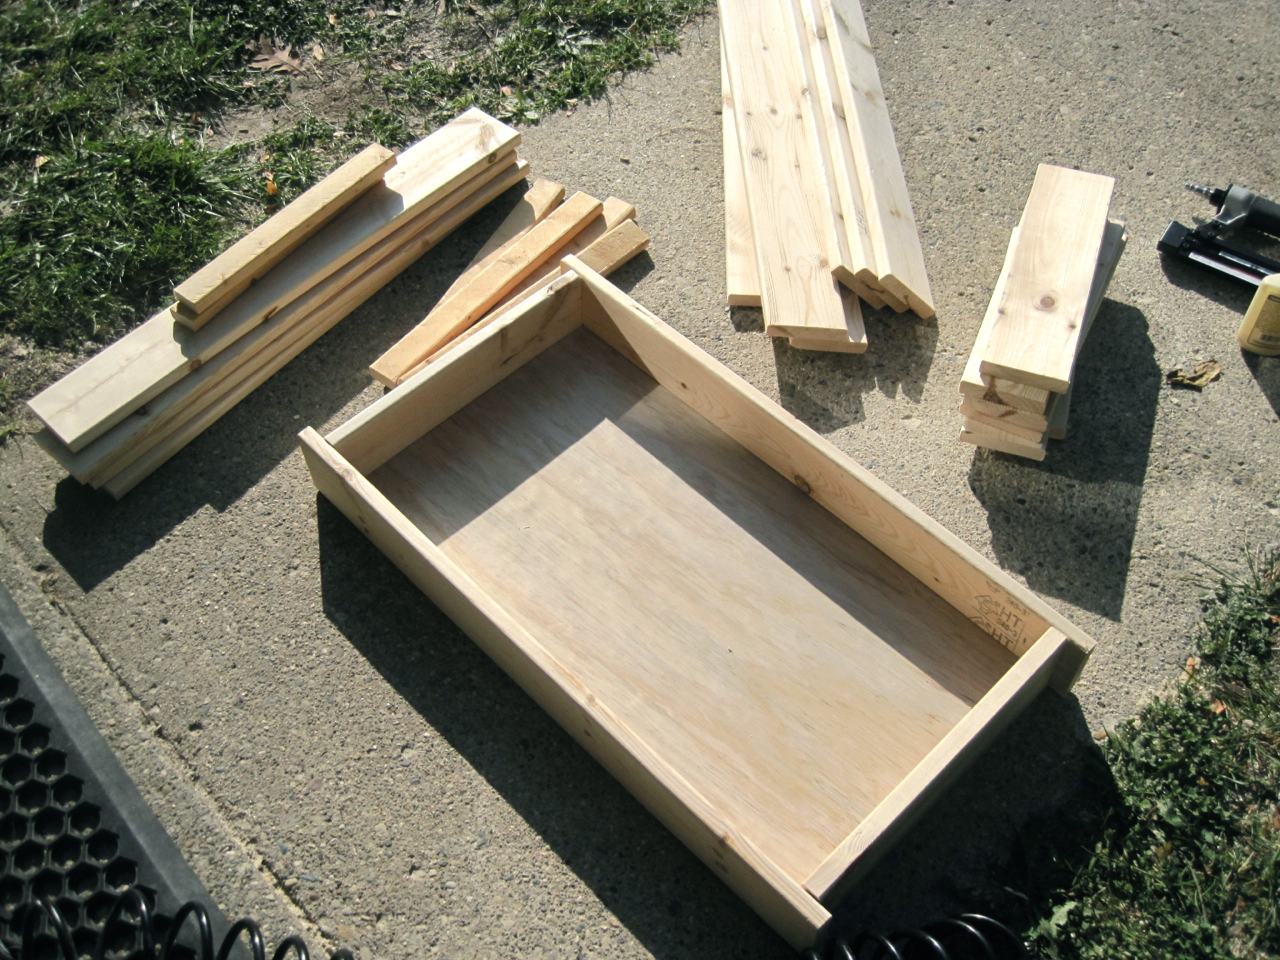
Step 6 – For the lid, lay out your 4 – 25.5″ (1×4) pieces and aline together. Glue* and nail your 12″ (1×2) pieces to these boards so they are 4″ from the ends.
*Brush glue to cover all areas being glued.


Step 7 – I wanted my chest to look worn and distressed so I found a few objects to hammer against my boards. I used a screw and some metal beads that I liked the best. It looks really cool once it is stained!
Step 8 – Decide what side you want to be your front for both the chest and lid.
For your rope hinges, measure on the back of your chest 7″ from each side and make a circle about 1″ down from the top. On the lid, measure 6 1/4″ from each side and make a circle about 1″ from the bottom.
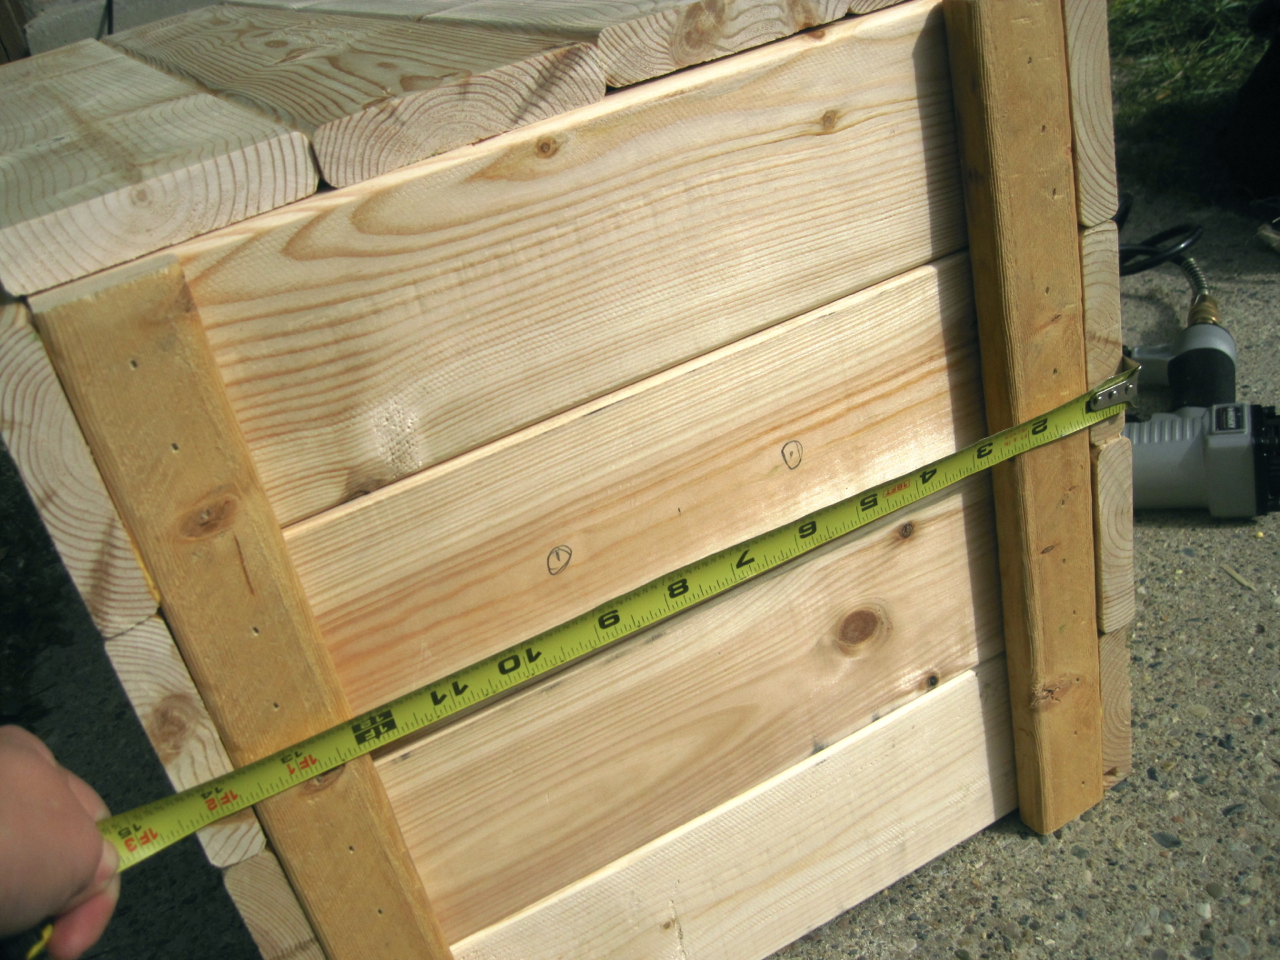
For your rope handles, measure across the 2nd board from the top. Your side should be 14.5″ across – mark a circle at 5 1/2″ and 9″.
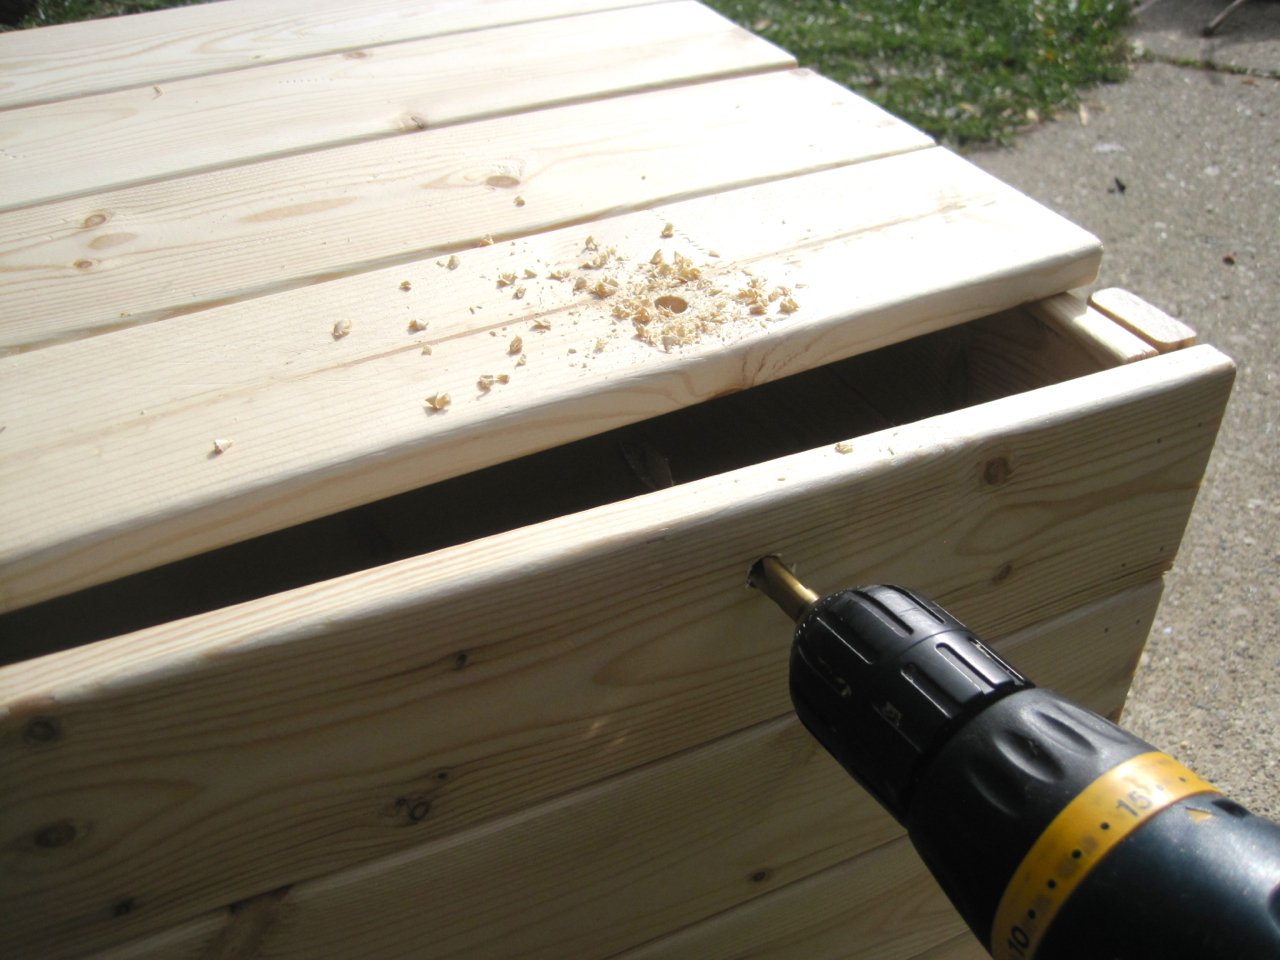
Use your drill and 15/32 drill bit to drill each hole. You may want to drill a smaller pilot hole to make drilling your large holes easier.
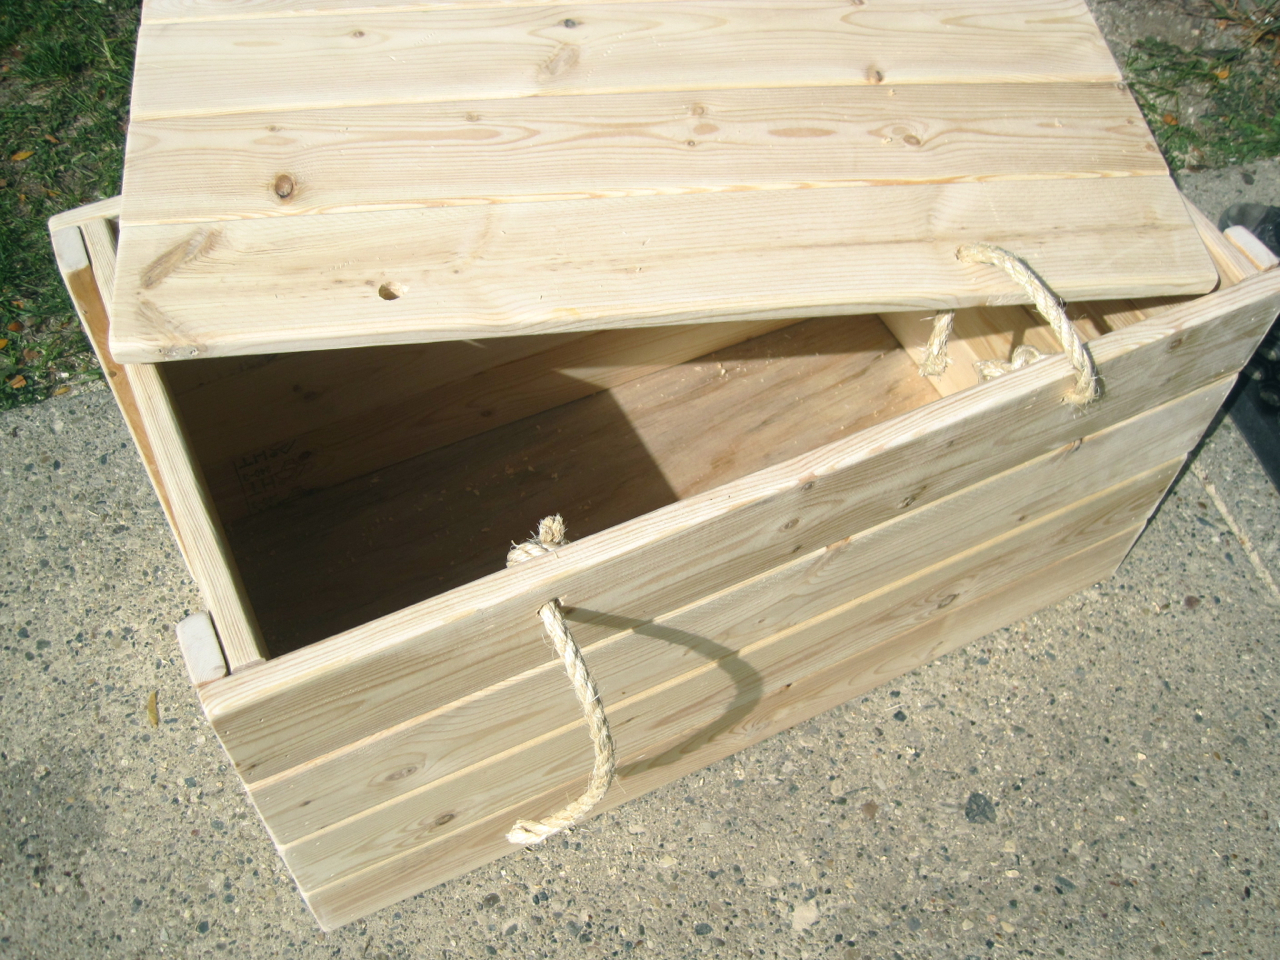
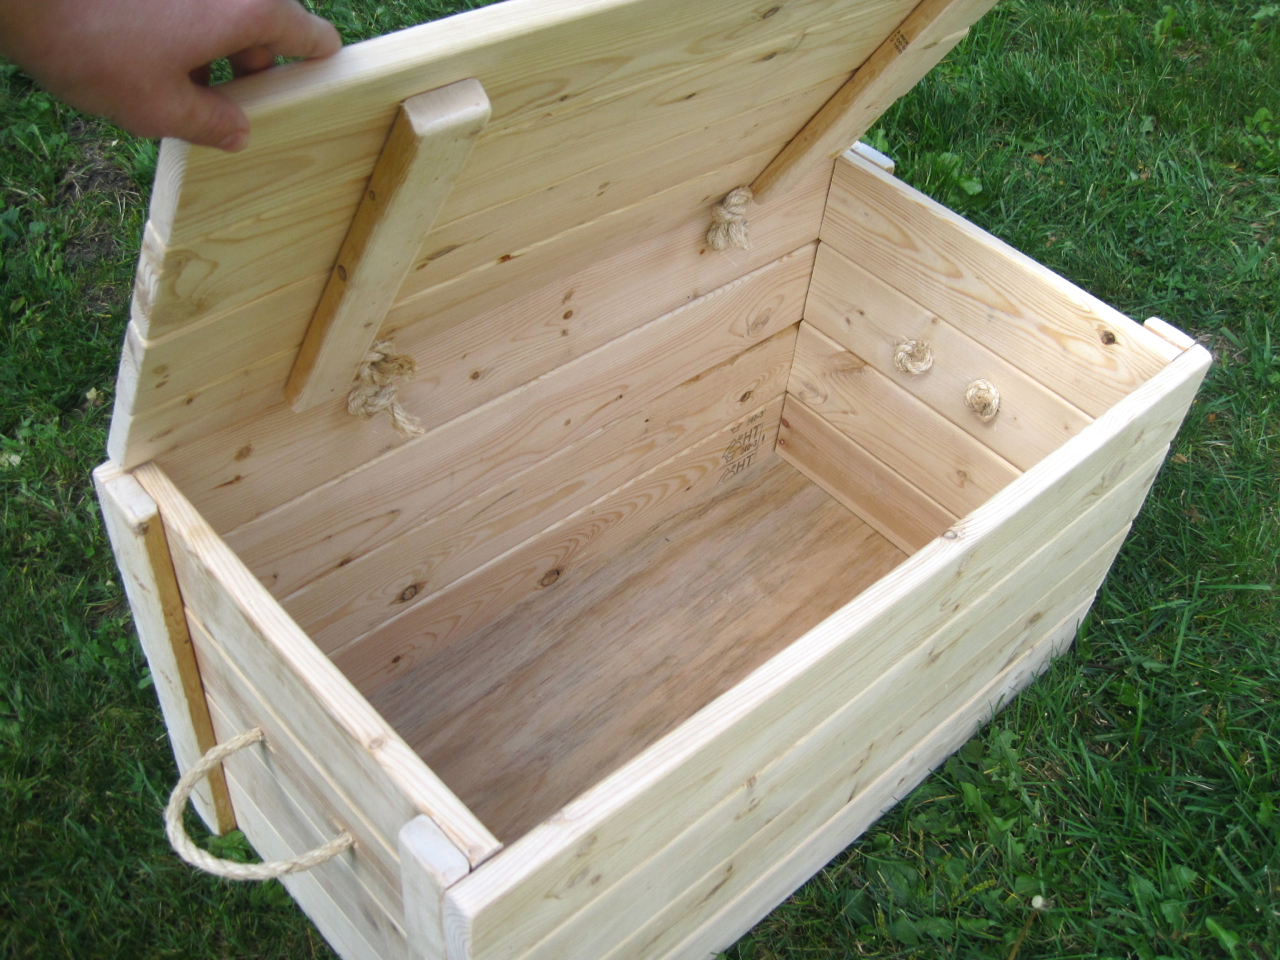
Step 9 – Use your 15″ rope pieces for your hinges. Tie the knots onto your chest first on the inside, then prop your lid up and tie the knots for your lid. Make sure both rope hinges are the same length. I like mine so they were tight once the lid is closed. Cut off any extra rope.
Use your 20″ rope pieces for your handles. Thread each end in from the outside and tie your knots inside. Decide how big you want your handles before tying your last knot. Make sure both handles are the same size. Cut off any extra rope.

Step 10 – Sand your chest really well. I like my corners really rounded especially since I have small children. Once it’s all sanded, make sure your chest is free of dust.

Step 11 – Stain your chest. I did mine in sections. After each section I would wipe the stain off and move to the next. I did the bottom first, flipped it back over, did the inside, then the outside, then the inside of the lid, then I put the lid on and did the top of the lid (make sure it is dry enough – and even separate the lid from the chest with some cardboard pieces). I also dabbed stain on my rope pieces to blend everything together.
Okay, that is WAY too cute!

38 Comments
Love the bench. LOVE Ana White and the Shanty 2 Chic too. SERIOUSLY, its really bad for me to even get started on those sites… Claire does need a new toy box in her room… hmmm…
February 28, 2013 at 7:21 amYou are so amazing!
February 28, 2013 at 7:21 amWow!!! Dani, you are amazing!
February 28, 2013 at 7:21 amI love it! I too drool over Ana White's website but have not been brave enough yet to build a lot. I need to take a basic class to learn how to use all the tools.
February 28, 2013 at 7:21 amI love it! I too drool over Ana White's website but have not been brave enough yet to build a lot. I need to take a basic class to learn how to use all the tools.
February 28, 2013 at 7:21 amDani,
How did you become so gosh dang talented and creative?!!! 🙂 🙂 🙂
~Camilla
February 28, 2013 at 7:21 amBuilding your own furniture!? Wow Dani, you never cease to amaze me! That looks really nice. When I first saw the picture I thought you were going to say you found it at a second hand store (since I know what a good bargain hunter you are). You've got skills girl!
February 28, 2013 at 7:21 amAmazing. I want one!
February 28, 2013 at 7:21 amHow much did this cost you to make? Im in love!
December 5, 2013 at 6:03 pmThe lumber cost less than $20, then you need rope and stain on top of that. I used furring strips for my wood which is the cheapest wood you can buy (because it is imperfect and you'll really need to pick through the boards to get ones that aren't warped). I did 2 woodshop classes with 8 girls each and we made these. It is a really easy project for a beginner and the storage chest is the perfect size!
December 5, 2013 at 11:27 pmIf the front board lengths are 27", and 1×4 boards are 3/4" thick…wouldn't the inside length be 27" less, 3/4" x 2 (1.5") on both sides….or 27" less 3/4" x 4 (3"), for 24" inside length. With 1/4" cuts on the end boards, plywood should be 24.5" x 13.5", not 25" x 13.5"??? Unless I'm missing something. 13.5" width is correct, as 13" side board plus 1/4" x 2 = 13.5"
April 10, 2014 at 2:08 pmHi Stephen! I checked my math and it should be correct You need to factor in that the side boards have 2 layers of 3/4" boards, insetting the side a total of 1.5" on each end, equalling 3" total. That brings you to 27" – 3" = 24" but then you add an extra 1/4" on each end for the dado the bottom goes into, bringing it to 24.5". Does that make sense? Look at the pictures of the chest to see how the sides are inset. Good luck!
April 11, 2014 at 7:46 amI'm sorry for any trouble you had with the instructions and I'm sorry you had to take an extra trip for more wood – that's never fun! I have fixed the instructions with a note about lumber dimensions… It can be confusing if you've never bought lumber before. I guess my only question is, did you use furring strips, and if so, what was the width and depth of your boards? Please see my notes above (in red) on the instructions for explanations as to why the measurement comes out to 14" (3.5" x 4 = 14").
May 22, 2014 at 10:21 amHello
I love this chest and am going to build one as a storage/coffee table/seat for my camper van. Am I good to go with the specs above (cut list) as long as I consider the notes in red you made.
Thanks so much for taking the time to share this…I feel s new hobby beginning, Matt
May 27, 2014 at 1:08 pmDelete
Hi Matt!
Yes, the cut list I have listed above should be correct. I would suggest that you go over it and become familiar with the pieces and instructions so you can draw everything out on a paper to make sure, especially after you have your boards and you know the exact widths and thicknesses (if they differ from my measurements then you'll need to adjust other measurements to fit.. BUT the boards I use are pretty standard widths/thicknesses so you shouldn't have a problem). This really is an easy project – I've taught 16 girls to make one of these chests (most of whom had never touched a hammer or drill in their life)! Let me know how it turns out!
May 27, 2014 at 3:12 pmAwesome, thank you so much! I will post a pic or two when I finish.
May 27, 2014 at 9:06 pmI get the idea and I did 3 big boxes and was awesome!!!!Put inside so many thing big garden tool .etc etc. I just add a few more inch's ..add some cushion and I have a very nice .outside cushion seat and storage box ..thanks so much for teach me step by step how to make this nice project….Muchas gracias ..por el tiempo que tomo en enseñarme el paso a paso de este fabuloso proyecto..
June 2, 2014 at 7:02 pmI get the idea and I did 3 big boxes and was awesome!!!!Put inside so many thing big garden tool .etc etc. I just add a few more inch's ..add some cushion and I have a very nice .outside cushion seat and storage box ..thanks so much for teach me step by step how to make this nice project….Muchas gracias ..por el tiempo que tomo en enseñarme el paso a paso de este fabuloso proyecto..
June 2, 2014 at 7:02 pmthis youtube video series runs through most of the tools 🙂 https://www.youtube.com/watch?v=c65rKk8frhc&index=1&list=PLLALQuK1NDrgWWk6tc0WT0V7If_9NpQ9n
January 27, 2015 at 12:27 pmI've made several boxes like this, and I make the lids a 1/4" bigger than the box base so there is a little overhang on the sides. This is really useful as a place for your fingers to grip the edge to open the box. It also helps to keep spilled liquids out of the box a little. I will be building a custom size box like this to store stove pellets, it will hide 3 ugly bags.
March 8, 2016 at 8:50 pmThankyou for the inspiration..
April 3, 2016 at 7:21 amIs this design sturdy enough to use as a bench?
December 16, 2016 at 9:30 amYes, you could use it for a bench. Just make sure the lid overlaps the sides enough and have the cross boards on the lid as close to the ends as possibly to make sure it doesn't shift around. Also, use glue+screws for the lid! 🙂
December 16, 2016 at 9:31 amOnce again, you just sent me back to the drawing board for a fabulously great reason. A CHEST at the foot of the bed would hold the pillows at night! Can be used as a seat! And hold extra blankets since I lack a decent linen closet.
February 7, 2018 at 1:09 pmI built Ana Whites outdoor couch! LOVE IT! I have not posted to the brag board yet because I have not finished my cushions.
I also modified Ana's Garage Store Shelves. Love them too!
I am currently building a 2×4 Vanity cabinet, based on the Farm Table!
My next Ana White Build will be her new Farm House Table!!!!
I have a few pictures at Alex & Aless of my not so pretty non cushioned couch.
Thank you so much!!!
Sounds like you know what you're doing with all those projects! These chests are so easy to make and have been so handy for storage. I'd love to see pictures of what you've made! (twirlybirdbaby@gmail.com)
February 7, 2018 at 1:11 pmHi! Is the bottom measurement the same if you are just going to nail and glue it??
August 12, 2018 at 7:21 pmHi Bob! Wait until your chest is finished and cut the bottom last according to the measurements of the base. I would actually cut it slightly larger than the dimensions and after nailing it to the bottom would use a flush trim router bit to cut it right up to the wood. Good luck!
August 14, 2018 at 6:46 amHello, just found this project. Looks great! Do you recall the brand/name of the stain you used? Thanks!
November 18, 2019 at 1:55 pmI believe it was Minwax Walnut 🙂
January 13, 2020 at 6:11 am[…] at The Project Lady explains how to DIY rope hinges to tie wooden storage […]
November 8, 2020 at 1:34 pmI love this! This is the first diy storage chest that didn’t use a pocket hole jig, and looks so much easier to make.
January 21, 2021 at 11:02 amIf you wanted this to sit on legs, would it work if you made your 1 x 2’s on the side a couple inches longer than 14″?
Yes, you can certainly make the 1×2’s longer for legs! Make sure you glue your joints well so they’re solid 🙂
January 21, 2021 at 6:53 pm[…] Source: … […]
February 19, 2022 at 10:18 am[…] The Project Lady – Wood Storage Chest – Make your own! […]
February 26, 2022 at 4:07 am[…] Via Theprojectlady […]
May 30, 2022 at 5:29 am[…] Project details: theprojectlady.com […]
July 13, 2022 at 3:32 am[…] Click Here […]
August 8, 2022 at 7:26 am[…] and tabletop storage is important, particularly in smaller areas. That’s the reason a storage chest with loads of house, could be so widespread. One of the best half is that these could be as easy or […]
September 21, 2022 at 1:40 am