
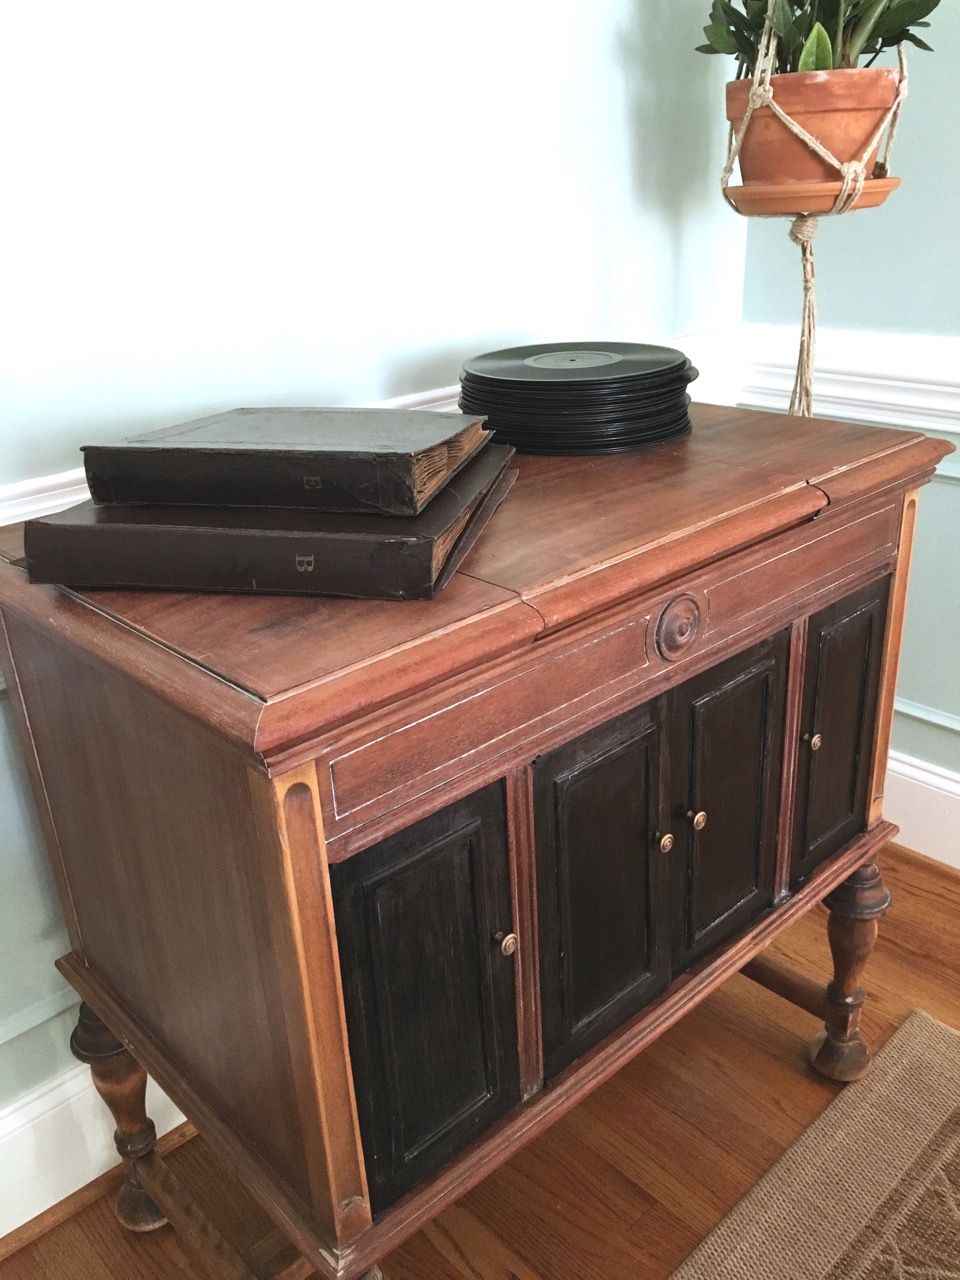
I just happened to be searching “record player” on Craigslist to see if there was anything worth buying (I used to have a table-top player and have always been interested in getting another one). To my surprise this old thing popped up in the search. It was listed for $10! I thought surely it must have been taken already because the listing was over 20 days old. I tried talking myself out of it after thinking about how much work I’d have to put into it but everything in me said I MUST have it. I knew I would regret not getting it! It came with 4 full binders of records, too!
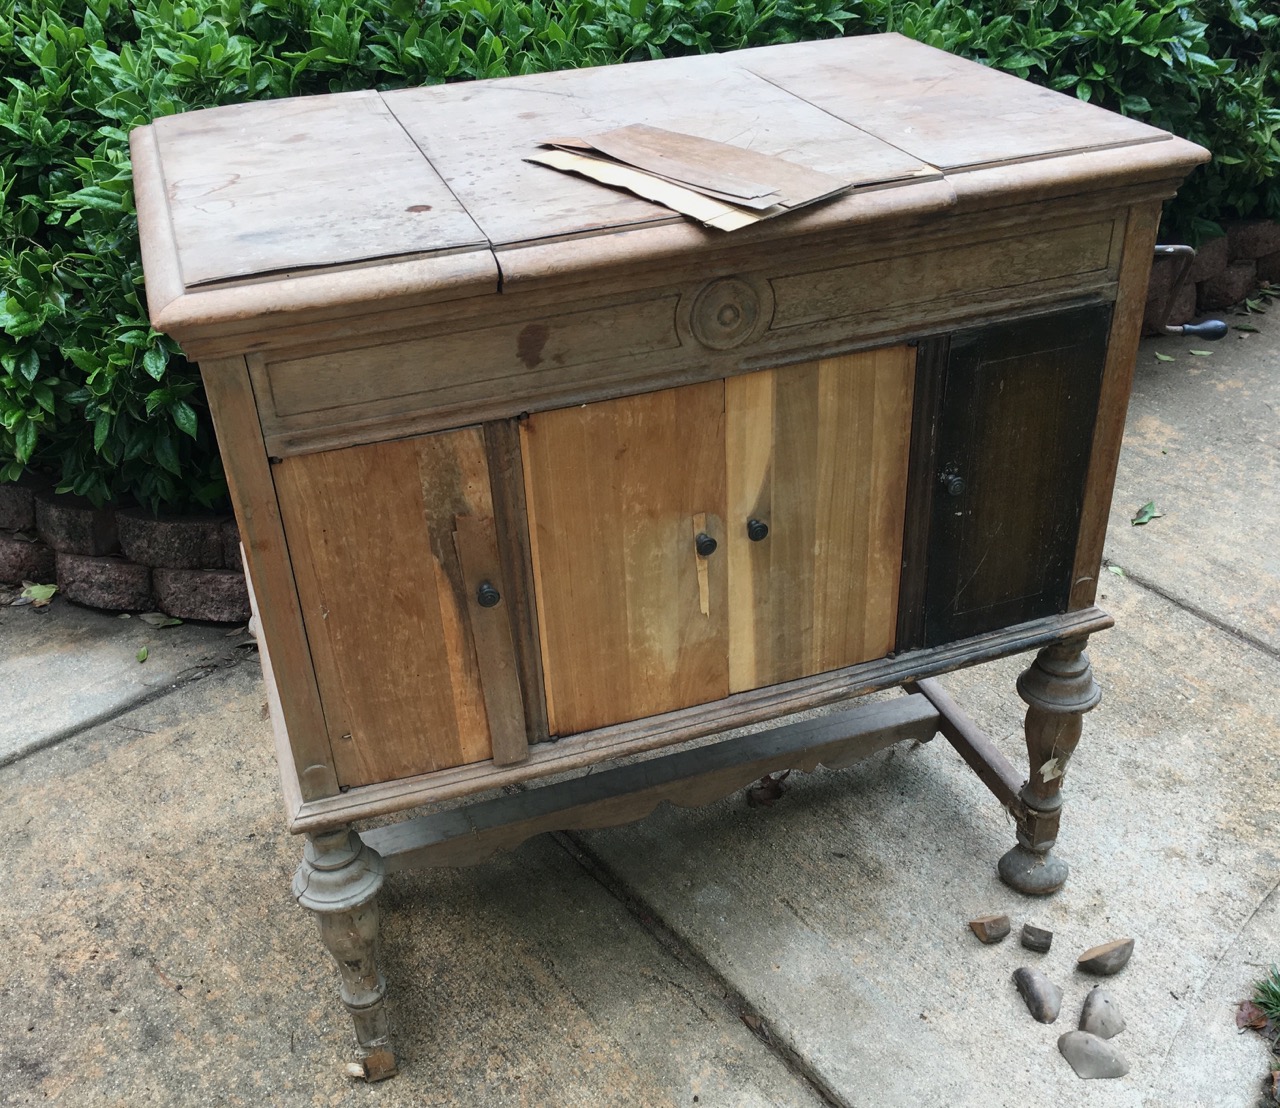
The current owner said it was his Grandmothers who had previously stripped the finish off the cabinet and it had sat a long time in a shed exposed to heat, cold and humidity.
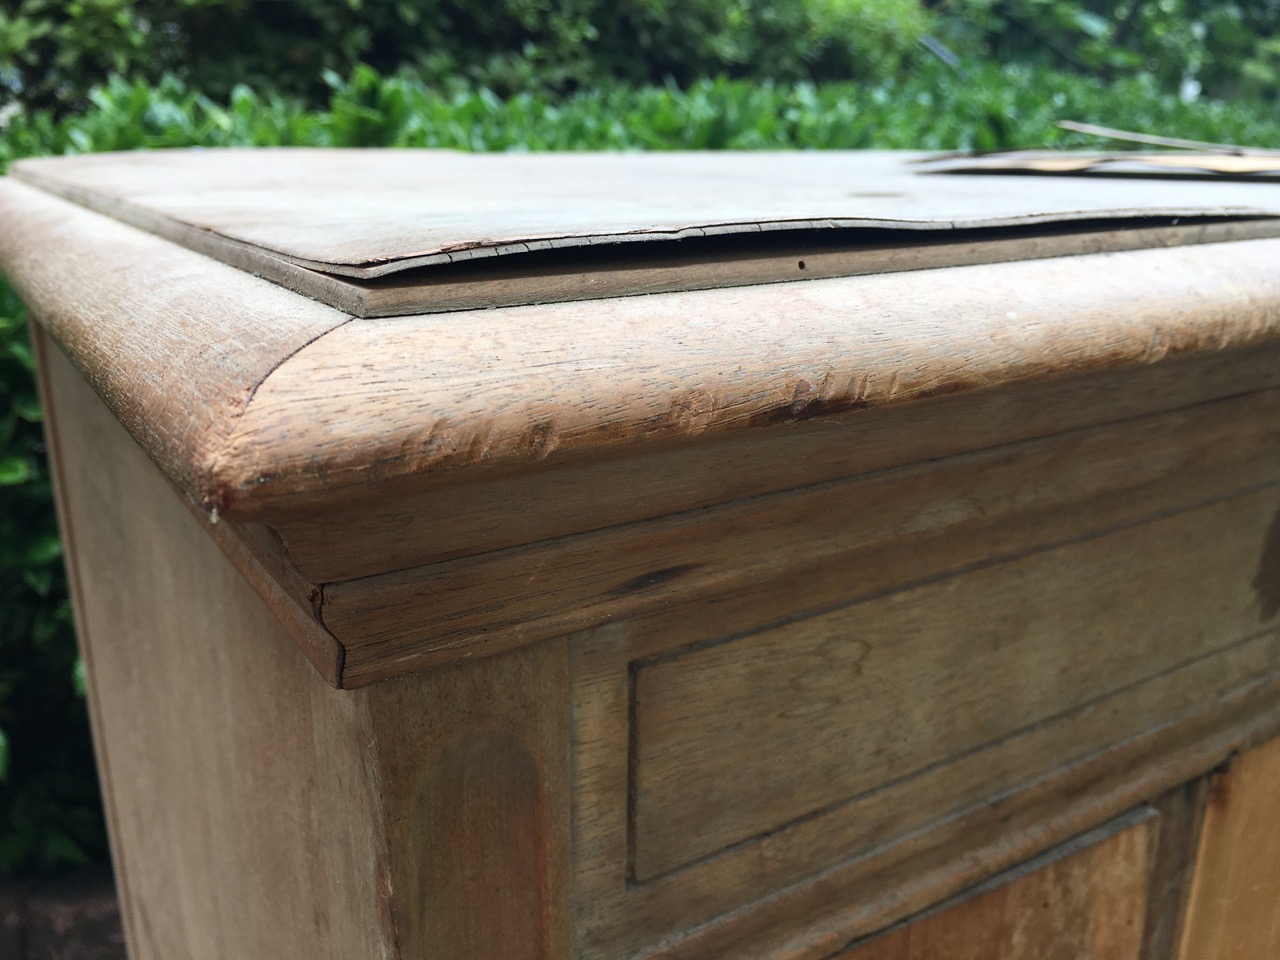
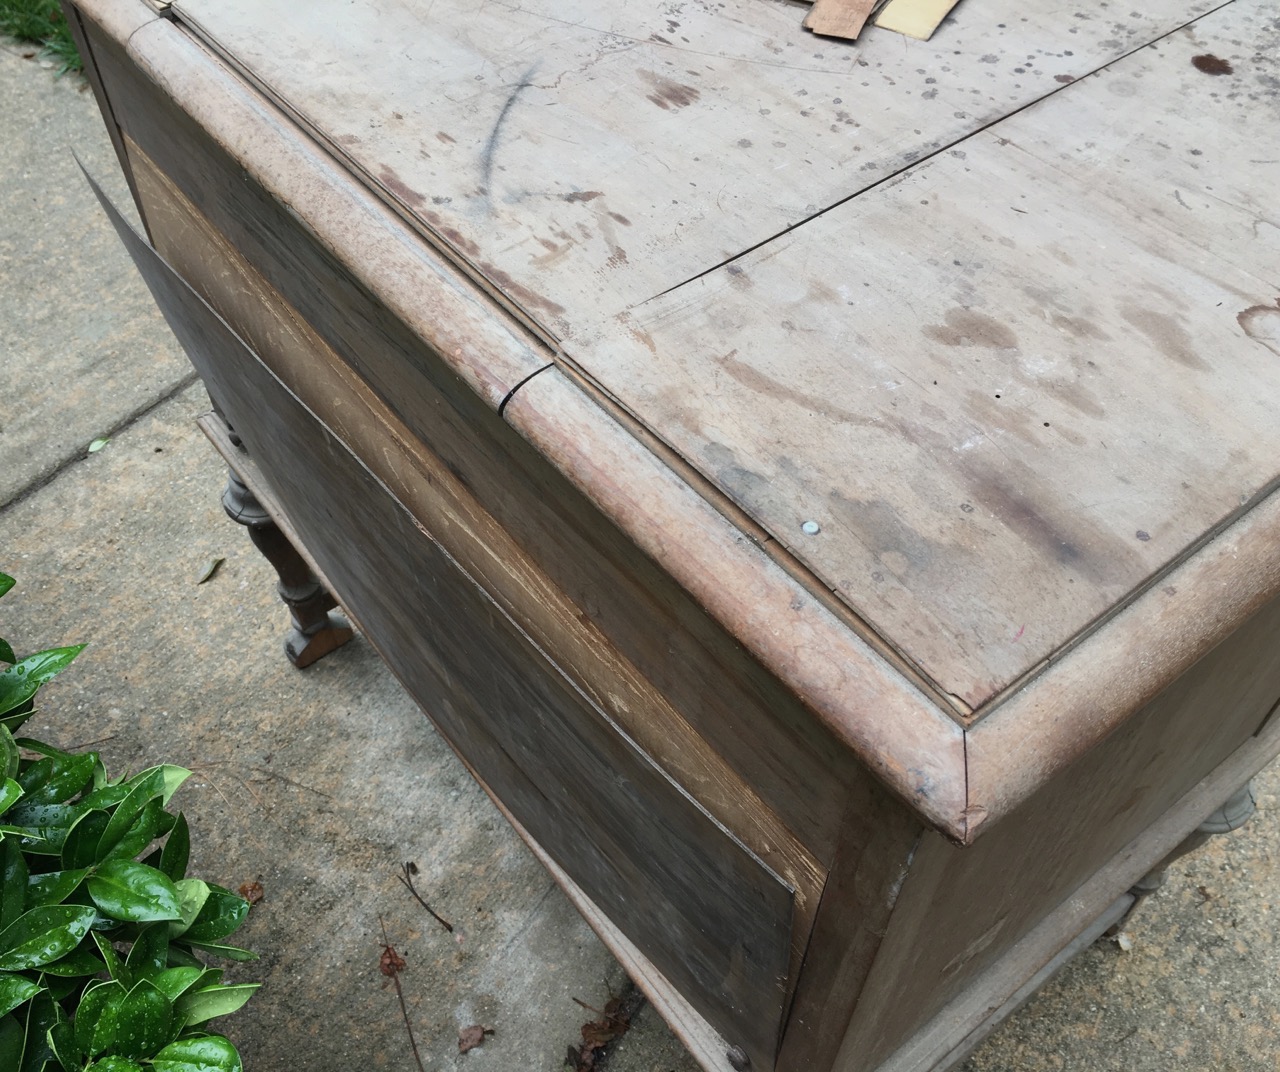
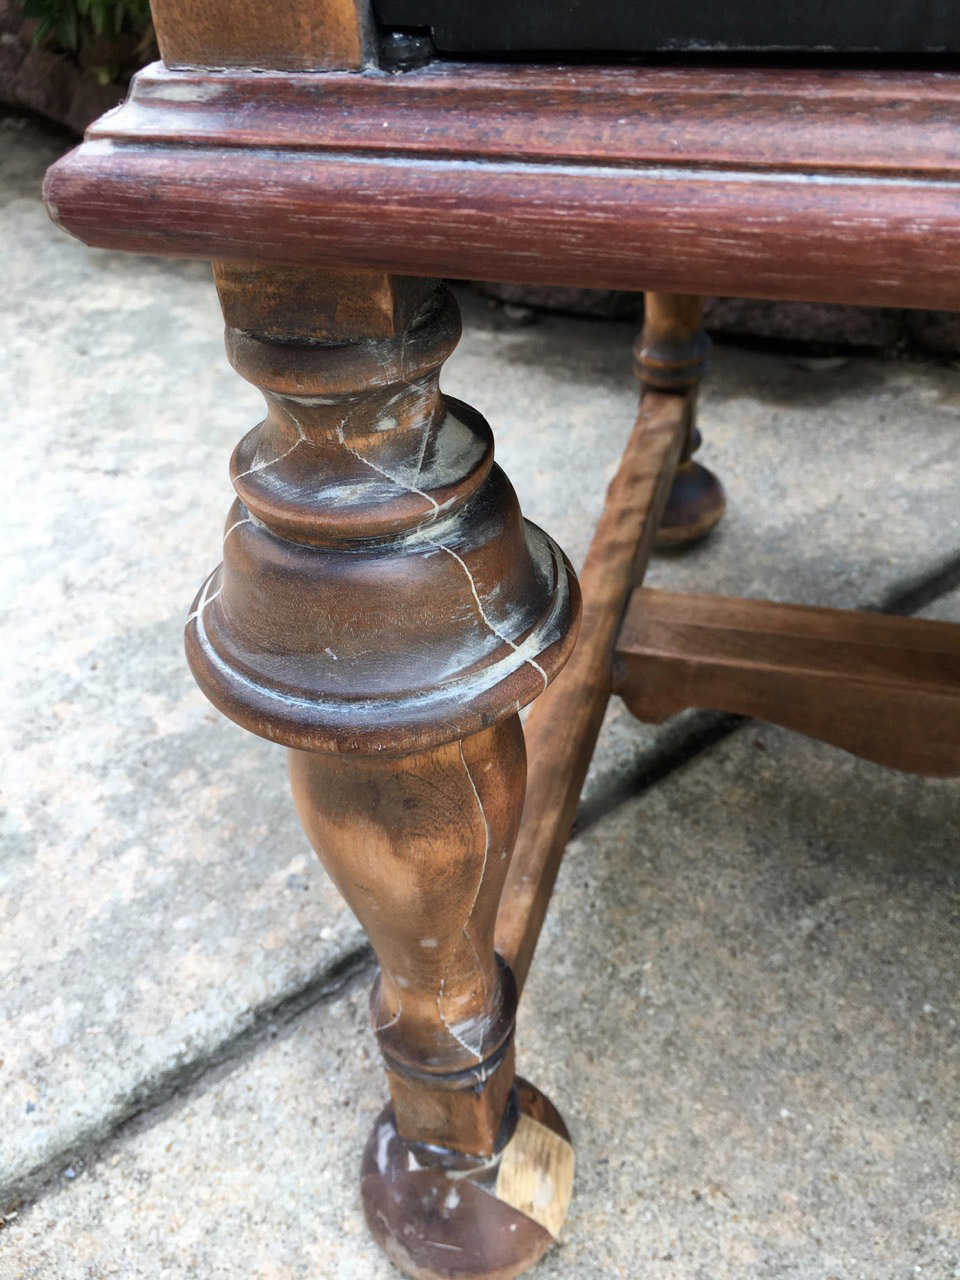
Upon inspecting it I saw that it was worse off than I thought. The wood was very dry and brittle – I call it thirsty wood! The veneer was peeling off in nearly every place and the legs were in pieces and had open cracks where other pieces were glued together to create the posts.
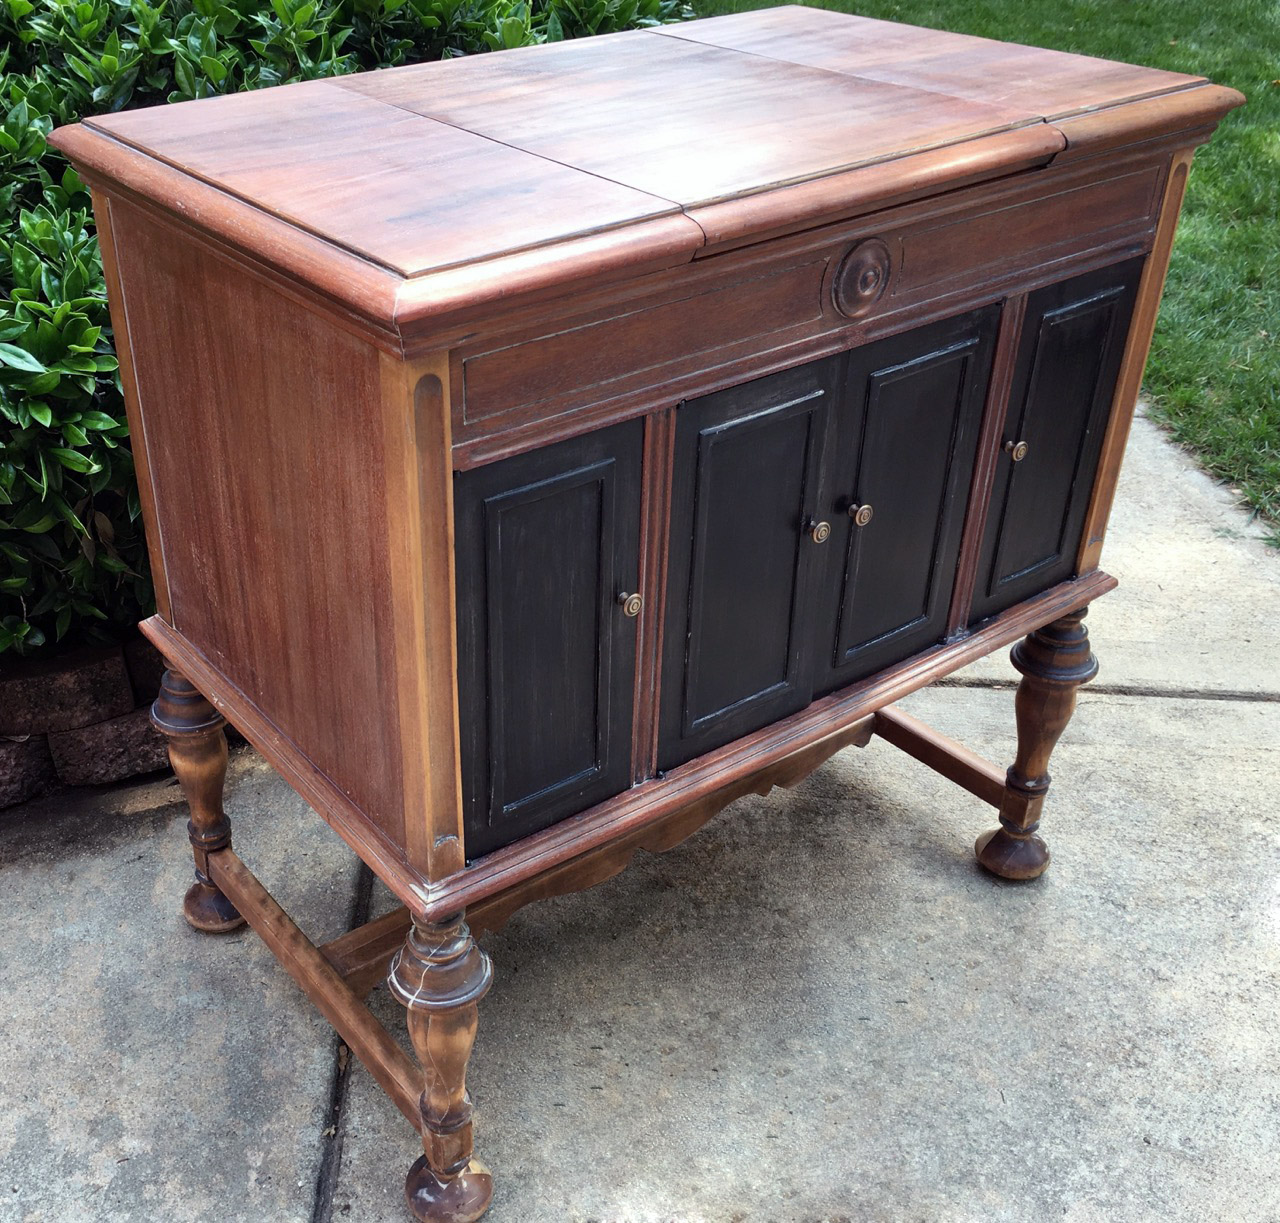
It took me about 6 days of non-stop work to complete. It was so exciting to see everything come to life during the process!
Let me share the BEFORE and AFTER pictures with you before I tell you about the restoration.
(This is my favorite part!)


– Day 1 –
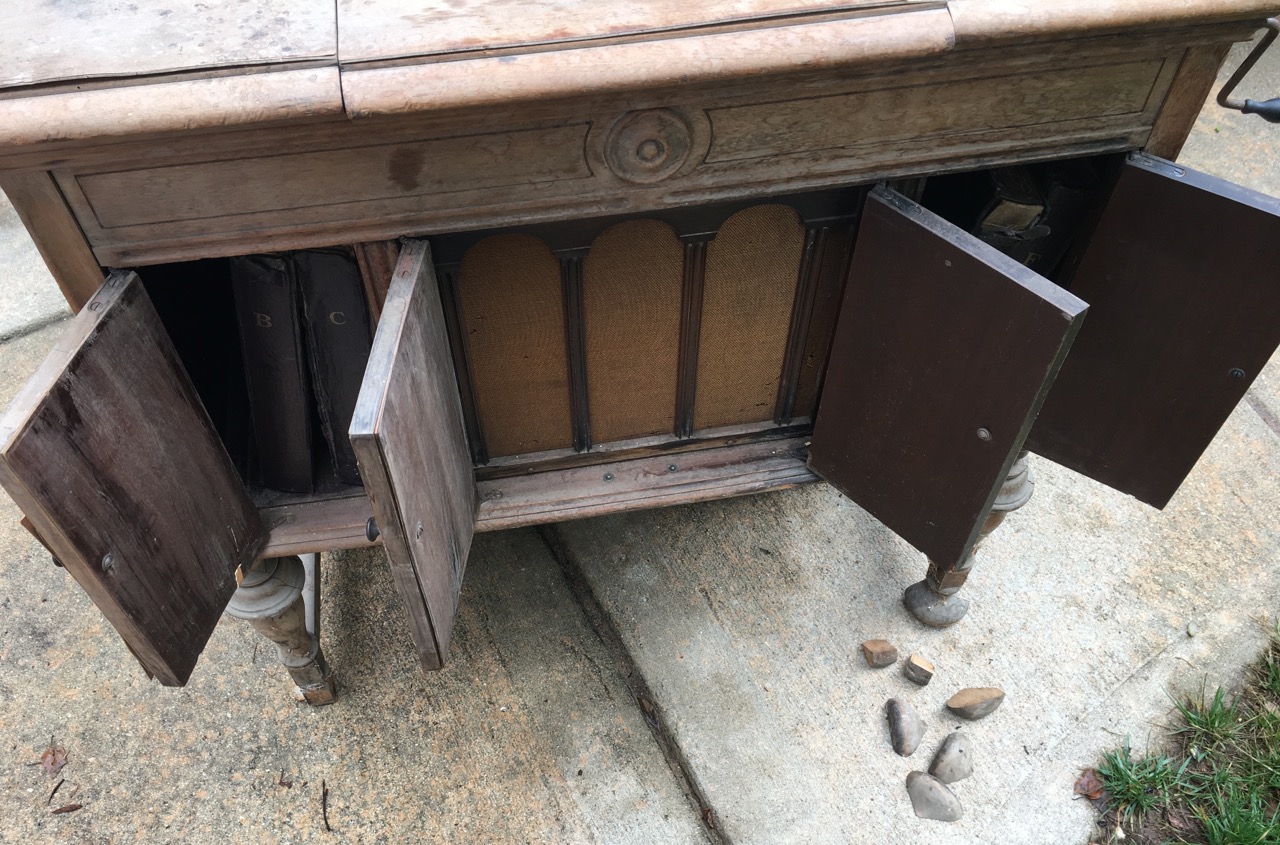
I removed everything from the cabinet that I could.

My first task was to make a new back for the cabinet. The original plywood was warped and the veneer was hanging on for it’s life. I laminated the original veneer to a new piece of plywood and it acted as a perfect pattern for cutting the new back just right!
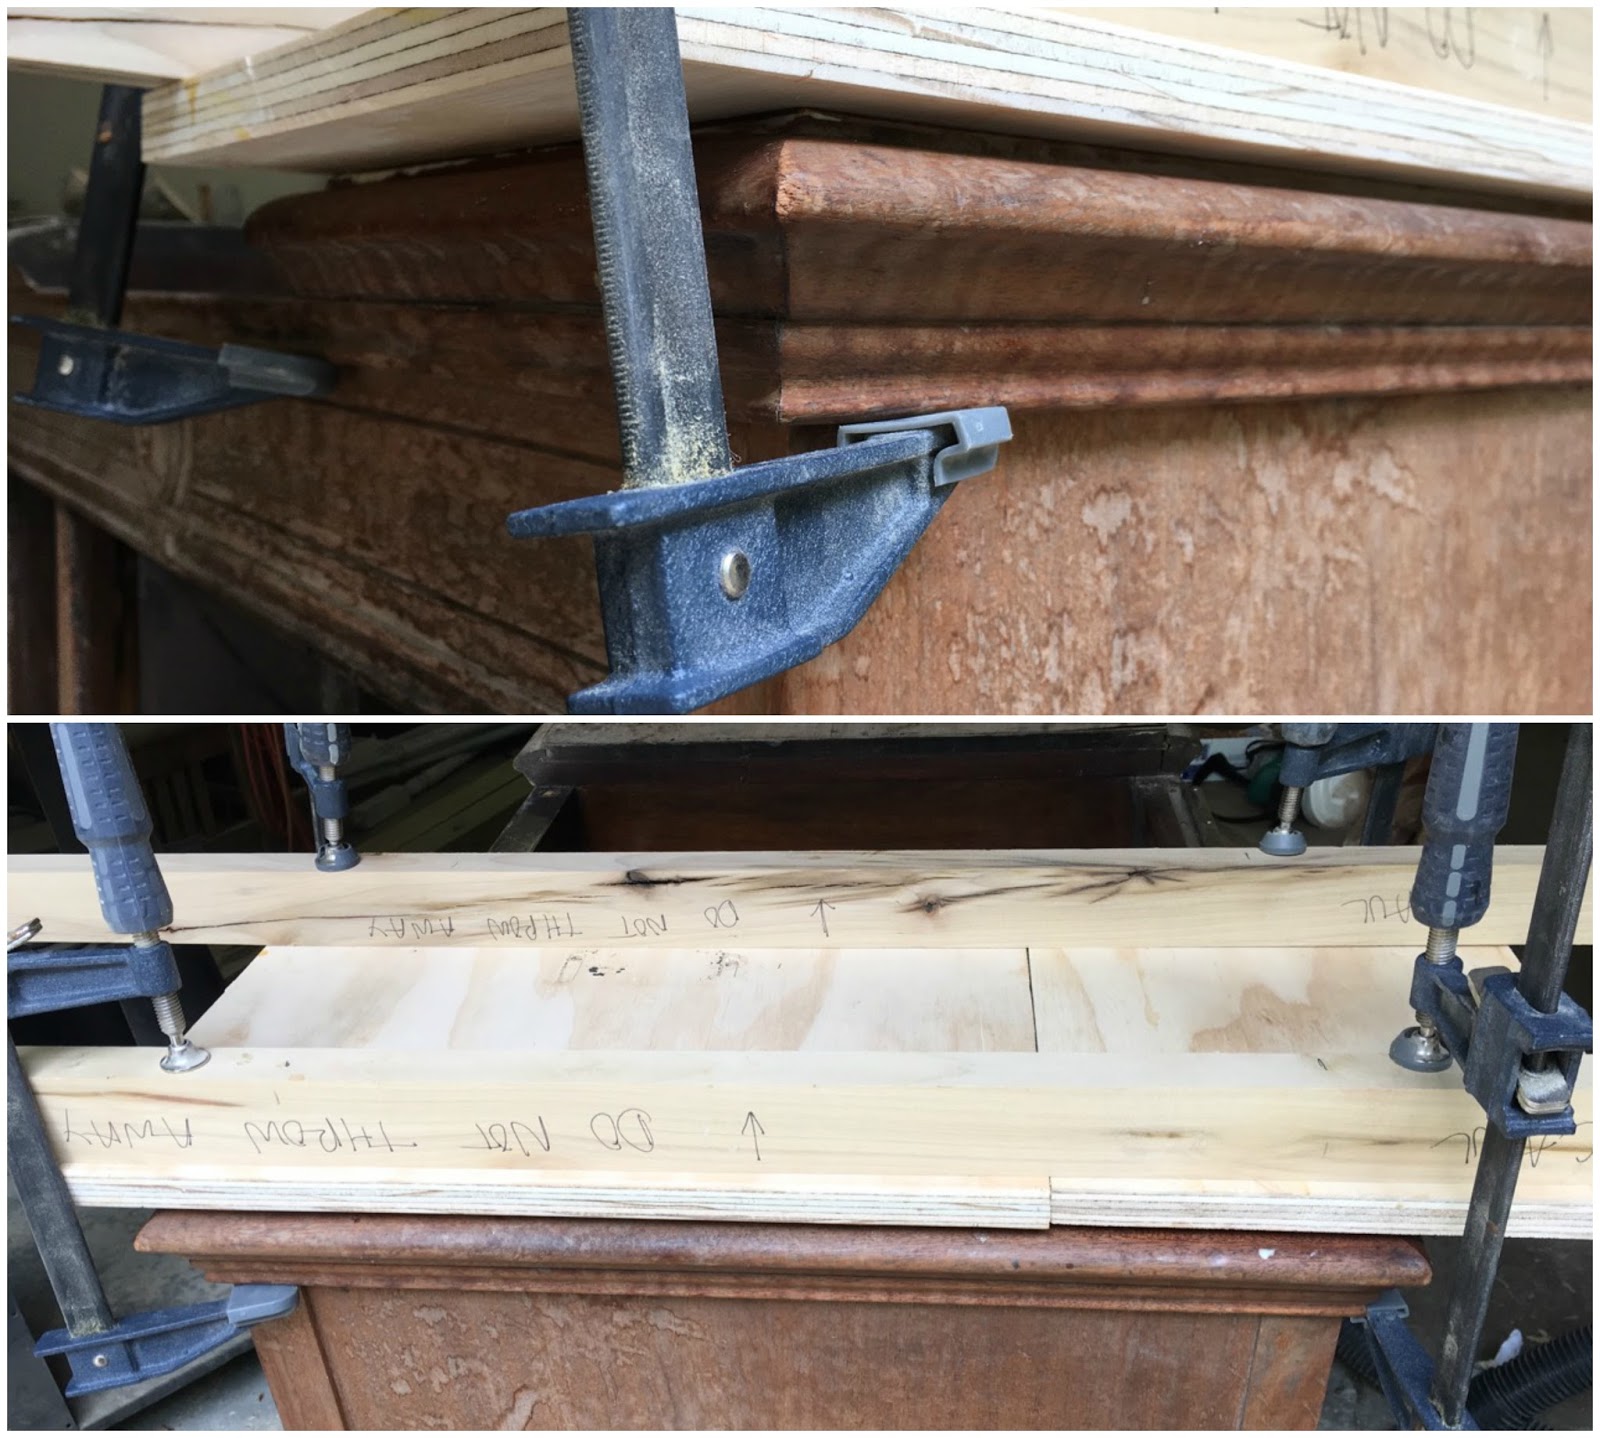
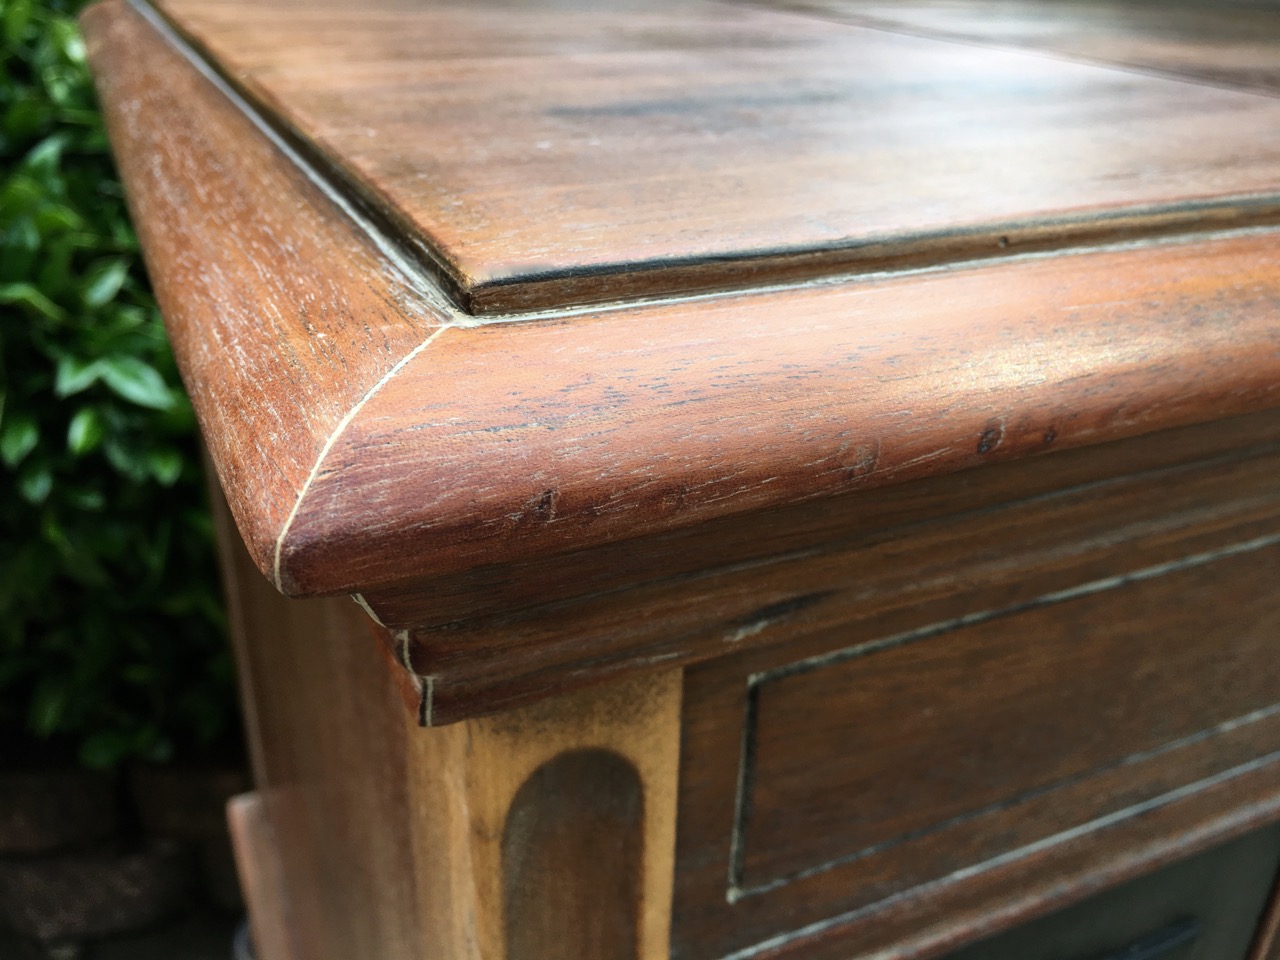
My next task was to start gluing the veneer back down. I used my air compressor to blow it as far as I could between the layers. My favorite tool for the glue-ups was using wooden cauls (long boards that have a slight bow on one long-edge) so that when clamped down on the ends it will also have pressure in the center.
– Day 2 –

I worked endlessly gluing up more veneer and fixing whatever else was damaged – especially the flip-up lid that had come apart in many areas.

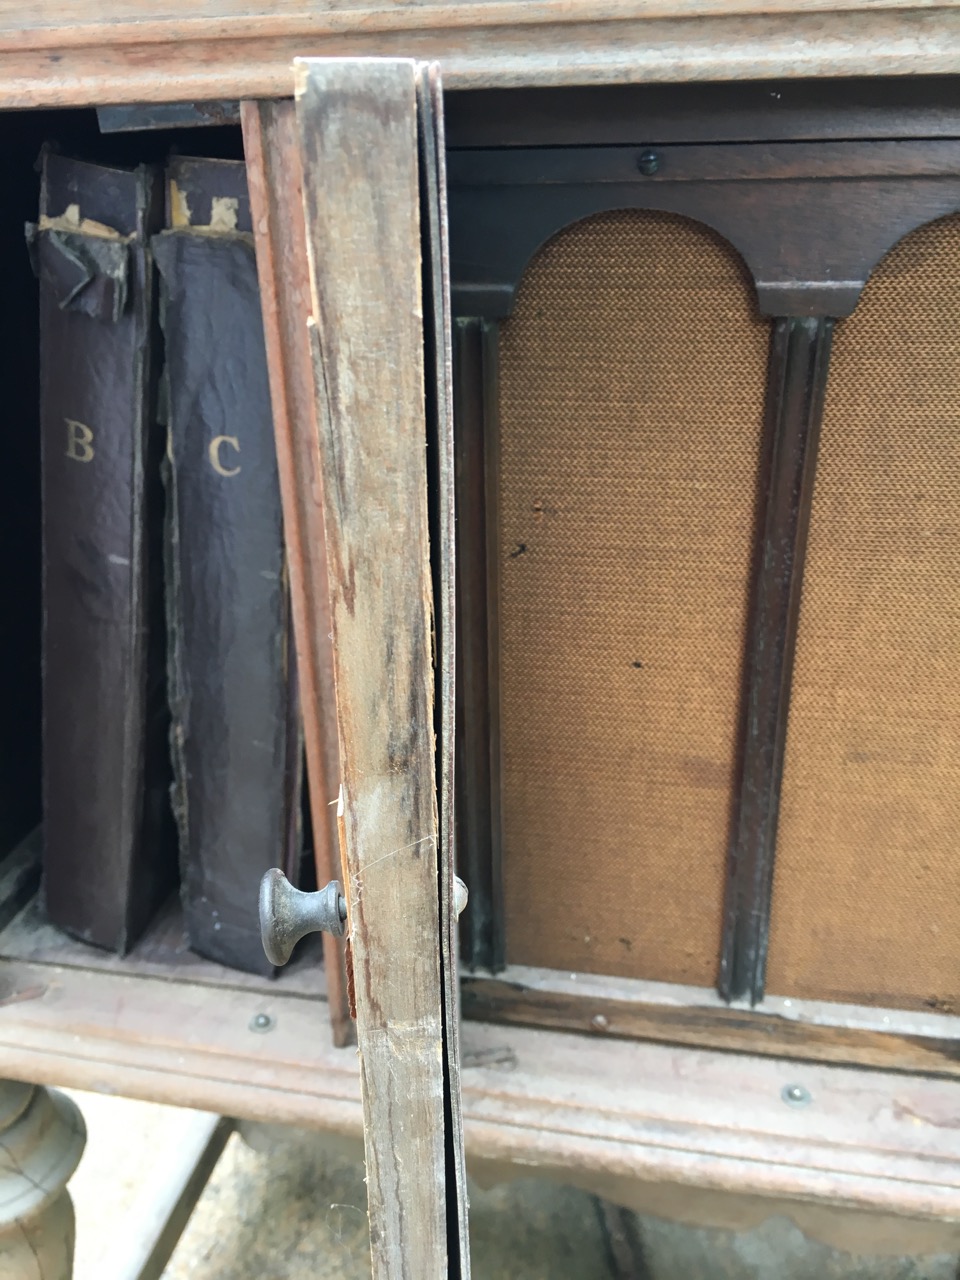
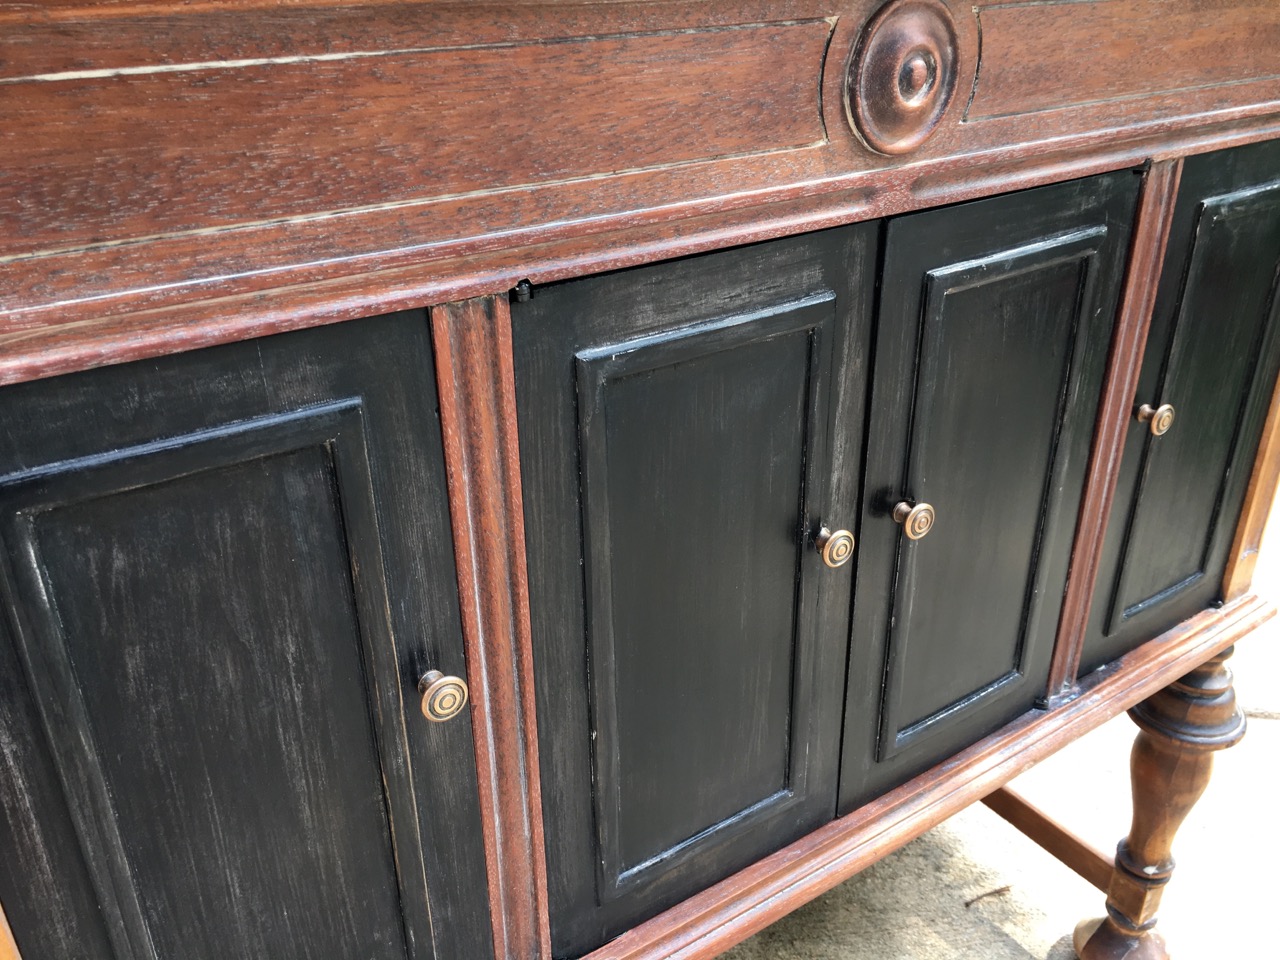
There were a few corners where veneer was missing completely. I used my chisel to square up the edges and glued pieces of veneer on that came off one of the doors. It doesn’t look perfect but it’s better than using anything else!
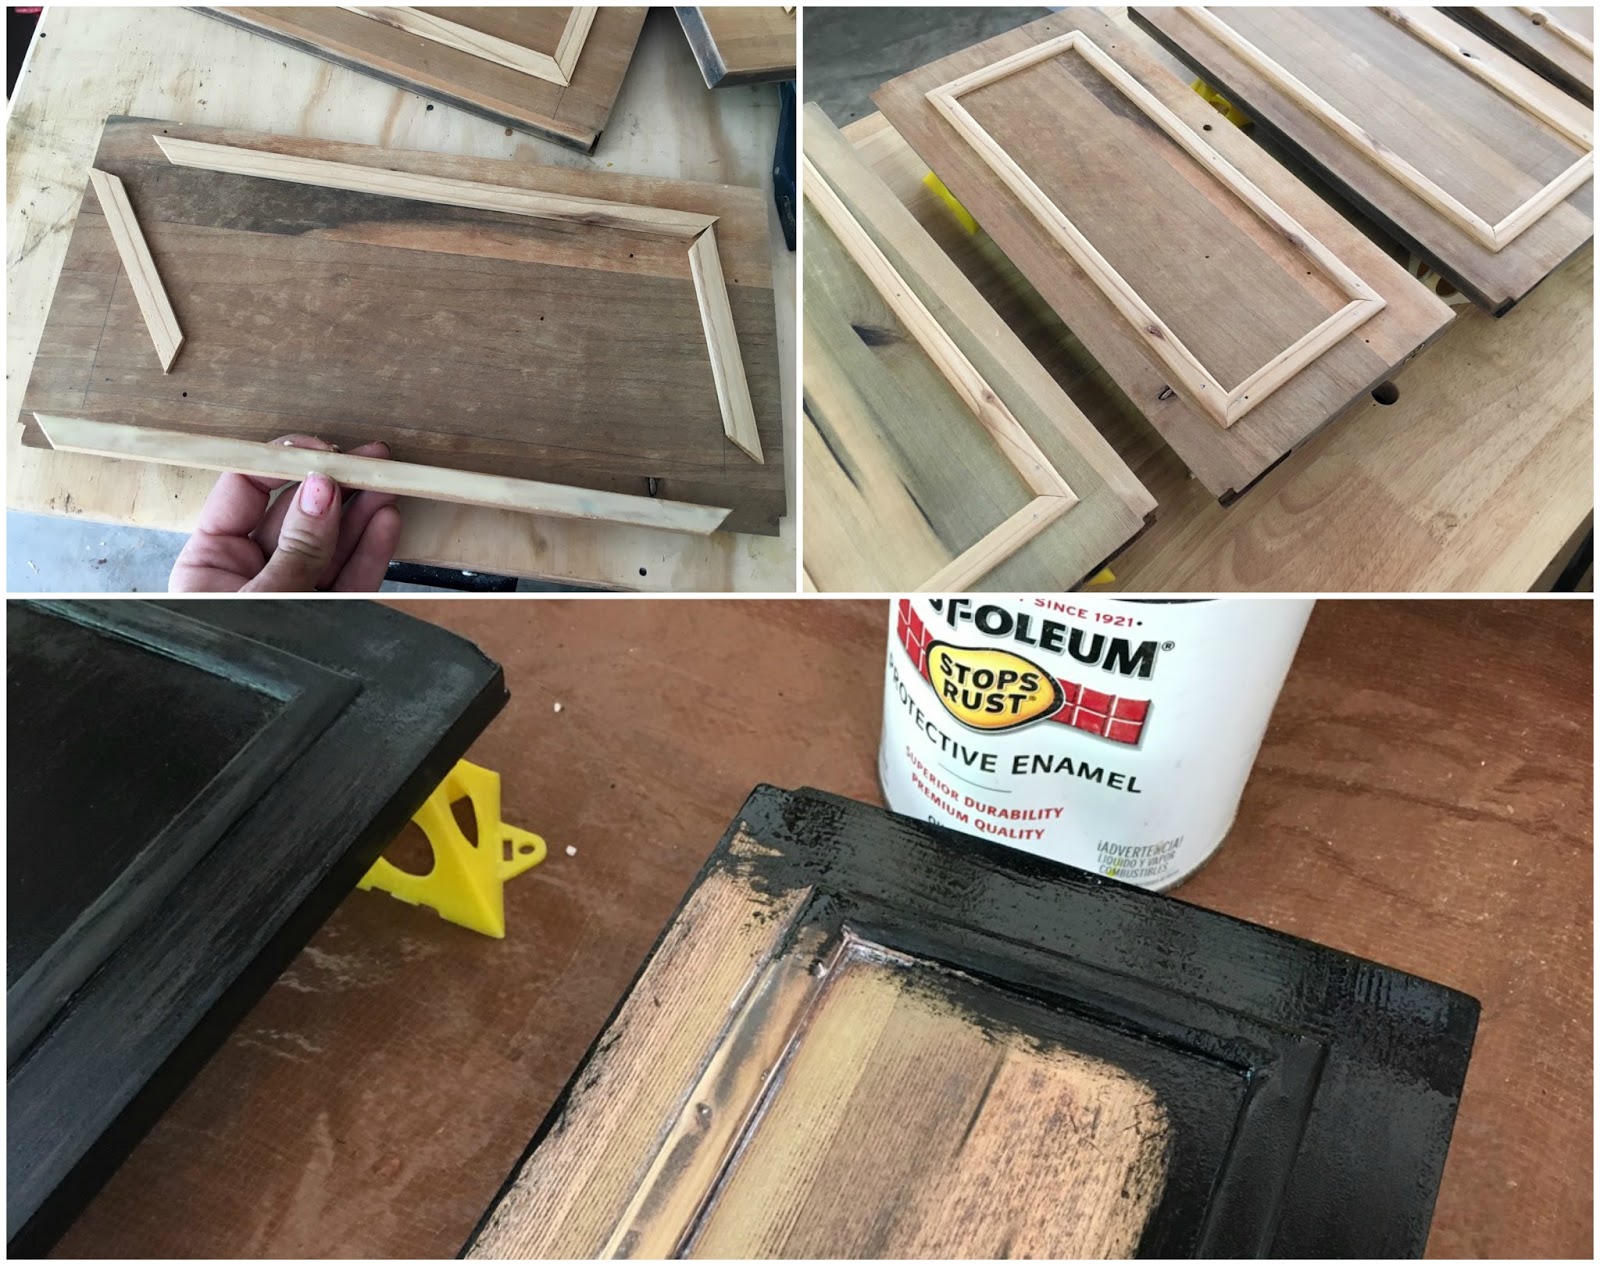
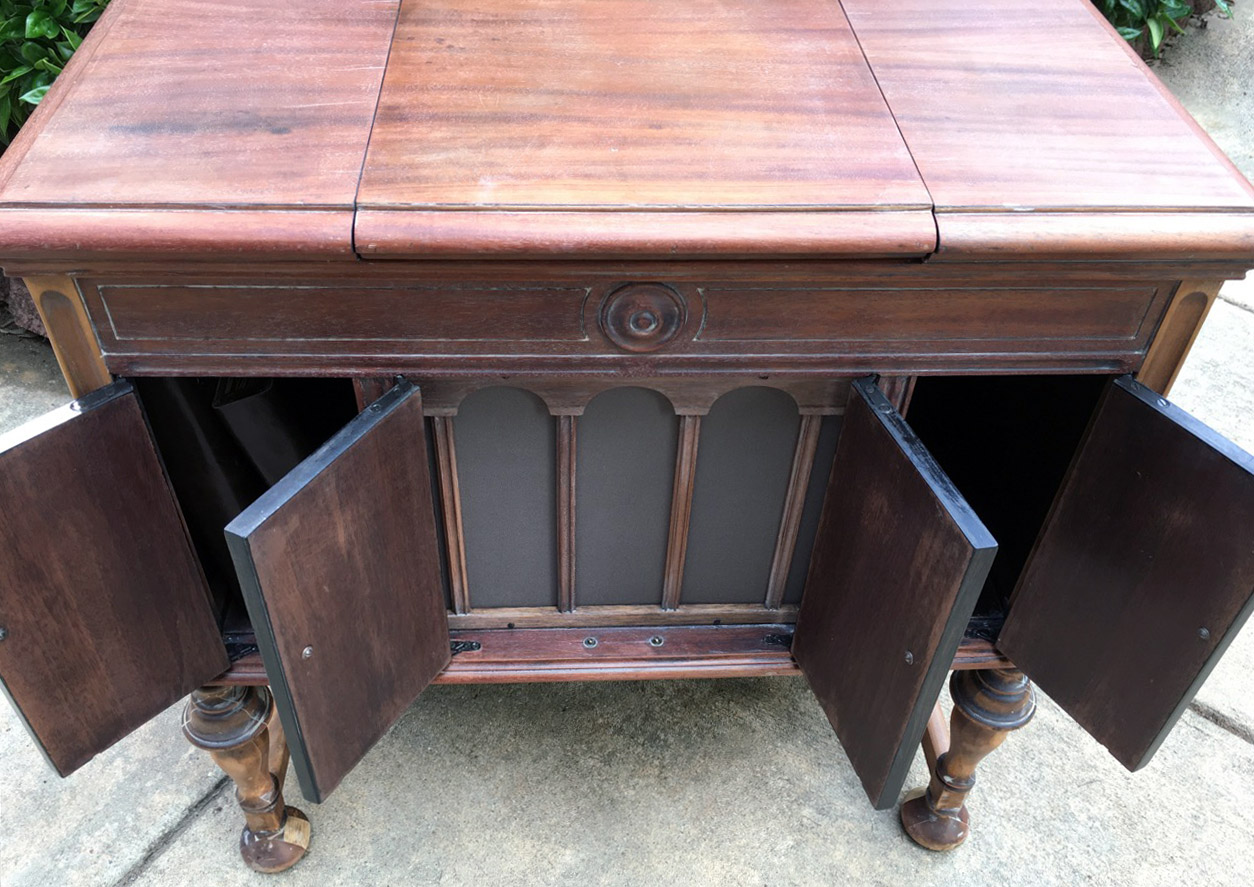
The veneer on the doors was missing so I ripped some thin pieces of wood to create trim. I won’t go into details about how many different colors I painted the doors over the next few days but lets pretend I got it right the first time and painted them black. 😁
– Day 3 –
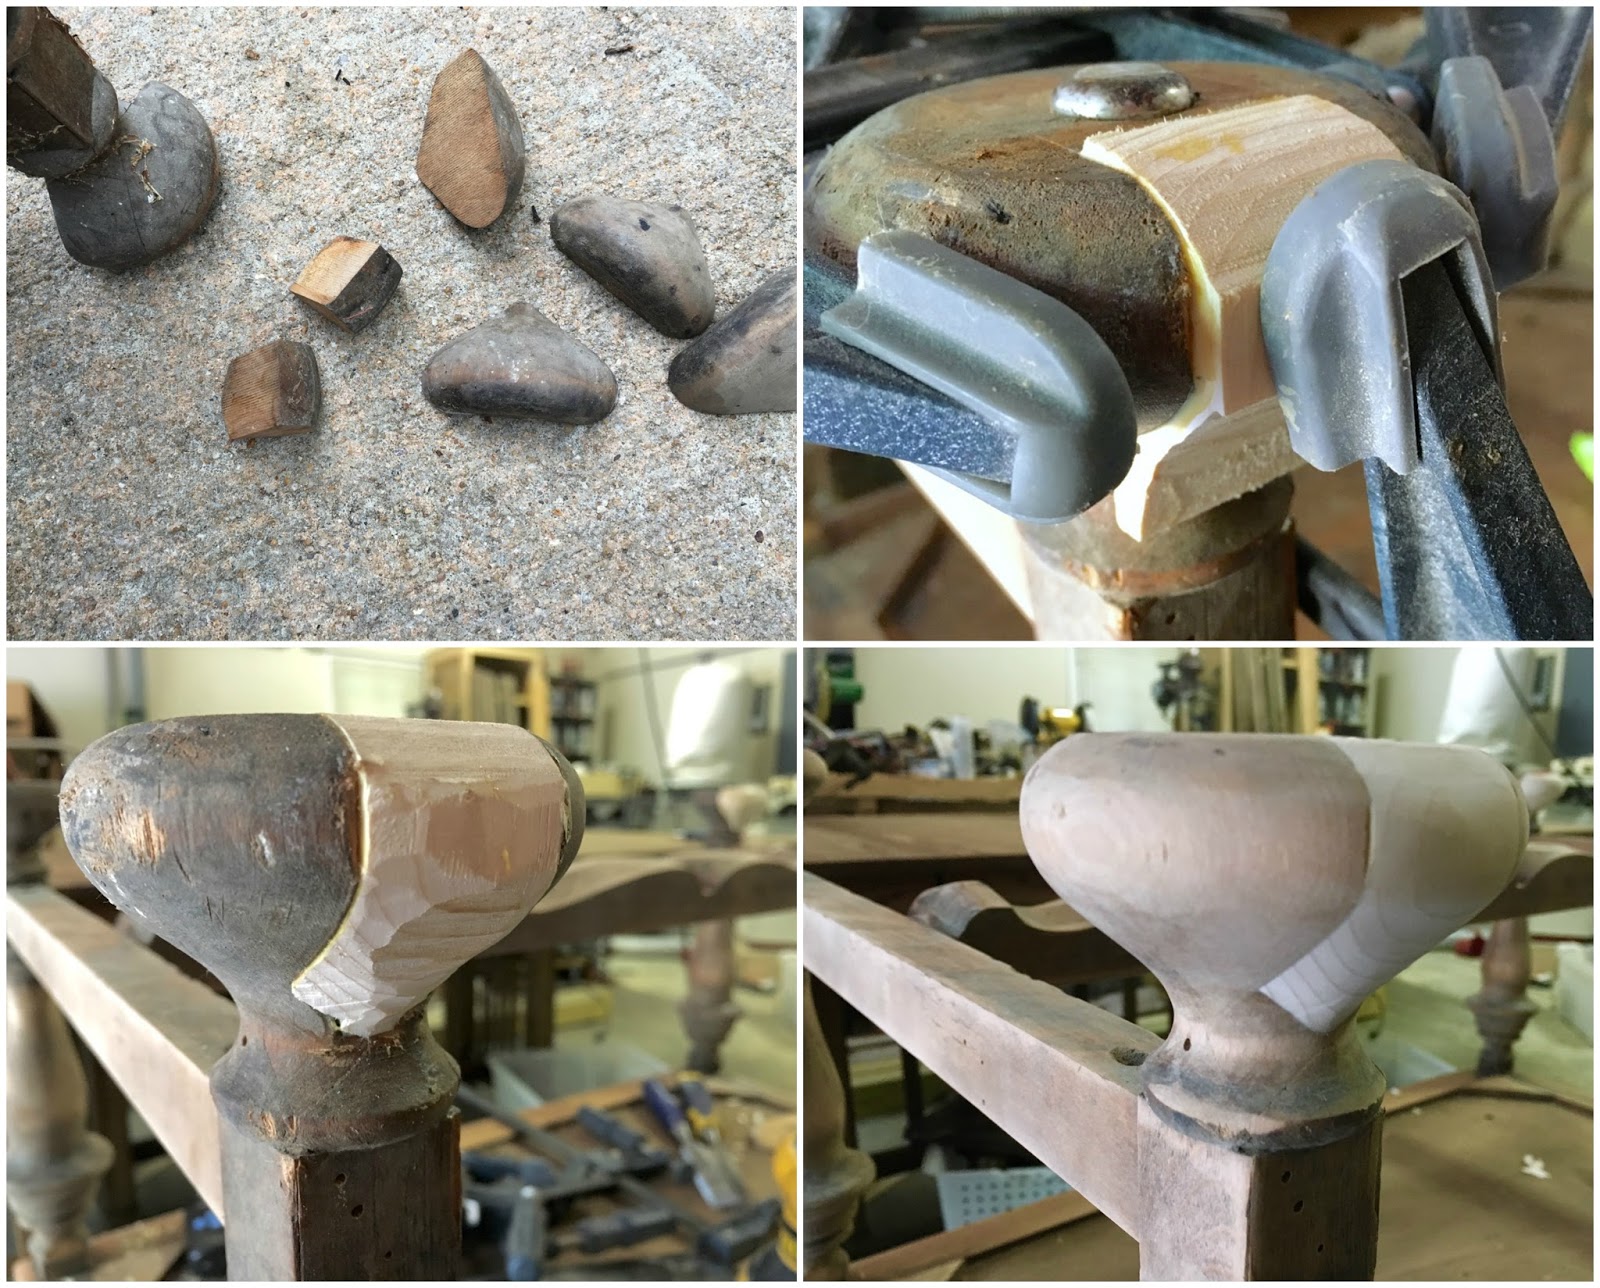
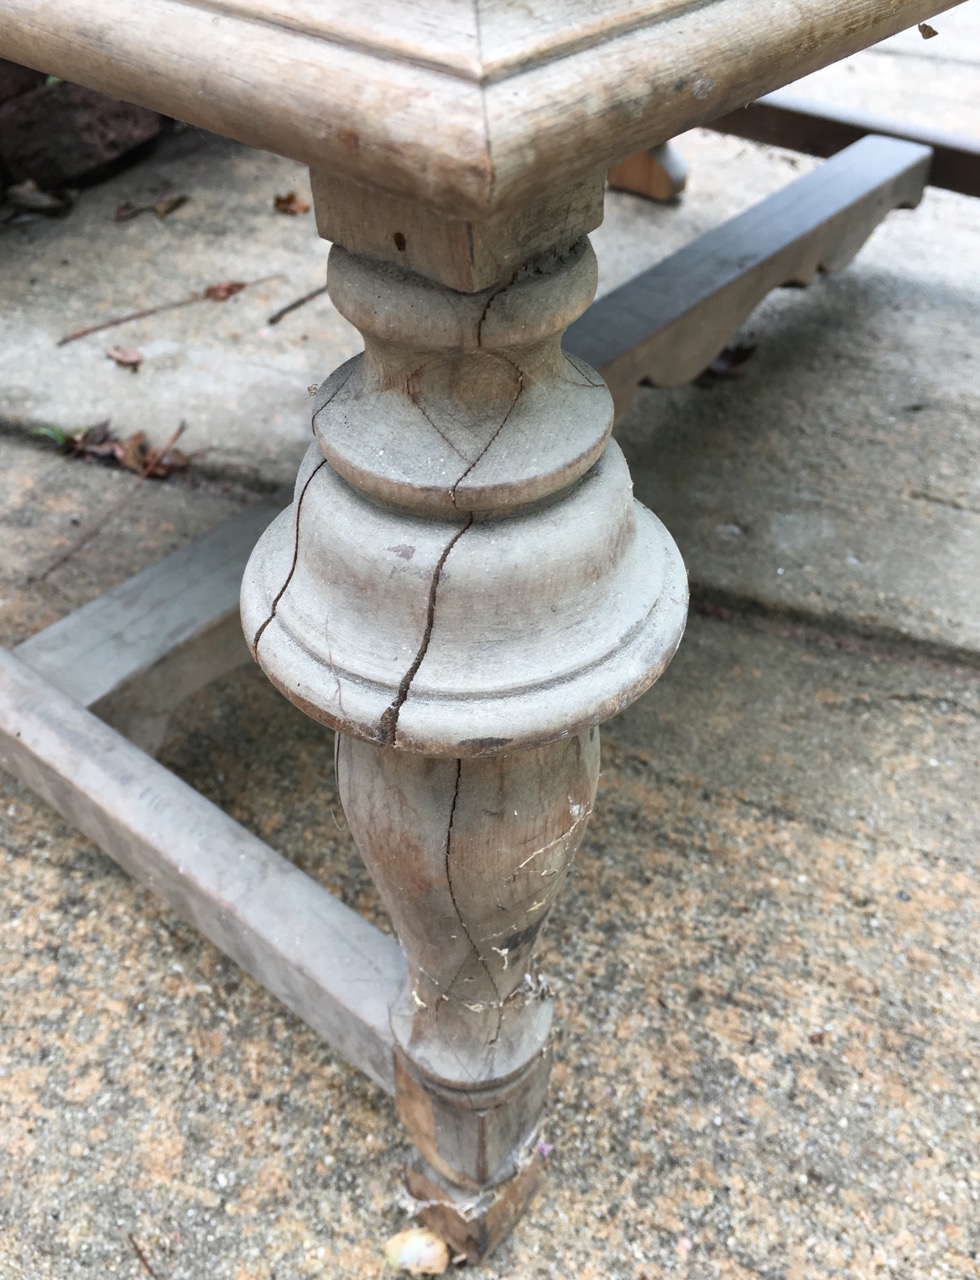
One of my biggest worries was how to fix the legs so they looked normal. I had 3 big chunks missing from the feet as well as many other small pieces. I considered turning new legs on my lathe but knew that was beyond my expertise (and I didn’t want to pay someone else to do it). It worked better than I had hoped to glue blocks of wood that fit snug where they were missing and use my chisel to get it close to the right shape. Sanding for the final shape was fast and easy!
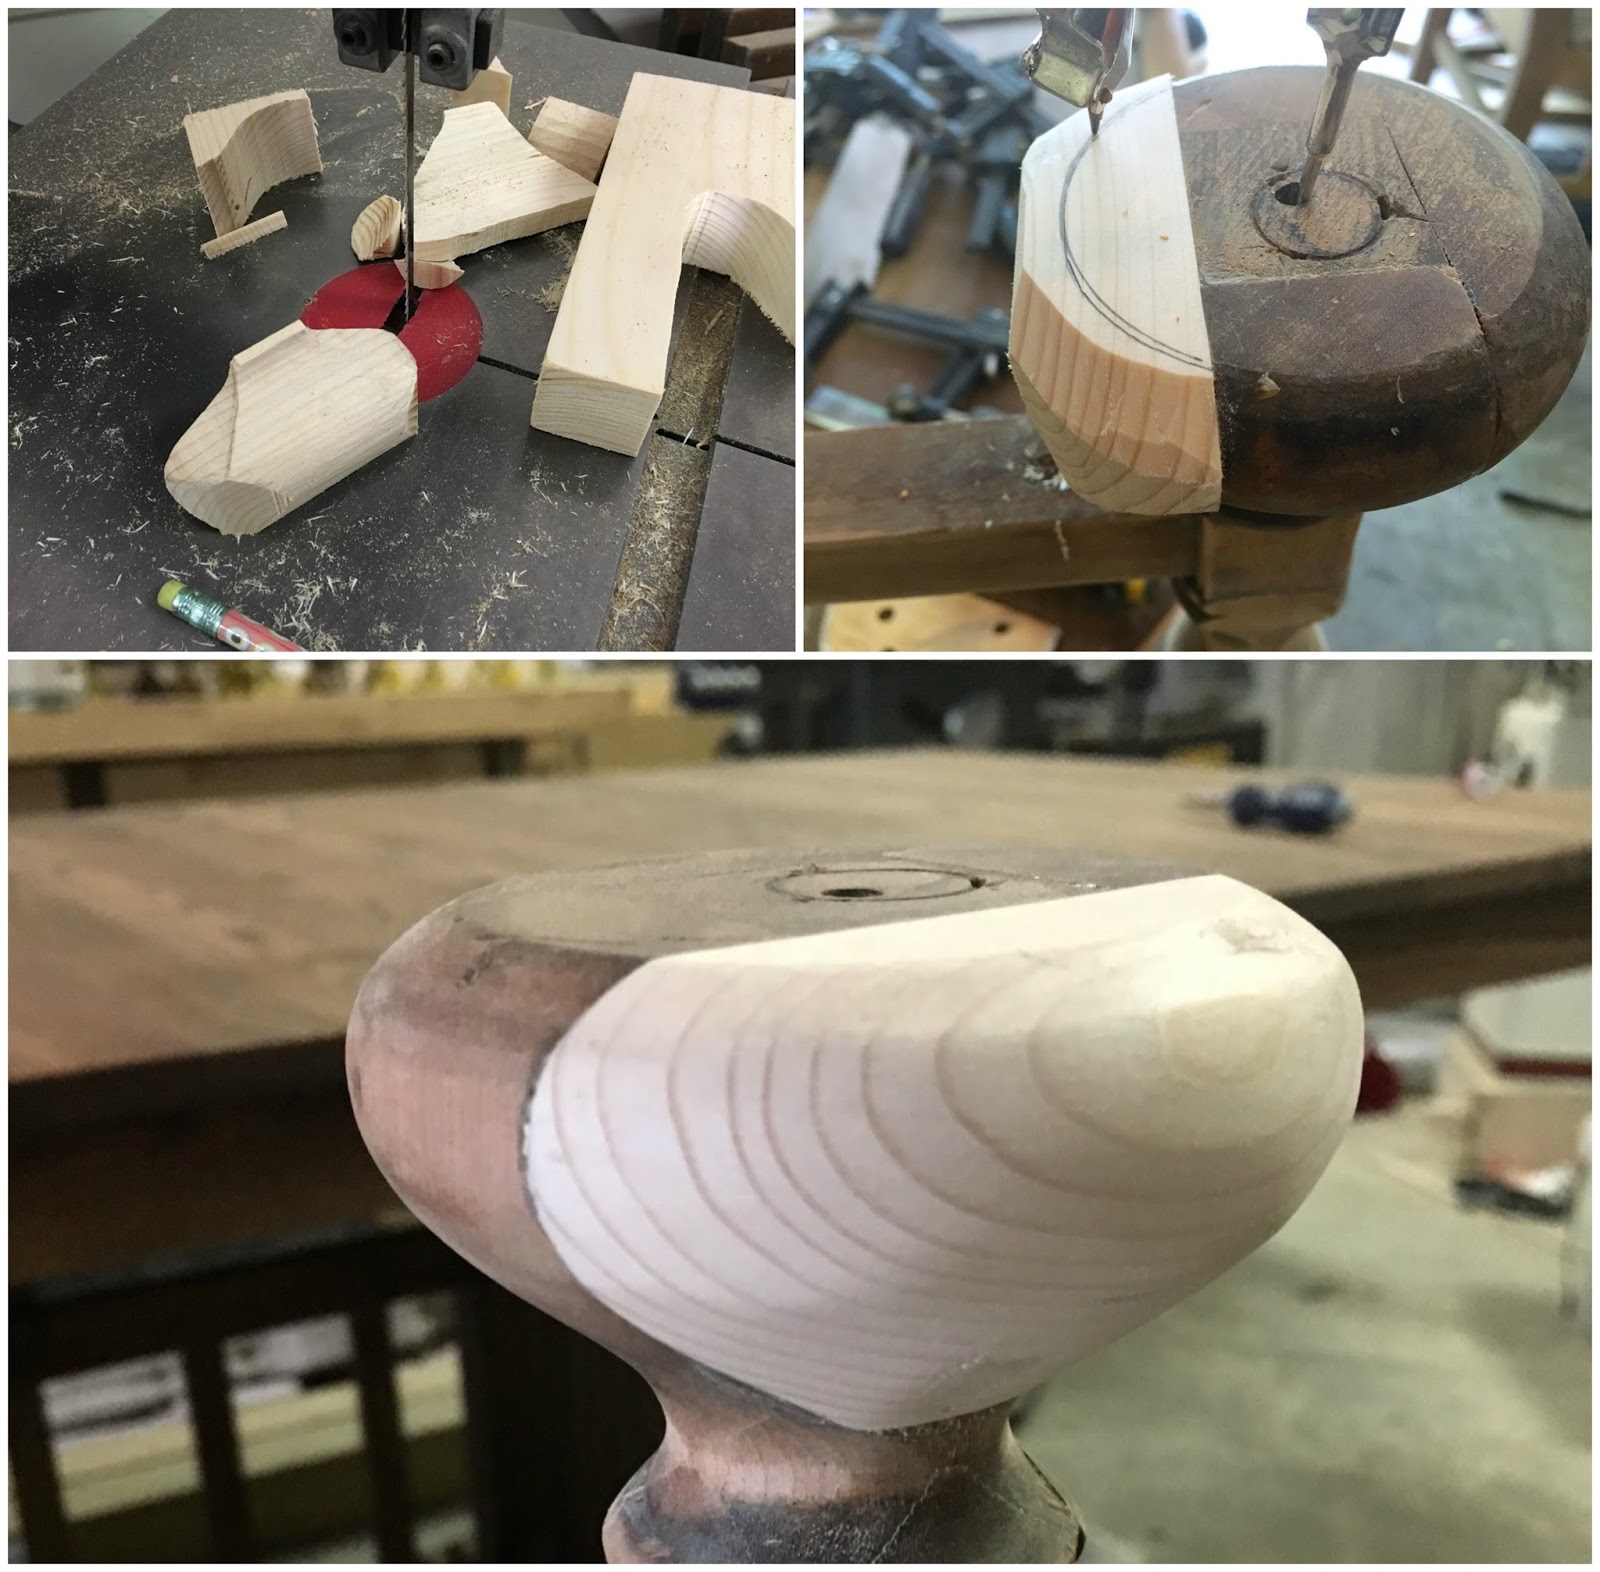
To cut down on the amount of wood I’d have to chisel/sand away I used my trusty bandsaw to cut the blocks first.
– Day 4 –
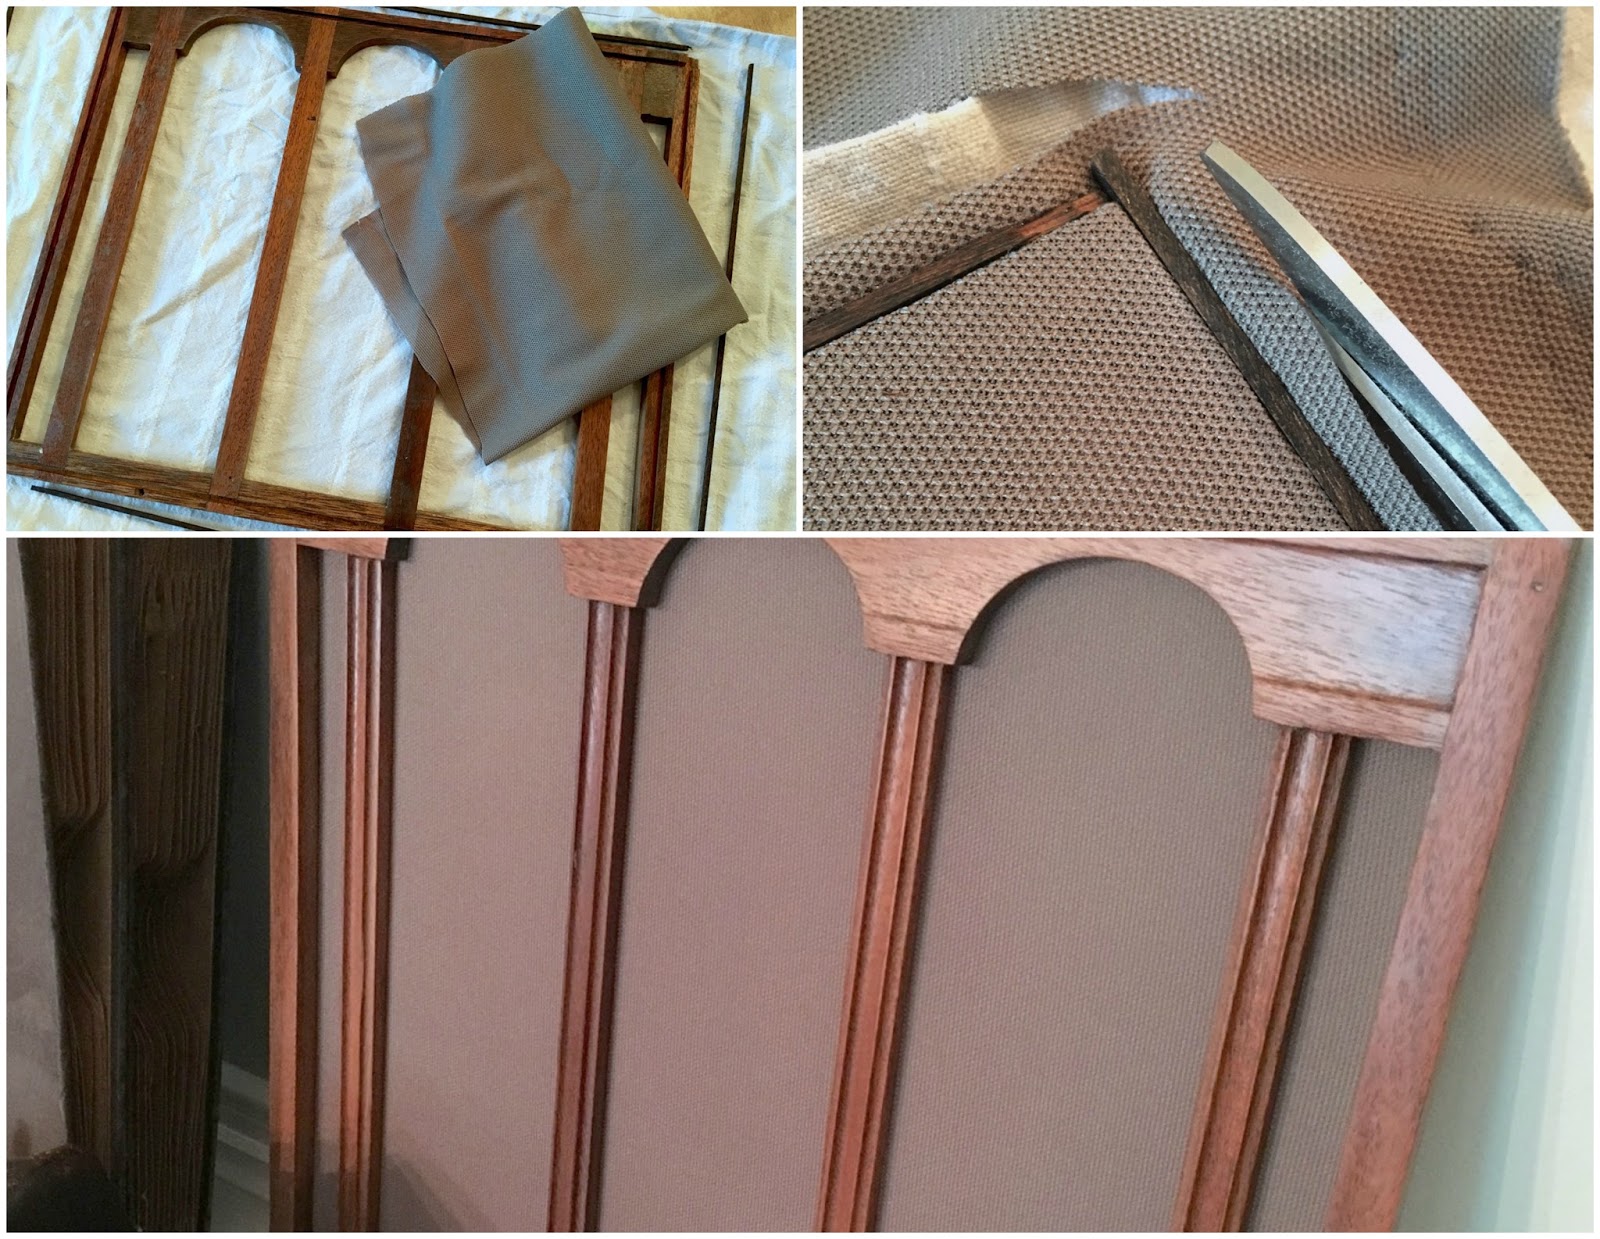
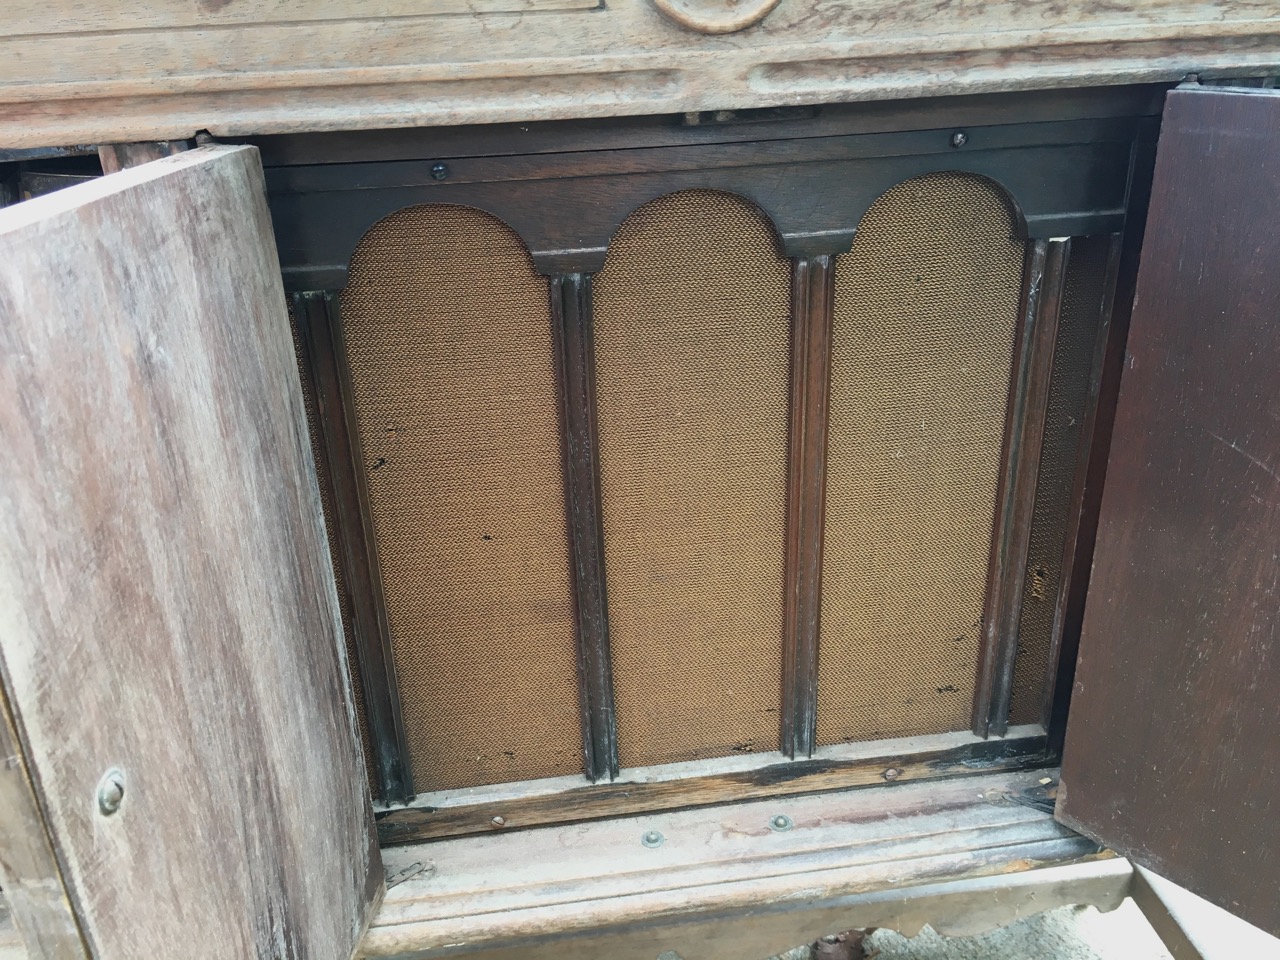
This wooden frame for the ‘speaker’ of the cabinet took more time that I had hoped. I first sanded it down and stained it dark, then painted it white, then I stripped and sanded it again and stained it the color you see here. Every project has it’s challenges and this was one! I bought new speaker grille clothe to replace the frail 90-year-old original fabric.
– Day 4 –
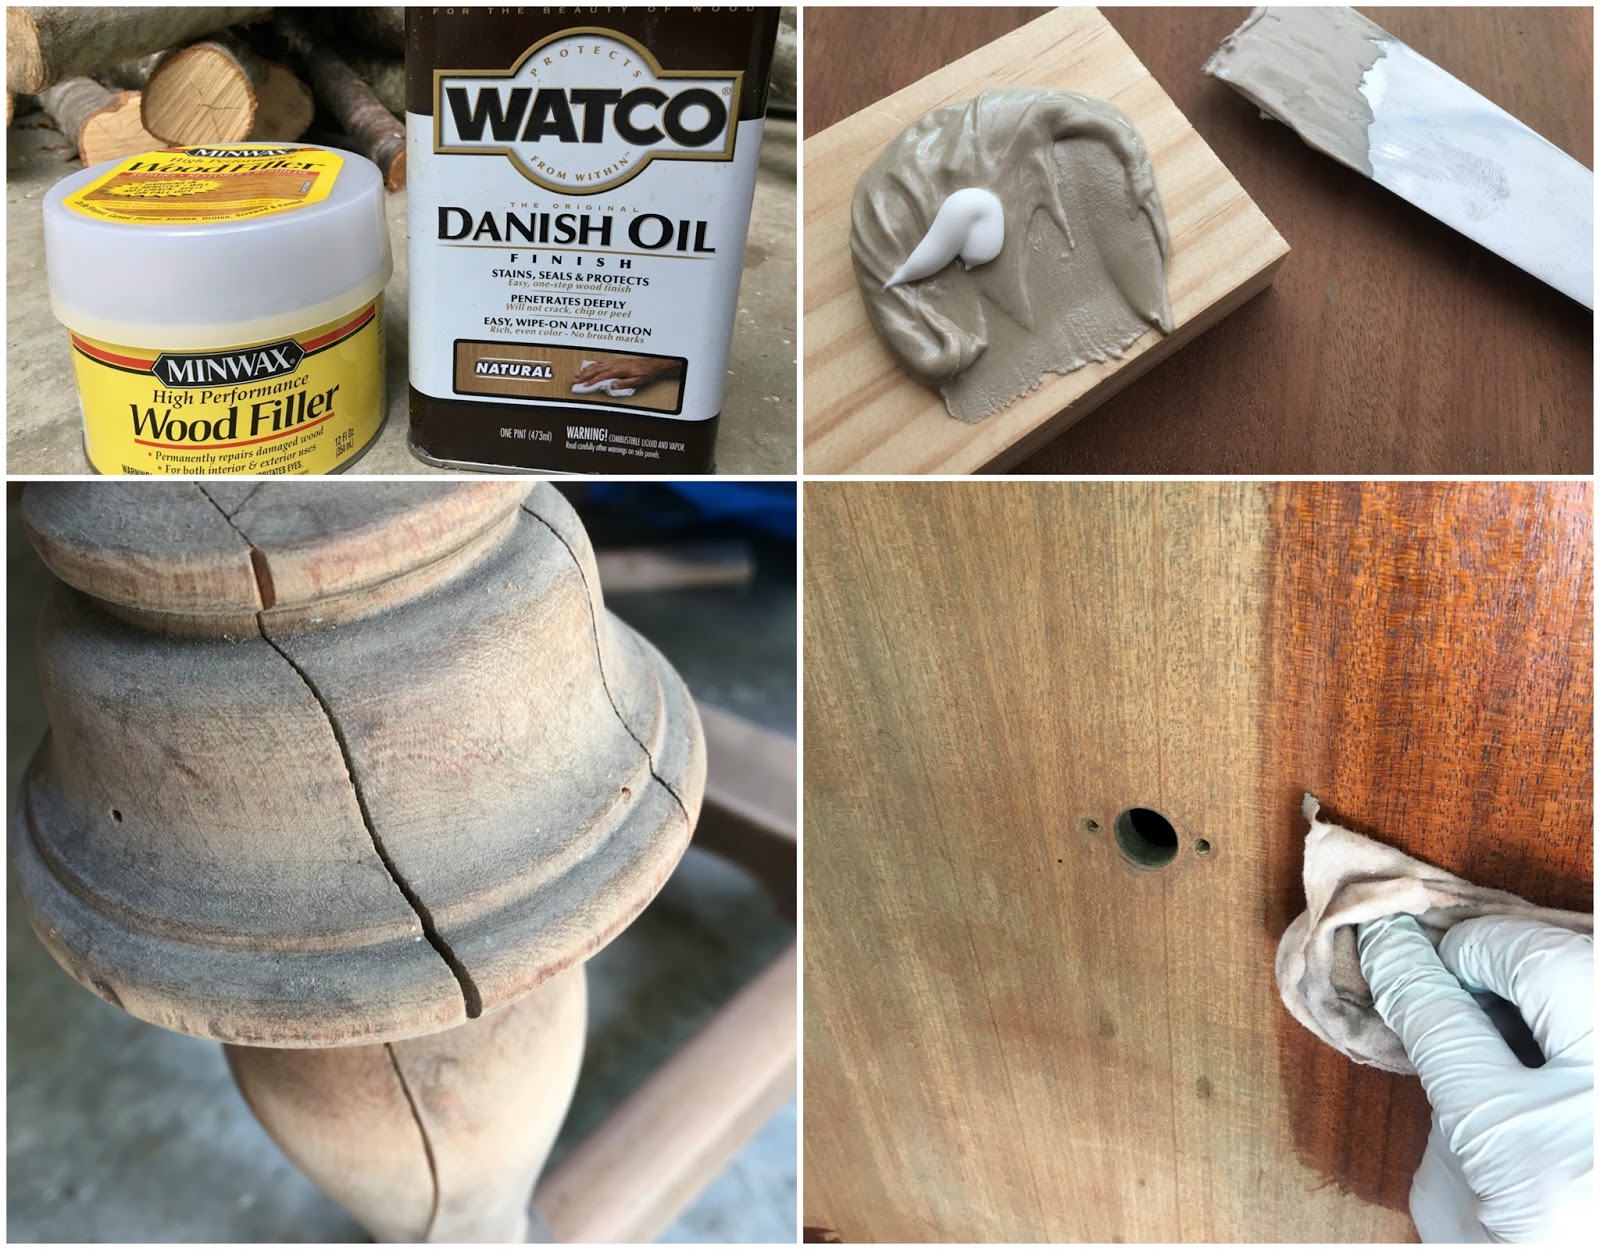
These are 2 of my favorite products! I used the wood filler to fill in the crack on the legs. The legs seemed strong and I wanted to keep them that way, as well as close up the gaps. This high performance filler is amazing! It’s super strong and I love that it sets fast (sometimes too fast… about 3-5 minutes). I had to mix up a few batches to complete. Once the filler was dry I sanded it down. It’s a LOT of work to sand this stuff by hand so I used my orbital sander the most I could and finished off with hand what was left.
I used clear Danish oil to bring the wood back to life. If there was one thing I was sure of – I loved the old look of the wood and didn’t want to cover it up but I also knew this wood needed something that it could absorb and come back to life. There’s nothing easier than wiping oil on!
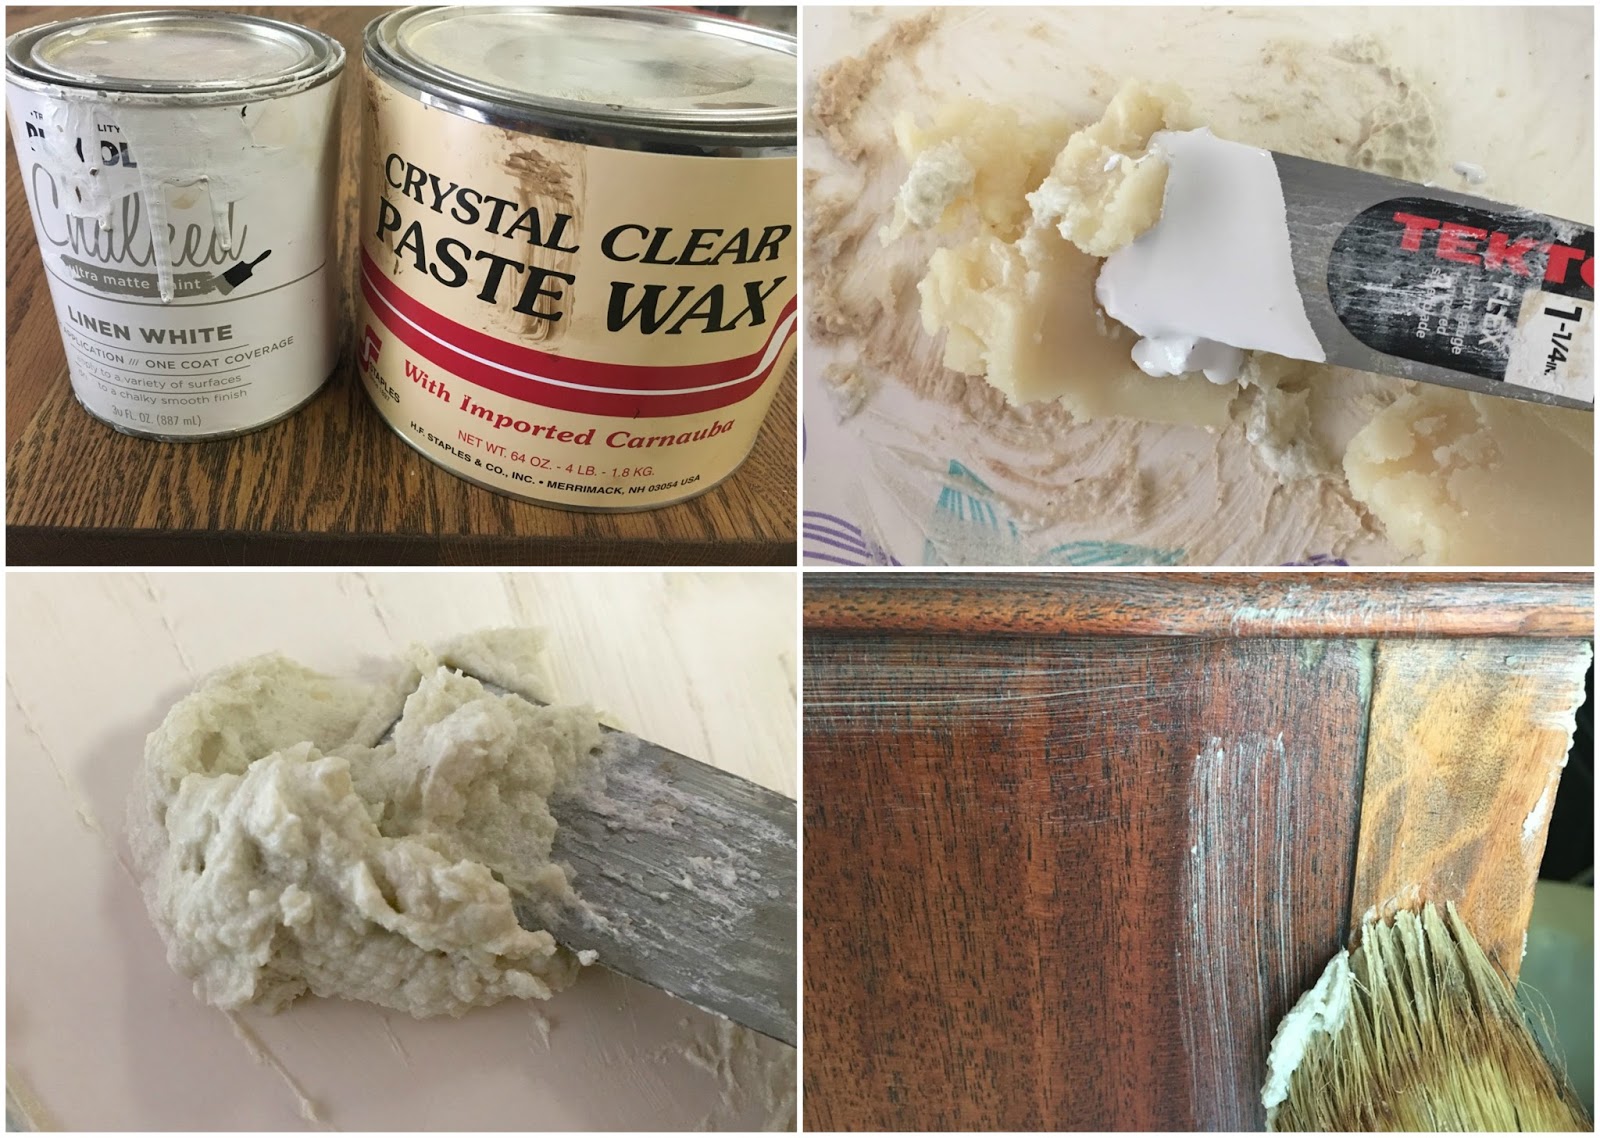
I also knew I wanted to wax the cabinet to give it a good “lotion” rub down” (the wood needed all it could get)! I also wanted the look of liming but I didn’t have the products and didn’t want to spend more than I already had. Adding a little white paint (chalkpaint in this case) was the PERFECT solution! It deposited white wax in all the pores and crevices of the wood giving it just the look i wanted. It couldn’t have been easier! I brushed the white wax on, let it sit for 5 minutes, and wiped the excess off and buffed it smooth.

This is a close-up of what it looks like.
– Day 5 –
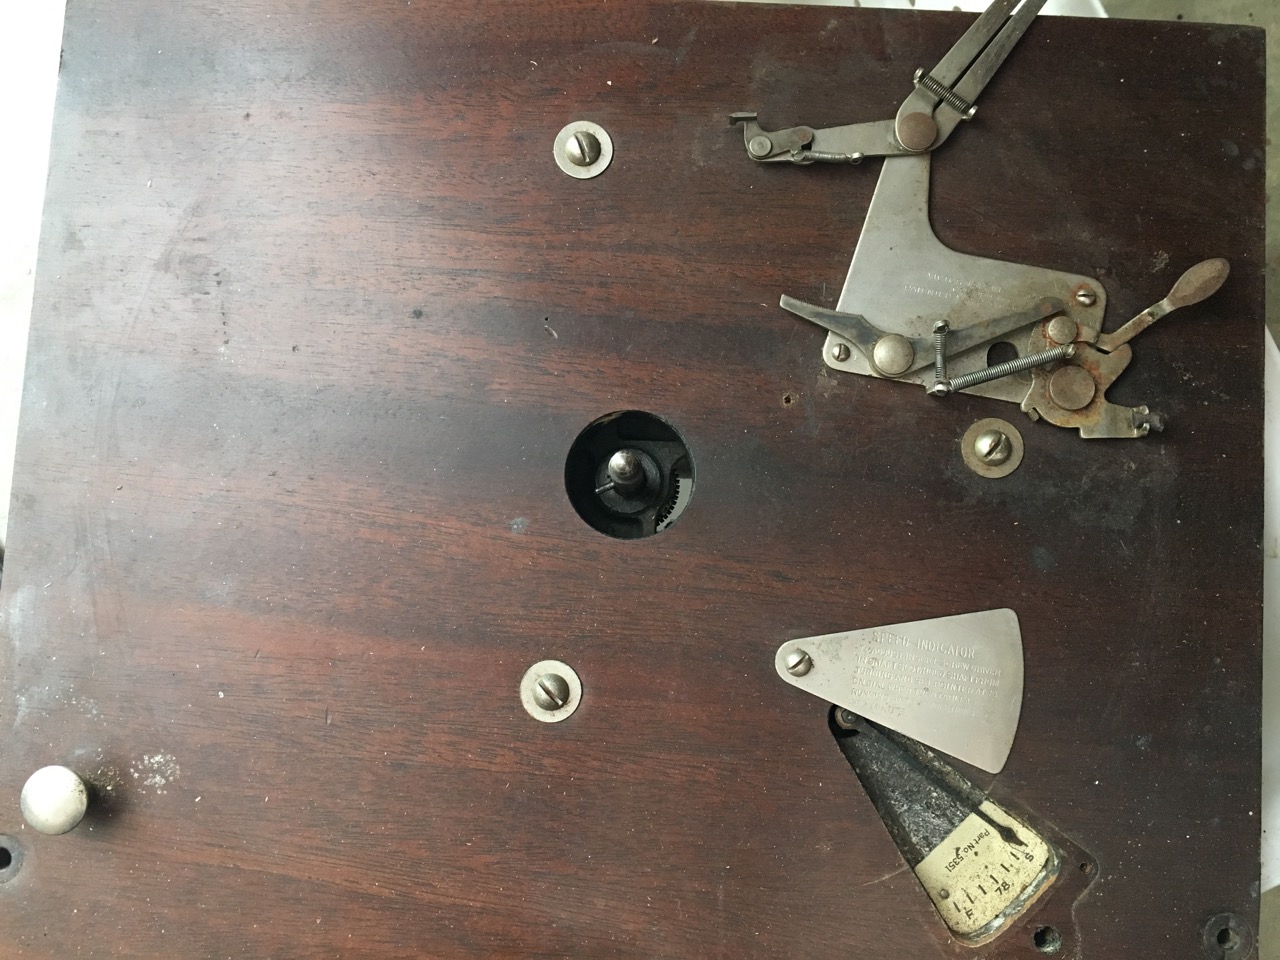
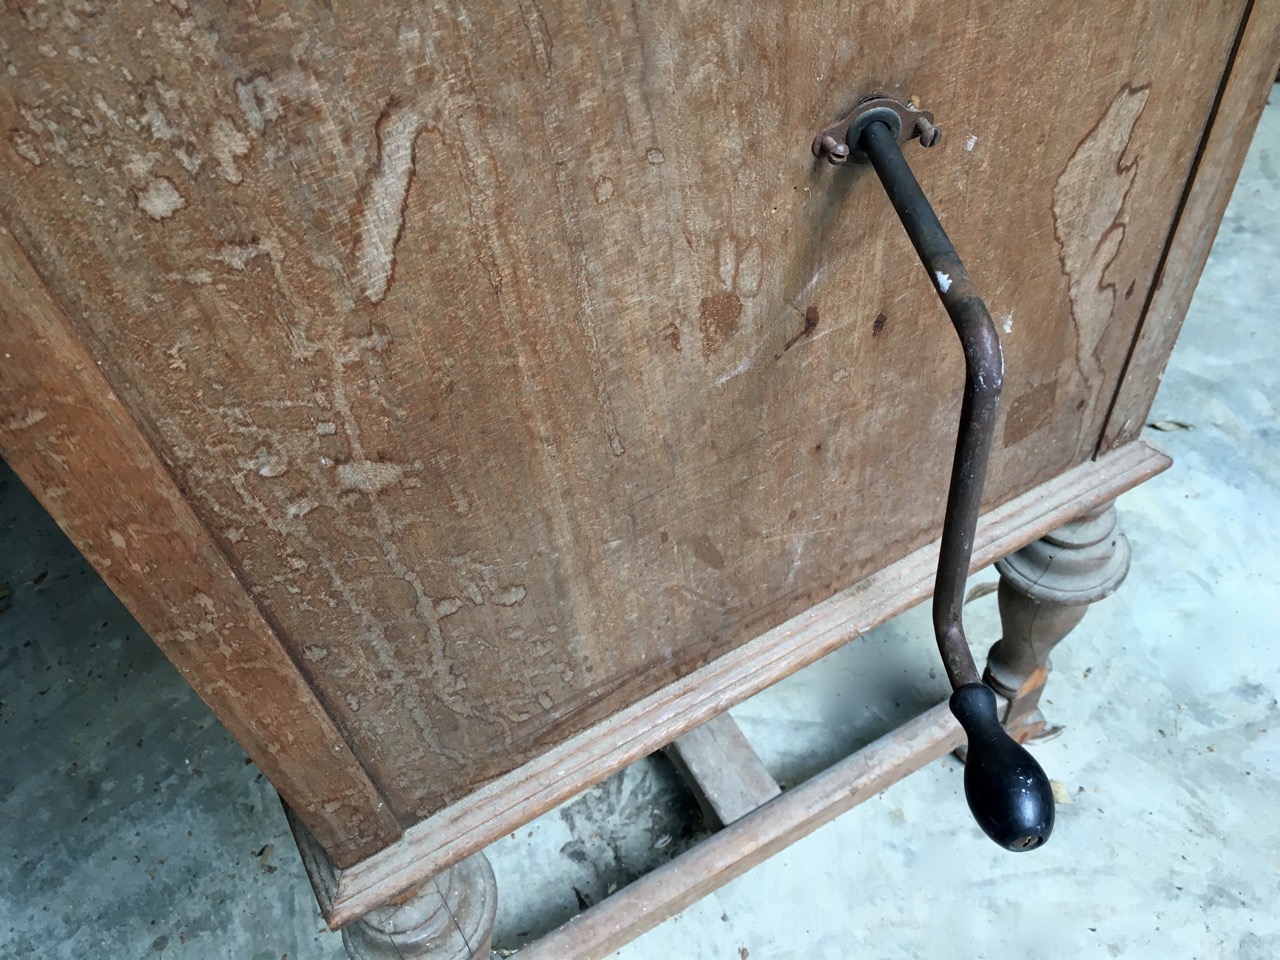
Here’s a picture of the brake mechanism. This is before I cleaned it up. The turn table sits over top so all you see is the little lever on the right and the long arms extending over the top. It wasn’t working properly so I soaked it in Kerosene, oiled it and added a new spring and ‘brake pad’.
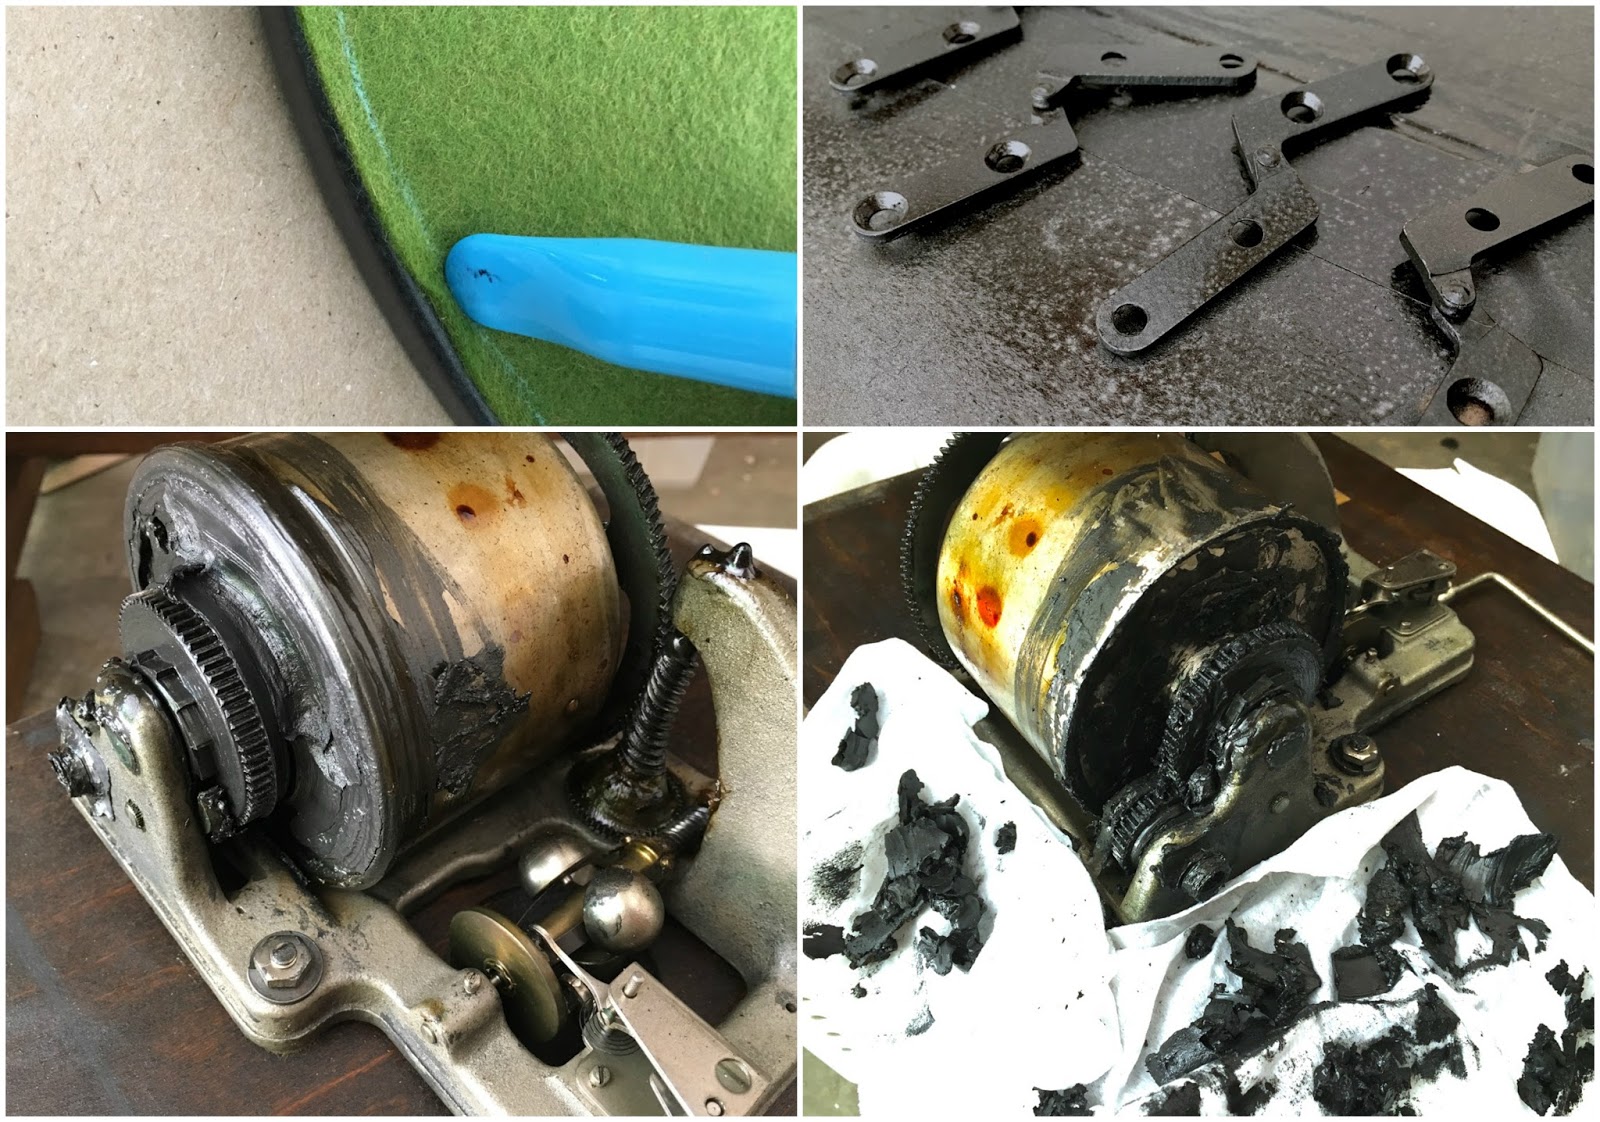
I spray painted all the hinges and screws for the door, turntable and hand crank. I cut a piece of felt for the turntable and added bumpers for the lid out of the same felt. I cleaned up the motor from all the hardened grease that was stuck on the outside and gave it some fresh oil.
I had originally planned to rebuild the motor and pack in new grease but after seeing how smoothly it ran I decided that it could wait for another day. I found an amazing video series on YouTube of a guy showing how to rebuild one of these motors step-by-step.
– Day 6 –

I glued wide leather strips over the binder ends to help strengthen and clean them up (and my husband says I never use my Mora knive… 😕).


I waxed the doors and hung them. I attached all the other hardware, including motor, crank, turntable, etc…

I rubbed all the bare metal parts with oil to protect from rust.
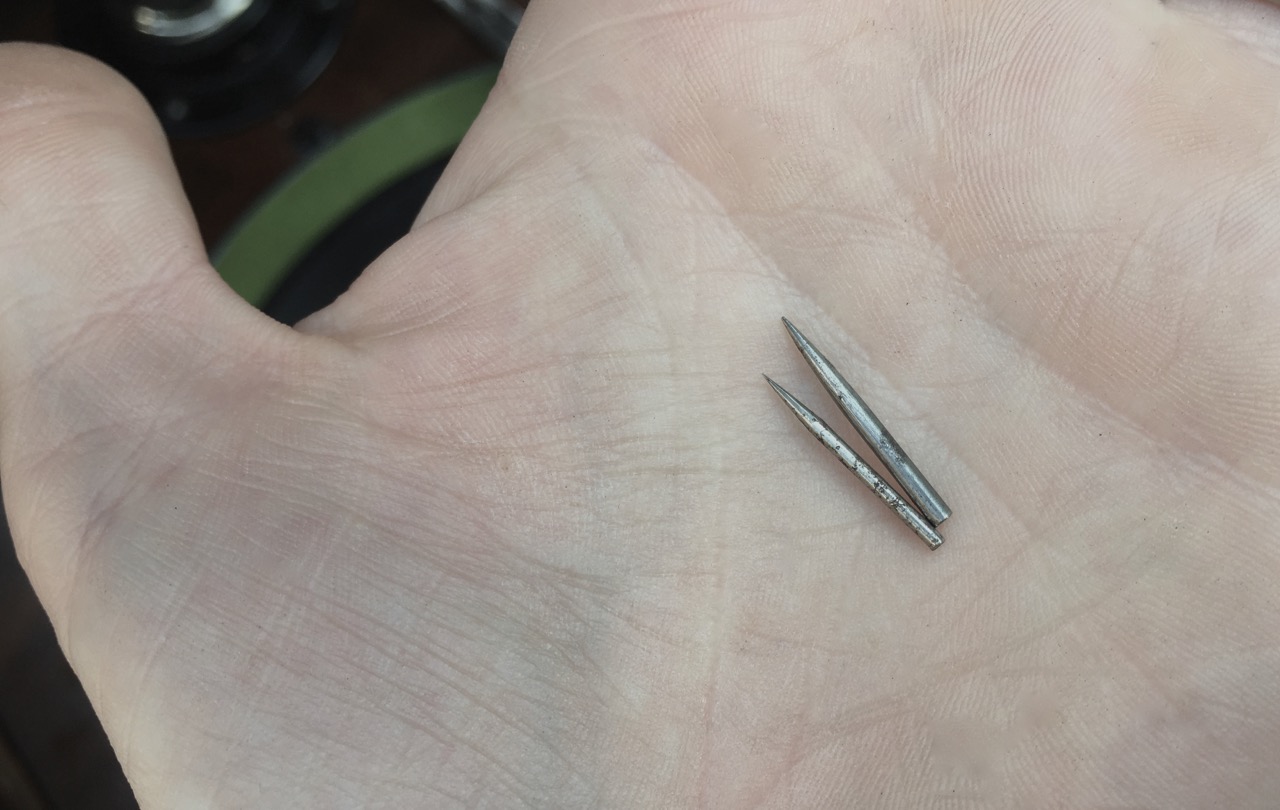
Although these original needles are rusty they work perfectly! There’s 2 sizes you can see.
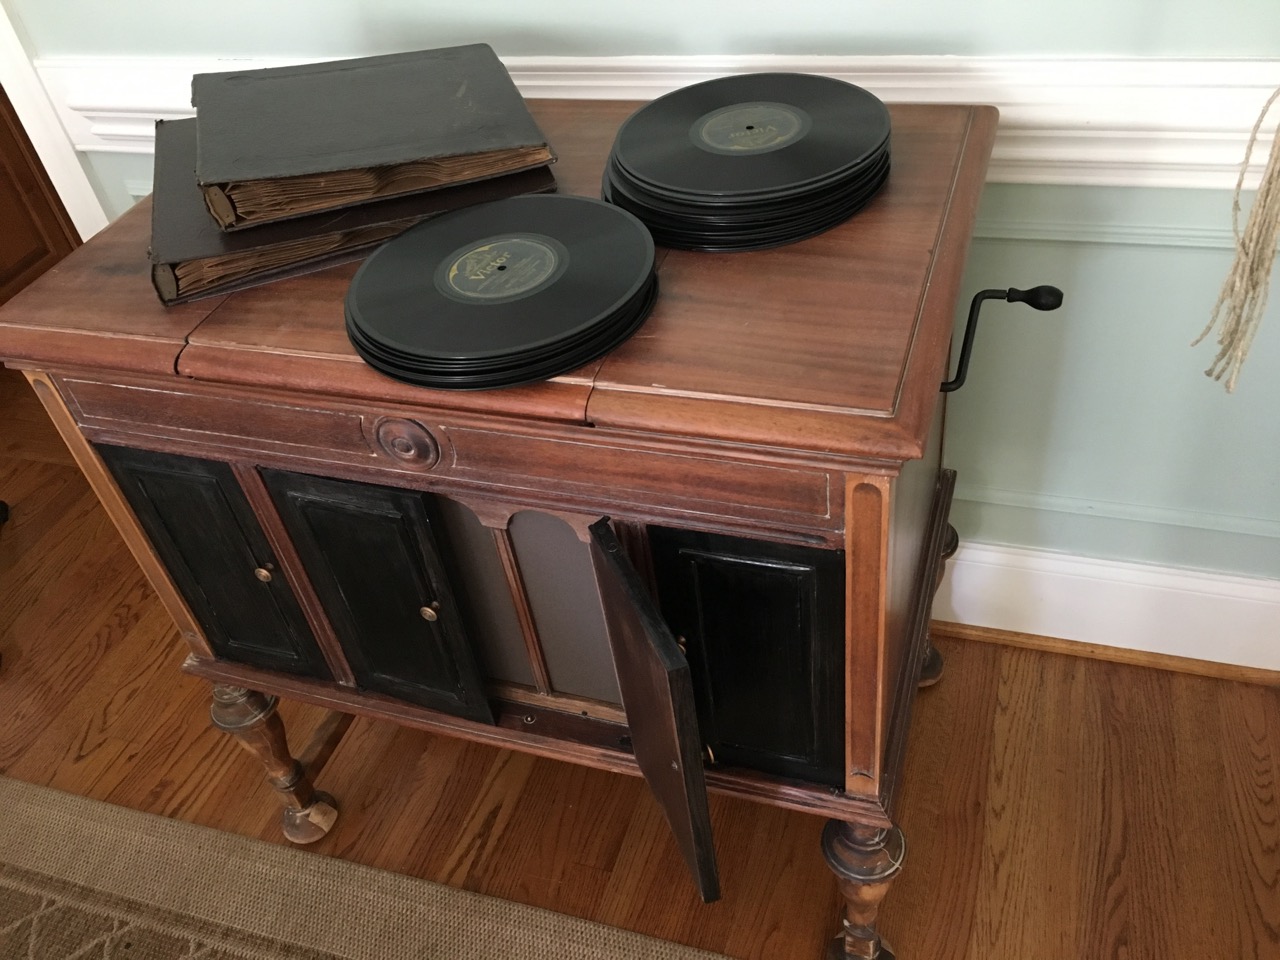
It was so nice to be finished and test it out! I love it!
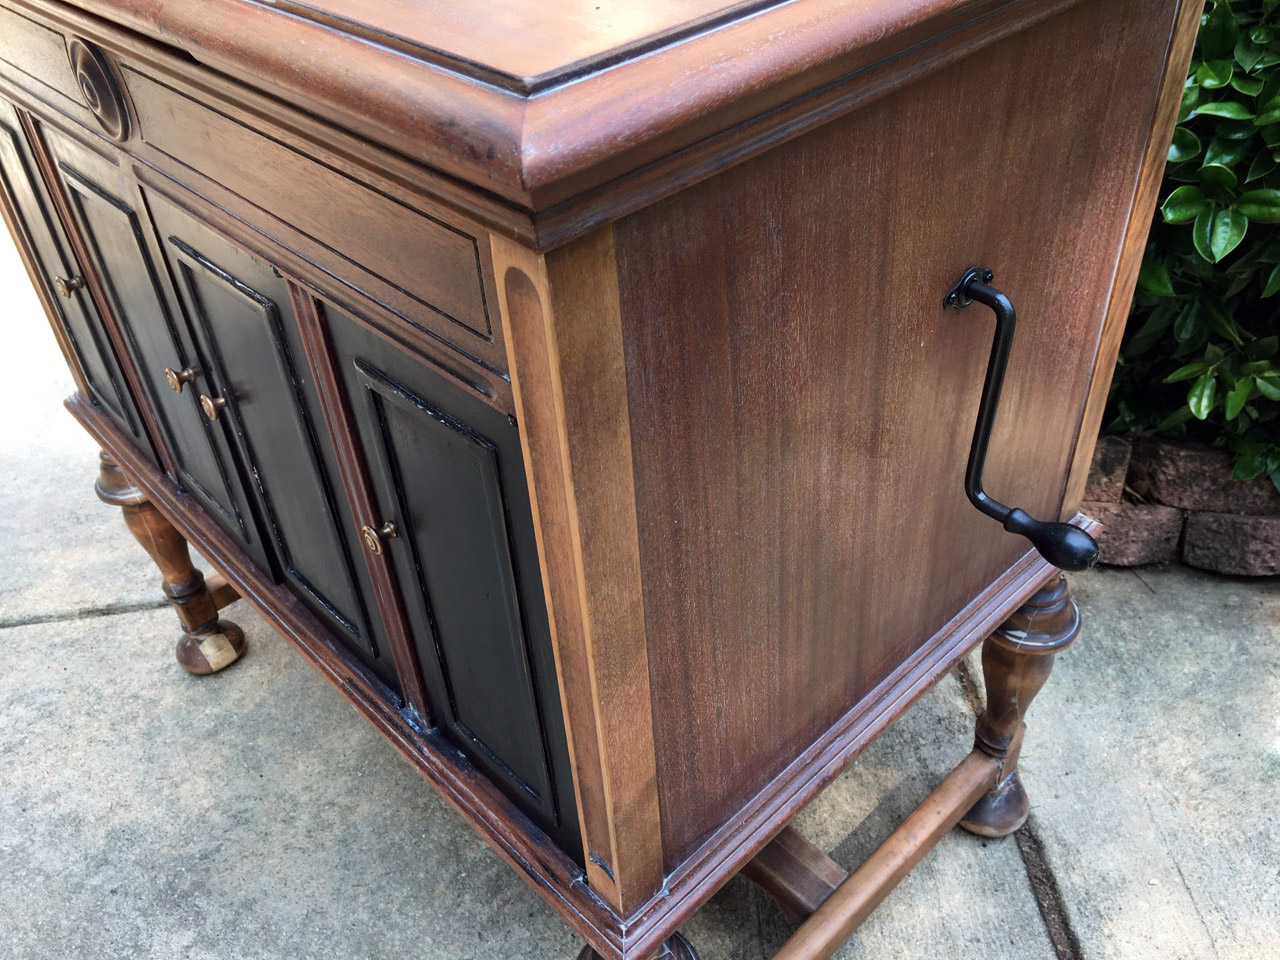
You can see the new wood I added on the feet pretty well but I kind of like it!
By 2 oldest boys helped me bring it inside to the dining room.
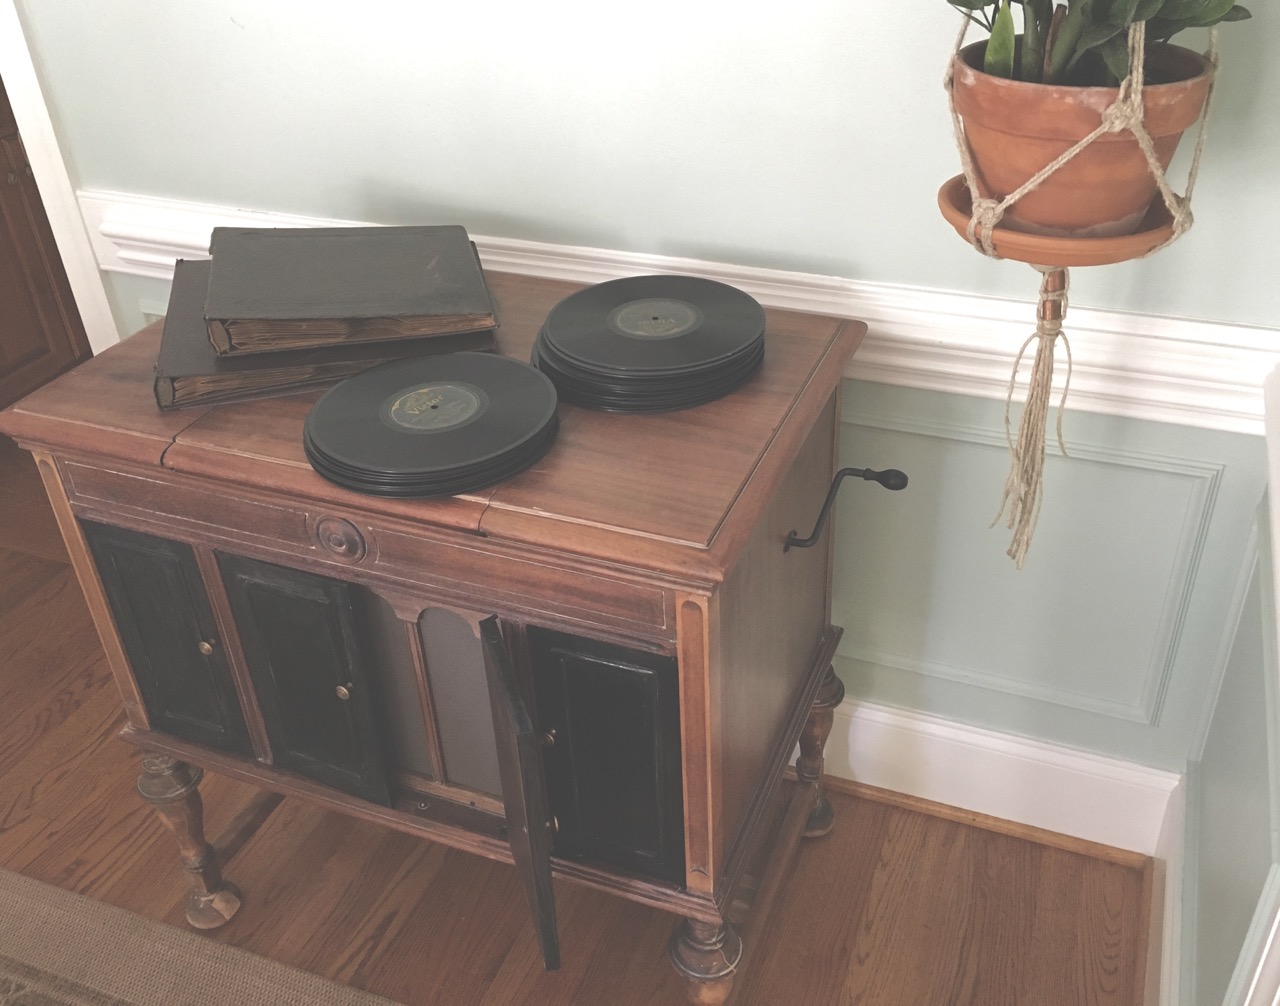
I still have 2 binders to fix up and put records back in… but we’re working on listening to them all first!

The boys found this a very curious contraption. I loved watching them investigate and learn how it works.
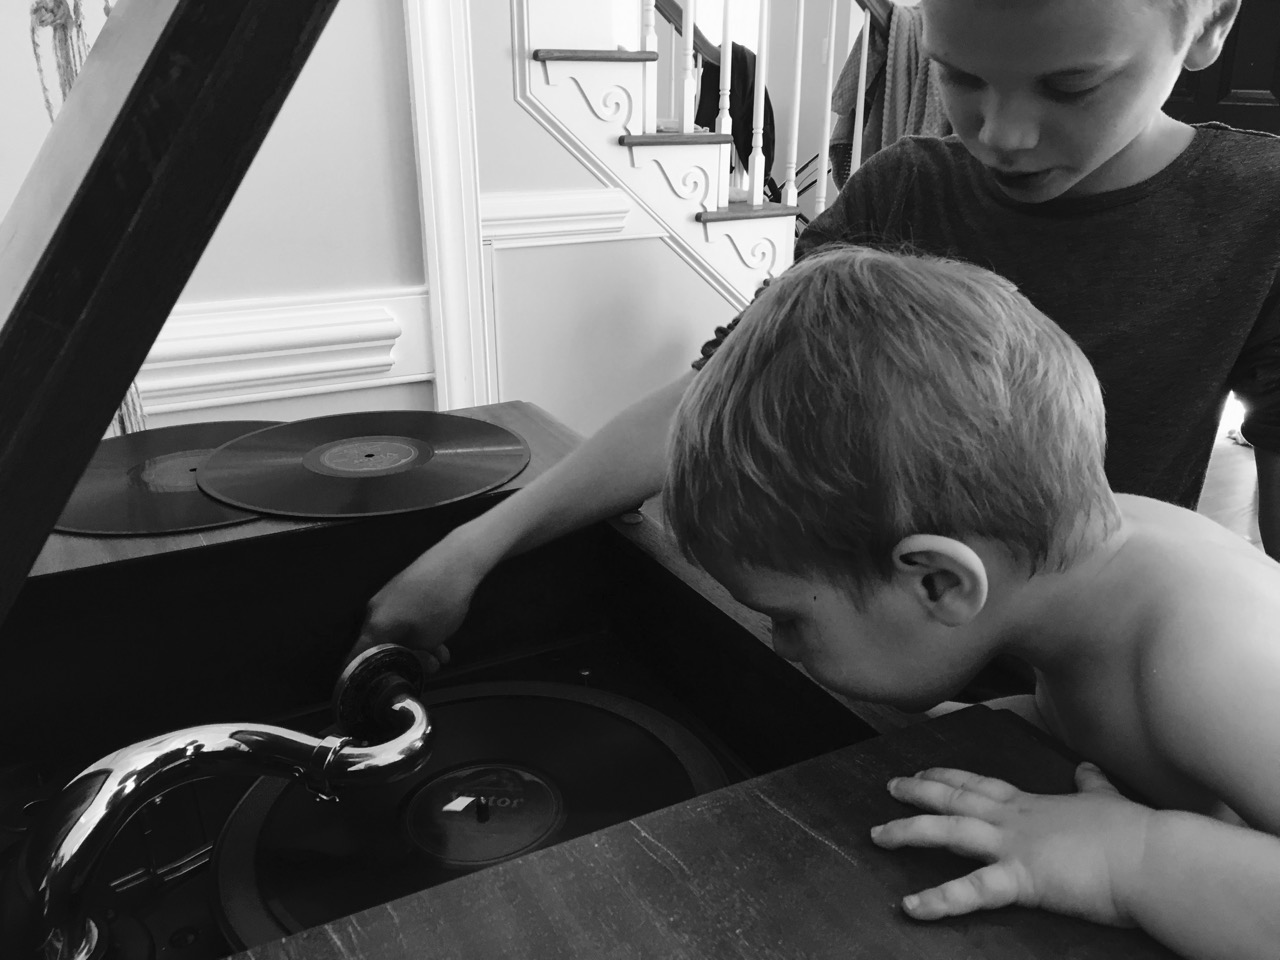
They love to open the lid, switch out records and crank it up. I have to keep telling the it’s not a toy (I’m a little paranoid they’re going to break it, ha)!
I thought it was loud outside in the driveway but having it inside I have to keep the doors halfway closed!
I thought it was loud outside in the driveway but having it inside I have to keep the doors halfway closed!
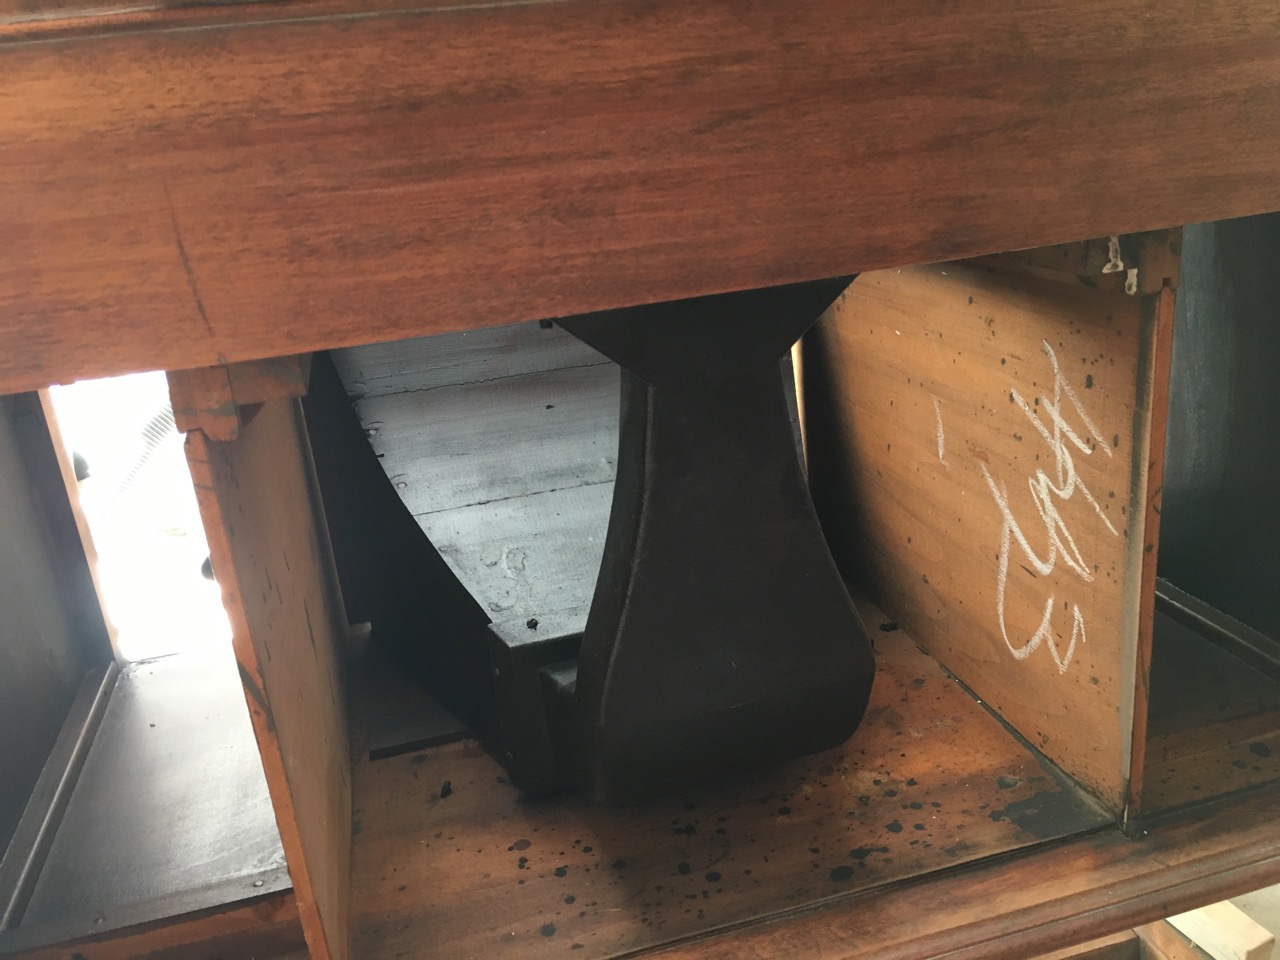
If you’re curious what the inside of the cabinet look like:
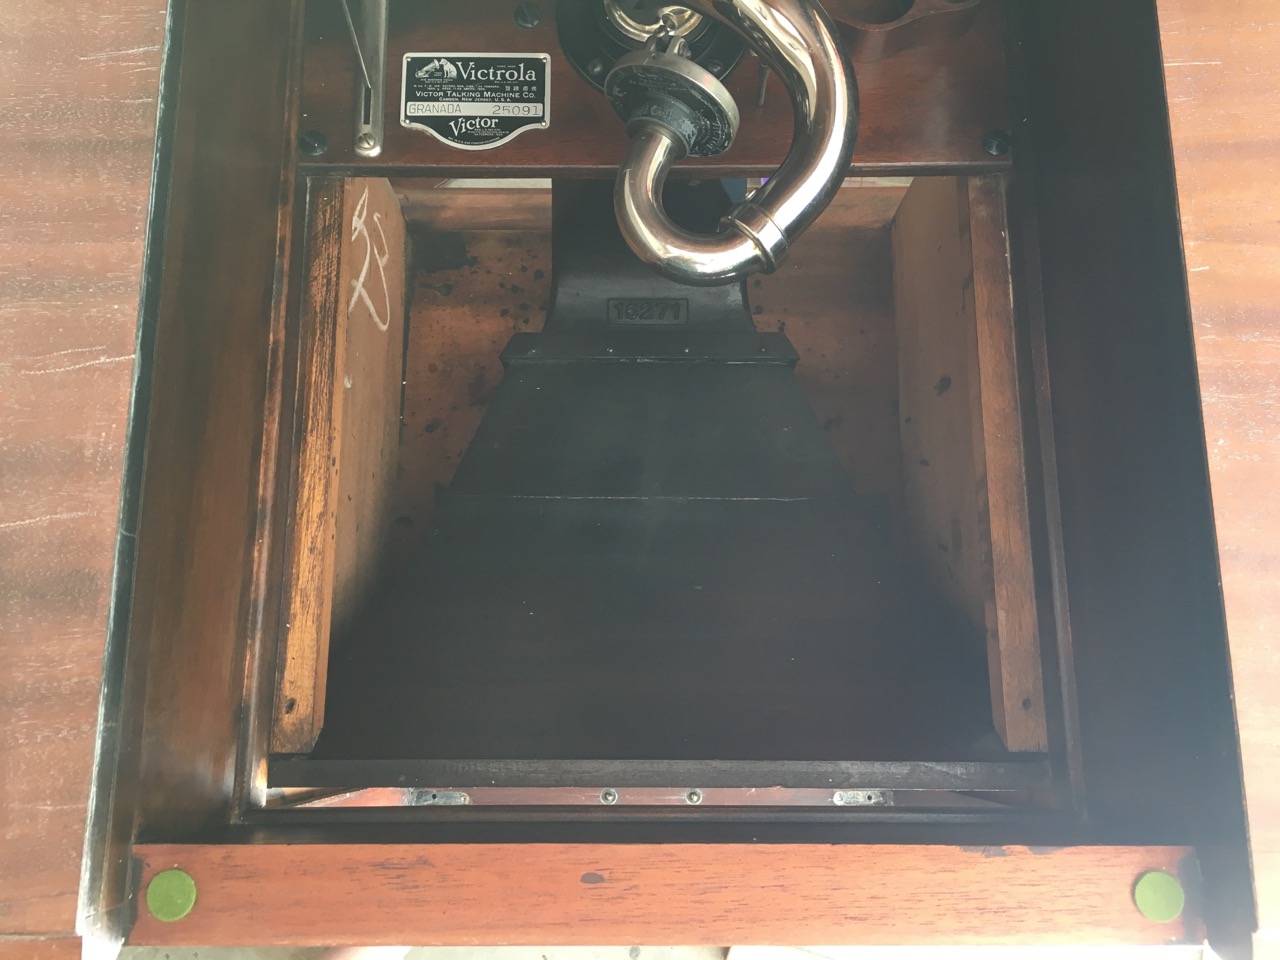
The motor sits right inside this opening.
This is the back of the cabinet where the sound travels out through the front.

Here’s the front that is covered by grille clothe.
I hope you enjoyed!
The man I bought the cabinet from gave me this:
The man I bought the cabinet from gave me this:
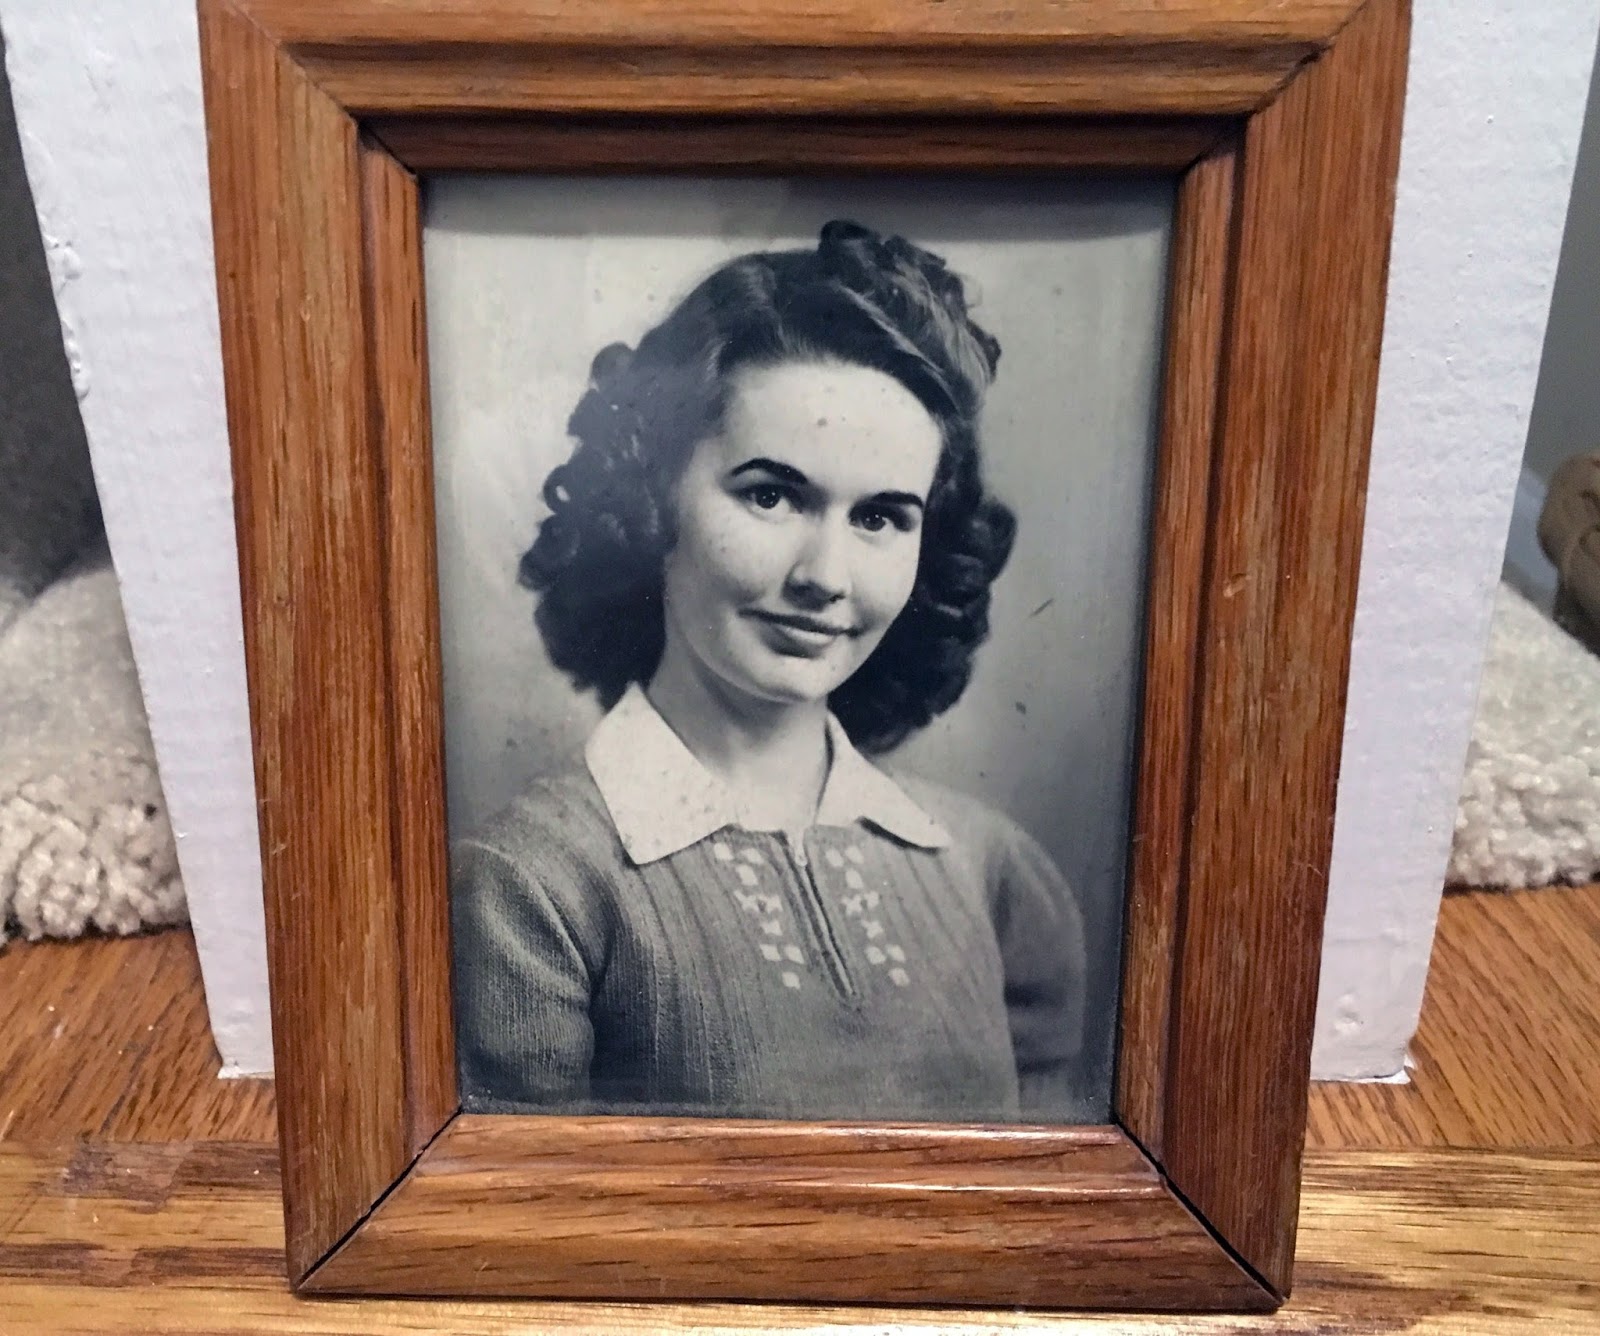
“Here is a picture of Doris Cheeves-my adored late grandmother of German descent-in her early twenties. Always such a kind and passionate woman who loved to cook, ride horses, and collect antiques.
Although she spend most of her life stateside on a 100+ acre ranch in Oklahoma, she spent several years in Australia, which is where most of her antiques were purchased. While visiting my Aunt, Uncle and many cousins in Kansas, Doris asked me at age 6 to go up the wide and worn staircase to the enormous walk-up attic of my Great Grandmother’s wind-blown, two story Farmhouse with full walk-around porch. I was asked to pick out one antique and after spending many hours poking around and playing with hats, typewriters, and chests, I landed on the Victrola.

13 Comments
It is obvious you put much effort into making this work again, and it does look better now than it did in its original condition. That said, though, this is not a commonly found Victrola model and I would have preferred to see it restored as historically accurate as possible. Just my two cents.
February 11, 2018 at 8:03 pmI love it and that’s all that matters to be honest!
February 11, 2018 at 8:09 pmYou did a very nice job restoring it!! The only question I have is how did you refinish the chromed needle arm mechanism? I would think that arm was in very bad shape.
March 19, 2019 at 11:12 amIt was actually in very good condition – I believe I used a metal polish and 0000 steel wool to shine it up – that’s all it took!
May 15, 2019 at 8:25 amYou most likely already know this, but needles should be used once or twice at the most. It’s surprising how many people do not know this even though they can do amazing work like what you have done. I didn’t know it for years although I was a new collector, but nobody had told me.
May 31, 2020 at 4:22 pmI actually didn’t know that! Thank you for telling me! I sold the Victrola quite a while ago but if I ever get another one I’ll be sure to buy lots of needles to go with it. Cheers!
July 4, 2020 at 9:40 amHey. I am living in Norway, and got one of same model – also in a little bad shape.After the numbers – its from 1926.
The grill was gone, so I was need make a new one.
The original gramophone crank was gone, I just had a bad one. Could you give med the measurement of the crank ?
My new grill: https://photos.app.goo.gl/SvTG7bn2Kz3zKWwq5
I am also miss the sound box – did you have the original sound box for this model ? Could I have a picture of this too ?
Thank you !
November 24, 2020 at 8:52 amHi Jan!
I’m sorry but I don’t have the player anymore.. I sold it over a year ago. I wish you the best finding the information you need!
November 24, 2020 at 11:38 amHello I have the very same victrola along with 3 stack of music and needles. I sanded the front and side veneers the top is pealing off. It plays very well. I’m going to need some help with the legs. Can you give some suggestions? I wish I could send you a picture of my victrola
March 28, 2021 at 8:45 pmMs. Bacote CT
Perhaps you can find a local woodturner who can help turn new legs?
January 29, 2022 at 2:35 pmI just aquired this. Fully restored. But I have no needles. It came with 100 vinal records
October 10, 2022 at 1:44 pmCan I buy some needels from you is my question?
October 10, 2022 at 1:46 pmI’m sorry I don’t have the player anymore. I hope you found some! Ebay would be a great resource!
May 19, 2023 at 7:13 am