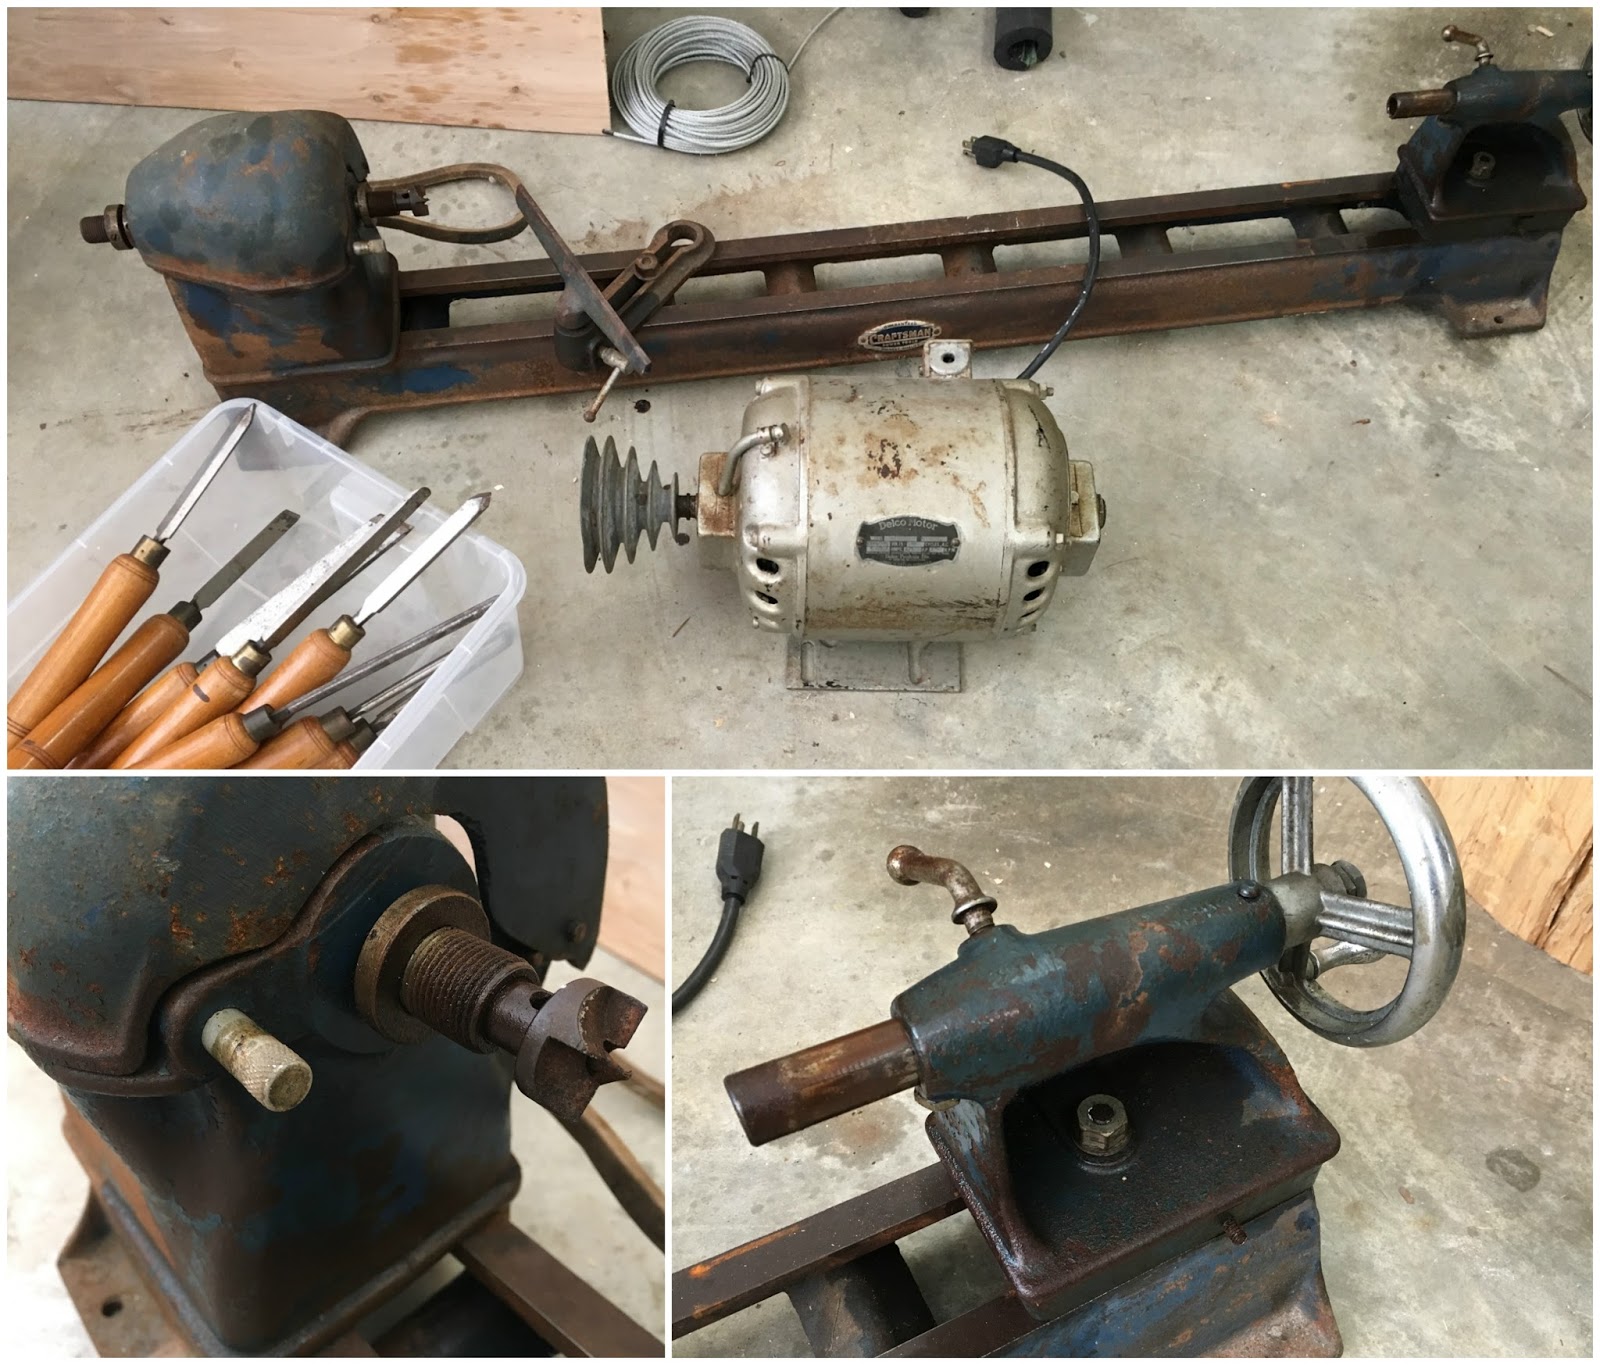
When I saw an ad on Craigslist for this lathe I knew immediately it was the one for me. It was a good price but I knew it would need a restoration (and sturdy table built).
It took me a few weeks to complete everything and I’m so excited it’s finished so I can stop thinking (and dreaming) about it.
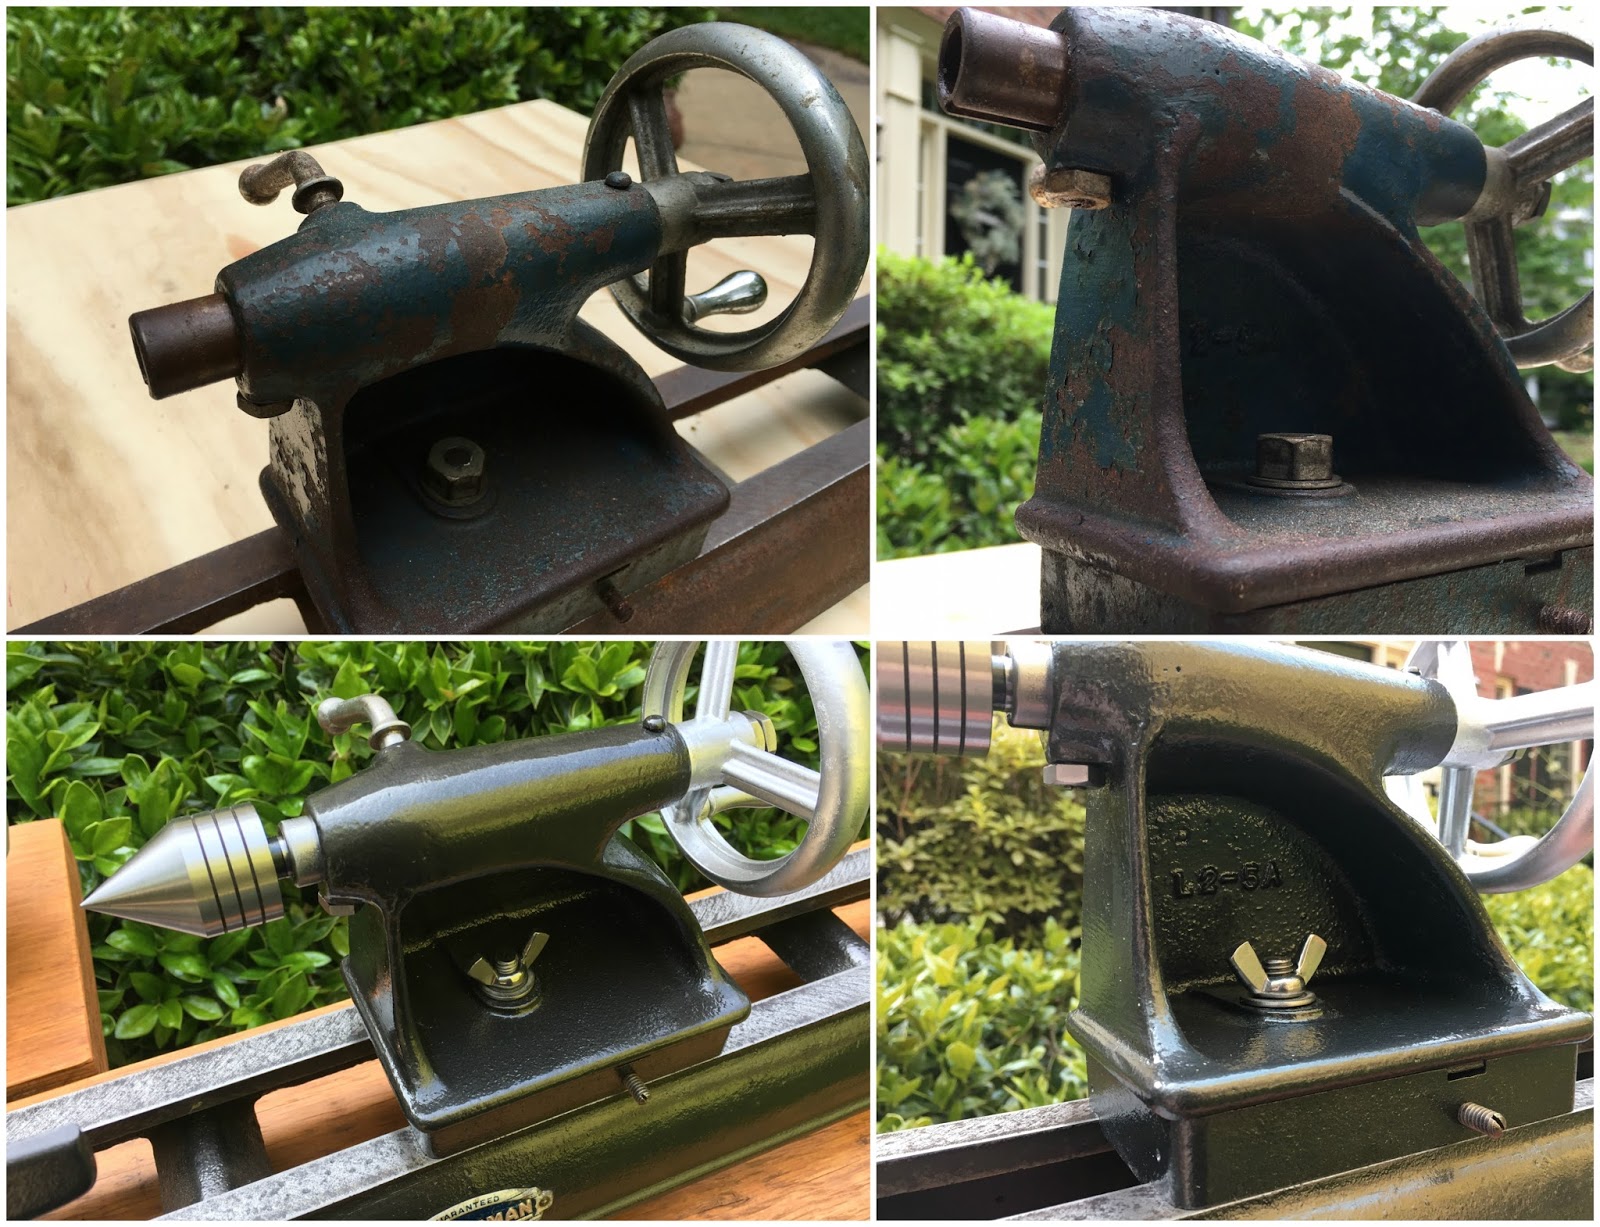
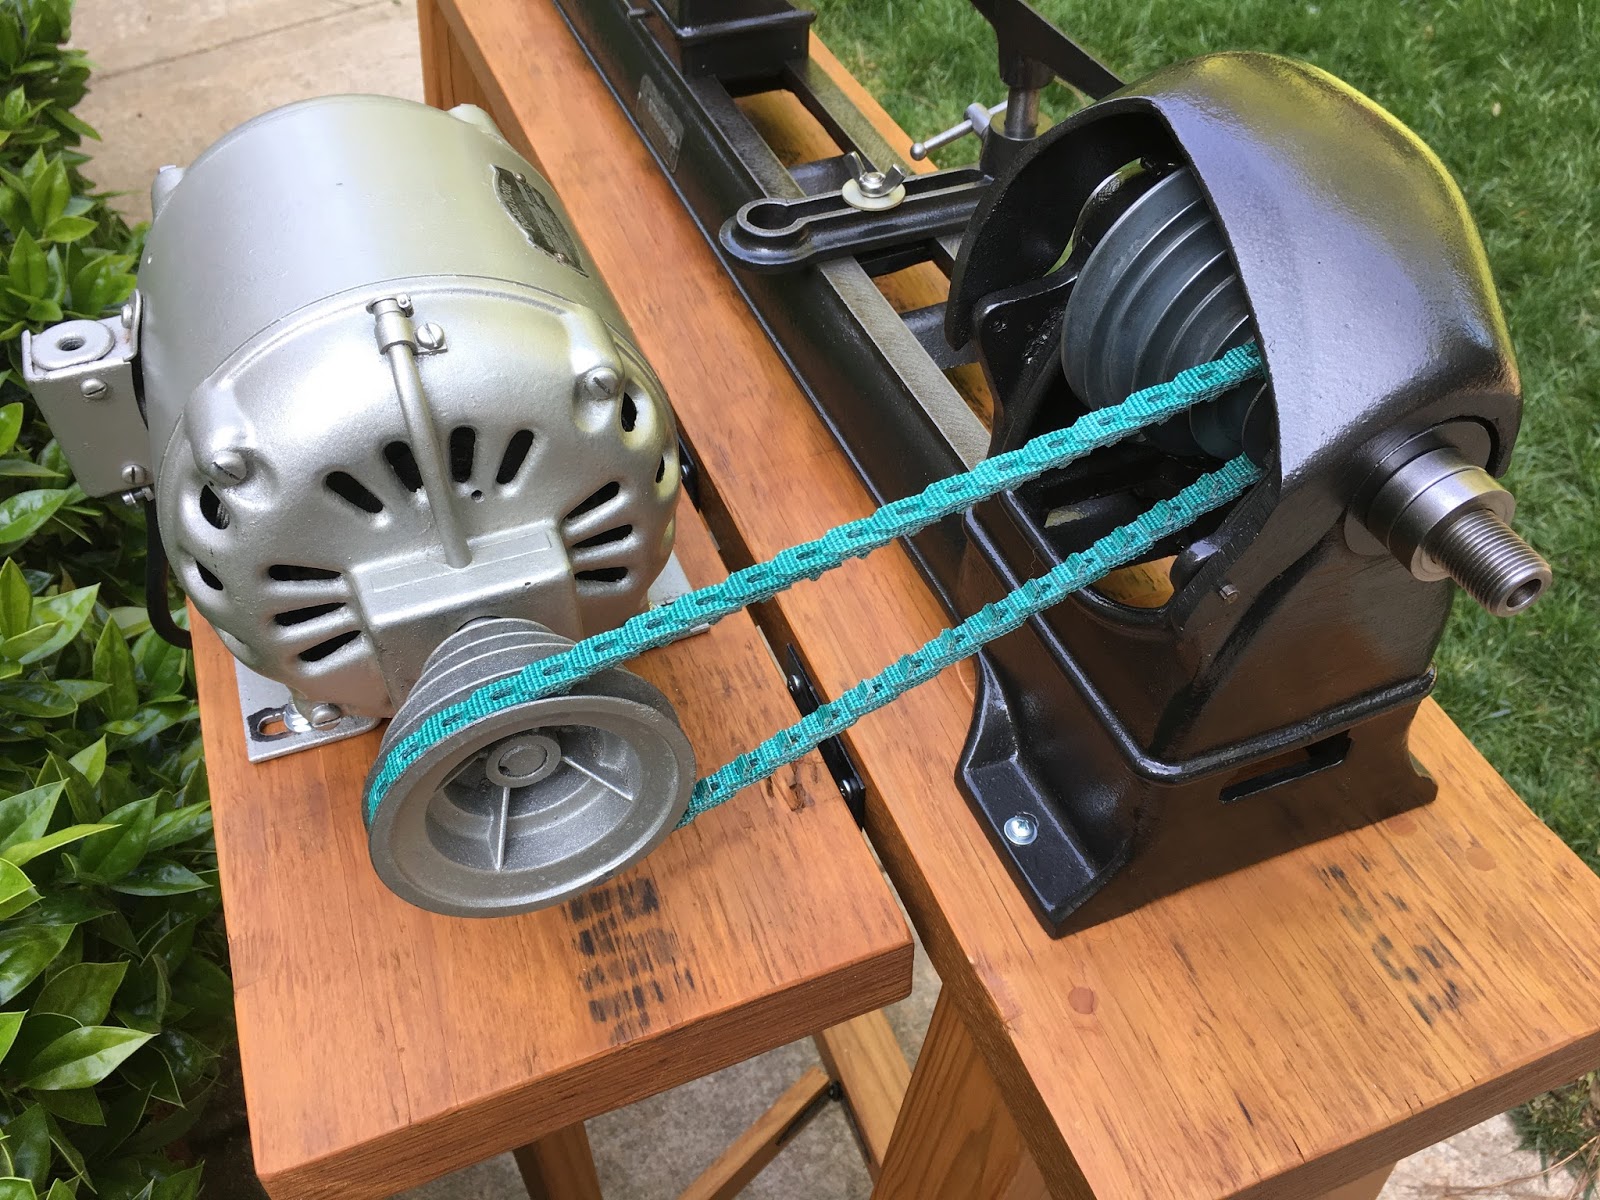
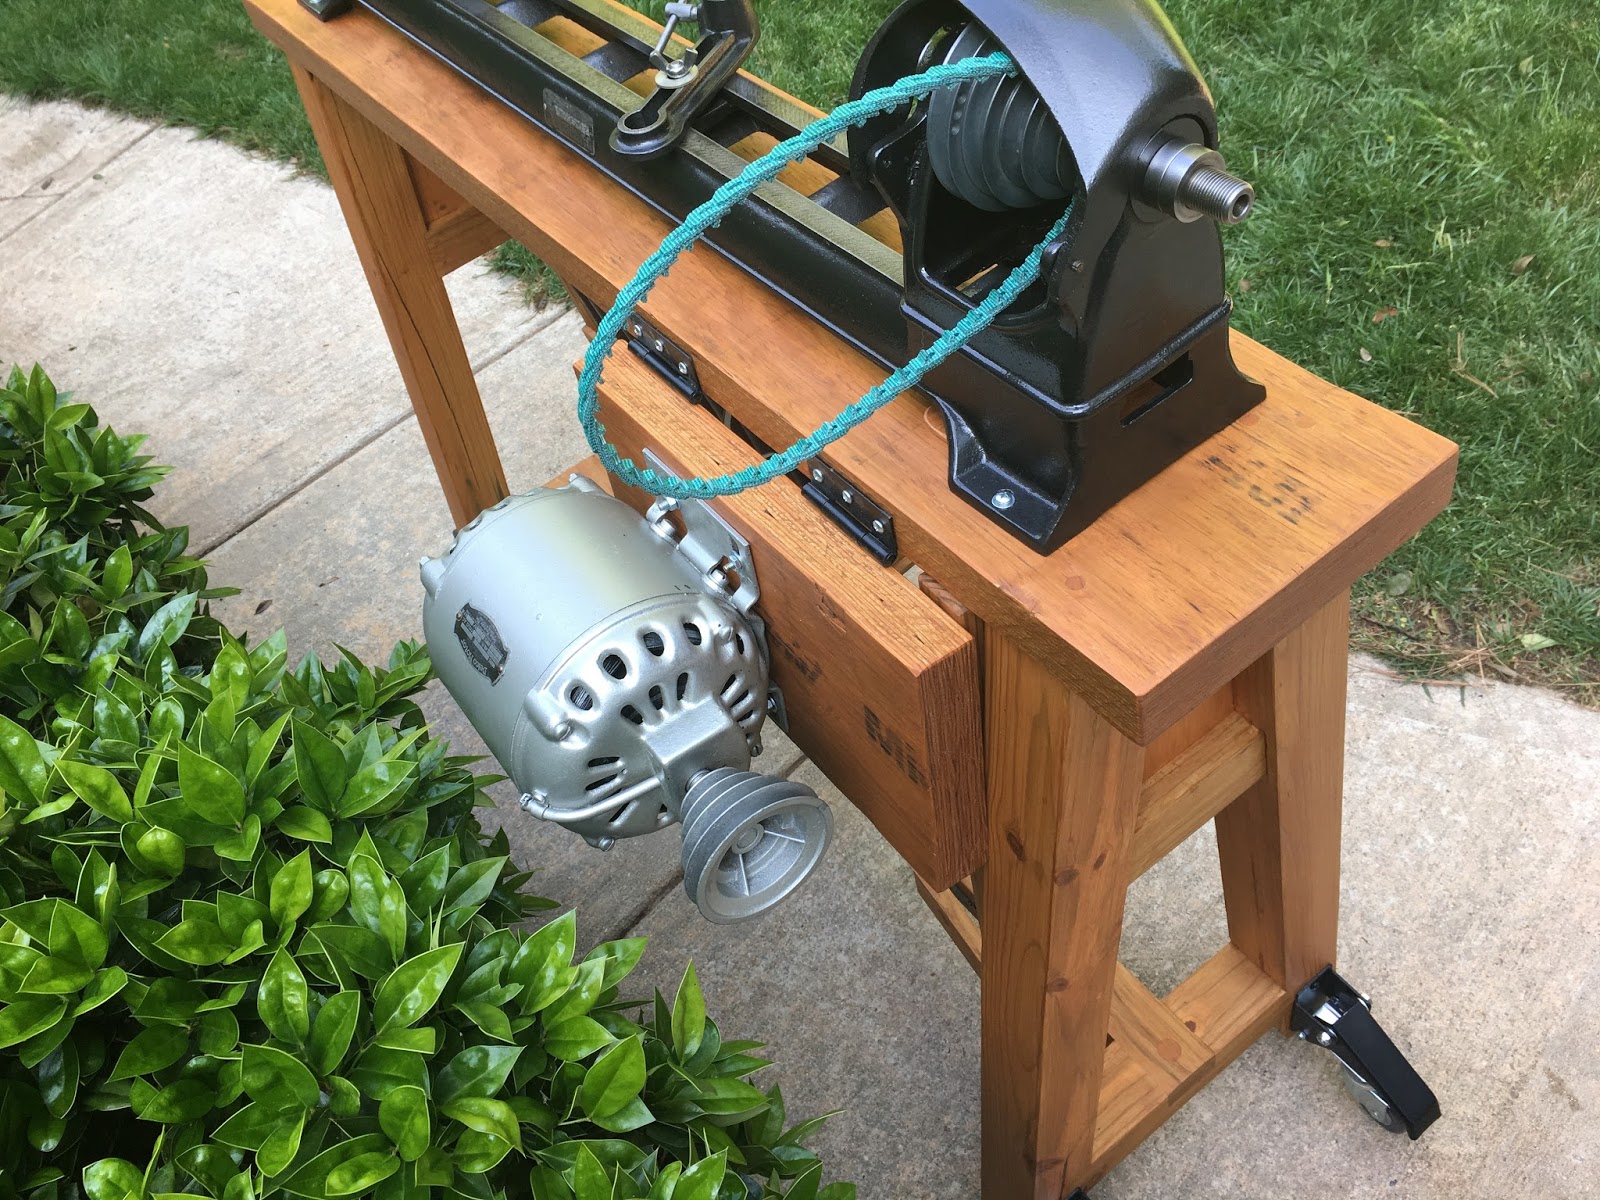
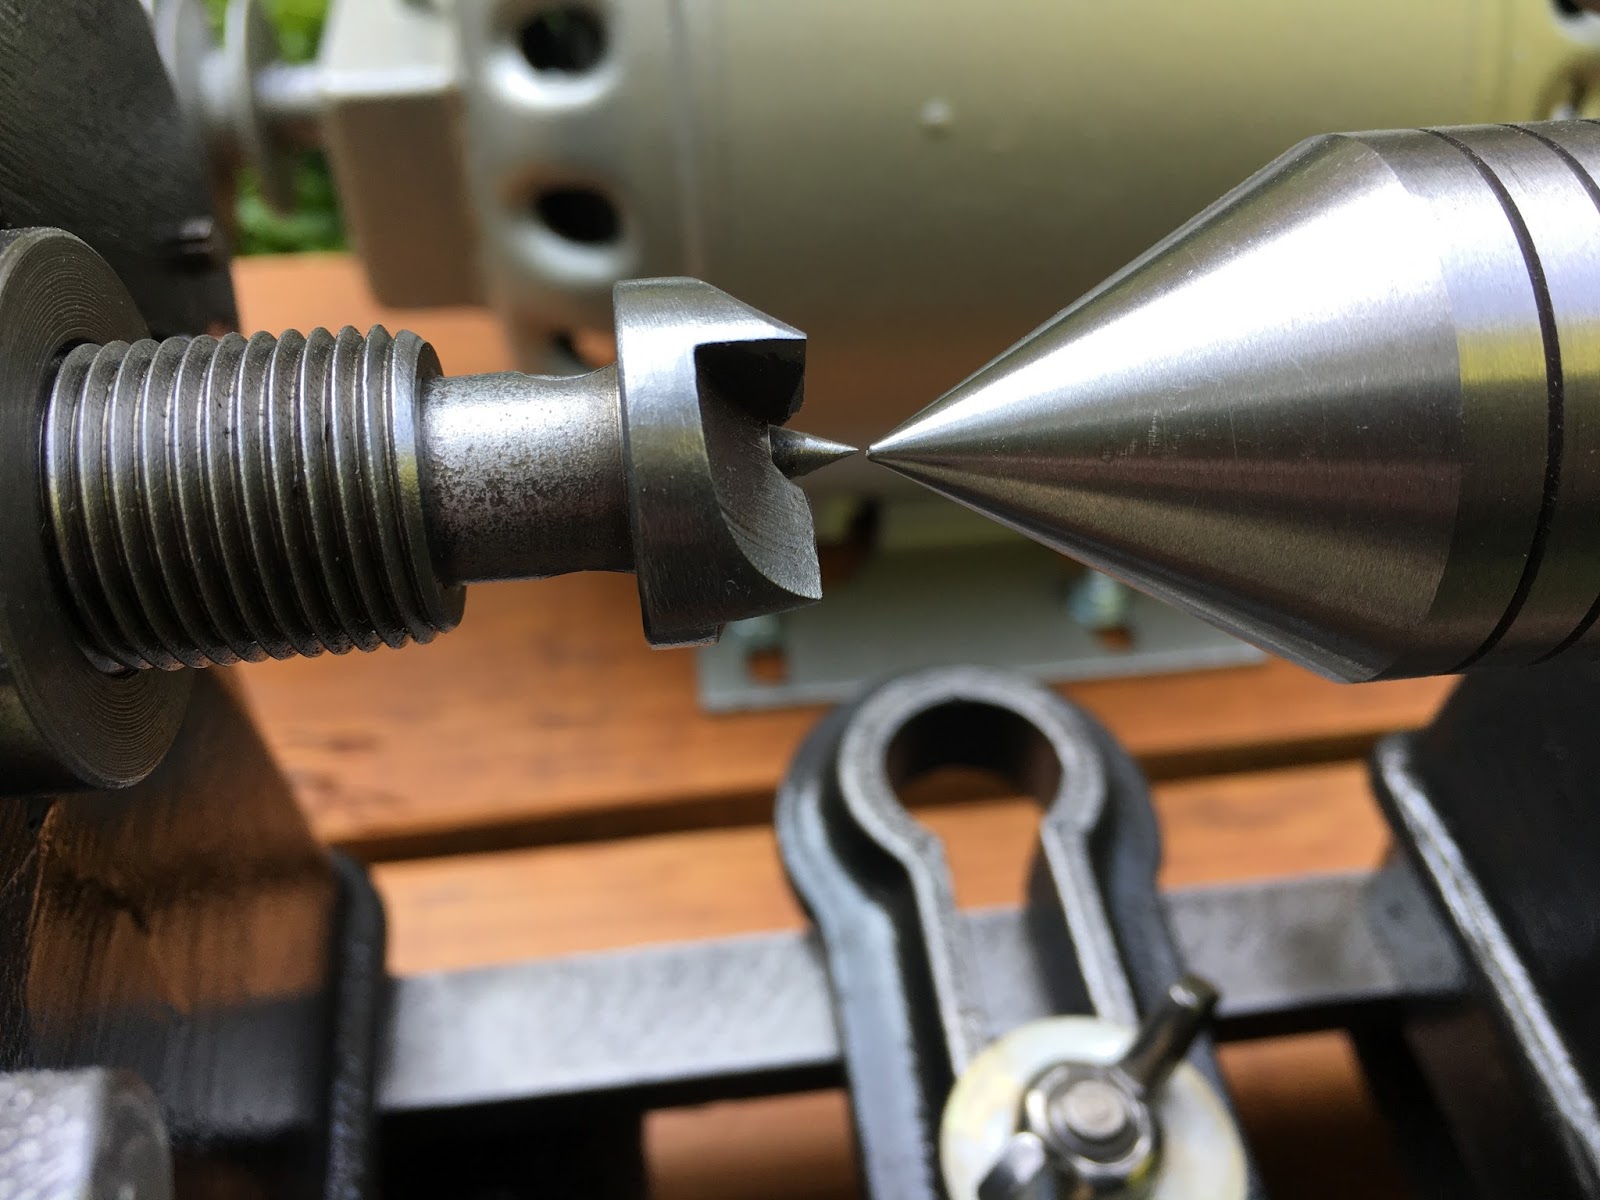
Everything was in great condition (besides the obvious cosmetic issues) and the only thing missing was the tailstock center. I kept everything original on the lathe except for buying a live center, new v-belt and adding wing nuts to the tool rest and tailstock for easier adjustments.
BEFORE and AFTER pictures are my favorite!
Let me share some with you!


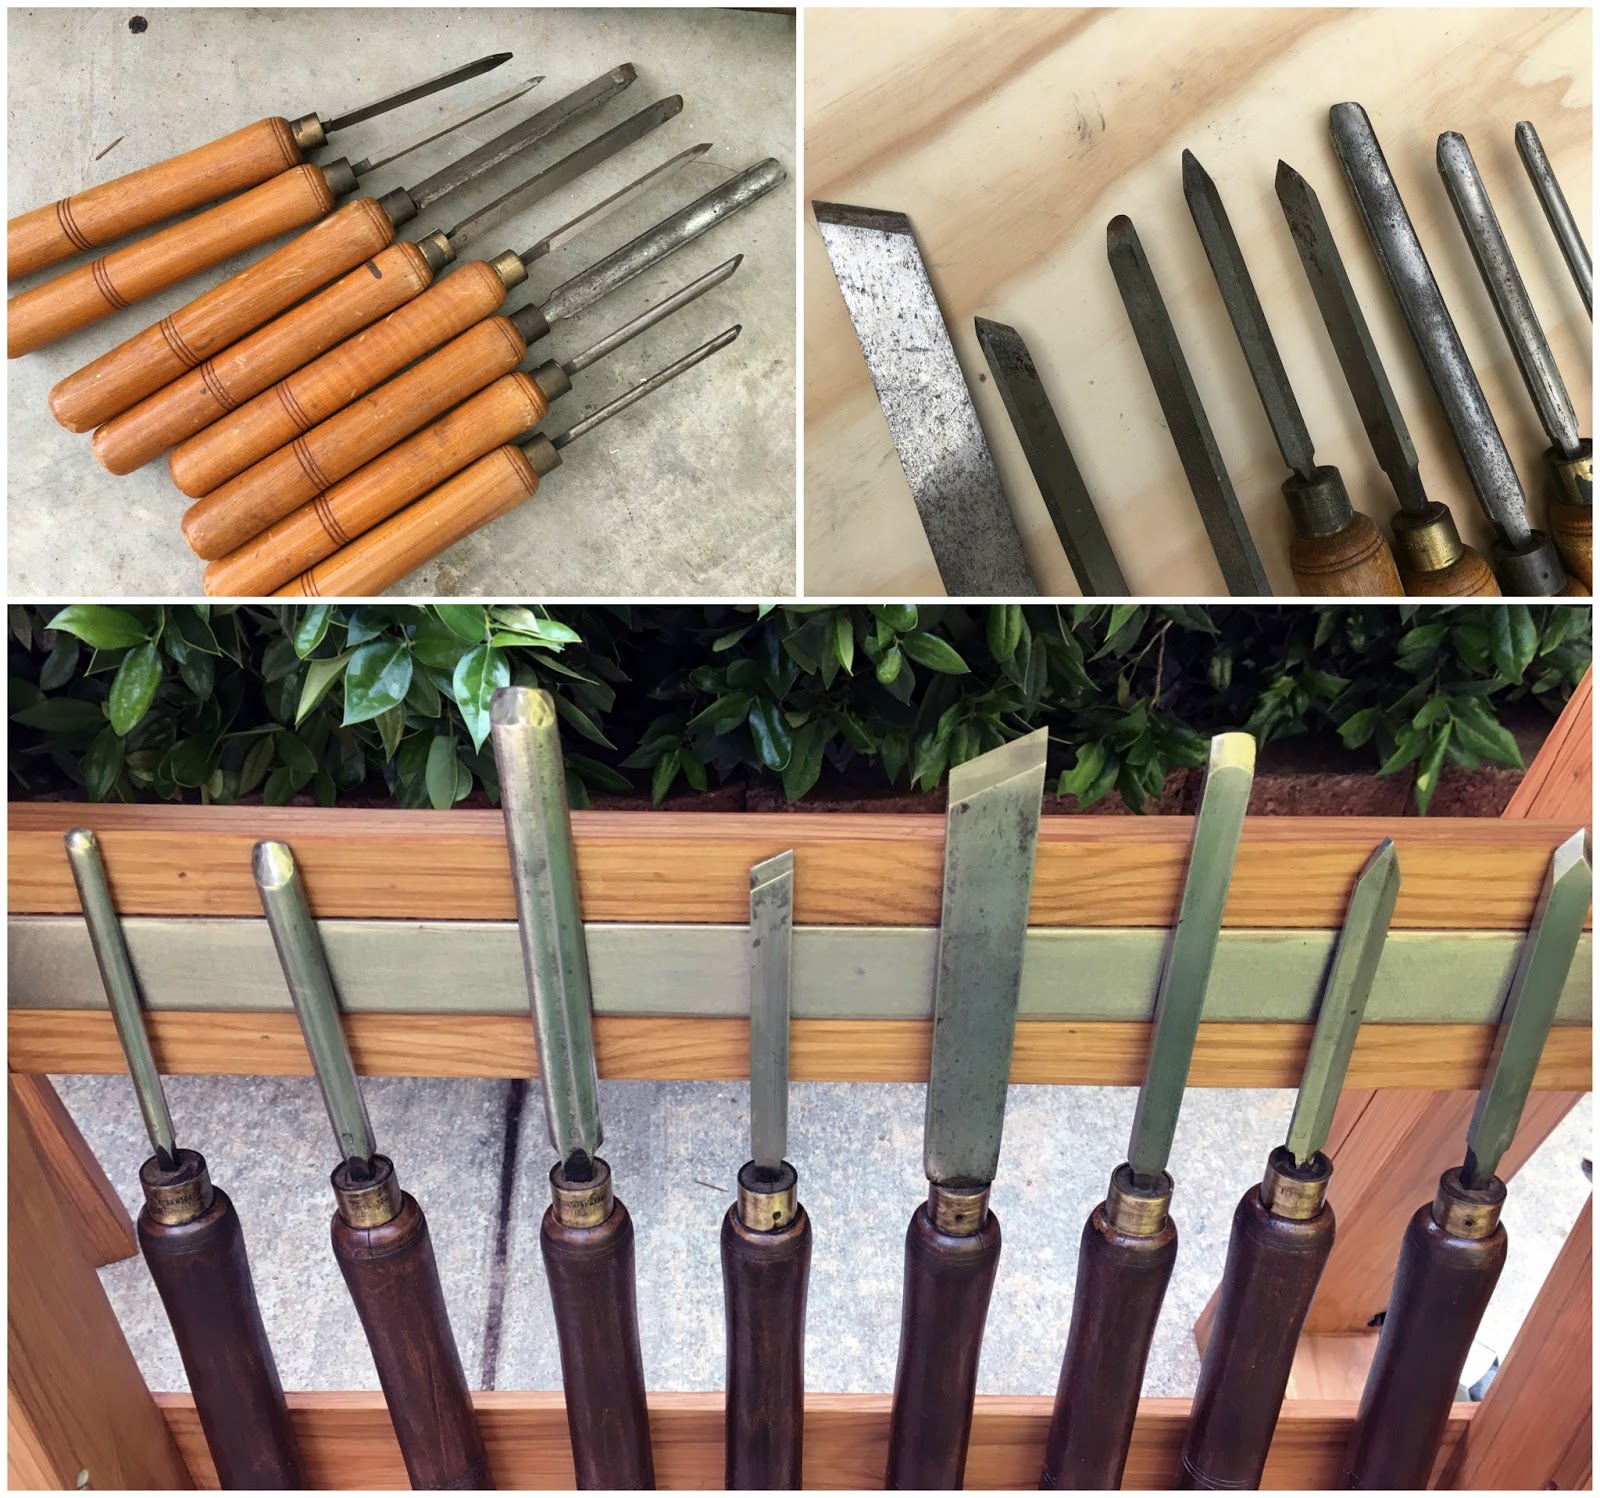
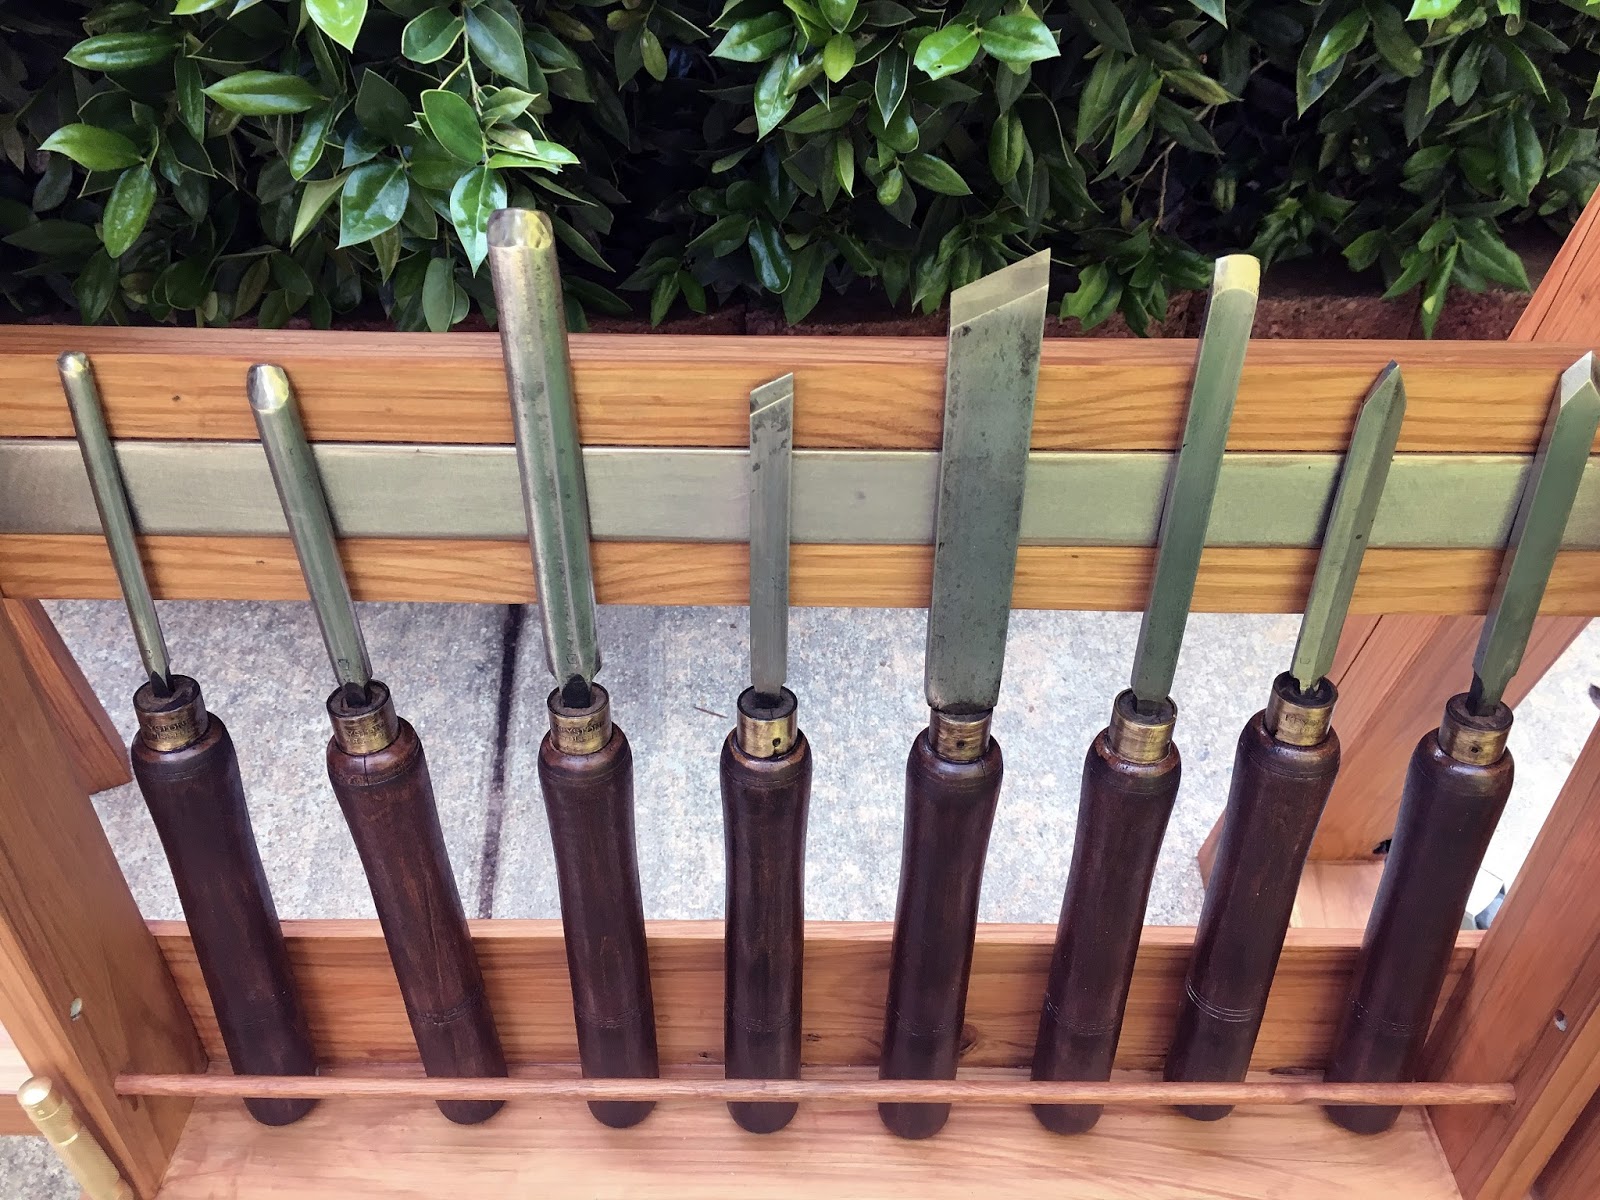
The turning tools also got a makeover, including new sharp edges (free-handing isn’t ideal but I did my best)!
The restoration process was just the same as other tools I’ve worked on requiring a lot of sanding, grinding, paint removal, scrubbing, prepping for paint, painting, cleaning, oiling, etc.
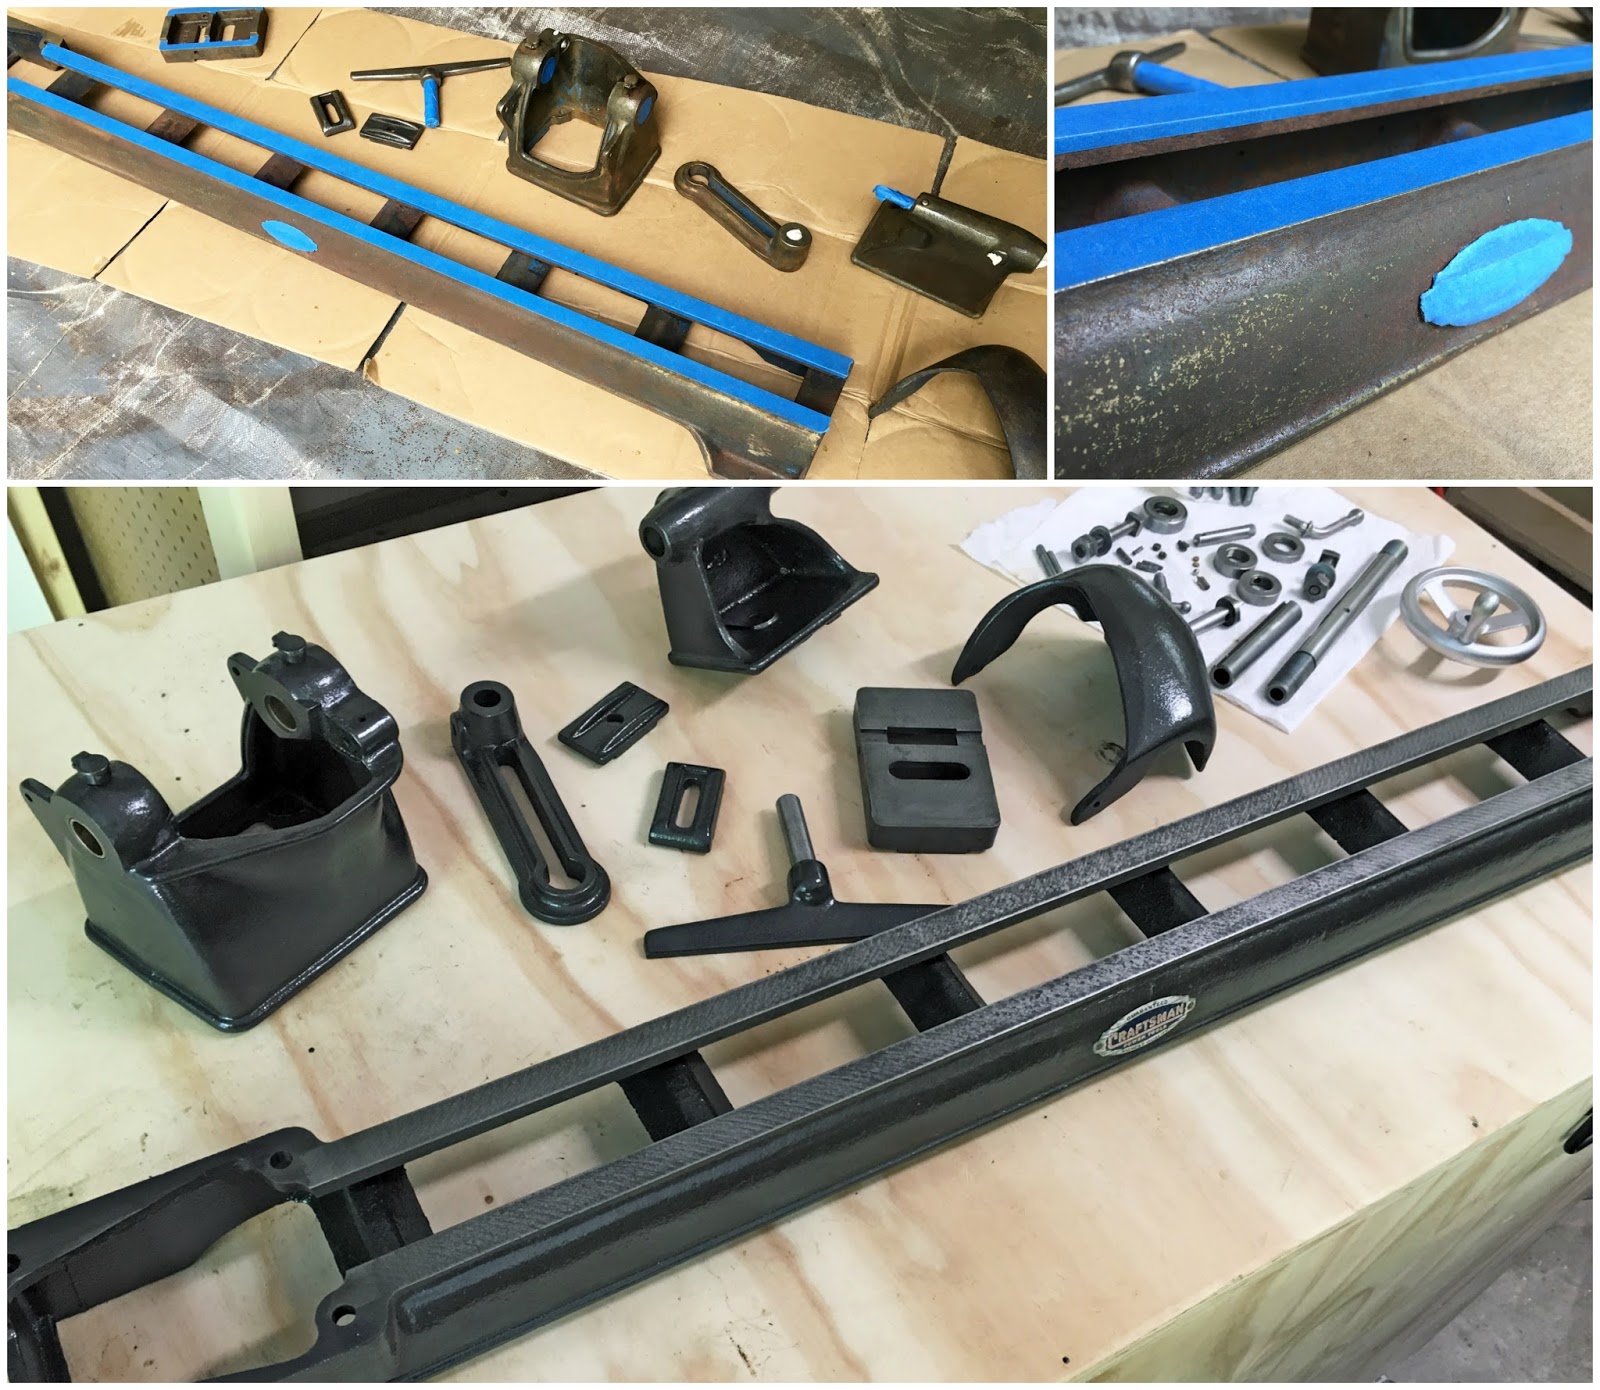
Because lathes are very simple machines it was very straightforward to disassemble (thankfully). I stripped the paint off the body castings, scrubbed and power washed everything and dried all the pieces super well. Masked all the ‘bare metal’ edges and primed+painted.

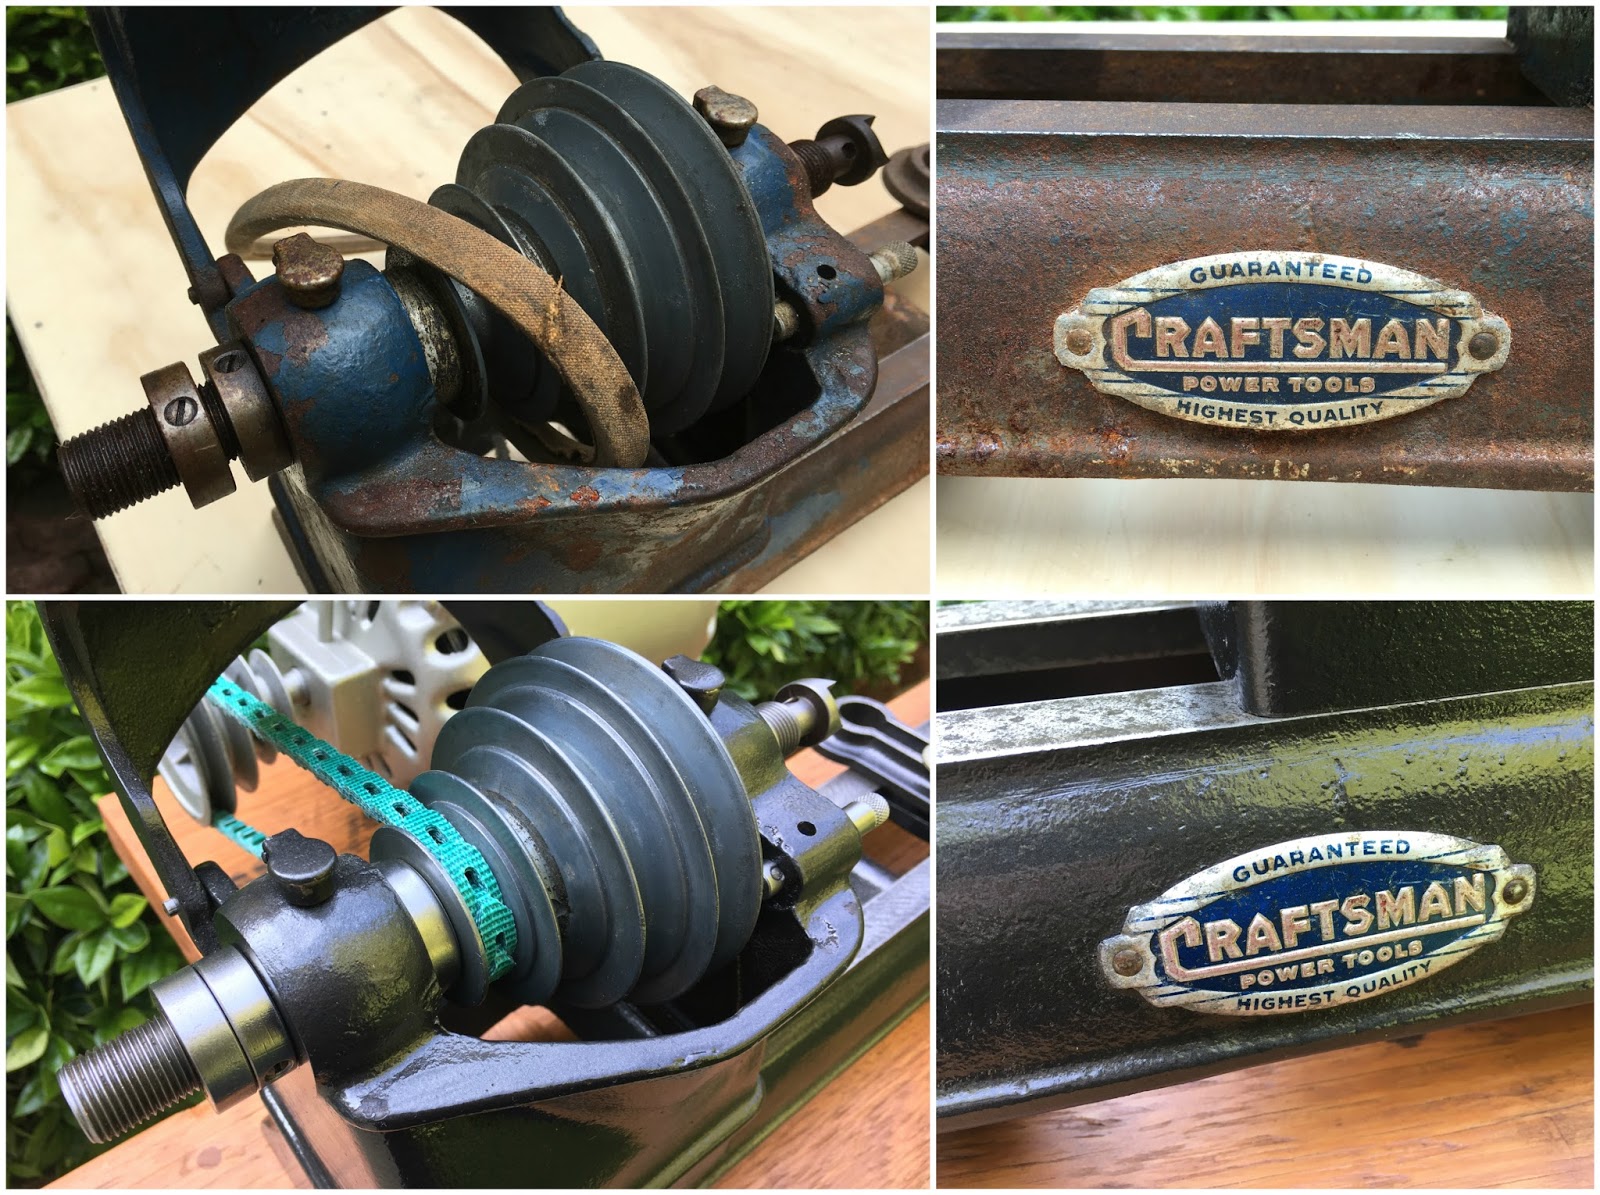
I used my bench grinder with a fine wire wheel to remove all the rust from the smaller parts. See the difference!? I enjoy the quick results using the grinder!
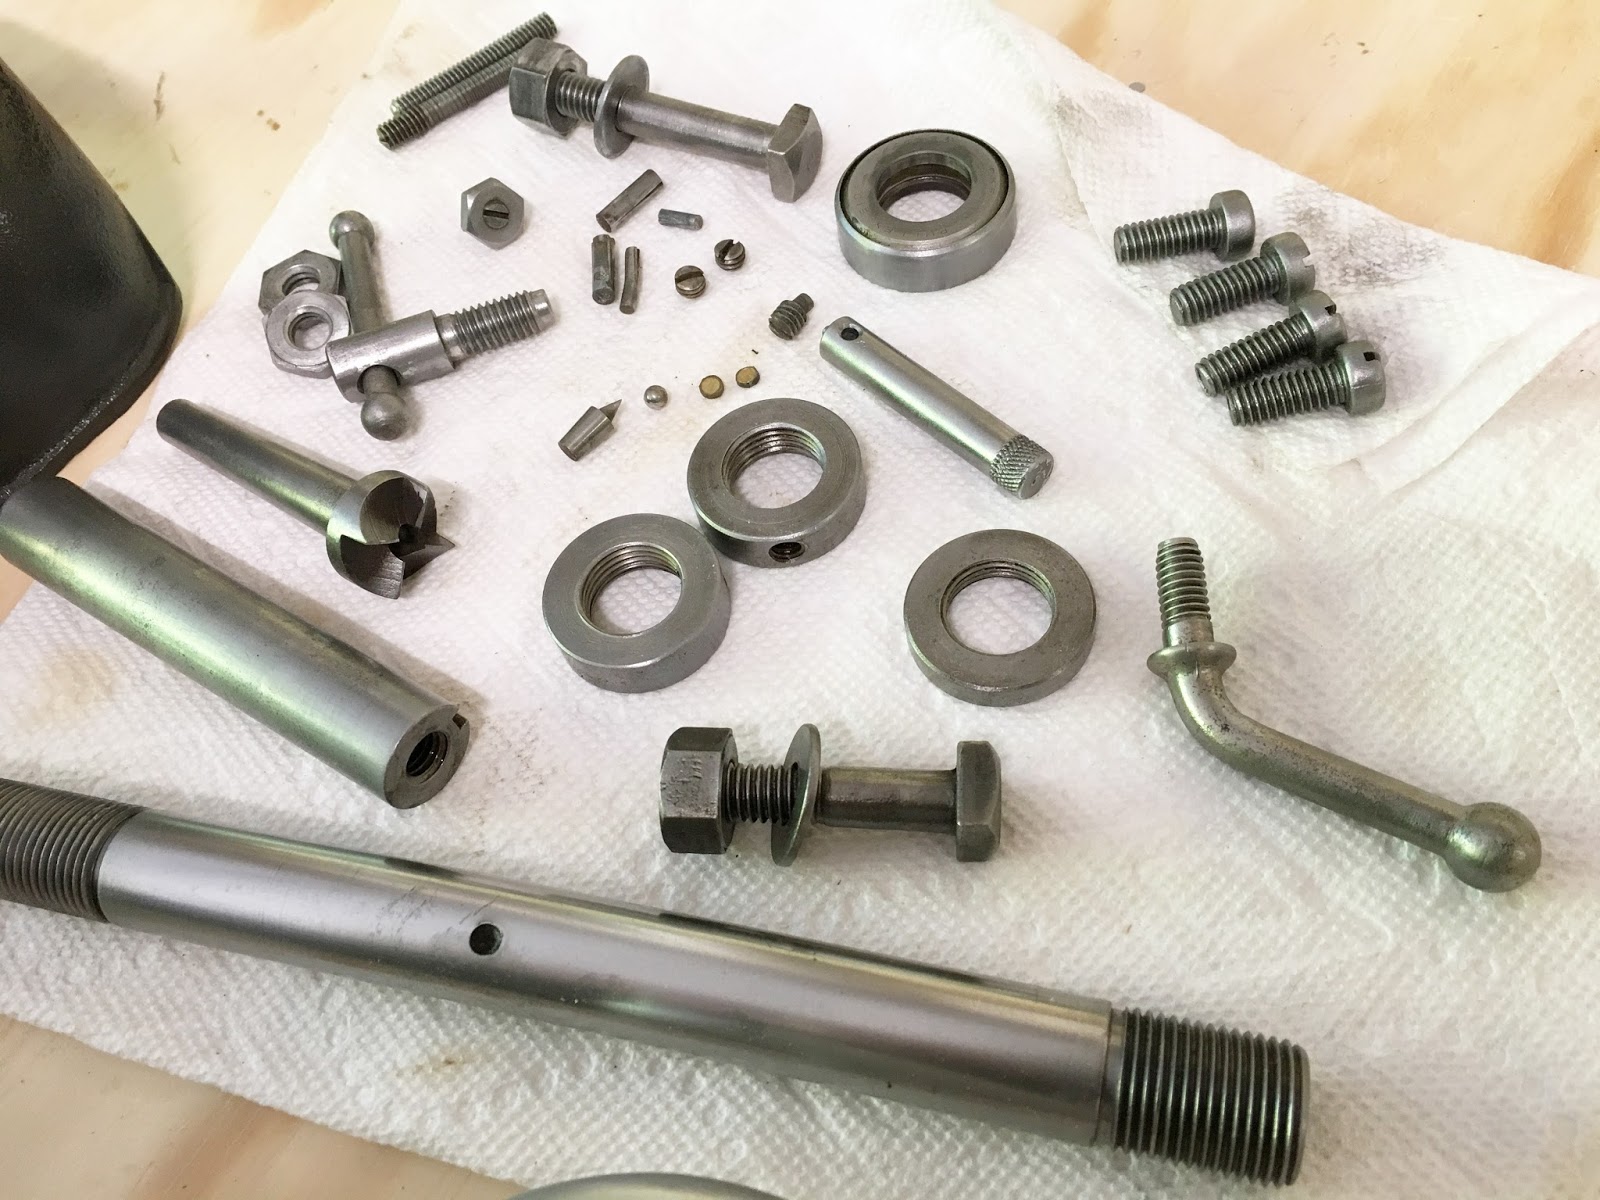
All my small parts are rust free and ready to go! I sanded the smooth metal areas with 800 grit paper and rubbed everything down with WD-40.

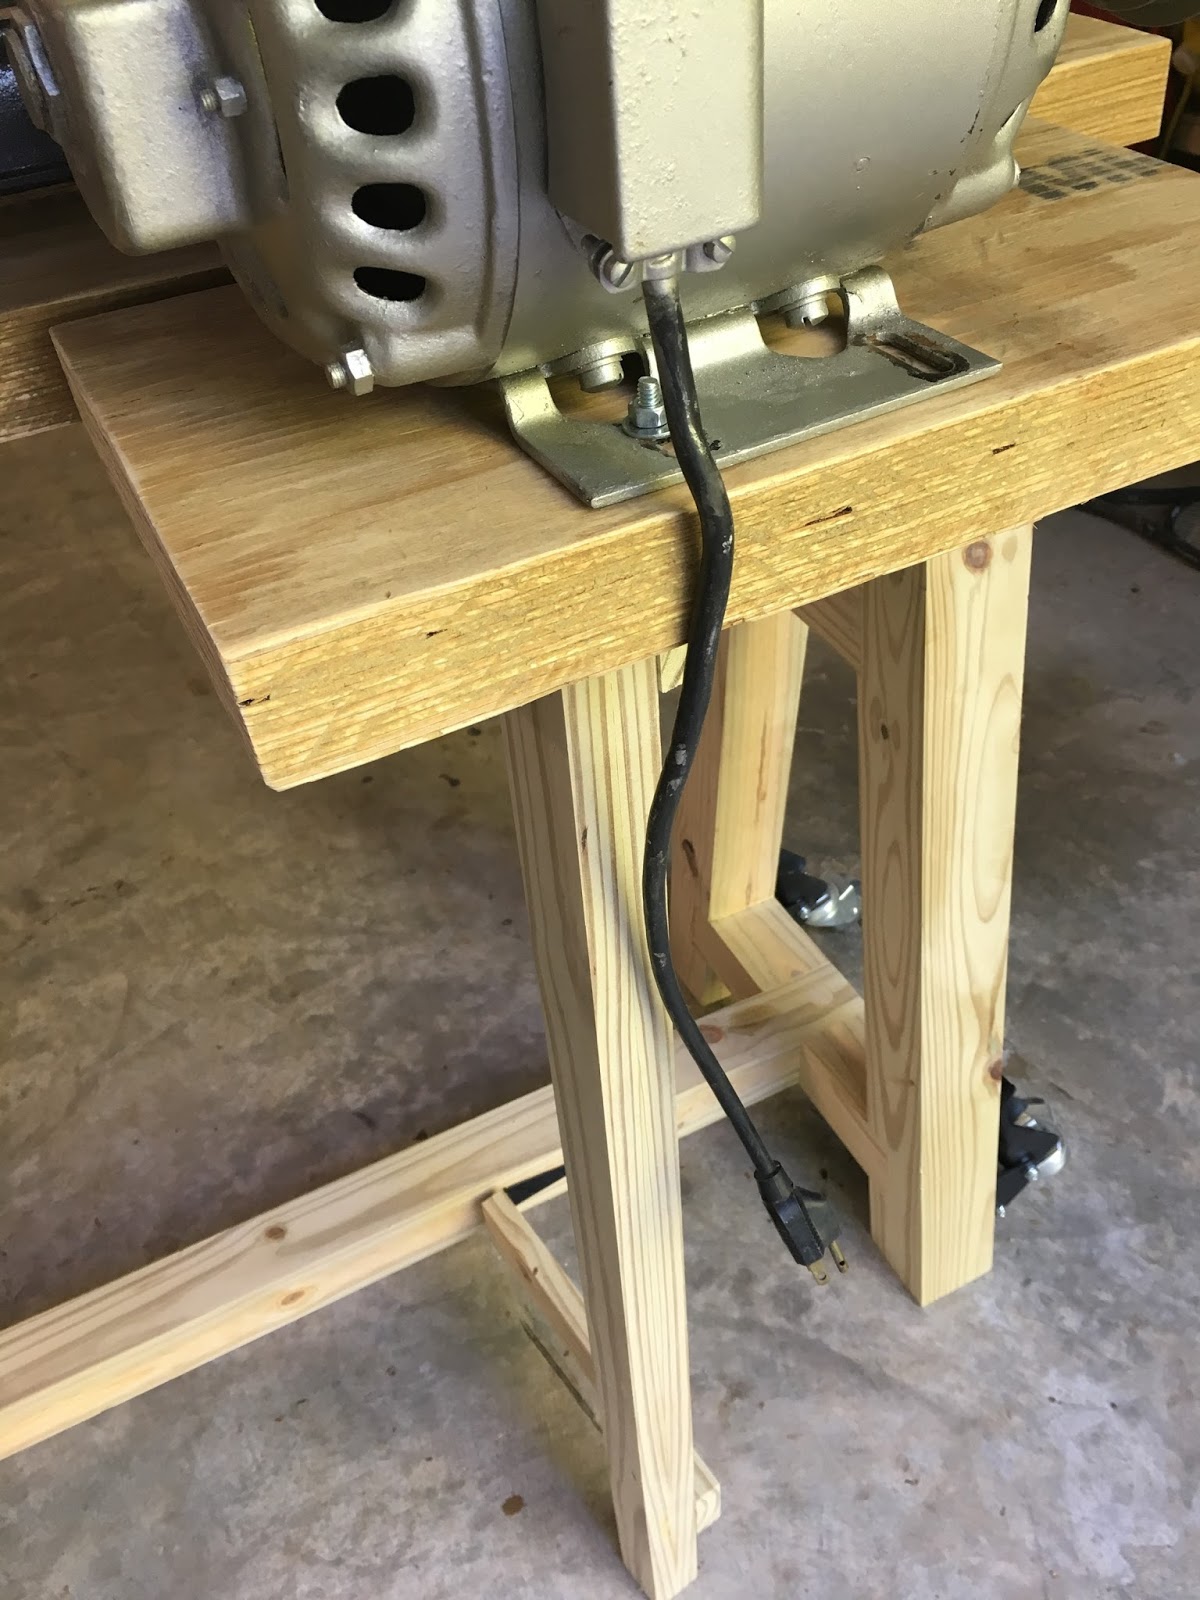
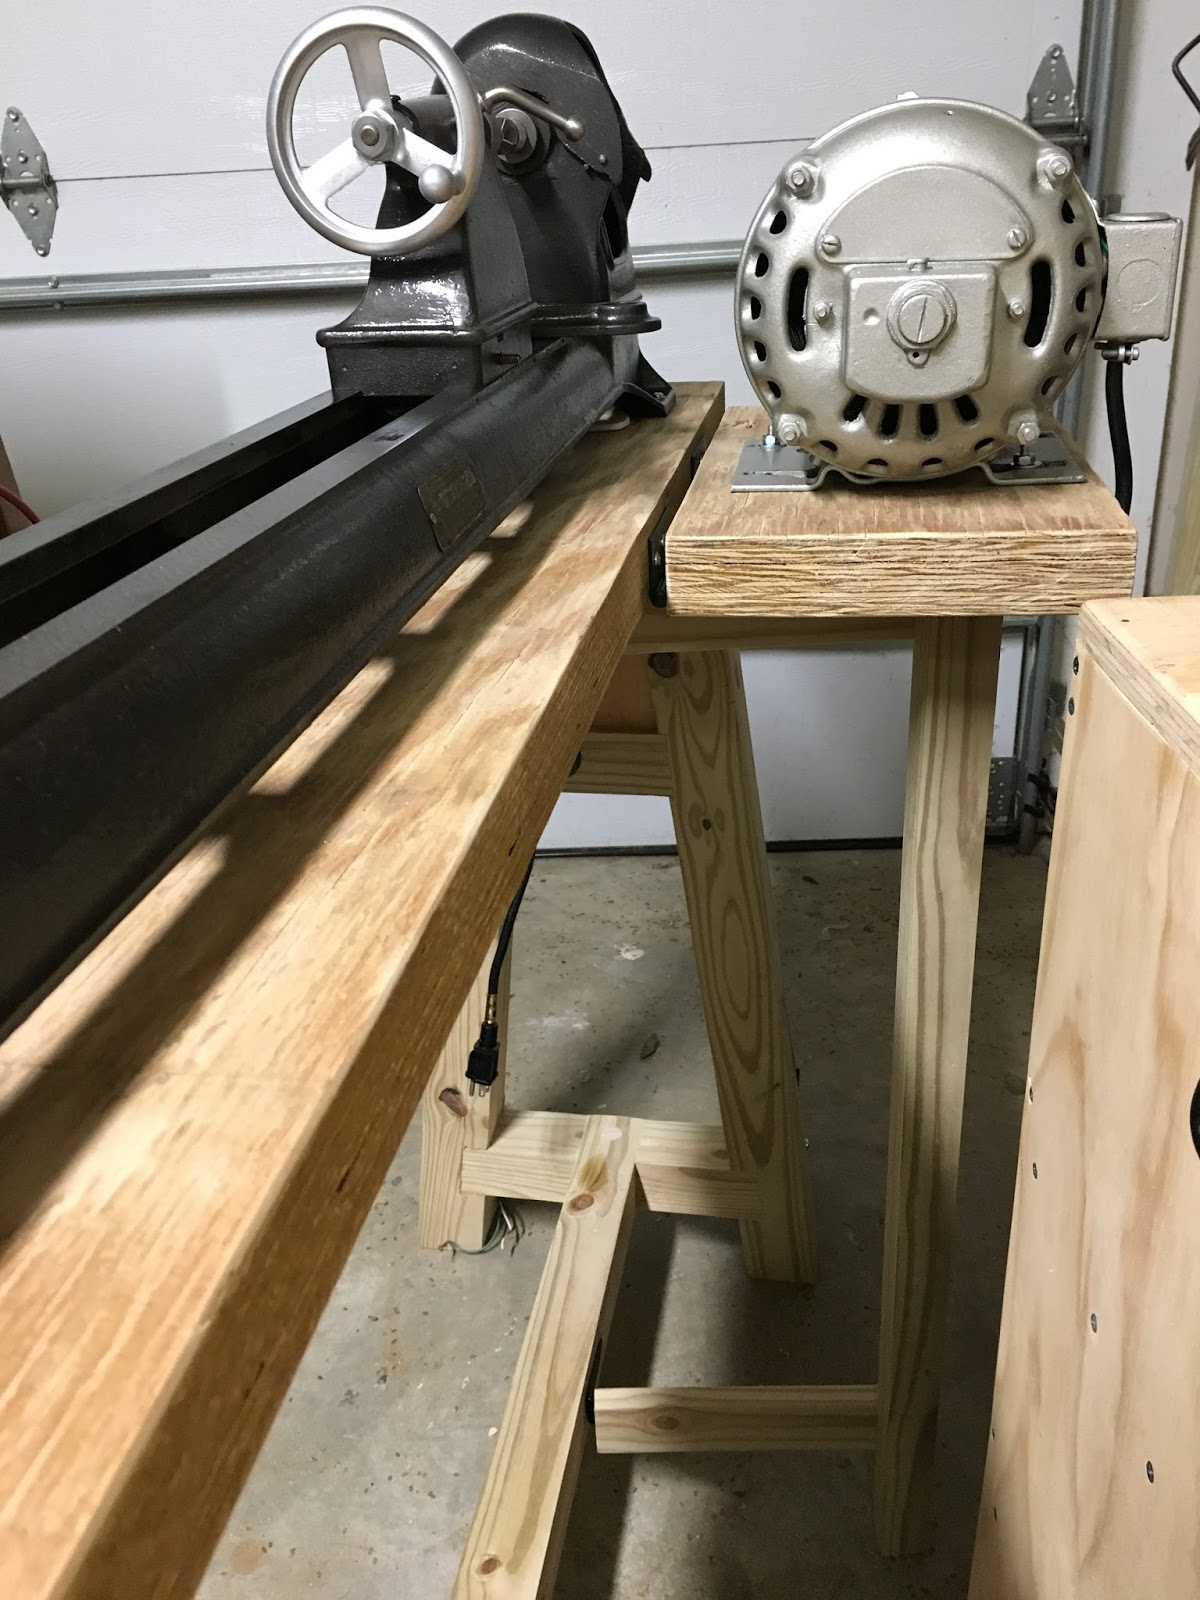
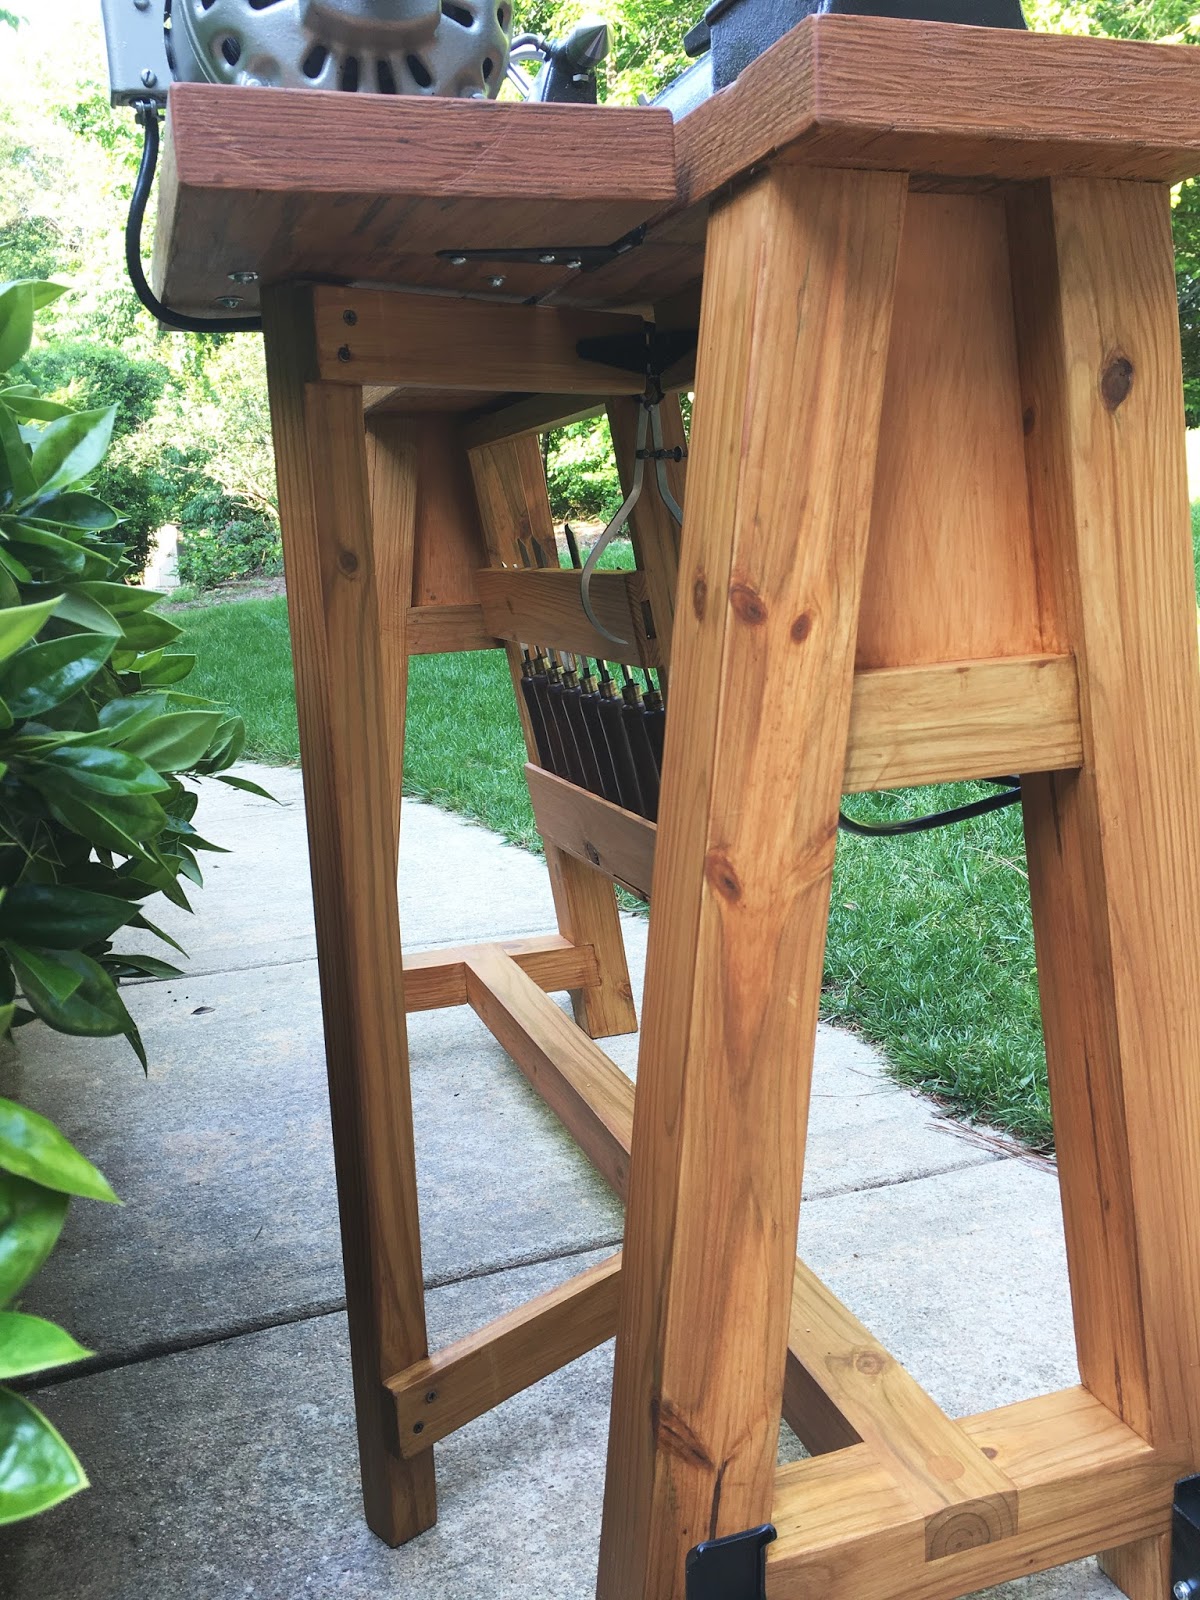
While I waited for the paint on the lathe to cure I worked on building the table. I had a few 4×4 posts I squared up and machined into smaller posts for the legs. I kept the cut off strips to make the motor stand and hand tool holder. I also had a construction beam that I used for the table top. After realizing I wouldn’t be able to mount the motor underneath the table like I originally planned/designed the table for I had to brainstorm how to mount the motor behind the lathe. In the end it all worked out.

Because the motor is on hinges it can be lifted up for changing the belt on the pulleys and also lowered by pushing the ‘motor stand’ out of the way (also on hinges). The only thing I’m not happy about regarding this design is that because the motor is so heavy the table is tipsy when engaging the caster wheels (and while moving the table). It’s not tipsy when the casters aren’t being used, in fact, it’s surprisingly solid even with the motor on hinges (I was worried about vibration – but nope!).
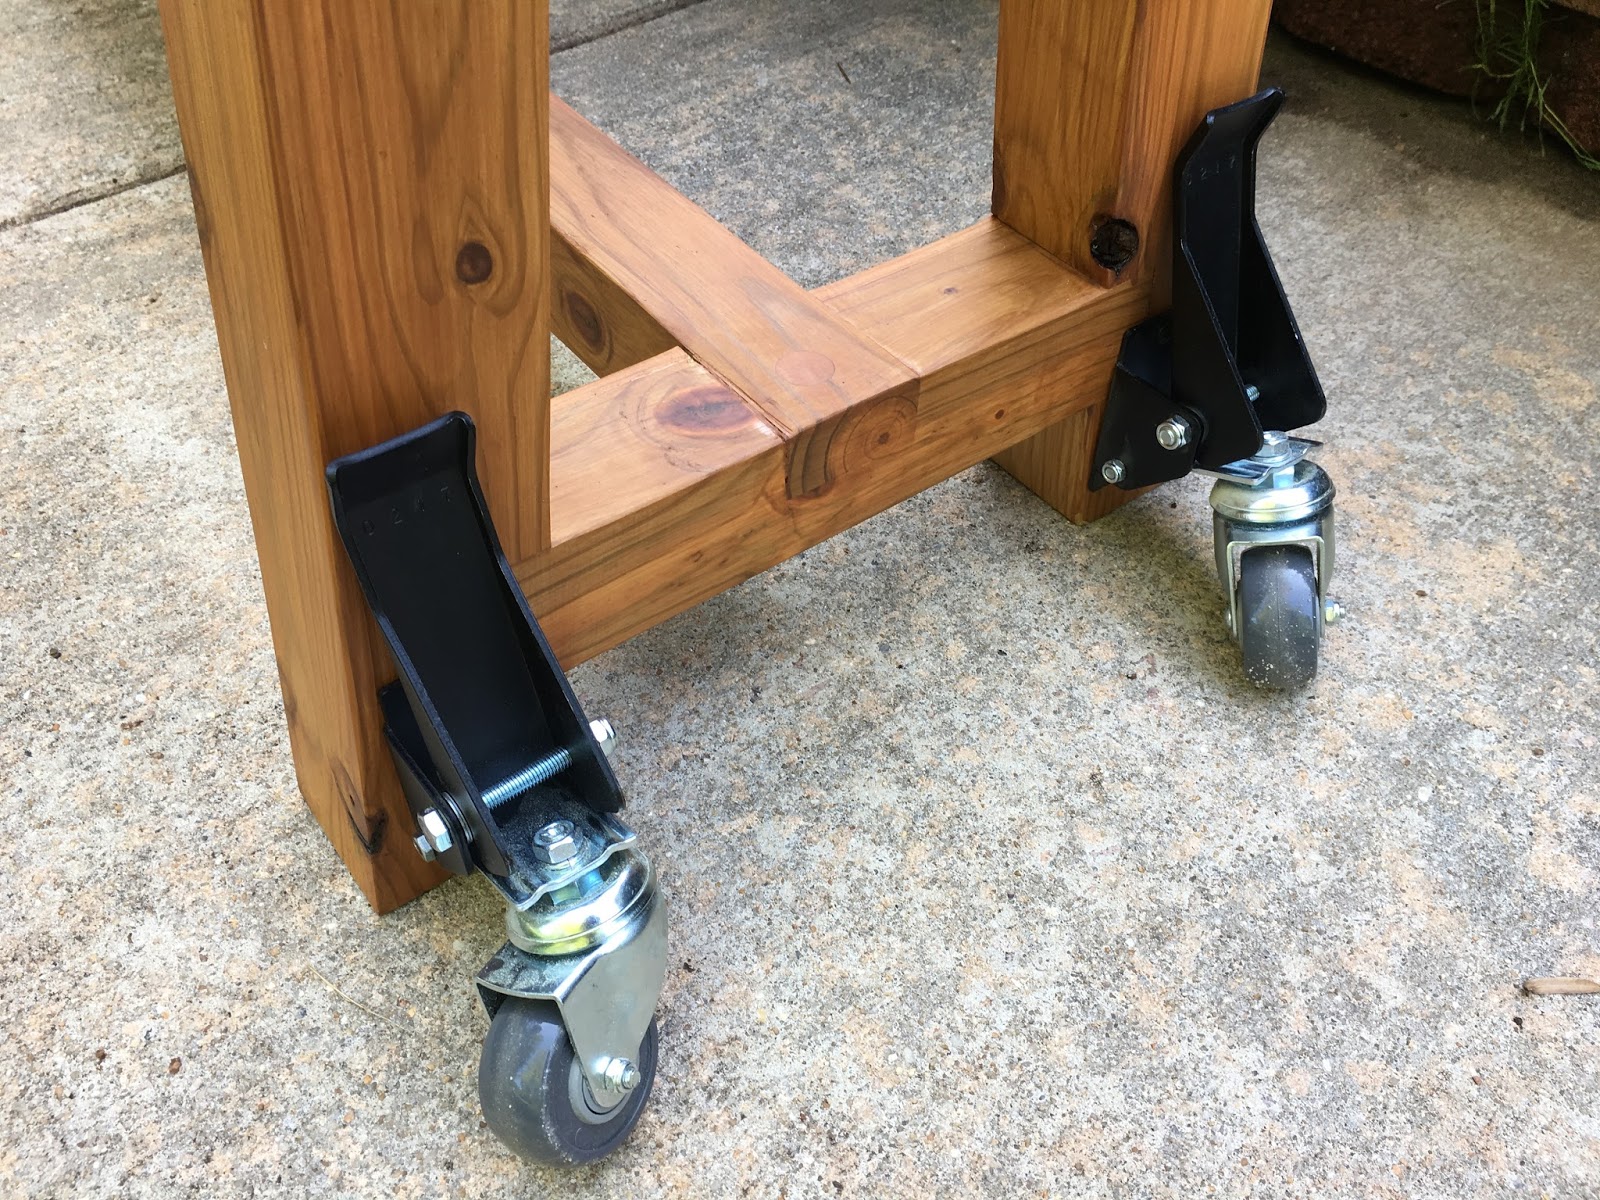
As a side note: I got the “workbench” casters from Rockler. For being $59 I would have hoped they’d be easier to engage/disengage. It’s pretty awkward because you want to engage/disengage both on the same side together and that means you’re using your hands to be able to do that OR you have to pull up on the table while using your foot to do one at a time. When disengaging them, they don’t always drop the table completely and you have to move it back/forth for the casters to fold over to one side to drop the table fully. Also, when going over the lines in concrete they tend to get stuck – if you pull up on your table to get it un-stuck the caster(s) lower further and fold down underneath your table leg (ugh)! They’re sturdy casters and will last but they’re exceptionally frusterating to operate.
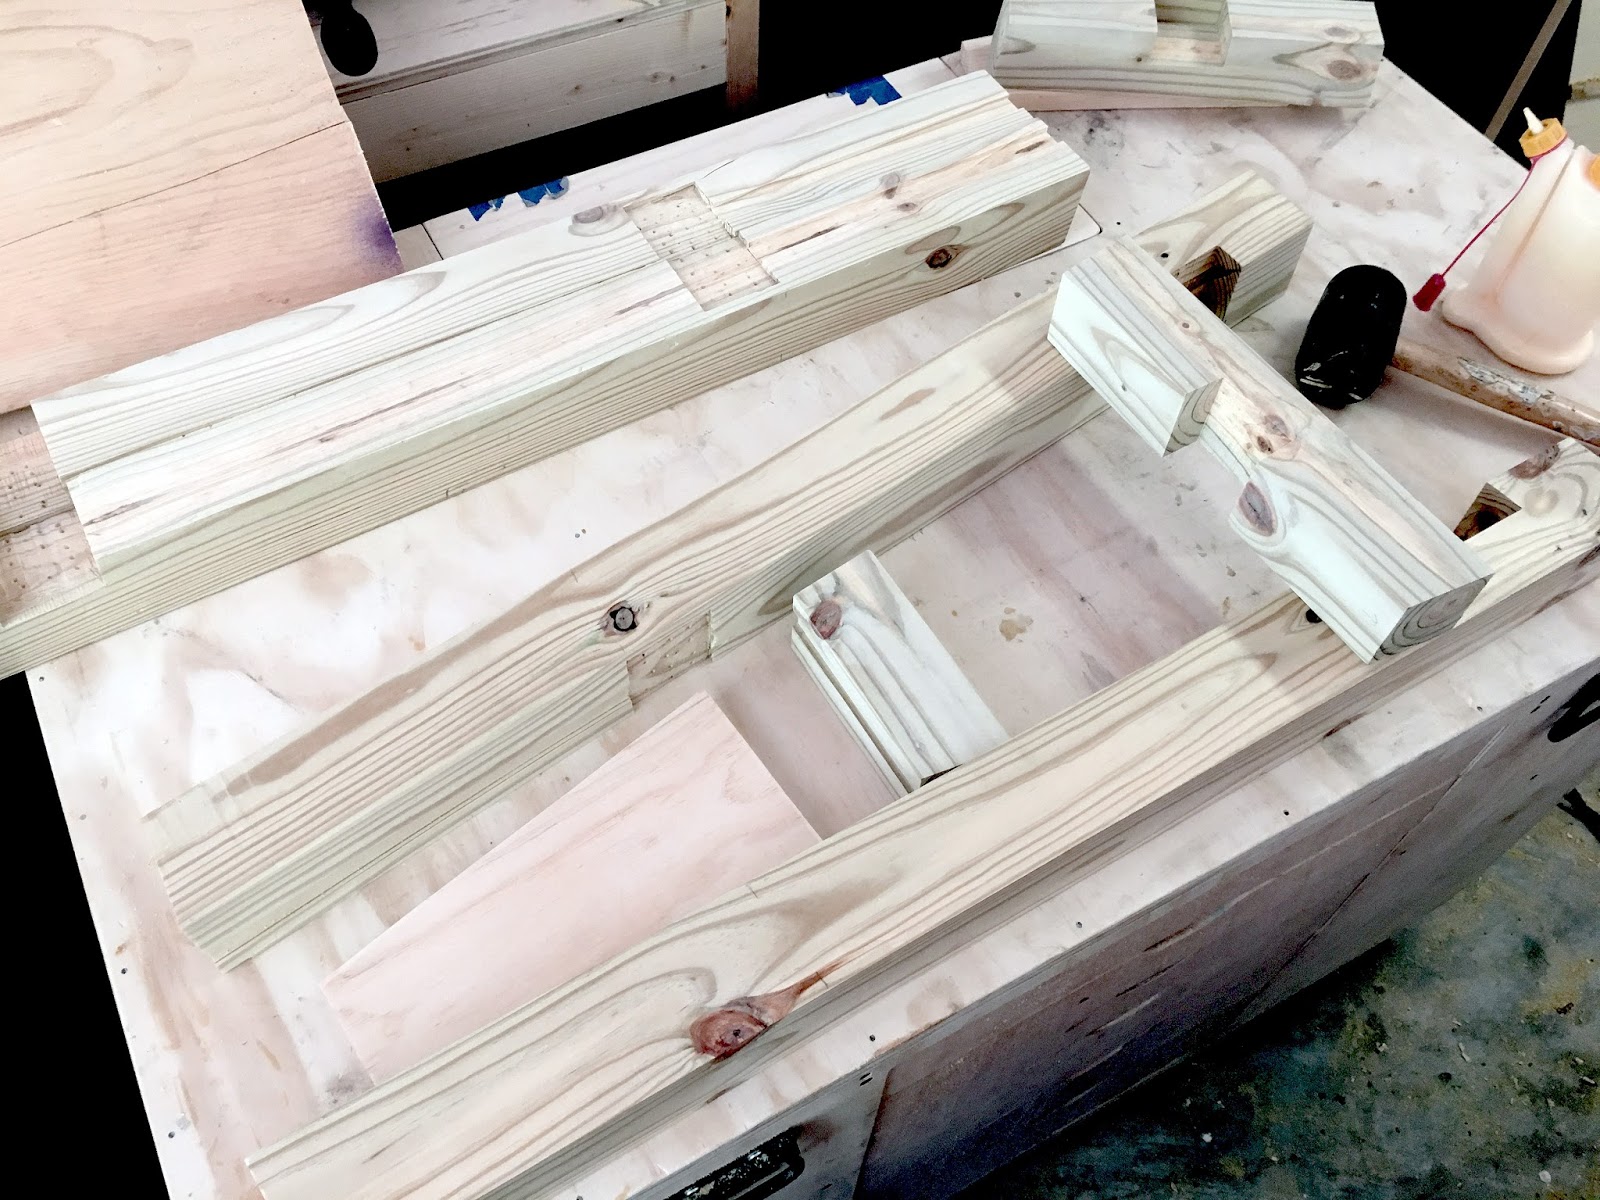
Leg pieces ready to be assembled!

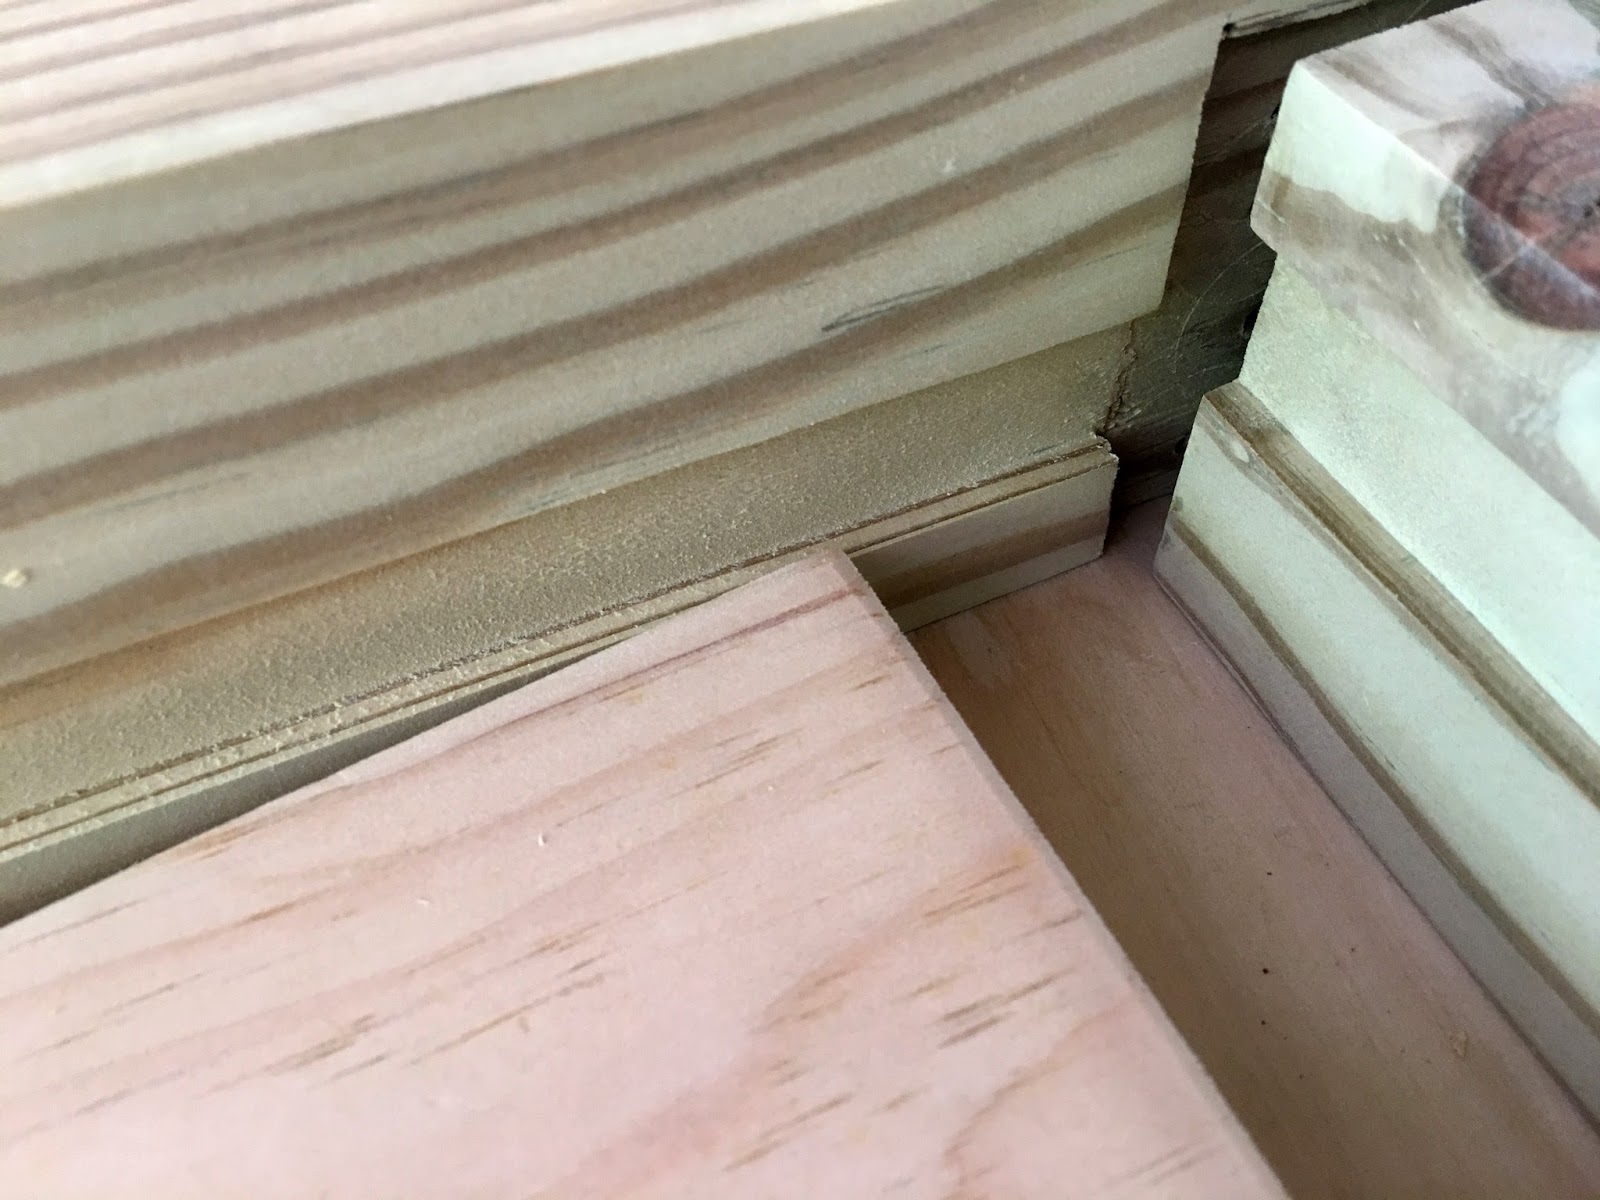
I made a rabbit for the small panel piece to slide into.
Once the legs were glued I attached the brace that runs between with a lap joint + dowel, then glued + screwed the top on. Next I made the stand for the motor to sit on.
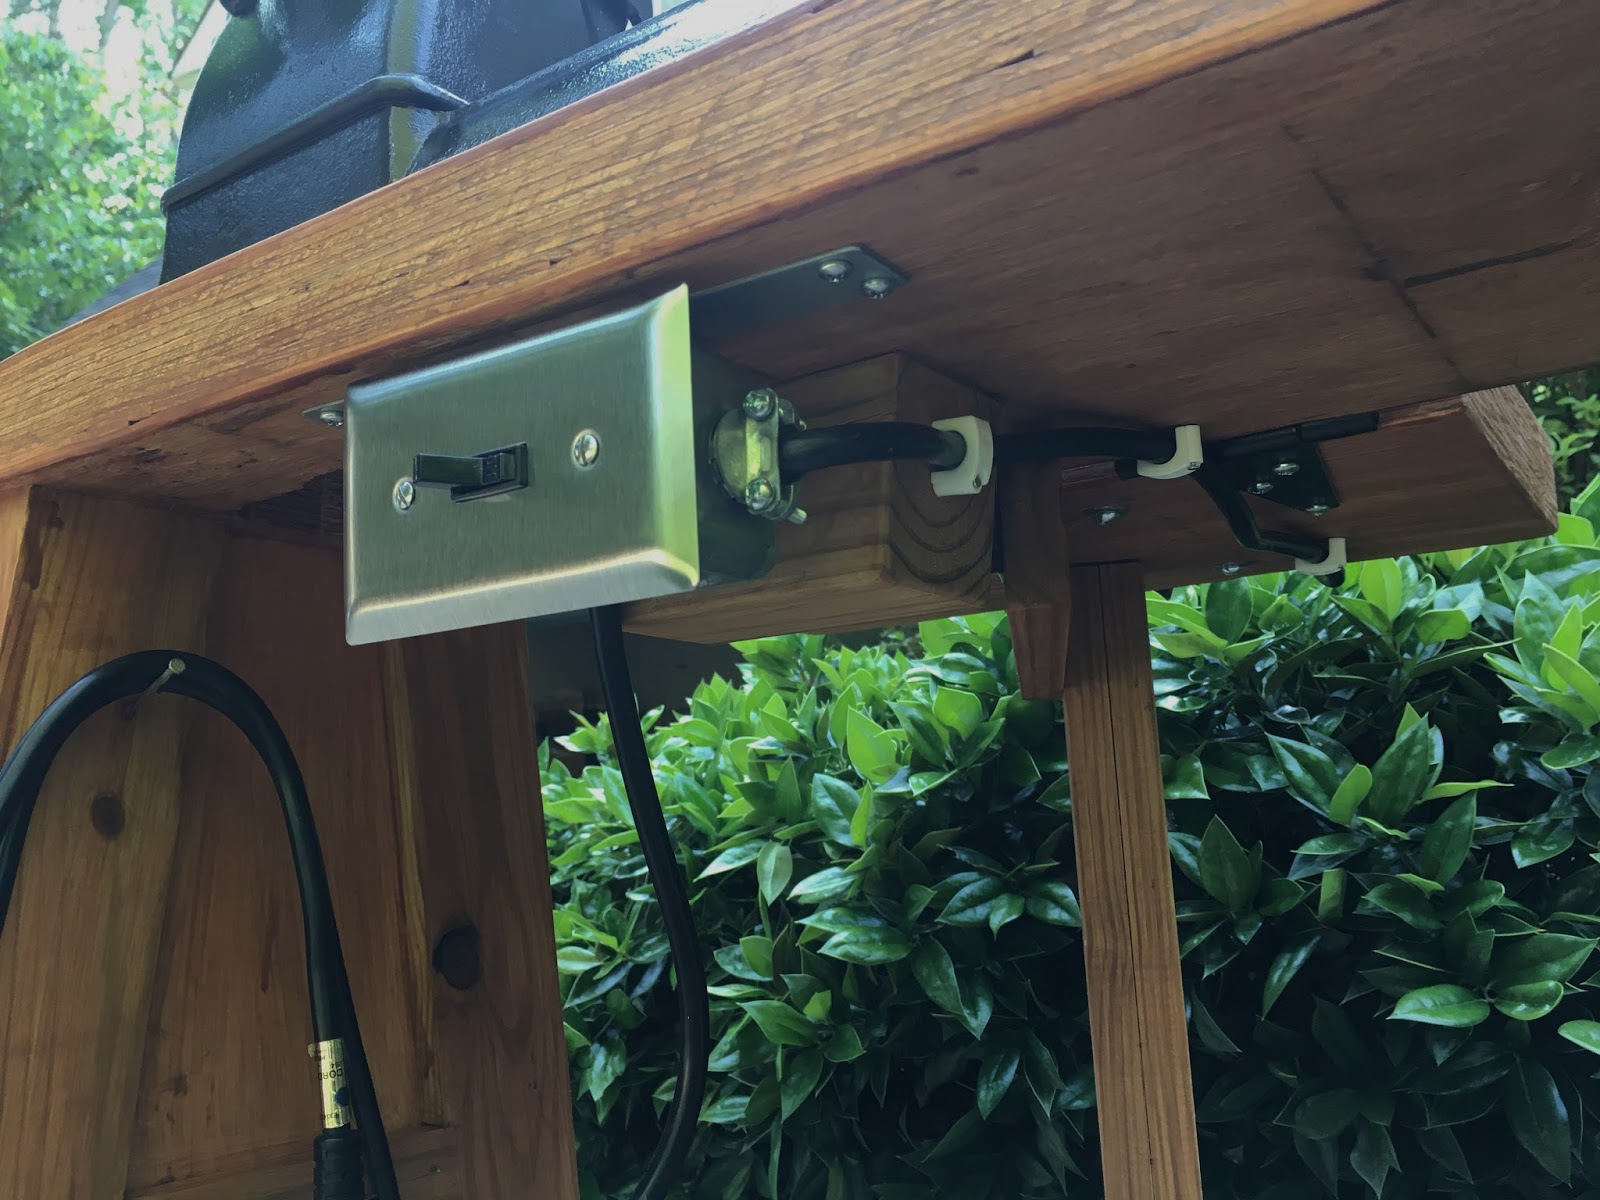
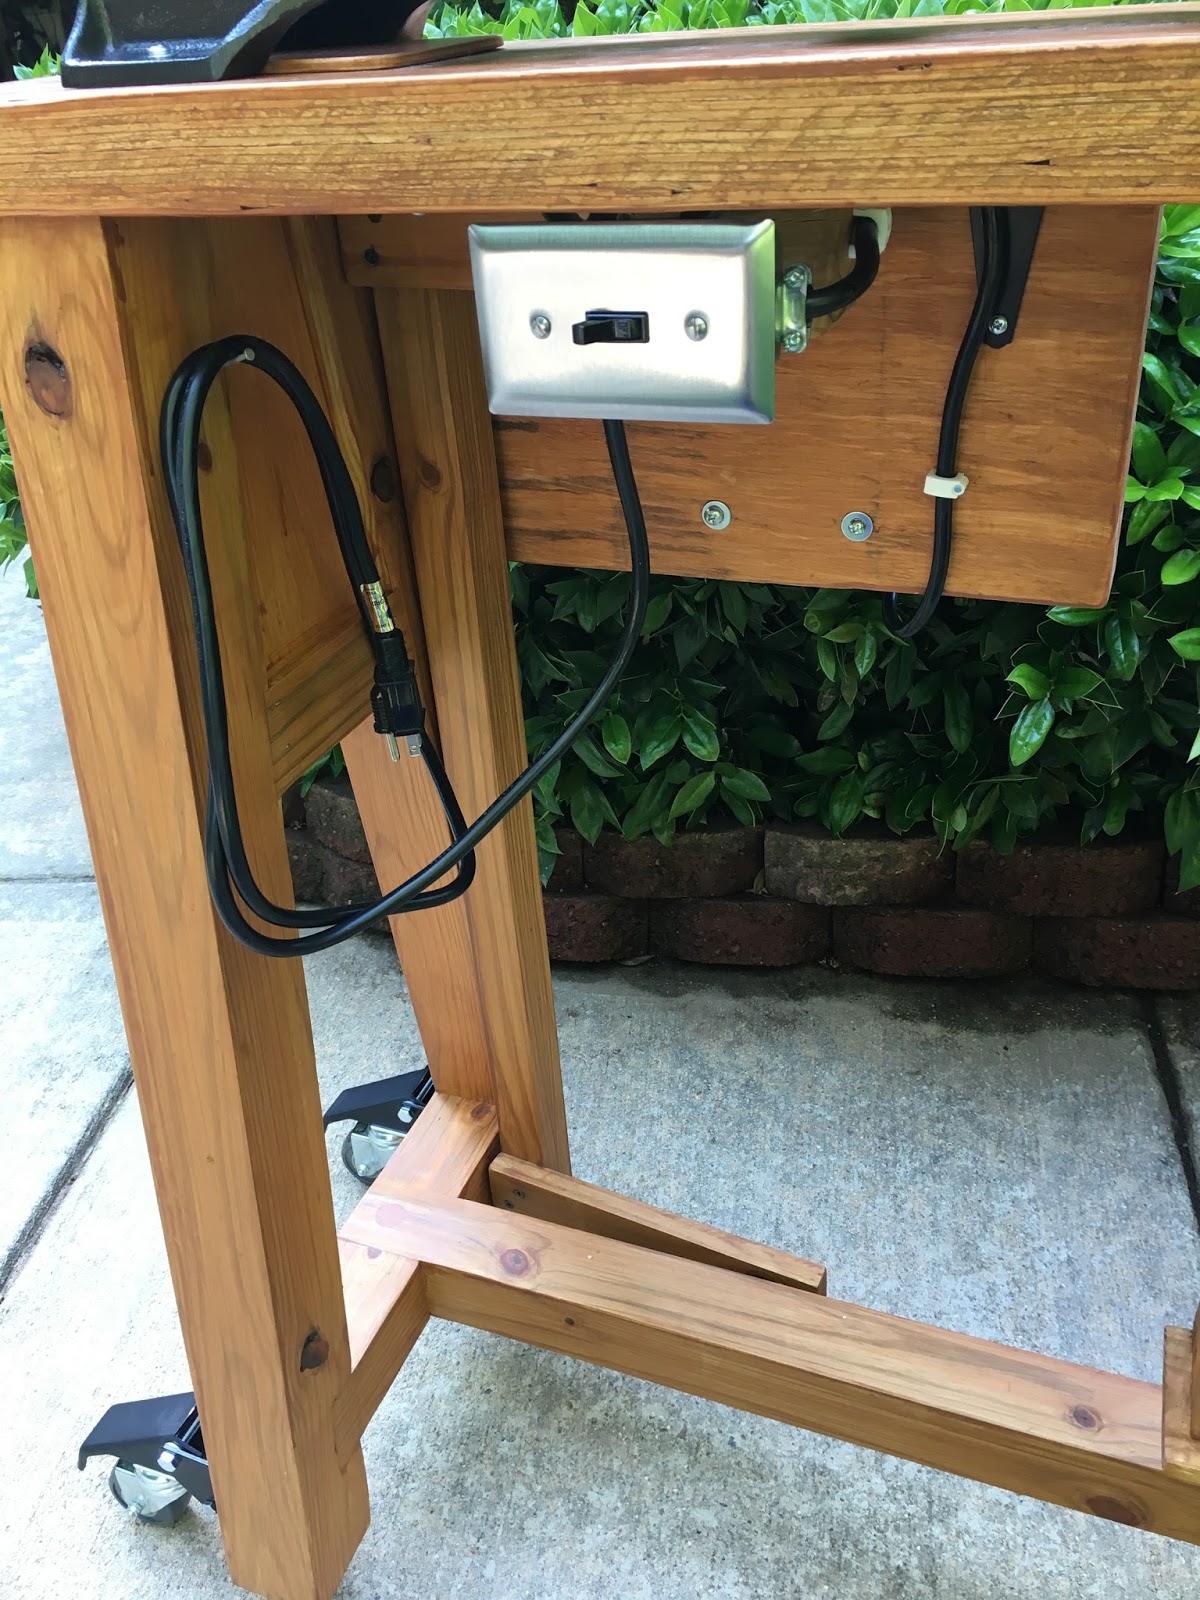
With the table built I was able to mount the motor and work on re-wiring + adding a switch!
I don’t like the idea of plugging a tool in to turn it on. Adding a switch is VERY easy! Because I already made a post with details on how to add a switch to a motor I won’t give too many details here – but I did want to show the few differences (mostly mounting).
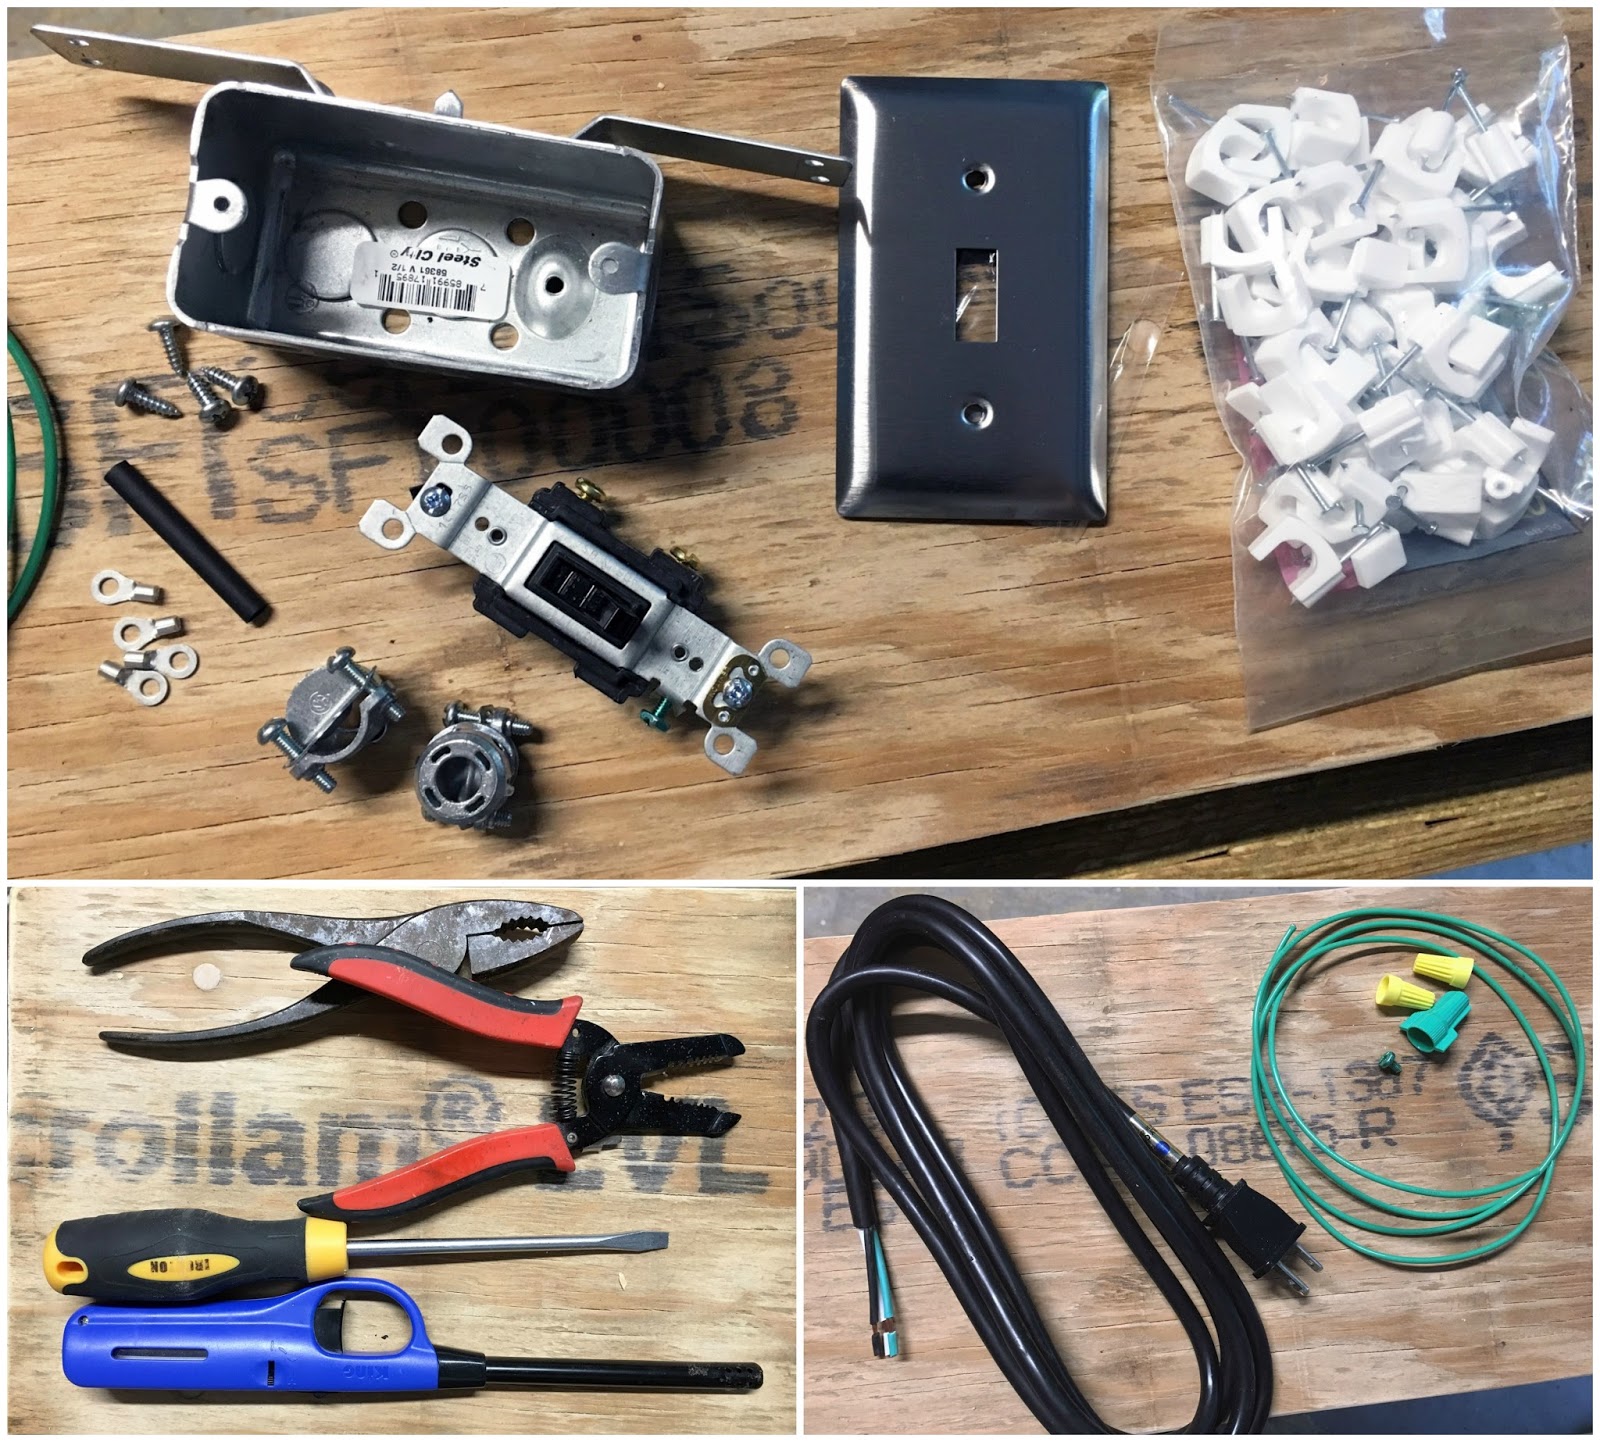
These are all the supplies I used. I was so happy to find an electrical box that would be easy to mount underneath the table! A few other differences from my previous post: I didn’t buy an extra piece of black cord to go from motor to switch and just cut a section from the replacement cord I was using. I also used clips with nails for securing cord underneath the table.
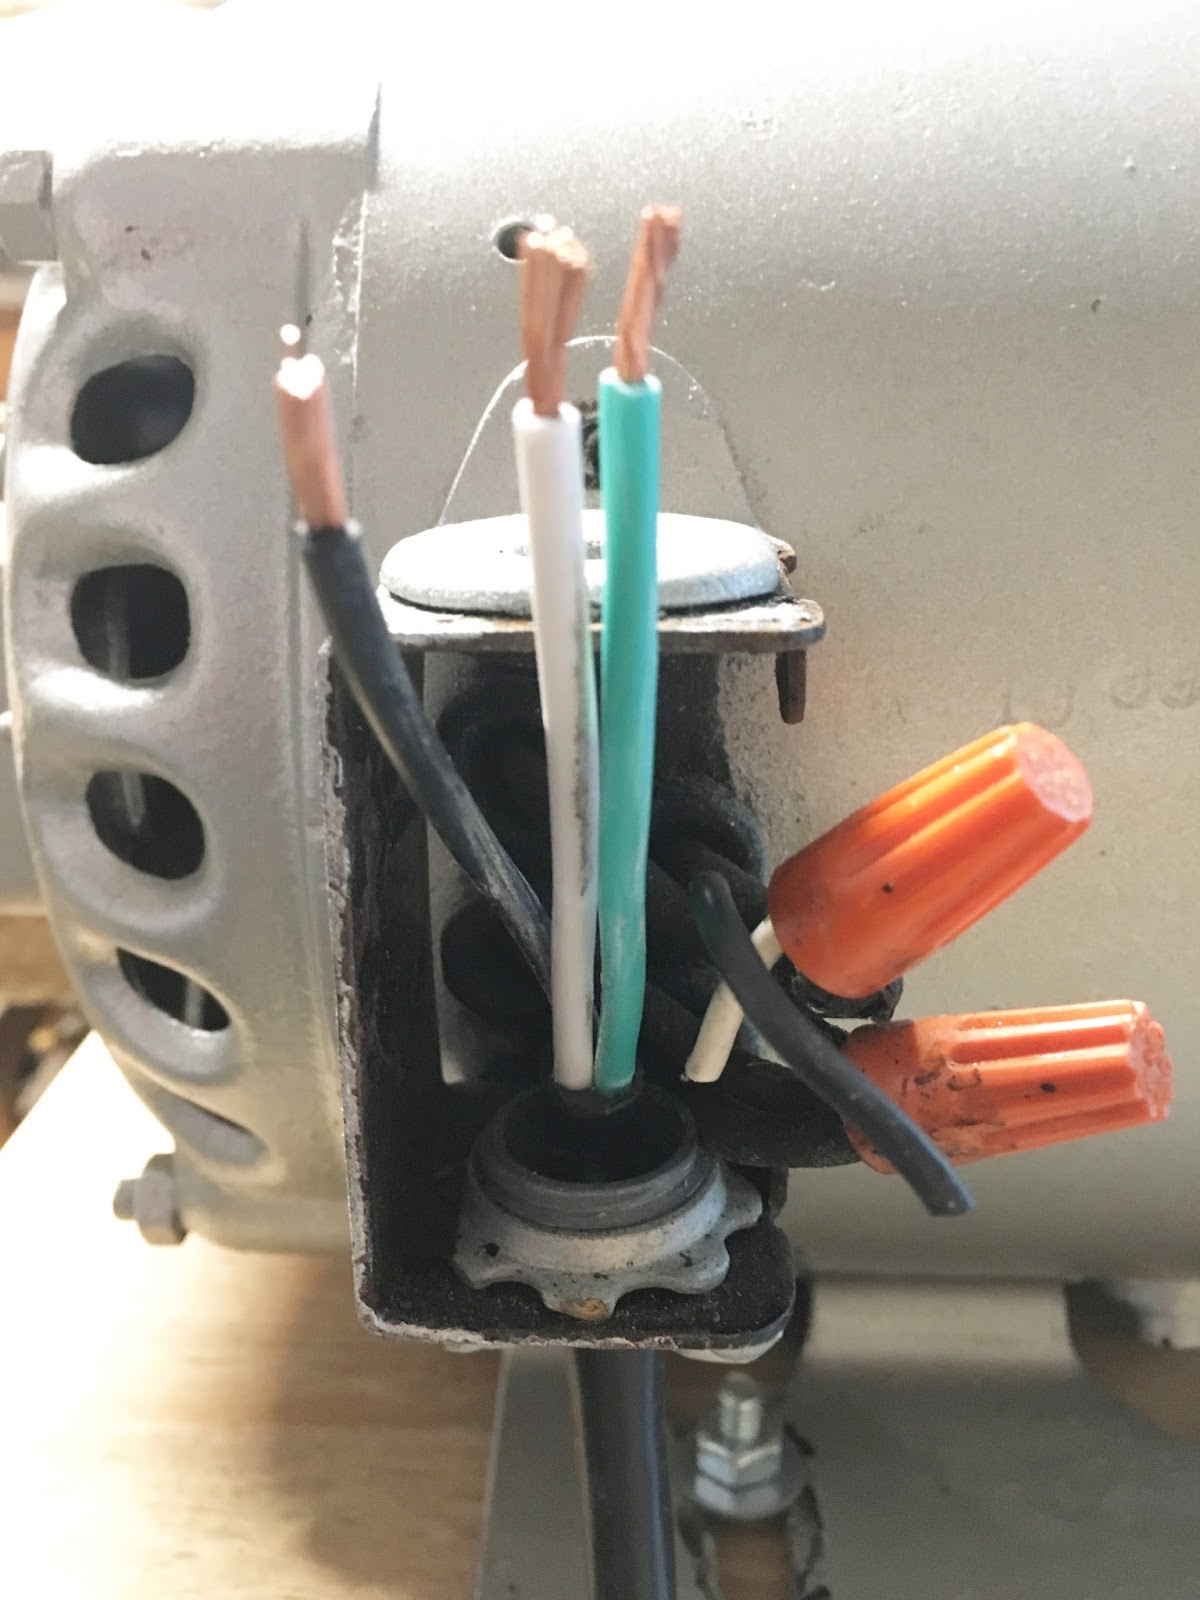
I threaded the end of my new cord through the wire casing on motor.
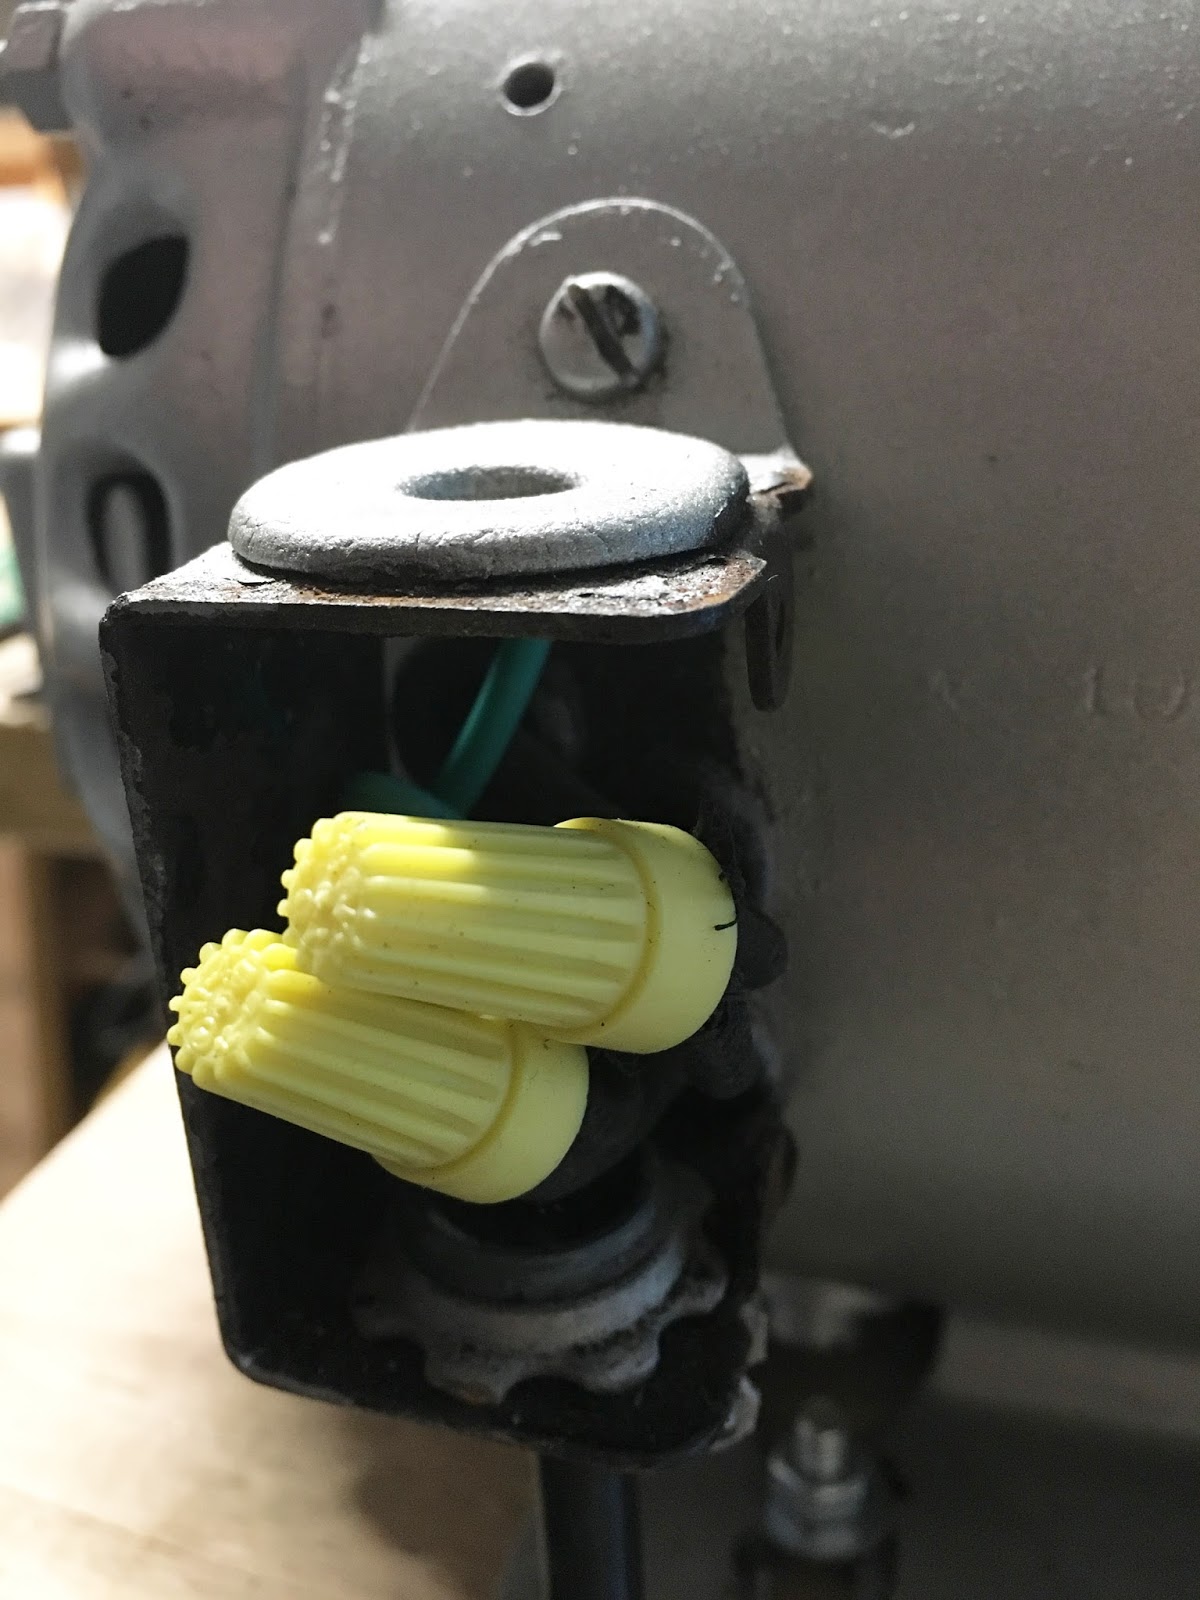
I grounded the green underneath the screw on the wire casing and used wire nuts to secure new wires with motor wires.
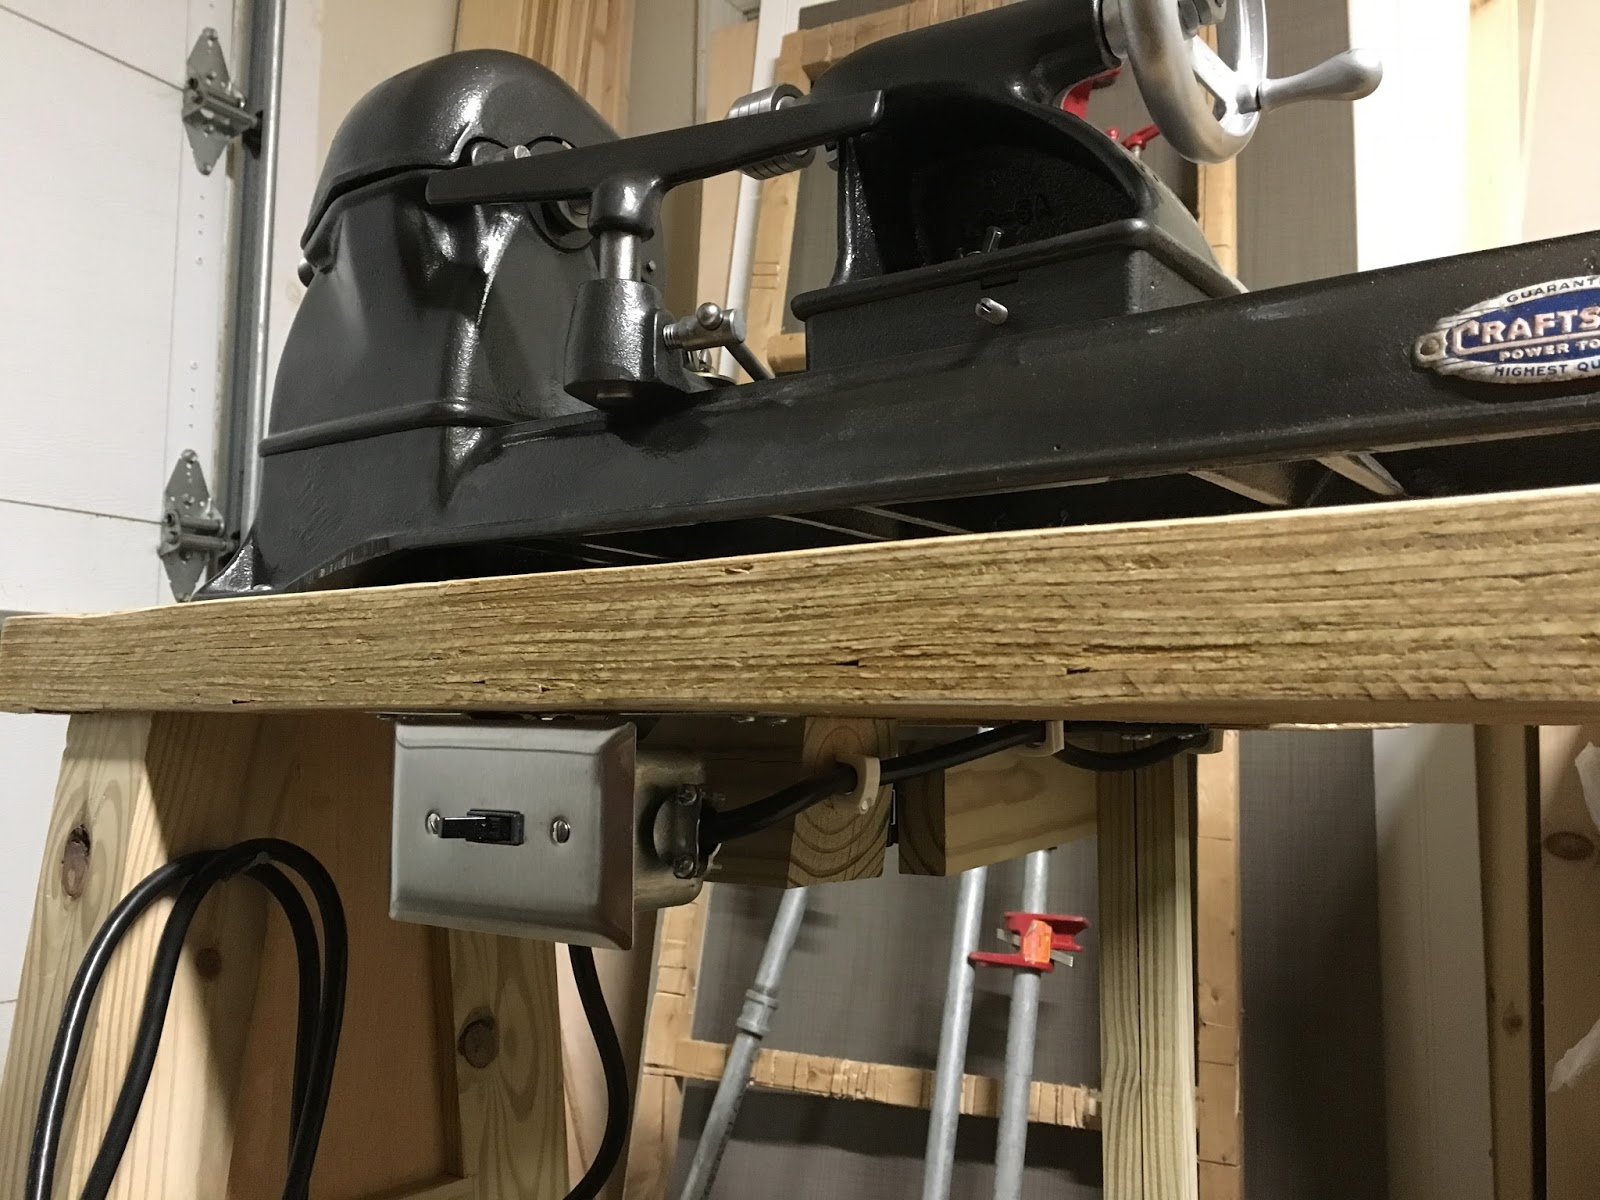
Next I screwed my electrical box where I wanted it and cut the cord so it would go through the box with a few inches extra. From there I connected both ends of the wires through the box/switch. Next I attached the plastic clips to hold the wire under table.
It’s super easy and inexpensive to add a switch like this! It feels good knowing my tool is grounded and safe to use + easier to turn on/off.
*DISCLAIMER* please use safety, caution and common sense when working with electrical. I will not be held responsible for any mishaps with electrical. Double check with an electrician to ensure the wiring for your particular motor and set-up is done correctly and to code.
After the wiring I was pretty much waiting on the v-belt to arrive in the mail. That’s when I decided I really SHOULD disassemble everything, sand it better so I could stain the wood to make it nicer (green-treated wood isn’t very pleasing).

Before disassembling everything I thought I should figure out something for my turning tools. I had an old kitchen knife strip magnet in the garage and incorporated it into the design. I wanted something simple that was easy to hang from the table. I used a few hinges and it hangs with a nice angle on its own.
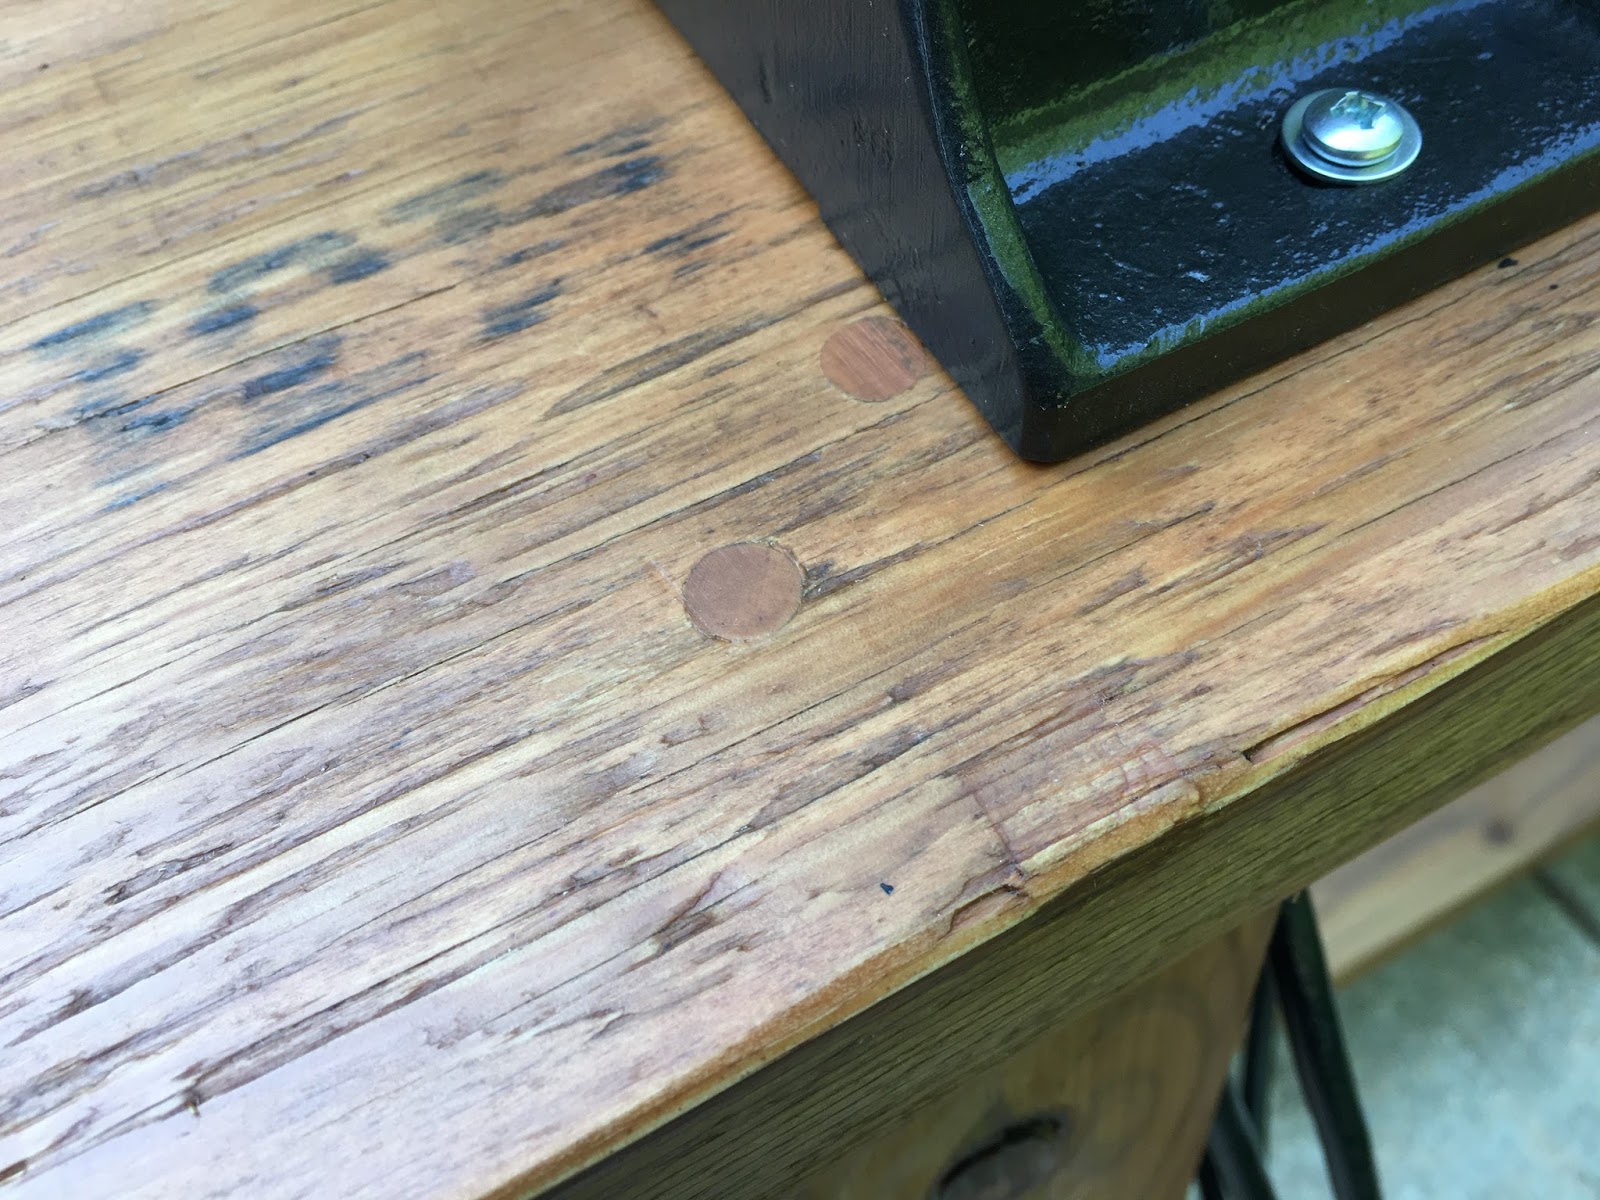
I used Flood outdoor stain and rubbed wax on the top to give a smooth finish.
While reassembling I wiped all the bare-metal finishes with WD-40 again and used Zoom Turbine oil for the oil pots in the headstock (oilite bushings) and motor.
BONUS PICTURES:


Download manual, here.
UPDATE
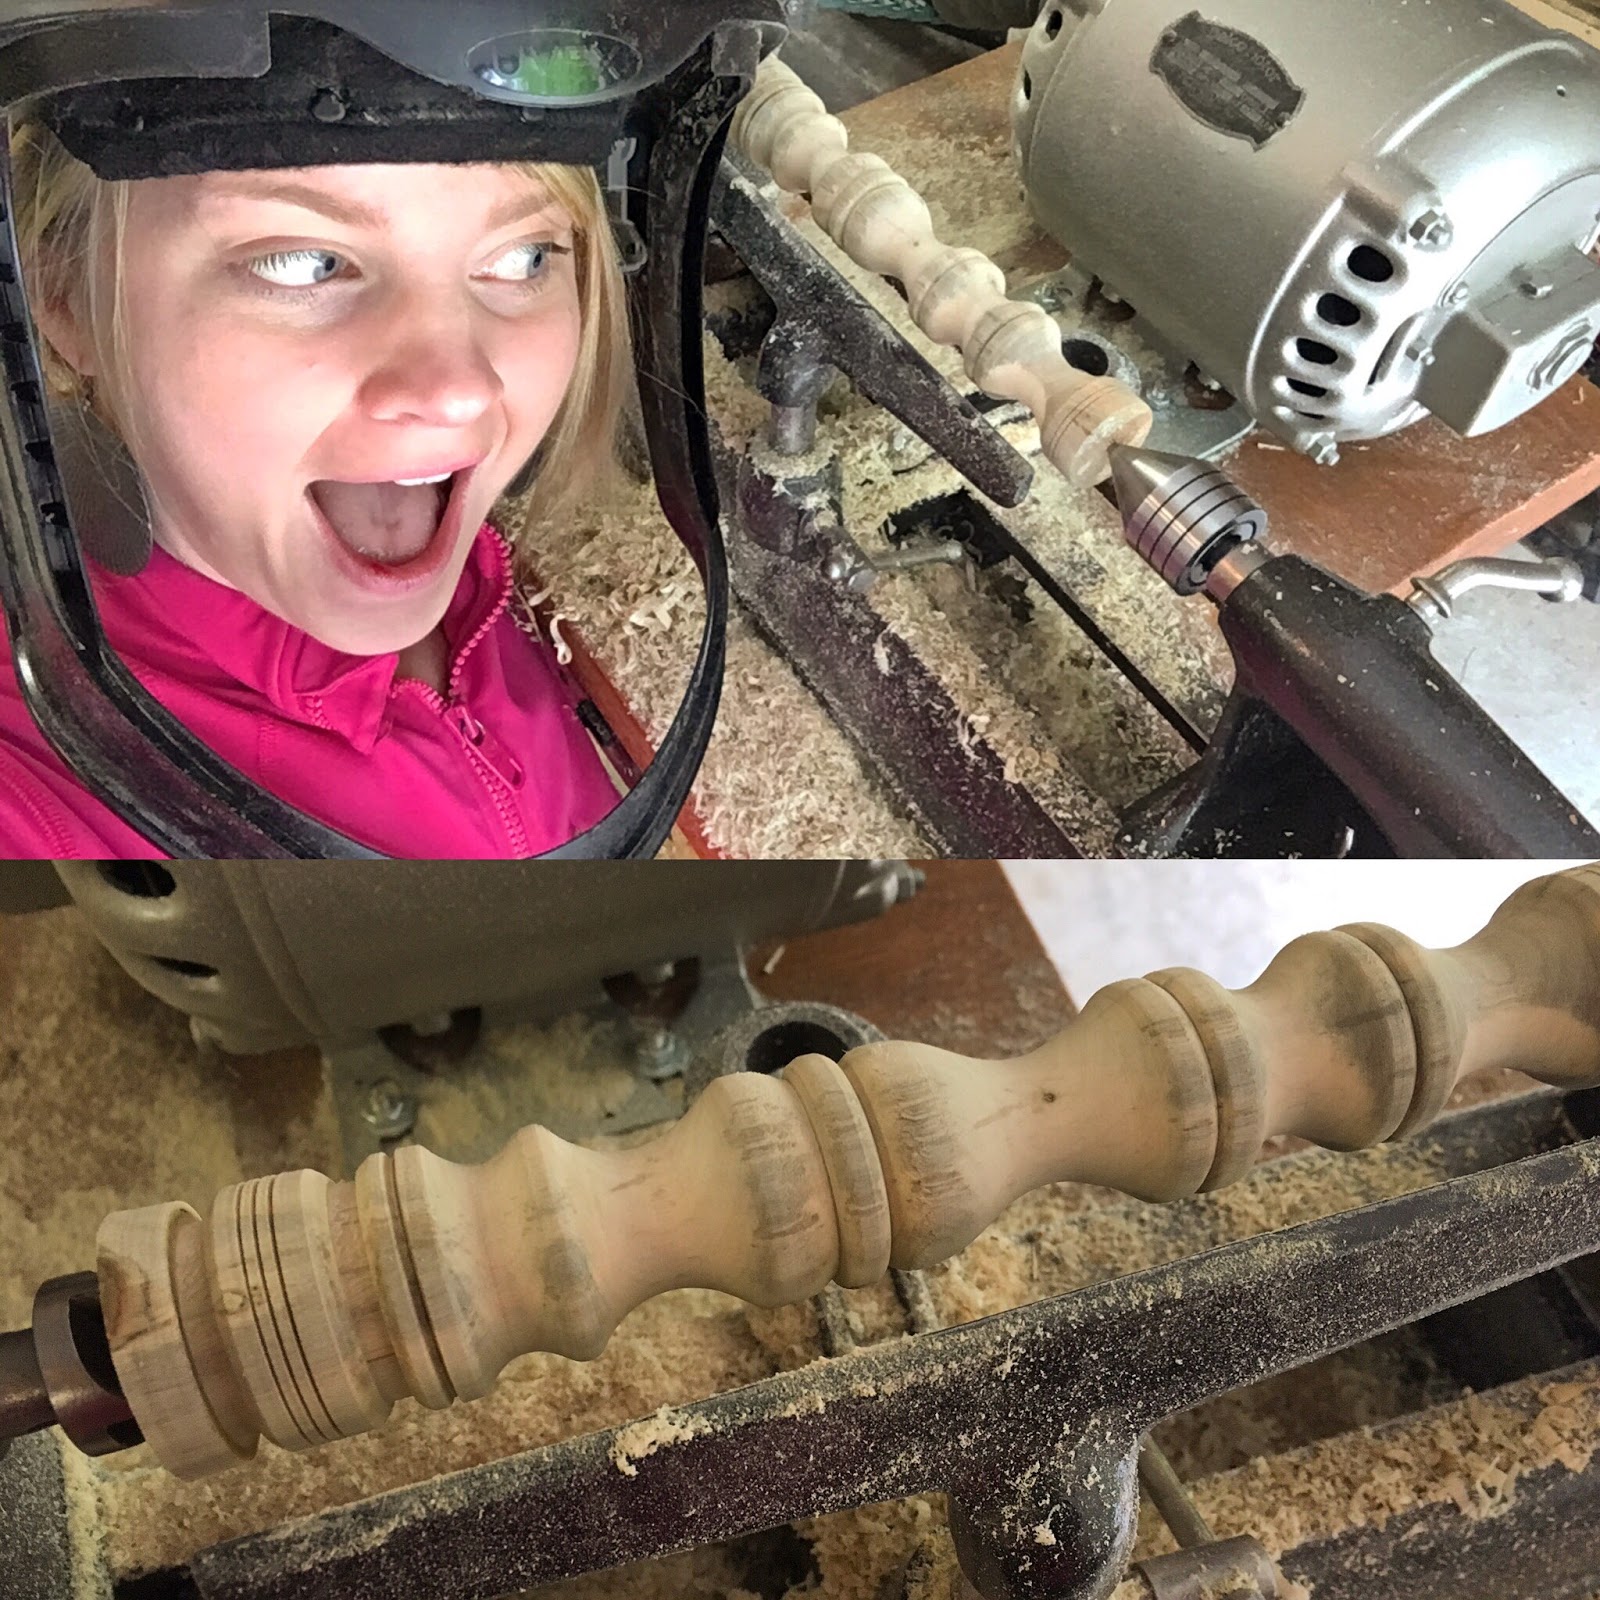
I finally got up the nerve to try my hand at turning for the first time a few days after finishing the lathe. I stuck a branch piece on from a tree we cut down last fall and it was so thrilling! Now I want a chuck and tool sharpening jigs! I have a feeling this will turn into a money pit fun hobby! 😁 (Luckily, finding free wood shouldn’t be a problem since trees grow like weeds here!)
55 Comments
All I can say is "WOW". Beautiful job for a beautiful lady!!!
June 15, 2017 at 10:25 amCan I adopt you? Outstanding job.
January 24, 2021 at 1:20 pmLol!
January 24, 2021 at 1:45 pmHi there. I hope this site is still active. I have a question hopefully you have a solution for. I have a sears model 101 06242 lathe. I want to attach a chuck. All chucks I have found use a 1-8 inch thread. The lathe uses a 3\4-16. I believe is a British whitworth. So, I bought an adapter. And of course the adapter won’t fit the lathe spindle. What is everyone doing to resolve this issue. Thank you for your time and reply.
April 25, 2021 at 10:16 amHi Michael! I never looked into getting chuck for the lathe and didn’t do any research – I’m sorry but I won’t be of much help!
April 25, 2021 at 10:59 amThank you! 🙂
June 15, 2017 at 10:29 amI’m purchasing this wave from somebody in 3 hours any tips to Resort it is up and running
February 27, 2020 at 2:18 pmNot really any tips – it just depends on how far you want to restore it! I personally like to know my tools are in their best running condition and that’s why I take them all apart and grease/oil all the parts. Hope all is well!
March 13, 2020 at 1:04 pmWould you have any contacts that I may use to further my investigation? I’ve searched for adapters with no success. Thank you.
April 25, 2021 at 3:38 pmHi Dani, thanks so much for this great info. Beautiful restoration job! Bravo!
August 13, 2023 at 12:23 amI found this same model for sale for $100, the guy says it works perfectly. It looks really good in the pics and comes with a table, motor and tools. Looks like it’s been very well maintained. This seems like a steal to me, I’ll go check it out in a couple days. What do you think, $100, worth buying? (I haven’t used a Lathe in over 30 years, but have been dreaming of doing it again).
Irena
Hello there! I’d say definitely, if it’s in good running condition it’s a great lathe to start on. It’s good for spindle work because the bed is long – it’s not for bowls because there’s not much clearance from the bed to the spindle. To give you an idea, I sold this restored lathe for $600 💪🏻
August 13, 2023 at 2:51 pmWow this is such an amazing project! I found you through the vintagemachinery.org site while looking for Craftsman wood lathes, I'm inheriting one very similar to yours from my dad and this post is so inspiring. Like yours I'm also missing the live center and also the back fly wheel is broken – would you mind sharing where you found the replacement center? Thank you!
November 19, 2017 at 9:36 amHi Claire!
This little lathe was a really easy restoration because it really is so simple. The results come quickly because it is so simple – I wish you luck! As for the center – I believe the original would have been a dead center which you wouldn't want anyways. You'll want a live center, meaning it spins with your wood. I got mine for $25 on Amazon. Any 1MT center would do but I was happy with the price and quality! You're welcome to e-mail me anytime with questions!
November 19, 2017 at 9:39 amNice job! I have the same lathe but have not started on a bench for it. I was looking at it closely tonight and concluded I probably could drive the headstock with the motor below. It seemed tight for belt clearance but not impossible. I felt I could improve clearance if needed by grinding / filing the lower opening a bit. Then I read here that you tried it. You concluded it was not possible. Why did you come to that conclusion? Trial and error?
August 21, 2018 at 11:45 pmHi James! Yes, I definitely tried it out and was bummed that it didn’t work. I cut a hole in my table underneath the headstock pulleys only to discover that the belt rubbed on the casing of the headstock REALLY bad. It ended up being a good thing because having the motor on the back with hinges made changignthe belt super easy.. just had to lift and change the belt. I had the length of belt just right so the weight of the motor have it just the right amount of tension.
August 22, 2018 at 7:24 amDani,
April 2, 2019 at 5:14 pmI have one of these lathes that I have carried around for 40 years. I just recently cleaned it up and started turning. I would like to get a chuck for bowls but cannot find an adapter. I believe the spindle is 3/4” x 18 tip. Do you know where one might get an adapter?
Hi Dave! Are you sure it’s 3/4″? That seems quite small. I’d look at Craft Supplies USA, Penn State and Woodworkers Emporium first.
April 3, 2019 at 8:20 pmI just looked up what chuck I bought for the Craftsman and it was the Barracuda2 from Penn State Industries: https://www.pennstateind.com/store/CSC3500SE.html
April 3, 2019 at 8:29 pmHave the bara2 as well im looking for the outboard reverse thread plate as well. Any ideals? Penn doesnt have and reverse thread they told me.
December 9, 2020 at 12:07 amThe 101.06242 (aka Dunlap 9 x 36 Craftsman Lather) spindle is 3/4 – 16TPI, for certain. Adapters and Chucks for Sherline Lathes or Taig Lathes are also 3/14 – 16 TPI. so that’s a reference source for parts to fit the spindle. I recently bought an adapter at The Little Machine Shop to fit a 3″ chuck for metal working on this lather. Here’s the link. http://lmscnc.com/1920
December 3, 2019 at 12:11 amHey James, I like others just picked up a 101.06242 and realized that my belt housing (cast iron one piece house the v-belt) is different than the others, do you or Dani have any Manual or vids of breaking this down, had to cut the original belt because of it. Thanks.
October 18, 2021 at 2:36 pmHi Dani I have a weird question but I have the same lathe and am having a problem getting the headstock spindle set up right. It looks exactly like your pictures. 2 bushings on the tail end both with set screws. Then through the headstock into the bearing. Then the pullys, then the front of the headstock and then their is the front collet that screws on. If I try to move the collet close enough I don’t get any front to back movement and turn the lathe on it will actually tighten itself to the headstock and stop turning. Looser and it has a ton of play. Any tips from when you put yours back together I can’t find a diagram just the parts lists. Thanks for any help.
September 22, 2019 at 6:23 pmHi Joe! Unfortunately I’m not going to be much help as I don’t remember the assembly process besides what I have in pictures. I have a bad memory (I blame it on having 4 kids!)… So sorry!
September 22, 2019 at 9:40 pmJust curious, did the chuck fit or did you have to get a adapter.
October 28, 2019 at 10:24 amIt fit!
November 7, 2019 at 7:02 amJoe: if you have the same lathe as Dani (and myself), the spindle shaft has another bushing on the working end. That is in addition to the two on the tail end of the spindle (left side of headstock). This other one is fixed (no set screws) or at least its keyed, or press fit, to the shaft. All adjustment is at the left end so I never looked into how this one on the chuck end it is attached. If you don’t have this fixed bushing, you’ll have to find a way of fixing some type of bushing on the shaft on the business end so that adapters, faceplates etc, don’t tighten into the headstock. I have a 1939 manual with views of all these parts and part numbers and can share them. It shows the fixed bushing on the shaft as one part. I don’t think I can attach anything here but I included my email. Don’t expect to find original parts readily available though. Contact me. Good luck. Jim Vanderpas
December 3, 2019 at 12:21 amJames,
Did you happen to replace the thrust bearing L2-20? If so where did you purchase it?
Walter
January 19, 2023 at 1:01 pmI didn’t need to replace it thankfully!
May 19, 2023 at 7:01 amI had the same issue today as I disassembled the pulley system to clean and lubricate everything. As soon as I turned the motor on the machine locked. This is what I did. If you loosen the front collet a few turns and then also loosen the two rear ones which have wrong turn threads(i call them that way) push the headstock shaft up until you are about to hit the pulley locking pin then tighten the 2 collets up until it stops then tighten the two flat screws on each collet, now you can tighten the front collet too. this is how I got it to work with no issues. I also noticed that the shaft can not go past where the collets are if you see part of the shiny shaft then it’s in too much out on one side. the threads where the collets turn on are supposed to end and no shaft should be visible. You probably solved this by now but figured I just bought one and ran into the same issue so why not help out.
January 1, 2020 at 8:00 amNice Job, I love the color that you used, can you leave a link what it is and where you got it from? also what did you use to strip the old paint out? did you use any chemicals?
November 6, 2019 at 8:51 pmIt’s Rustoleum Hammered Black. I used wire brushes and mineral spirits to prep for paint.. no stripping. Hope that helps!
November 7, 2019 at 7:05 amyou can look into this paint by Sherwin Williams Two websites. copy and paste.
https://www.paintdocs.com/docs/webPDF.jsp?SITEID=SWPROTECT&doctype=PDS&lang=E&prodno=B66W111
https://leblondusa.com/tips-for-repainting-a-lathe/
January 1, 2020 at 8:02 amGreat work. I just bought what looks like the same lathe you have. Guy sold it to me and told it was his brothers and he sadly passed away at 42 from cancer. I am going to strip it as you did and paint it back to the same original royal blue using Sherwin Williams DTM B66. I too love the wire wheel, it loves me too as I’ve taken nice pieces of skin by accident. Paid $100 with a lot of extras like the cutting knives and some attachments to turn bowls. Do you know if these were sold with all accessories like the knives, steady rest in a box? What have you seen them sell for? Excellent job on the table too! thanks for sharing
December 31, 2019 at 7:35 amHi there! I don’t know for sure but I’d almost guarantee the knives were sold separate. I sold mine for $600 after I refurbished it – I sold it with everything in the pictures including the chuck and set of knives. Good luck with your restoration!
December 31, 2019 at 8:46 amHi Dani – beautiful job on the restoration! I just bought the same lathe for $75 at the ReStore in Wake Forest today. I googled the model number and happened to find you just down the road – small world! I salvaged several big black walnut, spalted elm and cedar logs from a development site and had them milled in my driveway with a Woodmizer, so I’m setting up shop to get back into woodworking. I haven’t done anything with a lathe, but I couldn’t resist at that price! Thanks for posting the manual. I may need your advice when I get around to setting it up – maybe barter for some nice lumber?
March 16, 2020 at 10:33 pmIt sure is a small world! I wish I would have gotten it first, darn, you beat me to it! 🙂 I’m happy to give advice and you can even come and see my new Laguna lathe and all the attachments and tools I have for it! Getting a nice grinder and CBN wheels with large platforms for sharpening gouges has been my best investment! You can message me at handcraftedjourney@gmail.com for faster response *thumbs up*
July 4, 2020 at 9:37 amNice job! I stumbled onto your website while researching information on a similar lathe that I have an opportunity to purchase. I enjoy restoring tools in general, but lathes are an especially rewarding venture because they are so inherently simple, as you mentioned. One suggestion I would have for you would be to consider using a safety paddle switch instead of a standard toggle switch. These are inexpensive and readily available and they not only make it easy to turn the machine off in a hurry if, Heaven forbid, something gets caught in the machine or another mishap occurs, but they also have a removable paddle which effectively acts as a safety lockout to prevent the machine from being turned on accidentally. I add them to every tool I work on. They are a big win on the functionality side, although admittedly, they lack the cool retro look of a standard toggle switch. Just something to consider. Keep up the good work and I will be sure to explore more of your website.
July 4, 2020 at 8:24 amThank you for the suggestion Tim! I looked into that type of switch for my Walker Turner lathe I restored but I can’t remember why I didn’t go with it (perhaps because it didn’t have that nice retro feel like you mentioned). Safety is important, that’s for sure, and I really do like the large switch on my table saw that allows me to hit it with my thigh so I can keep my hands on the wood if needed. I hope your lathe purchase goes well! 🙂
July 4, 2020 at 9:35 amThanks for sharing this restoration, and you did a remarkable job. I found one of these lathes in my Dad’s basement. My grandfather acquired it in the 1940’s, and when he passed the lathe landed in my Dad’s basement where it has sat unused for the last 35 years. It now sits in my garage, and I look forward to bringing it back to life. Mine has the “Dunlap” brand, but otherwise is identical. It looks like I will go through a similar path that you have taken, but I will be glad to miss some of the roadblocks that you stumbled upon :-). You didn’t talk about any restoration that you might have done on the motor (other than wiring). Did you need to do anything to the motor (other than wiring/clean/paint)? Thanks again.
July 6, 2020 at 3:34 pmI didn’t do anything to the motor besides what I mentioned in the post 🙂 Good luck with your restoration!
July 13, 2020 at 4:22 pmYou inspired me to restore my Dad’s 1940 Companion Lathe. Thank you for the inspiration. I can send pictures if you would like to see the project.
August 23, 2020 at 7:21 pmKen in Oregon
So glad to hear Ken! I’d love pictures!
September 30, 2020 at 2:06 pmWhat HP is the motor? Thanks
November 19, 2020 at 11:57 amI’m sorry I don’t have the lathe anymore to check.
November 24, 2020 at 11:39 amAmazing job. I have the same lathe and i am looking for the reverse thread plate for the outside end bowl lathe. Did you ever find one? If so where ? You can see it on the far left of the first picture here http://vintagemachinery.org/photoindex/detail.aspx?id=10388
December 7, 2020 at 5:01 pmHi Gary! I didn’t find any extra attachments for the machine but I bet you could find something on eBay if you’re patient!
December 7, 2020 at 5:49 pmWhat type of paint did you use? I’m working on a restoration of the same lathe and looking for paint options – thanks! Great job!
February 8, 2021 at 11:01 pmIt was a hammered black Rustoleum 🙂 Good luck!
January 29, 2022 at 2:37 pmI see by one of your comments that you no longer have the lathe. Hopefully it went to a good home and will live on for many years. I wanted to mention something about the issue you brought up with the casters. If you ever use them again and you want to make them a little easier to deal with, here’s a suggestion: Take a piece of angle iron or even metal bar stock and bolt it from one caster to the other using the end of the lever as an anchor point . You may even be able to do with a piece of maple or other hardwood for that matter. Regardless of what it is made out of, the connecting bar will then act as a single foot lever allowing you to engage the two casters as a single unit. This should eliminate the frustration you described caused by having to operate them independently. I really admire your work. Keep the great projects coming!
April 25, 2021 at 9:43 pmGreat job, I am about to do the same with what I think is an old Craftsman lathe. Just fyi, Rockler had a switch setup that you can plug directly into and has on/off switches, The off button is a big red paddle that I am planning to use. I use one for my dust collector vac.
January 1, 2022 at 5:23 pmThanks Paul! I looked into using a big paddle switch but decided against it in the end (but I can’t remember why, ha)!
January 29, 2022 at 2:39 pmGreat job…..can you give me the belt on and vendor?
February 23, 2022 at 4:20 pmI think I bought it on Amazon – it’s a generic belt where you can change the length so no part number.
May 19, 2023 at 7:11 amDani,
So happy I found this post on your restoration! Not too long ago I was GIVEN one of these lathes by the owner of my favorite “junk store” where I buy all my antique hand tools for restoring. I’m only just now getting to where I’m ready to start restoring it and was curious about where you had sourced your Head and Tailstocks from. Thanks for any info!
P.S. Saw that you’re in the Triangle area. I’m a Sandhills guy ever since retiring from Ft. Bragg. I’m in NY for school at the moment but I CAN’T WAIT to get home to the Tarheel State. My blood-to-BBQ ratio is dangerously low. Cheers and Thanks!
February 28, 2023 at 3:02 pmWow, that’s amazing that someone gave you one of these! I can’t remember where I bought the head and tailstock pieces from unfortunately – I wouldn’t be surprised if it was amazon though! Get yourself a smoker and make some BBQ! Nothing easier than smoking some pork butt (especially when it’s my husband who does it), ha! 🙂
May 19, 2023 at 7:00 am