For the last month I’ve been looking for a drill press and band saw on Craigslist to add to my shop.

When I saw this little beaut it just felt right. I e-mailed the guy to see if he could budge on the price and I got it for $50.
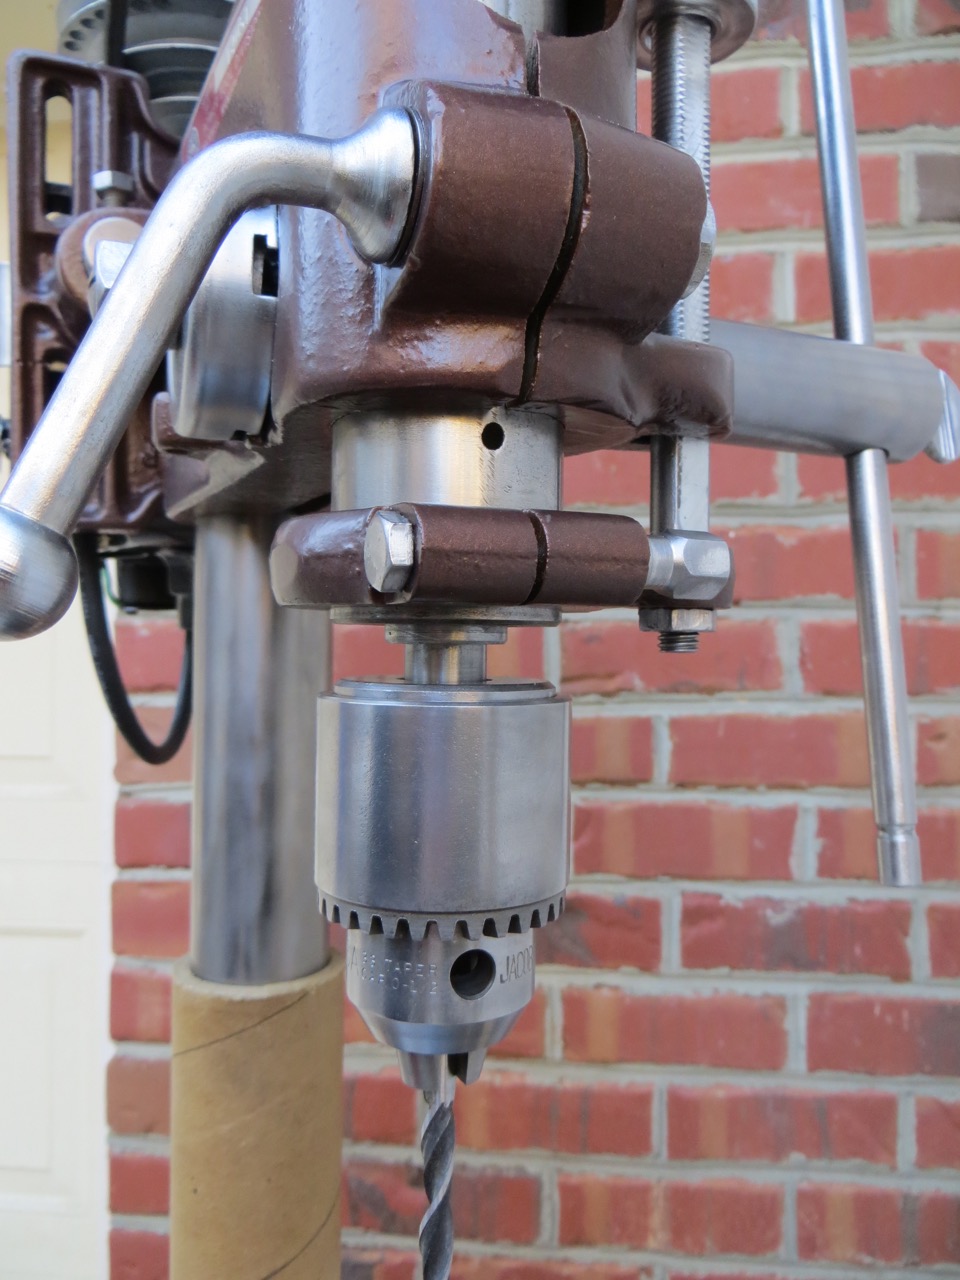
I honestly didn’t know much about drill presses a few weeks ago because I had only used one a handful of times. I was hoping it would be larger than what it looked to be in the pictures and I was glad to see that it was a good size – and it’s a heavy little bugger (I can barely tilt it up from laying down)!
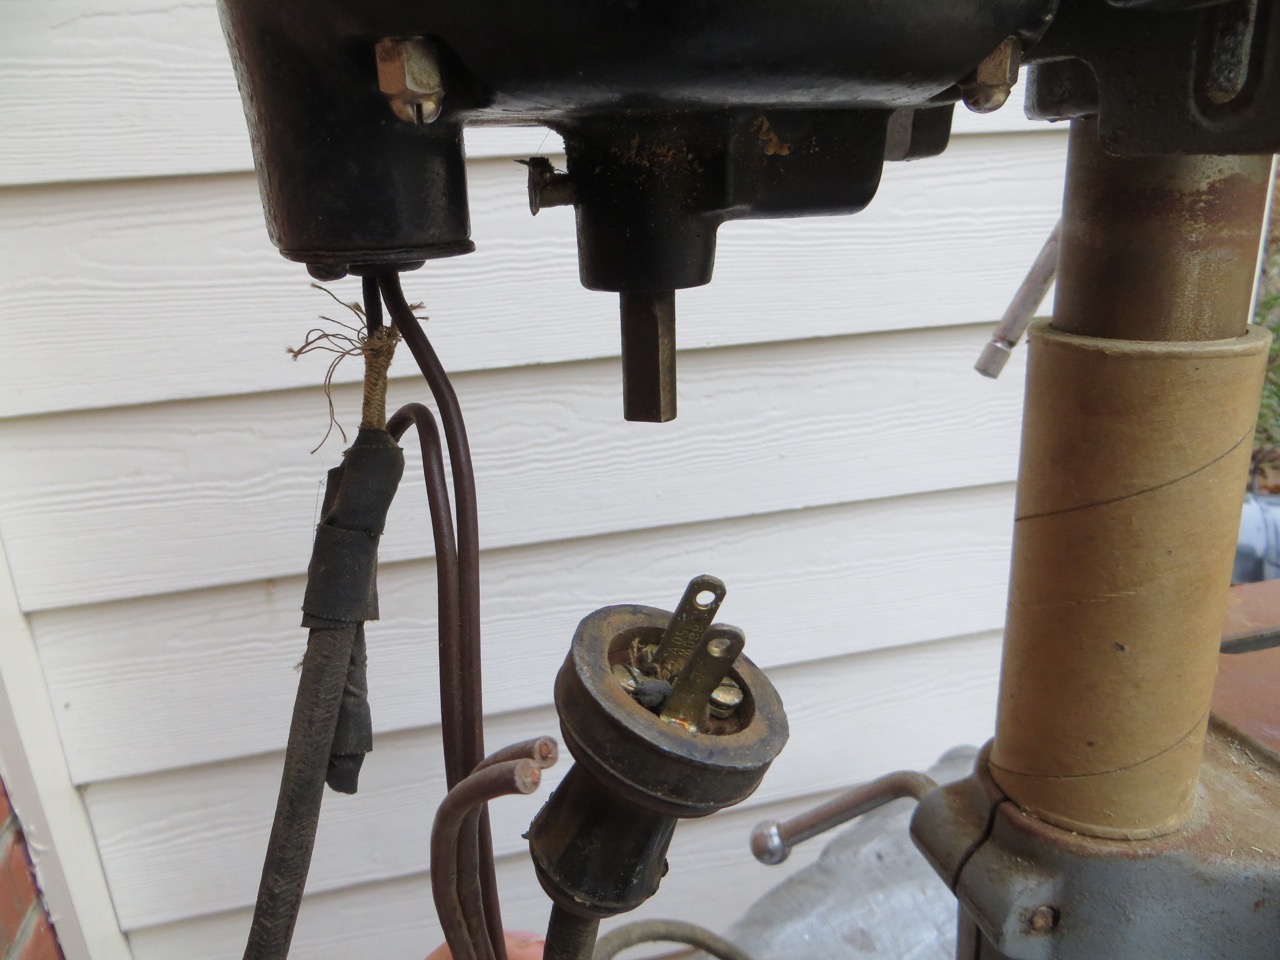
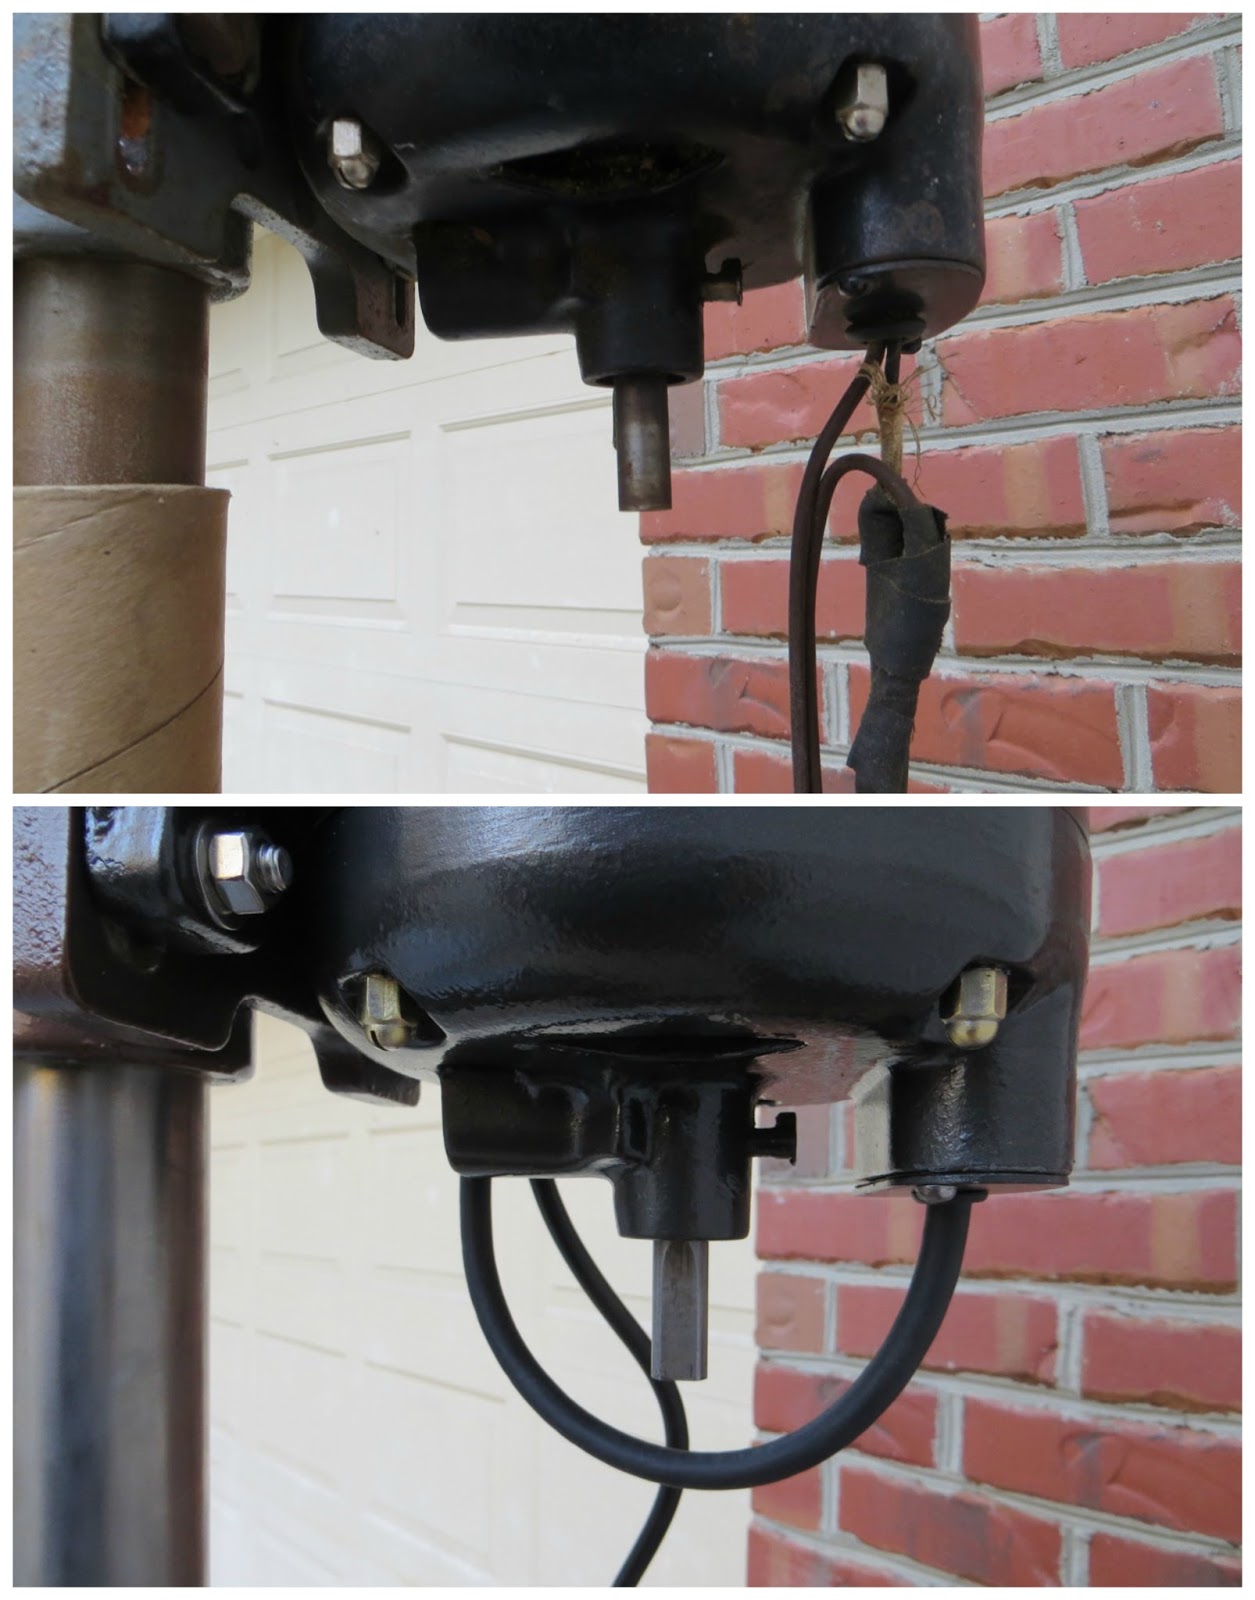
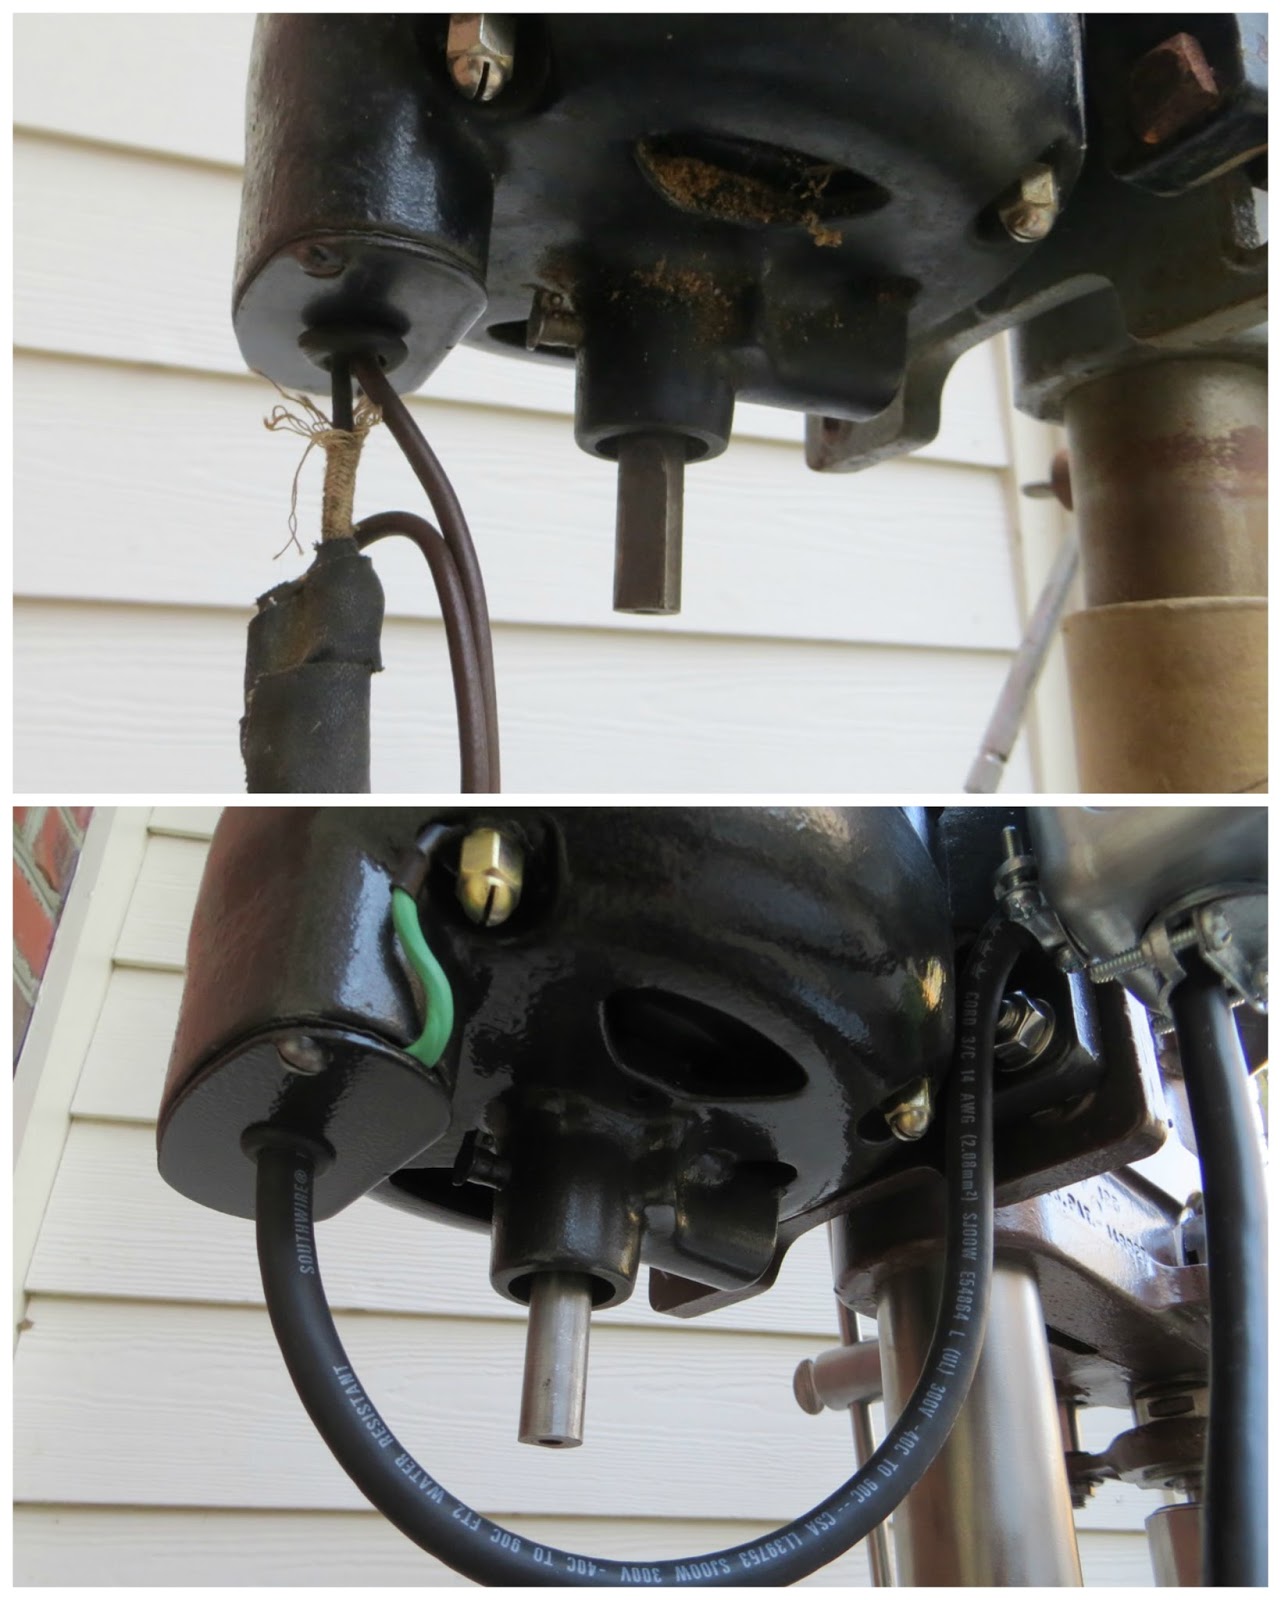
I didn’t test it before I bought it because the wiring was cr-aaa-zy! Seriously, someone just wired an old lamp cord to this thing and wrapped a bunch of electrical tape around the exposed wire ends. I honestly don’t get it.
I’m not going to do an in-depth post about how I re-stored my press because I mostly want to focus on how you can add a switch and a grounded wire (posted here).
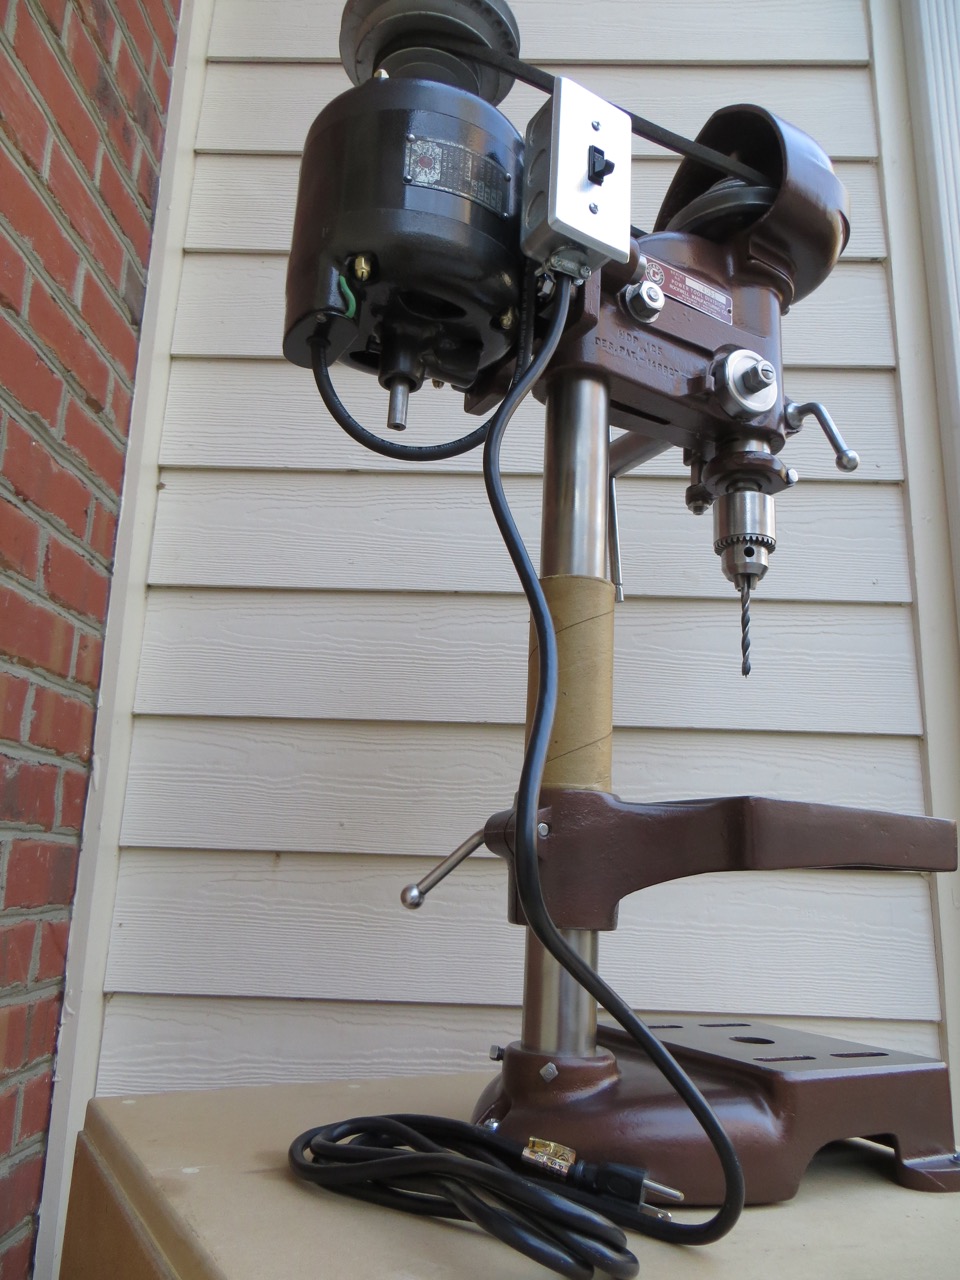
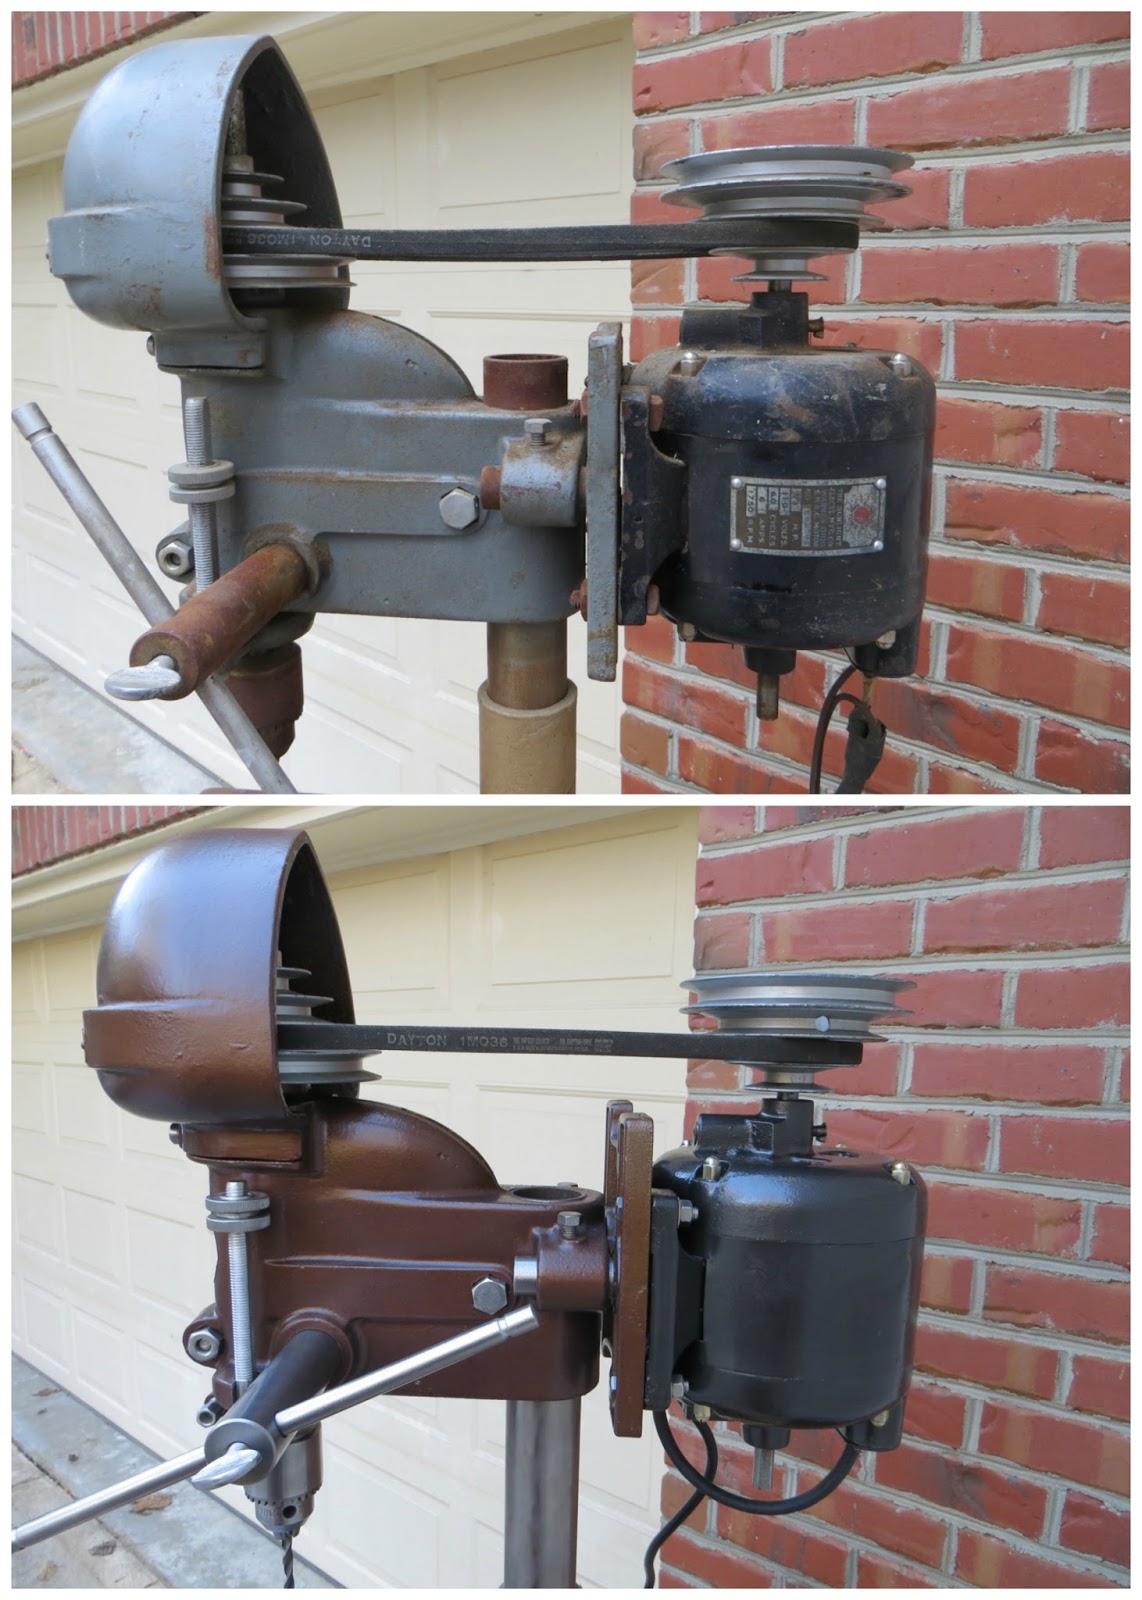
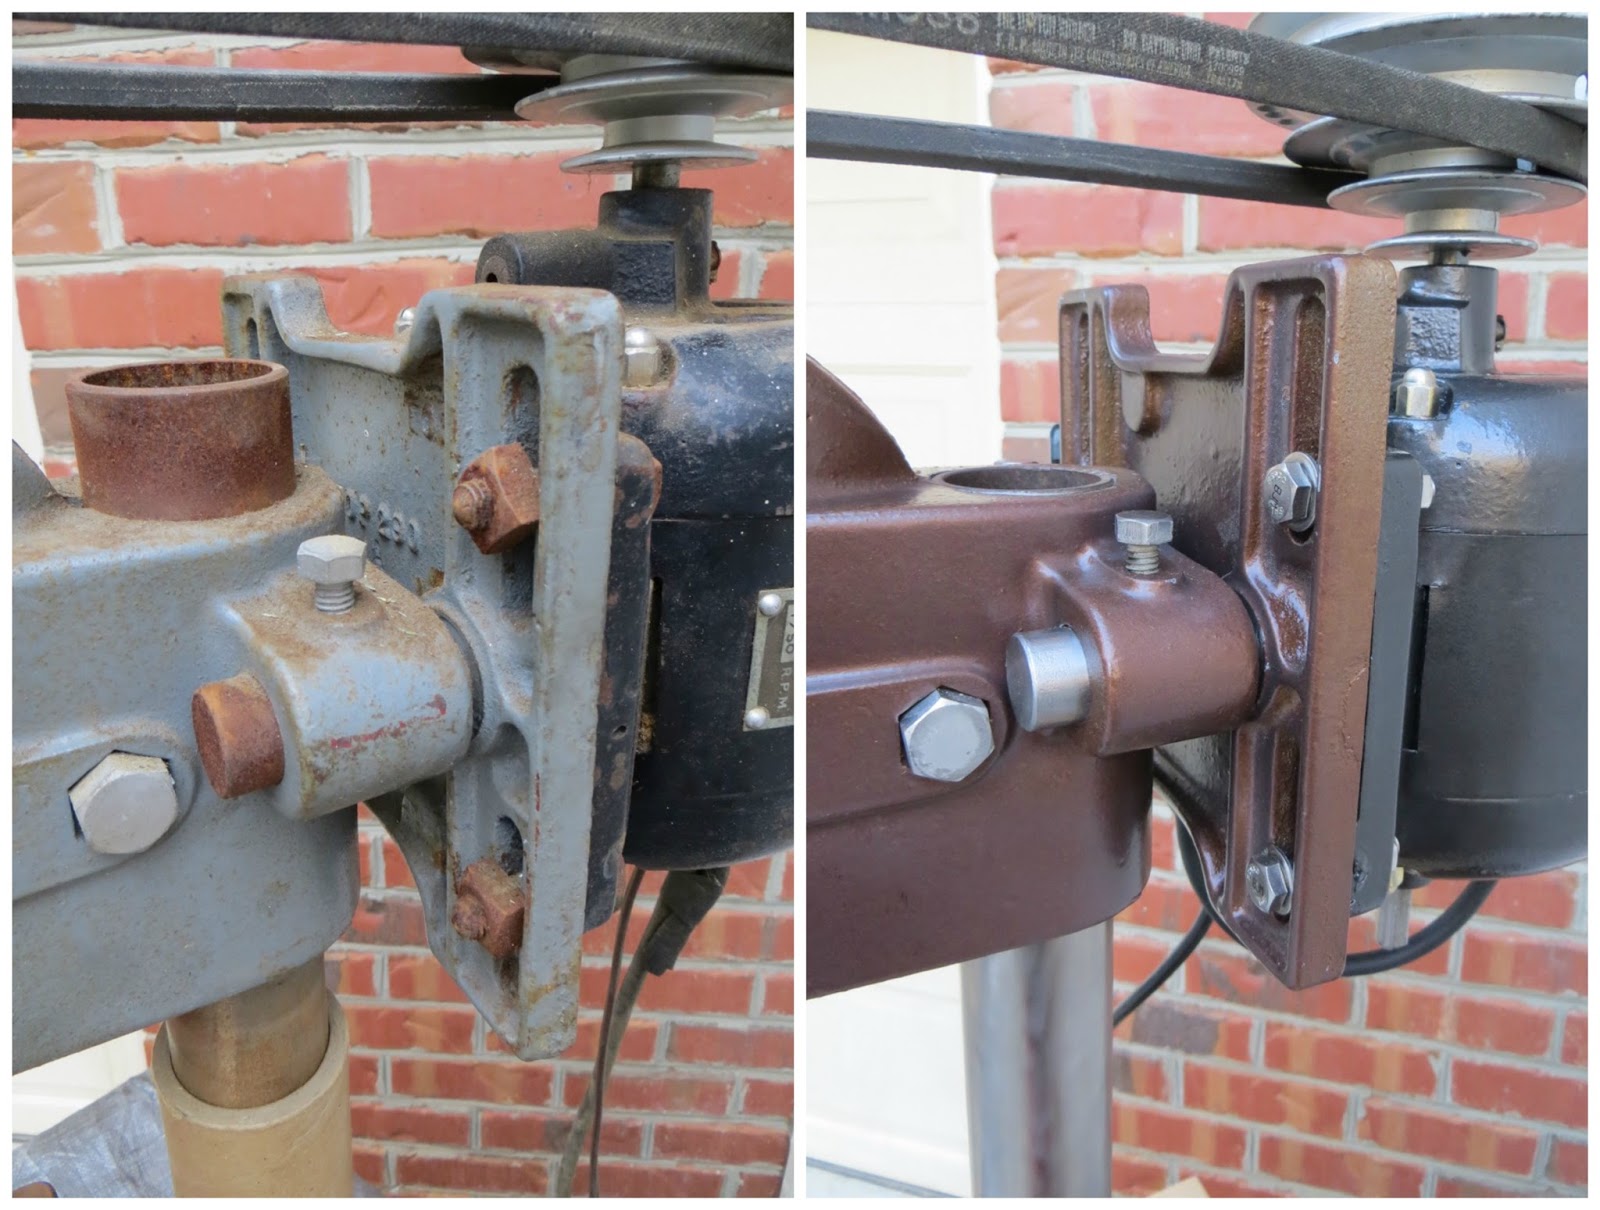
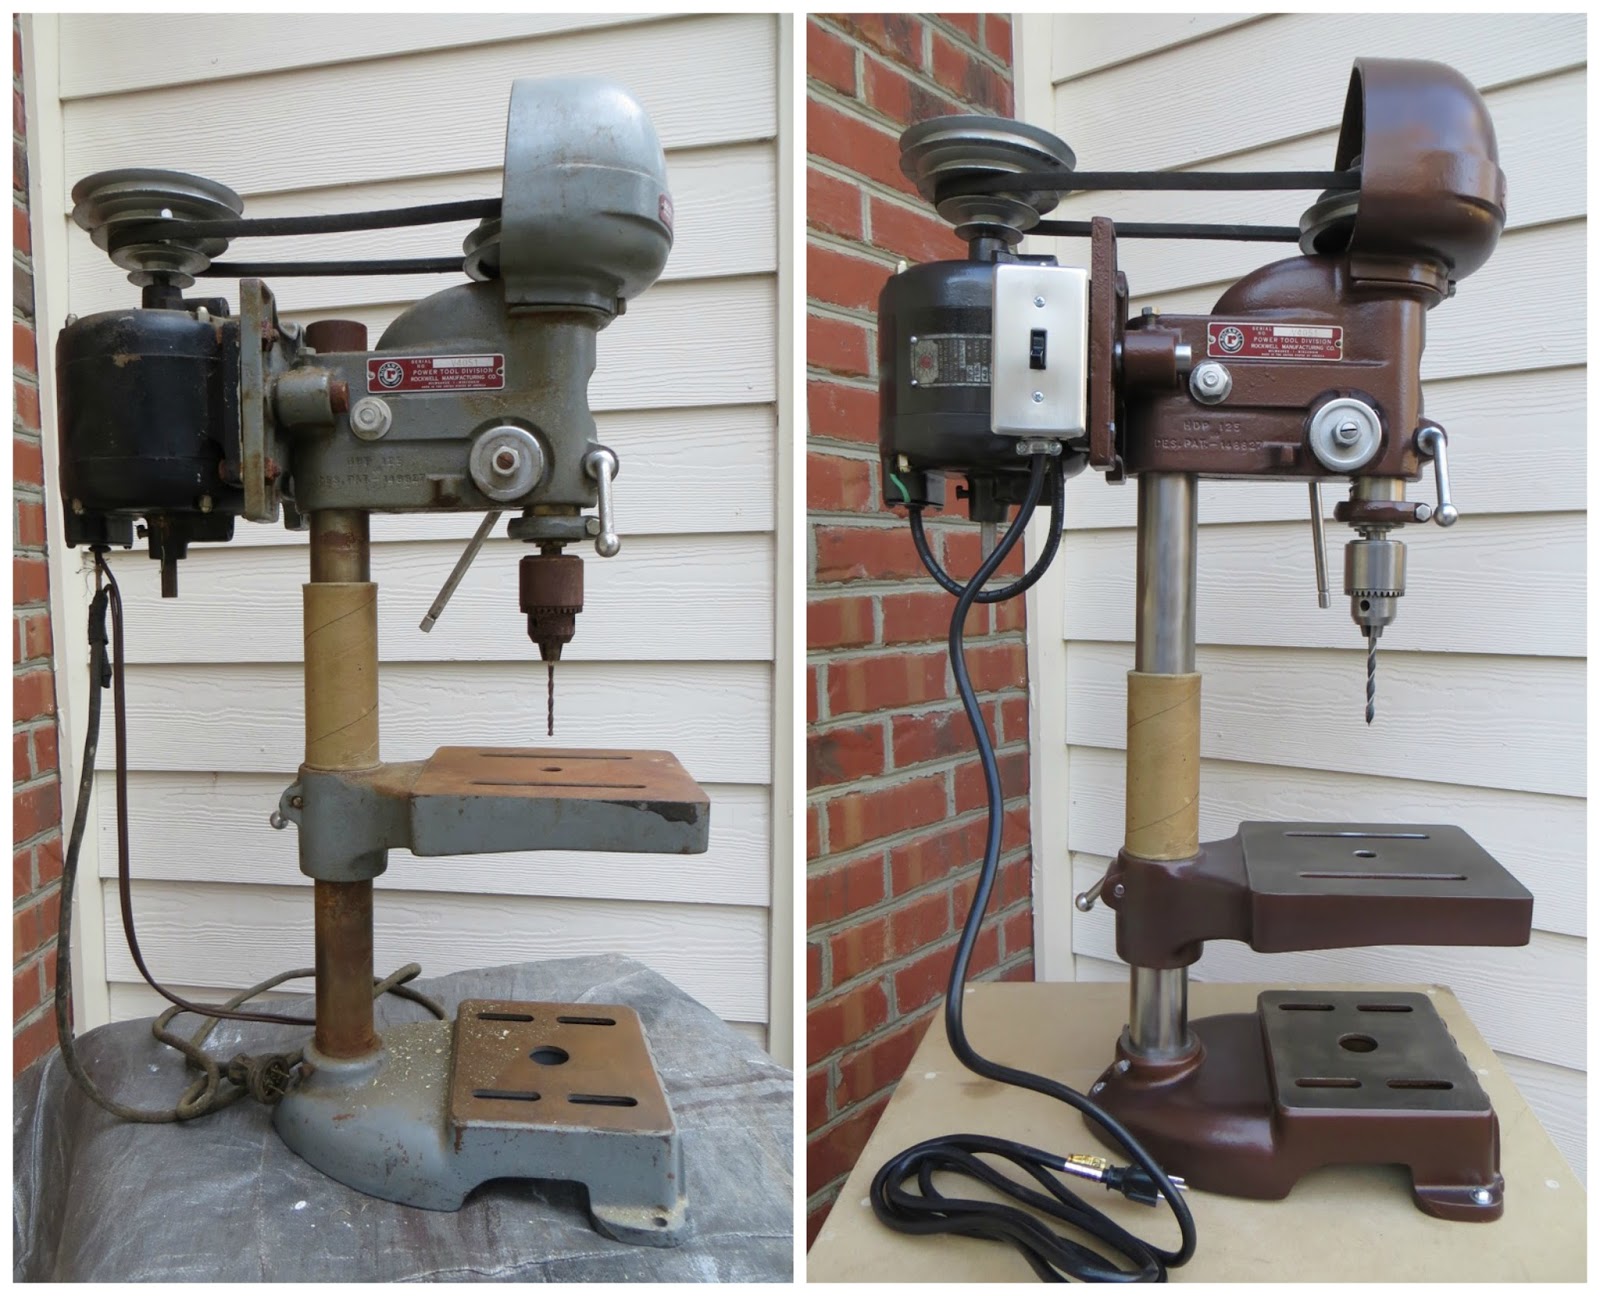
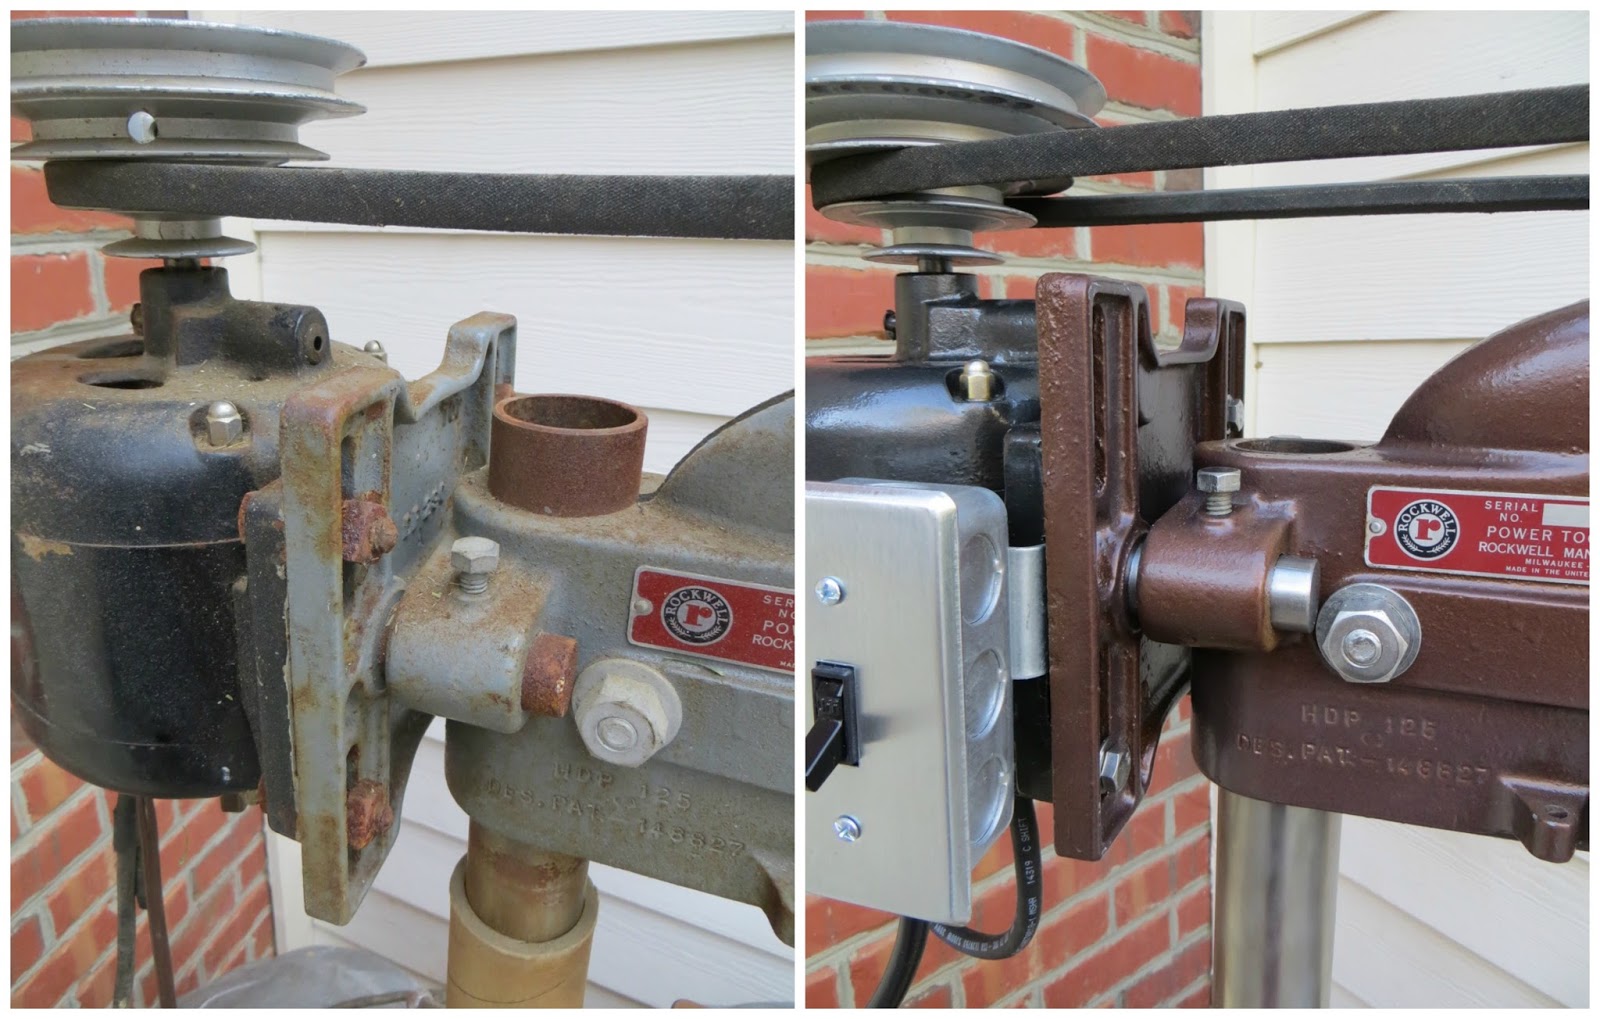
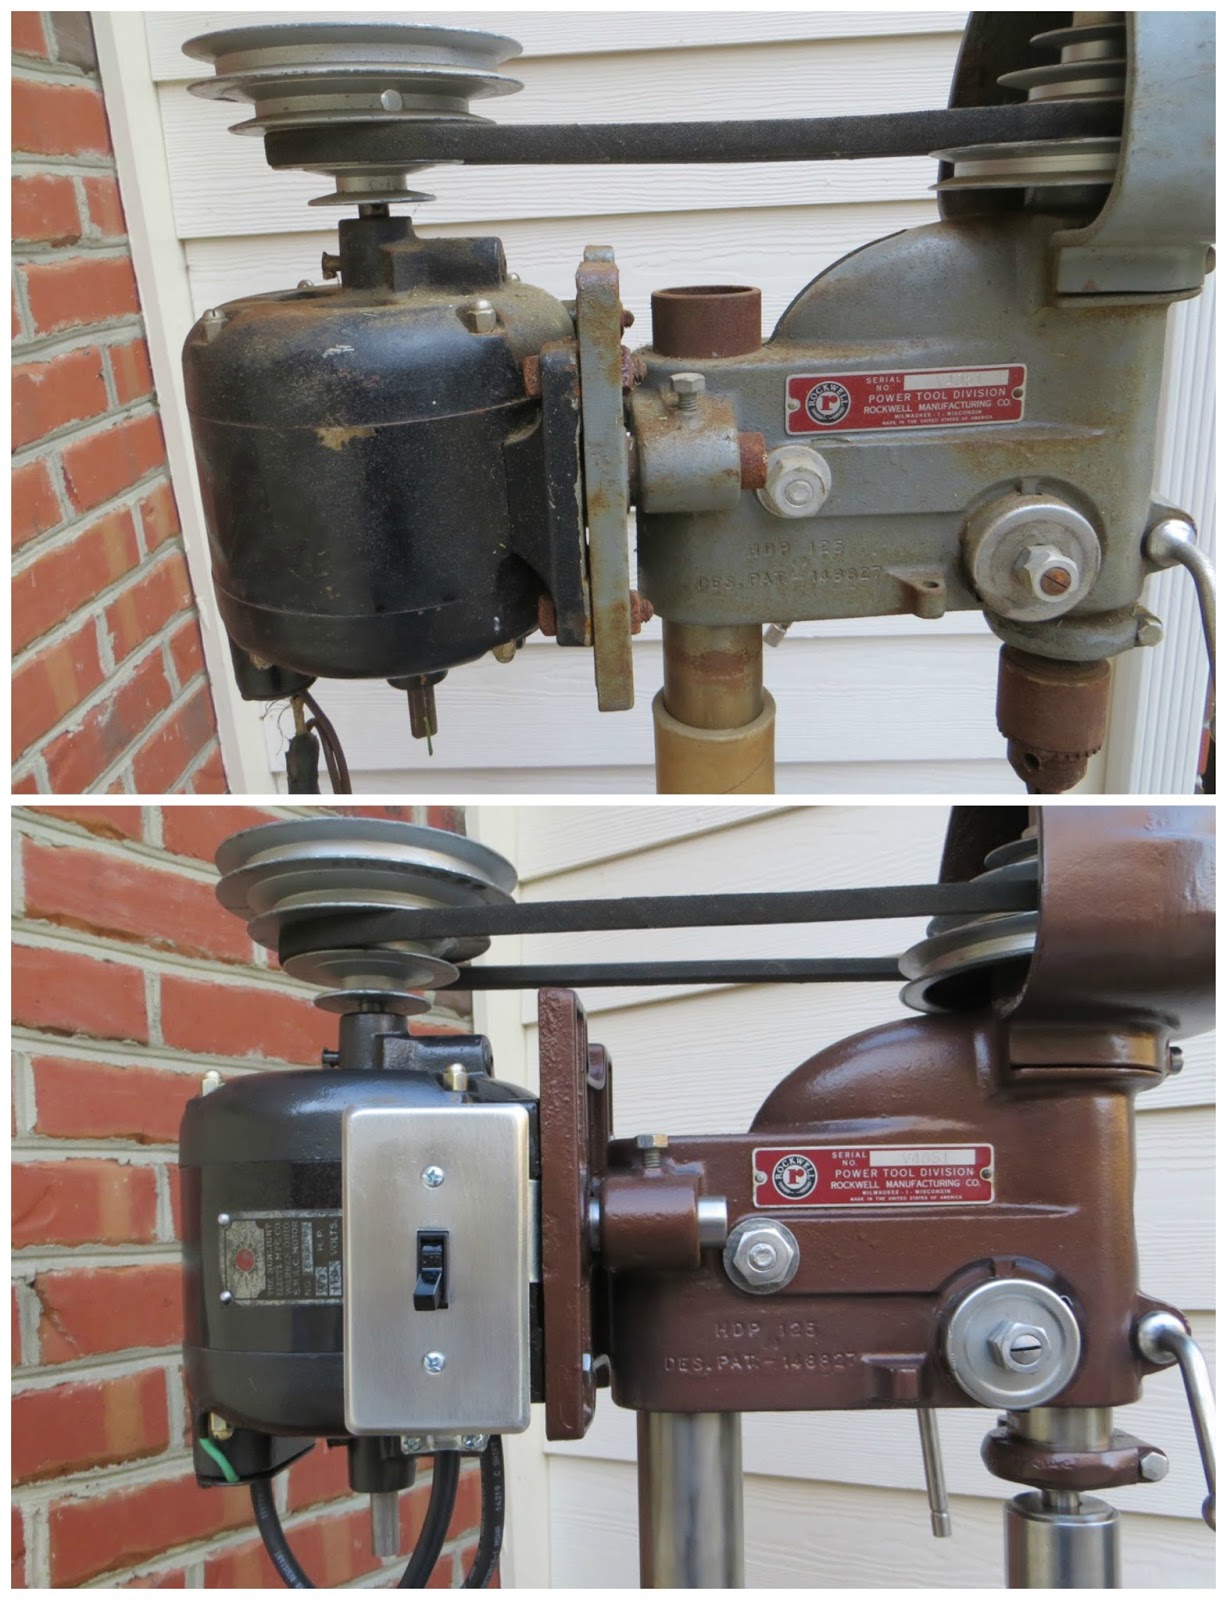
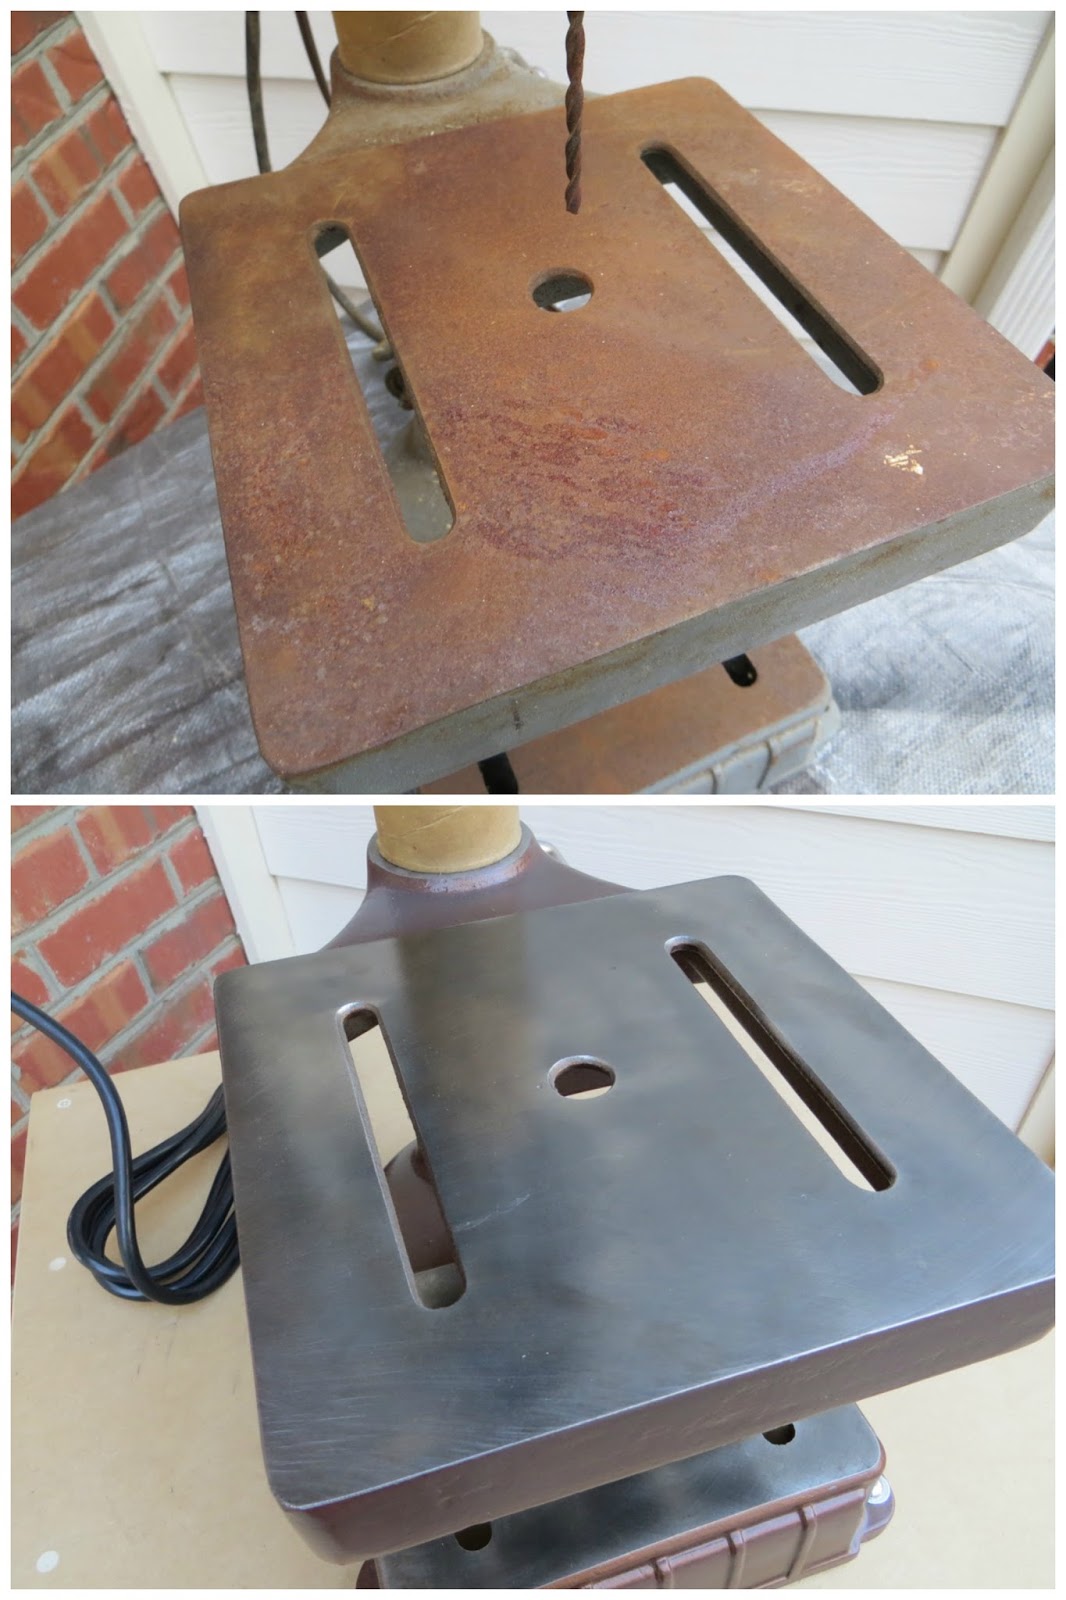
But first – BEFORE and AFTER pictures of this machine!

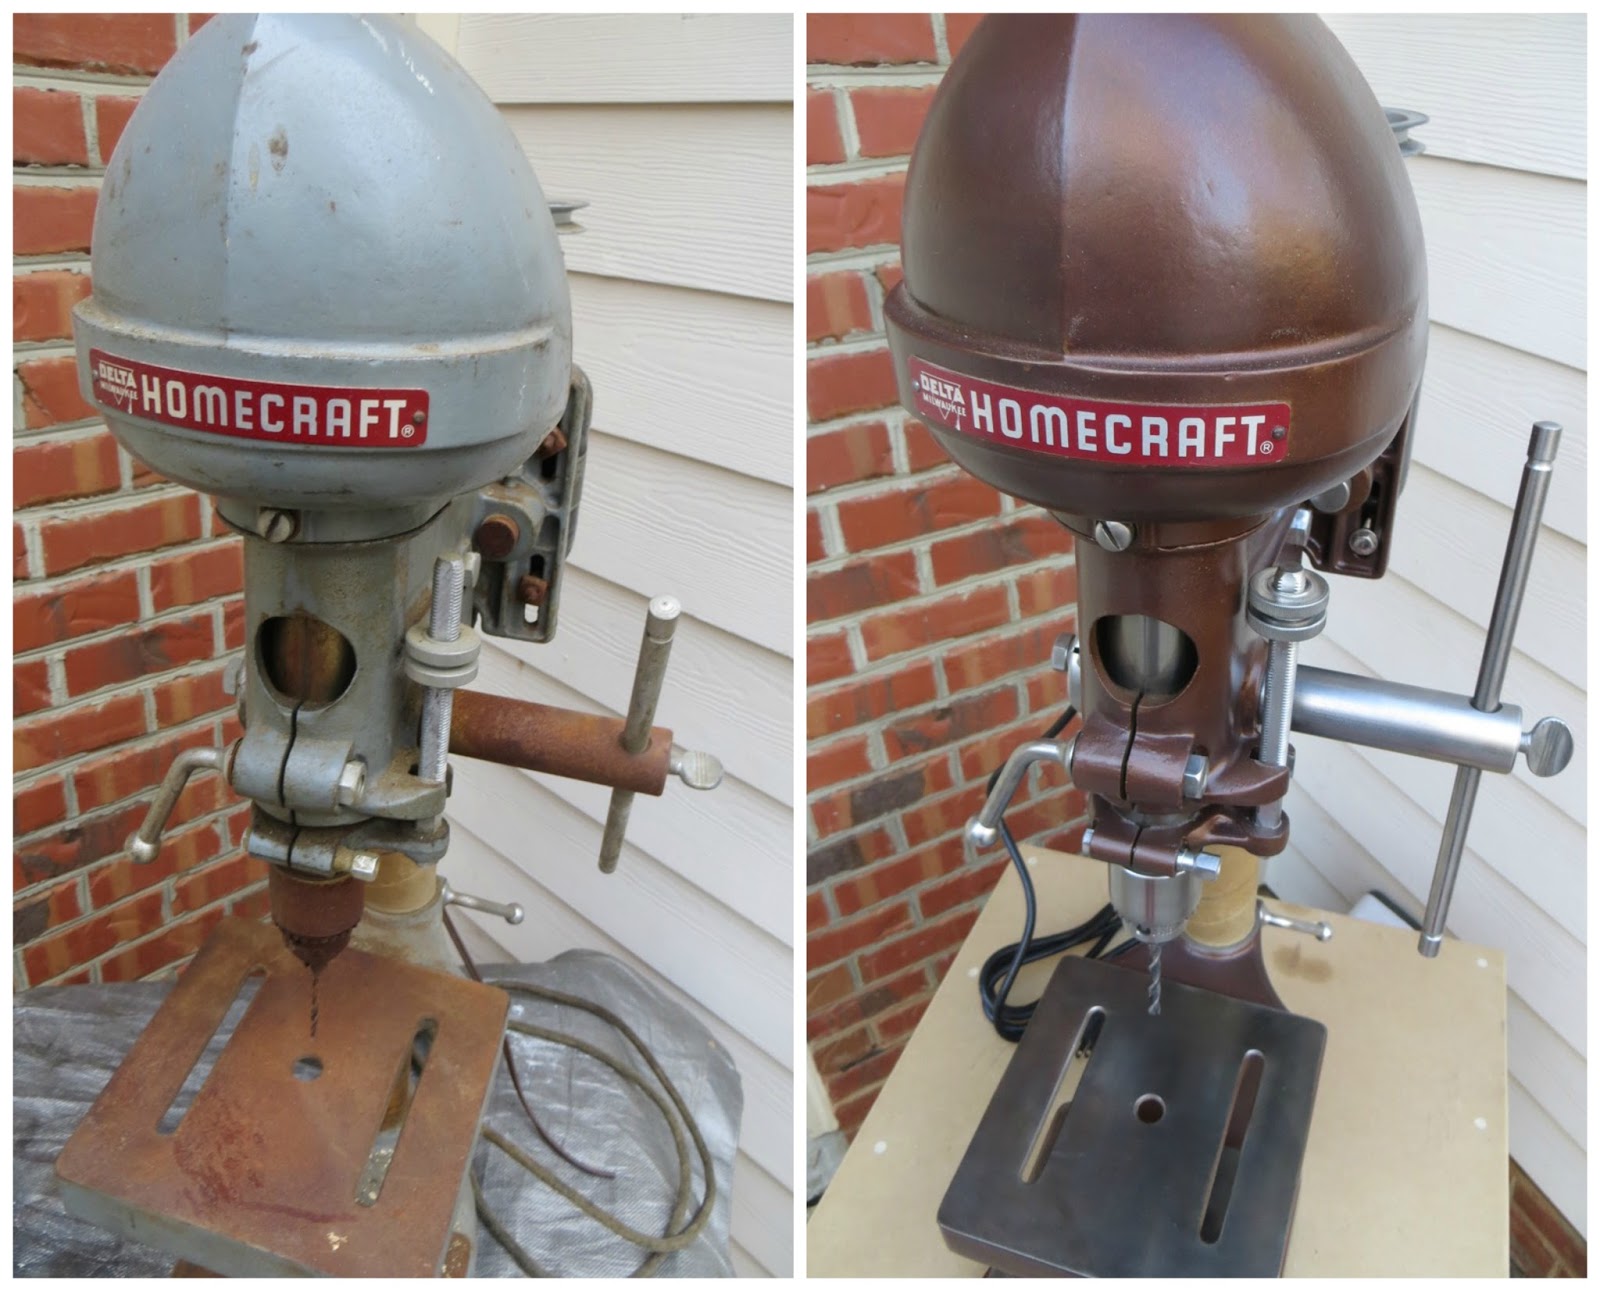
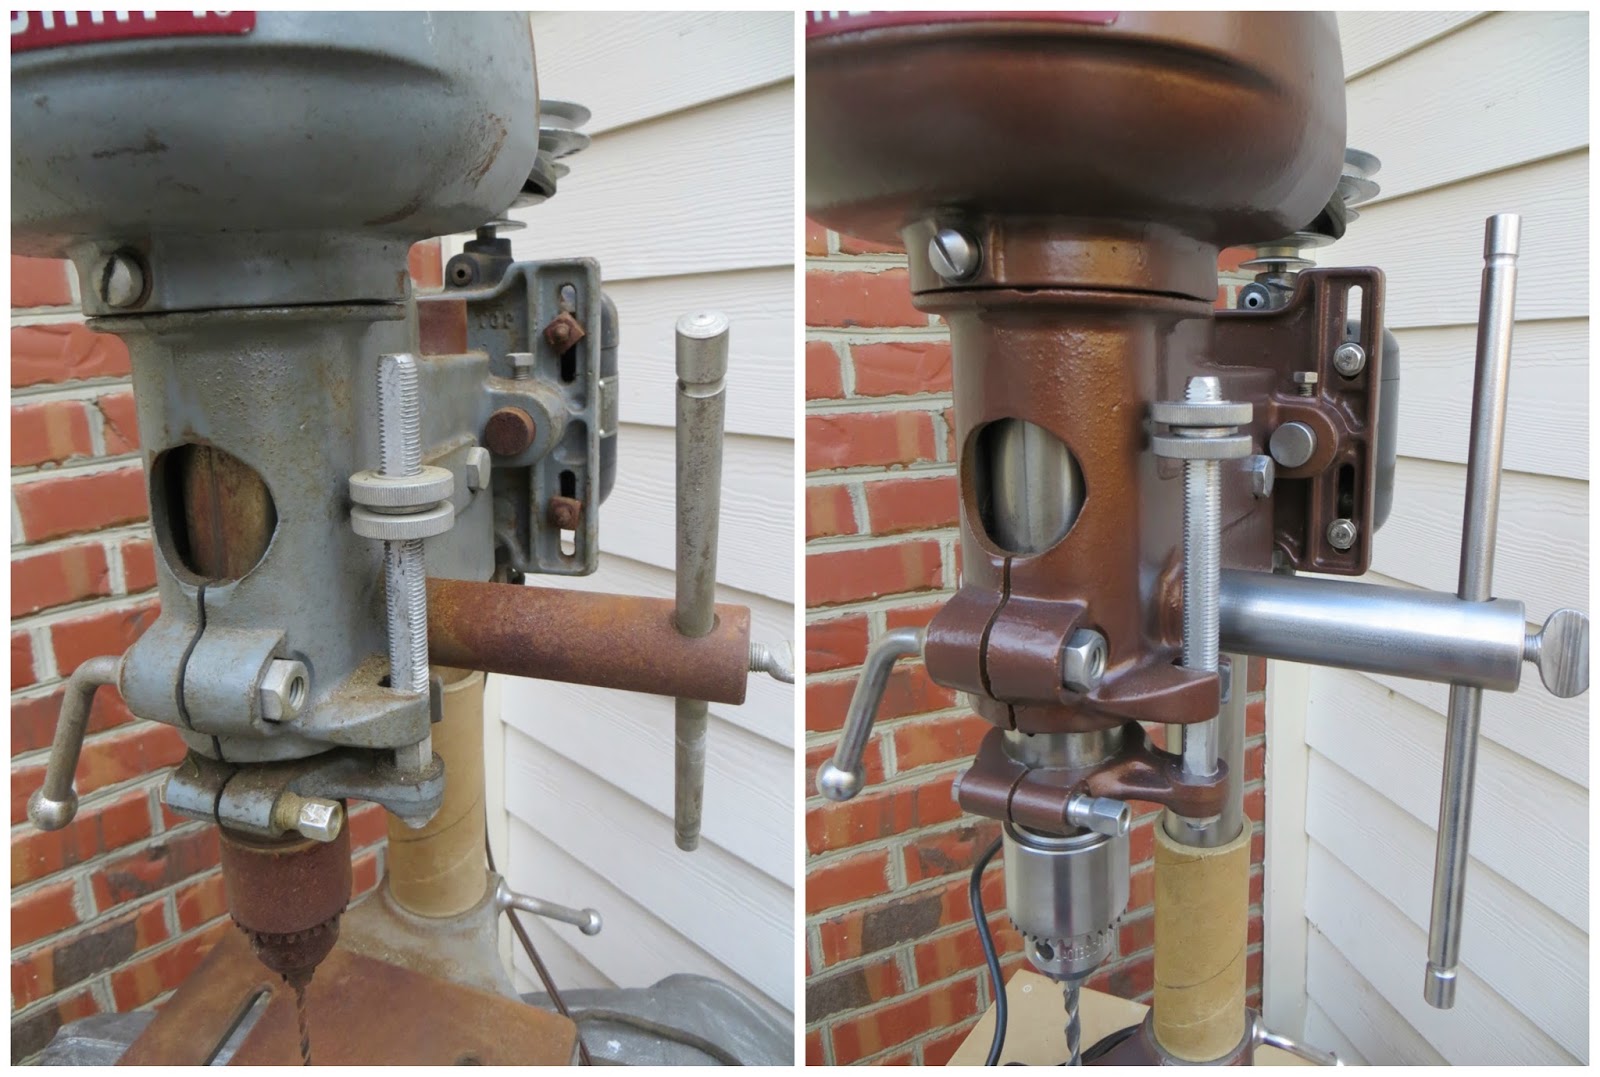
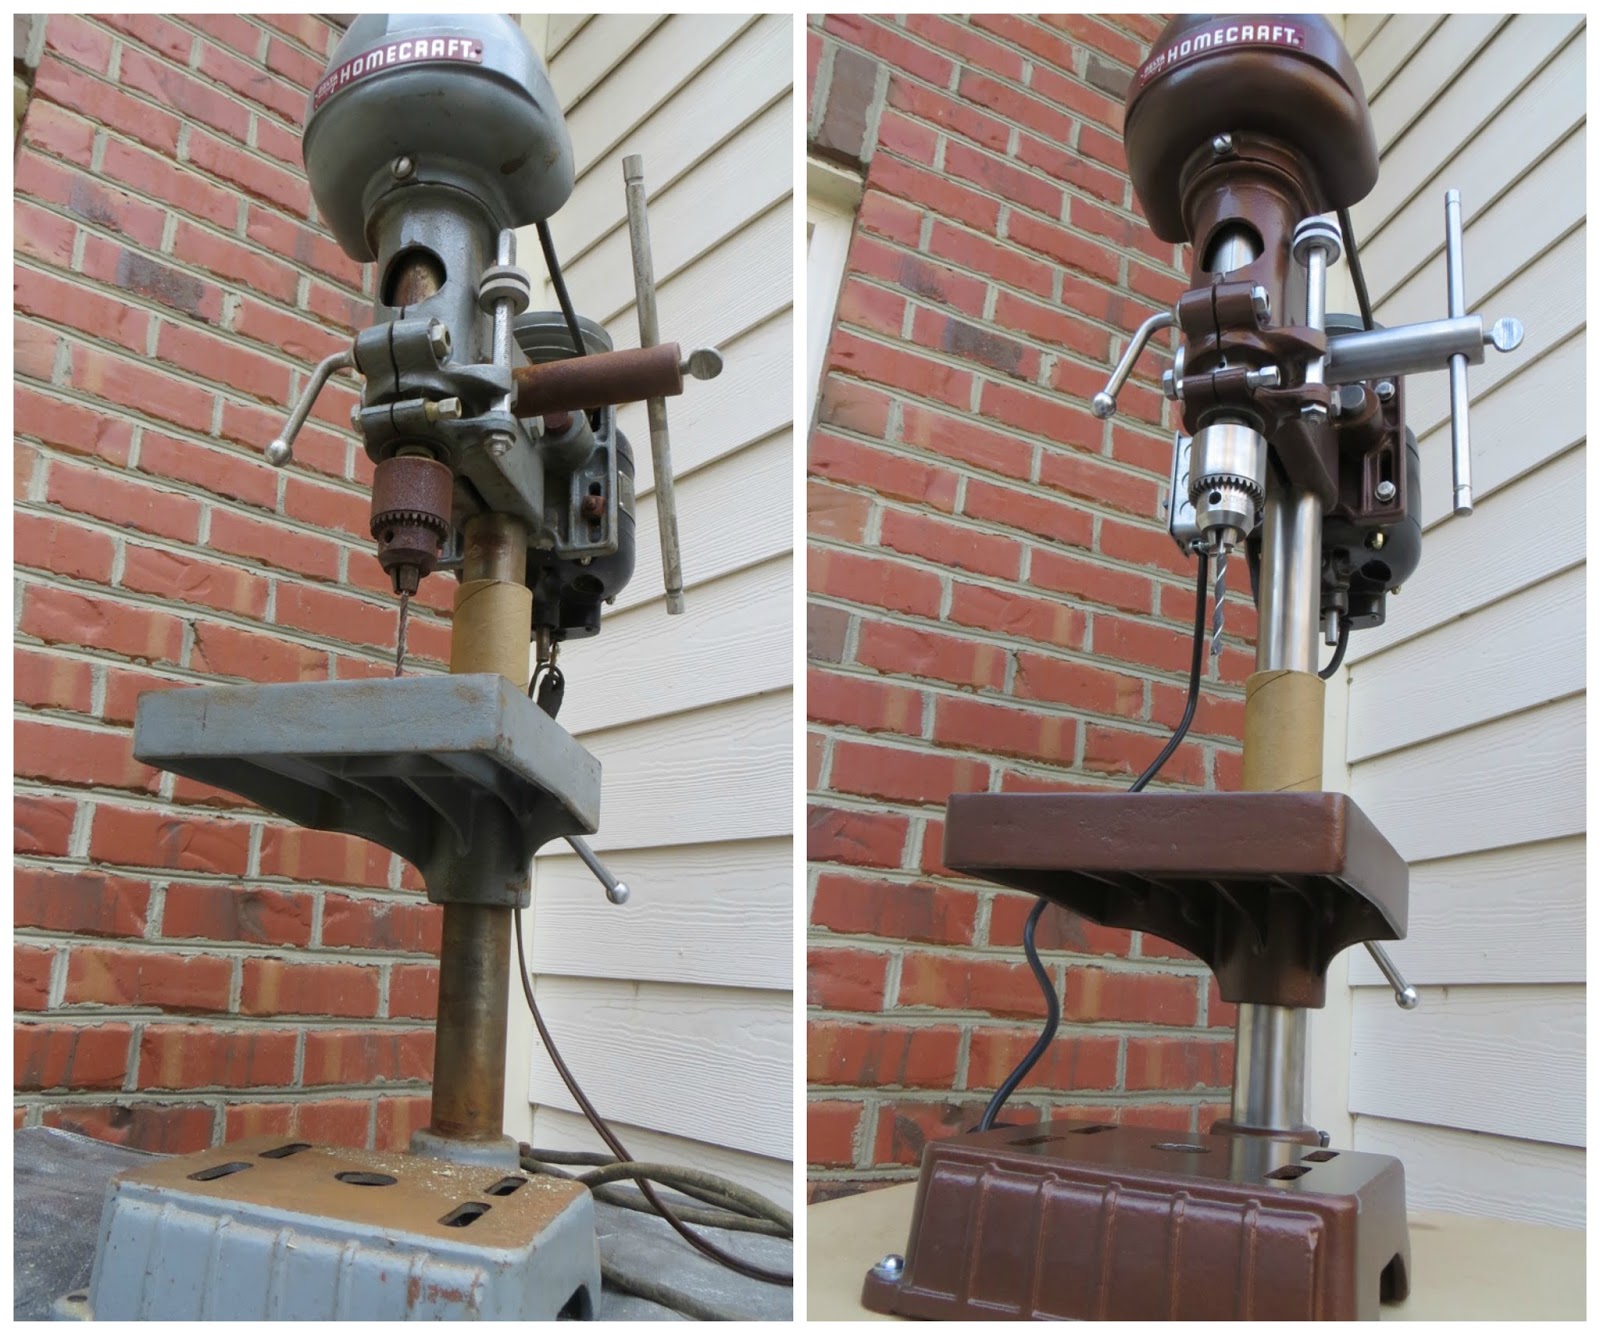


Here’s a little bit of the process:
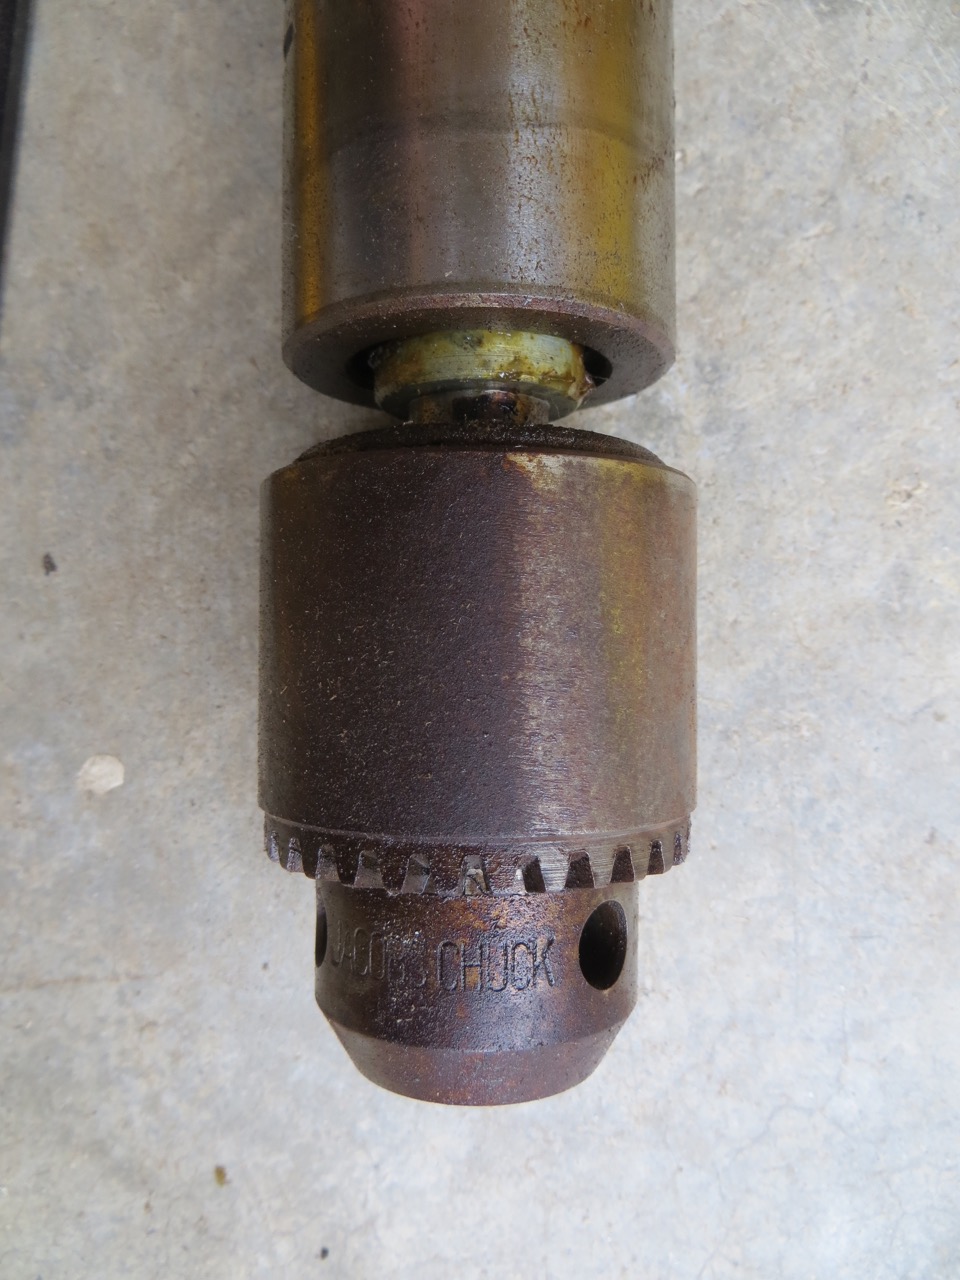
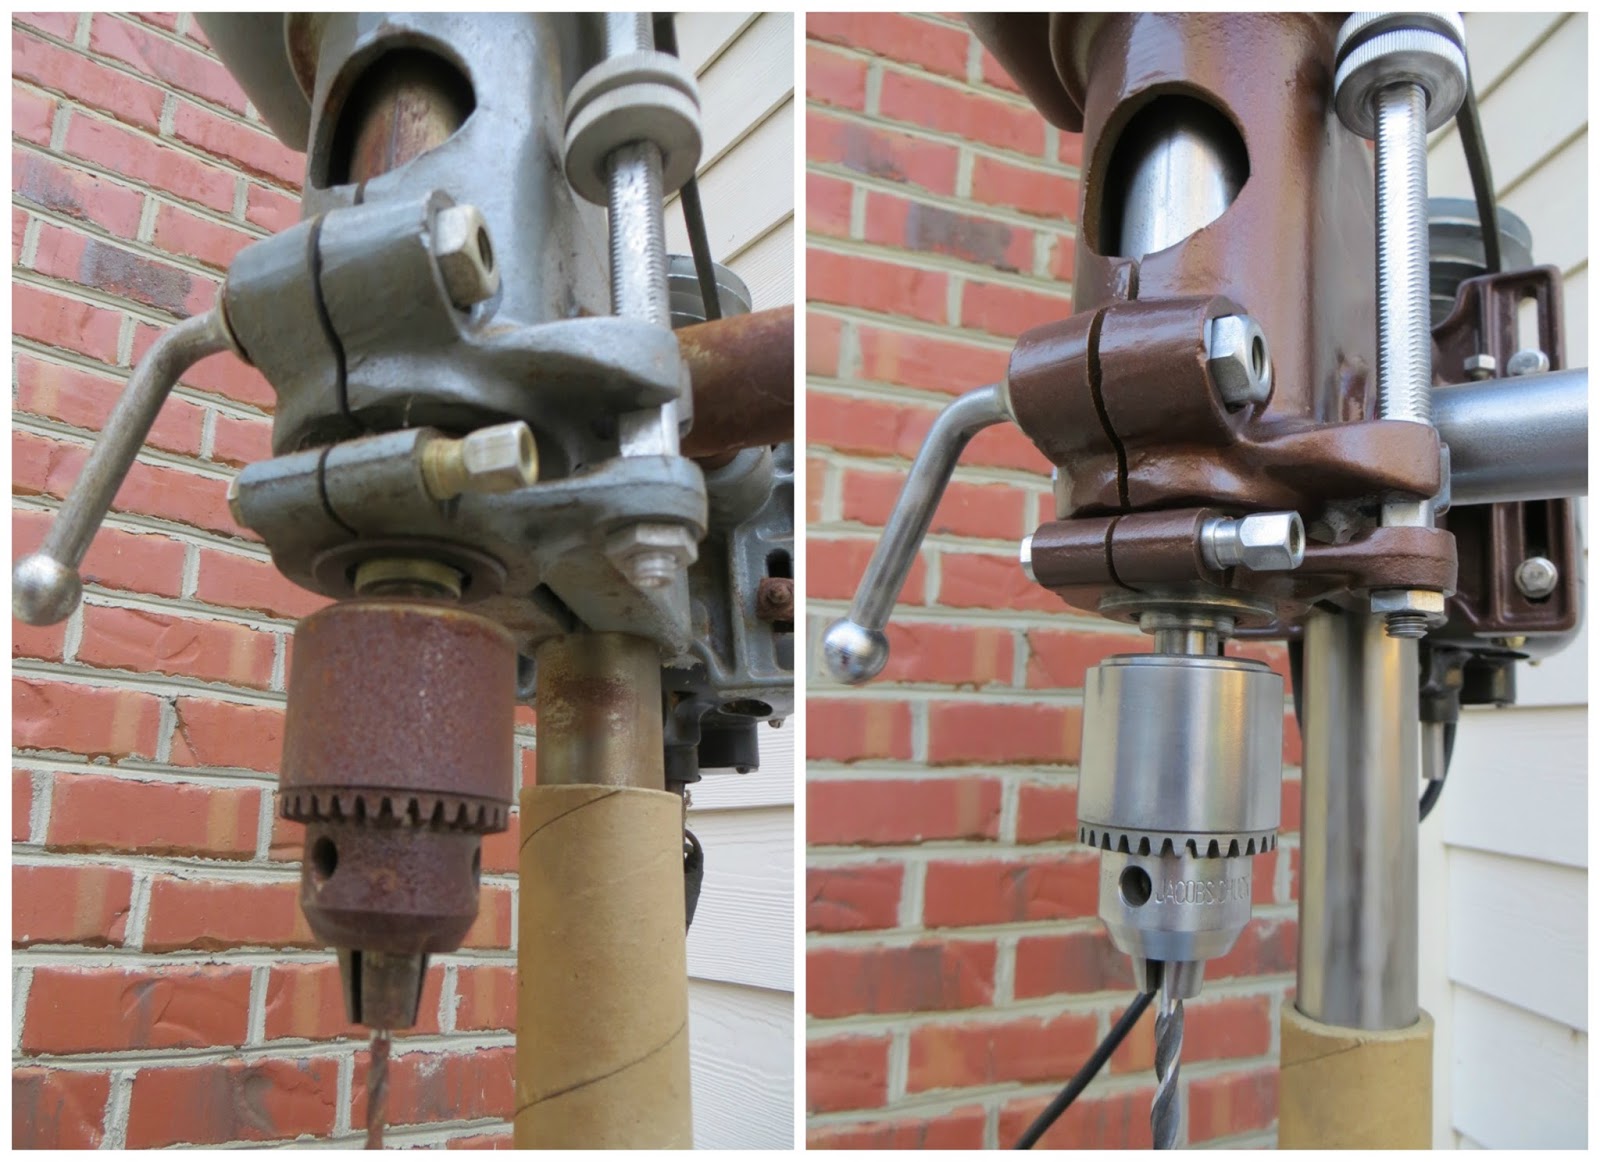
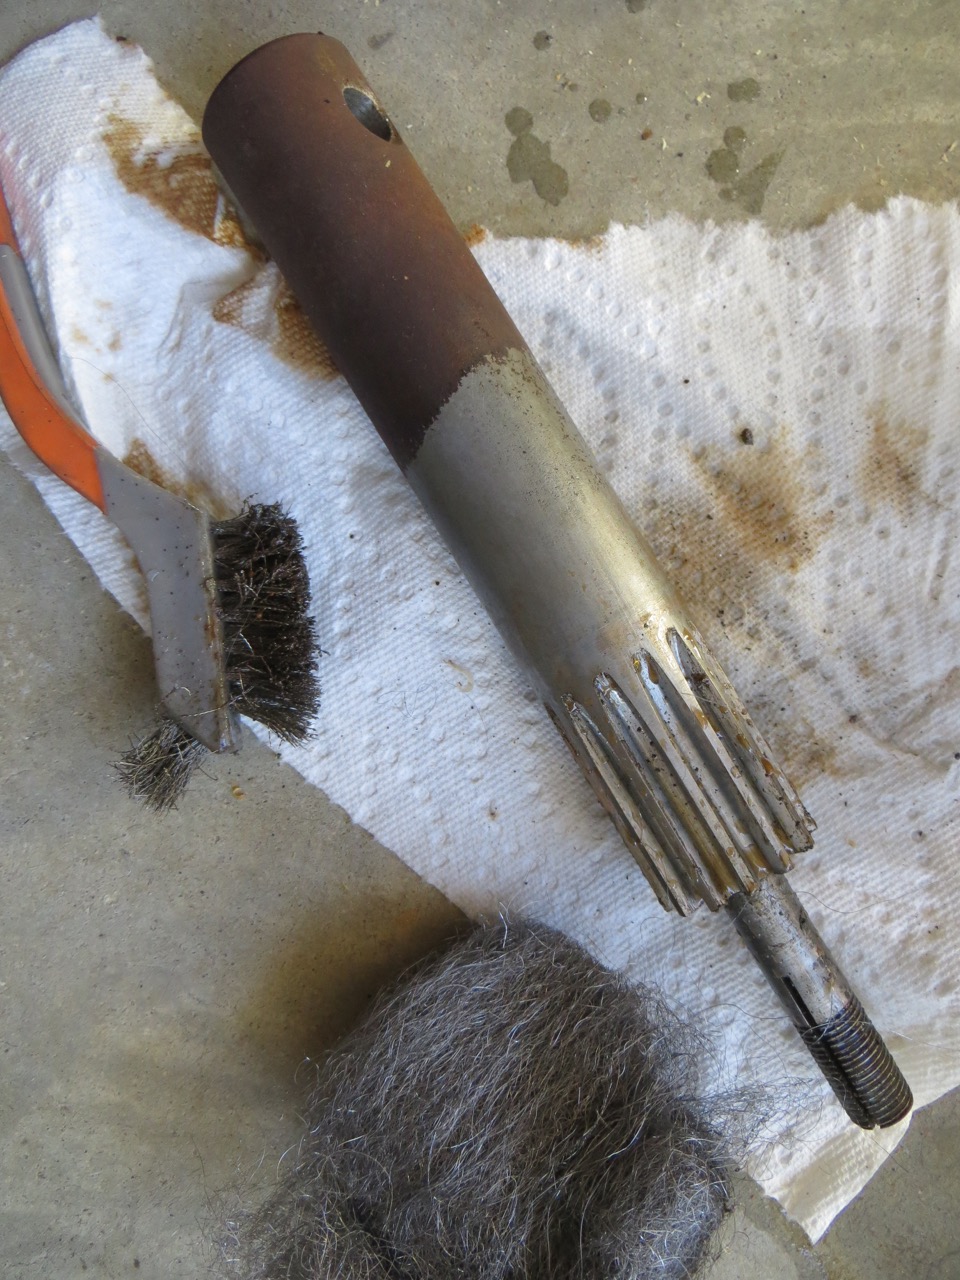
I first tried to take the surface rust off with WD-40 and a wire brush/steel wool. It worked OK. I was also having a hard time getting the chuck off but eventually got it off + was able to take it apart to clean all the internal parts. Everywhere I read people said to use an arbor press. I got so flustered with this chuck after it froze up that I took a large hammer over a block of hard wood on the jaws and it popped out so easy, I was surprised.
I cleaned it really well and added new grease to the threads and popped everything back together.
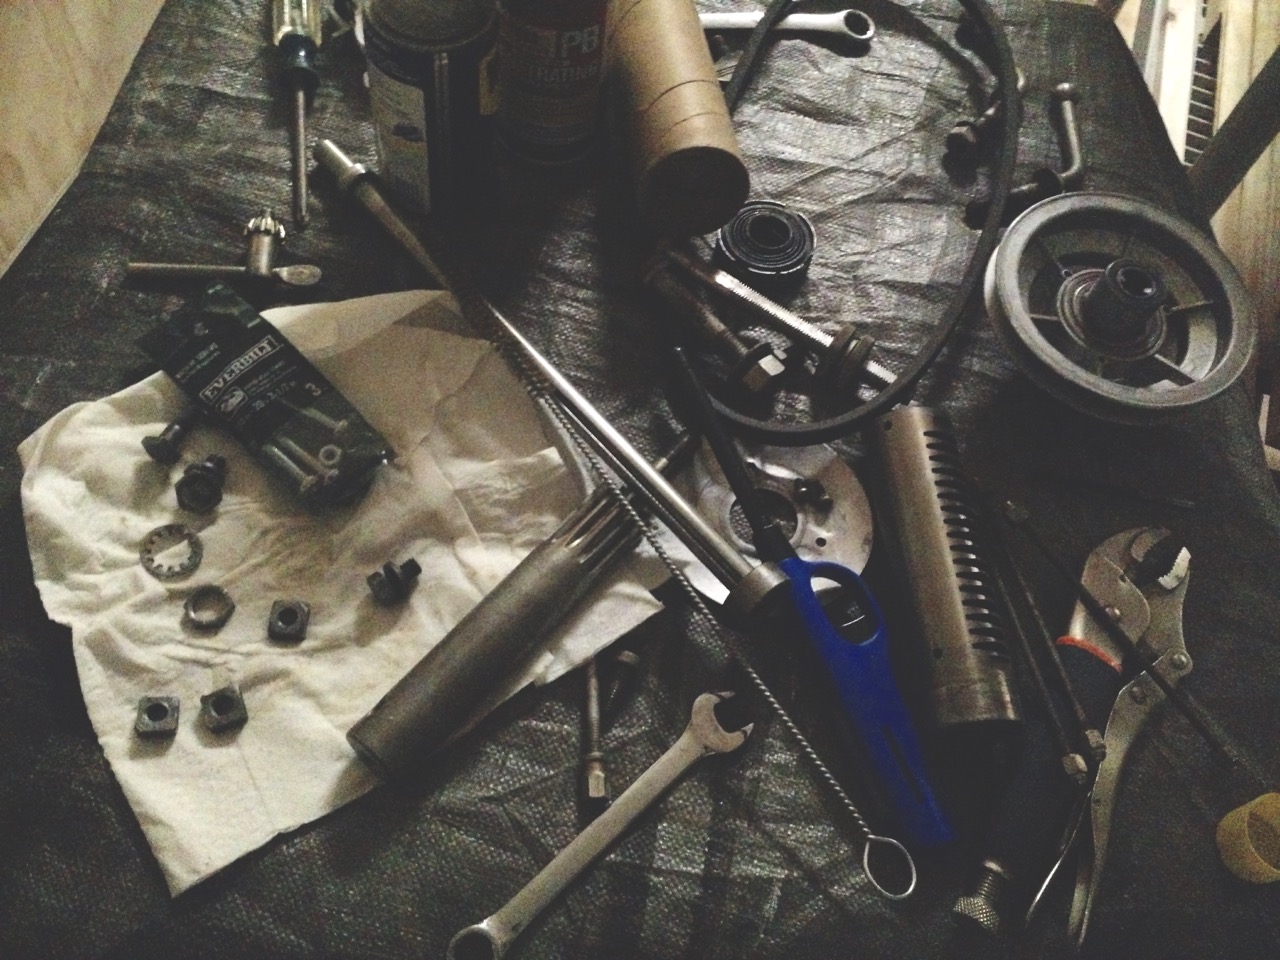
My table full of parts and tools after the demo.
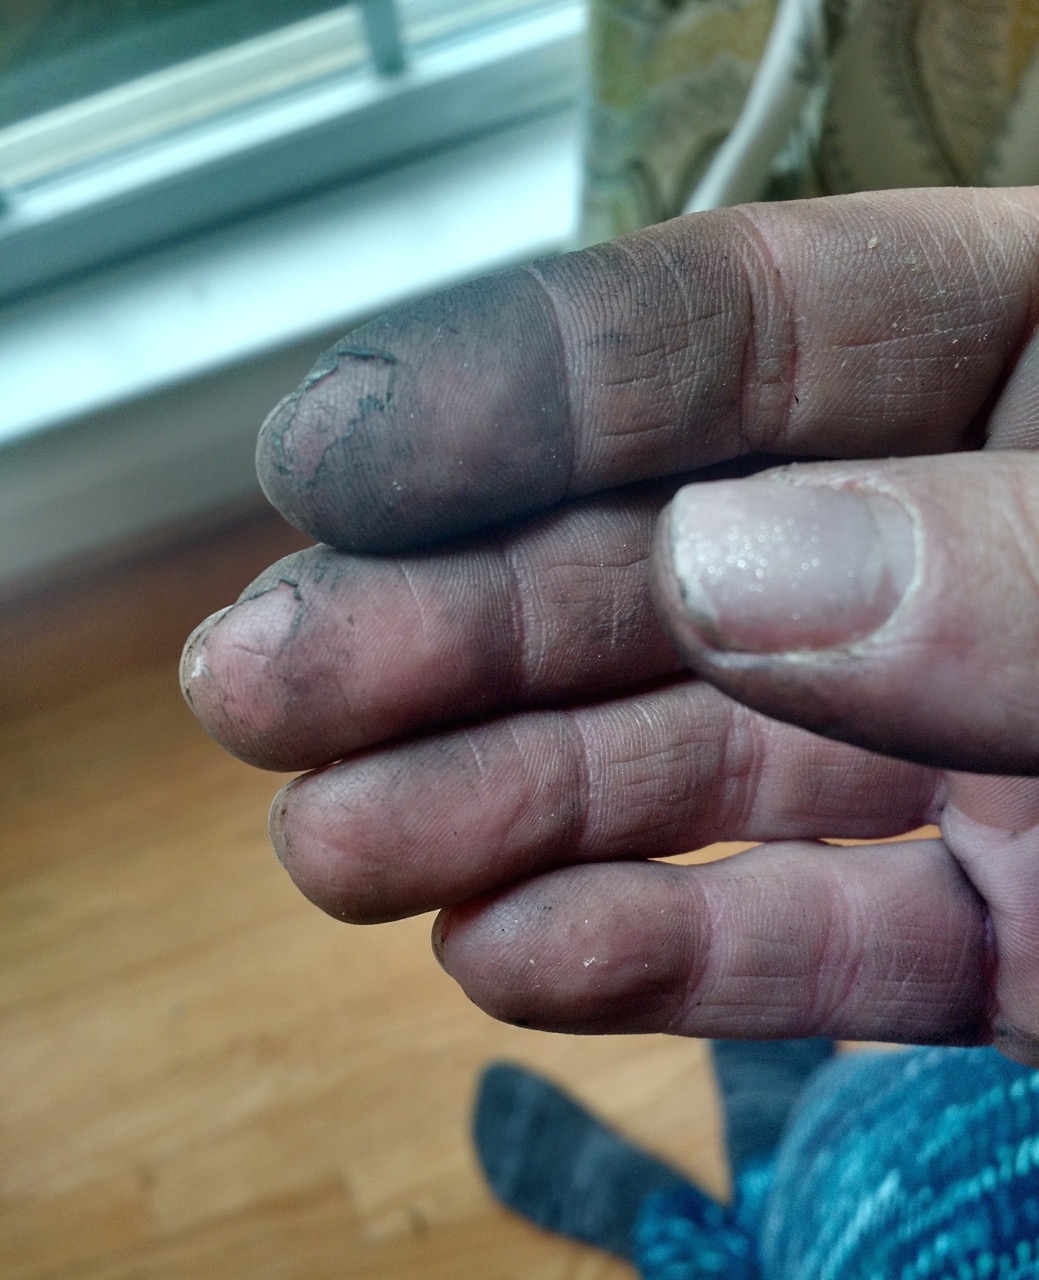
I was surprised to see what bad shape my hands were in – YIKES!
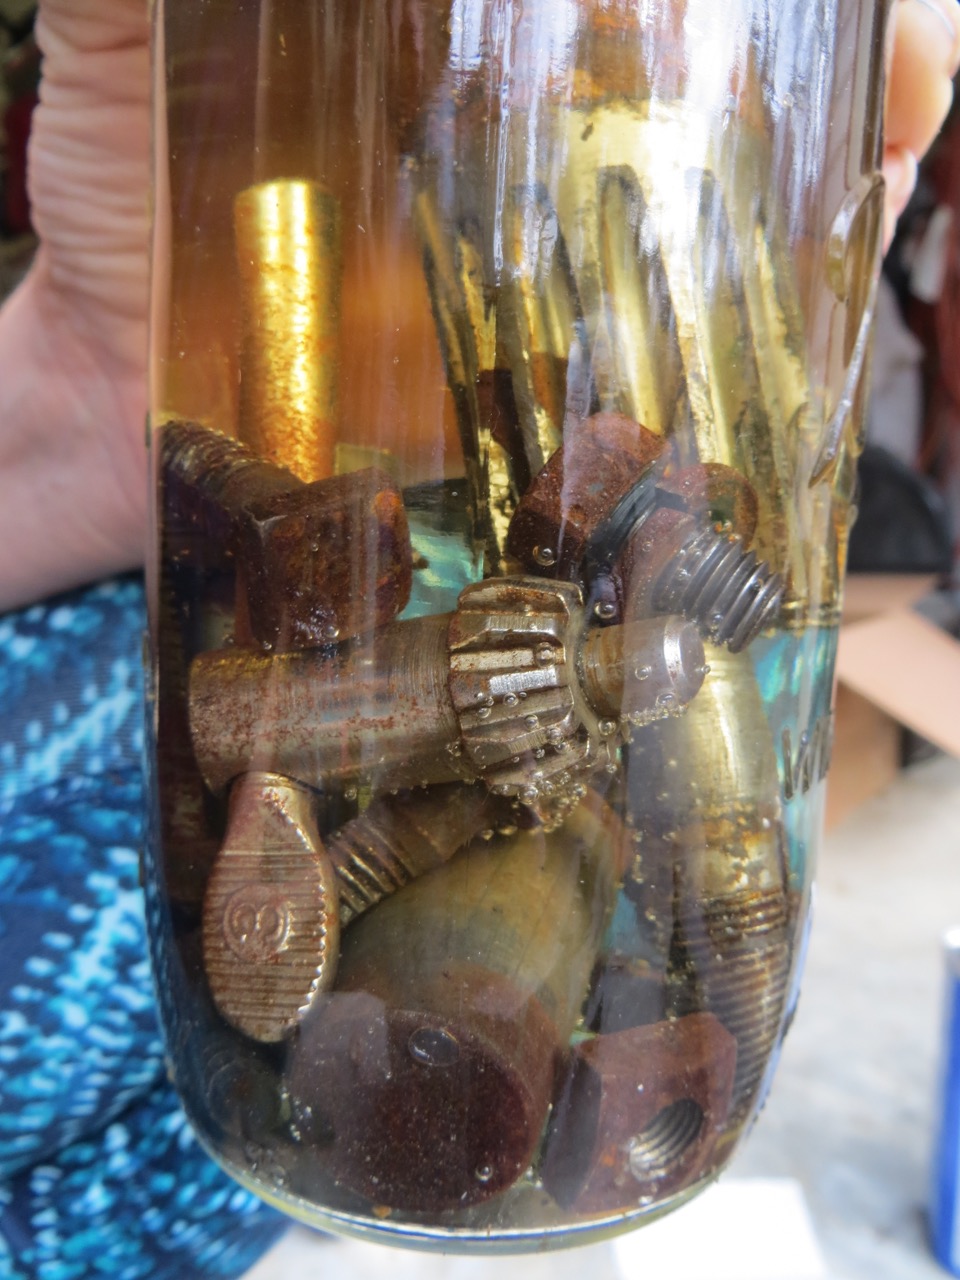
Steel wool and wire brushes just weren’t cutting it and I didn’t want to use my expensive Evapo-rust so I soaked the rust parts in Vinegar for 12+ hours.
The rust scrubbed off so easy!
Even though the rust was coming off pretty nicely with the Vinegar I didn’t like:
-waiting for hours and hours
-still had to scrub
-didn’t help with discoloration/spots
-I had to wash the parts in water to neutralize the acid from the vinegar… then had to stress about drying really well to avoid more rust (also would wipe with WD-40 as an extra precaution)
Basically, I hate soaking parts in ANY solution because it’s never good enough, it’s messy and time intensive.
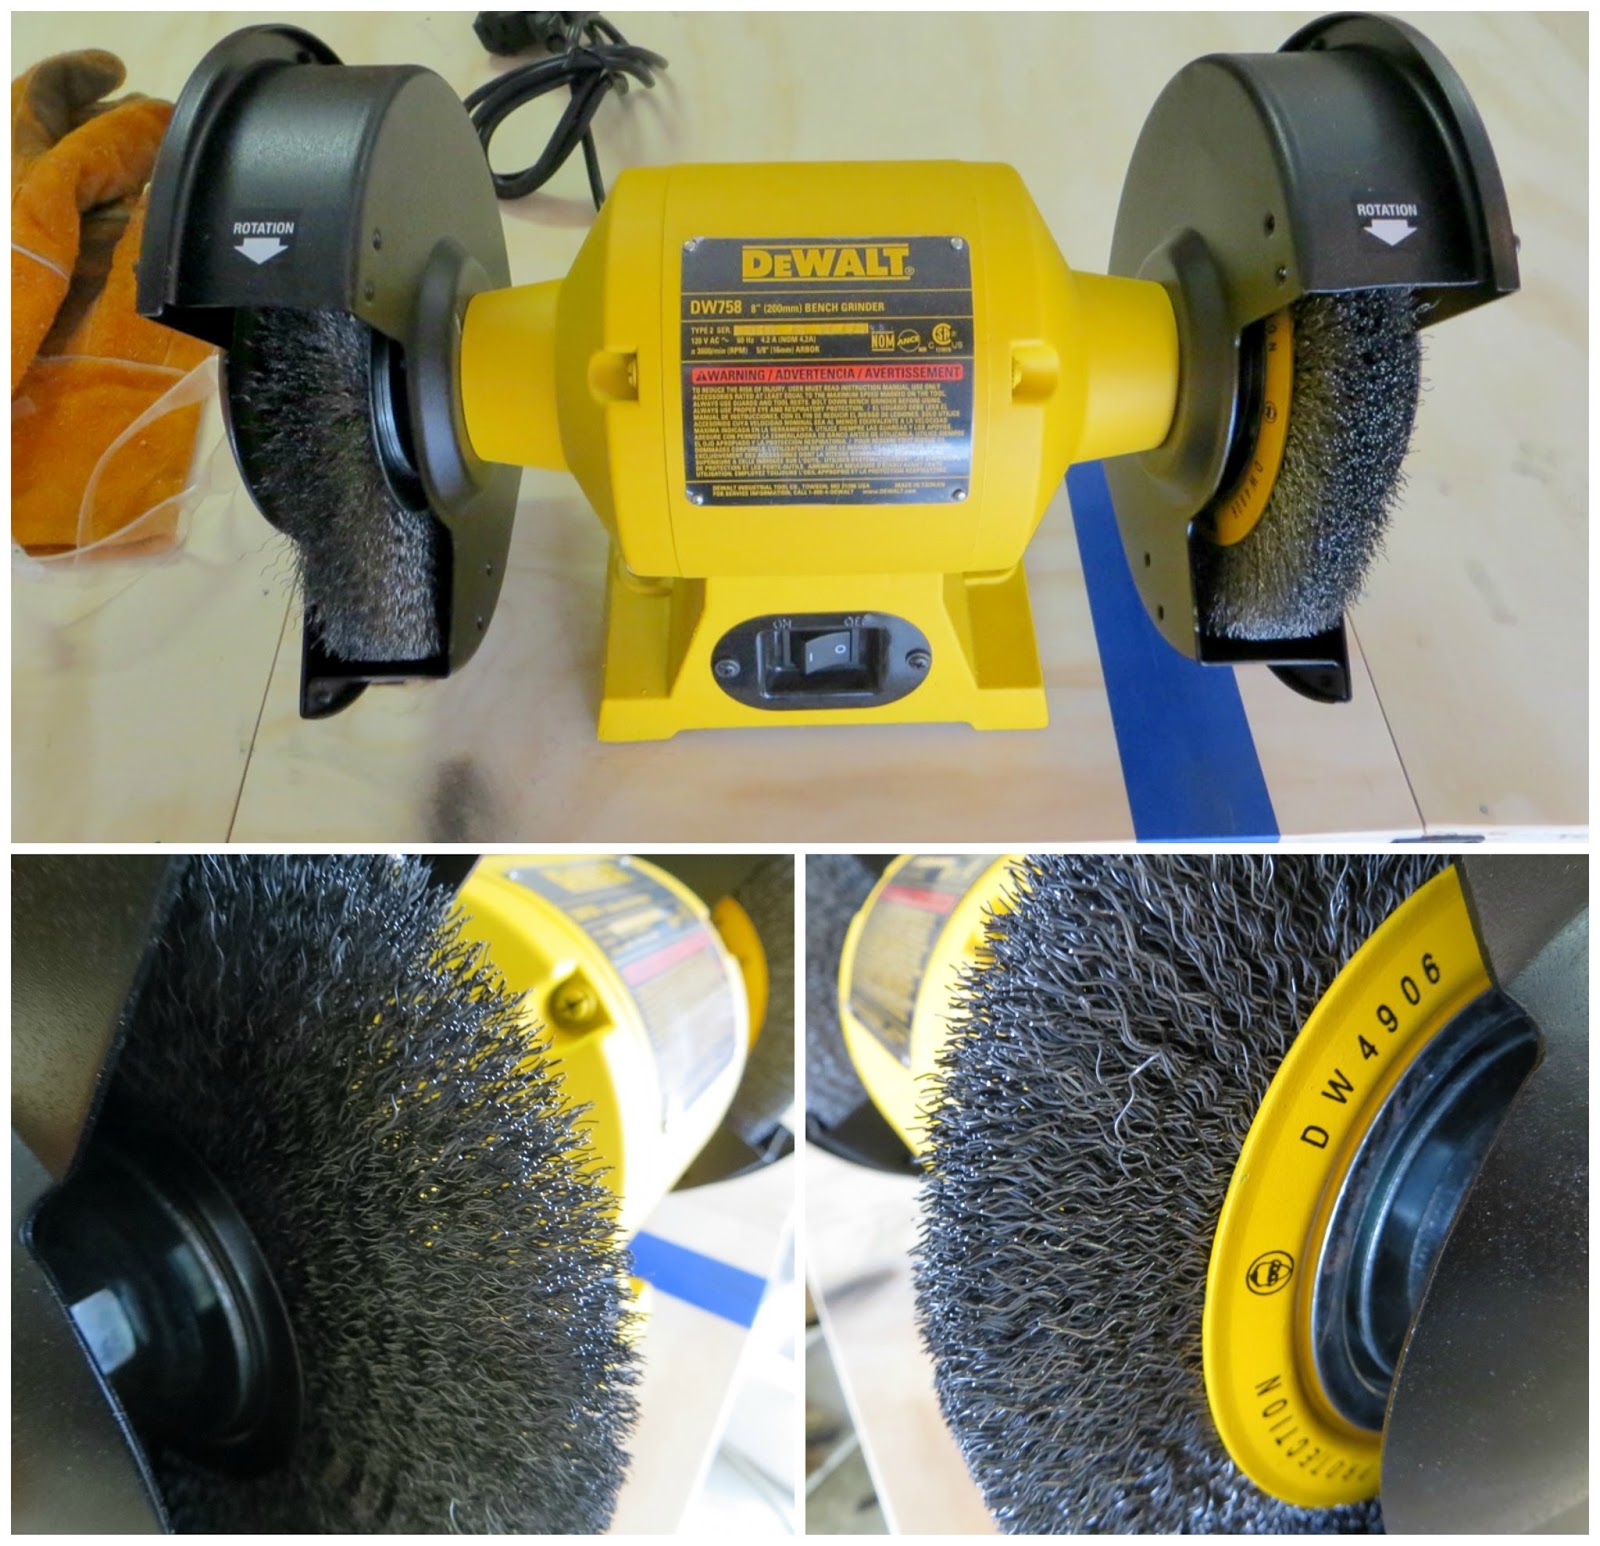
Here’s my solution. A beast of a bench grinder. When I say beast, I mean it. I wish it was a little less powerful to be honest – the wheels spin FAST and your hands get really cold from the air moving so quickly. I replaced the stone wheels with a .10 diameter (fine) wire wheel I got from McMaster and a .14 (Coarse) DeWalt wire wheel I got on Amazon.
Within seconds you can see the difference!
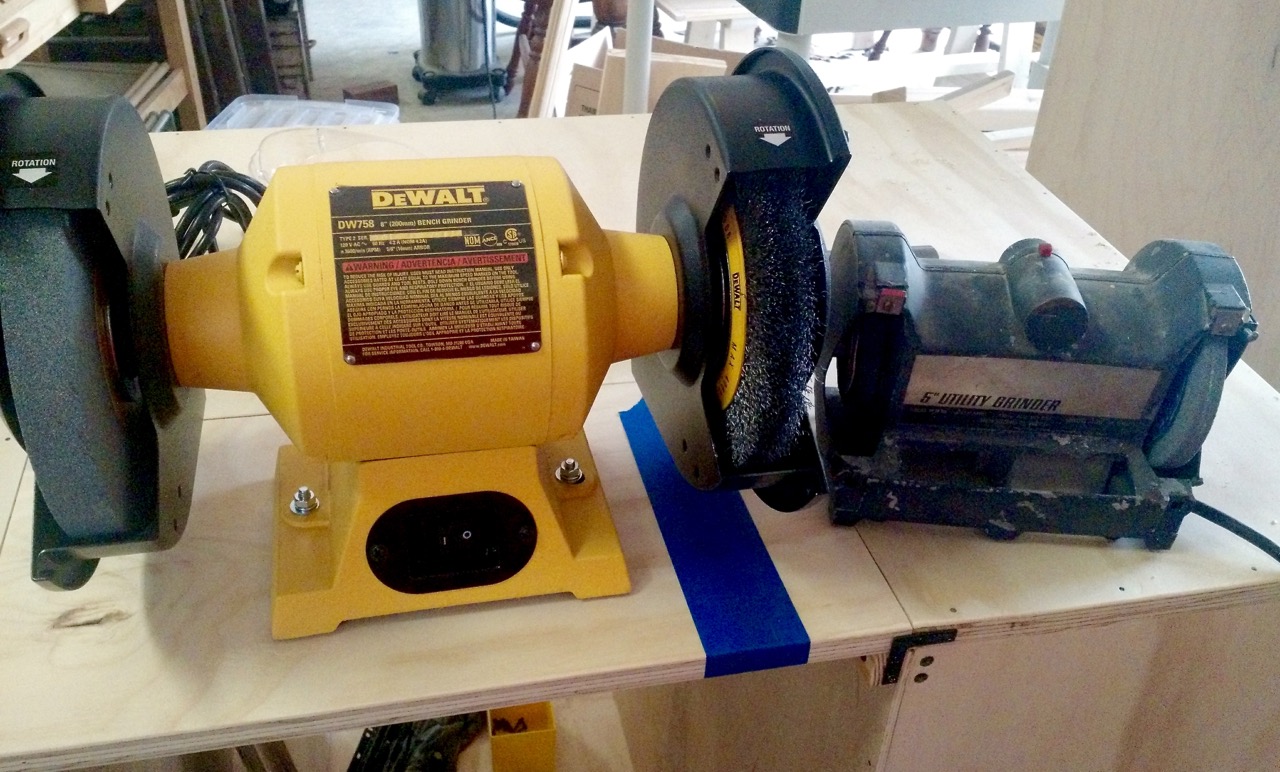
Here’s the size difference of my new 8″ grinder compared to the 6″ grinder we’ve had for a few years. Umm…. they don’t even compare. The 6″ halts to a stop if you press anything against the wheel and the 8″ will eat your hand off.
I should tell you that I had a cupped wire brush on my drill before I caved in and bought my bench grinder and the cupped brush worked wonders for the flat tables!
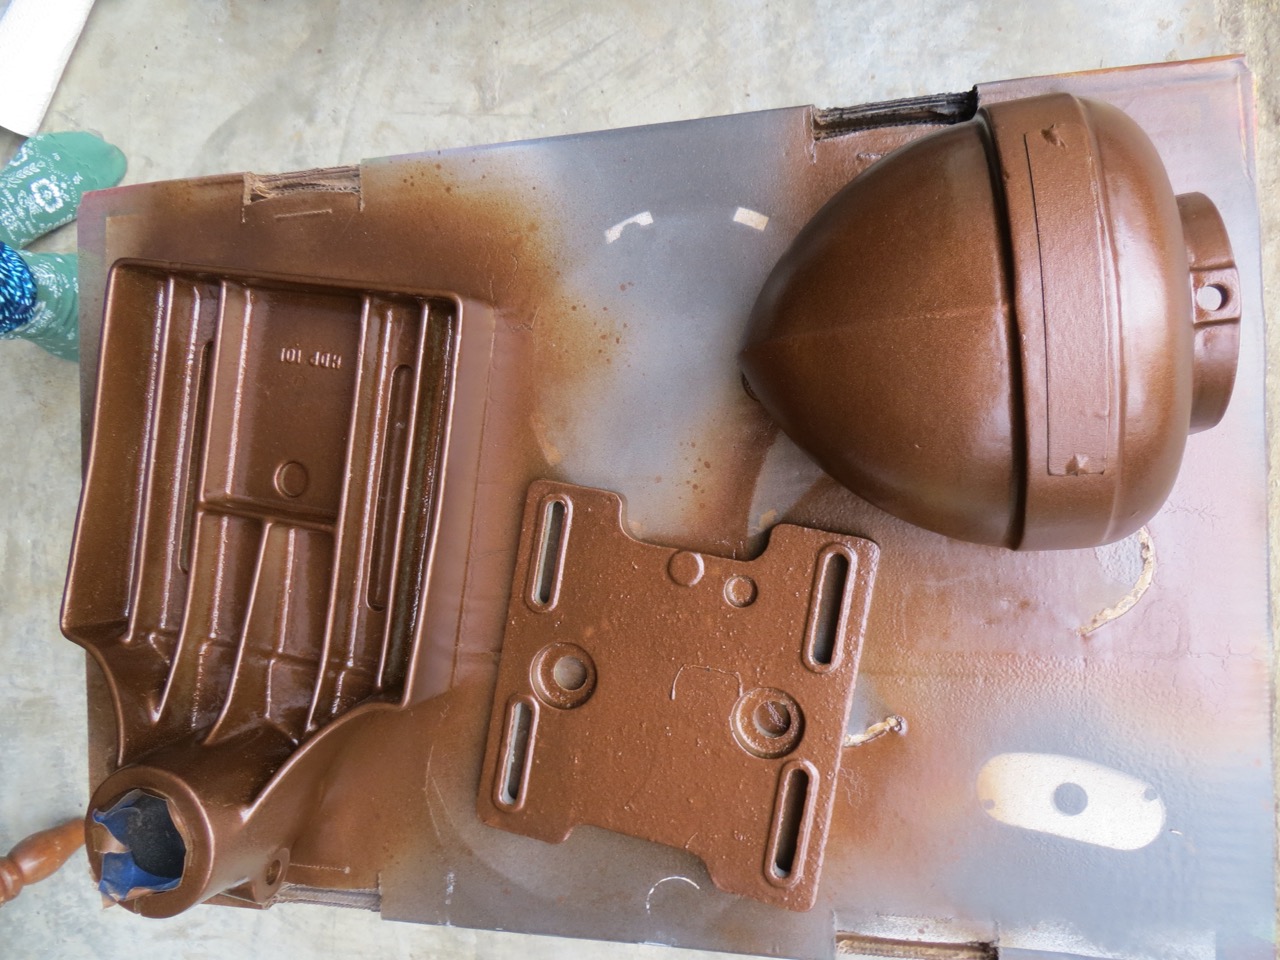
Primed and painted.
Clear coated and ready to cure.
I assembled the drill press as I wiped each of the bare metal parts with WD-40 and put grease where needed.
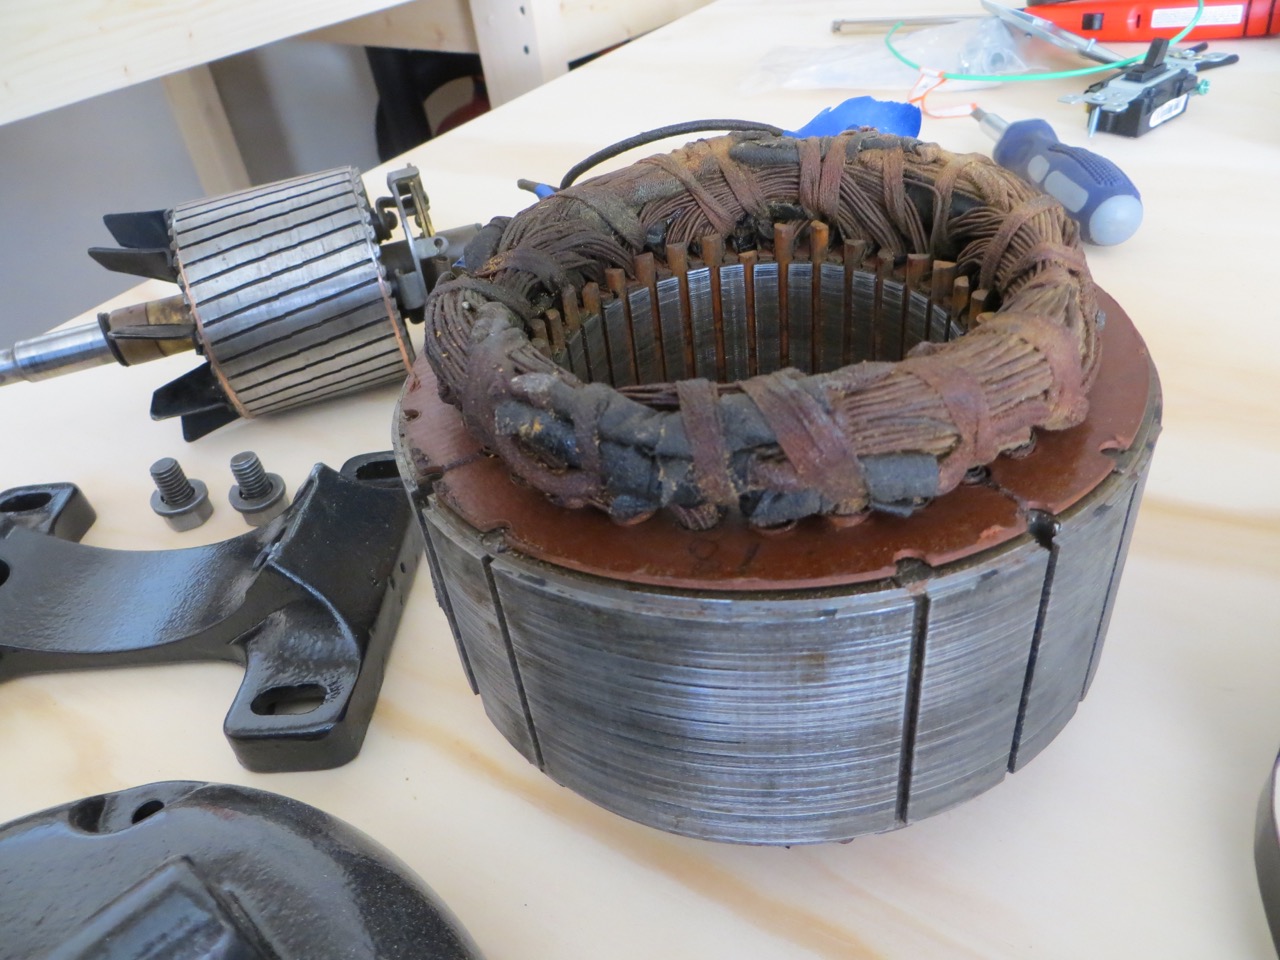
The motor was the very last and most painful thing to work on.
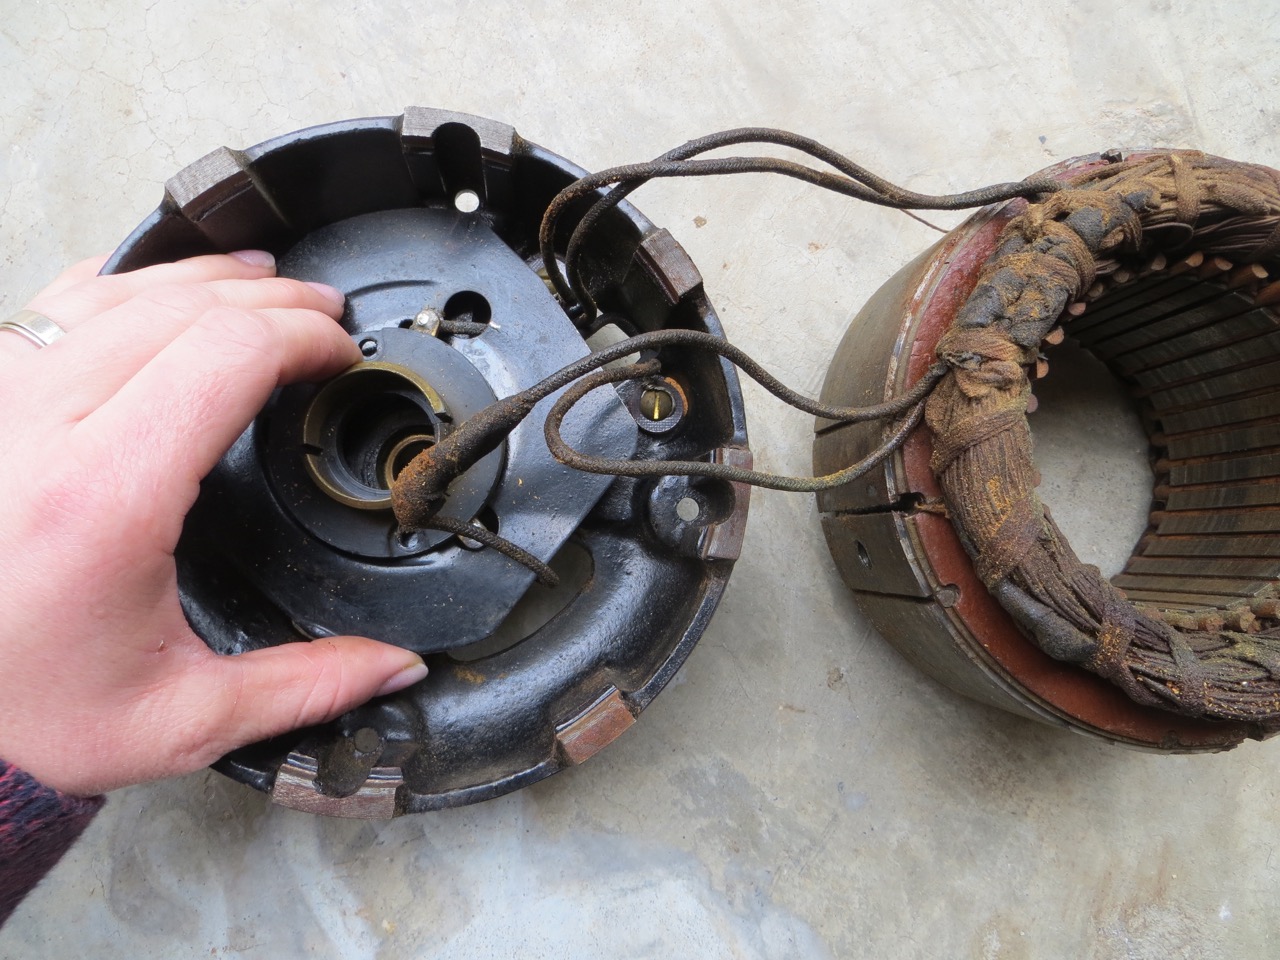
I so badly wish I had a picture of the inside of the motor before I cleaned it out. It was PACKED full of saw dust. I can’t imagine how it all got in there!

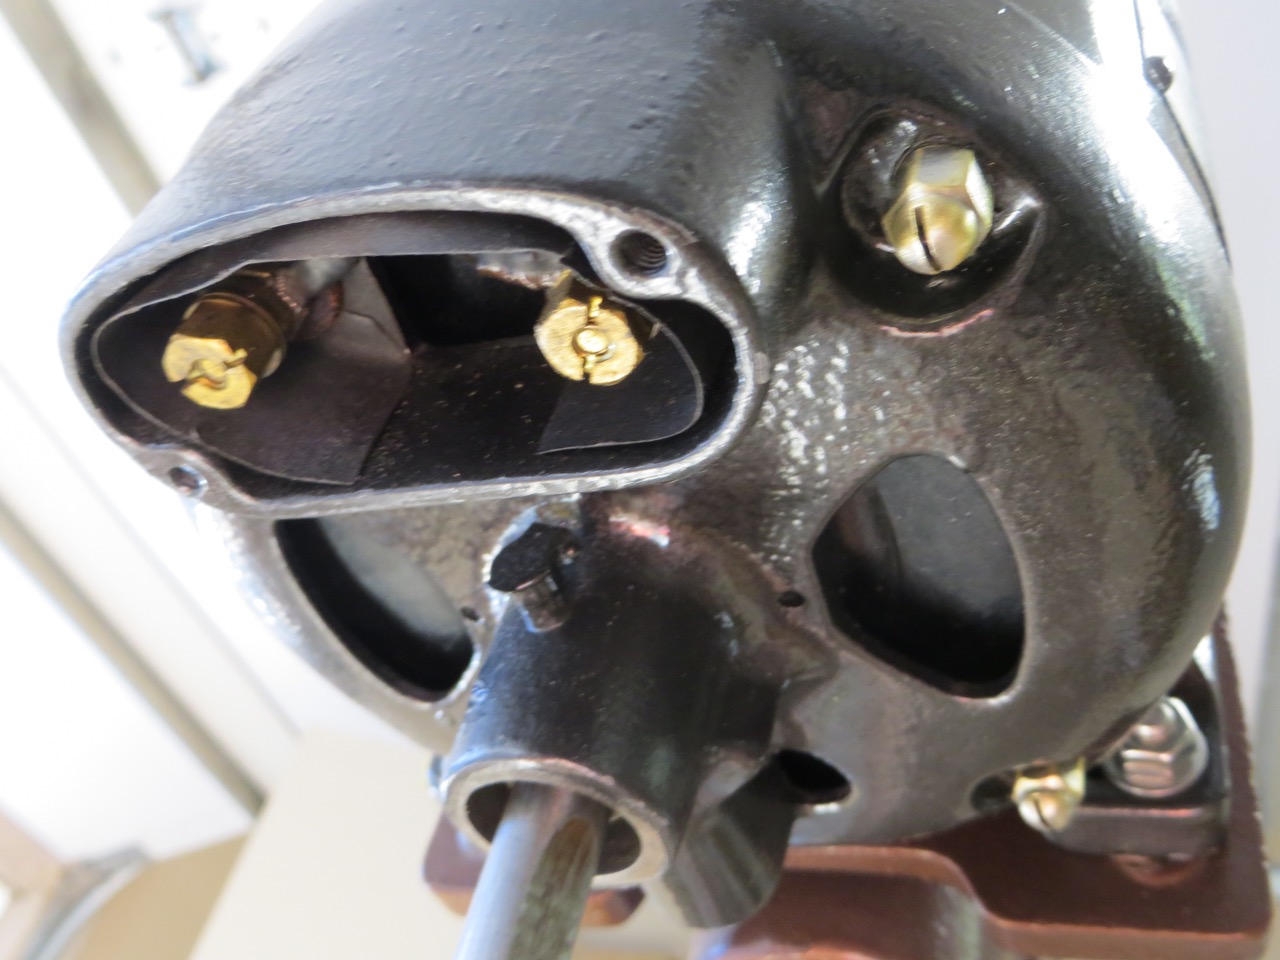
Documenting how the wires attached to be able to put it back together right.

I tagged the wires to help with assembly.
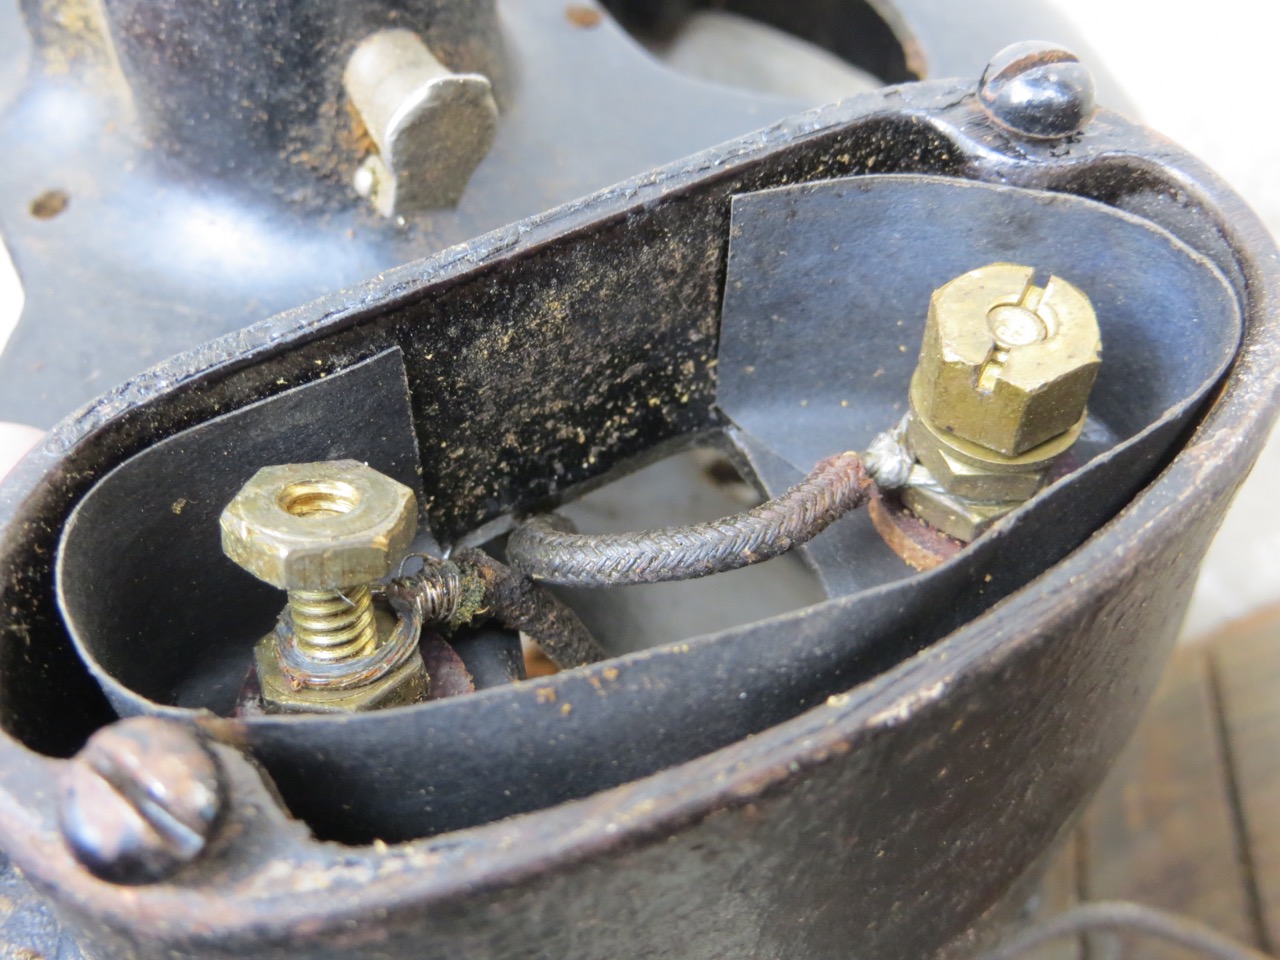
This is where the wires attach to the outside of the motor – also where the original plug attached.
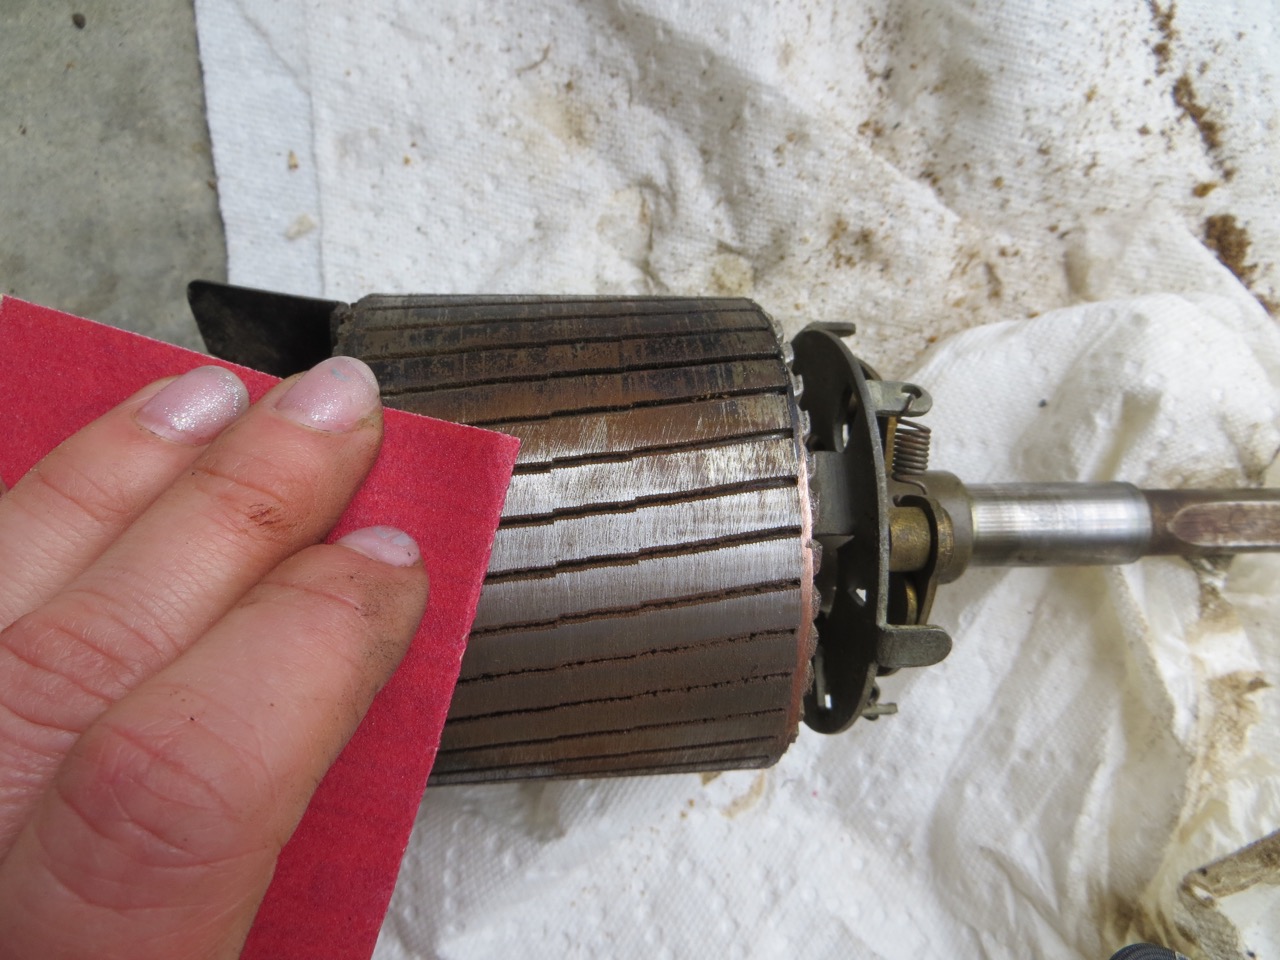
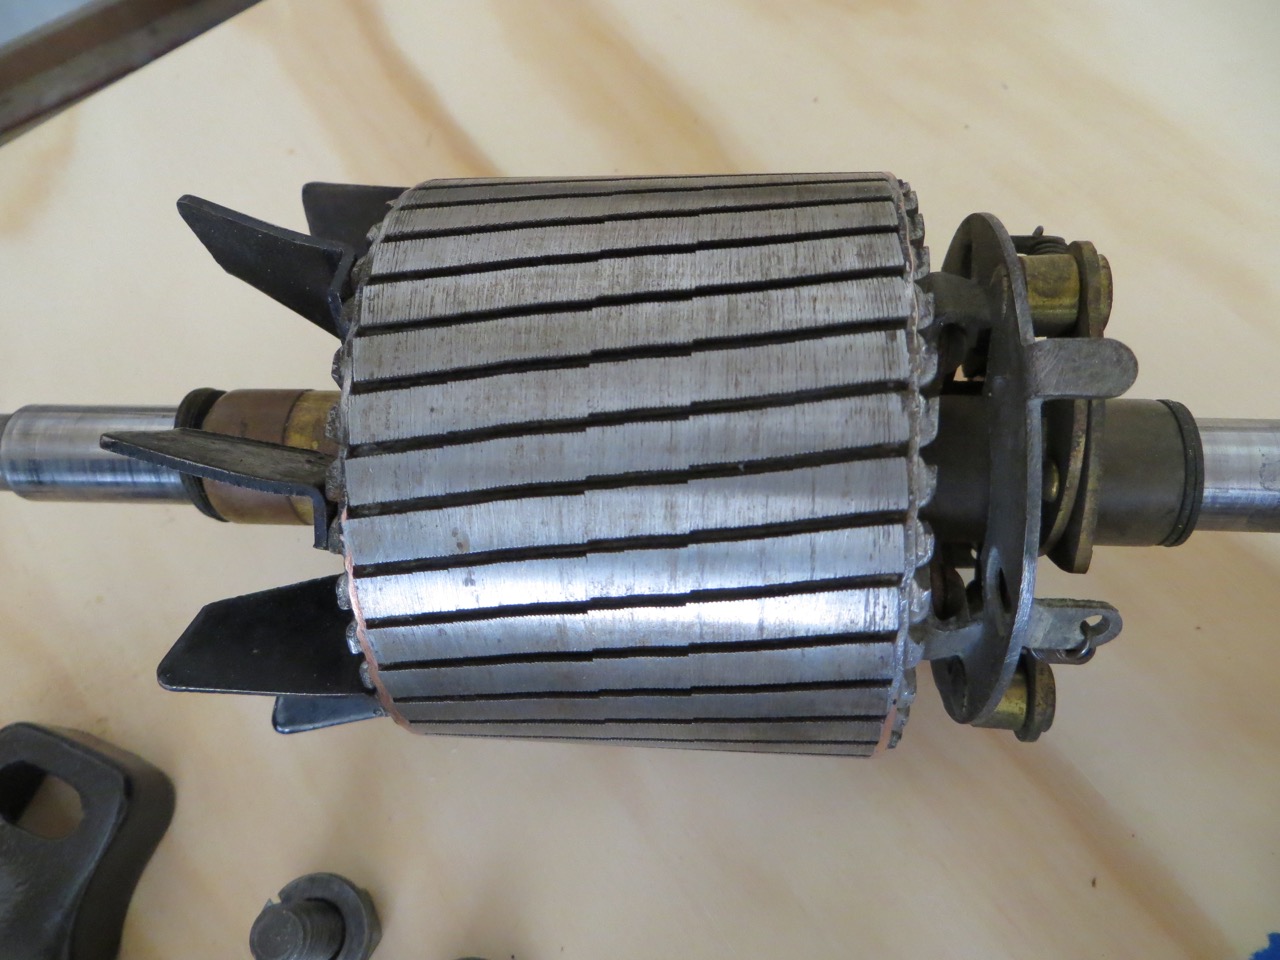
I lightly sanded the armature with a fine-grit sand paper.

Motor housing cleaned and ready for primer!
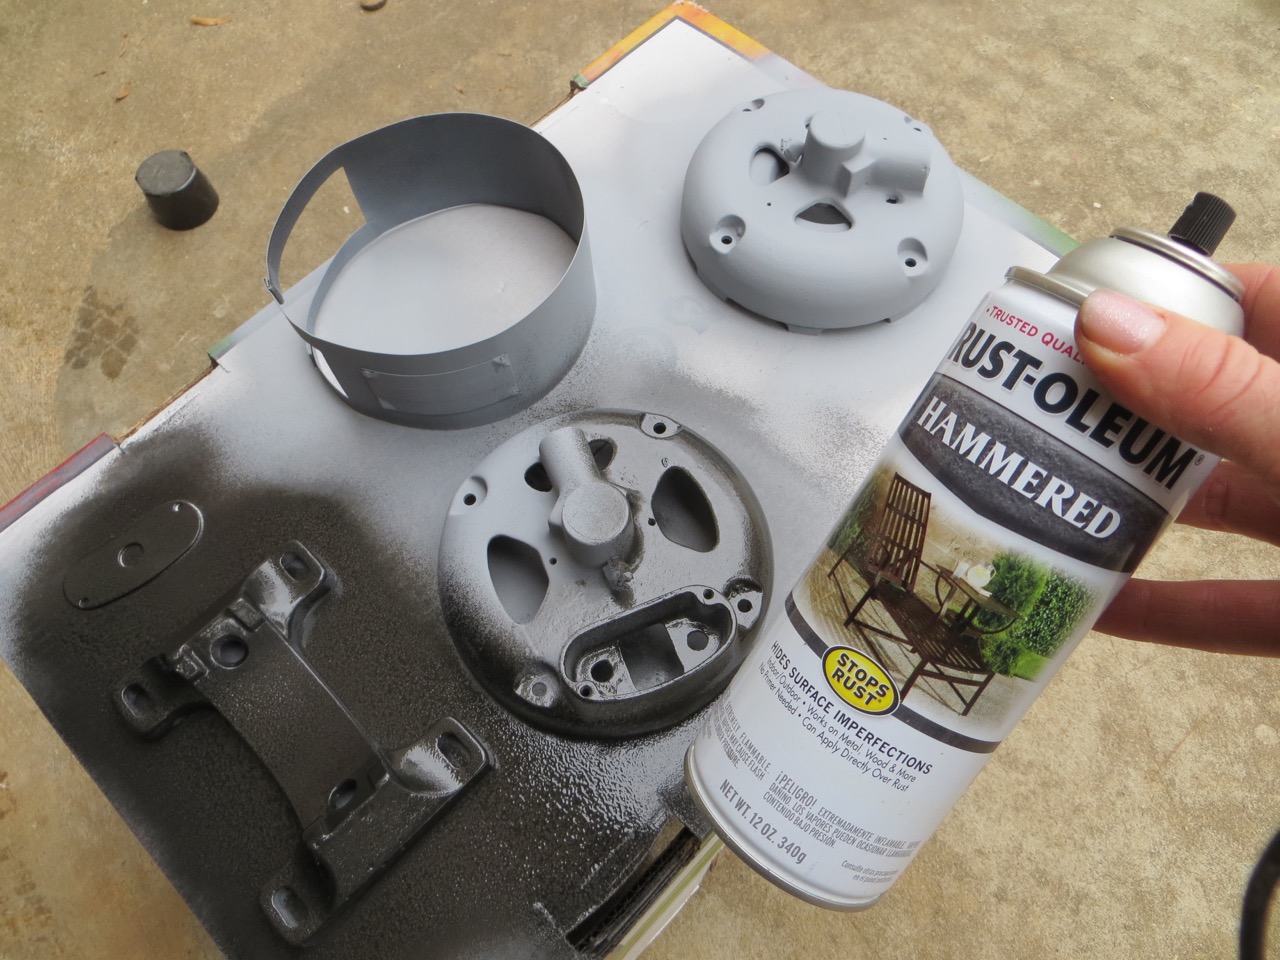
Primer and a little bit of paint. I love the hammered paint!
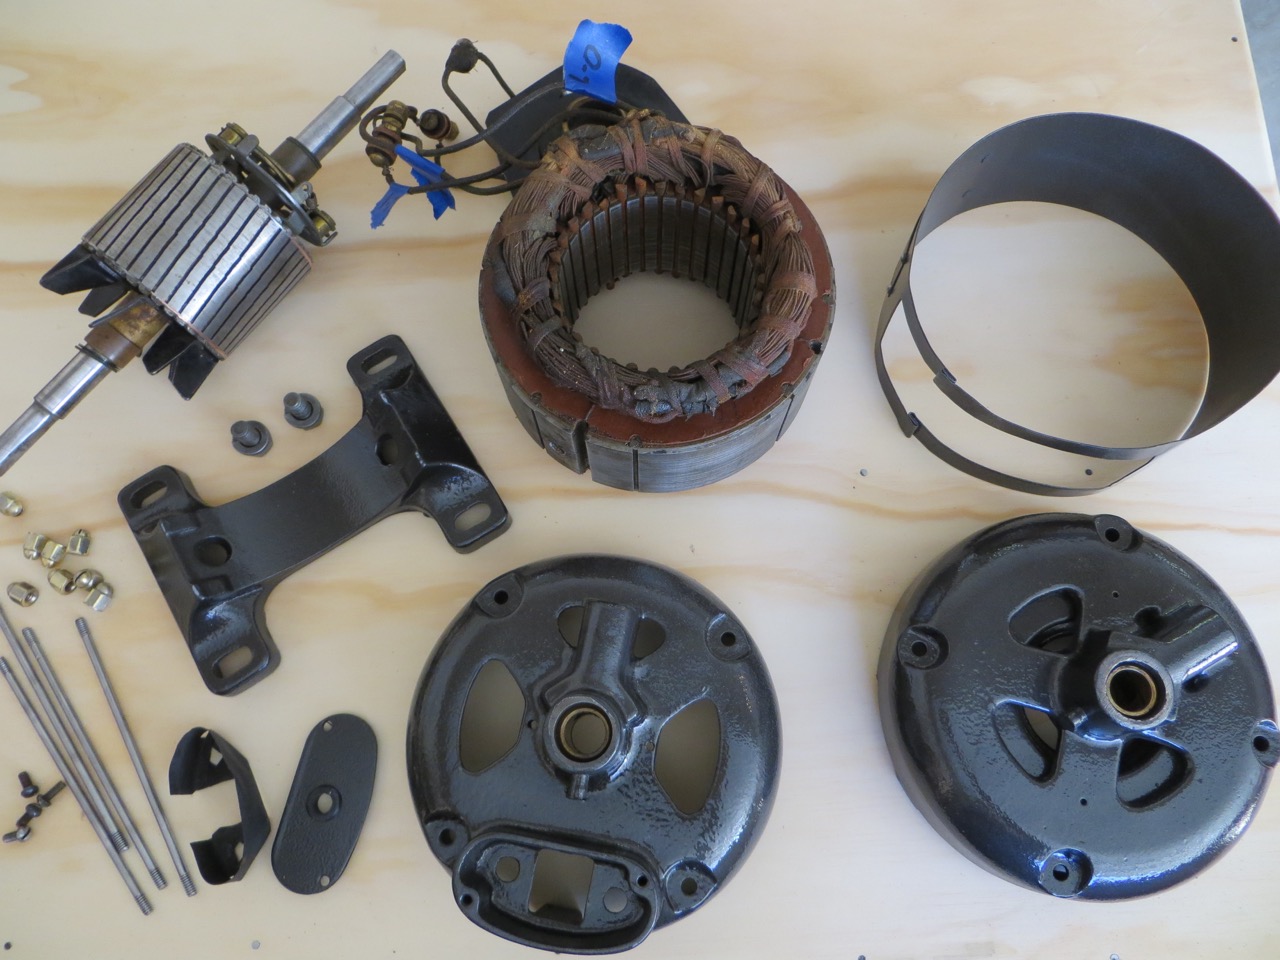
Here’s the motor parts ready to be assembled.
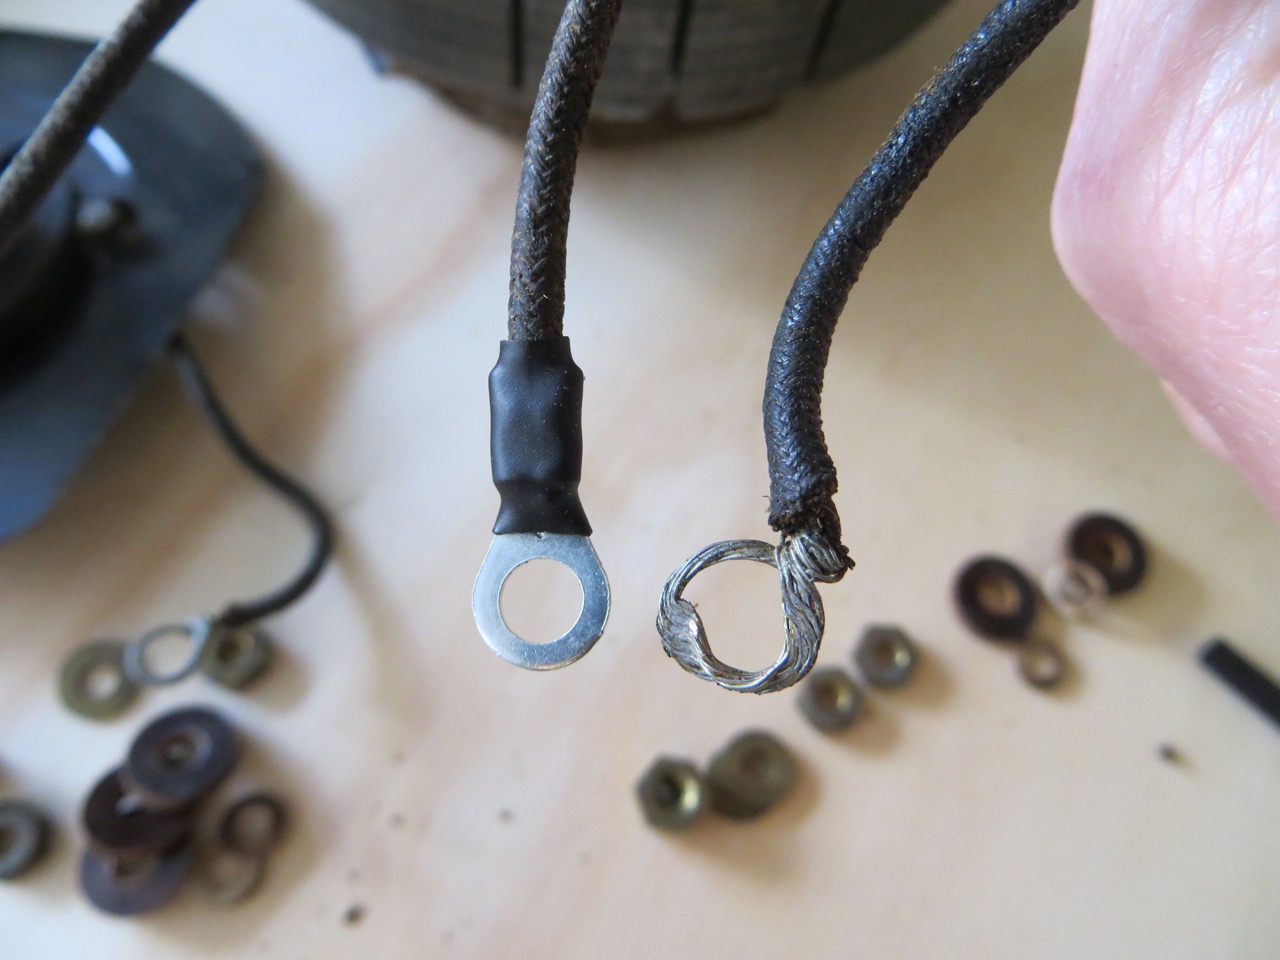
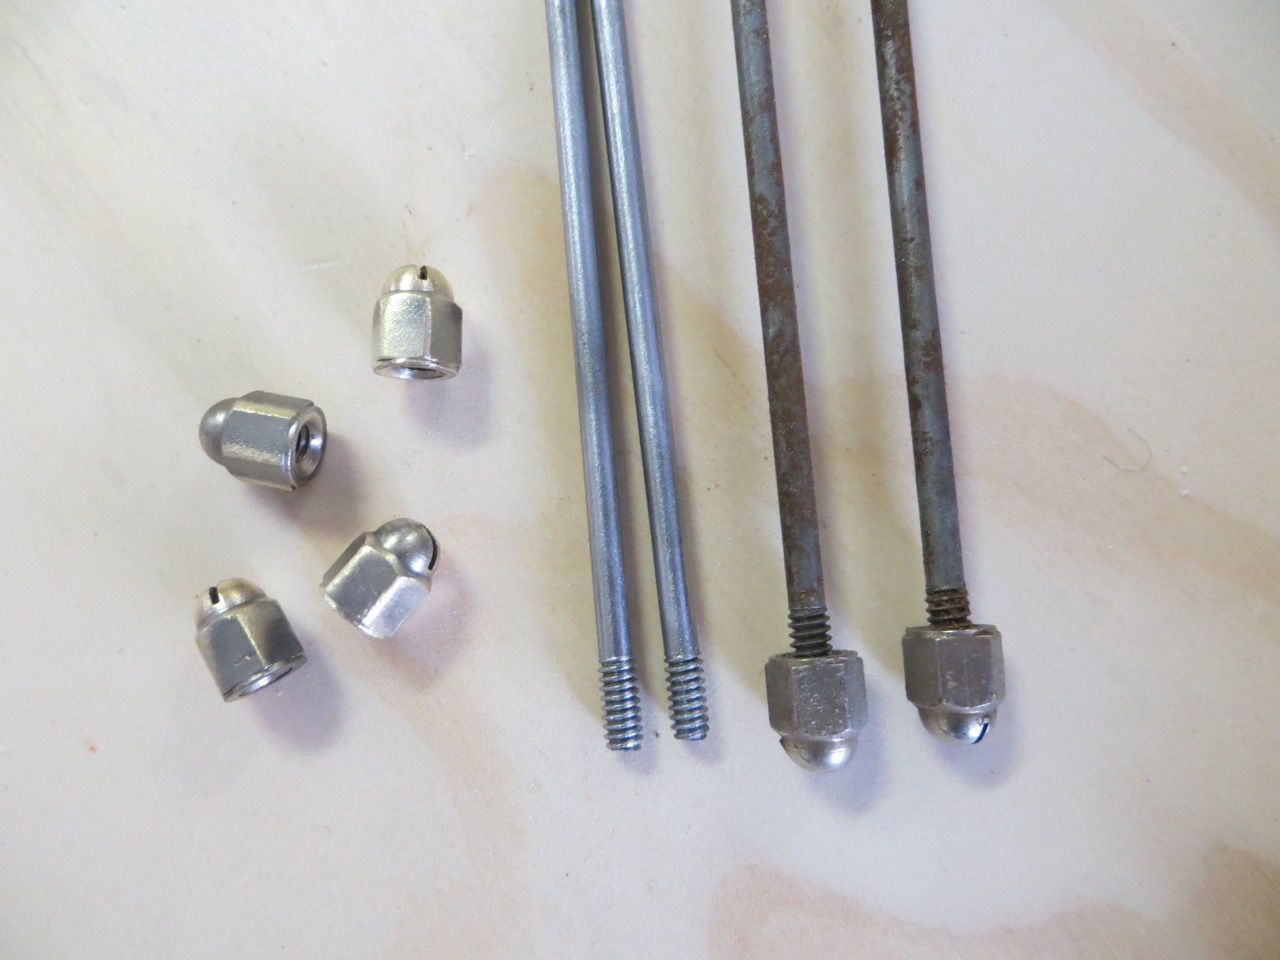
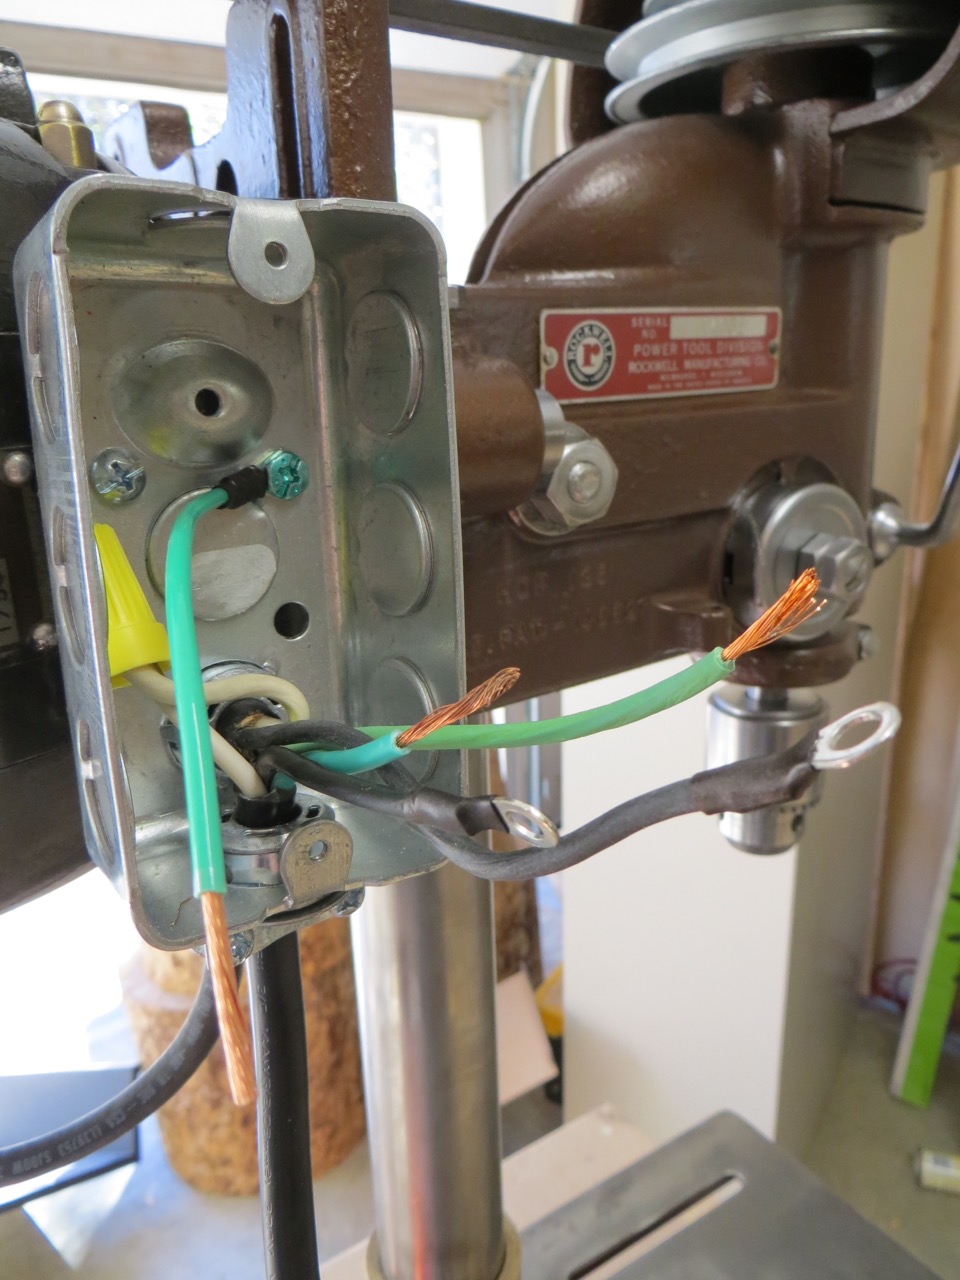
The main thing I wanted to do with the motor was to bring it up to “code” which meant the stranded wire needed to have terminal ends and not wrapped around a screw.
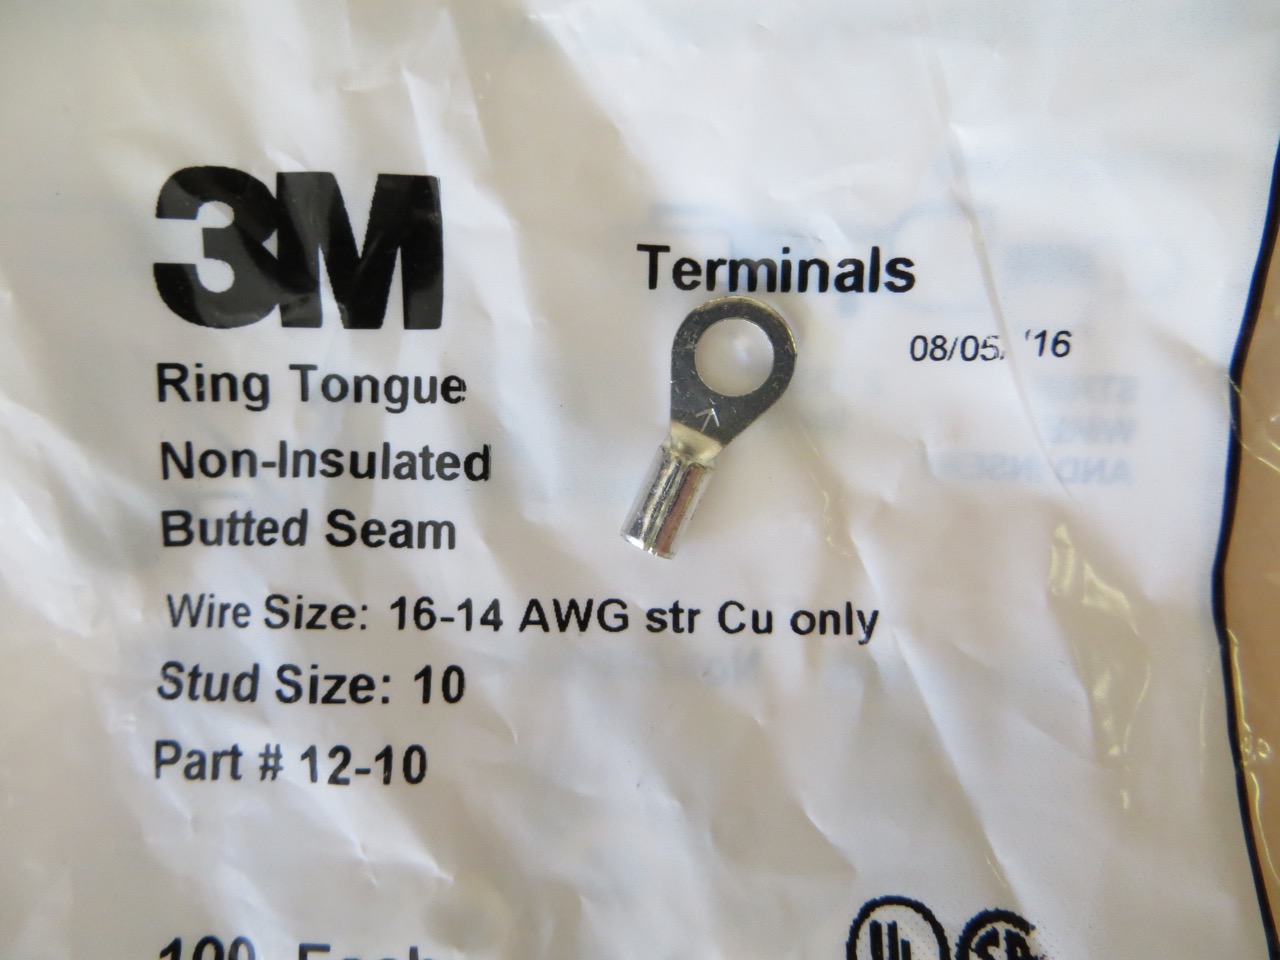
I don’t like the pre-insulated terminals because they look super bulky and awkward to work with in tight spaces. I had to special order these non-insulated terminals from McMaster and they’re the perfect size for my wires and stud diameter.

I cut off the old ends.
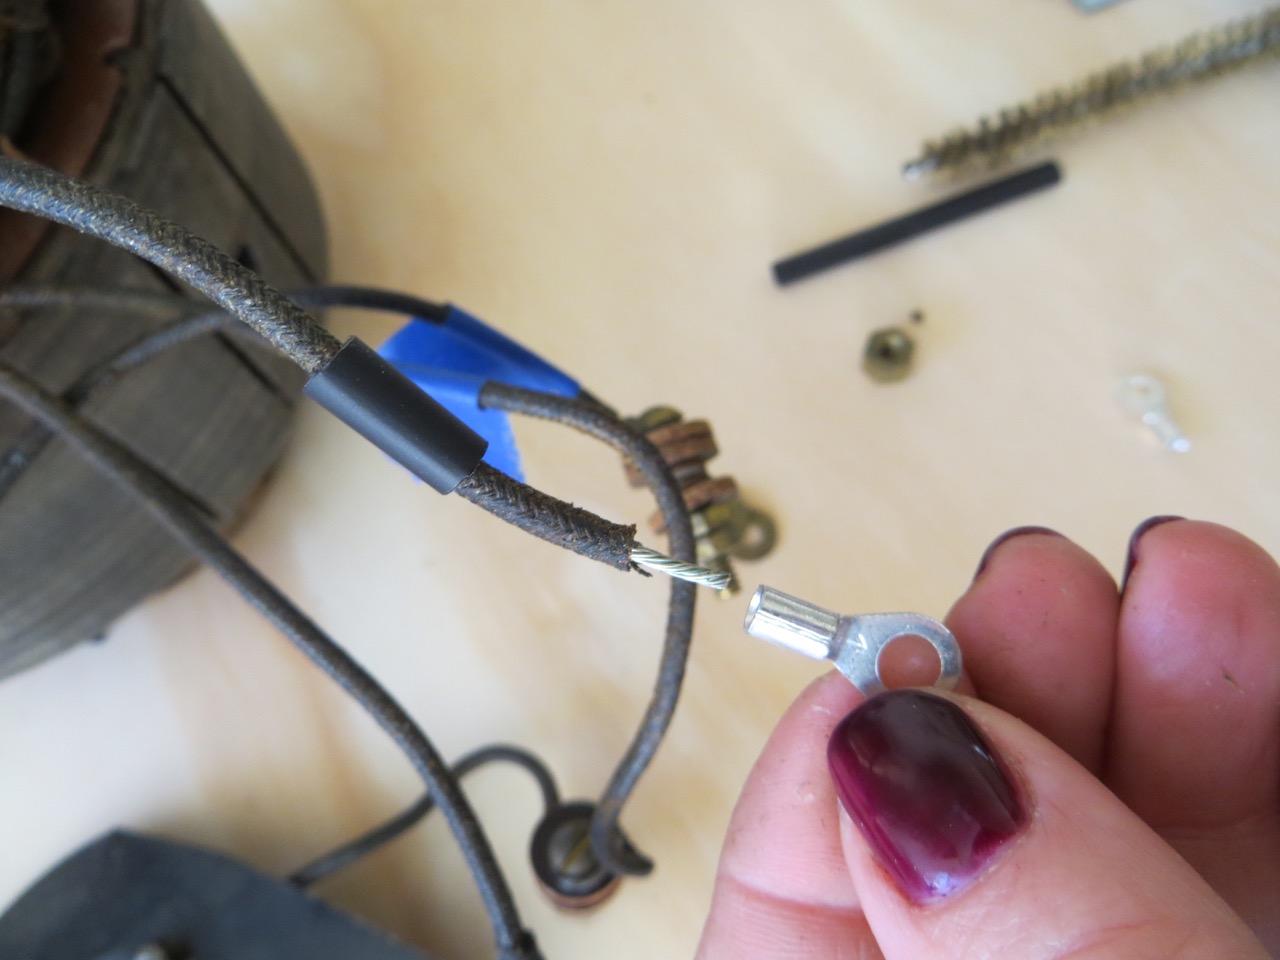
Stripped 1/4″ of the wire coating away, slid a 1/2″ piece of heat shrink tubbing onto the wire before the terminal.
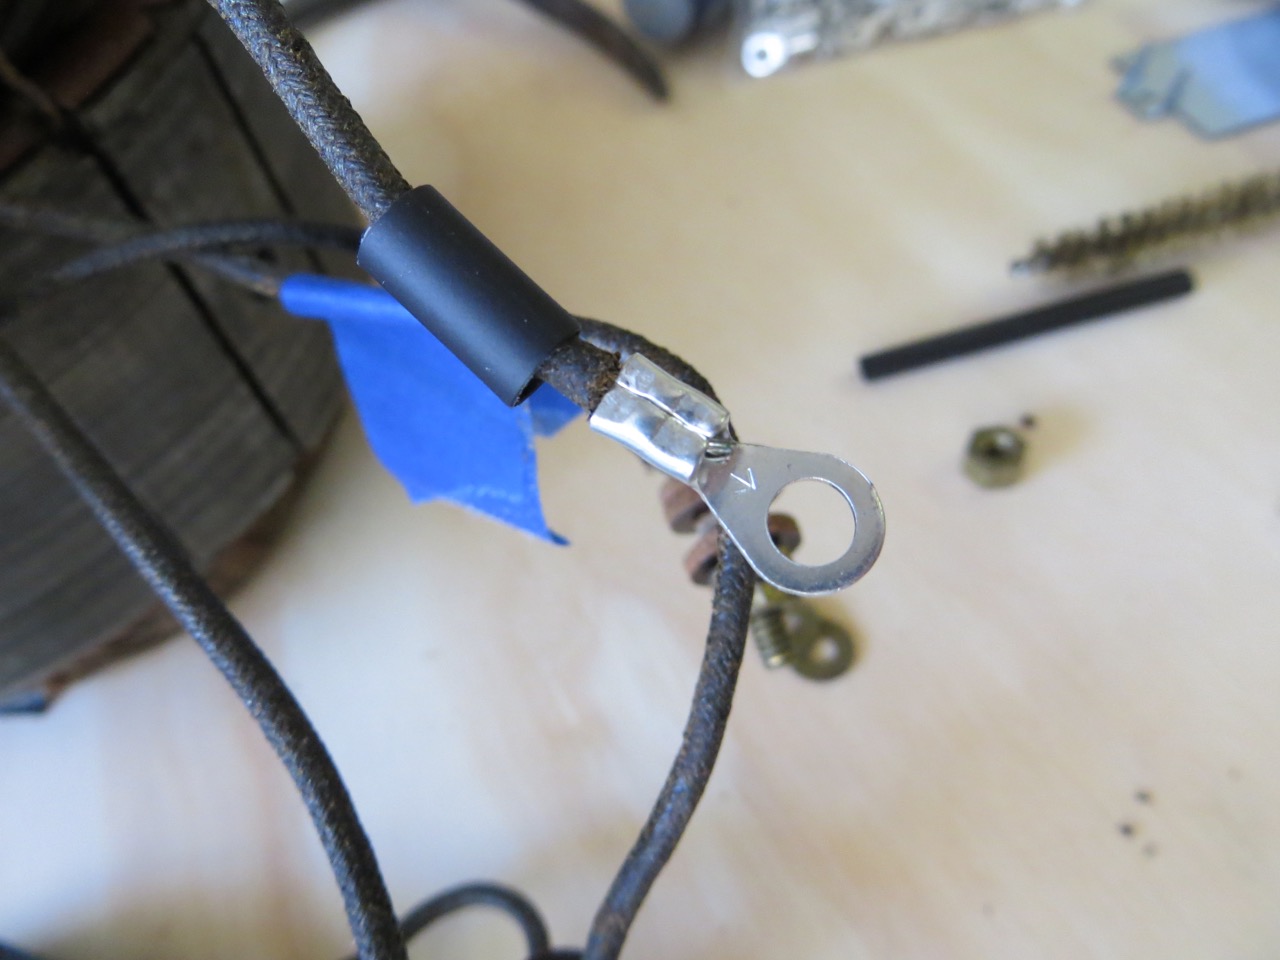
Crimped the terminal tight onto the wire.

Shrunk tubing over terminal/wire ends with lighter.
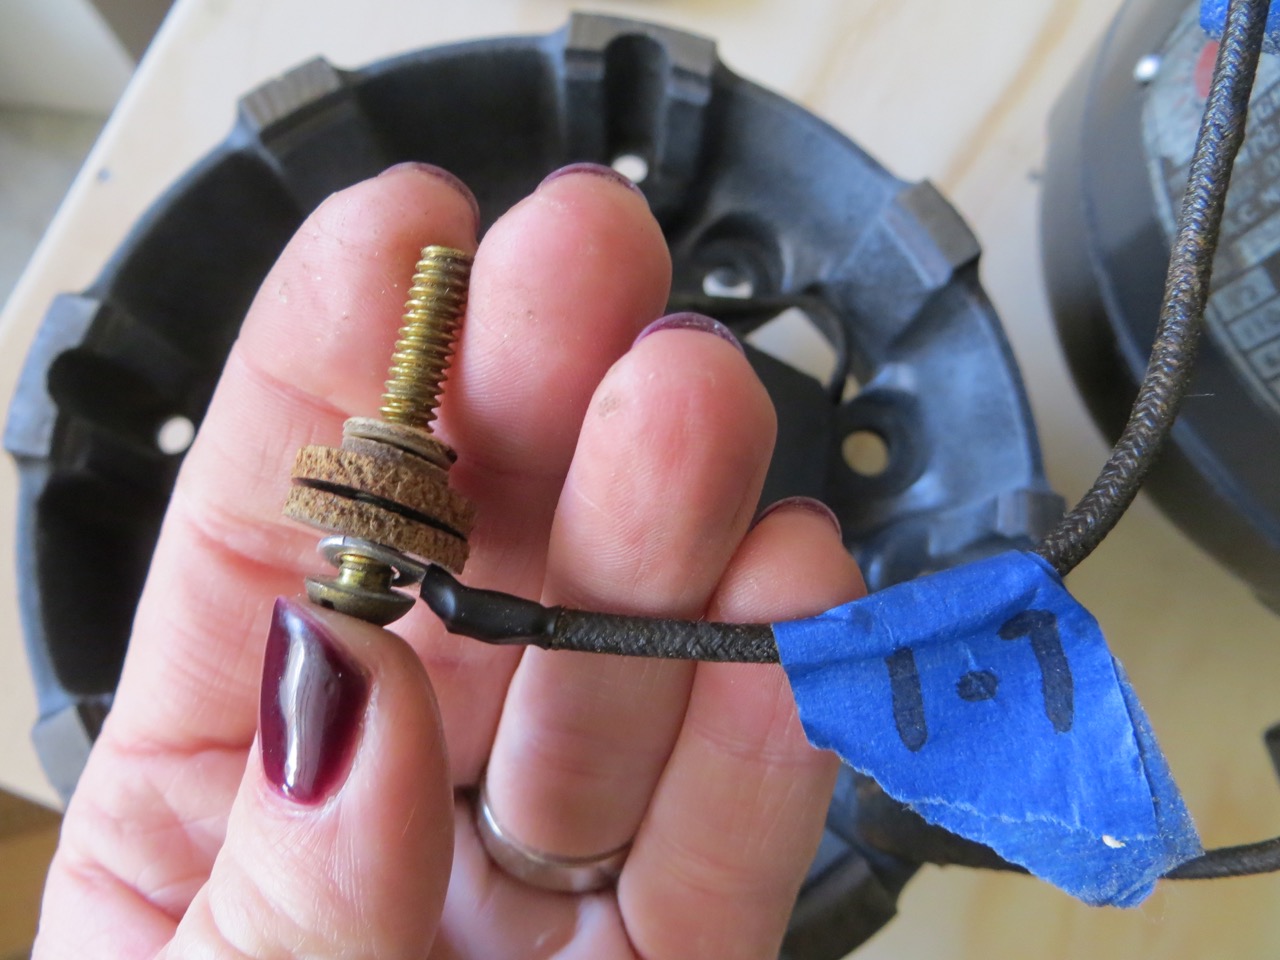
I added all the washers back how they were originally.
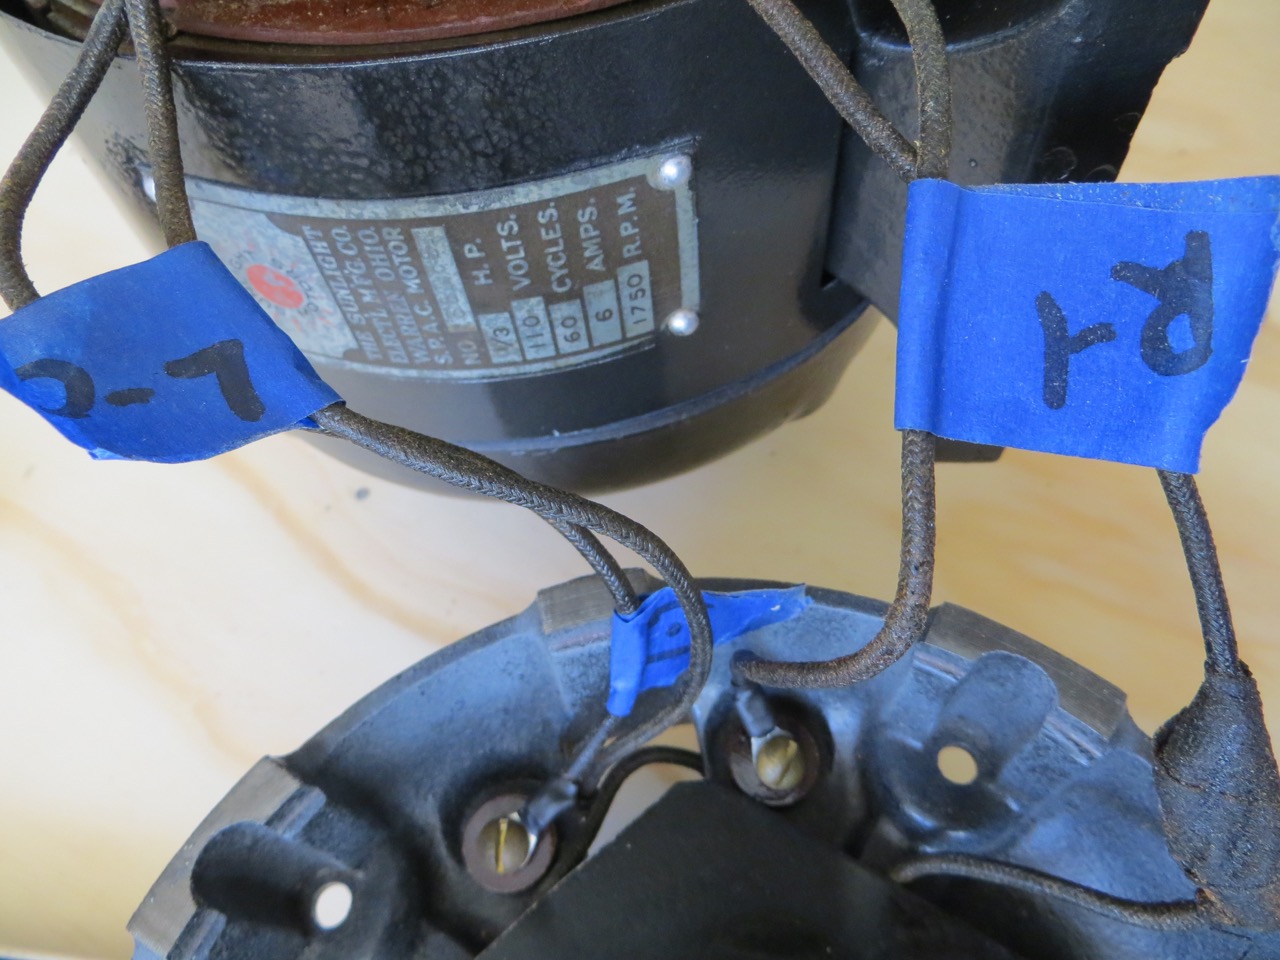
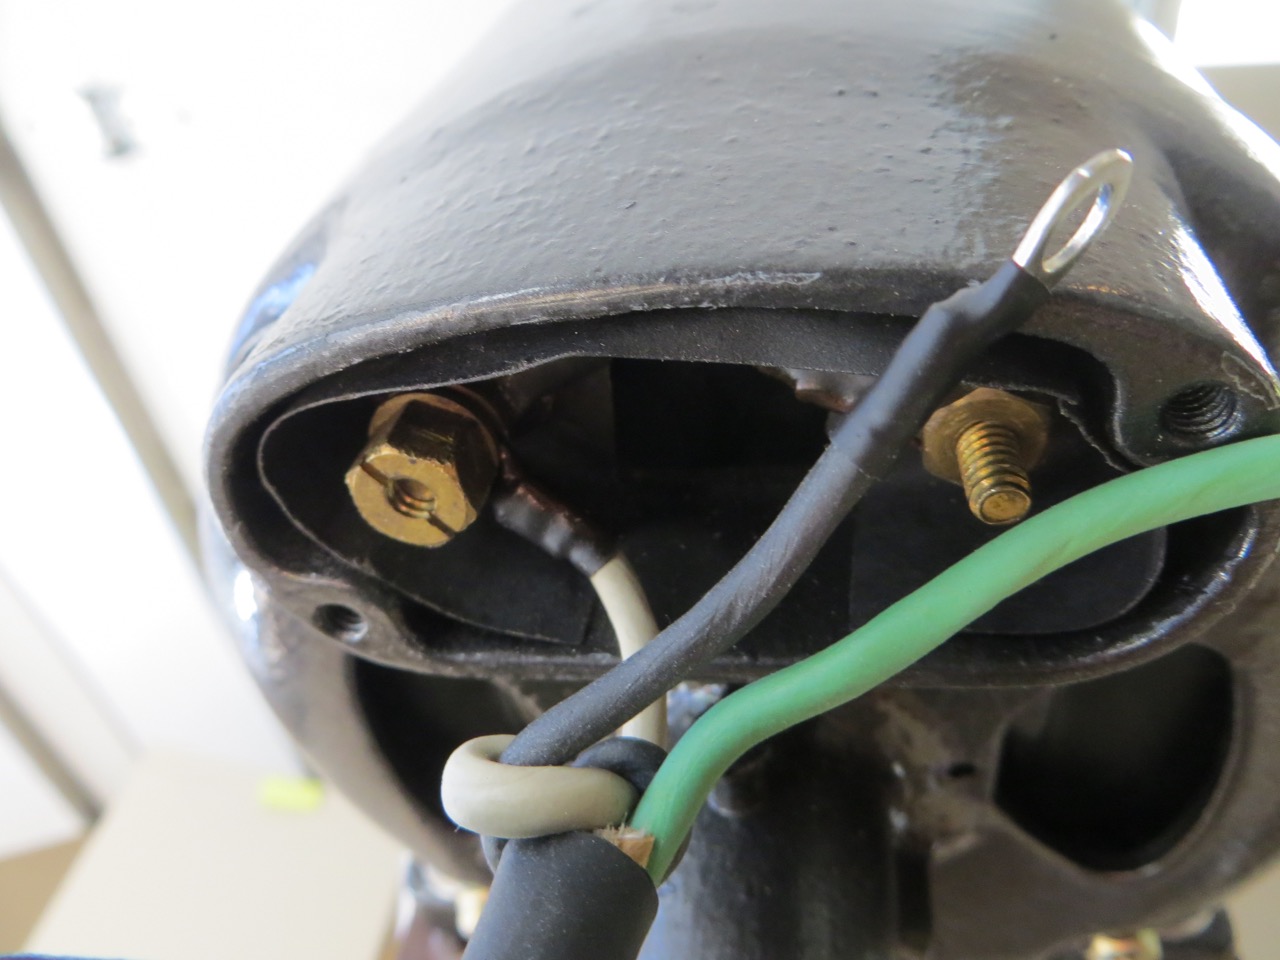
Attached the inside wires to the inside…
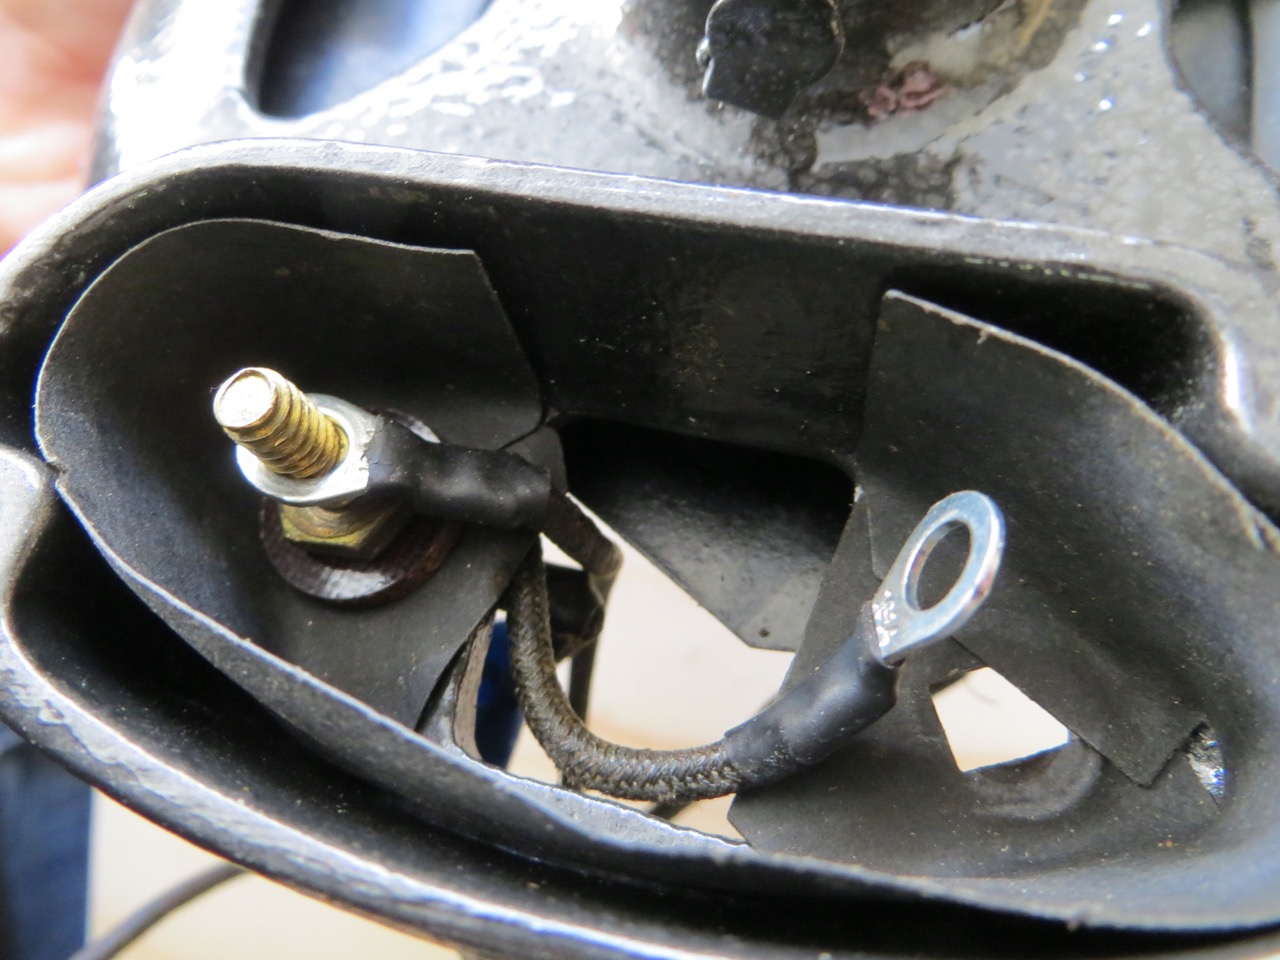
…and outside wires to the outside.
Getting the motor housing back together and the wires tucked out of the way was much harder than I expected. It was such a relief to get the motor bolted to the machine and being so close to seeing the machine finally run.

Because who wouldn’t take a selfie with a drill press!?
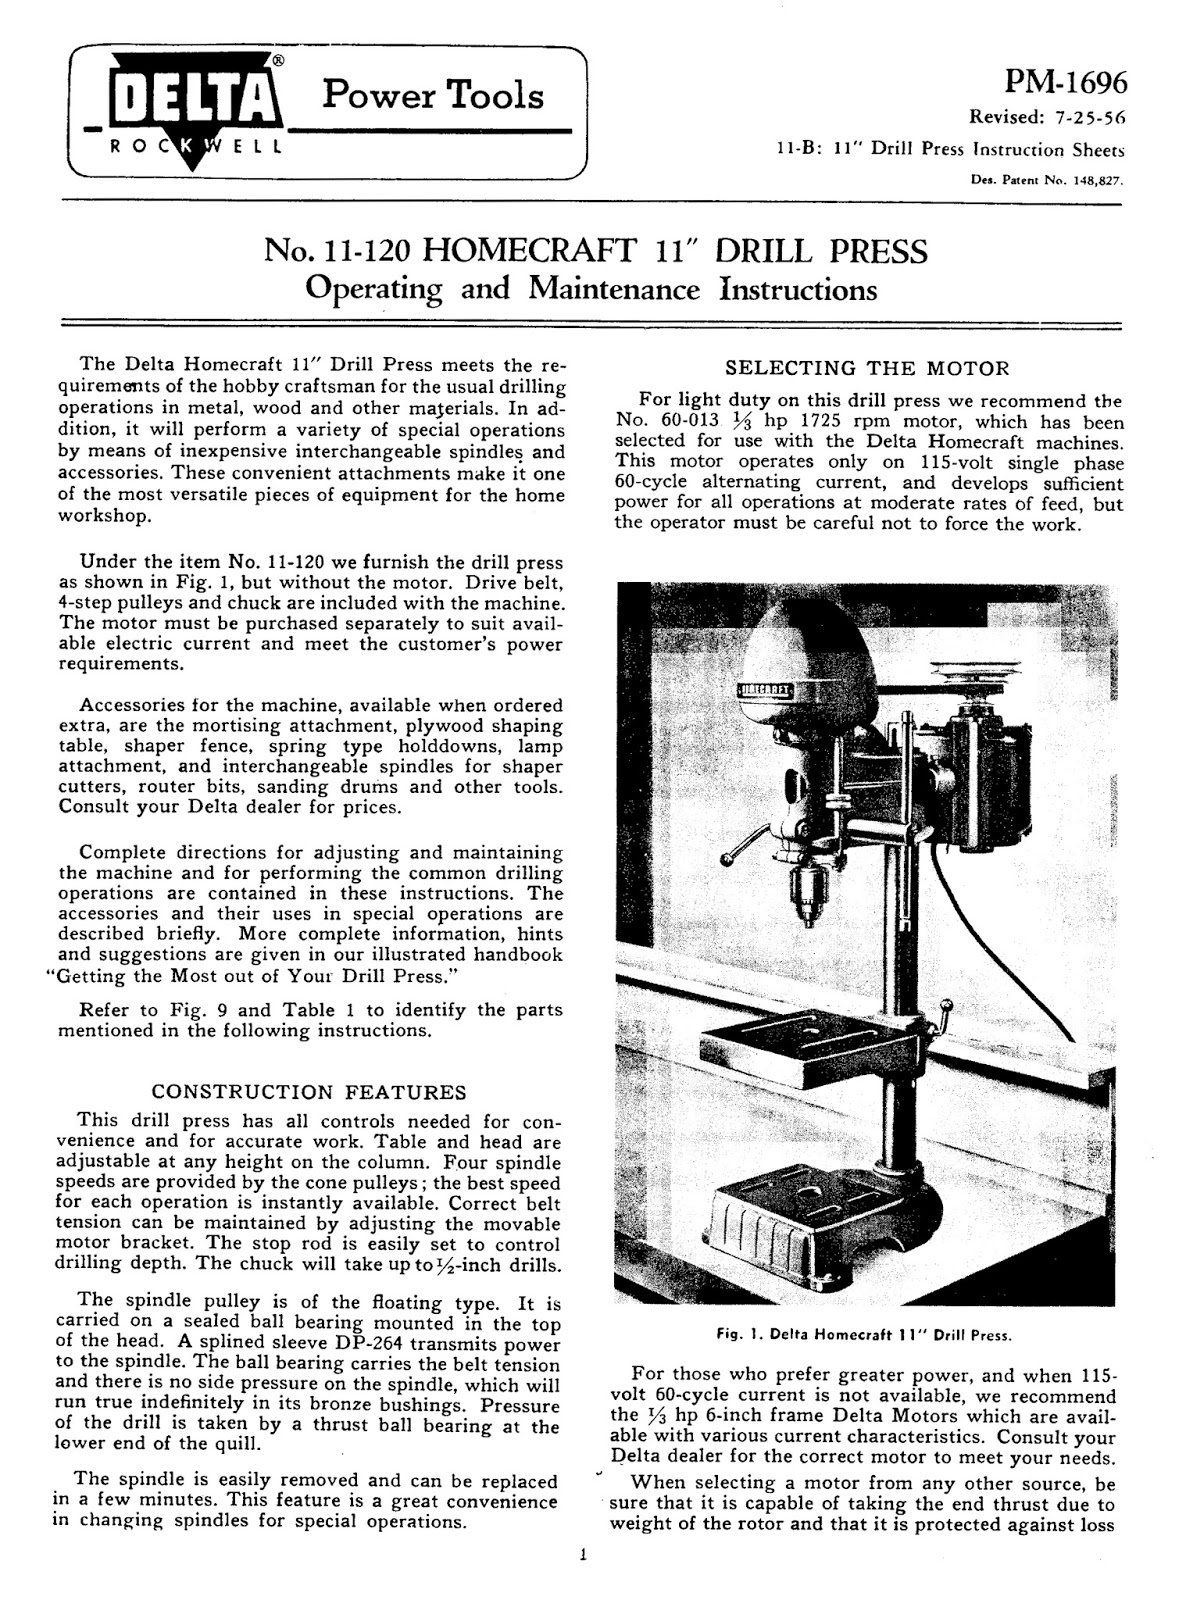
As always, the manual for download.
Here’s some teasers for what you’ll see in the next post (how-to add a switch and grounded wire to a shop tool motor):
33 Comments
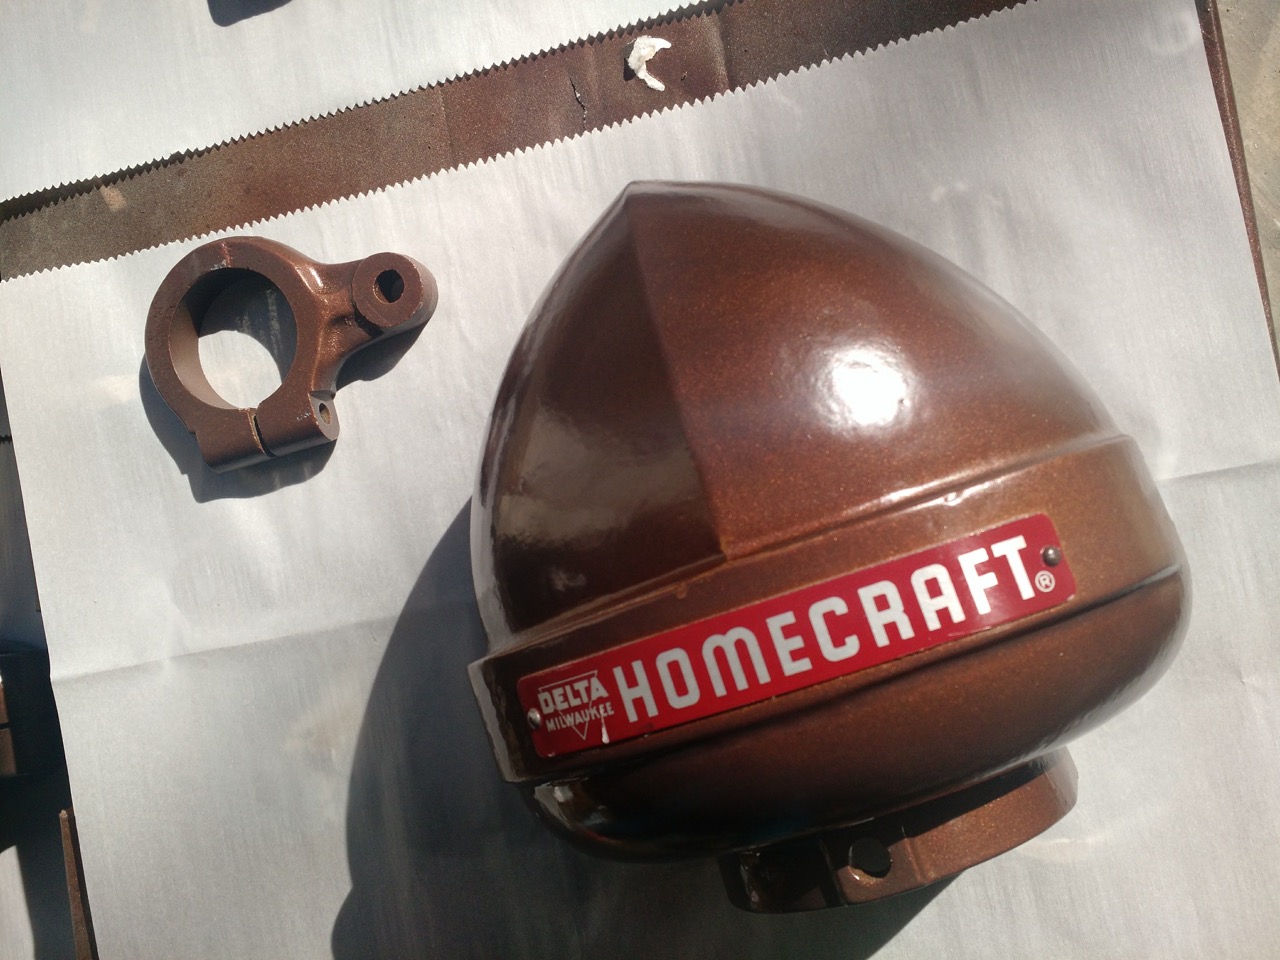
Hey Dani, amazing job on the old press! Wow, you really cleaned it up beautifully. Found this page while trying to learn how to lube my dad's old press which was part of a Rockwell multi-tool (table saw, jointer, drill press combo). You may not be aware that that little loop in the casting aft of the left side of the nut that retains the axle (spindle?) of the raise/lower arm is a keeper for handily storing the chuck key. I'll email you a photo of where it goes. Mike
February 13, 2018 at 7:22 pmThis is actually incorrect. I restore a lot of Delta stuff, that tab is actually for mounting a light. Look up “Delta retirement light” and you’ll see what I mean.
April 4, 2019 at 12:21 pmGreat job on the restore, I love these old machines and am always glad to see another back in use.
My chuck key didn’t fit so figured it wasn’t the original – now I know 😆
April 4, 2019 at 1:51 pmOh my heavens!! I looked at the pictures to see what you were talking about and I didn't really give it any thought. That's awesome – right now its tethered to the press with a metal wire and is awkward to use. Thank you for the tip! 🙂
February 13, 2018 at 7:25 pmI’m working on Delta/Milwaukee 11 in. Drill Press to get it back into use. It’s a AL-6805. Your work restoring yours was a Awesome job. I’m not that patient or just lazy, in taking everything apart. But your restore was a True Restore. I usually do the Original Machinery Gray Paint(not original but close), but after seeing the paint job on yours, I might try something new. What was the color you used. I painted my motor today with Rust-Oleum Metallic Oil rubbed Bronze, and might paint the whole machine that color. I’ve got 25 or more different machines restored at VintageMachinery.org, and will put this one in it to, I use this site for Research when I restore. Maybe you should put your machine in it too. Thanks for the Great Job and a Concise report and pictures how you did it.
January 11, 2023 at 12:50 amHi Phillip! I’ve put a few of mu machines on vintagemachinery.org – I can’t remember if I did this one or not. I can’t remember what color it was that I painted – next time I need to take a picture of the can to post for my own reference as well! Thanks for your message!
May 19, 2023 at 7:04 amGreat restoration. I’m saving this page. Thanks for posting.
October 13, 2018 at 1:23 amI’m glad you found me! Thanks for the comment!
October 13, 2018 at 5:39 am[…] tools, tutorial, woodshop Perhaps the biggest difference (and most important) part about re-storing my old drill press was updating all the wiring. I’ve read horror stories about these old, all-metal machines […]
October 14, 2018 at 1:57 pmNice Restoration!
I just picked the same model up today that appears in pretty good shape aside from cleaning, needing some oil/grease, and new paint and polish. Can I ask what color and paint brand you used? Looks like a bronze or copper? Krylon, Rustoleum or another brand? I really like the color you used over the machine grey.
Liked your jointer restoration as well.
February 2, 2019 at 12:41 amHi Doug! I know it’s Rustoleum and I can check to see if I have any left to look at the color. Basically it’s a rust-brown color 😆
February 2, 2019 at 2:05 amThat is excellent! Beautiful work and super descriptive writeup.
May 15, 2019 at 5:07 pmI just found yours while looking for information on the Homecraft I picked up at a garage sale recently. Mine is similar, Serial BP1661 and weighs 90 lb. It needs nothing, the action is smooth, no rust.
You note that your model is a 11-120 11″ press. How did you get the model no & actual size? All I see is the serial on mine.
Also, did you do any restoration on the Homecraft or Serial # tags? They look new.
Hi there! Thank you for the comment! I got the model # and information from VintageMachinery.org. It can be a bit confusing to navigate – there’s areas where you can register YOUR tool with the information/pictures you have and there’s an area with a large machinery index that OTHERS have registered. Here’s a link to the page for Delta Drill Presses: http://vintagemachinery.org/mfgindex/detail.aspx?id=1141&tab=4
I believe I use Mineral Spirits on #0000 steel wool and carefully cleaned the badges.
May 27, 2019 at 8:47 amWELL DONE. AN EXCELLENT RESTORATION!
June 11, 2019 at 12:54 amThank you Tom!
June 11, 2019 at 5:22 amWhat year is this?
August 16, 2019 at 8:19 pmThe instruction sheet is dated 1956 I believe.
August 16, 2019 at 9:19 pmI have this drill press at home that I got from an estate auction. It wasn’t very rusty, so I tore it apart and gave it a basic degunking, and it works well, but I want to actually restore it. Someone, at one time or another, added a new motor and fabricated a motor mount so there are welds on my mounting plate. They did add a switch, but it’s not mounted to anything, and the cord isn’t long enough to put the switch on the table so it just kind of floats there until I can fix it.
Biggest issue is that as my father-in-law was carrying it down into my basement, the front pulley cover fell off and down my steps and knocked a triangular chip out of the corner. It still goes on and the cover works, but wondering if you knew where to start for repairing that?
January 21, 2020 at 12:36 pmHi Ben! I’m not sure what kind of metal it is – pot metal? I don’t believe you can weld pot metal if it is that. I’d look into some type of resin you can use to patch/sand/paint to match. Good luck!
January 21, 2020 at 7:45 pmAwesome job I know I’m a little late to the party but I just came across your project and was blowed away with the nice job you did. I just bought the same dril press and plan on restoring it I hope it comes out half as nice as your drill did. Any advice on my project would be appropriated thanks. Antonio
February 16, 2020 at 4:25 pmHow much are you getting out of the 11-120 restored Homecraft bench drill press 1947 or 1956. I have one.
November 16, 2020 at 10:21 pmI’m not sure what you mean.. how much am I getting out of it?
November 24, 2020 at 11:39 amGreat job! I have a similar project soon (a Taiwanese floor standing drill press from the 80’s … not as cool as this drill press, but in about the same condition) and this was motivating. I’ve found soaking in evaporust absolutely magical for rust removal from small parts and it’s not even a super harsh chemical.
December 10, 2020 at 1:55 pmThank you SO MUCH for posting this! I have one of these from my dad’s shop, and it really needs some TLC, so it was great to find your excellent restore, and, most helpful for me, the manual!
As for your switch, mine has a pull rod that activates the motor. It’s attached to the side of the drill head opposite the pull arm and runs back to a switch built in to the motor. I think it’s how most were set up, and allows for the machine to be switched on/off from the operating side (for safety).
Also, I really appreciate you restoring your press to give it a new life! They’re great machines, and mine has been in the family for over 50 years now.
January 24, 2021 at 8:34 pmThank you John for your message! I definitely don’t like the switch on the press and how I need to reach back so far – it would be a great project to fix the location – I’ll have to look up what you mean about the pull rod.
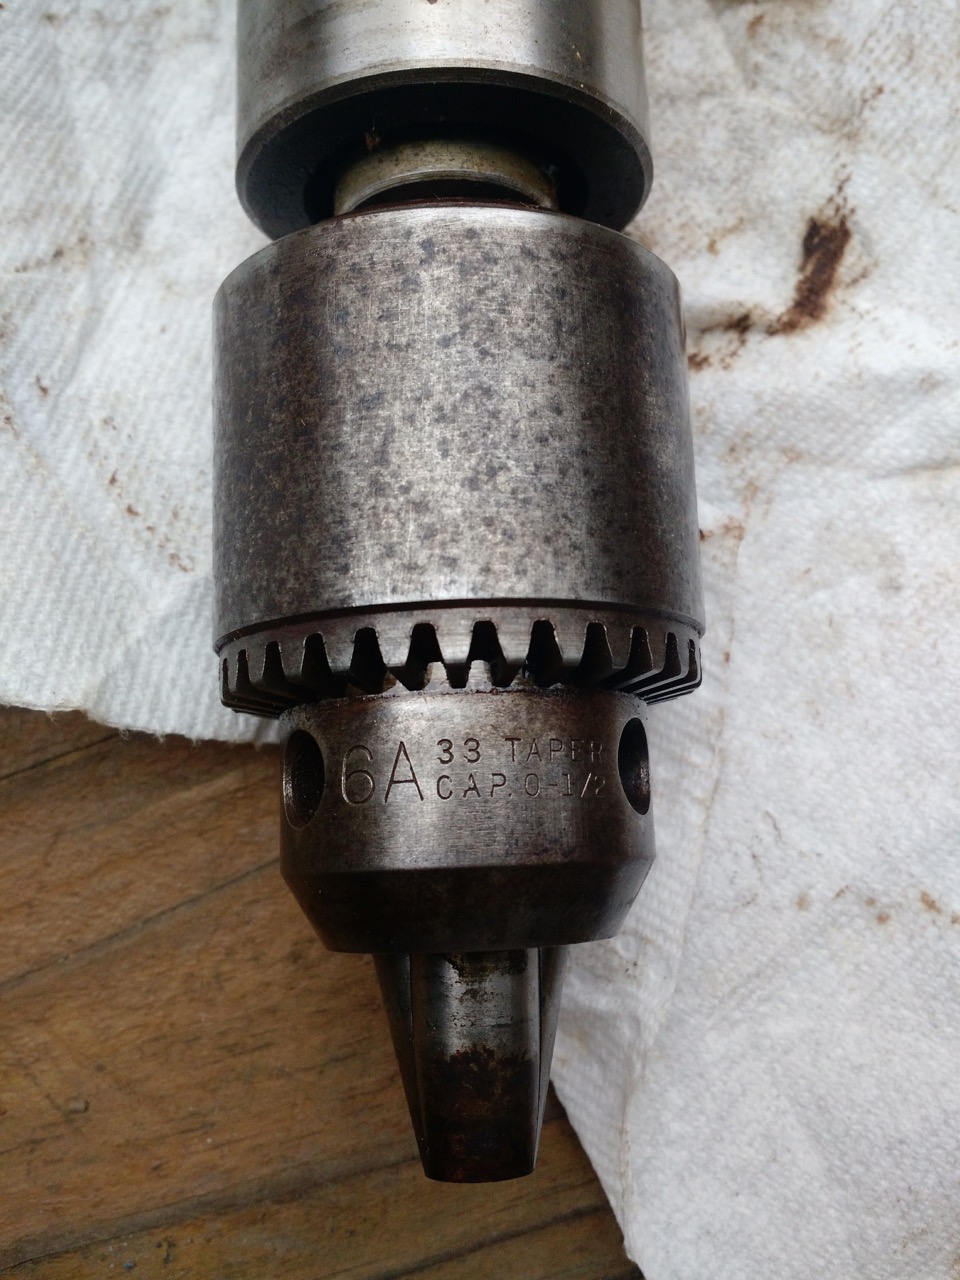
January 29, 2022 at 2:42 pmYou did a marvelous restoration! Very impressive. I just happened to pick up one of these 11-120 drill presses and I had a question. Is the chuck a standard taper that can be replaced with one that has wrench-free bit changing? What type of taper is it, unless it is proprietary? Thanks… Martin
March 19, 2021 at 11:55 amHi Martin! Congrats, I think you’ll love it!
It seems to be a standard Morse taper.. it seems similar to size of my lathe which is a size #2.. but I’m not 100% 🙂
March 19, 2021 at 1:18 pmHi Martin I like what you did with that bench drill press looks Great. I have one just like it and I am getting to putting on a switch like your. What I want to know is where you got that switch cover and what brand made it. I like the way it wraps around the edges of the box.
February 2, 2022 at 9:01 amI got the cover plate from the thrift store I think 🙂
May 19, 2023 at 7:13 amHi nice job on drill press. Just want to know where did you get the switch cover plate at, I like it the way it raps around the box.
February 5, 2022 at 9:17 amHey Ron!
I’m pretty sure I got it at Home Depot!
April 19, 2022 at 9:57 amHello Dani, I have the same press which belonged to my dad and I have been using since I was a kid; I’m now 69. Can I ask how you removed the chuck from the spindle and if your machine had a small pin running through the spindle directly above the chuck? Any info or suggestions would be appreciated. Warren
April 19, 2022 at 7:37 amHey Warren!
The chuck doesn’t have a pin or anything – it’s a simple morse taper. I remember putting some penetrating oil around the taper and using a scrap of wood and mallet to tap it out. Ever since I’ve restored the machine the chuck will actually pop off once in a while – I’m thinking with the cold/hot changes throughout the year and because I don’t use it that much to put pressure back on it. I probably need to clean it with come alcohol to make sure there’s no oil on it as well.
Anyways – good luck!!
April 19, 2022 at 9:55 am