
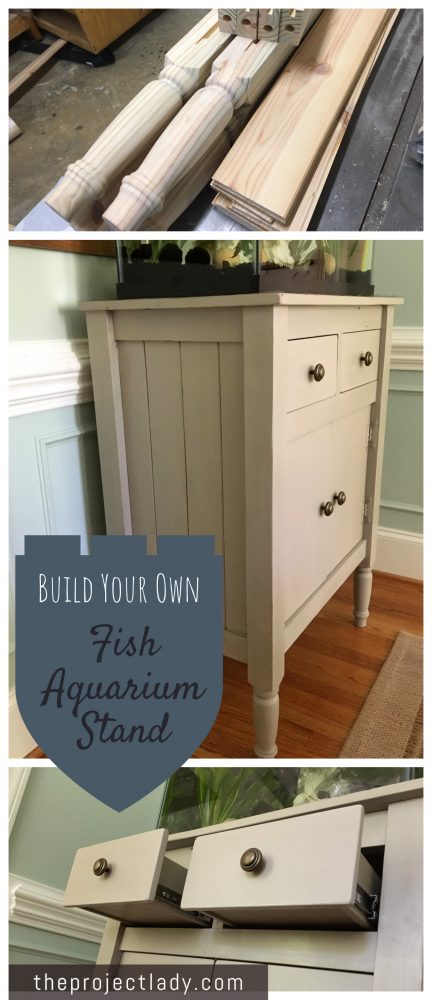
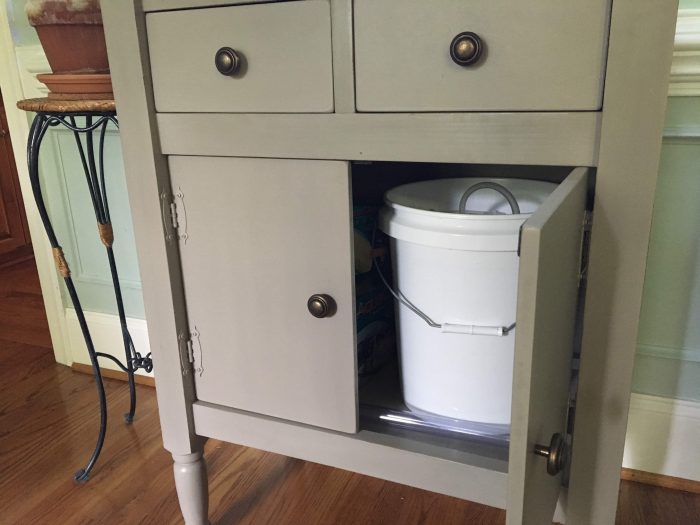
Hey there! I got into fish keeping earlier this year and needed a sturdy surface to put my aquarium. There were only a few requirements to the cabinet I wanted to build: look like an actual piece of furniture, tall enough so fish were close to eye level, storage for hiding fish supplies, have turned legs* and be high off the floor for easy floor cleaning.
*no lathe?… keep your legs square all the way down*

TOOLS NEEDED:
Table Saw
Miter Saw
Router
Lathe (or buy turned legs)
Dowel Jig (or other form of joinery)
Chisel
Wood Clamps
Hammer
Drill + Bits
Palm sander + various grit paper
SUPPLIES NEEDED:
2 – 4x4x8′ posts
1/4″ thick tongue and groove or 1/4″ plywood (for sides)
1/4″ board or anything 1/4″ (for back and drawer bottoms)
3/4″ plywood, MDF or solid wood (top, cabinet doors and drawer fronts)
4 hinges
4 drawer pulls
2 pairs 14″ drawer slides
Wood Glue
Small Wire Nails
Template for turned legs (download here)
Finishing Products
 Pictured: 4×4 posts, 1/4″ tongue and groove (for sides) and 3/4″ board for top.
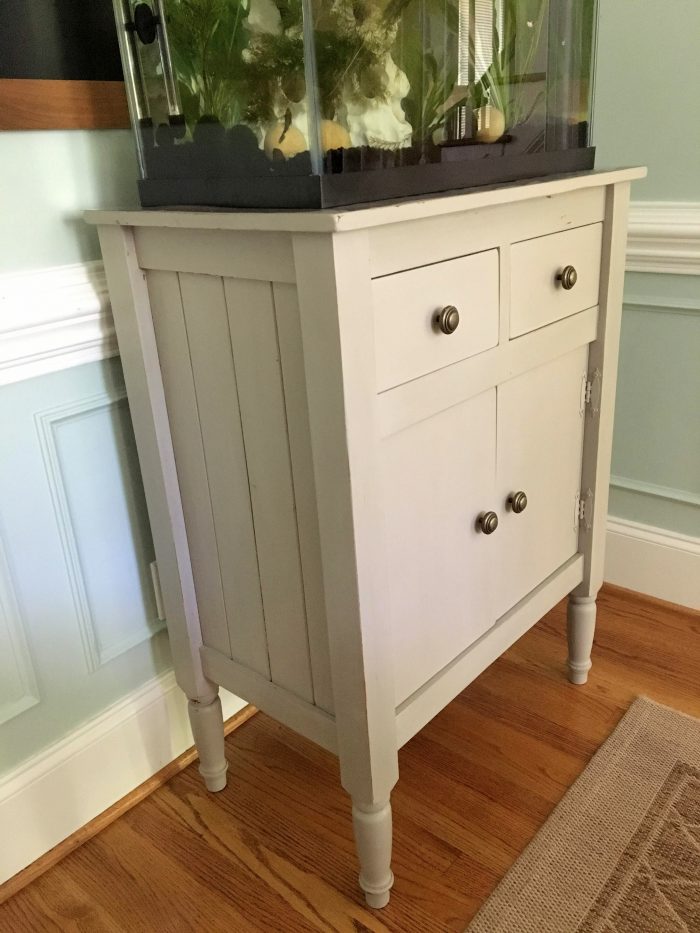
 I made the cabinet to fit my 20 gallon aquarium — I realize most people have different sizes but hopefully this post gives you ideas and inspiration.
 Cut your 4×4 posts so you have 4 – 37″ lengths for the legs. Rip each one down to a 2-1/4″ square post. Your cut offs will be used to build the stand.
Turn legs on lathe using the downloadable template in ‘supply list’.
 From your cut offs you’ll need 6 – 22-1/2″ lengths (front/back stretchers) and 4 – 12″ lengths (side stretchers). Use your router or table saw to make a 1/4″ rabbit down the center of your 12″ lengths to fit your side panels.
 Make the same rabbit down the center of each leg (just on on side)… stop the rabbit 26-27″ down from the top (where your side stretcher will cover). Cut your 1/4″ T&G or side paneling to 23-3/4″ tall and and wide enough to fit across your side stretchers and into the slots in the legs (about 12-5/8″). Sand all components to 180 before assembling.
 Use your dowel jig to make holes centered on each end of side stretcher and where they’ll meet on the legs (the top of the side stretchers meet 25-1/4″ down from my legs). Glue dowels into place and butter the ends of your stretchers and area of legs they’ll touch.
 Tap stretchers into place, slide paneling into place…
 …and tap other leg into place. Clamp until dry.
 Front and back stretchers are easy – place the bottom stretchers to match up with your side stretchers, the tops even with the top and the one separating the drawer and cabinet how you choose (I had a 5″ spacing for drawers). I centered stretchers with my legs and used dowel joinery just as with the sides. IMPORTANT: I placed a stretcher in the back where I would need to attach my drawer slides and you MUST place it 1/4″ more inset into the cabinet than all others if you want your backing board to sit flush with cabinet.
Glue+nail small strips of wood around inside of bottom stretchers for your bottom shelf board to sit (I made mine flush with the bottom so my shelf would sit as low as possible). Cut out a board to fit into the bottom.
Cut a top to fit with however much overhang you want – I cut mine 28 x 17-1/4″.
 Use your router to create a 1/4″-deep recess along the backside of your cabinet for your 1/4″ back. I used a rabbiting bit. NOTE: The bearing doesn’t cross over the stretcher in the back (for the drawer slides to attach to) so you’ll need to skip over it and go back with a chisel so finish the recess along that part of the legs.
 Use a chisel to square off the corners.
 Measure and cut out a 1/4″ back for your cabinet. Use wire nails to tack back into place.
I glued and screwed my top down to the cabinet by countersinking screws and plugging with 3/8″ wooden plugs.
Yes, drawers! – let’s do it! Amazingly enough I was able to use the wider scraps from the 4×4 posts and rip them in-half on my table saw to get the drawer components. They ended up being 3/8″ thick. I needed my drawers to measure 14″ from front to back and 9-5/8″ wide to fit into my the openings on my cabinet. I used my table saw to create rabbits along the bottom edges for drawer bottom to slide into and I cut out a bit on the sides to overlap the end grain on the front/backs (mostly to get more gluing surface area). Cut and fit as you go – it’s better to go too big than too small and take more off later.
 This is how the drawer components lay out.
 Do a test fit to make sure all fits well – cut out a bottom from 1/4″ material to fit into grooves. Glue edges that will touch and clamp into place ensuring box is square.
Clean up any glue with chisel and sand all your pieces to 180 before finish.
 I stained the cabinet first so it would show underneath when I distressed the paint on top.
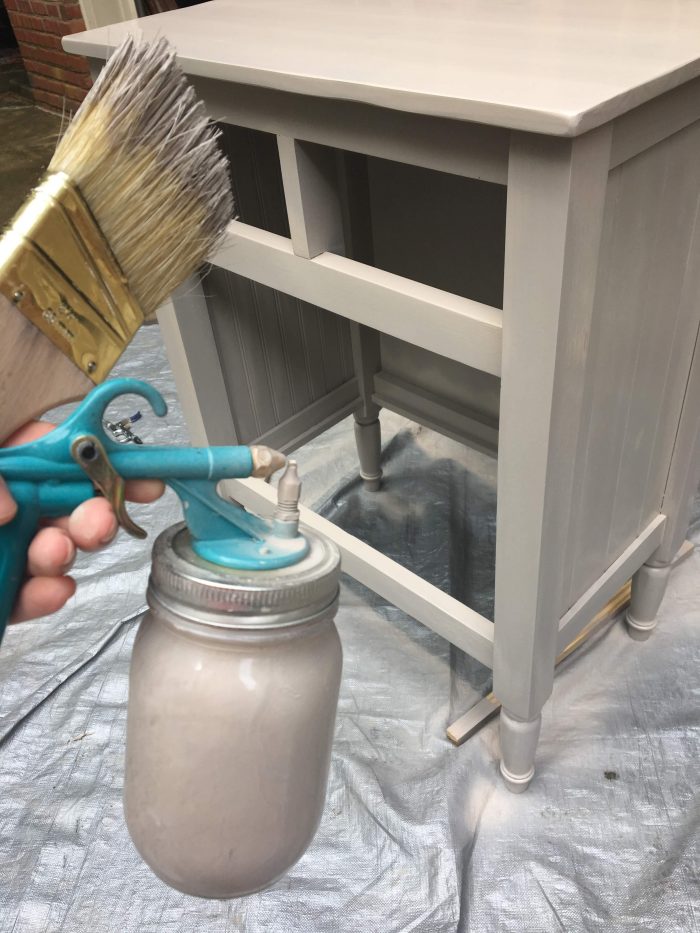 I used my trusty spray gun to spray a few coats of latex paint (see this and this post where I talk more about this little guy).
 After I got the aquarium set up on the stand I attached drawer slides & drawers. I cut drawer fronts and doors out of MDF with a very small gap around each side.

I sanded corners and edges smooth and used my paint sprayer with these too.
 Attach hinges and hardware.
I added clear vinyl on the top where the aquarium would sit to protect from water and used clear contact paper for the bottom of drawers and cabinet shelf.

Happy projects and fish keeping!
 To be honest, 4-1/2 years ago we had goldfish and I thought I’d never buy another fish again. Now I’m kind of obsessed, ha! Back when we had goldfish I made a stand and hood – see here for that project post.

2 Comments
Very nice. And much different than most aquarium stands that I’ve seen.
November 23, 2018 at 7:15 amThank you for your comment!
December 6, 2018 at 7:12 am