Why this post? I recently took apart a Singer 201-2 bobbin winder assembly to remove the rust and replace a spring. When I was ready to put it back together I realized I had no clue how and I couldn’t find anything online to help. I had another 201-2 sitting around and was able to look at it and figure out how to assemble everything.
By the way, I have no clue what all the names of the pieces are so I’ll do my best to describe them.

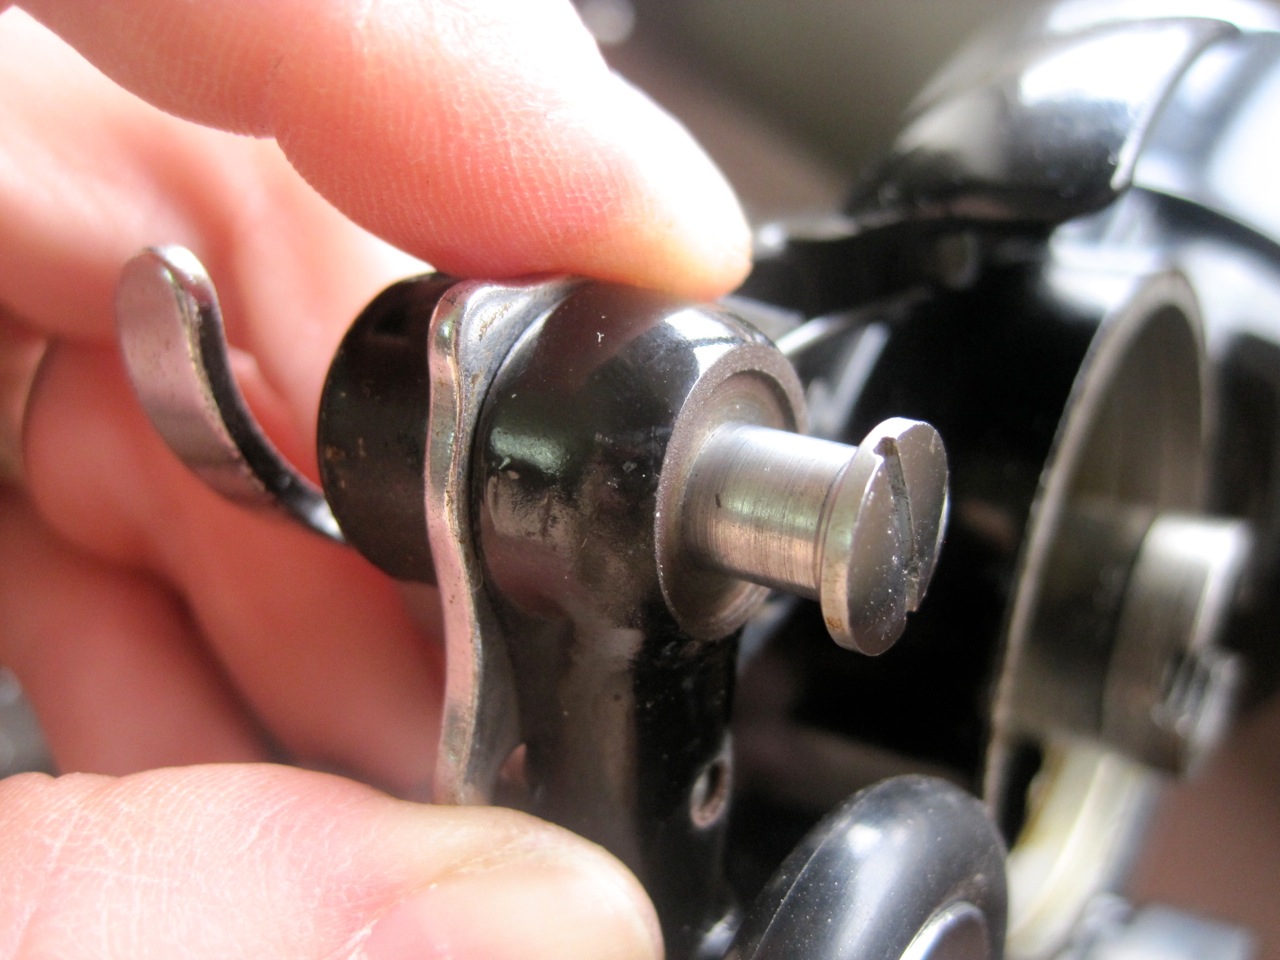
Taking off the handwheel is the first part, and it’s easy. Everything just unscrews and then you can pop off the handwheel by pulling it straight off the machine. The only thing to note is that the black washer seen in the above photo needs to be put back the same way. Before it falls off, with a black sharpie put a dot on one of the black tabs and then a dot to each side of that (on the silver part)… this way you can replace it how it was originally.
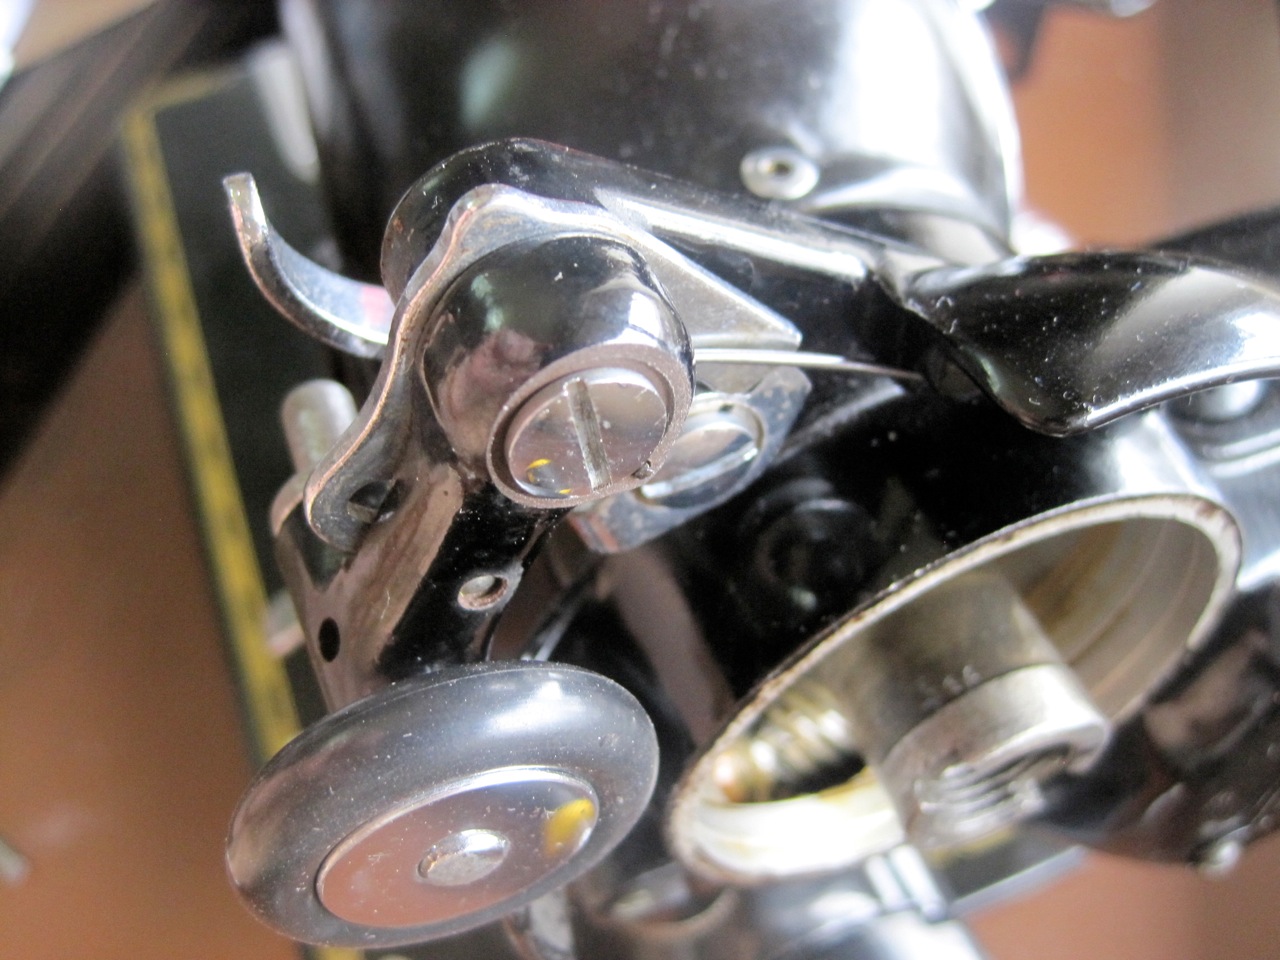
Here are the handwheel parts removed.

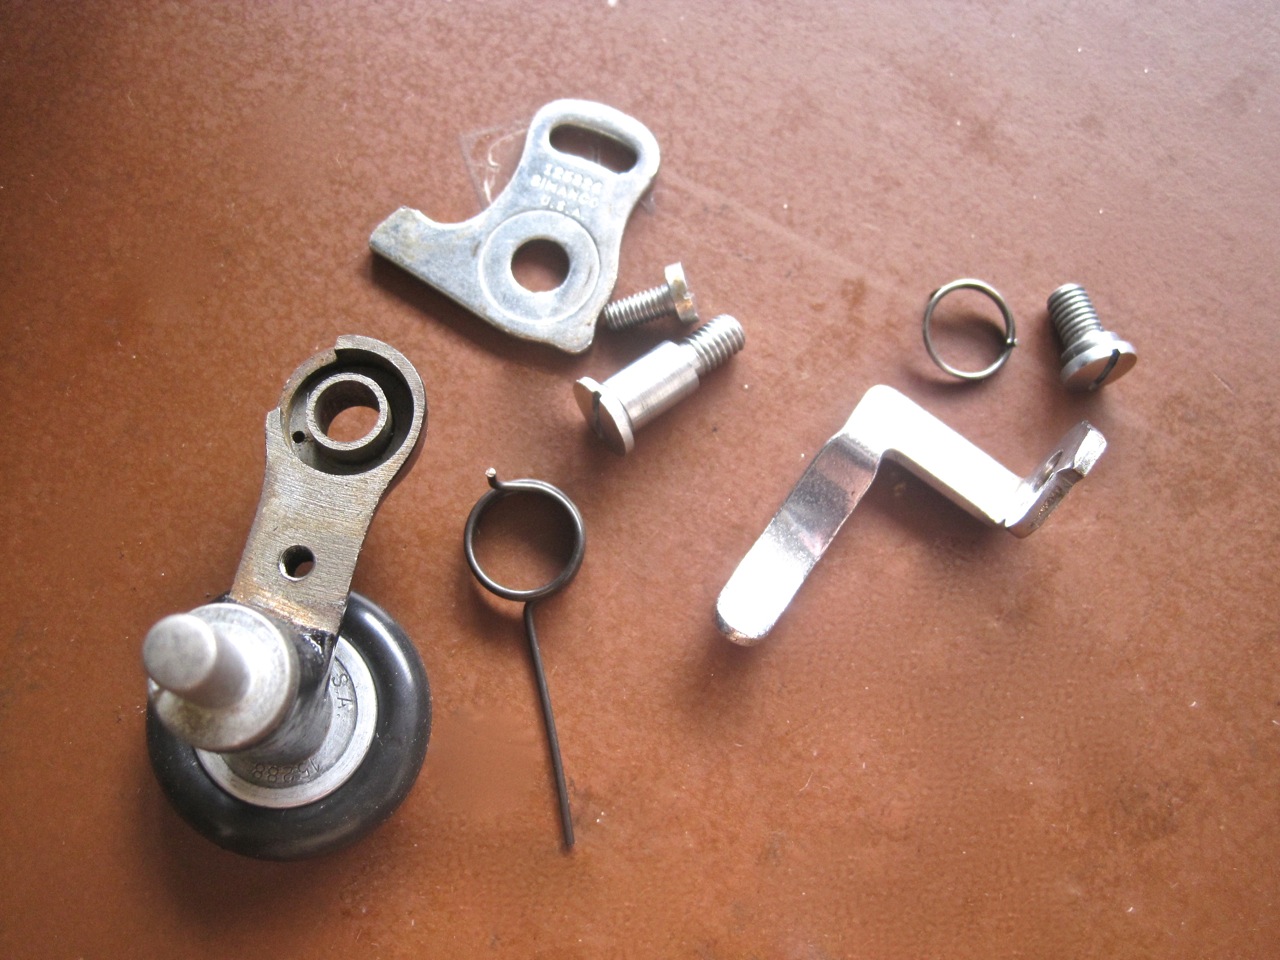
Here is what the bobbin winder pieces looked like when I took them off. They’re nasty and rusty. You won’t believe what I used to clean the rust off with… tinfoil and lime juice! I crinkled up a piece of tinfoil, put a few drops of lime on it and rubbed it over the rusted areas until it was gone. It was fast and easy! I got the idea of tinfoil a year ago when I Googled how to remove rust from bike parts, then I just did another search on home remedies for rust and lime was mentioned.. I put them together and BAM!

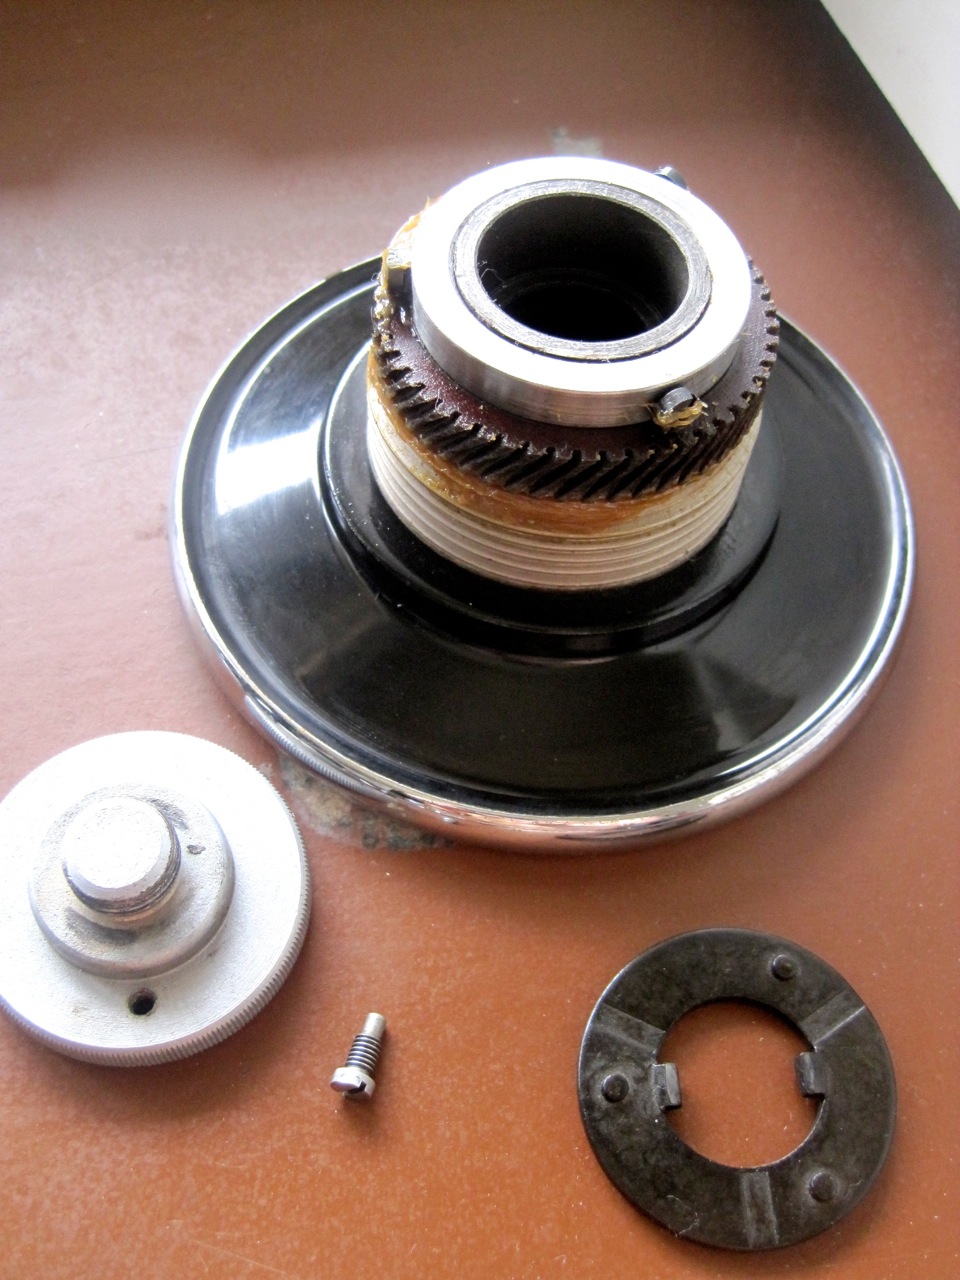
Here’s what the pieces looked like after. The piece I replaced was the spring with the long arm and I added a new bobbin tire.
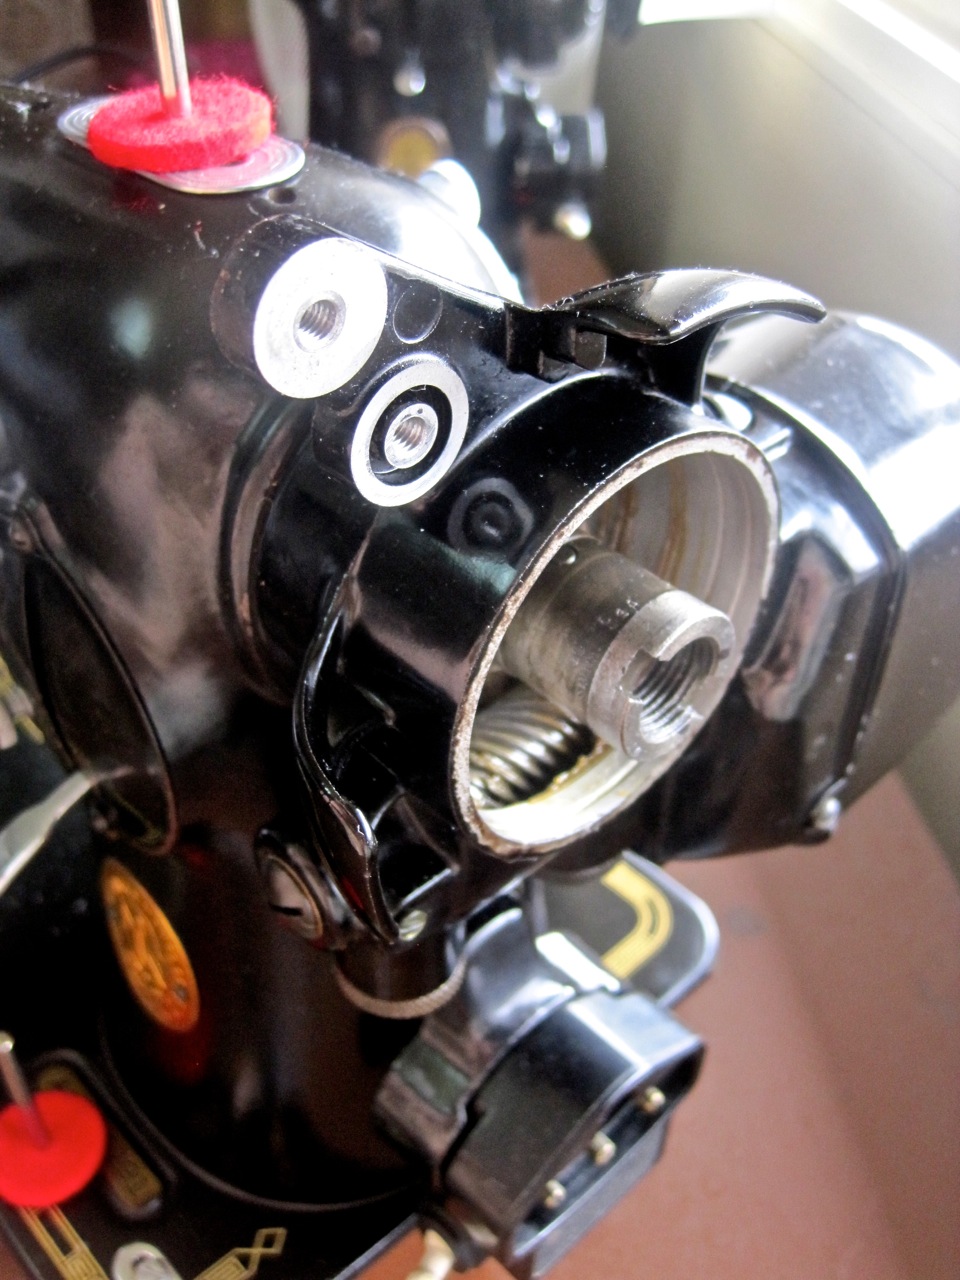
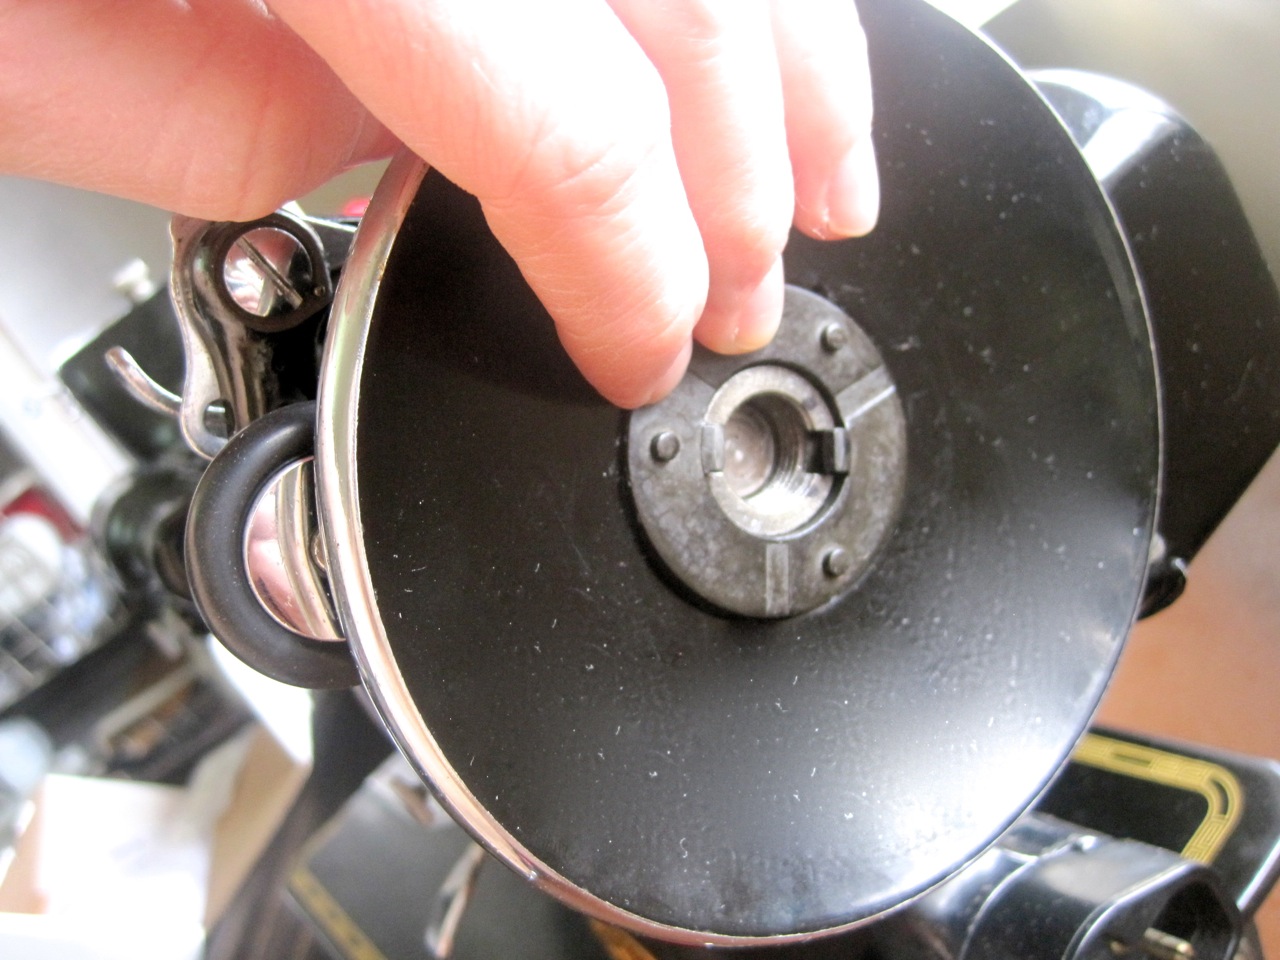
Okay, here’s what your machine looks like.
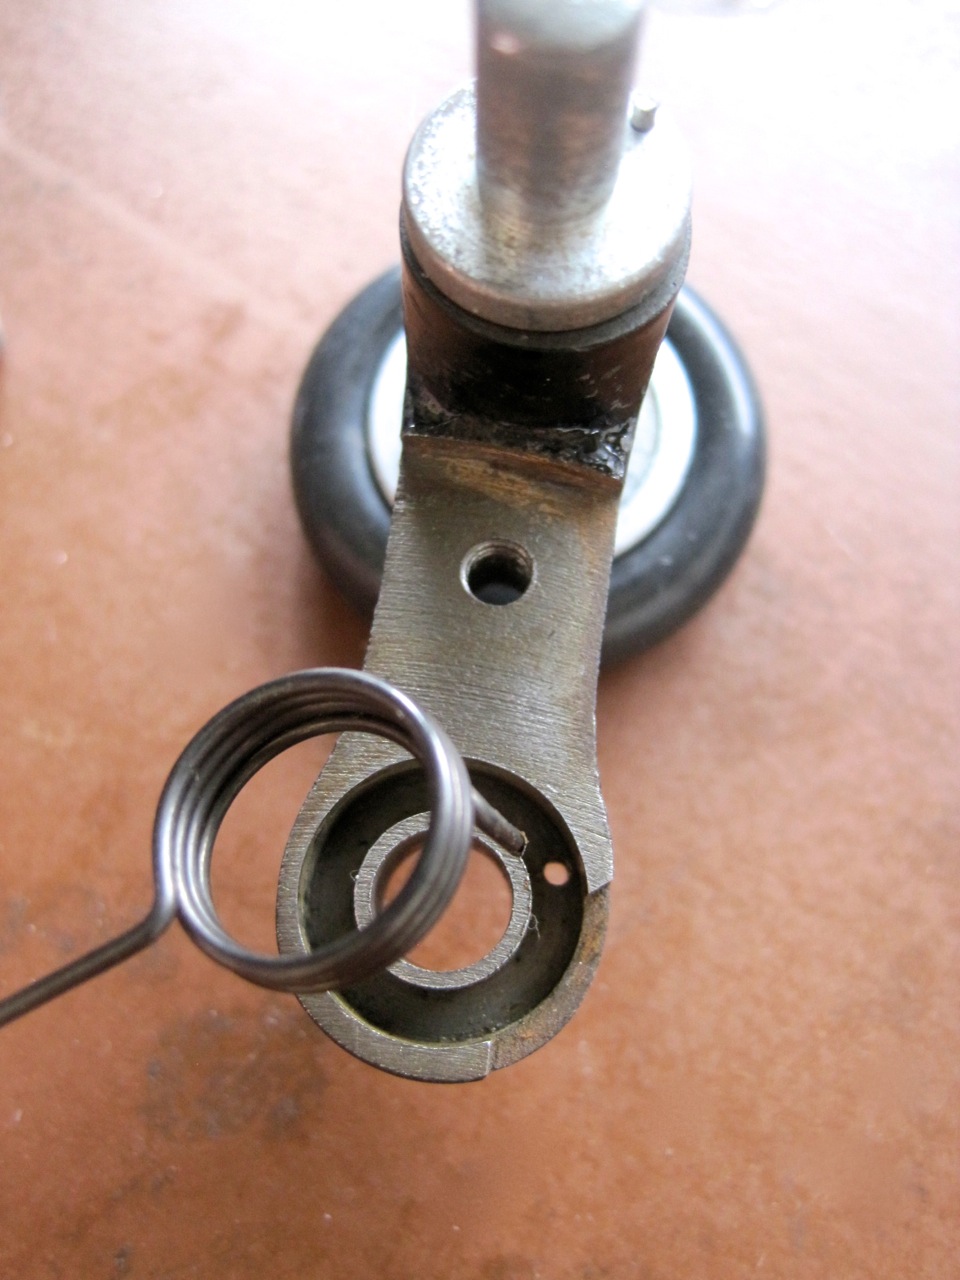
The small spring with 2 little fingers goes in the groove here. Make sure one of the fingers is in the hole inside the groove.

Next, put this silver piece over the spring, matching up the small finger on the spring with the hole in the silver piece.
Align the screw holes together and put the screw(with the lip under the head) in and tighten.
Take the spring with the long arm and put the small finger inside the hole of this part.

Hold the spring down and in place while you turn the long arm so it rests in the open window.
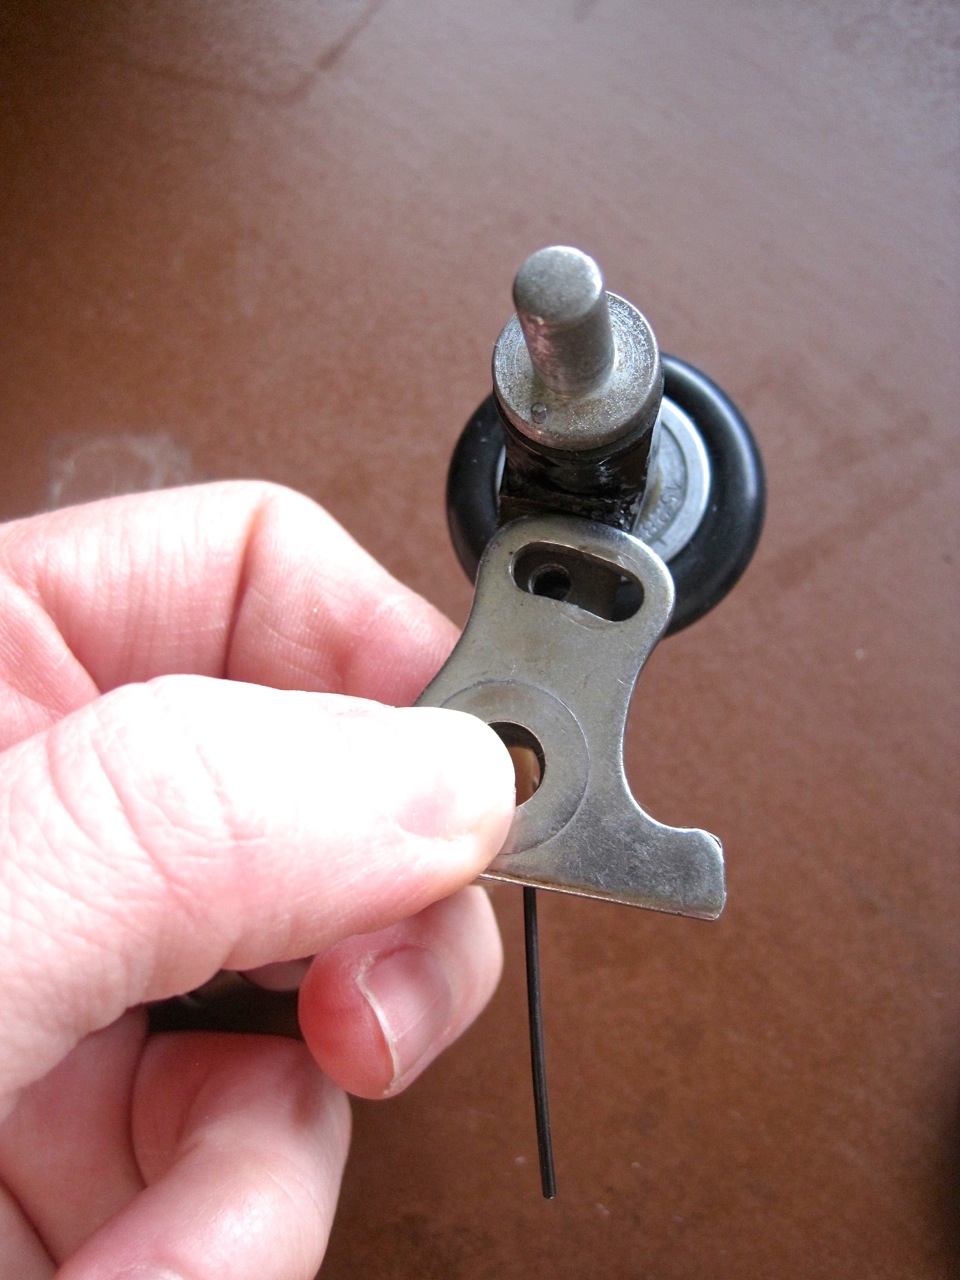
Sandwich your spring inside with this metal piece. Make sure your pieces look like the above photo. You should have 2 screws left, one large and one small. Screw the small one into the screw hole you see in the above photo to hold the flat metal piece down keeping the spring from popping out.
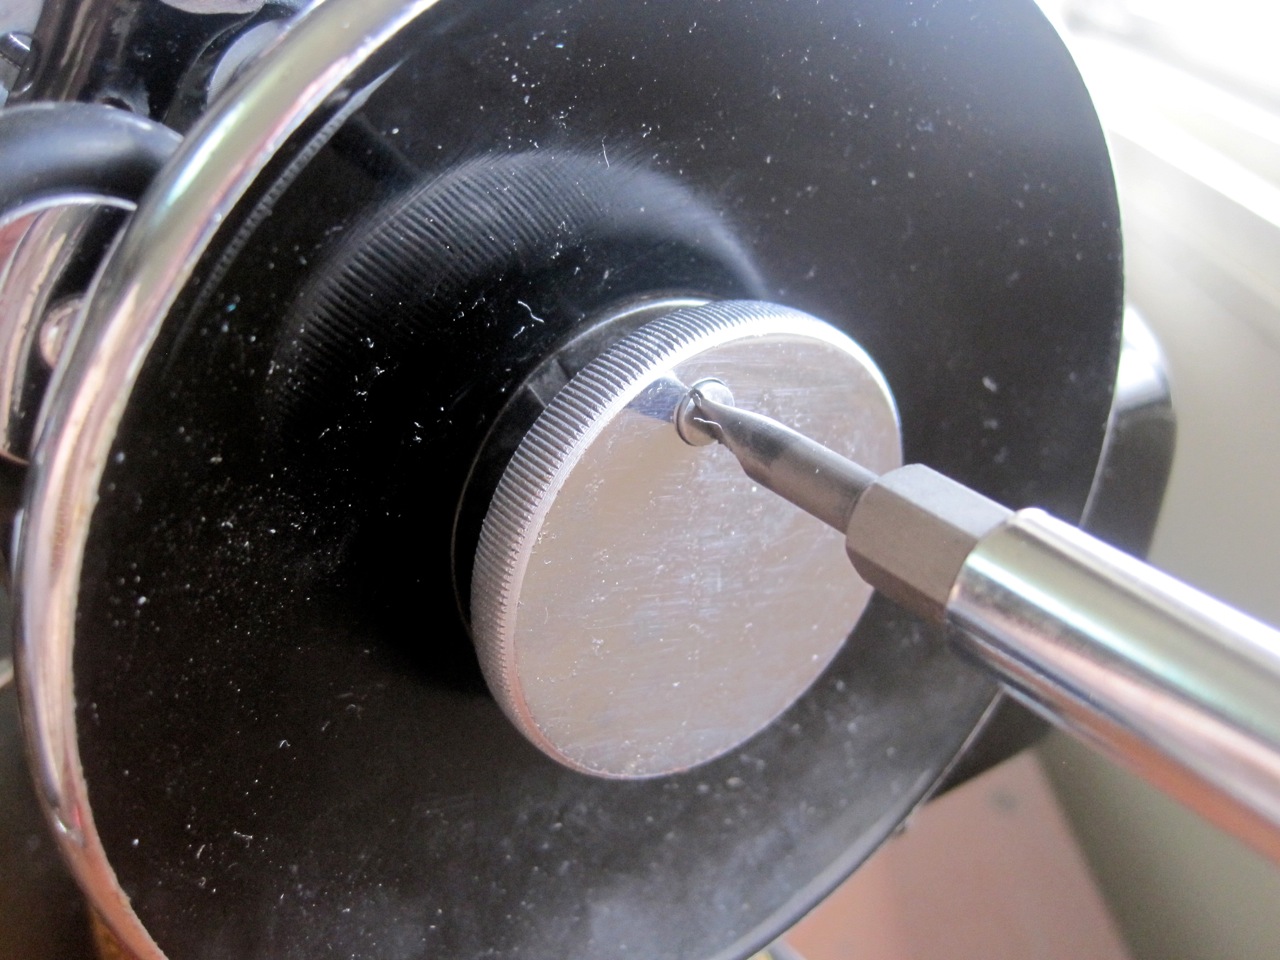
Now put the bobbin tire piece onto your machine like this.

Study the above 2 pictures closely and make sure yours looks the same.
Screw the last screw in.
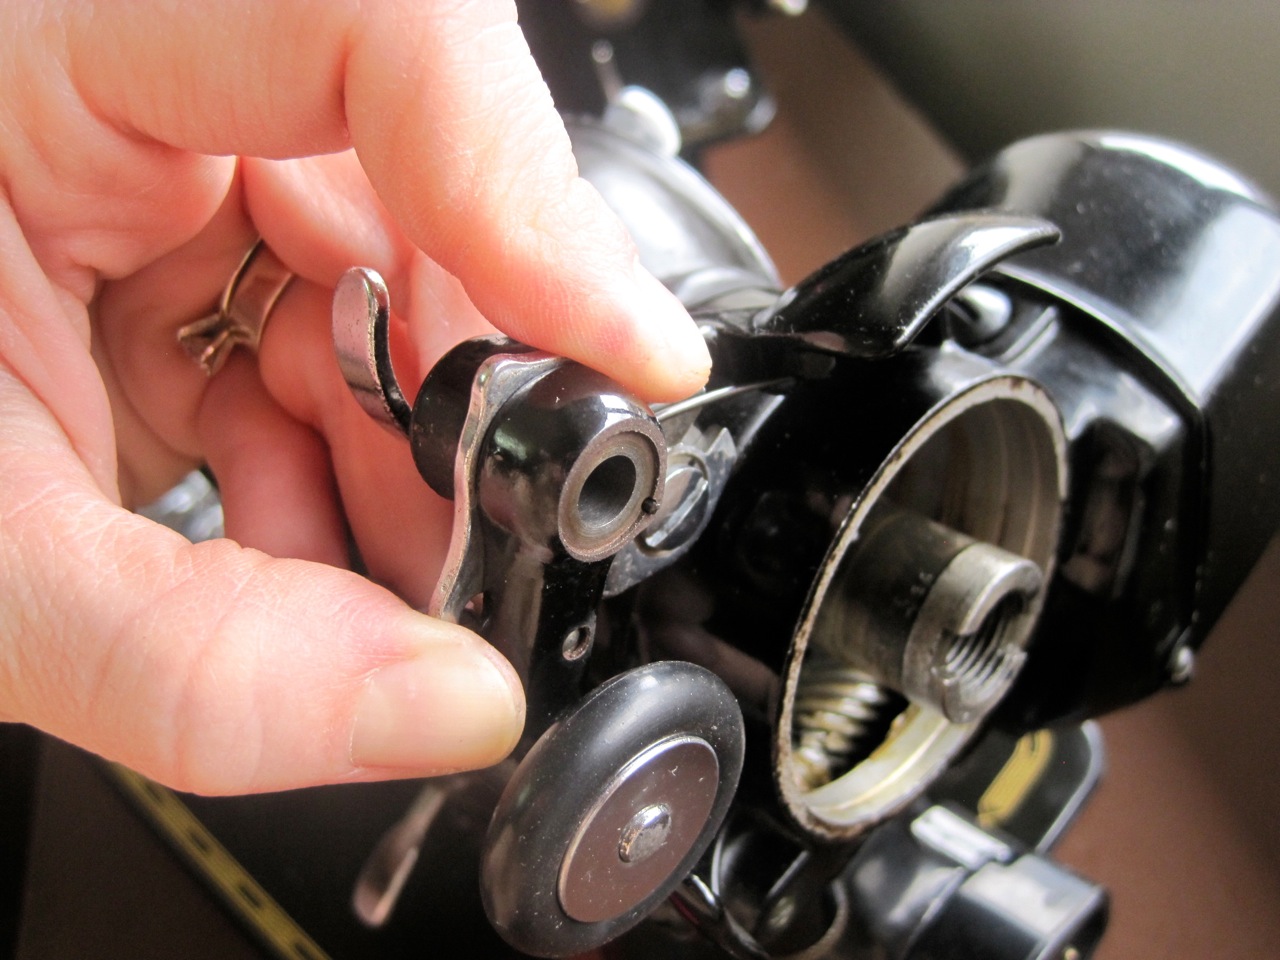
It should look like this. Before you put the handwheel back on make sure the mechanics of the bobbin winder assembly seem to function properly.
Replace the handwheel and put the black washer in with the marked black dots matched up.
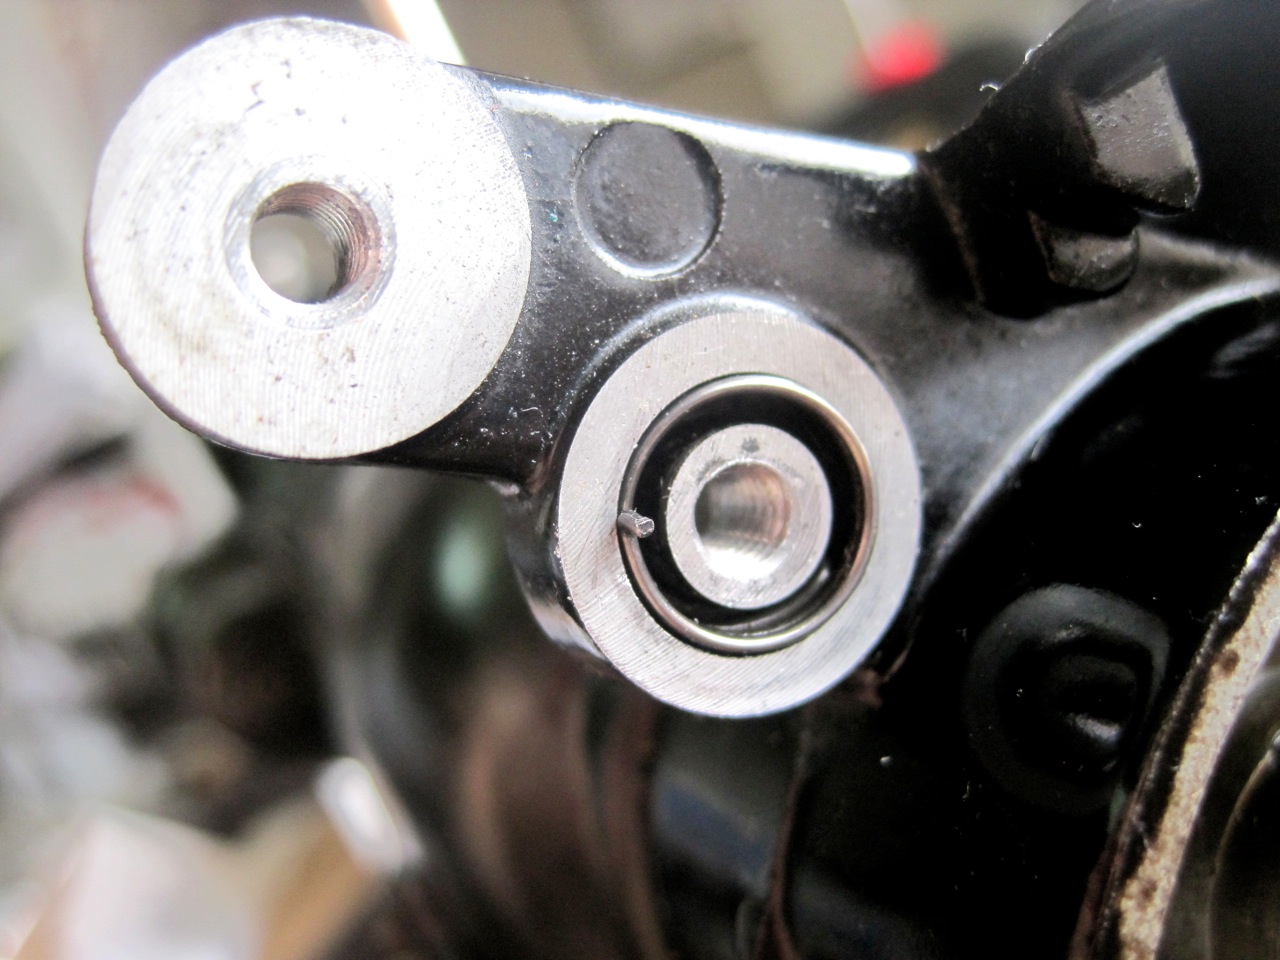
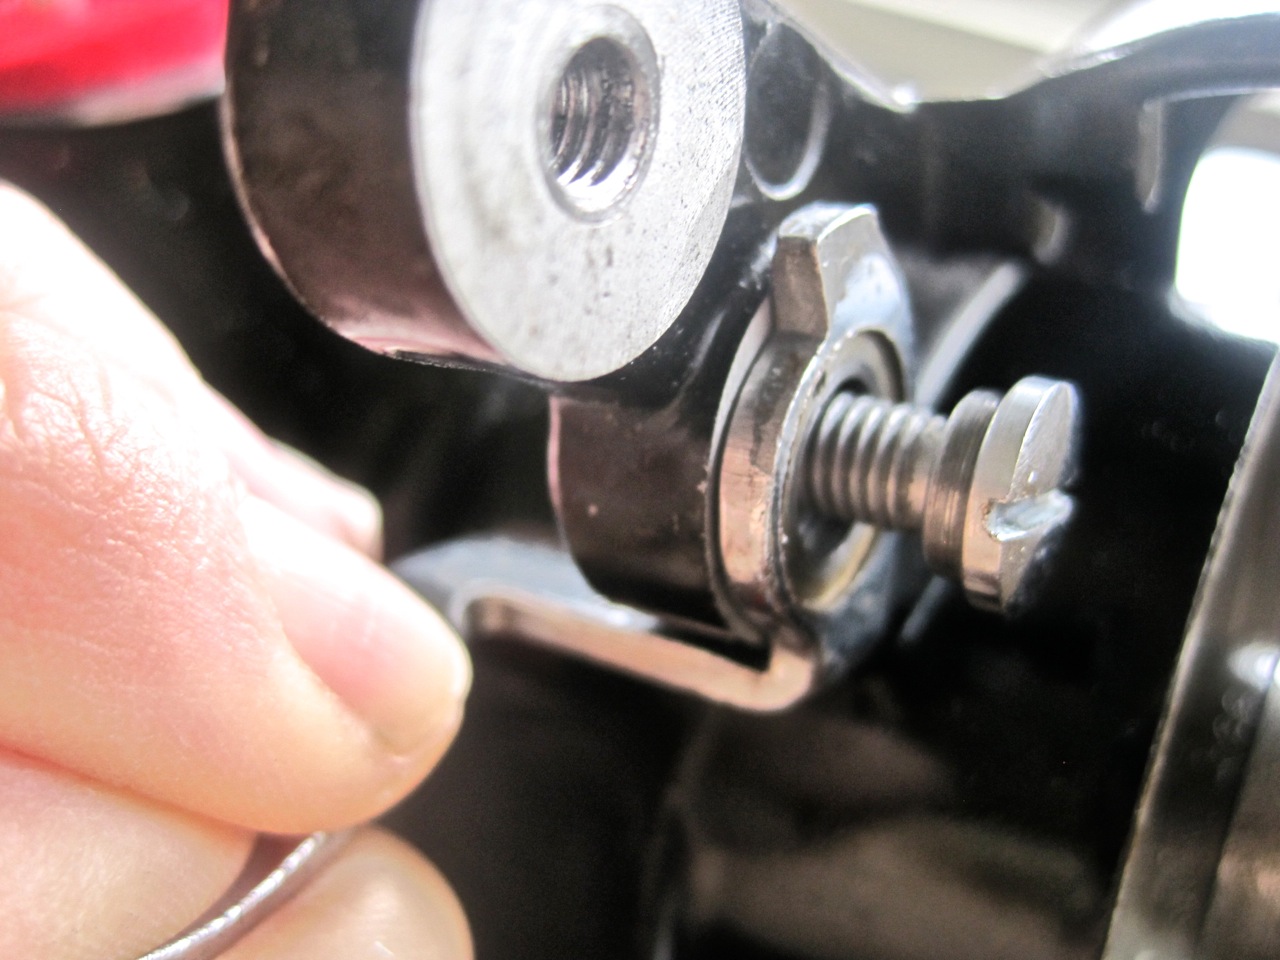
Tighten the large silver piece and stop motion screw.

Your last test will be to see if the tension the bobbin winder tire has on the handwheel is too much or not enough. Push the tire against the handwheel as if to wind a bobbin. Was it hard to engage or does it seem too loose against the handwheel? If you need to make adjustments, loosen the screw in the above photo and make minor adjustments until you feel it is right. Test it out with an actual bobbin, too.
23 Comments
Beautiful tutorial! I have a recently gifted 201-2 that I rewired with a nice tutorial from The Vintage Sewing Machine Blog. I was thrilled that I got it all apart and back together, and have been happily making friends with the machine today. When the bobbin ran out, I went to rewind. I know it was working correctly for a minute- I tested it right after the motor was running. Now it winds fine, but I can't get the needle part to disengage. I can't turn the clutch easily, and don't believe I should be loosening the stop motion (set?) screw to do so. Taking it off, flipping the washer, taking the wheel off and back on, all kinds of fiddling. I can see where some of my playing is causing some wear to parts of that washer so I have stopped. I DID not mark where the washer was when I took it off originally. Any tips? For now, I've decided to leave it all be and next time I have to wind a bobbin just unthread the needle and let it go while the winder does it's thing, but that might be irritating as heck while doing a big quilt. I'm going to buy a boat load of bobbins right now.
December 7, 2013 at 7:45 pmYou shouldn't have to take the hand wheel off completely to fix your problem. I've had an issue after putting a machine back together where the stop motion wouldn't disengage the needle from going up and down. After I tinkered with the stop motion set screw and/or flipped the washer over inside it worked. Sometimes if you look really closely at the washer you can see where the set screw was rubbing originally and try and put it back in at the right place.
Try this first: Look down from the top of your machine where the washer is and twist the stop motion back and forth and try to see where the set screw is hitting. Sometimes it hits on one of the 'ribs' on the washer so you have to flip it over or loosen your stop motion set screw and the stop motion a bit then re-tighten once it's over the 'rib'. If you don't think the set screw is hitting on anything you may need to just twist the washer. Try a 1/3 turn of the washer and put things back together and if that doesn't work try another 1/3 turn.
Like I said very first, I had a machine with the same problem.. sometimes I could get the needle to disengage but most of the time it would be running when winding a bobbin.. a few minutes of tinkering and adjusting things and now it disengages every time!
Good luck!
December 8, 2013 at 9:23 amI got it! Thanks to you and all the other bloggers out there that are helping me get this machine back to form. I am loving her a little more everyday!
January 27, 2014 at 12:29 amI bought a new ring for my bobbin winder, although I don't think it's critical, at this time. However, I can't seem to find anything about how to change it. From this tutorial, it looks like I have to take the wheel off to do this. How do you change it? The old one doesn't seem to just roll off, so I don't know if rolling the new one one is how to do it. I'm tired of messing with the cabinet, and just want to sew!
June 22, 2015 at 9:36 amHi Linda! The rubber bobbin winder tire just slips off, or rolls off like you said. It may be stuck just from being old.. give it a good pull. The other one rolls on too! Good luck!
June 22, 2015 at 9:37 amHello, I found your blog through a recommendation on http://www.sewing.patternreview.com. Thank you for the wonderful, clear tutorial! I have ordered the new bobbin winder spring and can't wait to get started. I have cleaned and serviced my friend's Singer 15-91 and this is the last thing to get done. I have learned so much and it works so well, I hate to give it back! Thanks again!
July 4, 2015 at 12:18 pmHi Amy! I'm glad my blog was able to help you out.. That's the whole reason I do this! 🙂
July 4, 2015 at 12:25 pmHello – Nice write-up you made for the bobbin winder assembly. I was wondering if there is any adjustment that can be made for a winder that is filling the bobbins less than 3/4 full? Can something be done so they fill up a little more?
November 12, 2015 at 11:49 pmDani, I could just jump through this laptop and give you a HUGE hug…THANK YOU!!!!!!!!!!!!!!!
April 4, 2016 at 8:59 amLol! I'm so glad I've helped in some way – it's why I do all these crazy random posts, haha!
April 4, 2016 at 8:59 amSorry for the late reply! Yes there is an adjustment. Notice how there's a metal finger that rests down inside your bobbin while it's winding and it pops up when the bobbin is "full". There's a screw you can loosen, change how far down/up that finger sits and then tighten where you want it. In your case, you'd want the finger to sit higher for a more full bobbin.
April 4, 2016 at 9:02 amThank you for your help! Your blog post made me brave enough the replace the bobbin winder assemby on my 201! A guy sold her to me with a 15-91 bobbin wonder on her. She wound a nice class 15 bobbin but thise dont fit in a 201!
August 6, 2016 at 2:12 pmHello,
I have a 1943 Singer model 201. The rubber tire/friction wheel on the bobbin winder broke and came off. Where can I order the new rubber ring? And what is the quickest/easiest way to replace it?
Thanks so much!
Martha S.
August 21, 2017 at 12:29 amHi Martha! You're in luck because replacing the bobbin winder tire is super easy! The old ones get dry and crack and usually need to be replaced. I buy mine on eBay and you simply push/roll it right onto the metal "rim" where it should go. The handwheel is a bit in the way but it's still pretty easy! Good luck!
August 21, 2017 at 12:34 amI have a Singer Model 66 treadle machine that needs a base – I'm going to add a hand crank and use it with granddaughter. I would like a base with a cubby. Still selling these?
April 25, 2018 at 2:31 pmHi! Yes I have several: https://www.theprojectlady.com/p/sewing-machines-bases-for-sale.html?m=1
April 25, 2018 at 2:31 pmHi, Dani. I just acquired my first vintage Singer sewing machine – a 201. As an inexperienced buyer, I didn’t realize how much work it needed until I started to learn more about these machines. For instance, in the last photo above there are two silver colored screws that are missing on my machine. Are these necessary for the machine to function properly? If so, what are they called (so I can try to find replacements)? Thanks so much for posting these blog entries. I’m learning so much!
October 30, 2020 at 12:05 pmHi there!
I’m assuming they’re screws for the bobbin winder assembly? If so the machine will still sew and function in that regard but you wouldn’t be able to wind a bobbin. Ebay is your best bet to find replacements (someone may be selling the whole assembly rather than just the screws) or you can buy a stand alone 3rd party bobbin winder. Good luck!
November 5, 2020 at 8:05 amHello, Dani… EnjoyEd your Writing of Singer sewing machine’s. I have three, a 15-125, and two 15-91’s, that are in my sewing studio, they Sew Beautifully. I like my oldest 15-91(circa’1935). One of these are sewing my FMQ’s. Is there a Attachment for my Class 15’s that are Zigzag pattern’s??? Please Let me Know Something… Thnx’.
January 22, 2022 at 6:32 amHi Dave! If I understand you correctly, you’re looking for a way to do a zigzag stitch on your class 15 Singer? Singer made specific attachments for this.. just search on eBay for “Singer Zigzag Attachment”… you can find them for under $20. They’re a bit clunky just like the buttonhole attachments but they work fine.. just can’t go very fast.
January 22, 2022 at 10:07 amThank you so much. Just what I needed for my 201. 🙂
May 2, 2022 at 11:37 amYour tutorial is great with all of your details, but my sewing machine has a broken long spring as well, and I can’t seem to find a replacement for one, do you know where I could locate one?
December 23, 2022 at 1:53 amEbay is surprisingly one of the best places to get parts!
May 19, 2023 at 7:07 am