
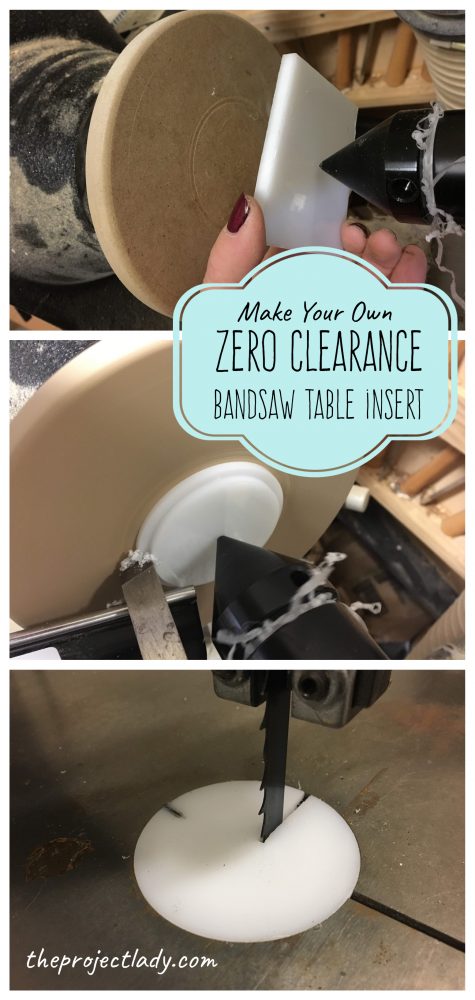
So…. I messed up my bandsaw insert by trying to saw through a cylindrical piece of wood…

…now THAT was a shocker!
I was dragging my feet about buying a new one for $15 and then waiting for it to be delivered. I looked around the garage to see what I could make one out of.
I found a 1/4″ thick piece of leftover UHMW plastic from a previous jig I made and was thrilled.
The only thing I wasn’t excited about was trying to get a perfect circle and then setting up my router to make the bottom inset.
WAIT… a perfect circle!?.. My lathe can do that!!
WHAT I USED:
- Lathe with Faceplate
- Double-sided Sticky Tape
- Circle Compass
- Calipers
- Parting and Skew Turning Tools
- 1/4″-thick UHMW Plastic
I grabbed my new faceplate and mounted a thick piece of MDF to it for my turning surface. I measured the opening of the bandsaw table and scored the surface of my plastic with my circle compass to be just the right size. TIP: make an obvious impression in the center of the circle with your compass for the next step.

Mount sticky tape on the back of plastic…

..and use your tailstock to center plastic over faceplate by using the center impression against your live center.
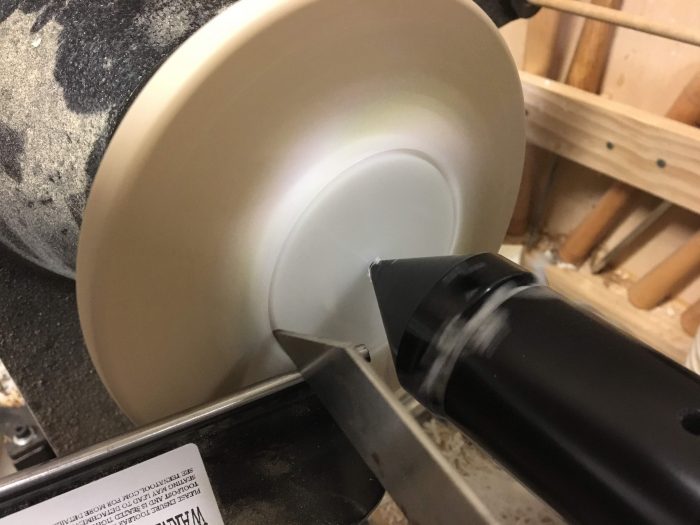
I used my thin parting tool to cut the circle just bigger then my scribed edge.

Next I crept up on the size little by little using my scraper tool. Once I was getting close I unscrewed the whole faceplate to test the insert in the table opening while it was still attached (remounting/centering back on the faceplate wouldn’t be ideal).

Once I got the outer size just right (fit snug in the table) I used my scraper to make the recess. I used my calipers to test the size as I took off a little at a time. I also unscrewed the faceplate several times for test fits. Once my faceplate was sitting flush against the bandsaw table I knew it was seated just right.

I used a putty knife to pry the plastic away from the faceplate and remove the tape.

Perfect fit!

There’s a small indent in the table that would keep the insert from spinning… I heated up a small nail to stick into the plastic edge.

New Vs. Old – I rather like mine!
Stay safe ya’ll!

No Comments