

Our church is doing a service project where we will sew fabric surgical caps for a local Pediatric Surgical Unit. The children get to pick the cap they want to wear during surgery and take it home as a keepsake. The staff know how much this means to the kids and families – it eases their anxiety by letting them choose something which gives them a feeling of control and also lets them know someone was thinking about them by creating something special.
I hope this post will help other individuals or groups with a service project of their own!
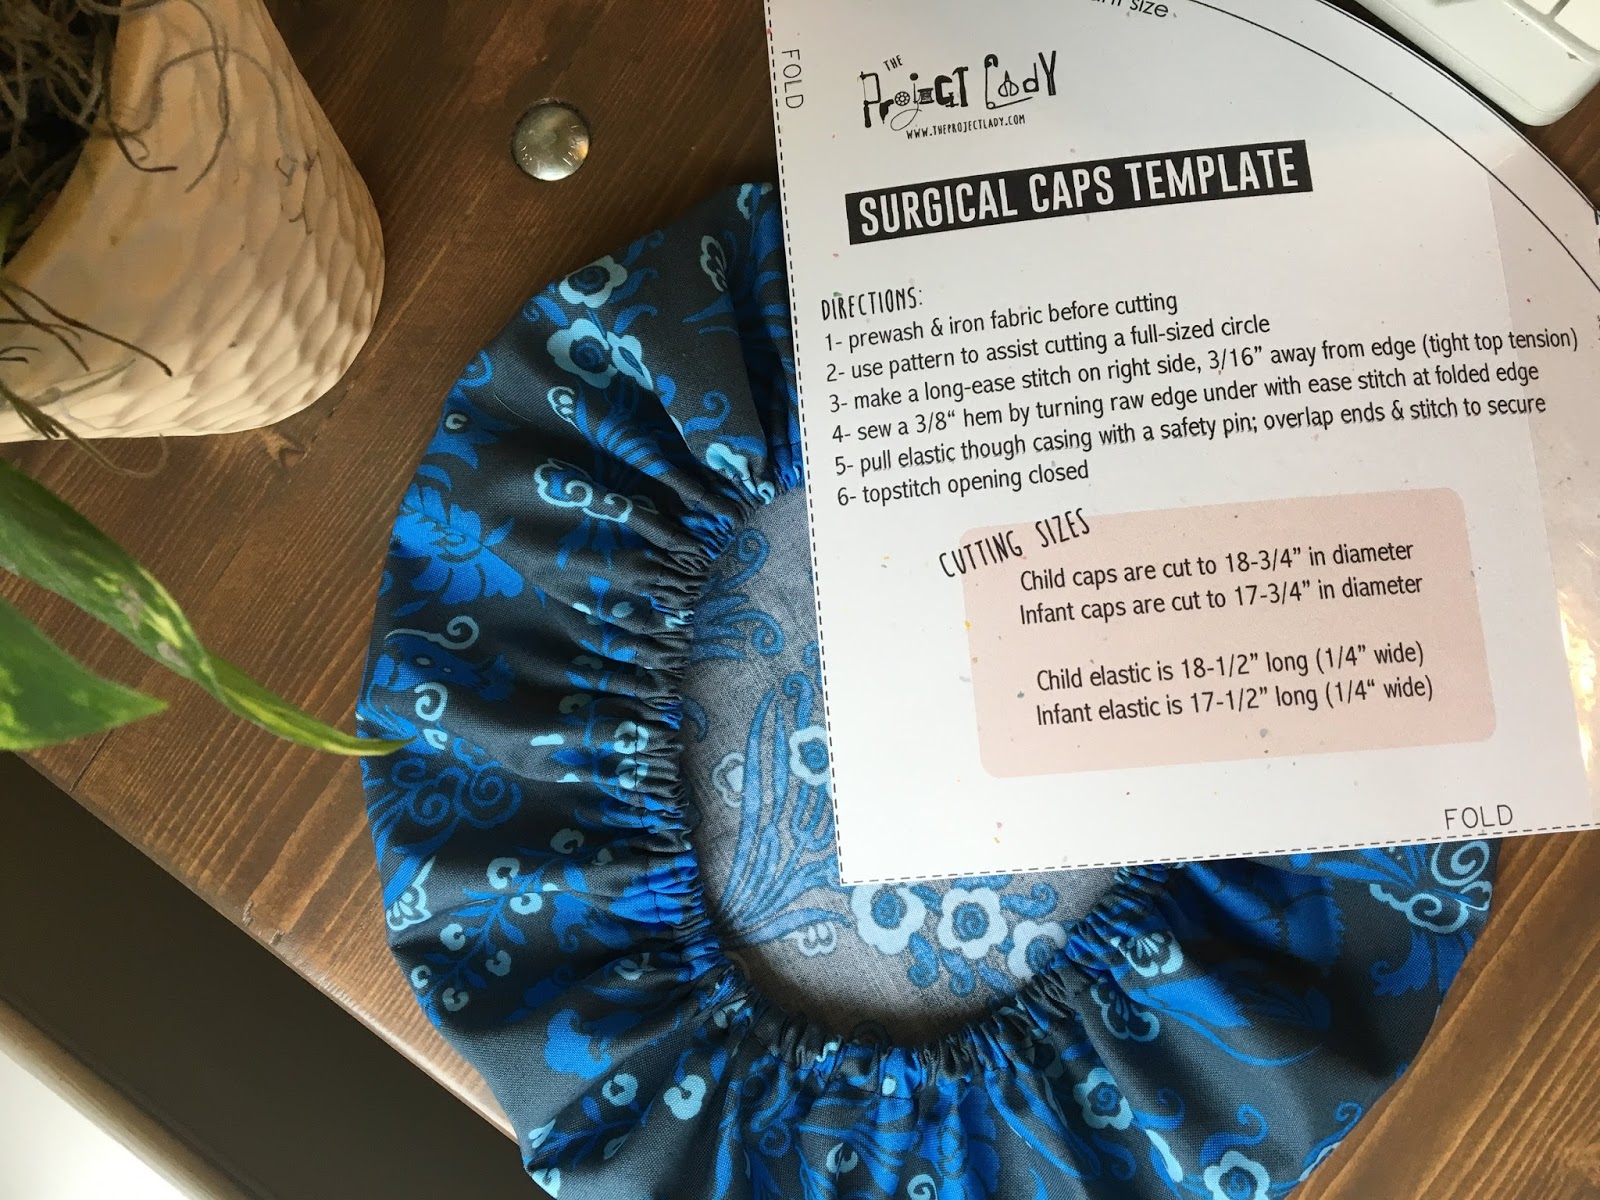
Each cap is made from a large circle and only takes about 10 minutes to make.


The caps are made from quilters cotton fabrics (no flannels or glitter). Fabrics are chosen with colors, patterns and characters children would like.
The infant size is for up to age 2 and the child size is for ages 2-10.
SUPPLIES NEEDED:
quilters cotton fabric (you can get 4 caps out of 1-1/8 yard)
1/4″-wide elastic
matching thread
TOOLS NEEDED:
template (click here to download)
safety pin or other tool for pulling elastic through casing
scissors
– TEMPLATE + CUTTING FABRIC –

Ensure you print the template with ‘no page scaling’ or ‘scale to 100%’. Tape template pieces together along bold dotted line and cut out.

I used the template to make a half-circle template from a poster for making cutting easier.
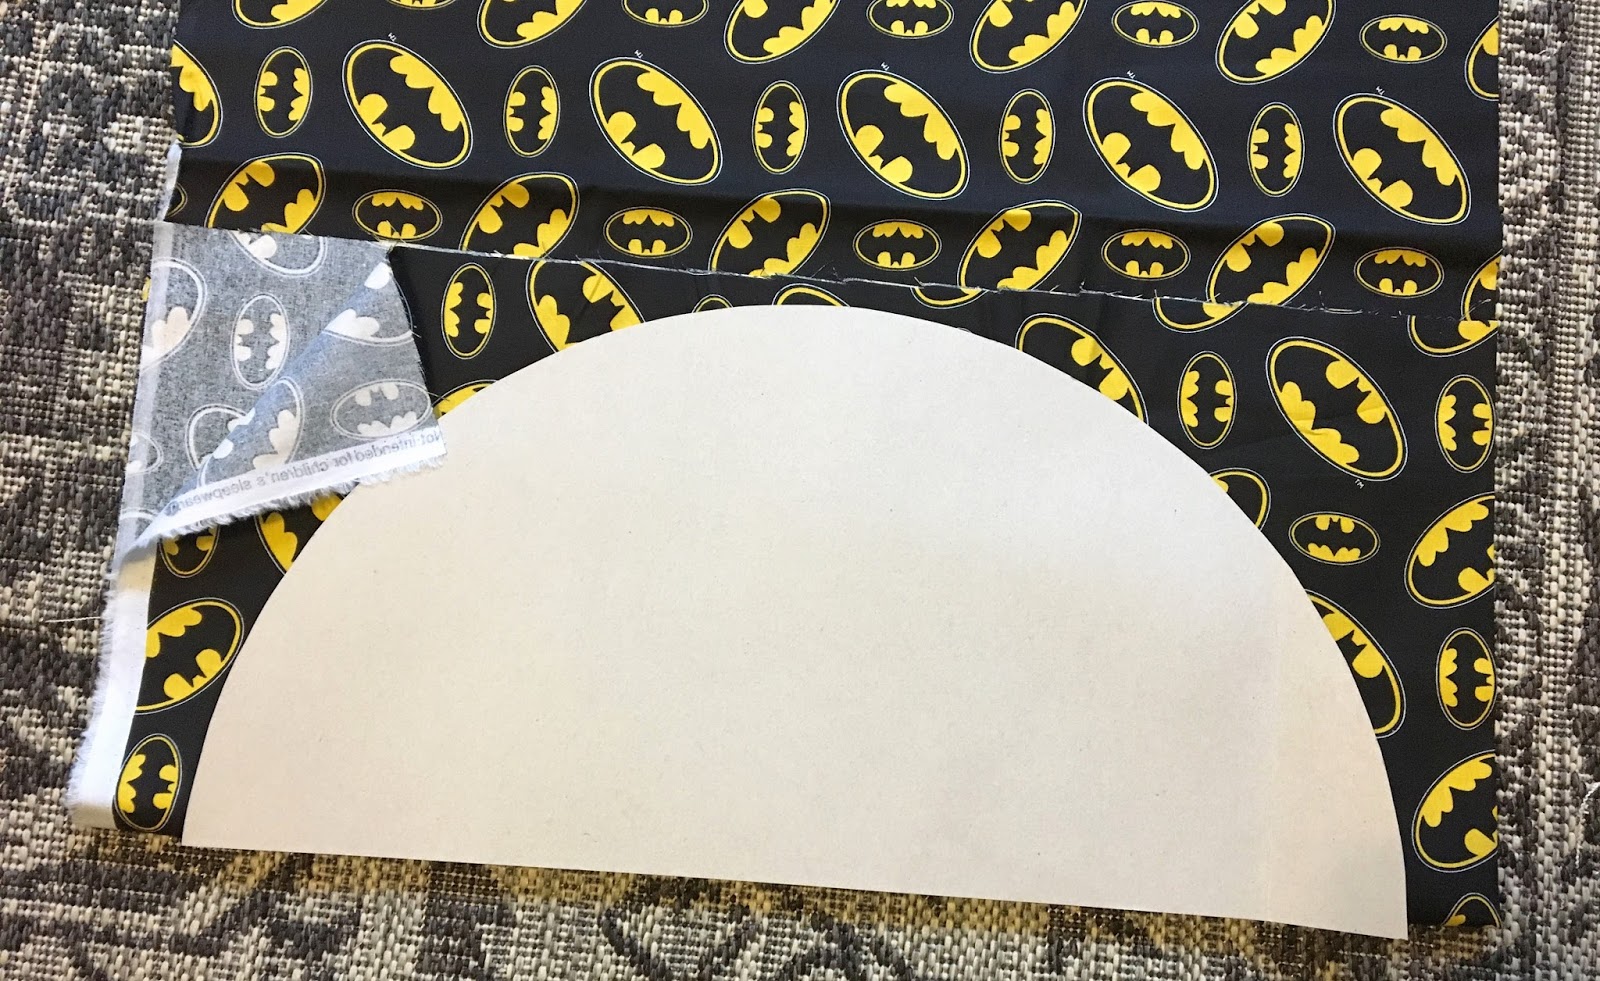
I found it easiest to cut the fabric out just how it comes off the bolt (folded in half with selvage sides together). Fold one end of fabric up just enough to fit your flat template edge along the fold of fabric.

Cut along template…

…and you’ll have 2 circles in just a few seconds! To keep cutting, I just moved the end of fabric up again to make a new fold for the template.
Cut elastic according to the size cap you are making-listed on the template.
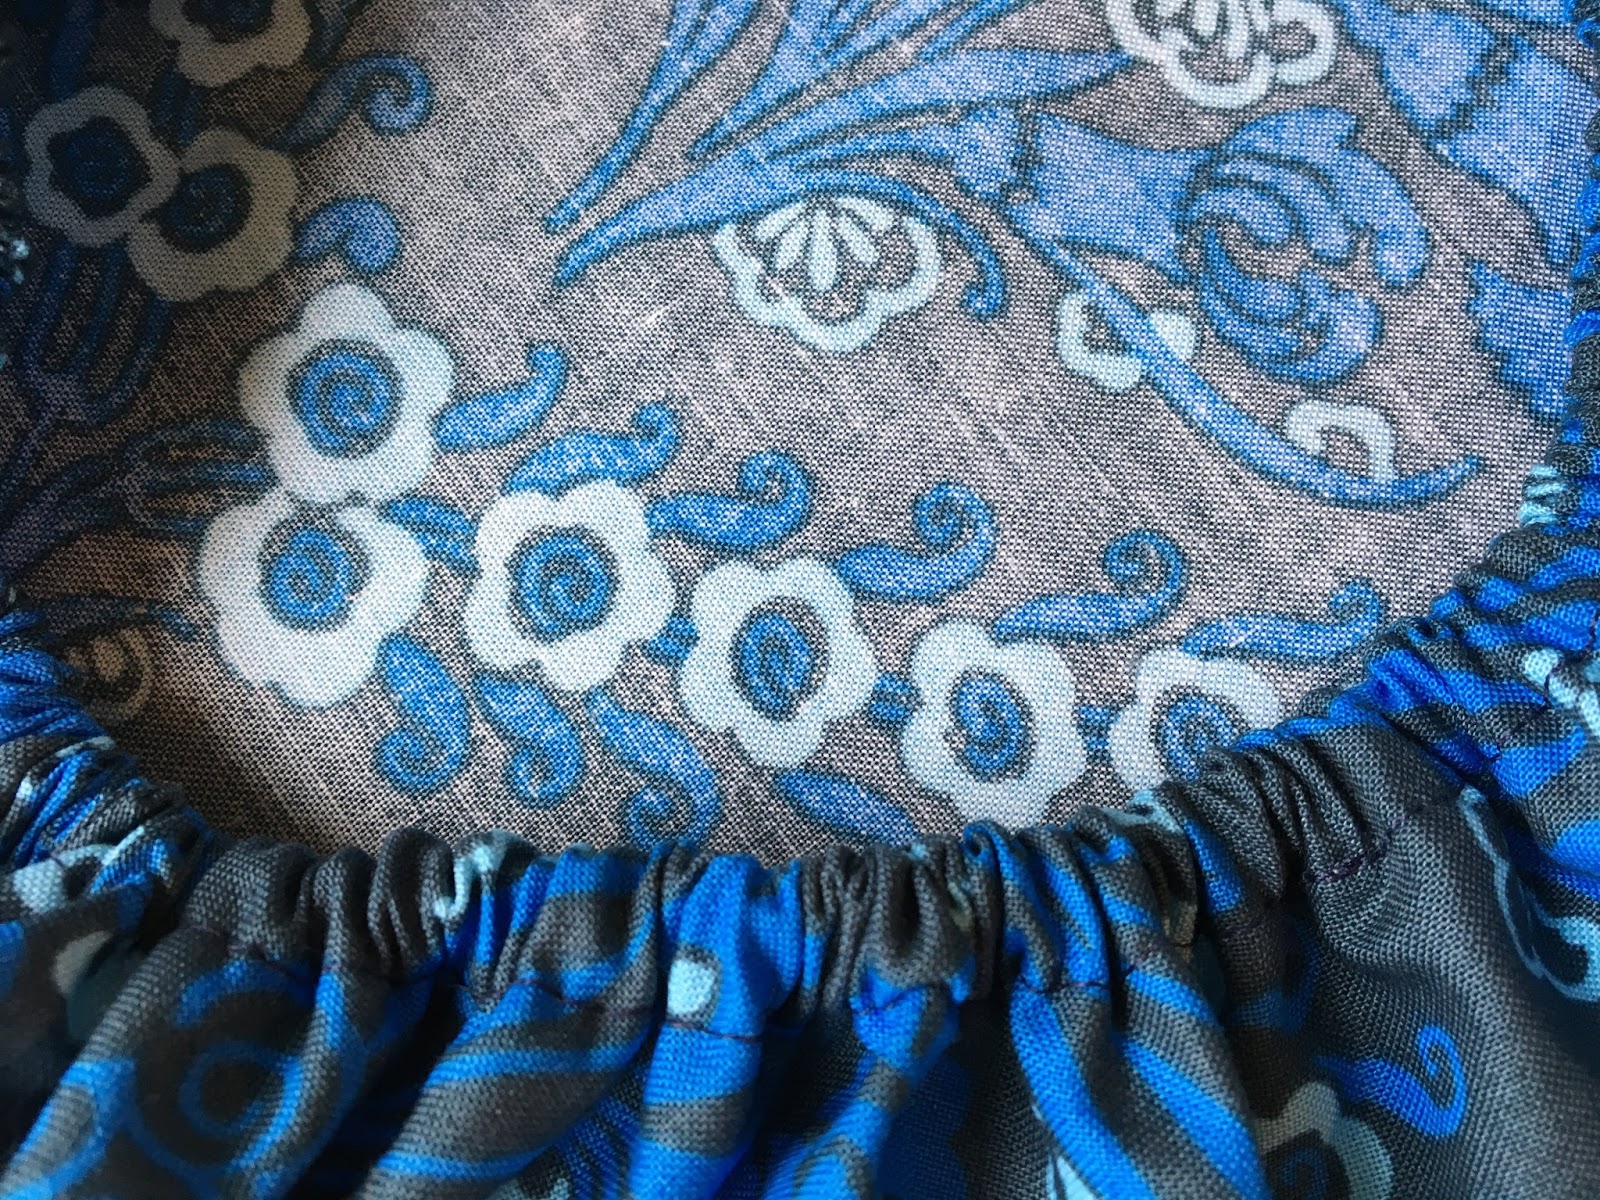
– SEWING HEM –
If you’ve ever tried to sew a hem on a curved seam you know it’s a challenge! The trick is to make an ease stitch along the edge to tighten the edge (with small gathers) so it will match up with the smaller diameter of the circle when you fold it inwards for hemming.

After making several caps I found that it was best to:
1) use a long stitch for ease – between 4 and 5
2) use a tight top tension – 1 to 2 steps up from your regular tension*
3) sew your ease stitch on the right-side of your fabric about 3/16″ away from the edge (any less than 1/8″ and there won’t be enough fabric to turn under
*sew one cap at a time to figure out what tension works the best for the ease – if you get it just right you won’t have to adjust your stitch like you would by pulling the threads to gather. If your stitch is a bit too gathered when you go to turn the hem, clip a loop of thread in the top tension to release some tension.
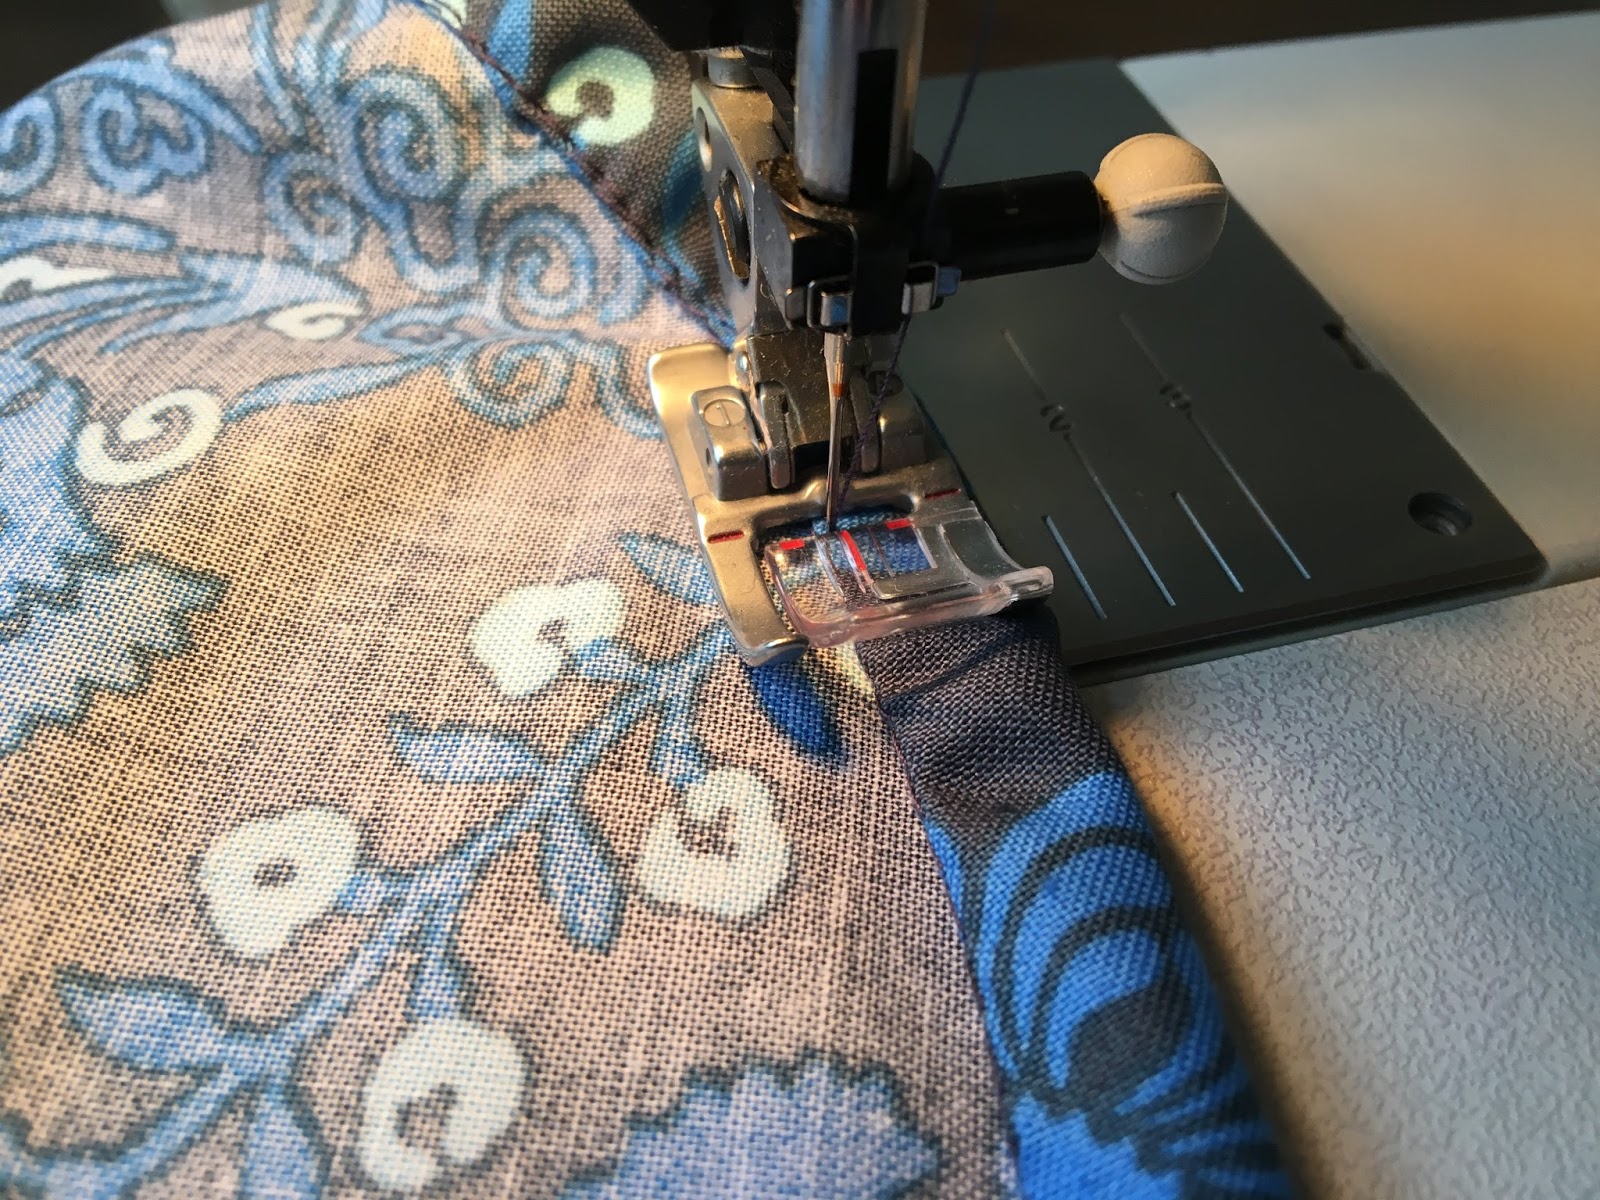
Change the tension and stitch-length back to your regular settings. Make a 3/8″ hem by turning the raw edge of fabric under, keeping your ease stitch right along the edge of the hem fold. Leave a 3/4″ hole for adding elastic. TIP: sew as close to the edge as possible to ensure you will be able to pull your elastic through easily.
– INSERTING ELASTIC –
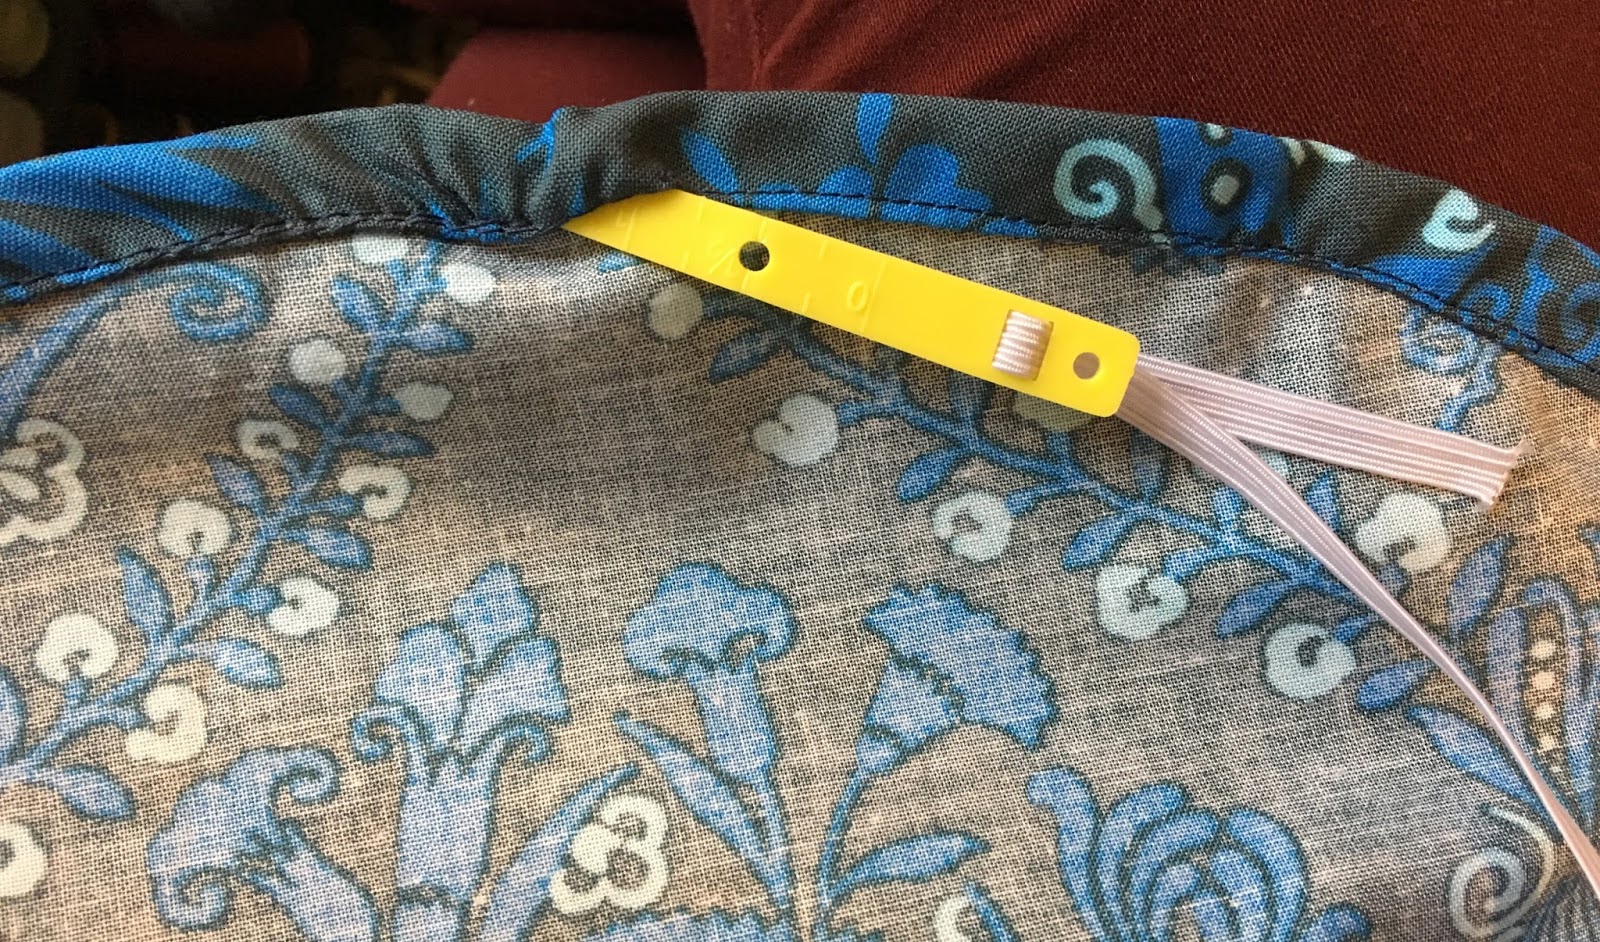
You can use a safety pin, bobkin or a plastic tool like I have. I prefer using something longer than a safety pin because it allows you to slide the elastic through faster.
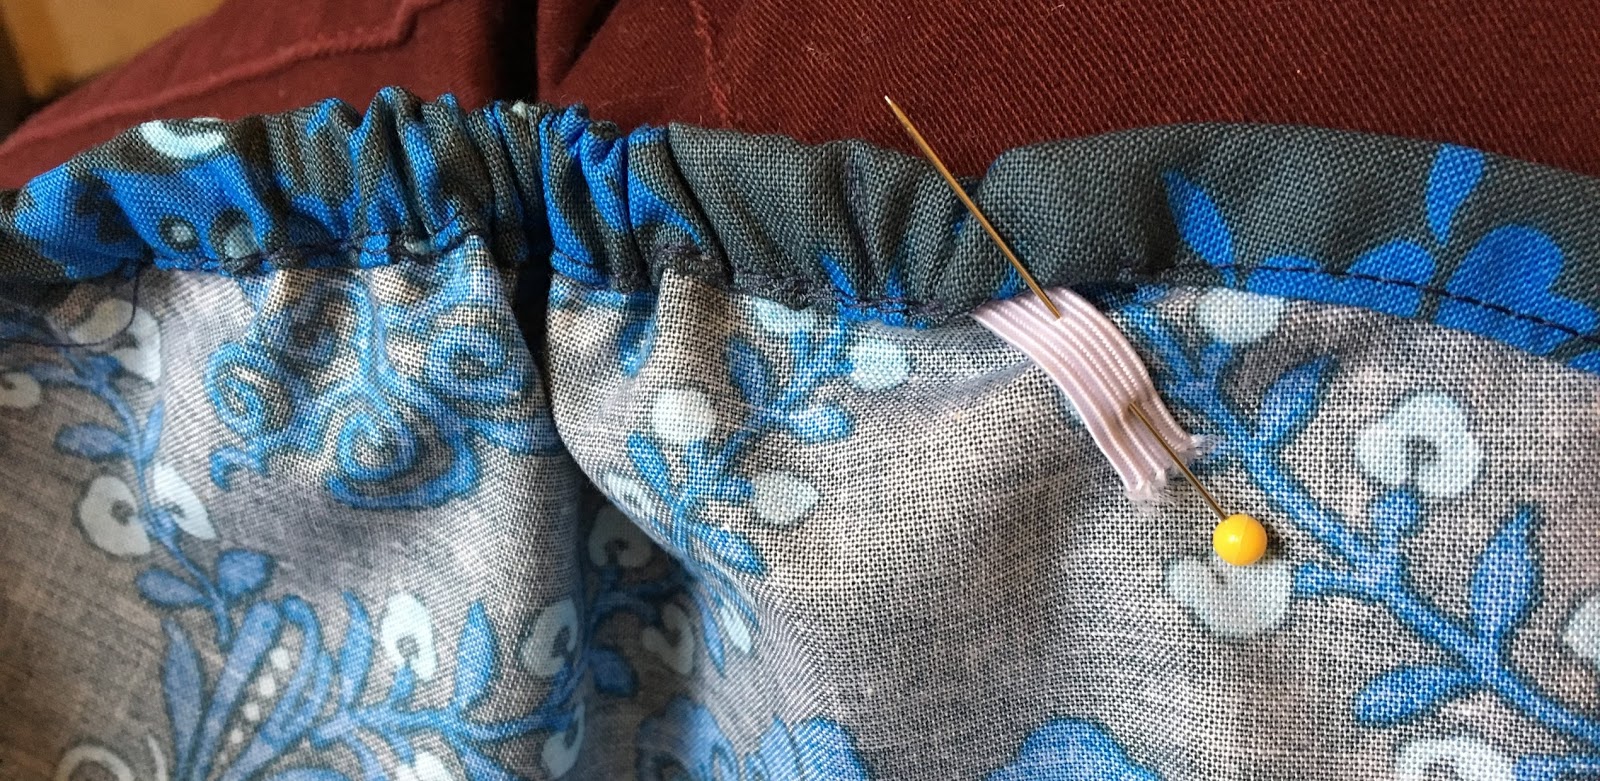
Pin the tail end close to the opening so it won’t pull through.
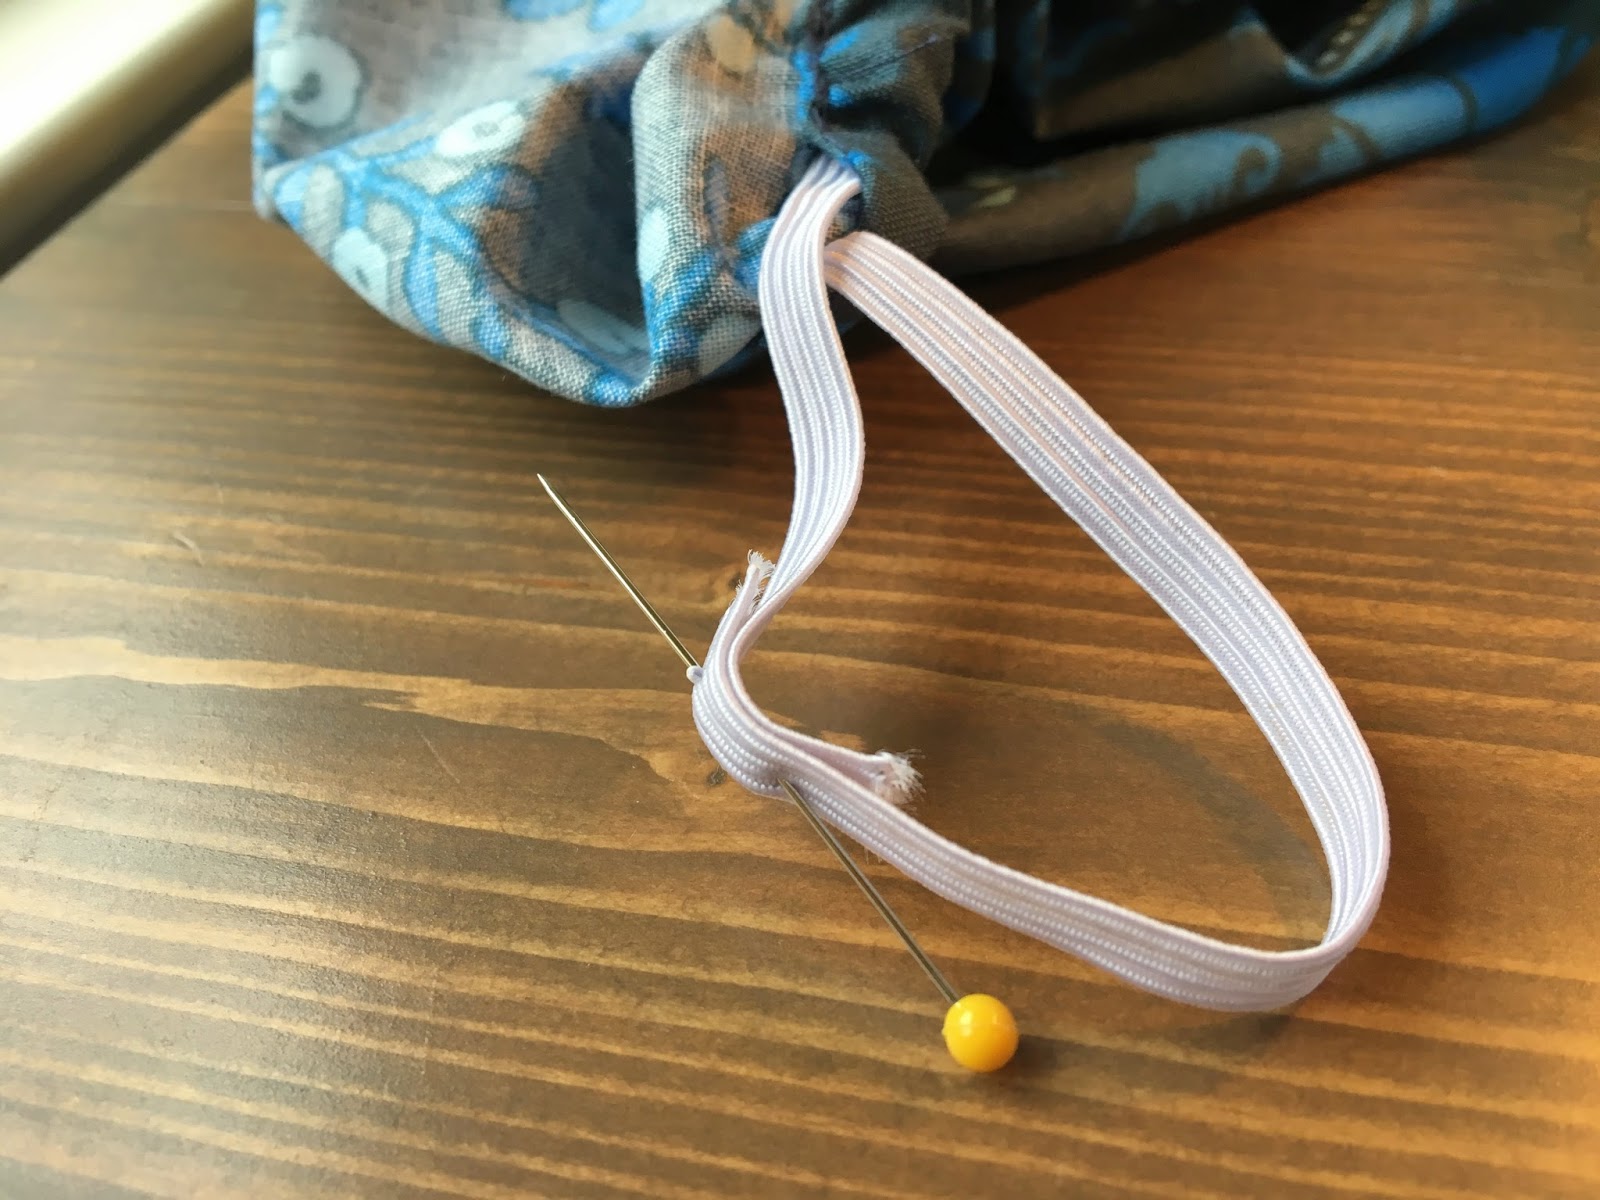
Overlap the ends about 3/4″ and pin.
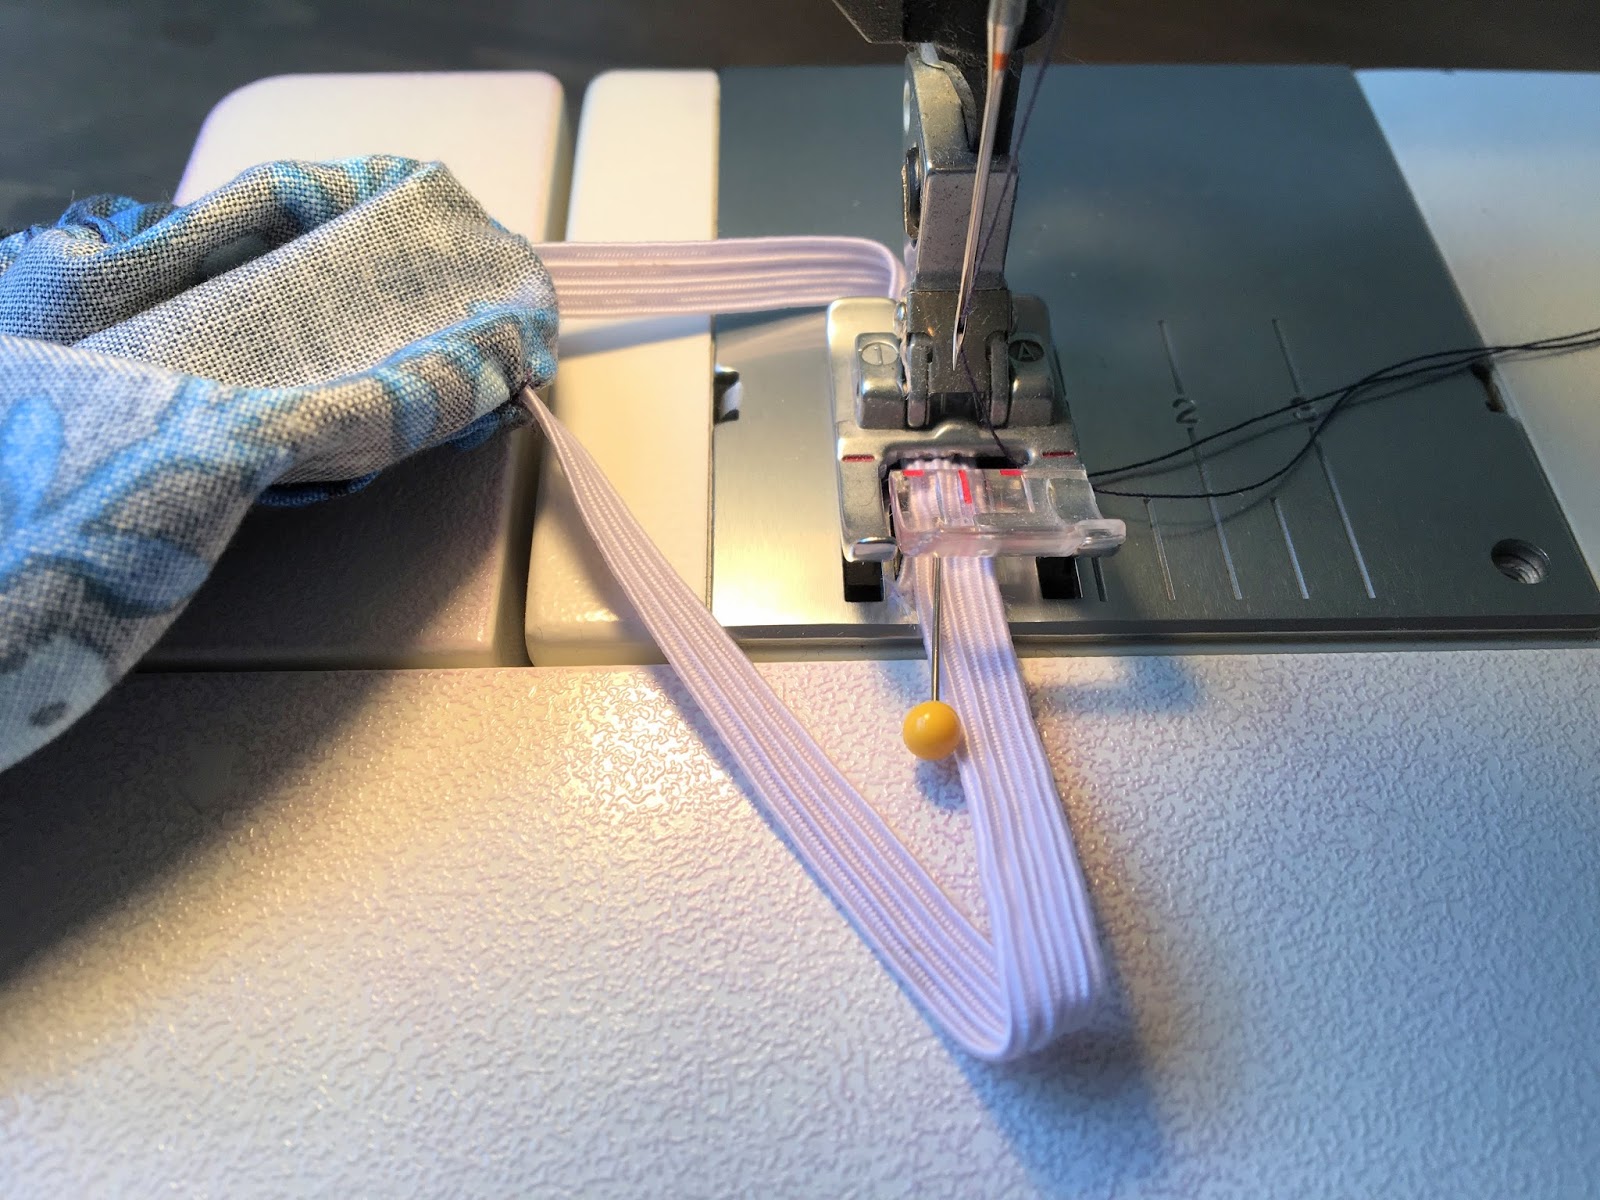
Once the ends are under the foot of your machine you can remove the pin.
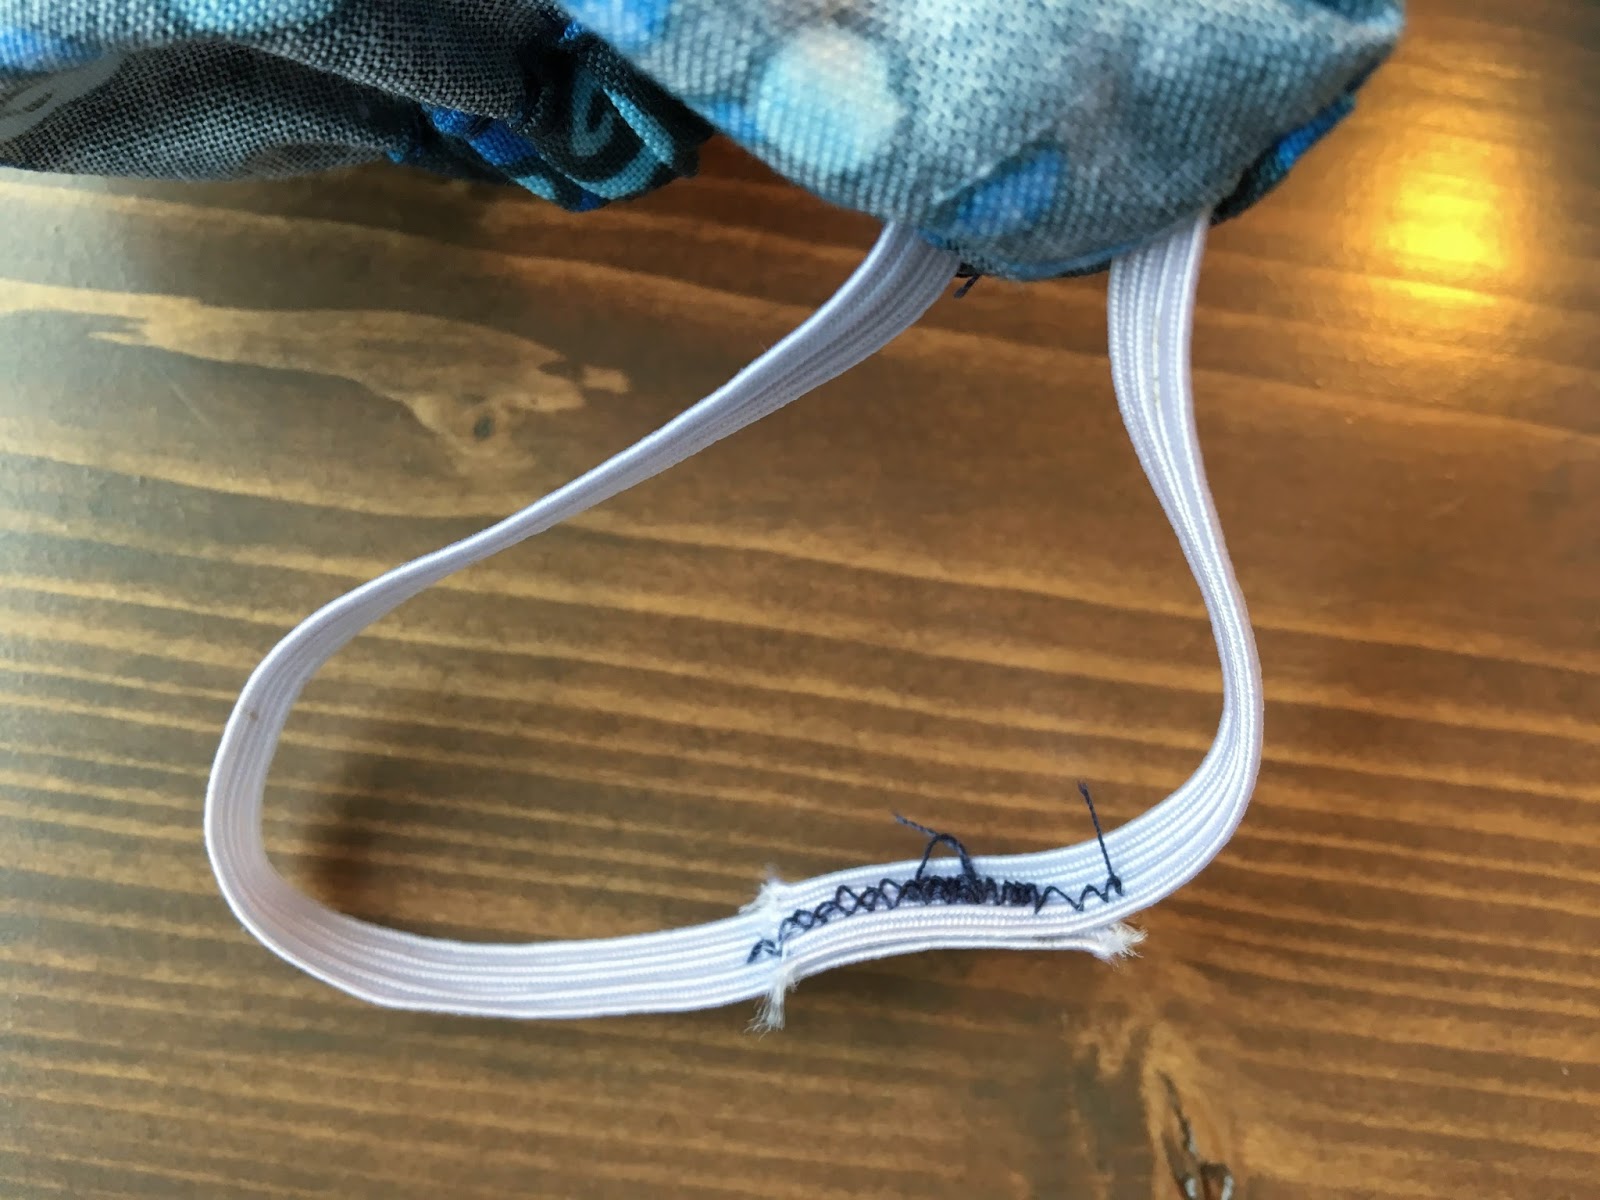
Use a small zigzag stitch to lock ends in place.
Stretch the elastic inside the casing to pull it through opening; stitch opening closed.

Finished! Good work!
8 Comments
Great sewing skill. Is there anything you cannot do? I am impressed. Simple but good looking caps, hope the kids will like it.
April 10, 2018 at 7:26 amThank you! I hope they like them too! 🙂
April 10, 2018 at 7:28 amWhere is the pattern to print out, it says the site doesn’t exsist
February 21, 2020 at 5:37 pmI’m sorry I don’t have the pattern on my computer anymore to upload again 🙁
November 5, 2020 at 8:28 amHello !
We are making these for a hospital fundraiser… would you still have the template ?
It says the link is no longer valid.
could you email it to 2sewtextiles@gmail.com please ?
July 9, 2020 at 10:07 pmHi there! Some how the file got deleted from my Google Drive and I don’t have a way to retrieve it unfortunately – I’ll work on making a new template.
July 13, 2020 at 4:21 pmI believe this is a good source for the pattern/info on this surgical cap:
March 29, 2021 at 6:46 pmhttps://you.stonybrook.edu/stonybrookstitchers/2020/05/24/pediatric-patient-surgical-caps/
Hi, I am carrying out a similar project in England, and I am trying to contact hospitals that have already done initiatives with surgical caps for paediatric patients. Could you kindly tell me what hospital you did this for? Please.
May 16, 2023 at 3:26 pmWarmest regards
Patricia